How To Draw A Cruise Ship | A Comprehensive Guide
Today, we will show you how to draw a cruise ship in a super easy and fun way. We’ll transform your blank paper into a spectacular cruise ship scene.
A cruise ship is used to carry tourists on an adventurous voyage across the sea. It is a big, enormous structure that can be hundreds of feet long. Many modern cruise ships have a pool, a park, dining lounges, bars, and many other things inside them. They can carry thousands of tourists in a single run. A cruise ship is way bigger than other ships, like a battleship, a pirate ship, or a ski boat.
So, grab your artistic supplies and dive into the world of art and adventure!
What you will need
- A pencil
- An eraser
- A sheet of paper
- Coloring kit
- Ruler
- 30 minutes
how to Draw a Cruise Ship
This guide offers you all you need to draw a cruise ship. Follow each step, and you’ll have an amazing ship in just a few minutes.
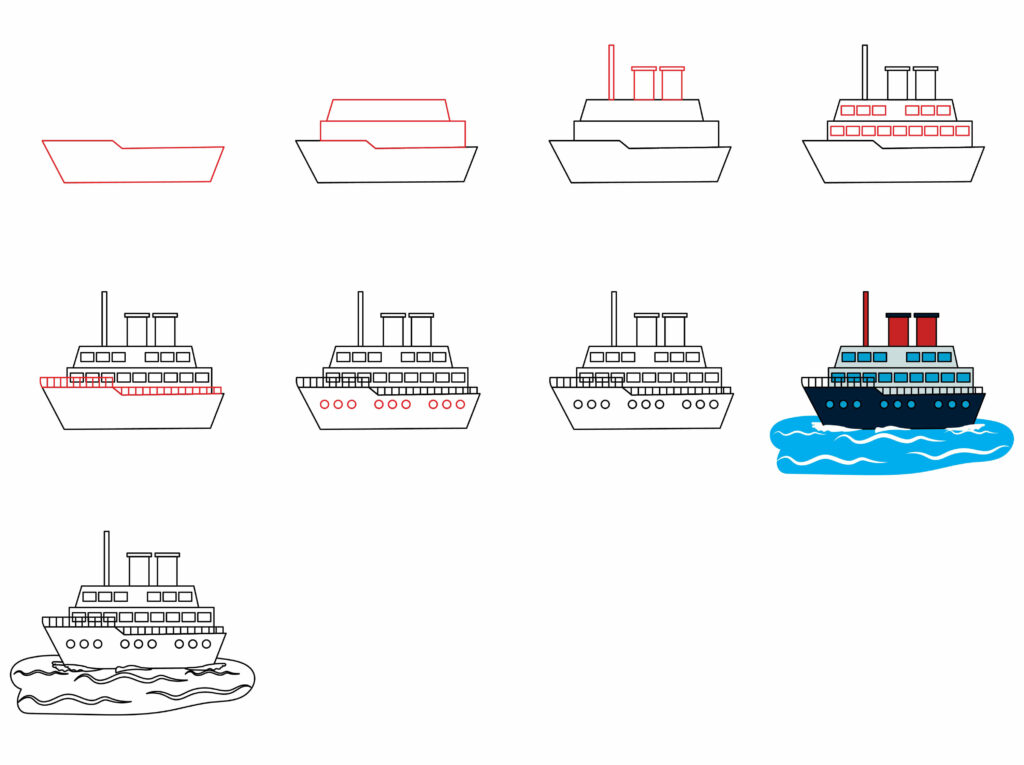
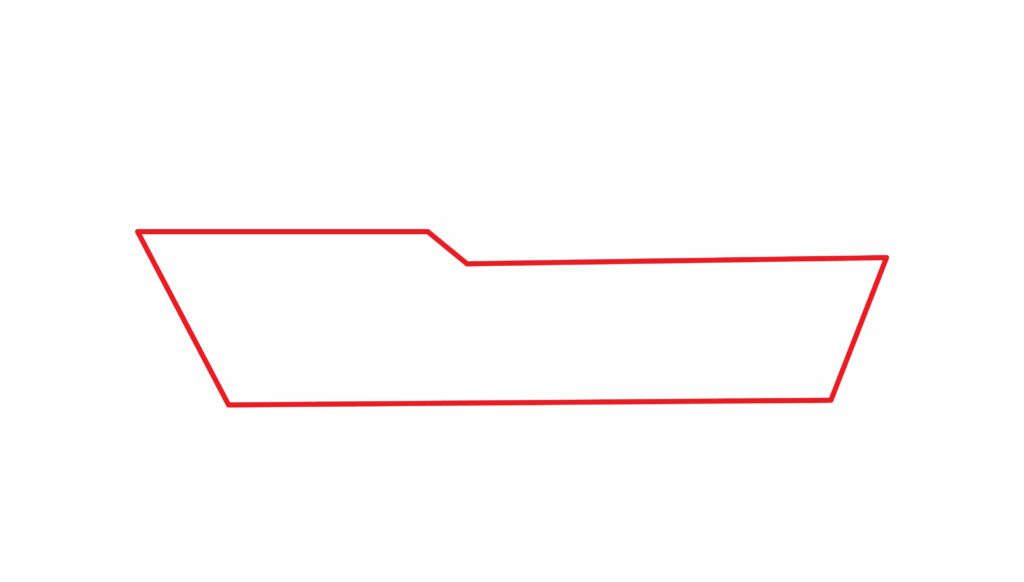
Step 1: Draw the cruise ship body
The ship’s body is a large structure that supports its weight. It is slightly submerged in the water when the ship cruises.
To make the ship’s body, draw an inverted trapezoid in the middle of the paper.
We’ll draw a horizontal line at the base of the paper. Then, we’ll stretch two vertical straight lines from each end of the horizontal line. These lines should be slanted outward. The line on the left should be bigger than the right. We’ll draw a horizontal line on the upper side to close the structure. As the slanted lines are of unequal lengths, there will be a slope in the middle of the upper line, as shown in the image.
Step 2: Draw Two decks
We’ll draw a rectangle on top of the ship’s body to draw the decks. This will be our first deck, just like the double-decker bus. We’ll make another rectangle on the first deck. This will be our second deck. The second deck will be slightly smaller in length than the first one.
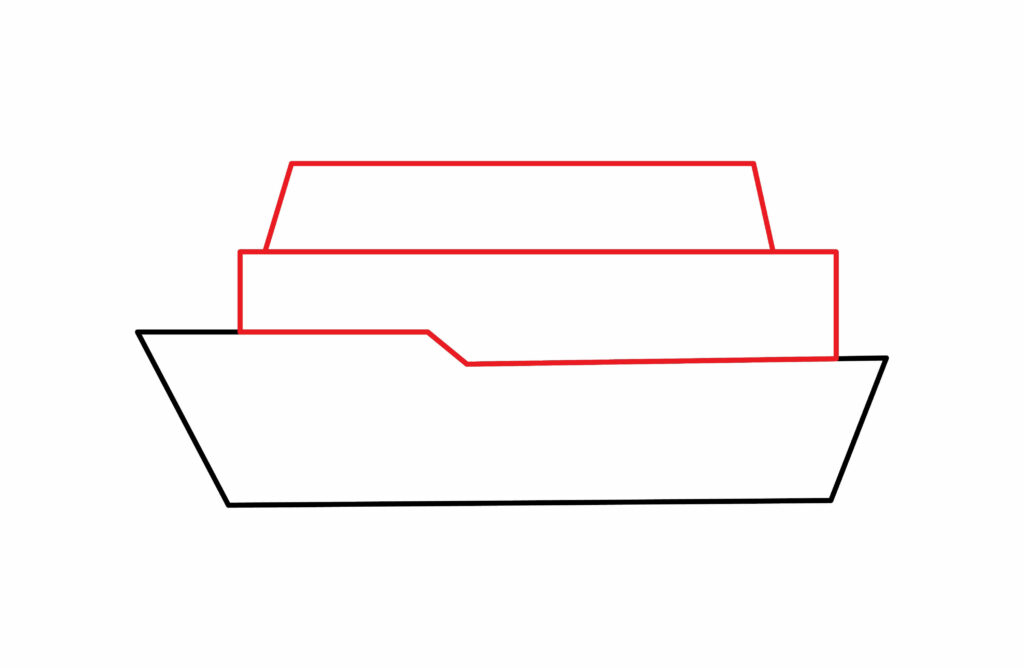
Modern cruise ships have several decks. We will draw only two decks using a ruler.
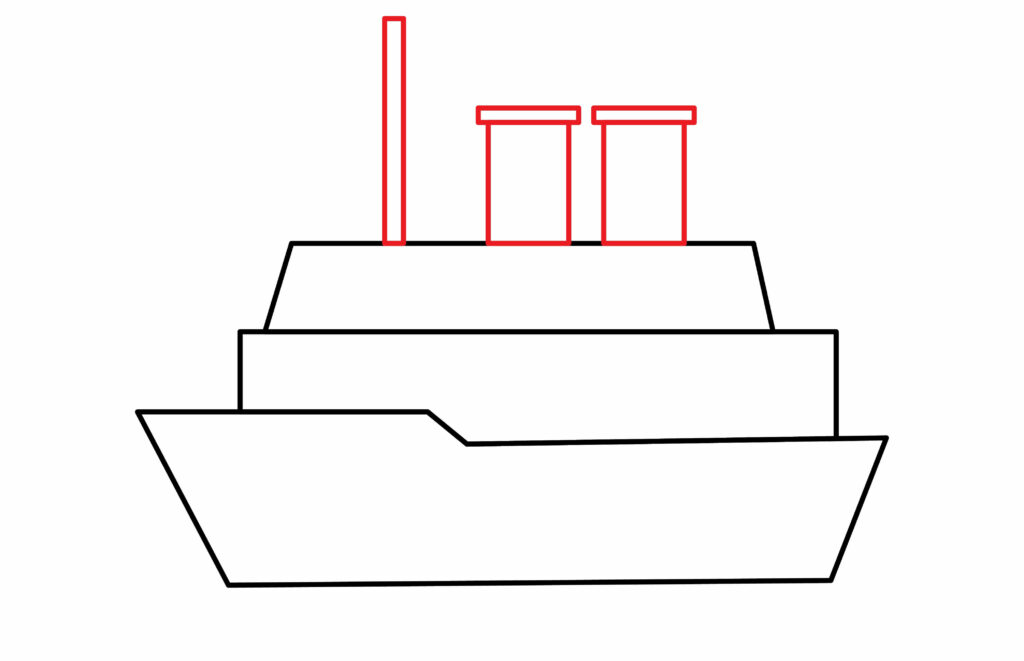
Step 3: Draw two smoke stacks and wind tower
The smoke stacks are used to evacuate the smoke from the cruise ship. To draw the smoke stacks, we’ll draw two vertical rectangles on the upper side of the upper deck. The length of both of these rectangles should be the same. We’ll keep the upper sides of these rectangles slightly bigger.
We’ll draw a thin vertical tower parallel to the smoke stacks to make the wind tower. The length of the wind tower should be greater than the smoke stacks.
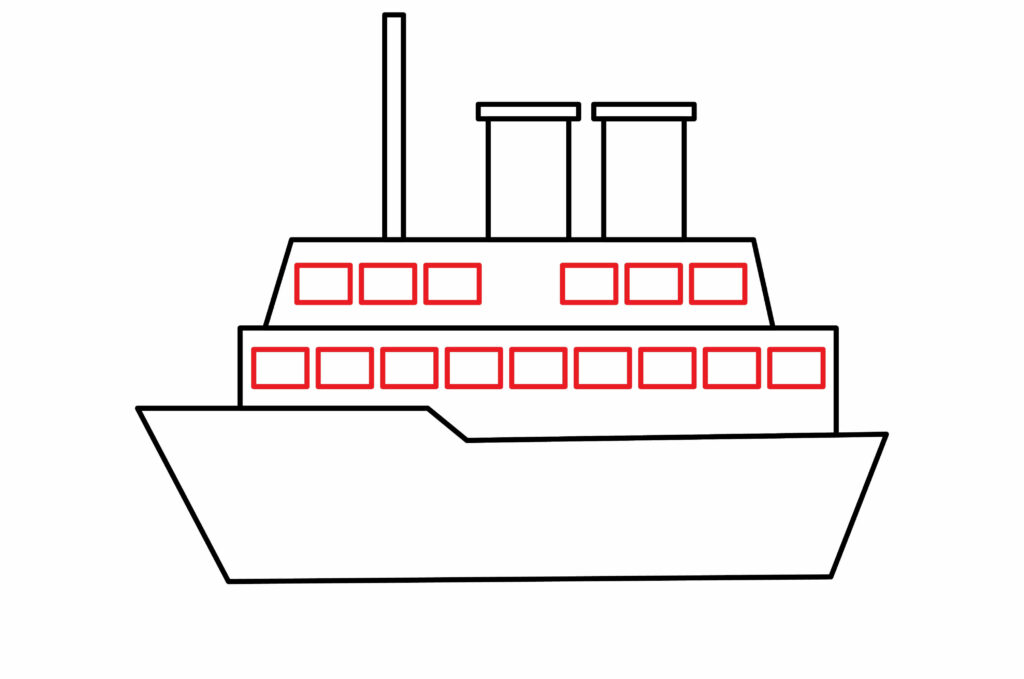
Step 4: Draw windows on the Two decks
The decks have several rooms on them, including balconies. The windows in these rooms give a scenic view of the ocean.
We’ll draw windows on both decks. On the first deck, we’ll make several small rectangles. These rectangles will serve as the windows. In a similar fashion, we’ll replace the windows on the upper deck as well.
We’ll ensure that each window’s length and size are the same. Our windows are ready.
Step 5: Draw the railings on the main body
Railings are the fences used for safety purposes. It is present on all sides of the cruise ship.
To make the railings, we’ll draw two horizontal lines parallel to the upper line of the main body. Then, we’ll draw several vertical lines connecting these parallel lines to the main body of the cruise ship. There should be a short gap between the vertical lines.

We’ll ensure that no vertical line crosses the parallel line or the ship’s main body. If we notice any irregularities in these vertical lines, we’ll erase them and draw them again.
Step 6: Draw the main body windows
We’ll draw several circles on the main body to have the main body windows. The size of each circle must be the same, and no circle should overlap another circle. We’ll use any round lid to draw the circle. We can also use a compass. If we don’t have the required apparatus, we’ll use the freehand technique to make the circles. We’ll make nine circles in total.
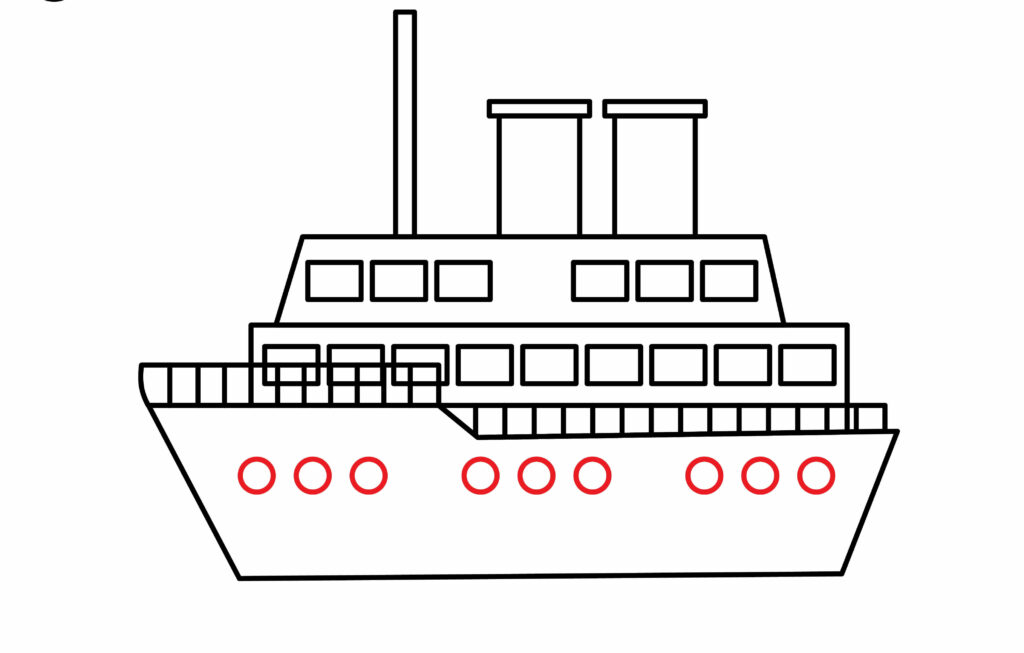
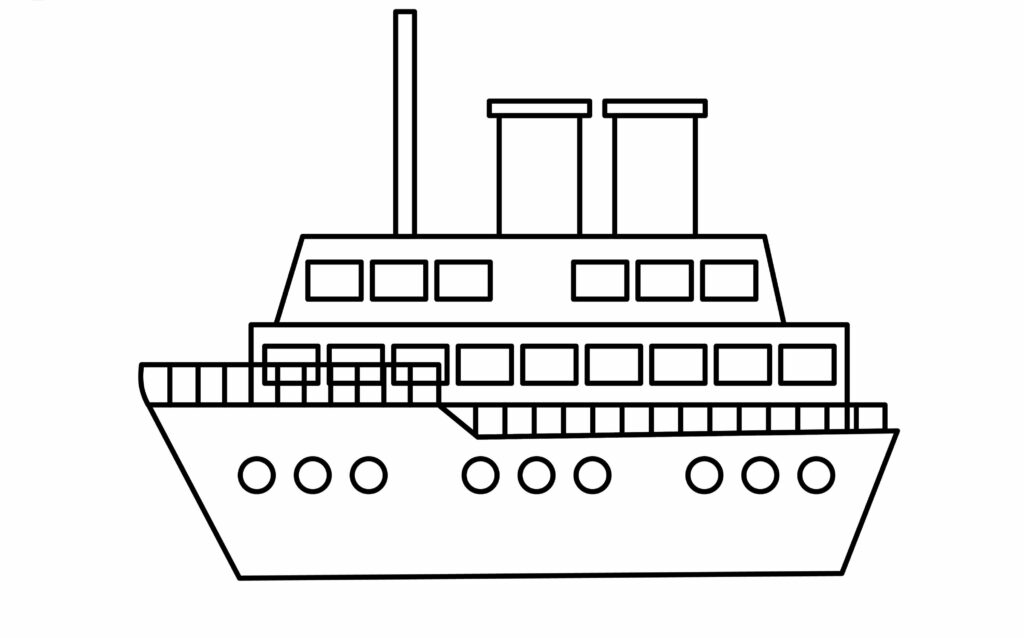
Step 7: Cruise ship is completed
Congratulations! You did it. Our cruise is all set to sail. We made each step easy for you. We’re sure you followed each step with us and made a spectacular drawing. Now, we’ll outline our drawing. We’ll use a marker to do this. A marker with a small tip will be the best option. After outlining our drawing, we’ll erase the pencil marks. It’ll clean up our drawing.
Taking your cruise ship drawing to the next level
A cruise ship doesn’t fly in the air or run on the streets. It floats on the sea. But in our drawing, there’s no perspective. We don’t know where our ship is. For that reason, we need to upgrade our drawing and add more details to it.
Also, our drawing has no colors. Colors can make our drawings appealing. We need to add color to it. Coloring is a fun part, and we’re sure you’re getting really excited to upgrade your drawing. These steps are not difficult.
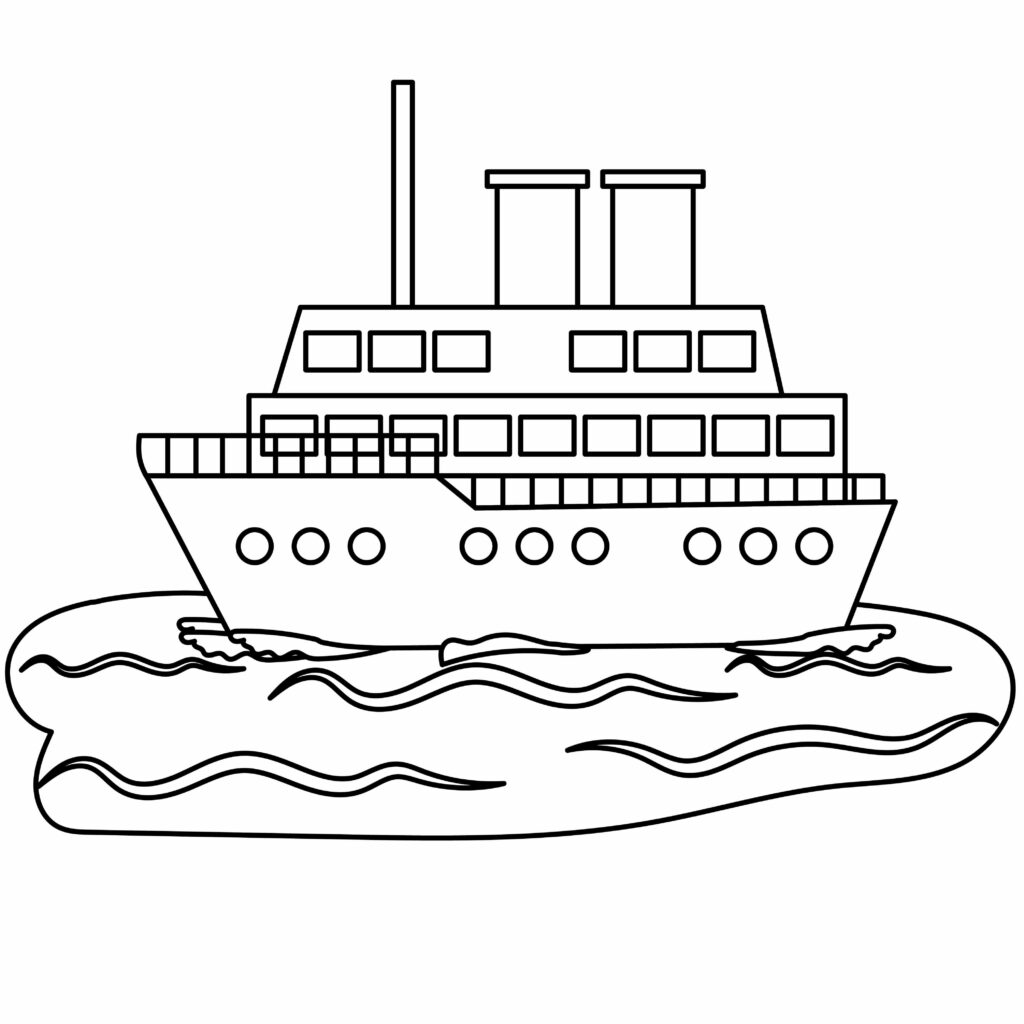
Adding background to your drawing
Having a background is a must. It gives our drawings a professional look. Drawing a background takes only a few minutes but adds considerable value.
As the cruise ship is always in the water, we’ll add the sea as our background. We’ll also draw multiple waves under the ship’s body.
We want our ship to be moving. Of course, it cannot move on paper, but we can give it a moving perspective. We’ll draw splashing waves near the ship’s body to achieve that. This depicts that our cruise is moving in the water.
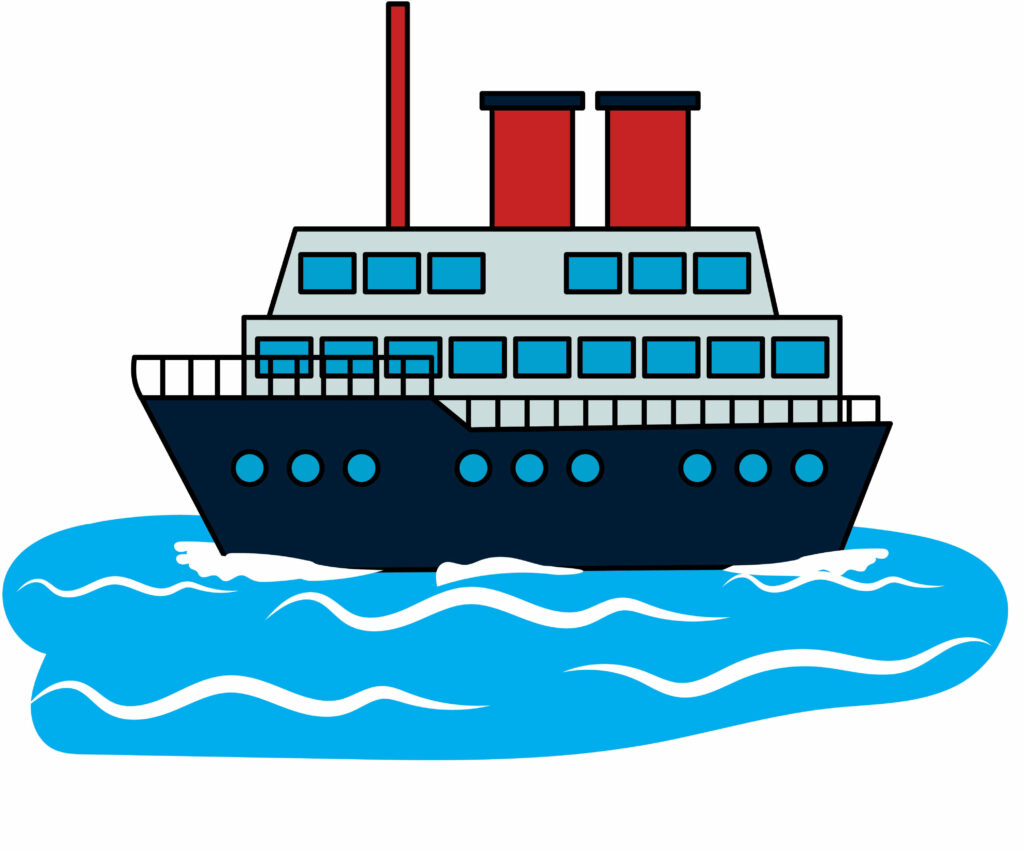
Adding colors to your drawing
Don’t you think that our drawing is lacking something? The attractiveness is not there, right?
To spice up our drawing, we need to fill it with colors. This will give our drawings a lively look. You can use any material to color your drawing. It can be markers, poster paints, crayons, or anything you choose.
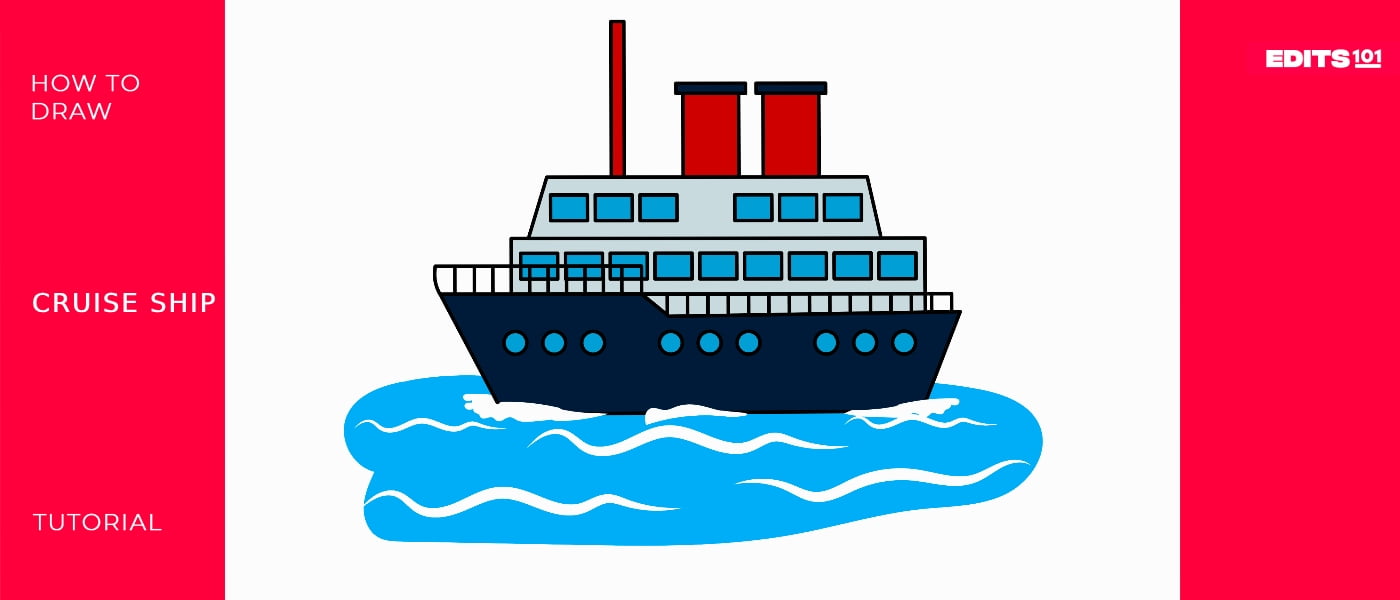
As we all know, the sea water is light blue, so we’ll color the water the same color.
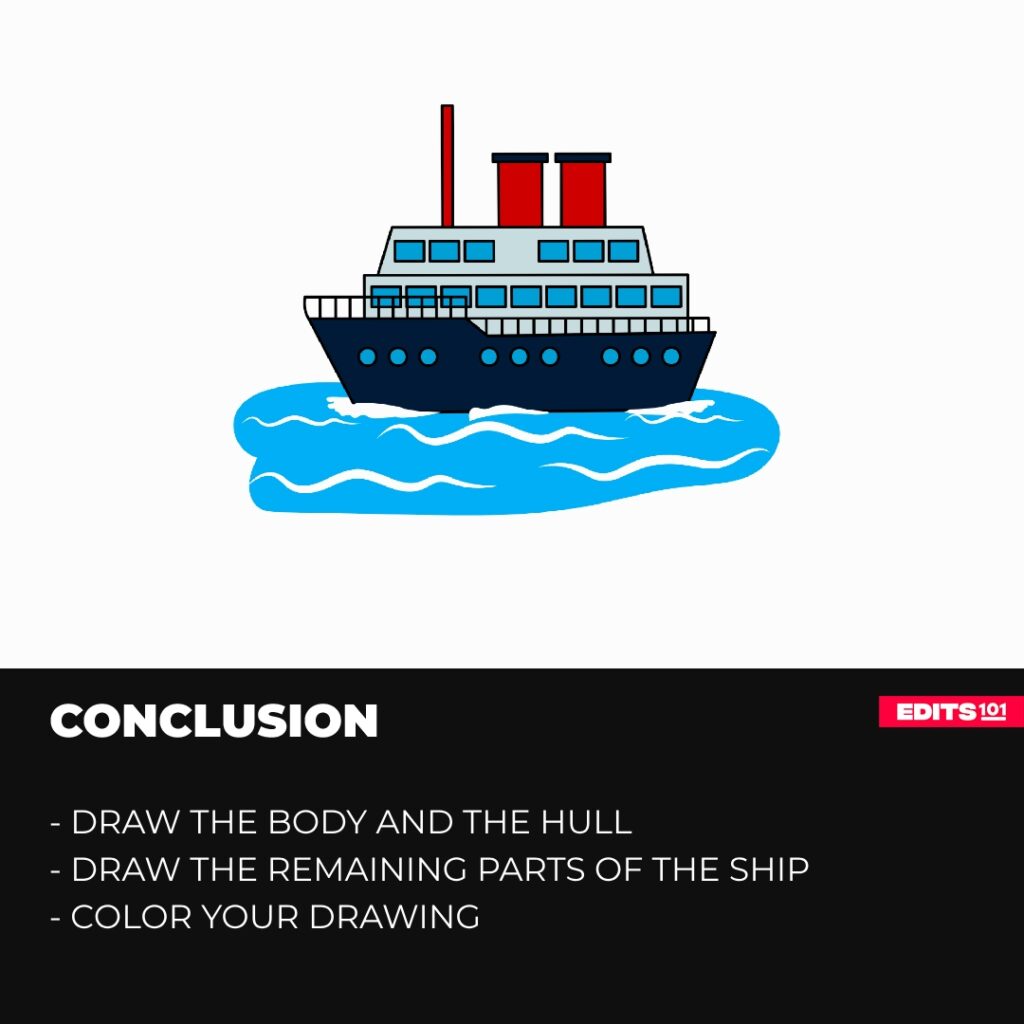
We used dark blue to color the ship’s body in our drawing. Red color for the smokestacks and wind tower. Black color for the railings and a light blue color for the windows. You can use similar colors in your drawing or customize it according to your taste. Just make sure to color the drawing in a tidy manner.
P.S Bonus Tips
Drawing is all about imagination and creativity.
We can add a flag at the top of the second deck. We can write the name of the ship under the main body windows. If we want our ship to be cruising in the daylight, we can draw a shining sun on the top corner of our paper. Below the sun, we can draw birds by connecting two curved lines. The size of the birds should be way smaller than the sun to give them a realistic look.
We can add stars and the moon as the background if you like night. We can use any round lid to draw the moon. For the stars, we’ll draw several dots around the moon. Everything will give our drawing a scenic look.
Remember, this part depends on your creativity. We have a few ideas, but these are not all. Imagination is limitless. Try multiple things and see which suits your taste best.
Conclusion
This guide explains how to draw a cruise in seven simple steps. First, we drew the cruise ship body. Then we made two decks, two smokestacks, and the wind tower. After that, we drew the windows on the two decks and the railings on the main body. Finally, we upgraded the drawing.
All these steps are quite simple. We’re confident your drawing will be amazing if you follow these steps. You might have to keep practicing for a better result, so go for it again if you think your drawing doesn’t look that good. Ultimately, you’ll have a beautiful cruise ship in no time!
Thanks for reading & feel free to check out more of our articles!
Author Rating
Overall Rating
Summary
This guides explains about the six easy steps to make a pirate ship.