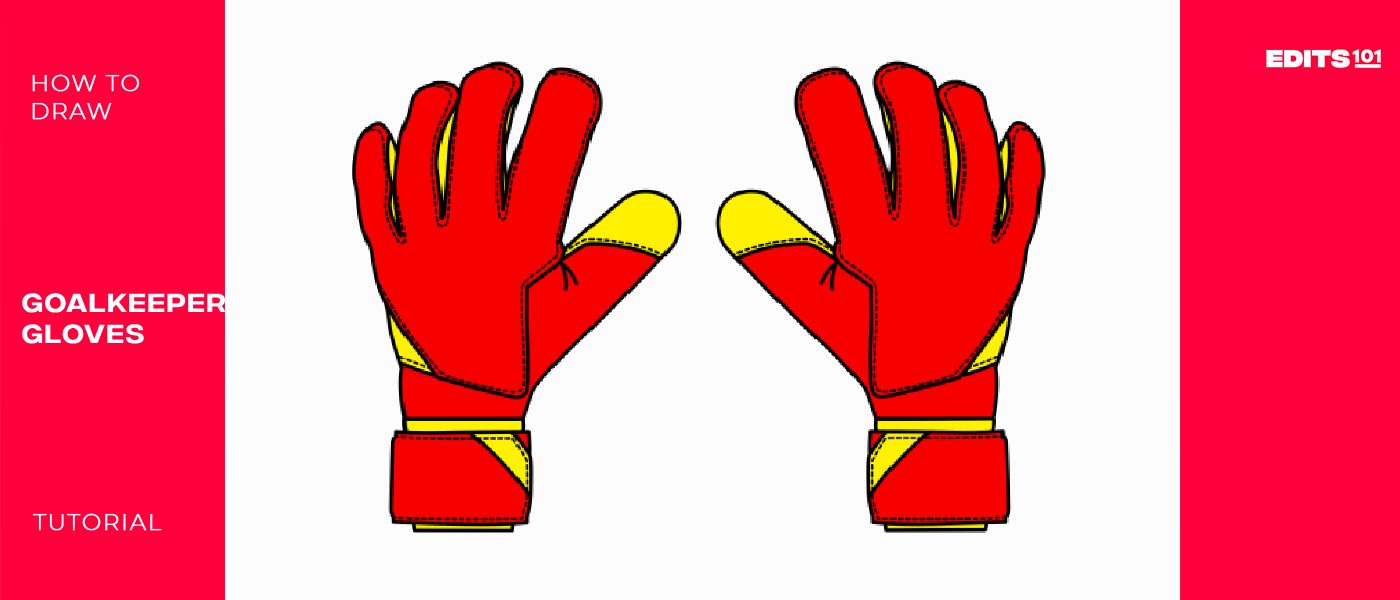
How to Draw Goalkeeper Gloves | In 9 Simple Steps
When was the last time you were at a football match or watched one on TV? Recently, right? If you were keen, you may have noticed that goalkeepers wear gloves. These are known as goalkeeper gloves. In our lesson, we will be focusing on how to draw realistic goalkeeper gloves in easy-to-follow steps.
The first thing you need to understand about goalkeeper gloves is that there are no rules that require goalkeepers to wear gloves. Even so, it is very rare to see goalkeepers playing without gloves. The reason for this is the gloves help reduce injuries when catching high-speed balls and also enhance grip. With that out of the way, let’s get back to today’s lesson.
What You Will Need
- A pencil
- An eraser
- A drawing piece of paper
- Coloring supplies
- 25 minutes
How to Draw Goalkeeper Gloves
The goalkeeper’s gloves look a lot like ordinary gloves. The only difference is they are padded to reduce injury. They are also designed to offer support to the goalkeeper’s wrists in order to prevent injury.
As we have always done in our lessons, the first thing we need to do is study the steps we will be following. The steps are in the below image. Studying the steps will help you get an idea of what we will be doing.
Keep in mind that we will be drawing the second goalkeeper glove later so leave ample space to the right part of your drawing paper. The best way of doing this is by folding your drawing paper in half. Use the left half for the left glove and leave the right half for the right glove.
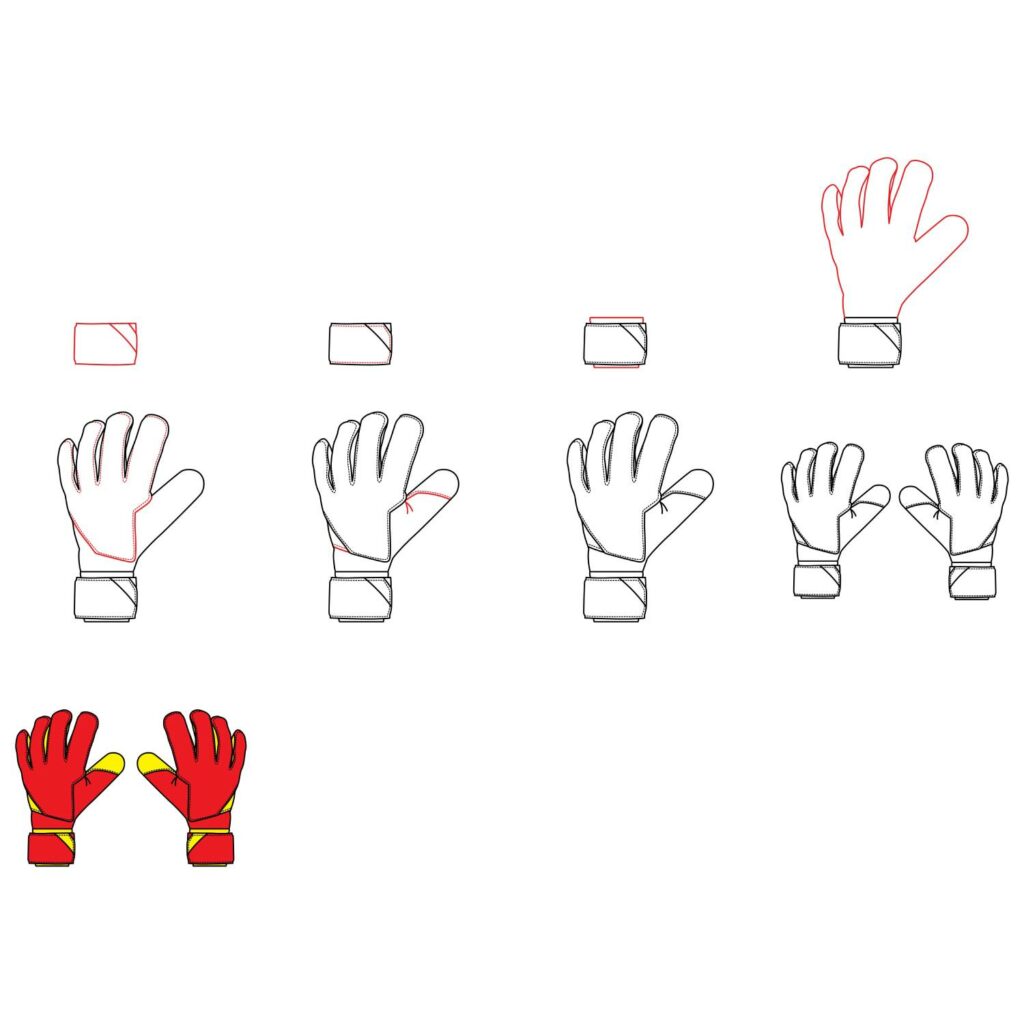
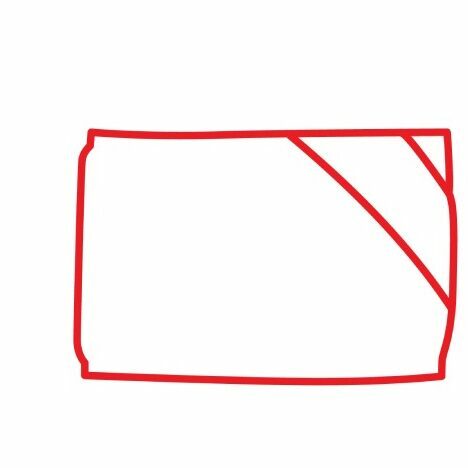
Step 1: Draw the Wrist Support
While the goalkeeper usually catches the ball in his or her palm, the wrist has to be supported in order to prevent injuries. That is why the first thing we are going to draw is the wrist support. This is the part of the goalkeeper’s gloves that is strapped around the wrists.
To draw the wrist support, we are going to start by drawing a horizontal rectangle at the bottom of our drawing paper. Since the wrist support is made up of a piece of cloth, the lines don’t need to be too smooth. That is why we never added a ruler to the list of items needed for today’s lesson.
Don’t make the rectangle too big either. It is okay if you draw a square instead of a rectangle. To show that the wrist support is adjustable, we are going to add two diagonal lines in the top right corner of the rectangle.
- Draw a rectangle
- Draw 2 diagonal lines on the right
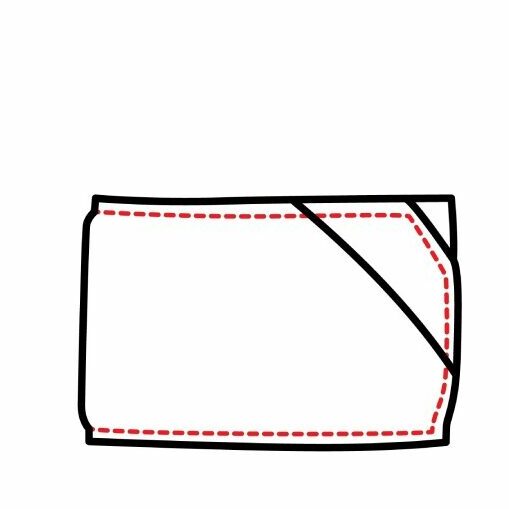
Step 2: Draw the Sew Line
Most goalkeeper gloves are made of leather. One thing you will notice with leather is that it is very hard to hide the sewing line. This is why the next thing we are going to do to advance our wrist support is add some sew lines. While this is not necessary, the little details will show that you are an artist who pays close attention to details.
For the sew lines, draw a dotted line starting right below the top left corner to the top right corner, curve the line downwards to the bottom right corner then end it in the bottom left corner.
- Draw a dotted line on the inside of the rectangle
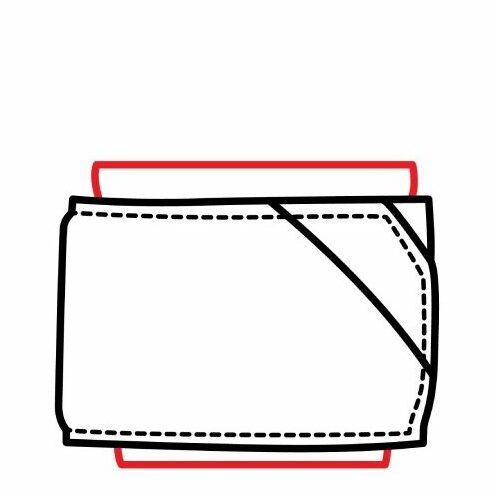
Step 3: Draw the Rubber
To improve comfort around the wrist of the goalkeeper, goalkeeper gloves usually have a rubber that sits beneath the wrist support. The purpose of the rubber is to reduce injury to the skin of the goalkeeper once the gloves are tightened around the wrist.
To add the rubber, we are simply going to add a flattened rectangle on the upper part of the wrist support and another one on the bottom part.
- Add a flattened rectangle on the top of the wrist support
- Add a second flattened rectangle on the bottom
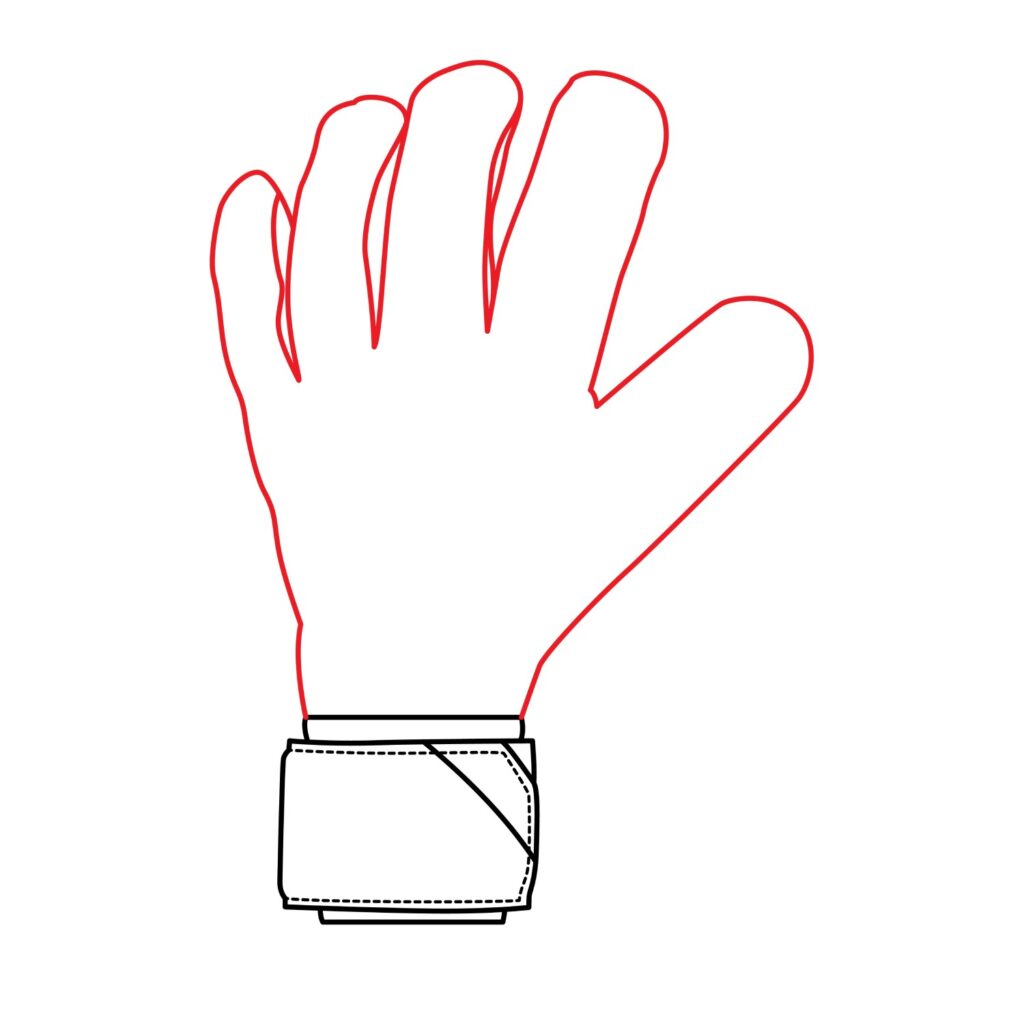
Step 4: Draw the Palm and Fingers
It is now time to turn our drawing into a goalkeeper glove. To do so, we are going to add the palm and the fingers. This is a step that requires a lot of care else you will end up with a drawing that doesn’t look realistic. The best way to approach this step is to take a look at your hand and try and draw its outline.
From the top left corner of the rectangle we added for the rubber, we are going to add a line that extends upward to almost three-quarters the height of the drawing paper. We are going to add another line starting from the top right corner of the rubber and extend it diagonally to almost half the height of the drawing paper. The two lines will serve as the outlines for our glove’s palm.
Next, we are going to use curved lines to add five fingers. The diagonal line we added to the right part of our drawing paper will be the outer outline of the thumb while the one we added to the left will be the outer outline of the pinky/small finger.
Use your hand as a reference when drawing the fingers. Don’t add lines for the knuckles since we are drawing a glove and not a hand. You also need to make the top of the fingers rounded.
- Add two diagonal lines starting from the top of the rubber, one on each side
- Use your hand as a reference to draw the fingers
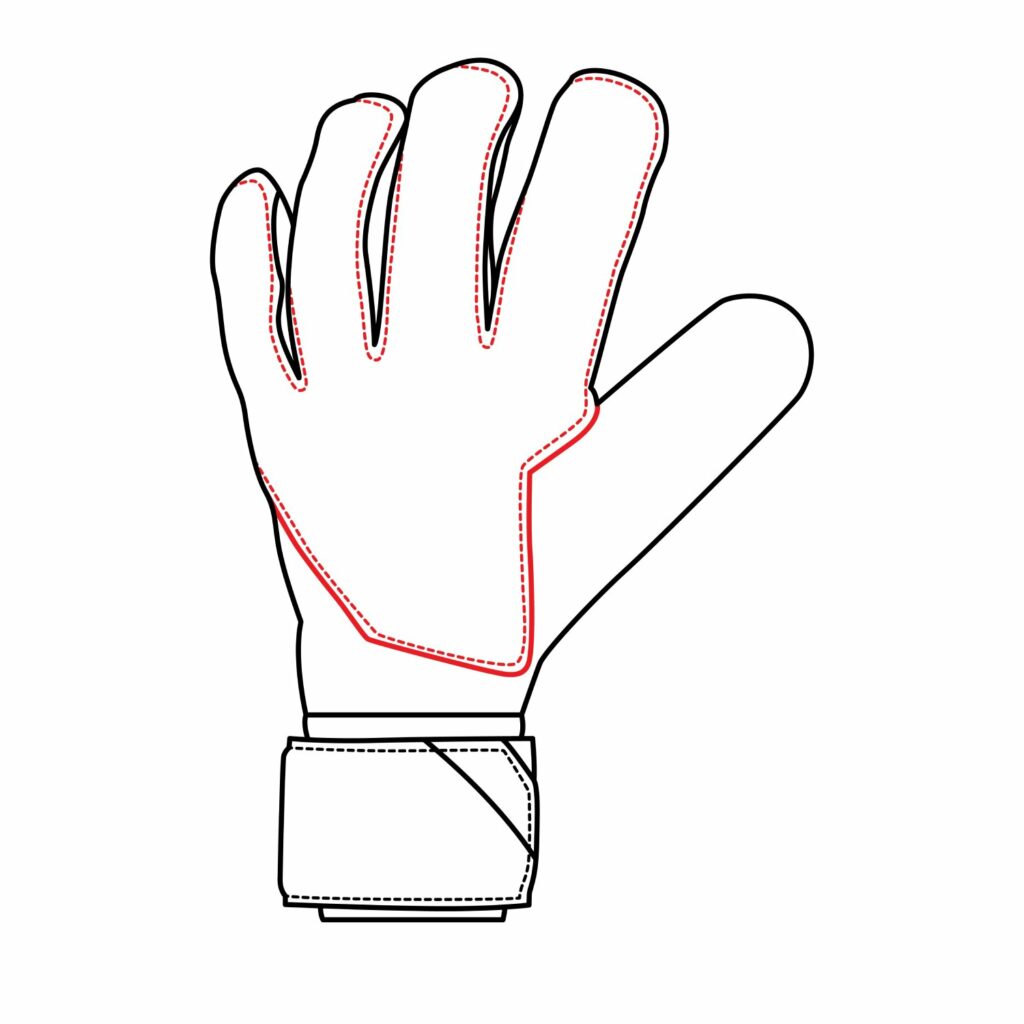
Step 5: Draw Sew Lines
We want you to be a great artist. That is why we will not be ignoring the minor details while drawing our goalkeeper gloves. To make our drawing more realistic, we are going to add sew lines.
First, we have to add a line on the palm to indicate that our glove is made up of different pieces that are sewn together. From the bottom of the small finger, draw a line that curves downwards and extends close to the bottom of the thumb. You then need to curve the line upwards so that it ends in the area between the thumb and the index finger.
Now we are going to add the sew line. For this, we will add a dotted line that starts from the line we added on the palm, goes all the way around and stops on top of the pinky finger as shown in our illustration.
- Draw a curved line on the palm
- Add a dotted line that goes around the curved line and the fingers
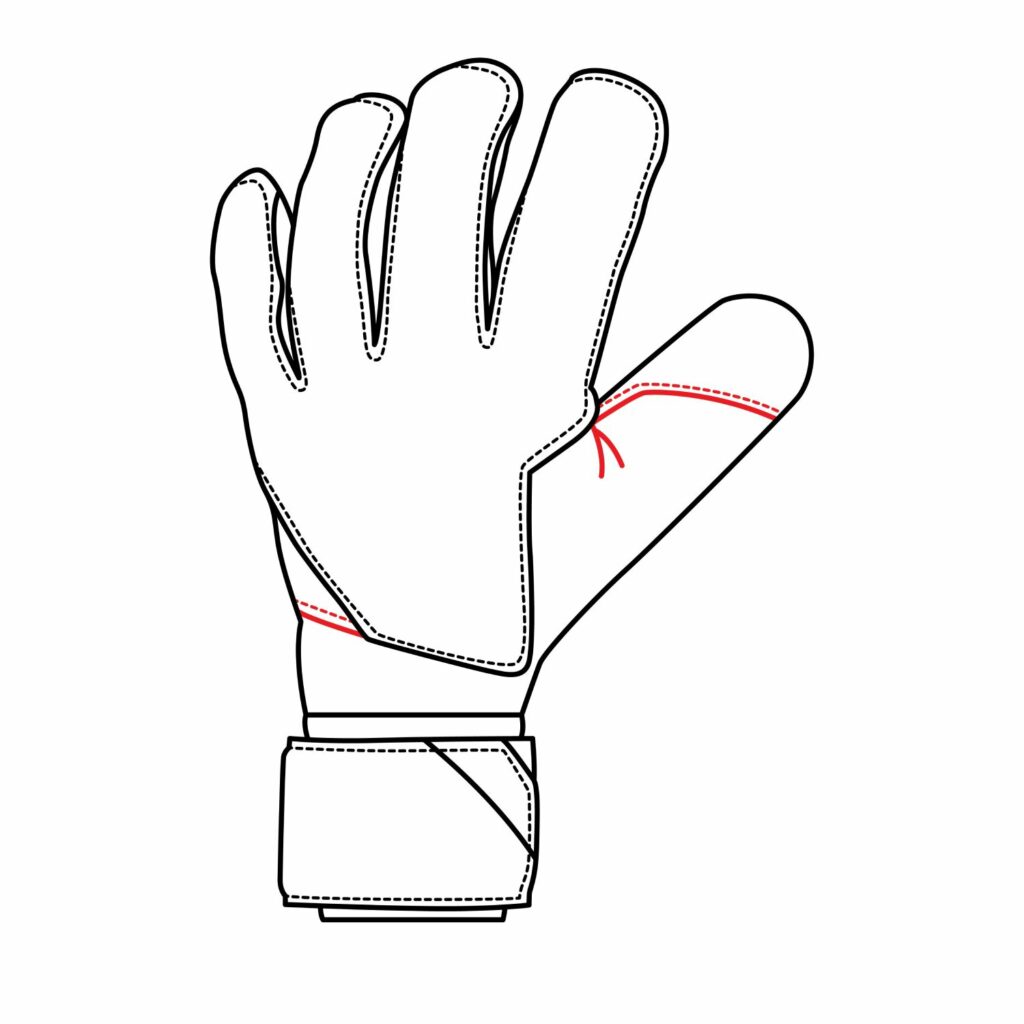
Step 6: Draw a Sew Line for the Thumb
The last details we are going to add to our soccer goalkeeper glove are the sew line for the thumb and bottom part of the palm. We will start with the simple one which is the sewing line for the bottom part of the palm. For this, we are simply going to draw a line on the bottom left part of the palm and add a dotted line above it as shown below.
For the thumb, we are going to start by drawing a curved line that starts in the space between the index finger and the thumb, curves the line over the line, and ends on the right side of the thumb. We will then add a dotted line over the line.
A good detail to add is the crease at the base of the thumb. This wrinkle makes the glove look more realistic.
- Add a line on the bottom left part of the palm
- Add a dotted line over the line
- Add a curved line across the middle of the thumb
- Add a dotted line on the upper side of the curved line
- Add a crease at the base of the thumb
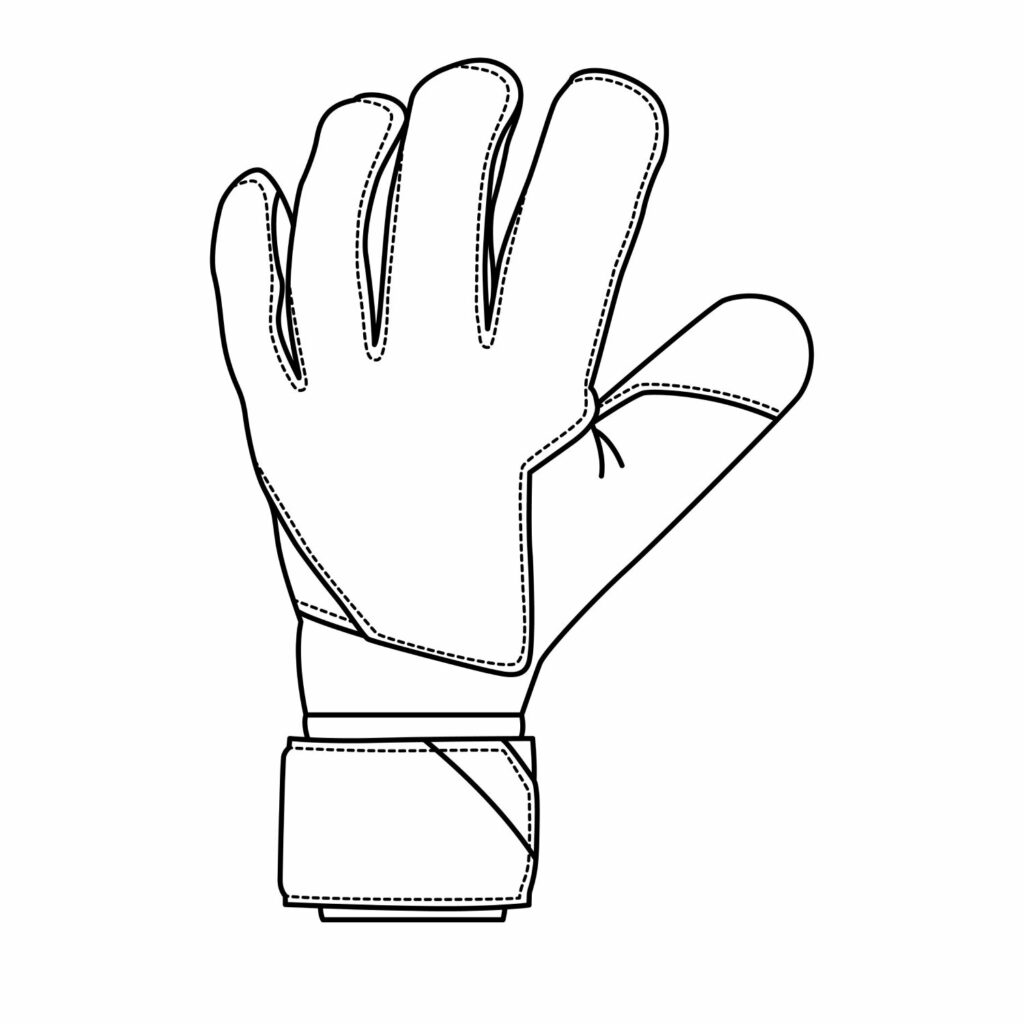
Step 7: Our Drawing is Ready
The goalkeeper glove drawing is now ready. Take a look at our drawing and then look at yours. Does your goalkeeper’s glove look the same as ours or better? If it does, bravo on work well done. If it doesn’t, you should not feel discouraged. There is always room for improvement on your next attempt. You will definitely notice a significant improvement on your next attempt.
Take the Drawing to the Next Level
It is okay if you leave your goalkeeper glove as it is. You must, however, note that as it is, the glove doesn’t look very convincing. For that reason, we are going to do two things.
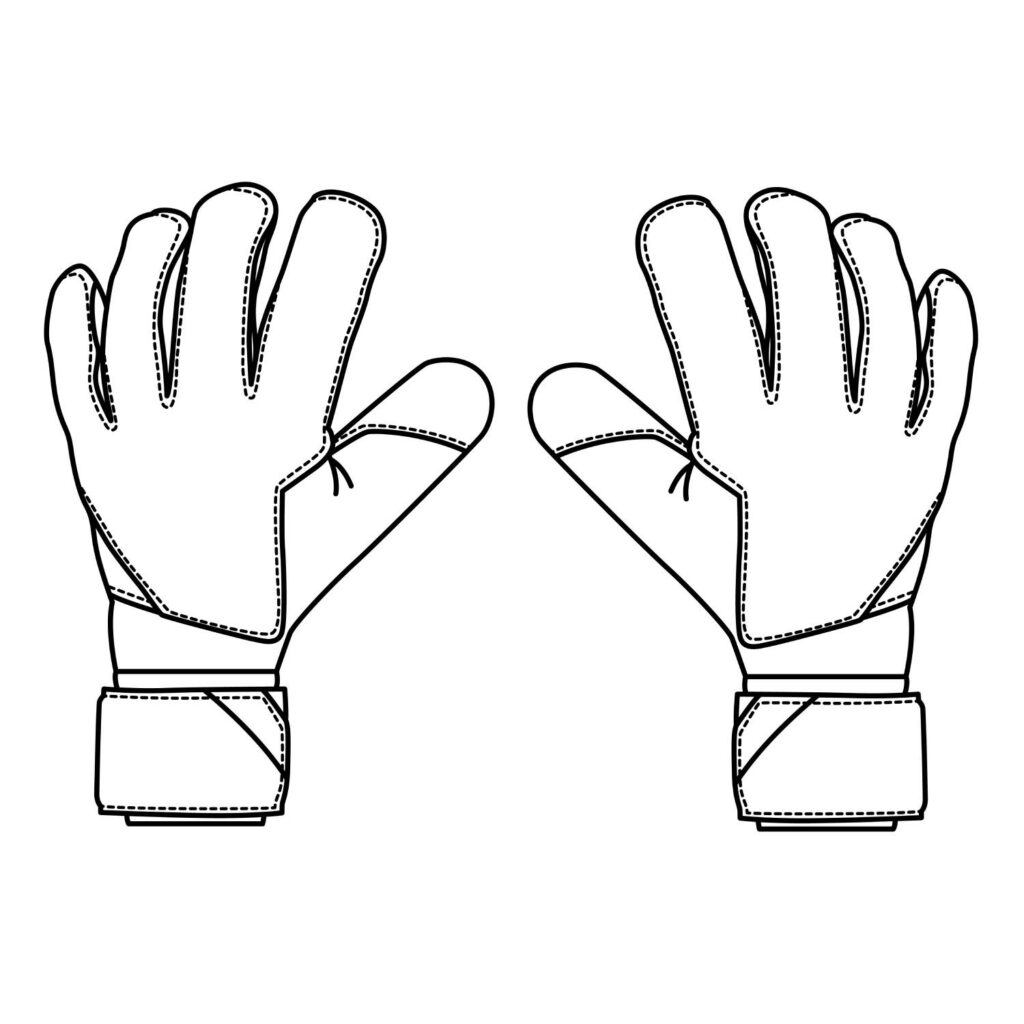
Step 8: Draw the Second Glove
Goalkeeper gloves come in pairs. To make your drawing more convincing, we are now going to add the right-hand glove. For this, we are going to repeat the same process we did earlier on the right half of our drawing paper. The only difference is that everything we do will be inverted.
- Repeat the process to draw the second glove.
- Everything on the second glove should be inverted
Step 9: Color the Glove
The final step is all about coloring. Take out your coloring supplies and add color to your goalkeeper gloves. Keep in mind that this is your glove so you can use any color that you want. The key is to make sure the colors don’t spill outside the areas you are coloring.
- Use your preferred colors to color the gloves

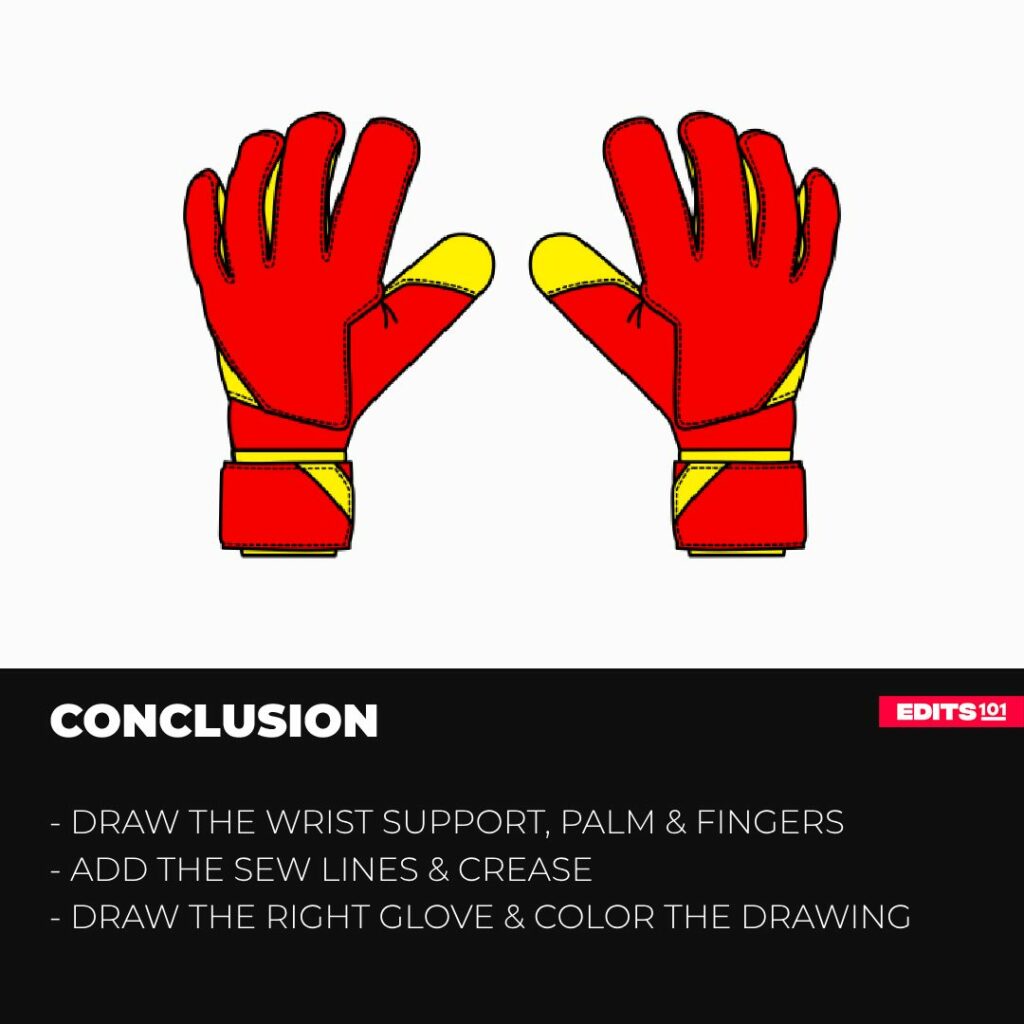
Conclusion
Drawing goalkeeper gloves is pretty easy when you know where to start. In our drawing, we started by drawing the wrist support and then added the palm and the fingers. We advanced our drawing by adding sew lines and a crease. We repeated the process for the right glove and then colored everything.
To save time, you can draw with the drawing paper folded. Press your pencil a bit harder so that trace lines appear on the folded part of your drawing paper. That way, once you are done with the left glove, all you have to do is trace through the lines on the second half of your paper to replicate the right glove.
Thanks for reading & feel free to check out more of our articles!
Author Rating
Overall Rating
Summary
Learn how to draw goalkeeper gloves in simple steps. You will also learn about the fine details that bring the gloves to life.