How To Draw A Sightseeing Bus | 7 Easy Steps
We are going to try something different today. Do you guys like to go sightseeing? If you do, it is a perfect drawing for you to make. We will draw a bus used for sightseeing, also known as a sightseeing bus.
An open-top bus is designed or adapted to run without a roof. These buses are typically double-deckers, though they are only sometimes. While buses were initially built without roofs, more contemporary models have only been designed with tourism and sightseeing services in mind. Some are created by removing the entire or a portion of the top from a typical bus. Seeing a lot of places in one day, ease, and comfort are the benefits of sightseeing bus trips. Various kinds of sightseeing bus trips provide unique experiences.
What you will need
- A pencil
- An eraser
- A sheet of paper
- Coloring kit
- Ruler
- 30 minutes
How To Draw a sightseeing bus
Dive into an exciting adventure and draw a beautiful piece of art. All you have to do is to follow the steps carefully. By doing that, you will have a sightseeing bus ready for a trip.
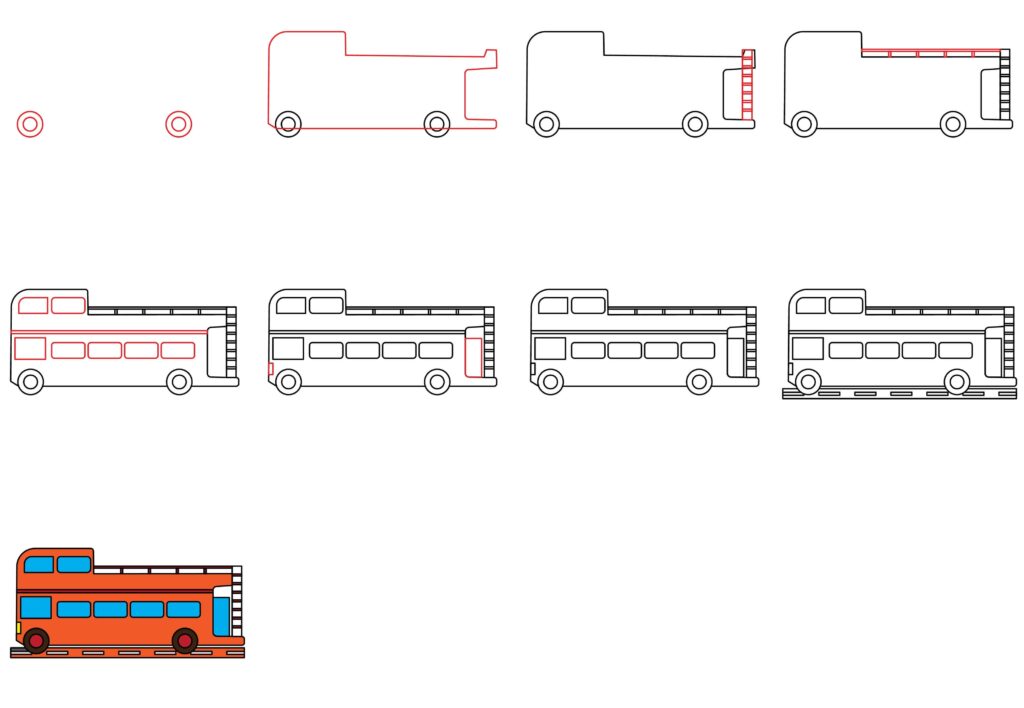
Step 1: Draw the wheels
In our first step, we will draw the wheels of our sightseeing bus. To make the wheels, draw 2 circles on both sides of the paper, as shown in the image. You can create perfect circles by positioning the compass’s sharper end where you want the wheel to be. Another option is to use a little disc or a circular bottle cap.
If any of the items mentioned above are unavailable, you shouldn’t panic. We’ll show you how to draw a circle with a free hand. Put a dot where you want your wheel to be, and then four more dots (top, bottom, and left, right) around it. Remember that these dots will be equally spaced from our reference dot. Create curved lines to join all of these dots together. Draw another wheel using the same procedure. The rim is created by drawing a smaller concentric circle inside the wheels.

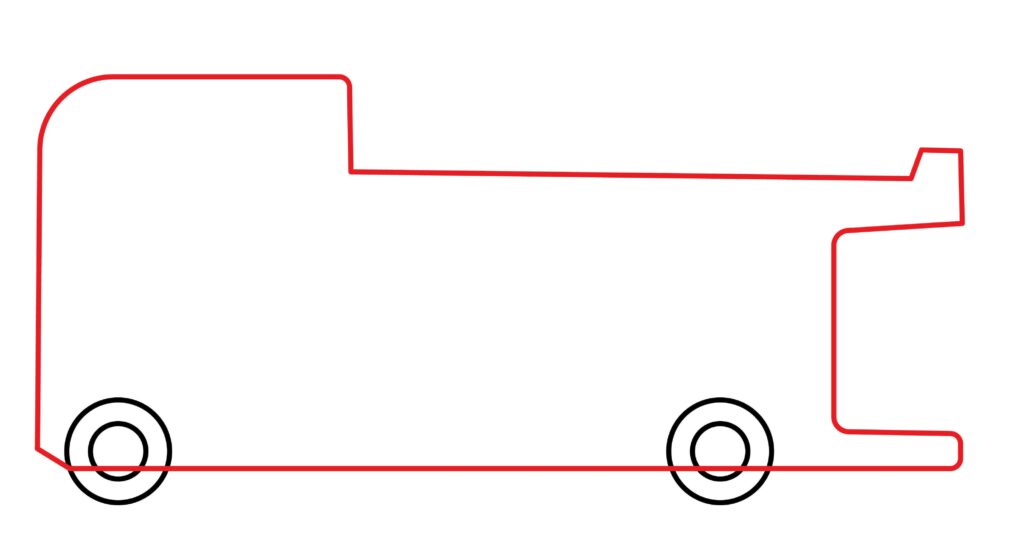
Step 2: Draw the body
Now, we will draw the important part, the main body of our sightseeing bus. This will act as our base for further steps in this drawing. To make the body, draw a horizontal rectangle over the wheels. This will be our base shape, and further modifications will be done. To make a horizontal rectangle, draw two horizontal lines along the width of the paper and join the ends of these lines with vertical lines.
Now, draw another horizontal rectangle over the top of the first rectangle, which will be a quarter of our first rectangle. Now erase the base of this rectangle to look like a part of our first rectangle. Note that this will be done on the front or left part of the bus. For the rear part, make a vertical rectangle along the rear side of the body and erase the outer boundary. Make all the edges curved for artistic effect as done in the image. Also, lift the top right corner of the main body, which will be helpful in our next steps.
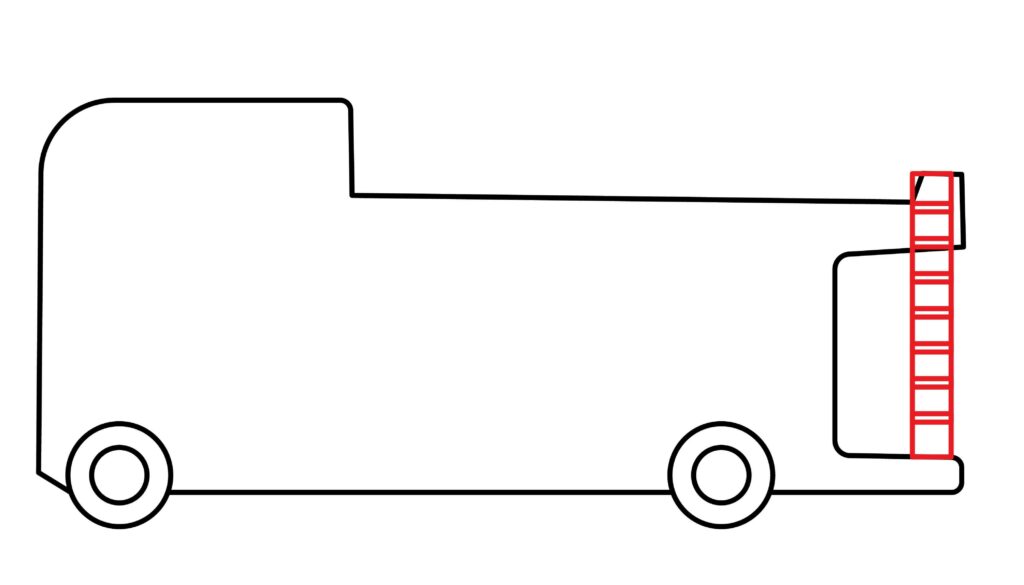
Step 3: Draw the stairs
A sightseeing bus is mostly a double-decker bus, so it will need stairs to get to the upper story of the bus. We will draw the stairs on the bus’s rear where we intentionally left the space. To make the stairs, draw a narrow vertical rectangle on the right side and horizontal lines along the width of this rectangle to make the steps.
Keep up the excellent work. A few more steps, and we will be done.
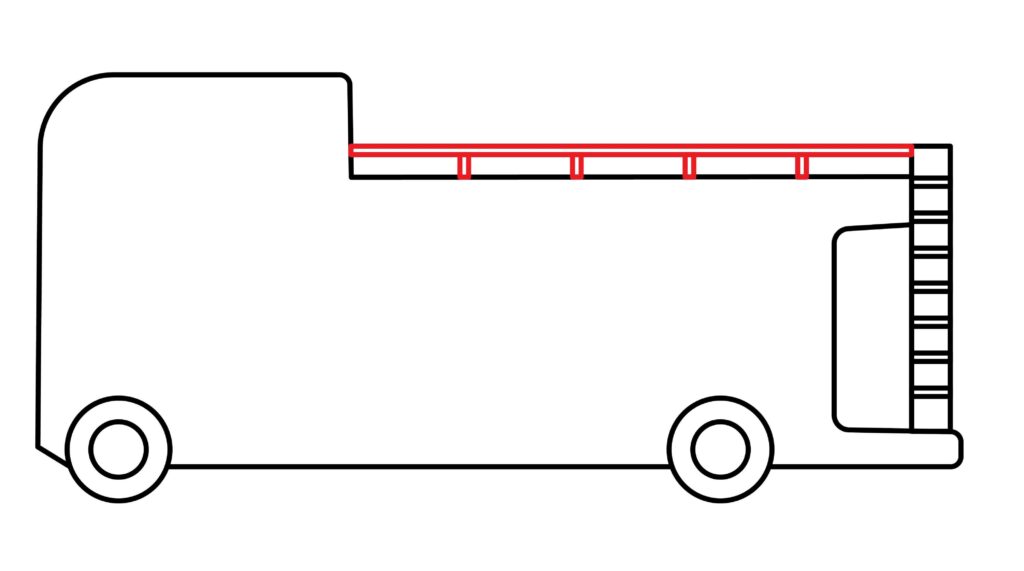
Step 4: Draw the side barrier
We will draw a side barrier for our bus as it has an open top, meaning no roof, so it needs some safety measures. To make the barrier, draw parallel horizontal lines on the top of the main body and then join these lines with vertical lines to the body.
Step 5: Draw the windows
Our sightseeing bus needs a lot of windows as it is mainly to see the outside view. To make the windows, draw rectangles on the upper and lower part of the body. Two windows will be on the upper and five on the lower parts. The front window will be square. Make all the sides of rectangles curved for a realistic look. Also, divide the upper and lower parts of the bus with horizontal lines as drawn in the image.
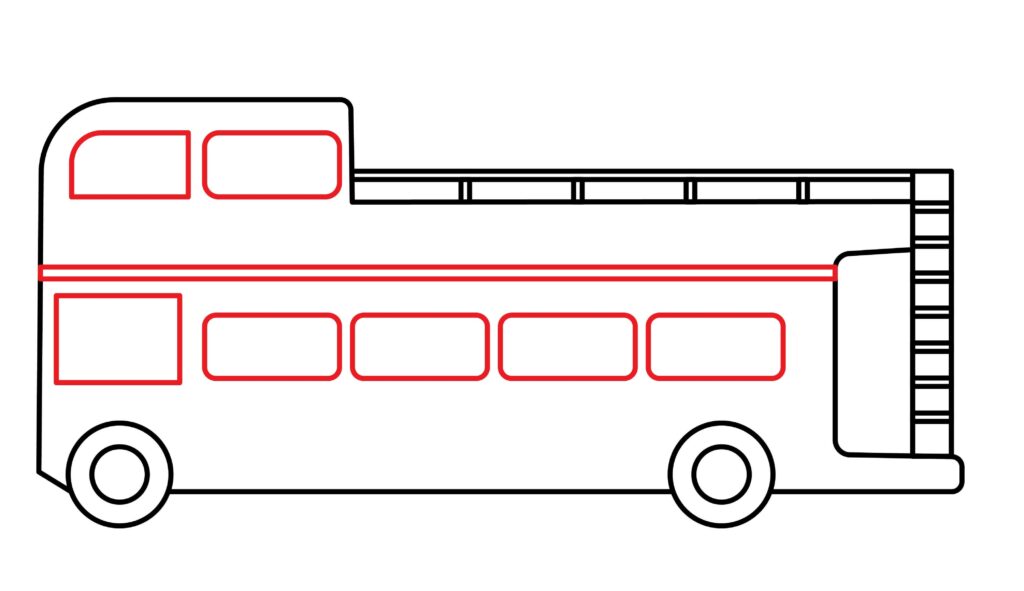
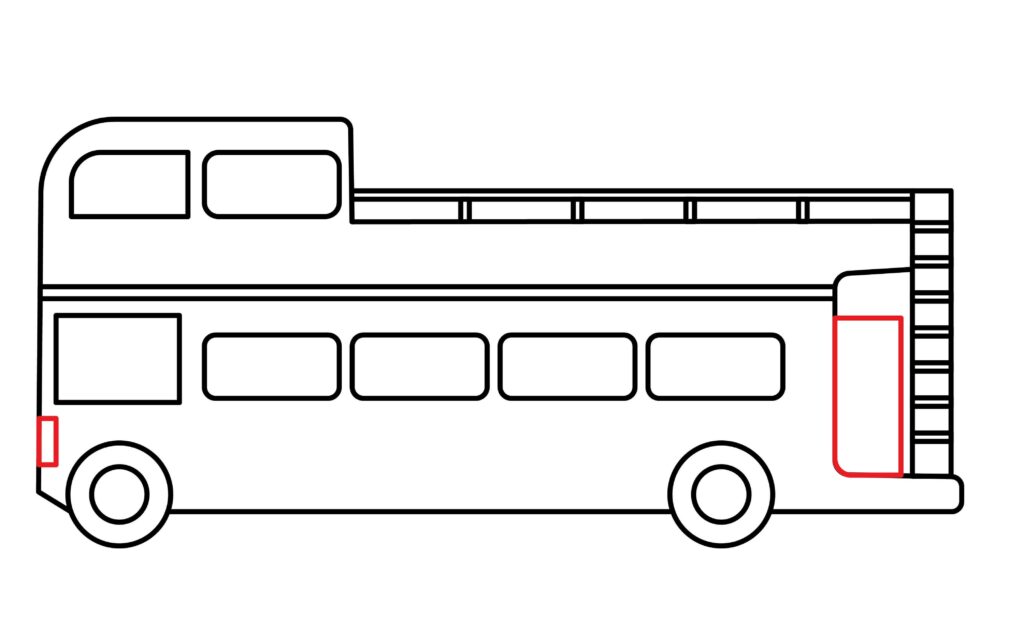
Step 6: Draw the door
This is the last and effortless step. We will make a door for our sightseeing bus. Draw the door on the back side of the bus near the stairs with a vertical rectangle.
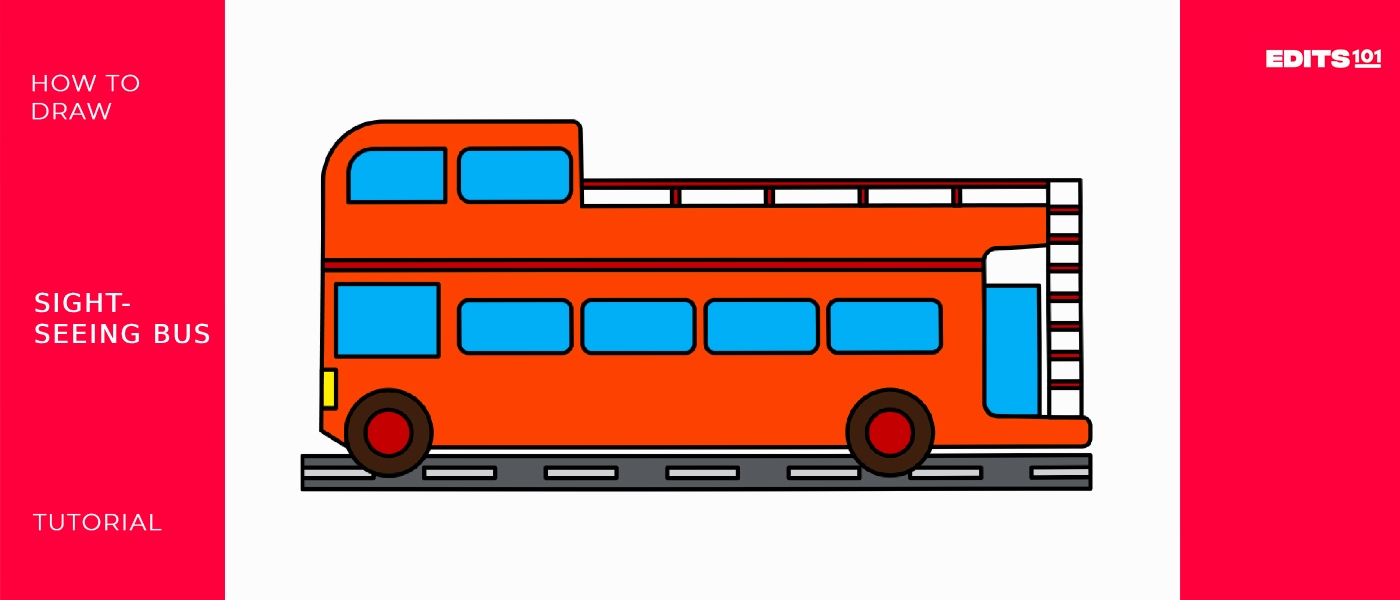
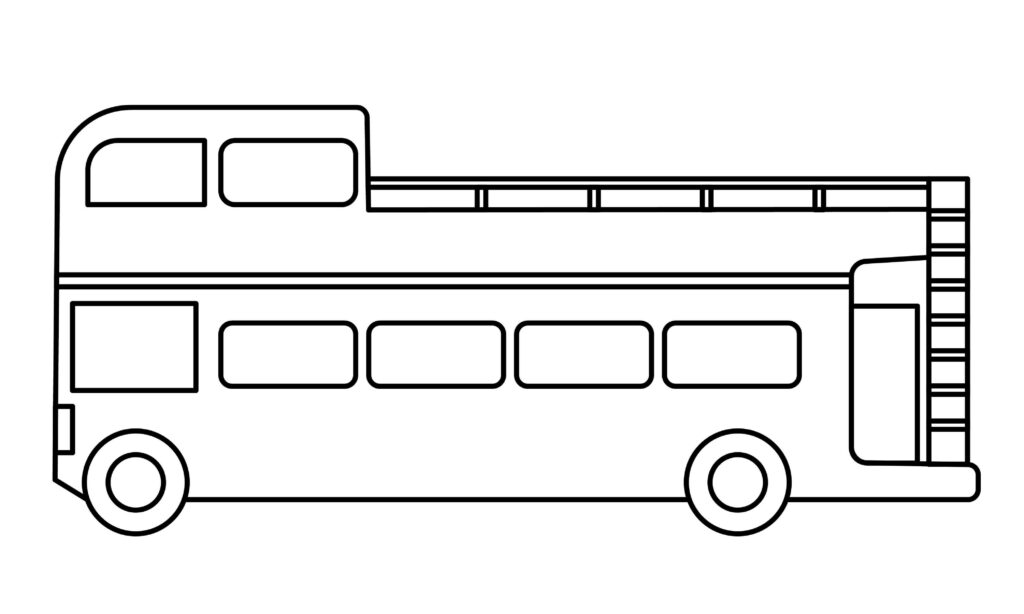
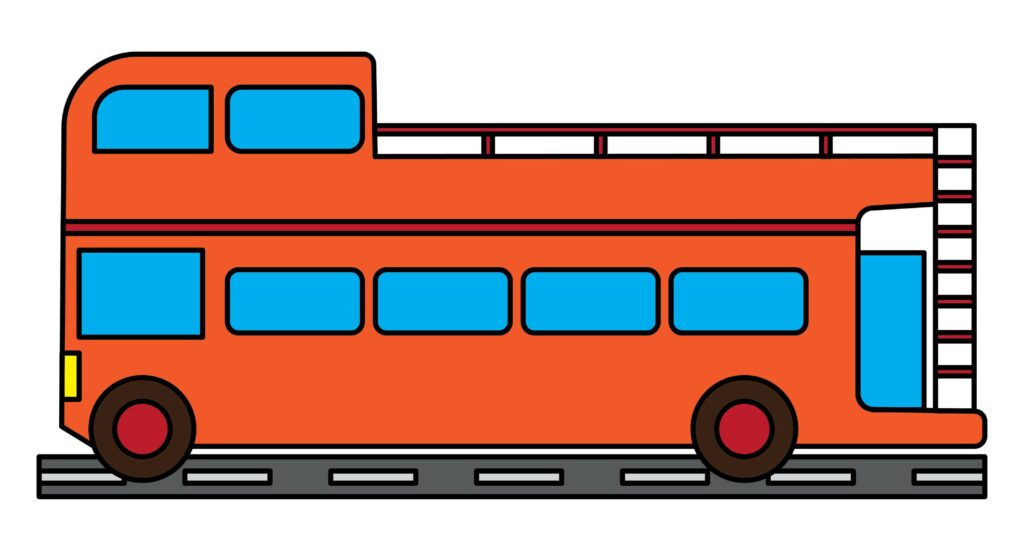
Step 7: The sightseeing bus is ready
Congratulations! The sightseeing bus is ready to hit the road. You did a wonderful job. We’re sure you followed each step and made your bus. To make the drawing more prominent, we’ll outline it using a marker. After outlining, we’ll erase the pencil marks for a better look.
The real fun is about to begin. We are about to upgrade our drawing and make it look more realistic. Are you ready to unfold your imagination and creativity to make your drawing professional?
Taking your sightseeing bus drawing to the next level
Drawing takes practice, just like any other ability. Even if you only have time to sketch briefly each day, do it. Take note of your environment. This aids in a better understanding of details, proportions, and shapes. You can begin with basic items and work up to more complicated topics. Experiment with various drawing instruments such as charcoal, colored pencils, watercolors, markers, and pencils. Every media has distinct qualities of its own and can assist you in finding your preferences.
Additionally, you can experiment with simple methods like cross-hatching, hatching, blending, and shading. Understanding these methods will improve your drawings’ depth and realism substantially. Try new things and use your imagination while you draw. This might be experimenting with new looks and hues or even including creative features of your own. Grab your items and let the magic begin.
Adding background to your drawing
Everyone can tell a story. It can be told in words or even through images. By giving your drawing a background, you can describe your story. A drawing takes on an entirely new appearance with a background. It adds depth to the specifics and provides perspective.
You can draw a road. A shining blue sky or some bushes on the roadside. Your sightseeing bus could also be parked in a parking lot. You can traffic signal on one end of the road if you like.
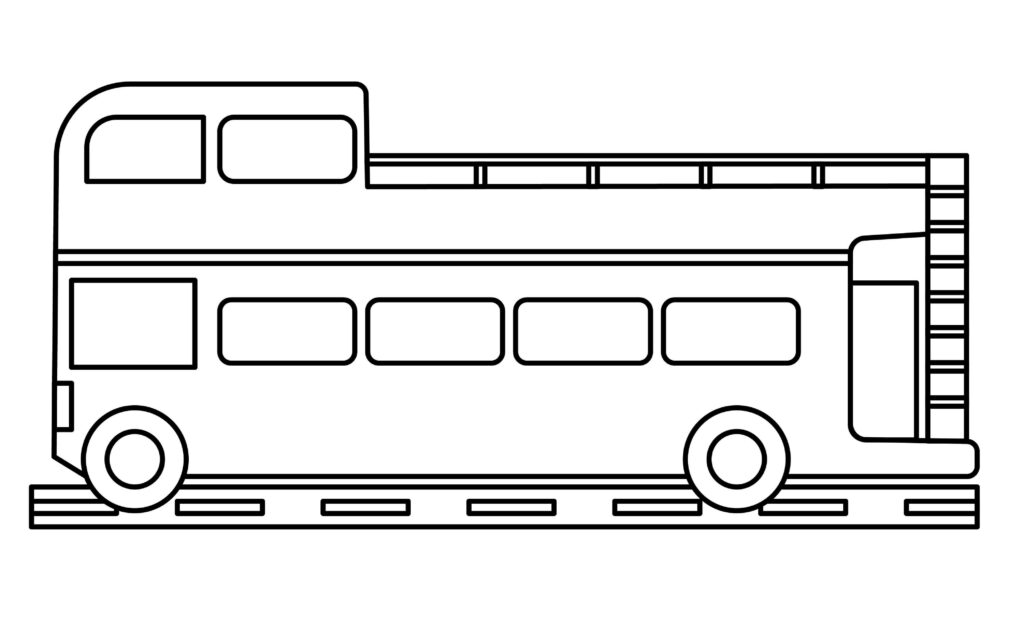
As we draw the background, we will ensure it is distinct from our sightseeing bus. If you notice any line overlapping our bus, erase it carefully.
Adding colors to your drawing
Let’s get to the fun part. Use your imagination to explore different colors and shades that you like and color your beautiful drawing. A drawing gains depth, realism, and emotion as it is colored in. It can enhance storytelling and give a piece of life by evoking mood and atmosphere. Furthermore, color selections can elicit particular emotions or connections, increasing the impact and memorability of a picture. Furthermore, coloring offers a means of self-expression, enabling the artist to incorporate their distinct style and viewpoint into their creations.
The coloring all depends on your creativity. Most sightseeing buses are red, but this is your drawing, and you can color it with any color you prefer. Make the sky blue and the road black or grey in the shade.
P.S. Bonus Tips
Our drawing is completed, and we’re sure you enjoyed it as much as we did. As mentioned earlier, there’s no limit to one’s creativity. The drawing can be upgraded in any way. We added background and colors, but there’s more you can do.
You can draw patterns on the bus or make some stickers you like. You can also draw some people on the bus’s roof, ready to go on a sightseeing trip.
Hey! These are just a few ideas for ideas. Don’t limit yourself to these ideas only. Use your creativity and give your drawing a new look. It is a hit-and-trial method. If you won’t get right on the first attempt, practice and try again.
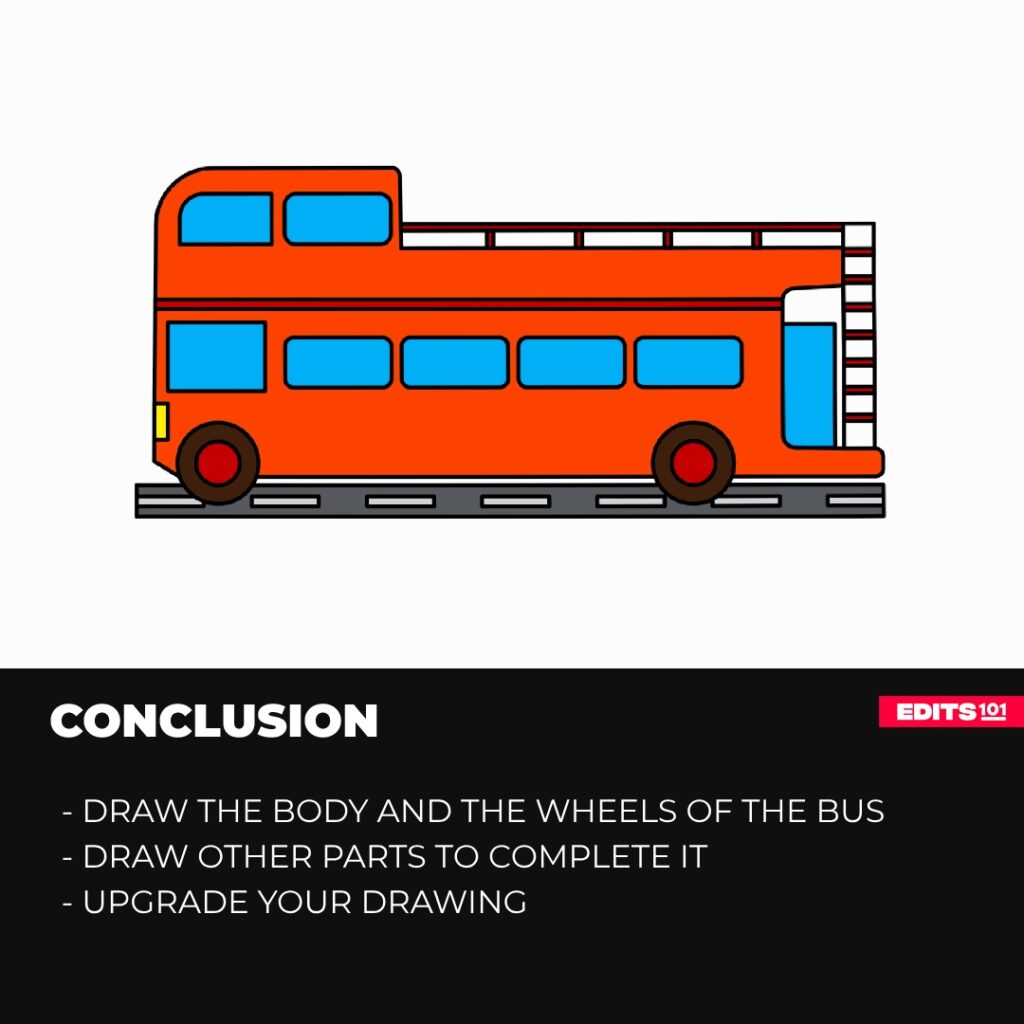
Conclusion
That’s it! Our drawing is completely ready now. It was a fun and easy process. We’re sure you followed each step without skipping and made a fantastic drawing. We started by making wheels, the main body, stairs, the side barrier, windows, and the door. In the end, we upgraded our drawing using our creativity.
Remember, the most important thing is to enjoy the drawing process; the skills will improve naturally.
Thanks for reading & feel free to check out more of our articles!
Author Rating
Overall Rating
Summary
This guide explains how to draw a sightseeing bus. You will also learn a few interesting facts about this vehicle.