How to Draw a Cricket Helmet | An Easy Step-by-Step Guide
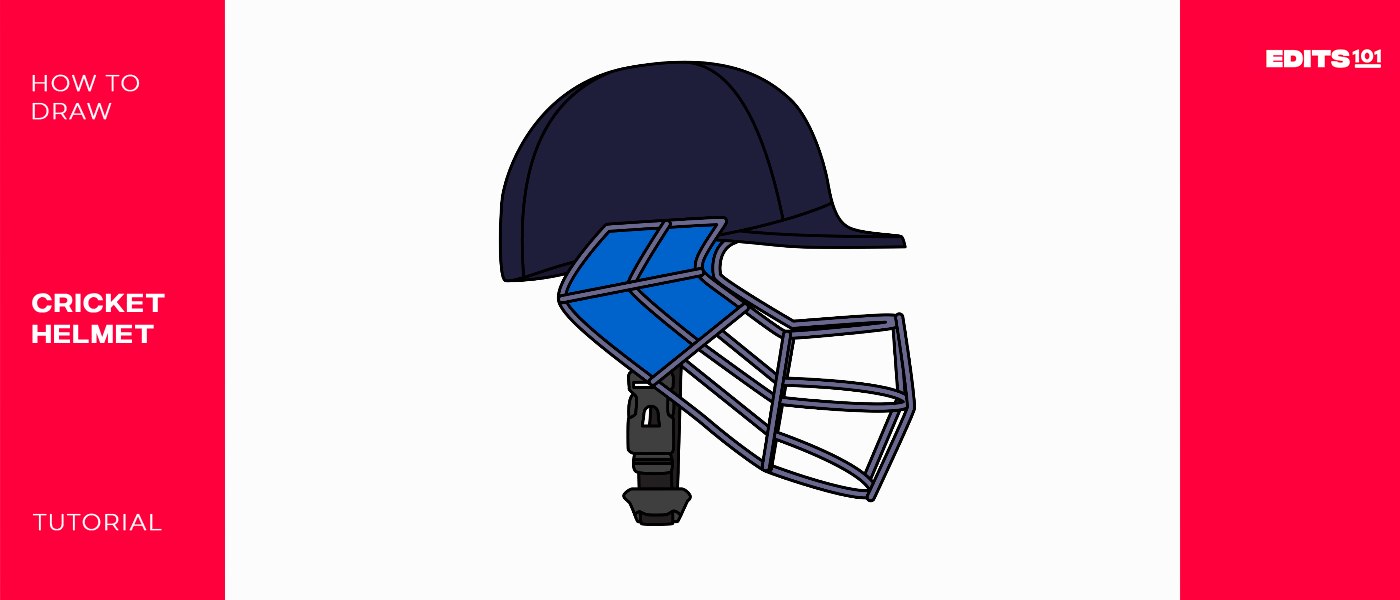
Cricket players wear a helmet to protect their heads from impact from a pitched cricket ball. While the helmets were first used in the 1930s, they did not gain broad popularity until the 1970s. In our lesson, we will be learning how to draw a cricket helmet in easy steps.
Although they are designed to look more like baseball caps, cricket helmets have a hard outer shell that shields the player’s head from injury. The helmet is made using materials that absorb impacts and distribute the force over an increased area to reduce injury. The helmet also has a grill to protect the player’s face. Now that you understand the basics of cricket helmets, let’s get down to today’s lesson.
| Step | Complexity Level |
| Drawing the Helmet Shell | 3 |
| Drawing the Ear Guard | 2 |
| Drawing the Face Guard | 3 |
| Drawing the Chin Strap | 2 |
| Coloring | 1 |
What You Will Need
- A drawing piece of paper
- A pencil
- An eraser
- A ruler
- Coloring supplies
- 15 Minutes
How to Draw a Cricket Helmet
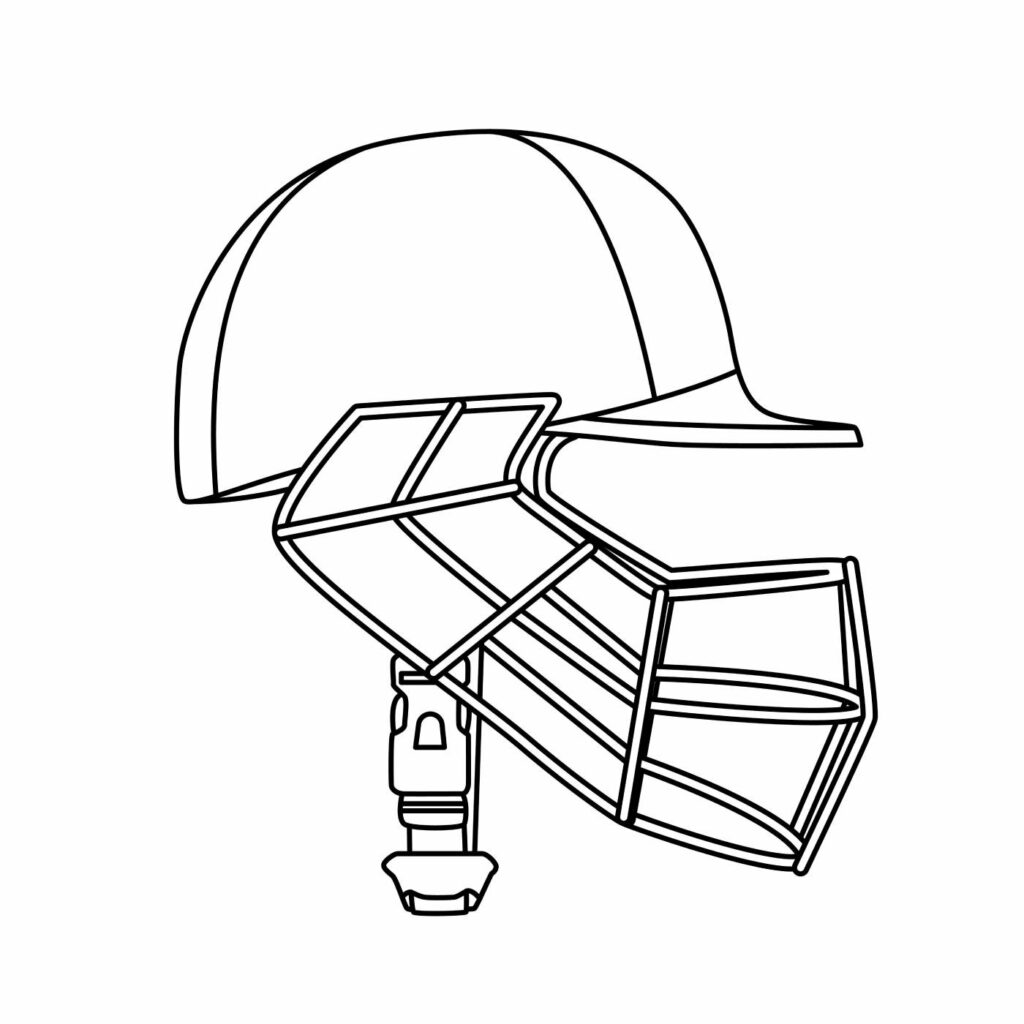
Learning how to draw a cricket helmet is a lot of fun. We will simply be combining lines to create shapes that create the helmet. To give you a better understanding of what we will be doing, we have included the below image which has all the steps we will be taking. Take some time to study the image so that you know what will be involved in today’s lesson.
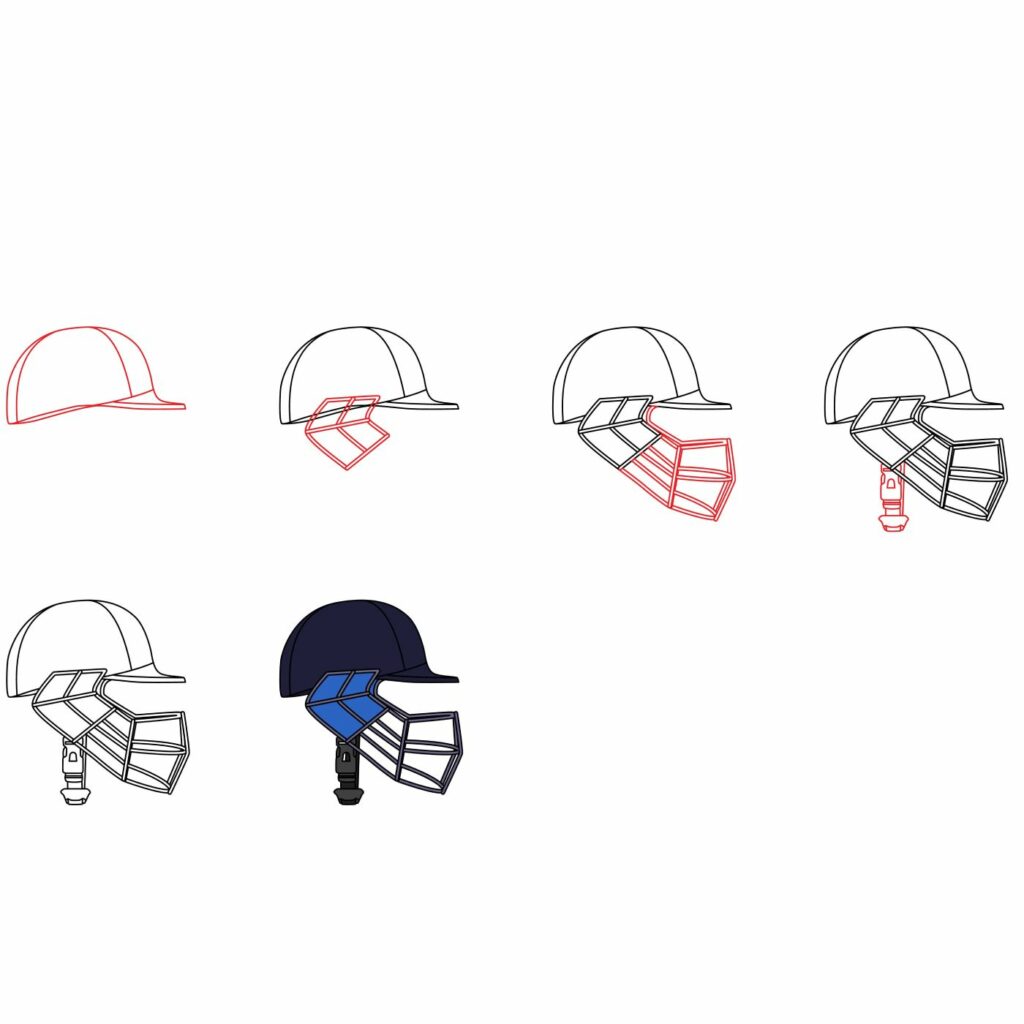
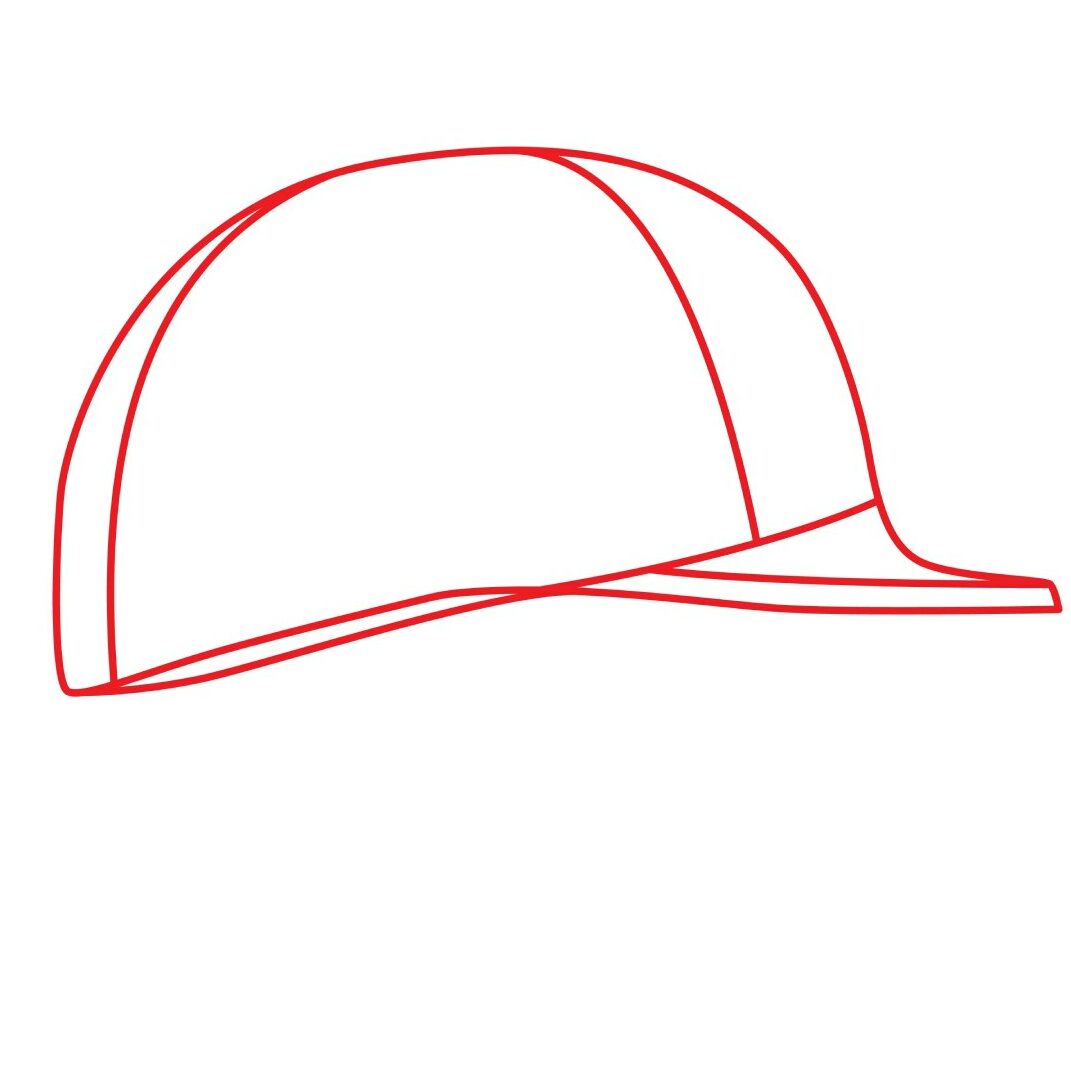
Step 1: Draw the Helmet Shell
Just as we mentioned earlier, a cricket helmet looks more like a baseball cap. That is why the first thing we are going to do is draw the top part of the helmet which looks more like a cap. We need to draw it on the upper part of the drawing space because we will need some room for the grill.
With the drawing paper in a portrait orientation, draw a large semi-circle that covers the top part of the paper. Use a slightly diagonal line to connect the bottom part of the semi-circle as shown in the illustration.
To refine our drawing, we are going to start by adding a visor. This is the part of the cricket helmet that goes over the face. For this, we will add a slightly curved line starting from halfway through the base of the helmet and extend it slightly to the right. We will then add a curved line to connect the top of the visor to the shell.
We are then going to add a few lines to the drawing to add more details to it. As you can see from the below image, our helmet has some distinctive shapes.
- Use a large semi-circle to create the top part of the helmet
- Connect the bottom of the semi-circle using a diagonal line
- Add the visor using curved lines
- Add curved lines on the helmet to give it depth
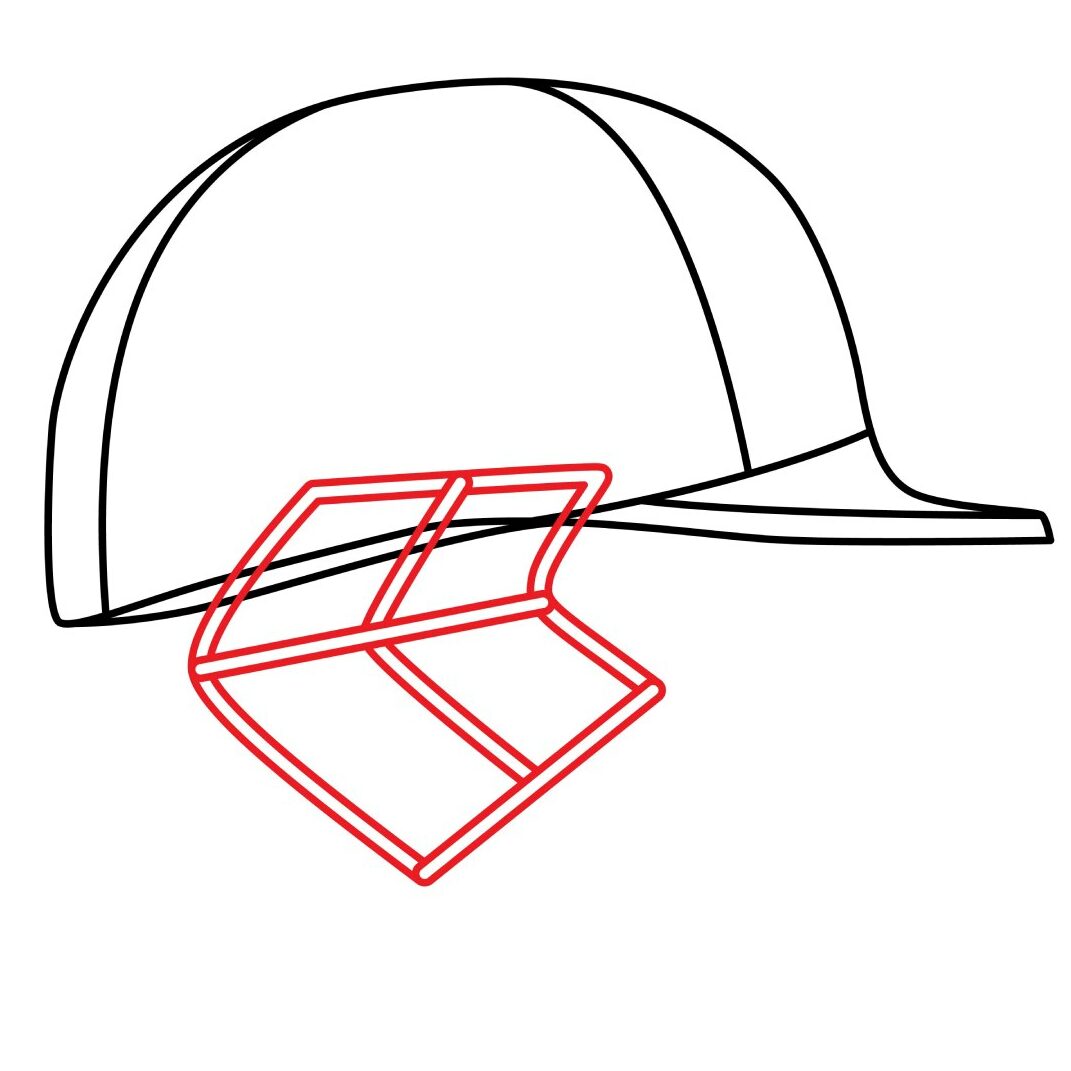
Step 2: Draw the Ear Guard
For the ear guard, we are going to add a couple of angled vertical and diagonal lines below the shell. You should create shapes similar to the ones we have in our illustration. This will form the ear guard which protects the player’s ears from impact.
- Create angled shapes to form the ear guard
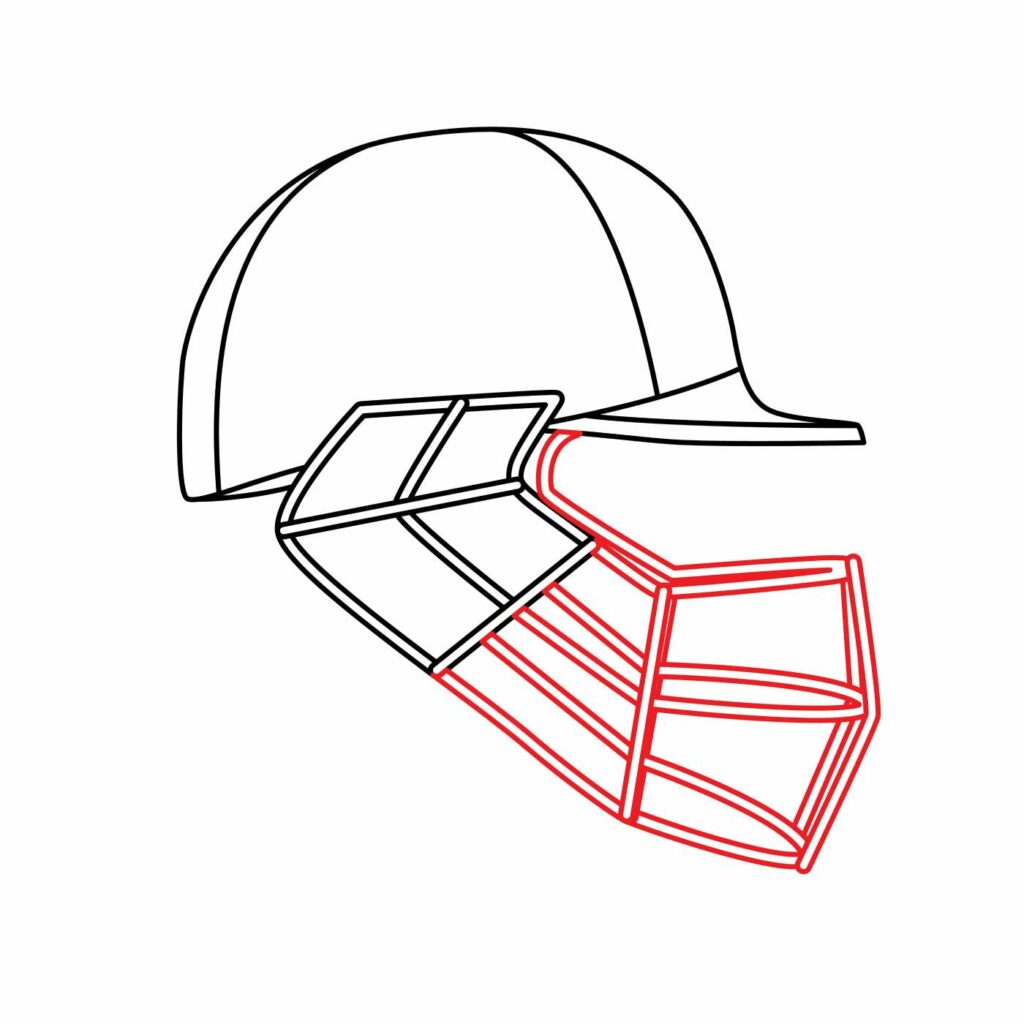
Step 3: Draw the Face Guard
Next, we are going to add the grill. This is the part that protects the wearer’s face from a pitched cricket ball. It protects the face without limiting visibility. The most common material used on the grill is metal. It is, however, not uncommon to find grills made of other composite materials or polycarbonate.
For the grill, we are going to use angled and curved lines to create a three-step steel cage that looks like what is depicted in our illustration below.
- Use angled lines to create a cage below the visor
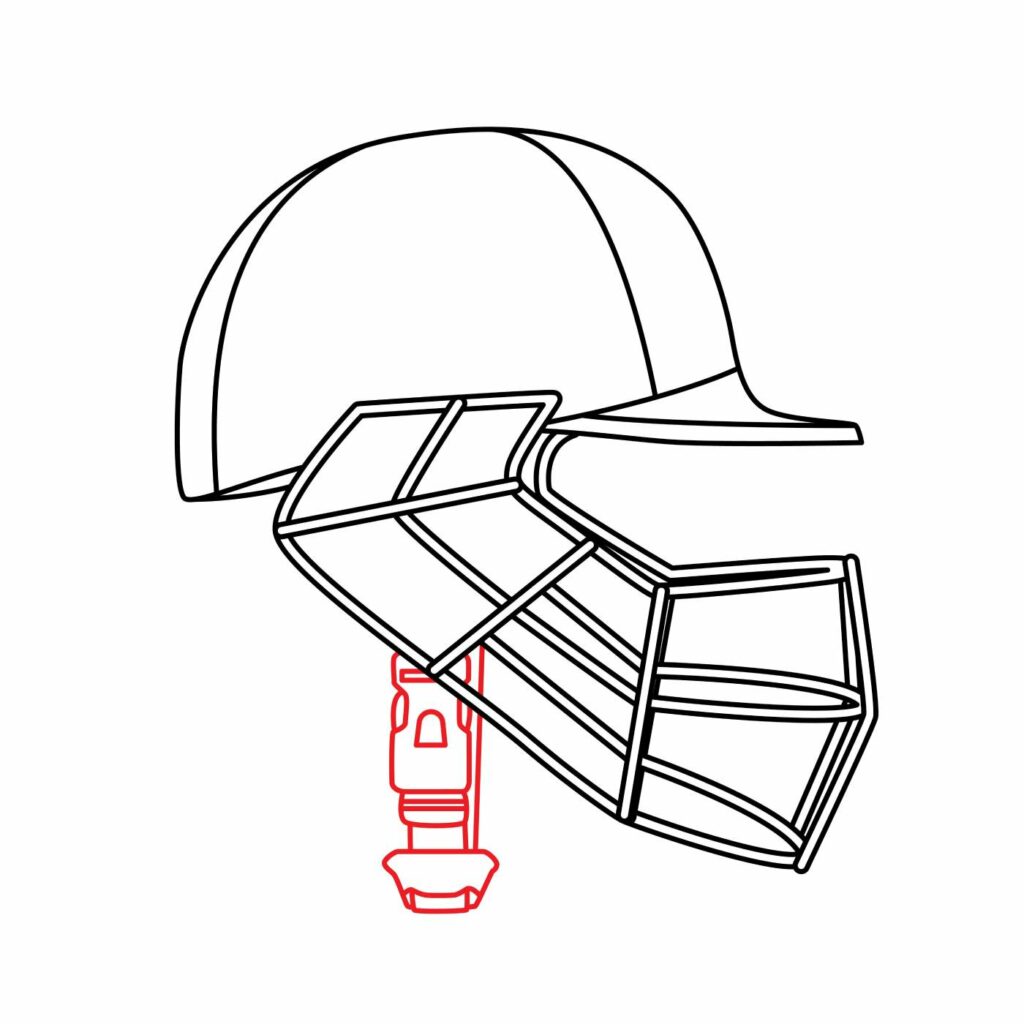
Step 4: Draw the Chin Strap
The final detail we are going to add is the chin strap. This is used to strap the cricket helmet tightly around the player’s head. The strap goes under the chin.
To draw the chin strap, we are going to use a combination of horizontal, diagonal, and vertical lines to create a structure that looks like what we have below.
- Use a combination of diagonal, horizontal and vertical lines to draw the chin strap
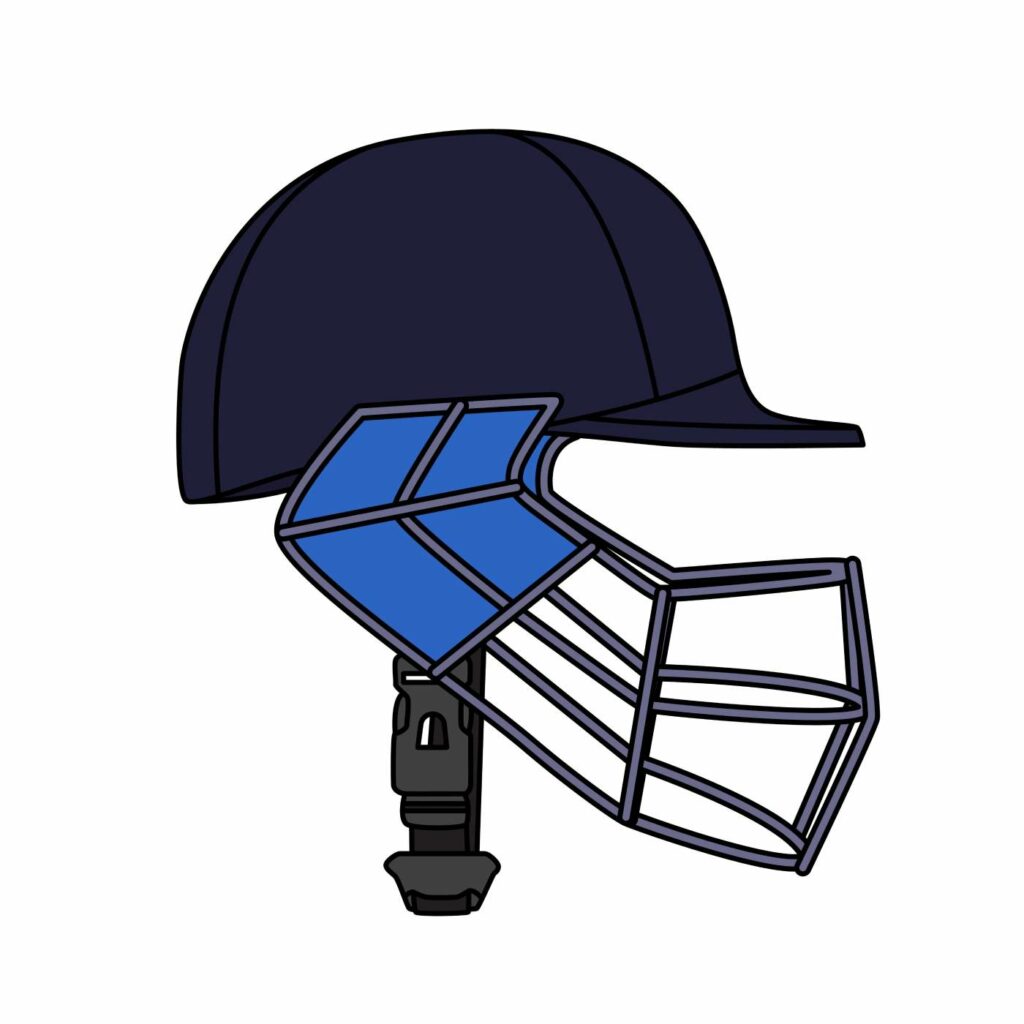
Congratulations! Your Cricket Helmet Is Complete
With just four steps, our cricket helmet is now ready. Your helmet should look like what we have below. Keep in mind that your drawing doesn’t have to look exactly like ours. Every drawing is unique. However, if your drawing is way off and you wish to redo it from scratch, you will notice a significant improvement now that you have a better idea of how to draw a cricket helmet.
Take the Drawing to the Next Level
It is not good to leave your drawing as it is. It is too boring. To advance it, there are a couple of things you may consider doing.
Add a Background
If you have time, you can go ahead and add some background to your cricket helmet. You can add a cricket ball, a player, a cricket bat, or even a cricket field. It is also okay to add a name or a logo to the side of the helmet. Doing so will add a unique touch to your drawing.
Keep in mind that the cricket helmet is the main focus of our drawing. As a result, any background detail you add must not conceal it. You also need to note that adding too many details may ruin your drawing.
Color Your Drawing
The most important thing to do is to color your drawing. Coloring is the best way to advance your drawing and take it to the next level.
- Before you pick up your coloring supplies, be clear on the colors you want to use on your cricket helmet.
- The colors you use must remain within the borders of the areas you are coloring.
- Use different shades on different areas so as not to conceal crucial details.
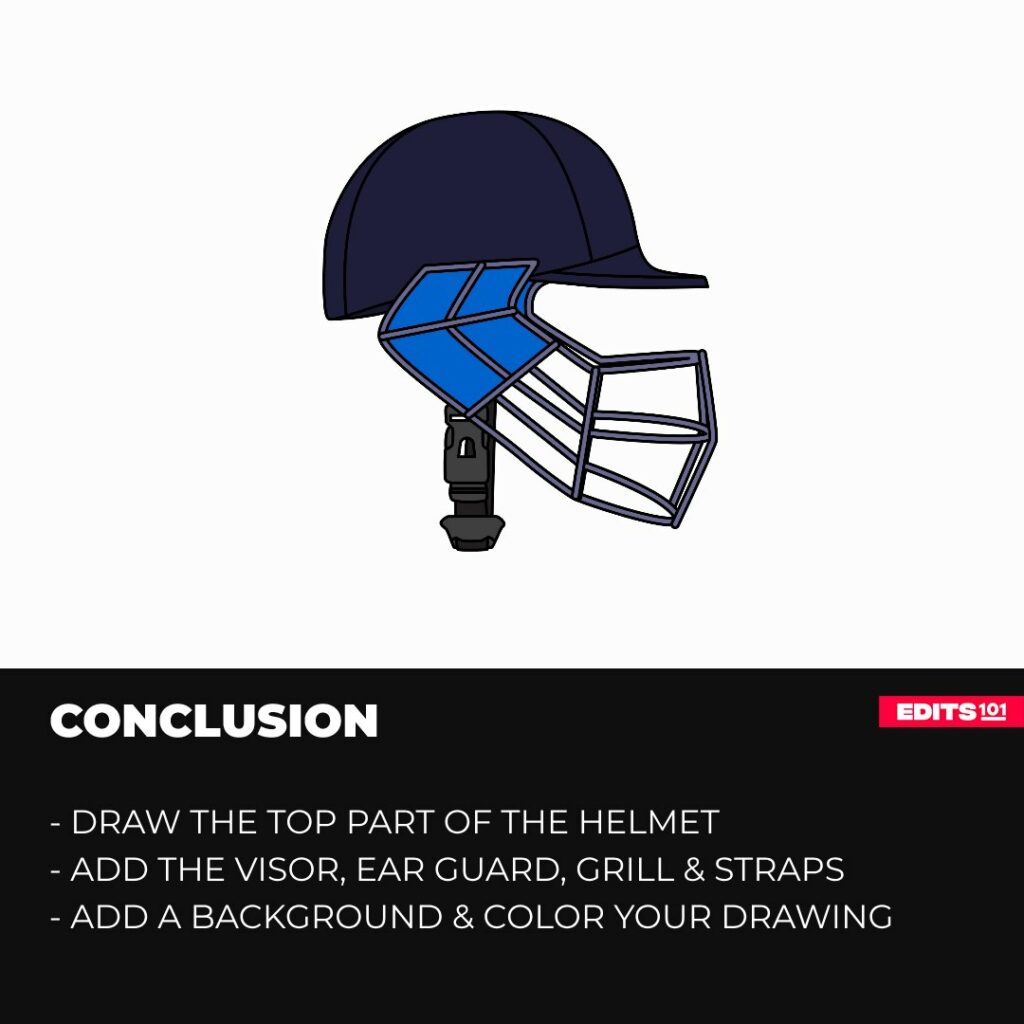
Conclusion
Drawing a cricket helmet might seem complex at first but once you understand the basics, it is the most rewarding thing you will get to do. In our drawing, we started by drawing the top part of the helmet. We then added the visor to the right of the drawing and then added the ear guard using a combination of angled lines. For the grill, we used a series of angled and curved lines. The final detail we added was the chin strap beneath the helmet. In the final step, we colored the drawing.
You can use these steps to draw a cricket helmet from any perspective or even from a real-life helmet. These steps can also be used when drawing a helmet on a sketching app.
Thanks for reading & feel free to check out more of our articles!
Author Rating
Overall Rating
Summary
Learn the easiest way to draw a realistic cricket helmet. The tutorial also shares tips on how to advance your artwork.