How to Draw Cricket Pads | A Step-by-Step Guide
One of the most important pieces of equipment for any cricketer is their protective gear. Cricket pads, also known as leg guards, are essential for safeguarding the legs of a player when playing hardball cricket. If you enjoy sketching, you will love our lesson for today. We will be learning how to draw realistic cricket pads in three simple steps.
Before we begin, let’s look at the two types of cricket pads: batting pads and wicket-keeper’s pads. These are usually white to match the uniform of the other cricket players. It is, however, good to note that in limited-overs cricket, the pads can be colored to match the uniform of the team. With that out of the way, let’s get back to today’s lesson.
| Step | Complexity Level |
| Drawing the Outline | 3 |
| Drawing the Knee Roll | 2 |
| Adding Details to the Pads | 2 |
| Coloring | 1 |
What You Will Need
- A drawing piece of paper or a sketchbook
- Pencils for sketching
- An eraser for correcting mistakes
- A ruler for drawing straight lines
- Coloring supplies
- 10 Minutes
How to Draw Cricket Pads
Drawing cricket pads is not as challenging as you might think. This is without a doubt one of the easiest cricket gears to draw. To complete the drawing, we will only need curved and straight lines.
Since the cricket pads come in pairs to protect both legs, we will be drawing two of them. However, our focus will be on drawing the first cricket pad and then adding the second one later. To make it easy for you to draw identical pads, you may fold your drawing paper in half so that as you sketch the first cricket pad, you will have trace marks for the second pad which you can highlight later. Alternatively, you can draw the second cricket pad from scratch.
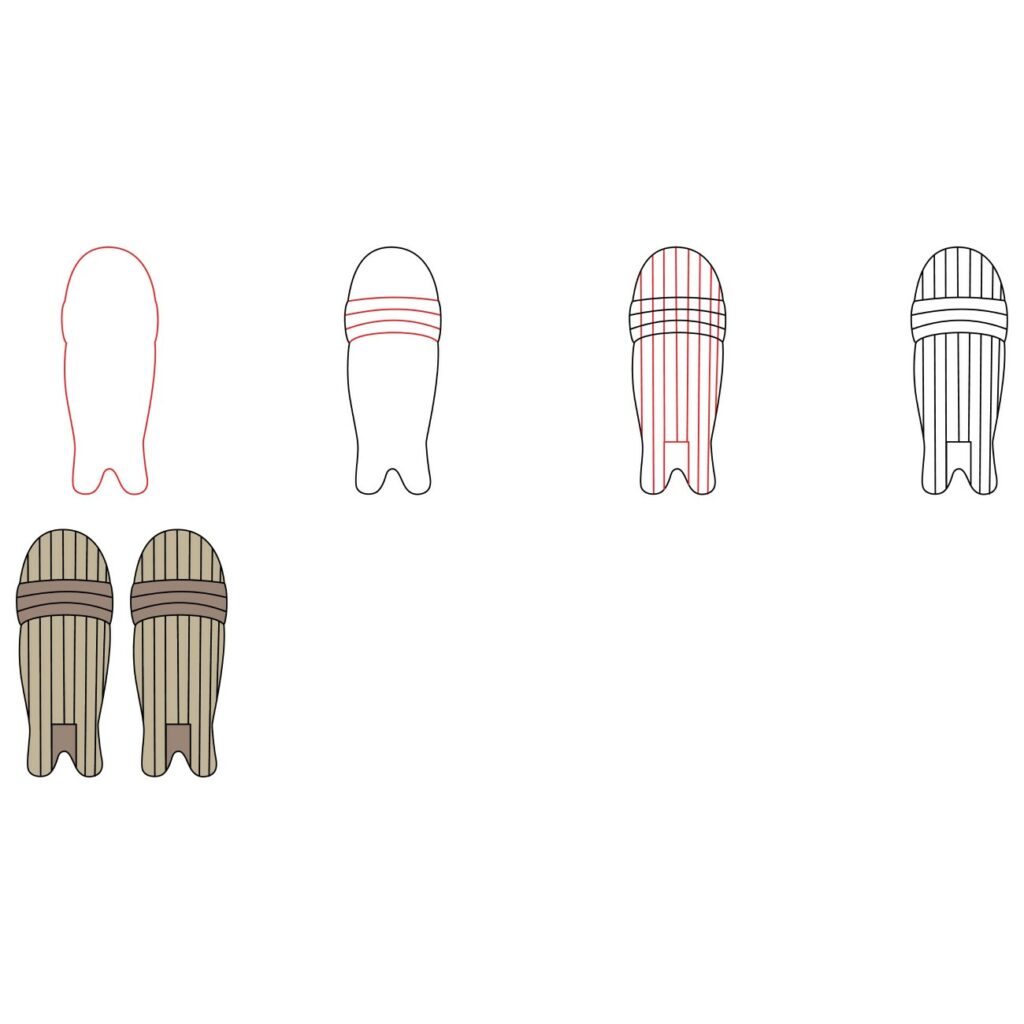
Take some time to study the below image so that you know what will be involved in today’s lesson.
Step 1: Draw the Outline
The first thing we are going to do is outline the cricket pad. We will draw this on the left side of our drawing paper so that we have room on the right for the second cricket pad. However, if you fold your paper in half as we suggested earlier, you can simply draw the first pad in the middle of the paper.
To begin, we are going to draw a basic outline of the cricket pad. Use your pencil to sketch a leg guard similar to the one we have in the below illustration. You will be using curved lines for this. Don’t forget to add similar contours to the ones we have in our drawing. The lines will create an overall shape that resembles the real cricket pads.
- Use curved lines to draw the outline of the cricket pad
- Add contours in the top part for the knee rolls

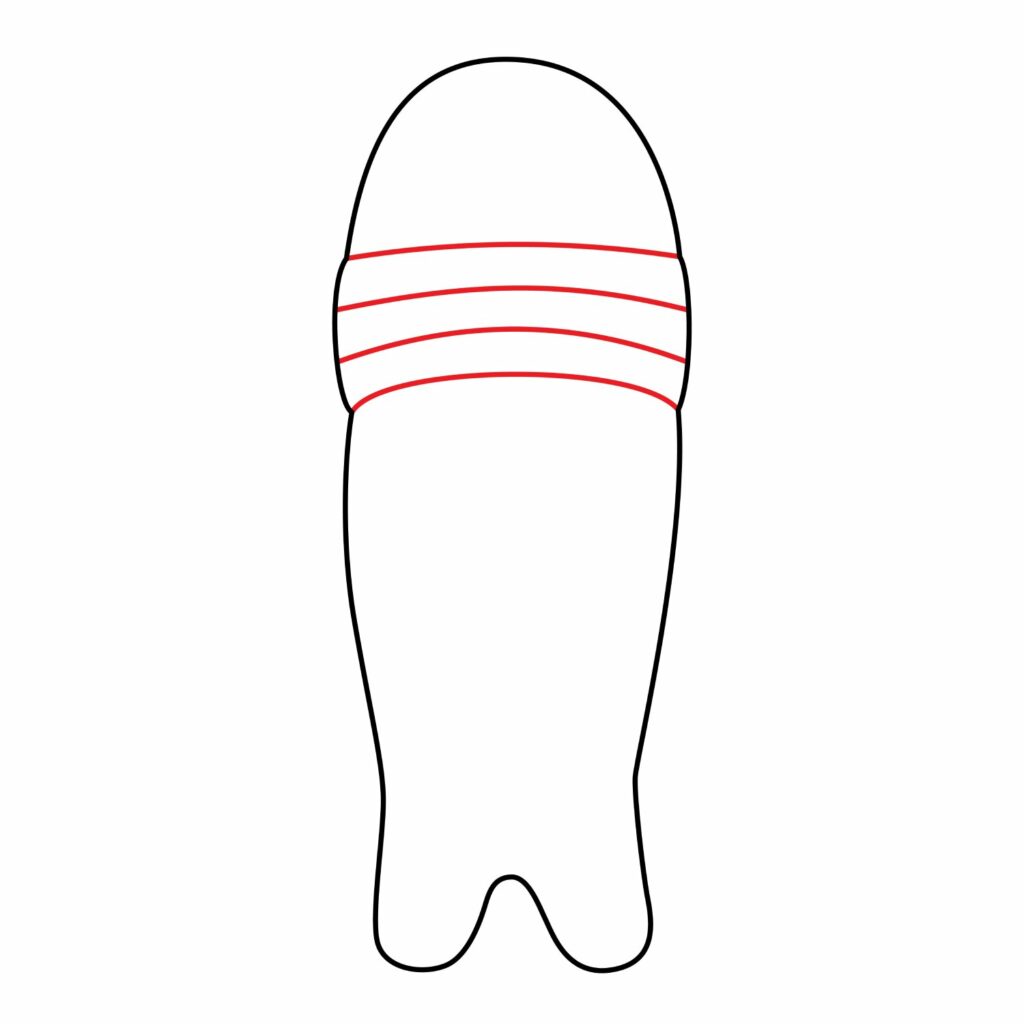
Step 2: Draw the Knee Roll
The next thing we are going to add is the knee roll. This structure is designed to offer more protection to the vulnerable knee joint from a pitched cricket ball. It also allows the cricket pad to flex easily when the player is moving. The knee roll has horizontal sections that include the padding material.
To add the knee roll to the cricket pads, we are going to start by adding a curved line in the area close to the top of our pad outline. Use more curved lines to indicate that the knee roll is flexible. Make sure that the curved lines are not too close together. Your drawing should look like what we have below.
- Add curved lines in the space between the contours to represent the knee rolls
- Don’t squeeze the curved lines too close
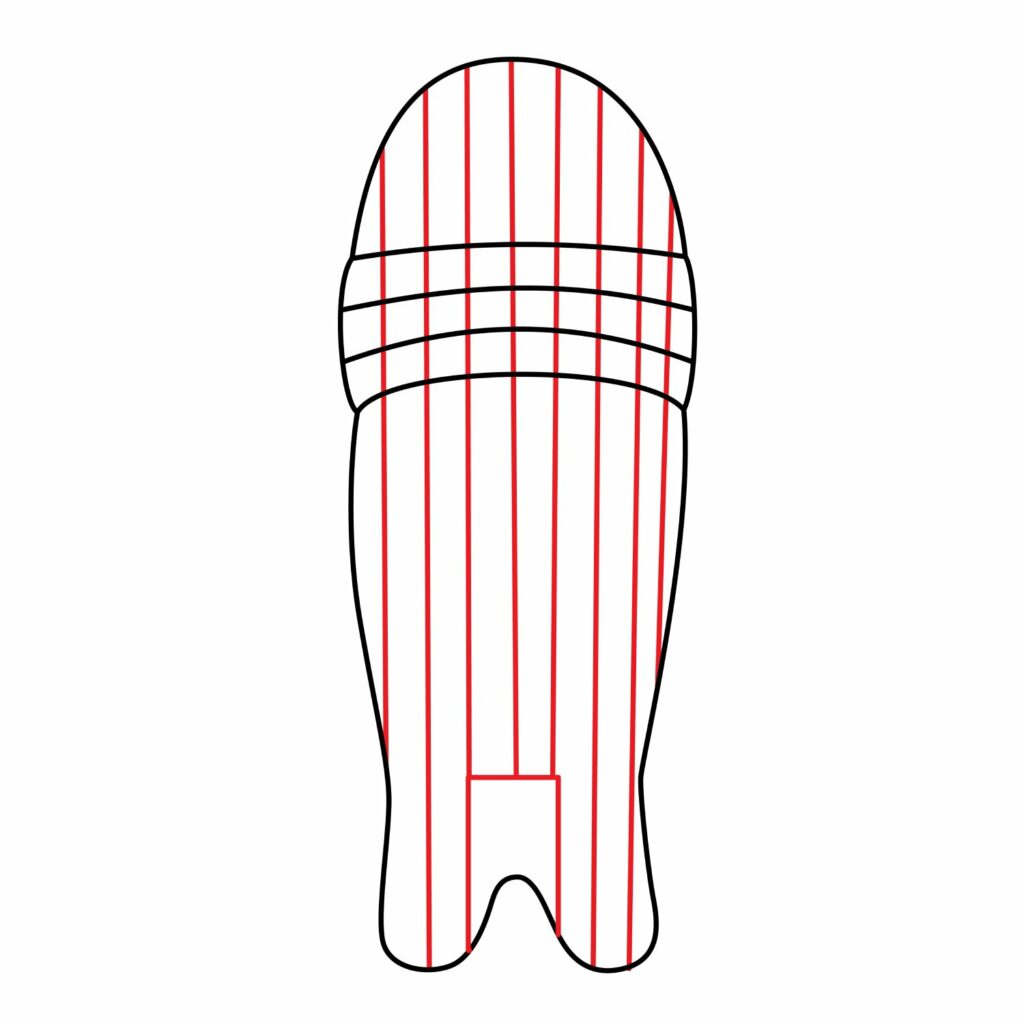
Step 3: Add Details on the Pads
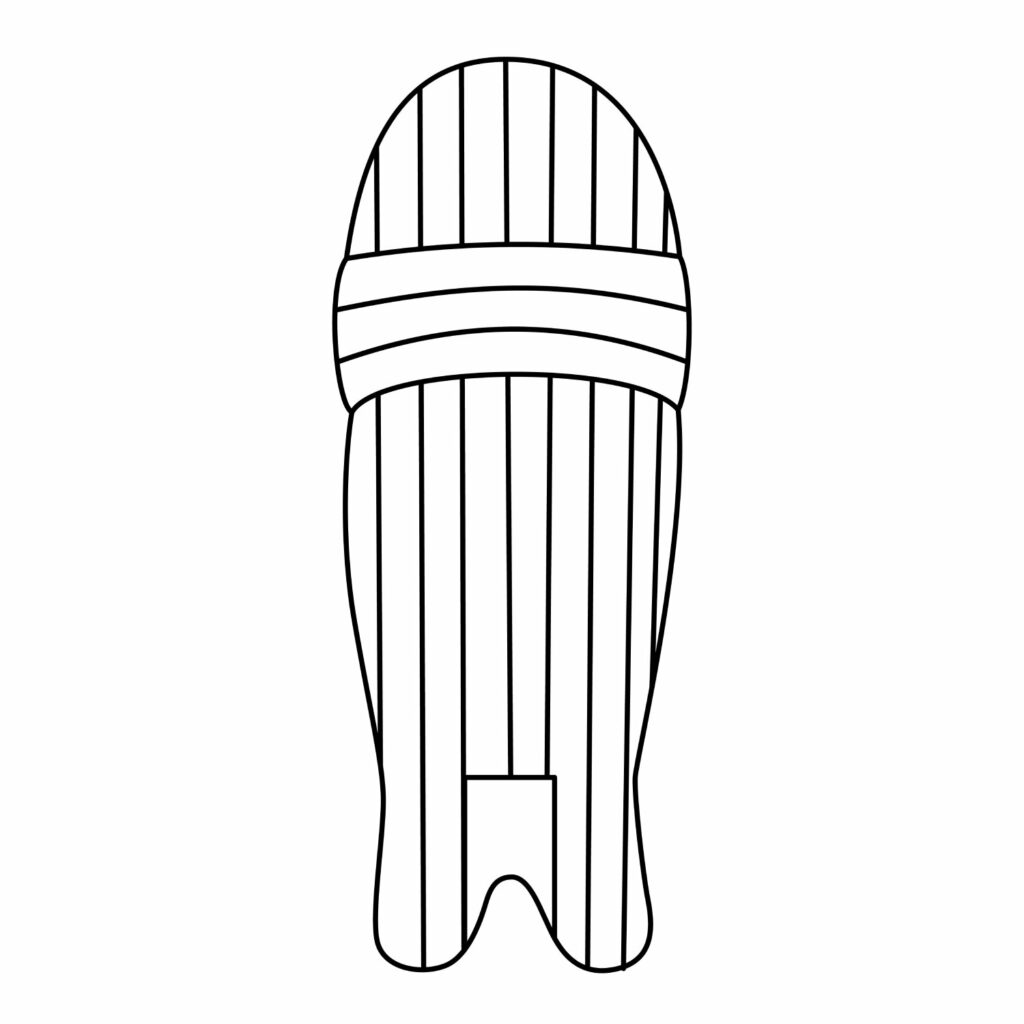
We are now going to add details to form the face of the cricket pads. For this, we will be using vertical lines. But first, we need to add the bottom part that usually has the logo. For this, we will add a vertical rectangle in the area above the groove on the bottom part of the cricket pads.
For the face details, use your ruler to draw a series of vertical lines. Ensure the lines are evenly spaced and should run the entire length of the cricket pad. If possible, you can add the vertical lines without drawing them over the knee rolls. However, if that is not possible, you can add them and later erase the lines that cut through the knee rolls.
These details will give the cricket pads the structure and texture that makes your drawing resemble a real cricket leg guard.
- Add a vertical rectangle above the groove on the bottom of the pad
- Use vertical lines to add details to the face of the pad
Congratulations! Your Cricket Pads are Ready
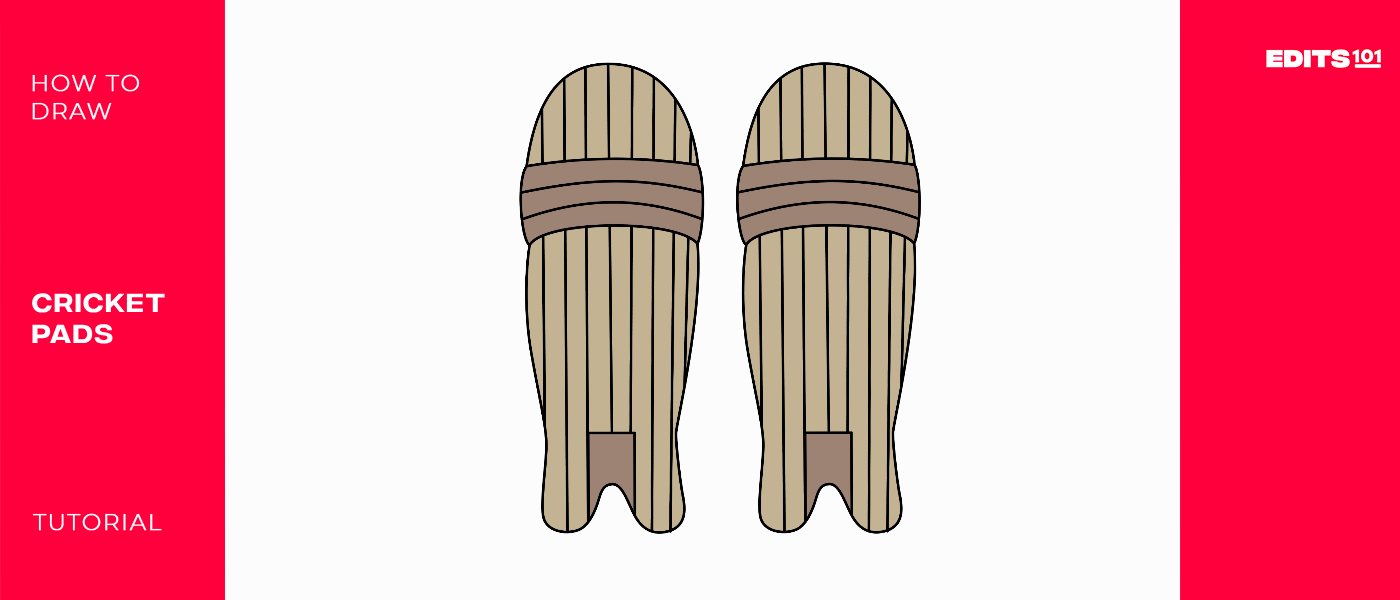
Your drawing should look similar to what we have below. Take a moment to admire your work. You did a great job!
If the cricket pad did not shape up as well as ours, there is no need to feel bad. You will notice better results when you attempt to draw the cricket pad again. You may also consider redoing the areas on your cricket pad that seem way off.
Take the Drawing to the Next Level
Leaving your drawing as it is doesn’t look too good. Some people may not even know if it is a cricket pad, a skateboard, or something completely different. To add realism to the drawing and make it easy to identify, we are going to add a couple of things.
Draw the Second Cricket Pad
The first thing we are going to do is add the second cricket pad. If you had folded your drawing paper in two, you could unfold it and trace through the marks left when drawing the first cricket pad. If you haven’t done that, you can simply start drawing another similar cricket pad on the right side of the first one.
Add Some Background
Another important thing you should consider doing is adding some background to the cricket pads. The background can be anything you want including a cricket bat, ball, or a cricket field. You can also add a logo in the small space we left at the bottom part of the cricket pads.
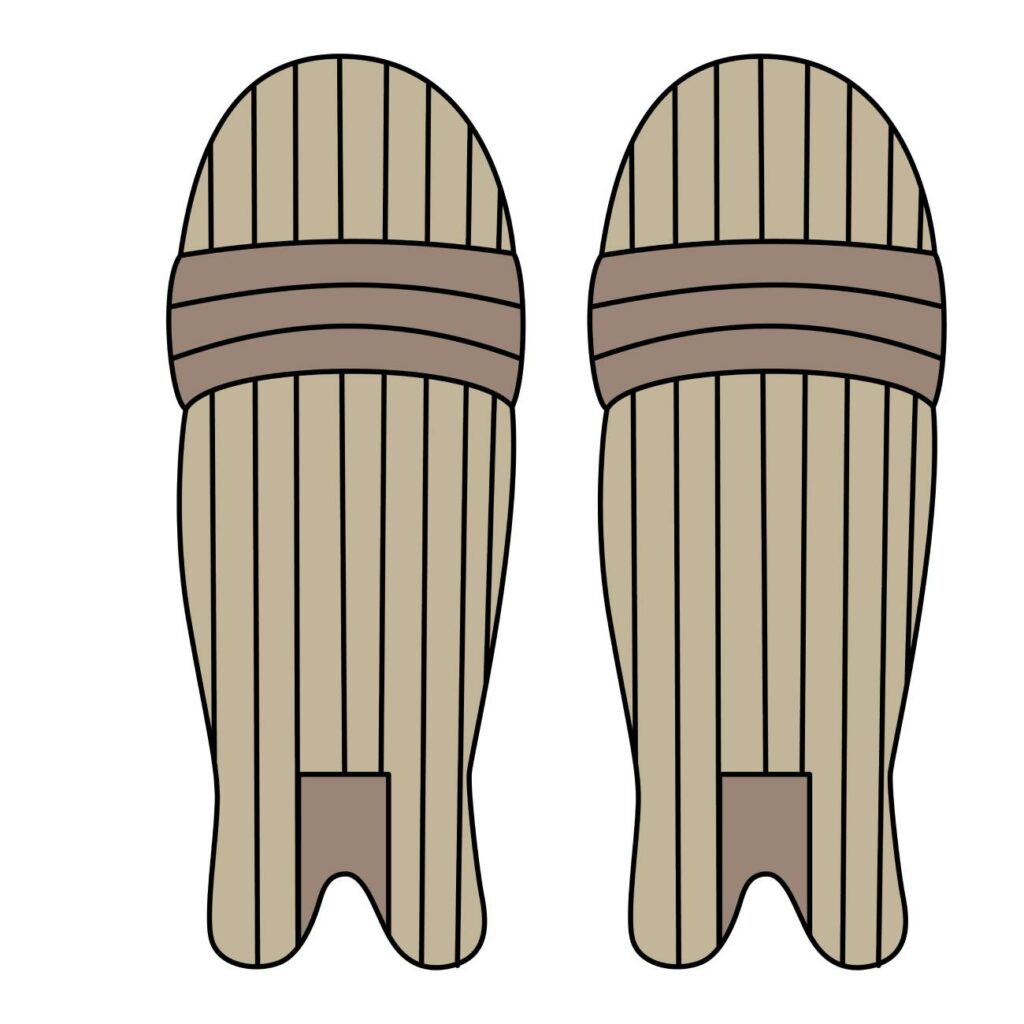
Color Your Drawing
Last but not least, we need to add color to the drawing. This is the final step that will bring our drawing to life. Reach for your coloring pencils or marketers and add vibrant colors to your drawing. Remember that this is your drawing so you can use just any color that you want.
Use different shades for the different parts of the cricket pads. That way you will avoid concealing the details we added. Additionally, you can enhance your drawing by using various shading techniques to make the cricket pads appear three-dimensional. Experiment with light and shadow to add depth to your artwork.
Conclusion
It is very satisfying to draw cricket pads from scratch. You get to watch simple lines create something realistic and beautiful. In our drawing, we started by folding our drawing paper in half so that we had trace marks for the second cricket pad. We then drew the outline of the first cricket pad, added the knee roll, and then used vertical lines to add details to the face of the pad. To advance our drawing, we drew the second cricket pad and then colored them.
You can use these steps to draw cricket pads from a photograph or a real cricket pad. These steps will also help sketch cricket pads on any sketching app that you love. We hope you had fun.

Thanks for reading & feel free to check out more of our articles!
Author Rating
Overall Rating
Summary
Learn how to draw realistic cricket pads in three simple steps.