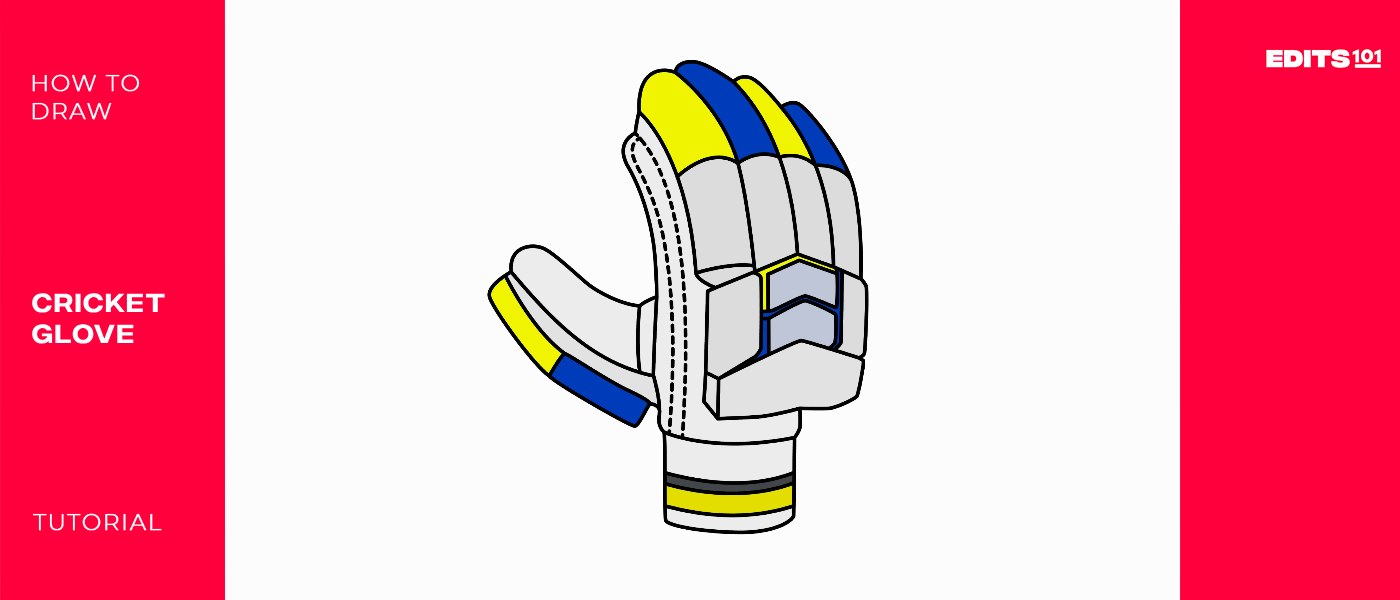
How to Draw a Cricket Hand Glove | A Step-by-Step Guide
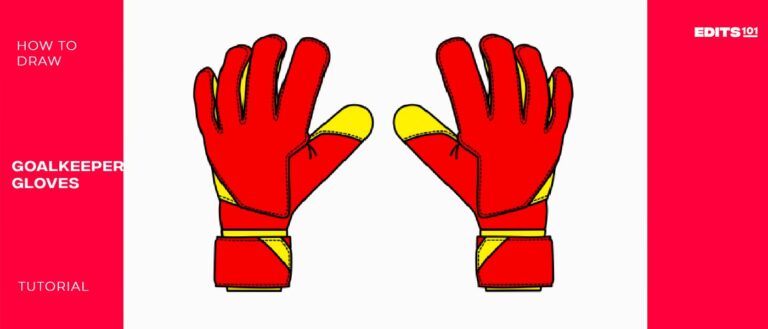
Cricket players wear protective clothing while out on the field. The batter (the player that hits the ball) is allowed to wear a protective helmet, external leg guards, forearm guards, and batting gloves. In today’s guide, we will be learning how to draw a realistic cricket hand glove, also known as the batter glove.
A cricket hand glove is made of a leather palm and nylon or any other synthetic fabric on the back. The gloves are worn to cover one or both hands. The gloves are designed to prevent blisters by absorbing shock, provide comfort, and warmth, and also improve grip.
| Steps | Complexity Level |
| Drawing the Outline of the Glove | 3 |
| Drawing the Sweat Cuff | 2 |
| Adding Details to the Thumb | 2 |
| Adding Details to the Back of the Glove | 2 |
| Drawing the Sew Lines | 1 |
| Coloring | 2 |
What You Will Need
- A drawing piece of paper
- A pencil
- An eraser
- Coloring supplies
- 15 Minutes
How to Draw a Cricket Hand Glove
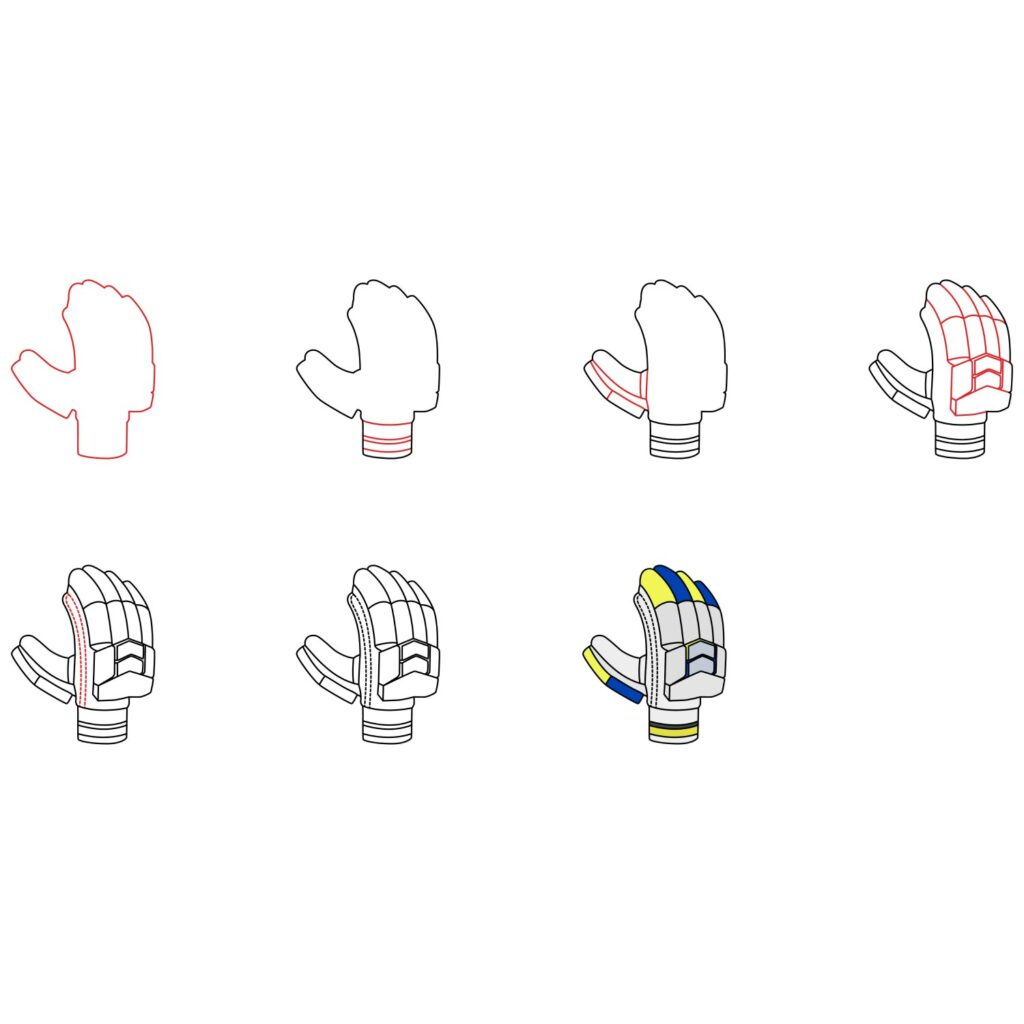
At first, drawing a cricket hand glove may seem hard. The truth is once you know where to start and how to go about it, it is pretty easy. In this tutorial, we are going to learn how to draw a realistic cricket hand glove step by step. To give you an idea of what we will be doing, the below image has all the steps involved in today’s lesson.
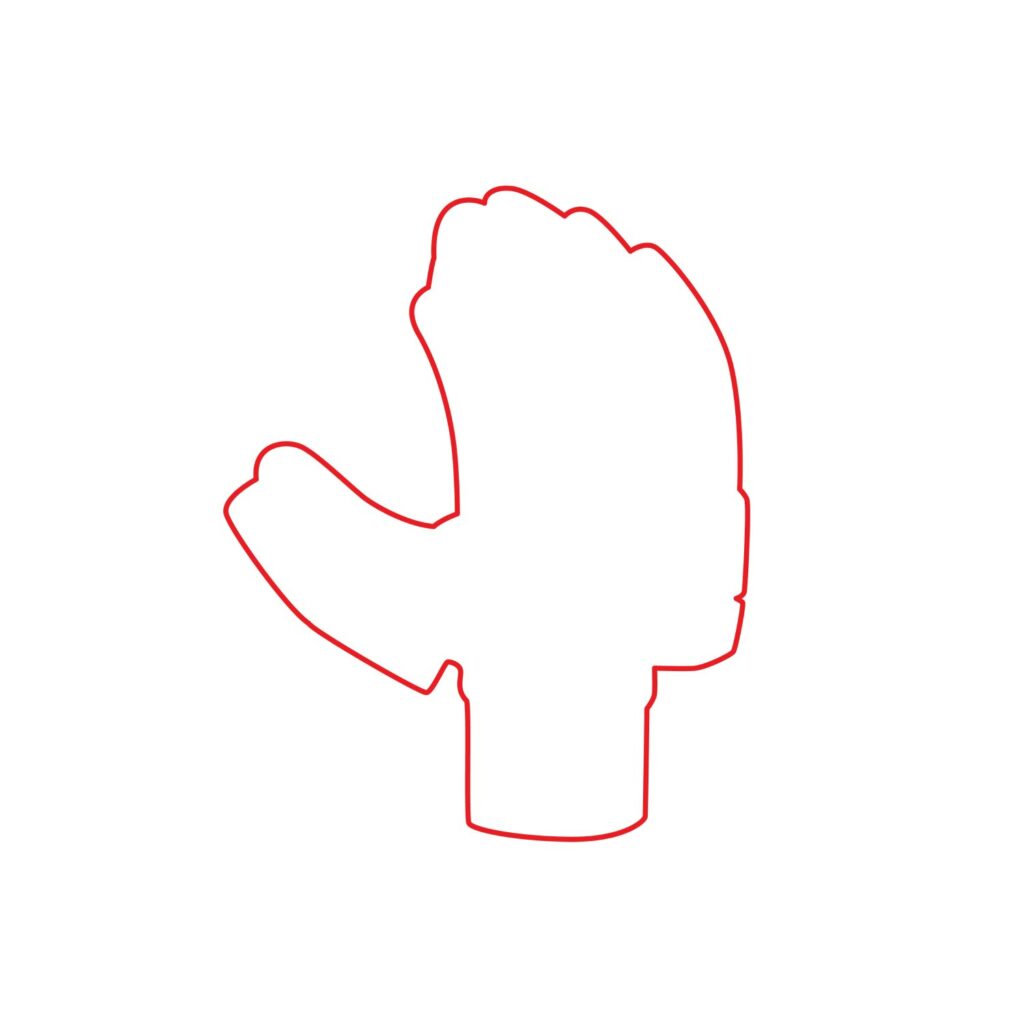
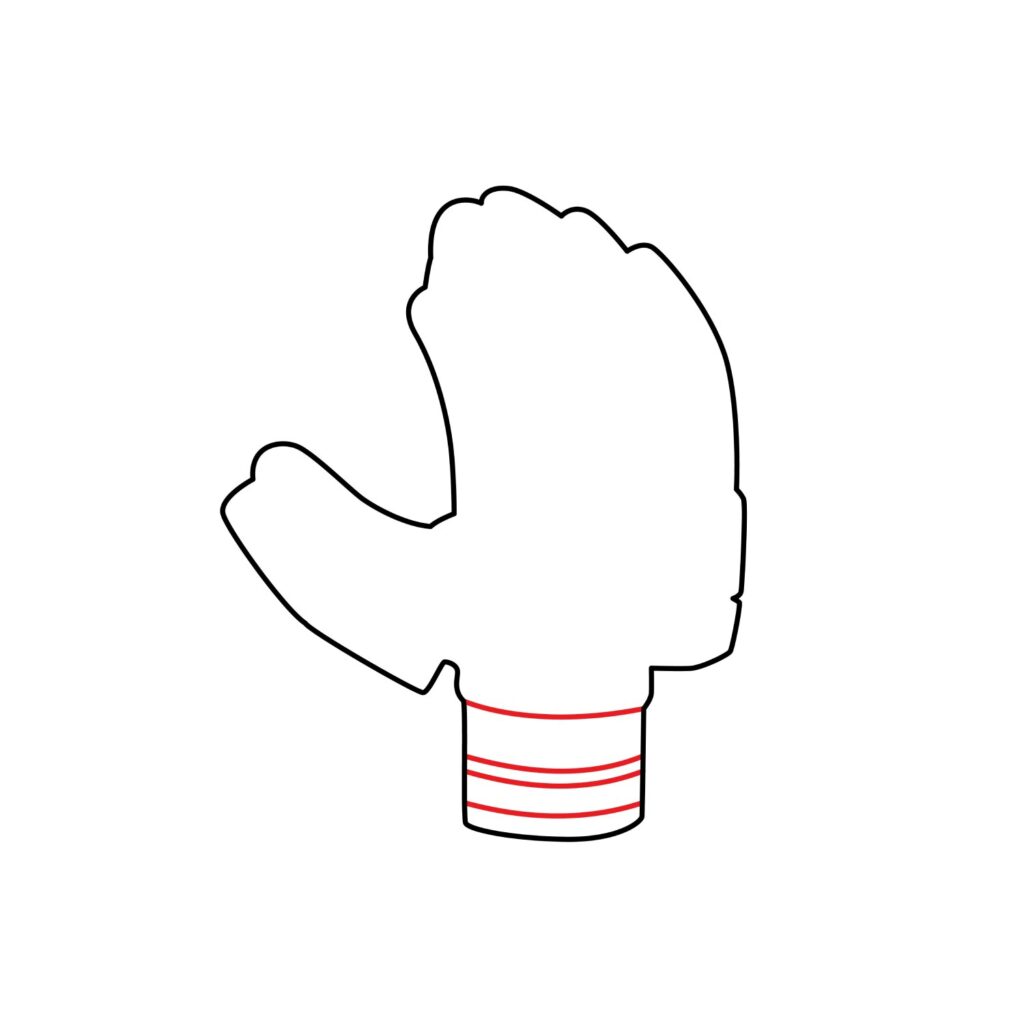
Step 1: Draw the Outline of the Gloves
The first thing we are going to do is outline the cricket hand glove. Keep in mind that a batter’s glove is not like normal gloves. It is heavily padded to absorb shock and offer maximum protection while improving grip. For that reason, the outline may look different from that of a softball glove.
With your drawing paper held in a portrait orientation, use a series of curved lines to draw something that looks like what we have below. The drawing should cover most of your drawing space. For now, it might not look like much but it will take shape as we proceed.
- Place your drawing paper in a portrait orientation
- Use curved lines to draw the outline of the cricket glove
Step 2: Draw the Sweat Cuff of the Glove
To make it possible for the batter to put on the cricket hand gloves and fasten them, the gloves have a sweat cuff. The sweat cuff is the part that goes around the wrist. The structure is designed to be extremely comfortable so that the player can swing the bat freely at the crease.
To add the sweat cuff, we are going to add a couple of curved lines at the bottom of our cricket hand glove outline. In our case, we used four curved lines spaced unevenly. This small detail will give the glove a realistic appearance.
- Add curved lines on the sweat cuff to give it a realistic appearance
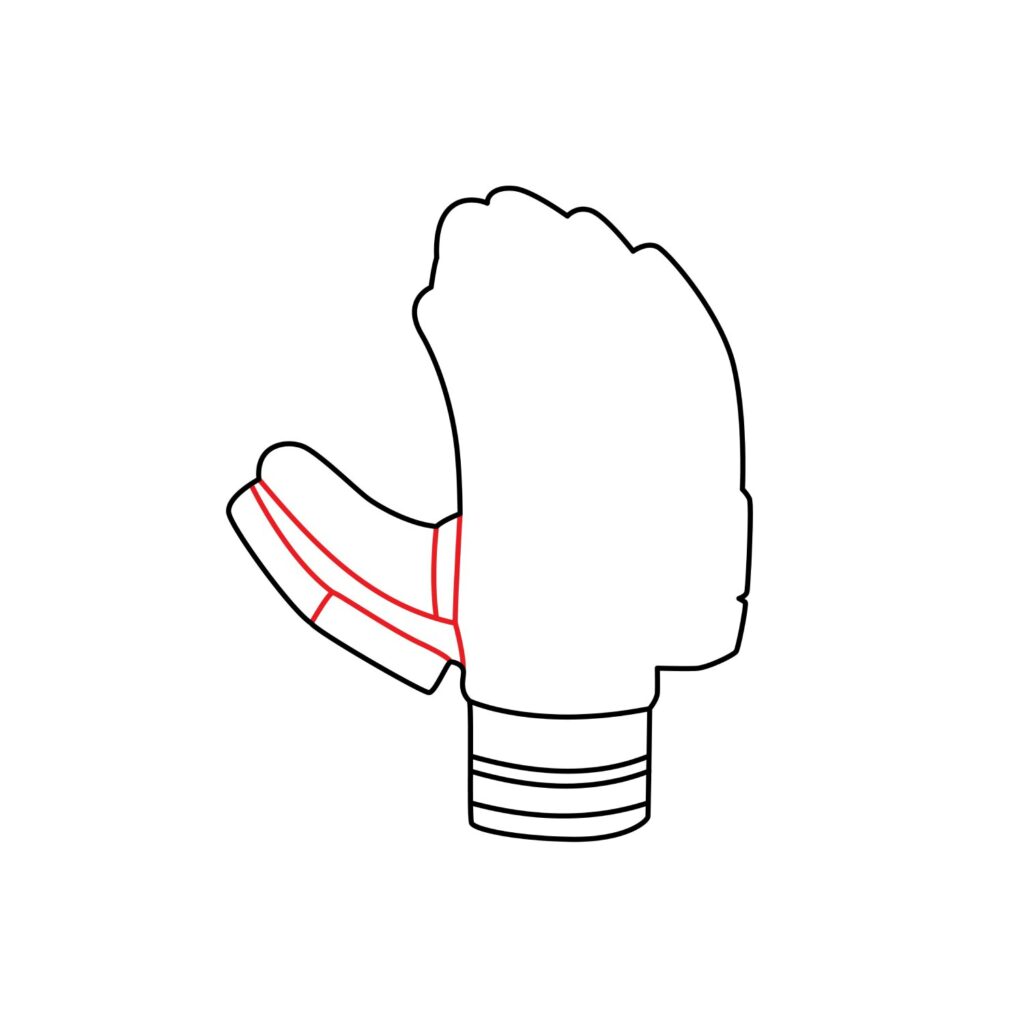
Step 3: Add Details on the Thumb
We are now going to enhance the thumb by adding some angled lines to represent the contours and stitching details which represent the signature padding that is seen on a batter’s glove. We will do so using a couple of diagonal lines.
Start by adding a slightly curved line running through the middle of the structure we added for the thumb. Next, add a line that cuts the outer part of the thumb into two as shown in our illustration. Add another line, running vertically, at the base of the thumb. Your drawing should look like this.
- Add a slightly curved line to cut through the length of the thumb structure
- Add a vertical line to cut through the middle of the outer part of the thumb
- Add a vertical line at the base of the thumb for more details
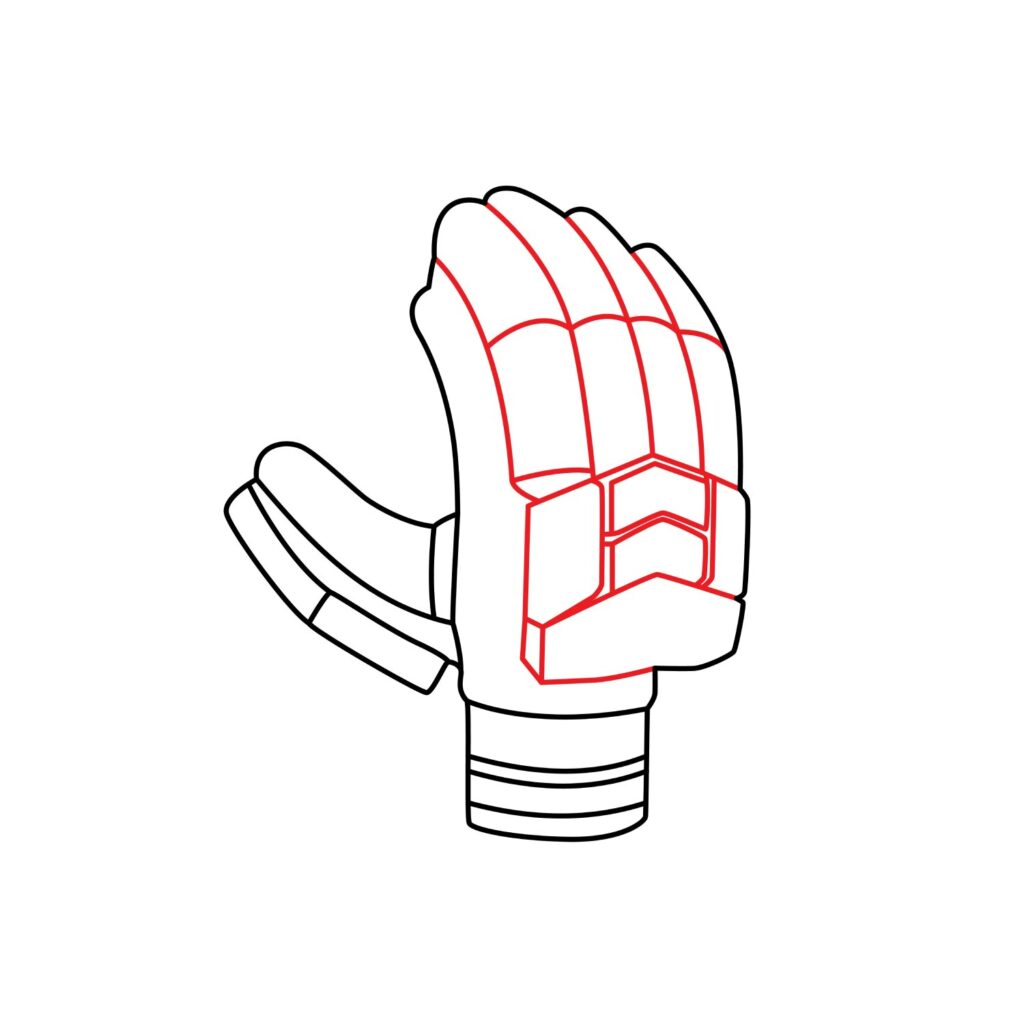
Step 4: Add Details to the Back of the Glove
To transform our drawing further into a realistic cricket hand glove, we are going to add finger and back padding. The padding is usually added using either foam or cotton. It is meant to offer extra protection in case the batter is hit on the hand.
To add the padded back side of the cricket hand glove, we are going to start by adding lines that separate the fingers. You also need to add extra padding on the hand using a combination of diagonal and vertical lines as shown in our illustration.
- Add slightly curved vertical lines to separate the fingers
- Use diagonal and vertical lines to add details to the back of the glove
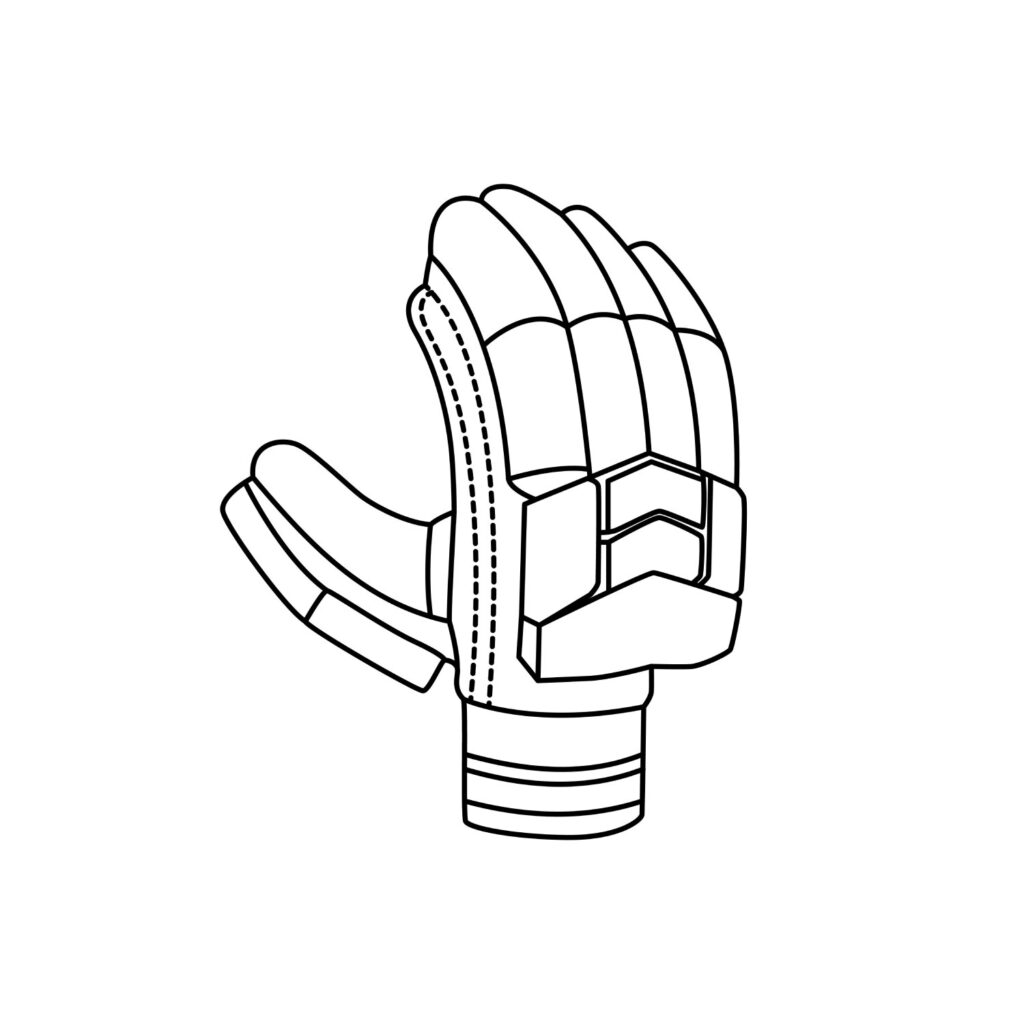
Step 5: Draw Side Sew Lines
The last detail we are going to add is the stitching between the thumb and the back of the hand. For this, we are going to use two curved lines. Start by drawing the curved lines using a faint line then add dotted lines over it. That will create the impression that it is a stitch line.
- Use a faint line to add two curved lines between the thumb and the palm
- Add dotted lines on the faint lines to create sew lines

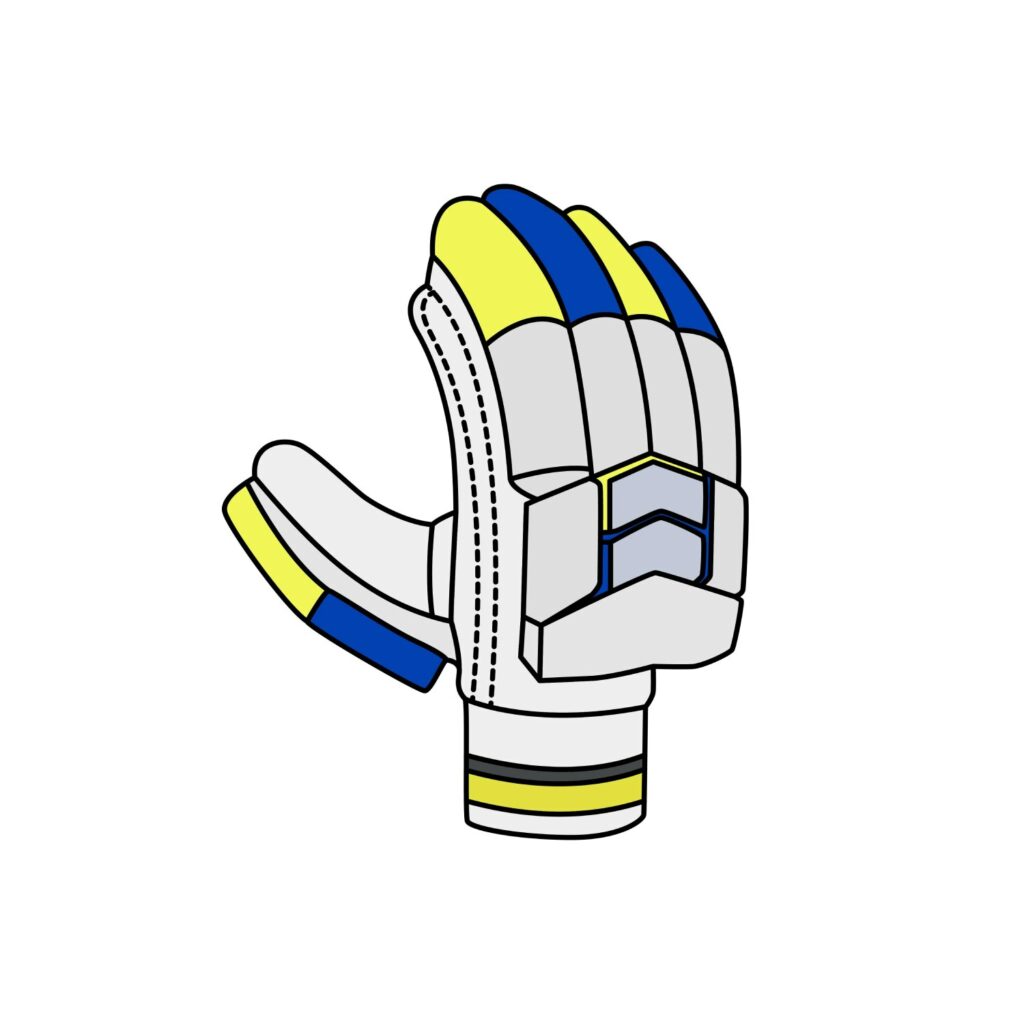
Congratulations! Your Cricket Hand Glove is Done
With just a basic structure and details, you have successfully drawn a batter’s glove. Take a minute to admire your work.
If your drawing doesn’t look exactly like ours, don’t be frustrated. Every artist has their signature. If it is not as good-looking, you will notice better outcomes on your next attempt because you now know what is involved.
Take the Drawing to the Next Level
It is okay if you wish to leave your drawing as it is. The truth, however, is that it is pretty boring. To create a realistic drawing, you have to be willing to add a few more details.
Add Some Background
One of the best ways of enhancing a cricket glove drawing is by adding a background. You can add a cricket bat in the background or a cricket ball. It is also okay to add a cricket field or a player in the background. Doing so will make your artwork more dynamic. You can also add a name or logo on the glove.
Color Your Drawing
Even if you don’t end up adding a background, you must never skip coloring your drawing. Color is what will bring your cricket hand glove to life. Take out your coloring supplies and start coloring.
Here are some tips to help you achieve good results:
- Don’t start coloring until you are done adding the background details.
- Decide on the colors you want to use before you start coloring. That way you will avoid using the wrong colors in the wrong areas.
- Keep the colors within the boundaries of the areas you are coloring. This will make the drawing more realistic.
- When coloring, pay attention to shadows and highlights to make your glove look three-dimensional and realistic.
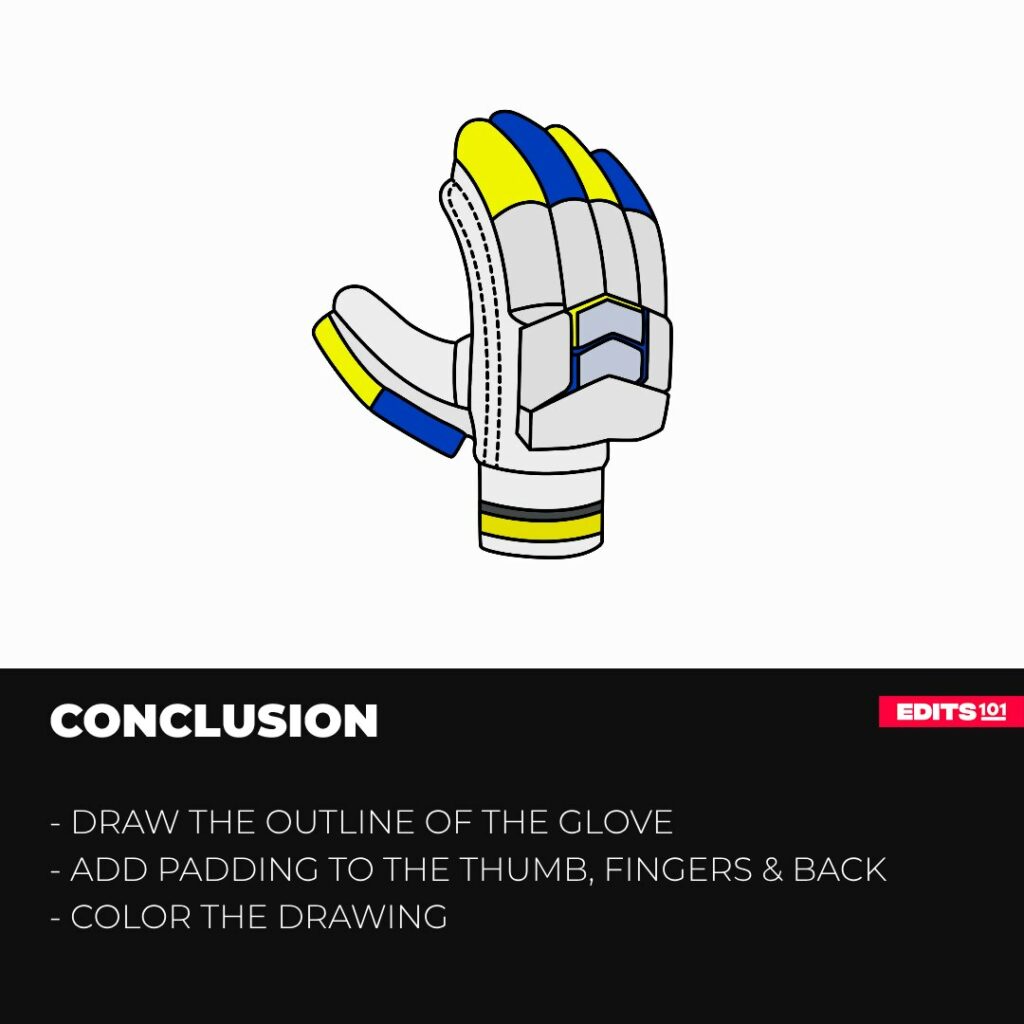
Conclusion
Drawing a cricket hand glove can be quite rewarding when you know where to start and how to make your drawing realistic. In our drawing, we started by outlining the batter’s glove using a series of curved lines. We then added details to the sweat cuff and details to the thumb to make it look more three-dimensional. To refine our drawing further, we added padding to the back of the glove. For the final touch, we colored everything.
If you followed all our steps, congratulations on creating a stunning piece of cricket hand glove. Keep in mind that you can use these steps to draw a batter’s glove from a different perspective and even from a real-life glove. These steps can also be used when drawing the glove on a sketching app.
Always keep in mind that practice is the key to honing your drawing skills. Keep practicing and don’t forget to have fun in your drawing journey.
Thanks for reading & feel free to check out more of our articles!
Author Rating
Overall Rating
Summary
Learn how to draw a realistic cricket hand glove in easy to follow steps.