How To Draw Hockey Cleats | An Easy Tutorial For Aspiring Artists
Hockey relies heavily on player speed and quick turns, making a good hockey essential gear. The blade on hockey cleats allows athletes to grip the ground and maneuver during fast-paced play. Learning to draw hockey cleats can help young artists and fans appreciate the sport’s specialized equipment. In this beginner’s guide, we’ll break down the simple steps to sketching the basic contours of hockey cleats. Lace-up your pencils and prepare to draw some dynamic hockey footwear!
| Steps | Complexity level |
| Draw the sole and cleat | 3 |
| Draw the upper outline | 3 |
| Draw the laces | 2 |
| Add details and sewlines | 3 |
What you will need
- Paper
- Pencil
- Eraser
- Ruler or straight edge (optional)
- Coloring supplies (optional)
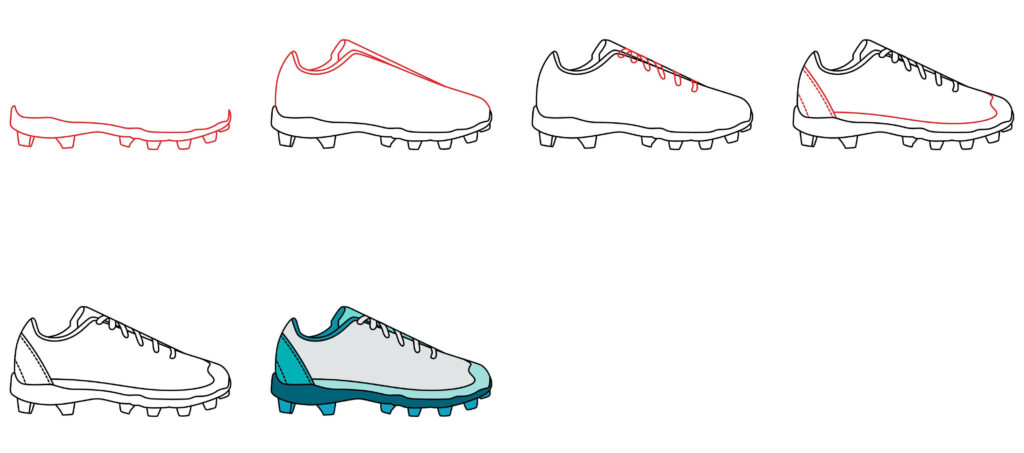
How to draw hockey cleats
The basics needed to draw a hockey skate are regular drawing paper, pencils, and an eraser to correct mistakes. A ruler can help with straight lines but is optional. Coloring supplies can also add flare later on. The most essential tools allow you to sketch and gradually improve your hockey cleats shape lightly. With materials ready, we will stick handle into learning the fundamentals of drawing a hockey cleat!
Step 1: Draw the Sole and Cleat
Hockey cleats, also known as field hockey shoes, are pivotal in providing athletes with the necessary traction and support on the field. These specialized shoes are designed to cater to the unique demands of field hockey, offering features that enhance agility, speed, and grip. Typically characterized by low-profile cleats arranged strategically on the sole, hockey cleats ensure optimal traction on the grass or turf surface. This enables players to make quick turns, accelerate, and decelerate with precision.
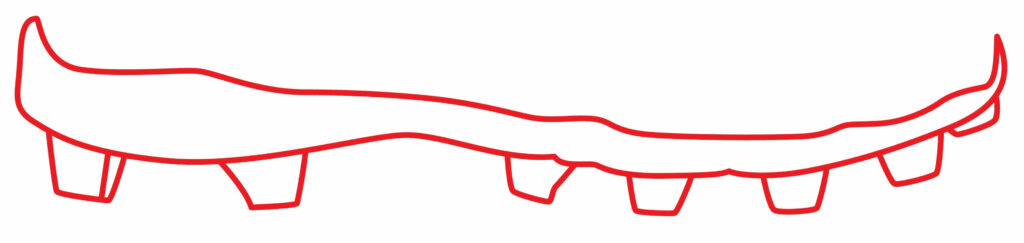
First, lightly sketch the cleat’s curved trapezoid side and sole outline. Draw the back base with a rounded “U” shape. Create the cleat contour on the bottom with two opposing curved lines that meet at a point at the toe. Connect the sides with a long, sloped middle sole line. Then, sketch a small oval to connect to an upside-down T shape for the cleat support structure that rests on the ice.
- Lightly sketch curved base and cleat outlines
- Draw rounded back and pointed toe
- Connect with a long, angled middle sole line
- Sketch oval and upside down T for cleat under sole
Step 2: Draw the Upper Outline
The outsoles often incorporate materials that balance durability and flexibility, allowing players to maintain stability while executing intricate movements. Additionally, the upper portion of hockey cleats is crafted with breathable materials to enhance comfort during prolonged matches, and some models may include reinforced areas to provide extra protection for the foot. Hockey cleats are a crucial element of a player’s equipment, contributing to their performance, safety, and agility on the field.
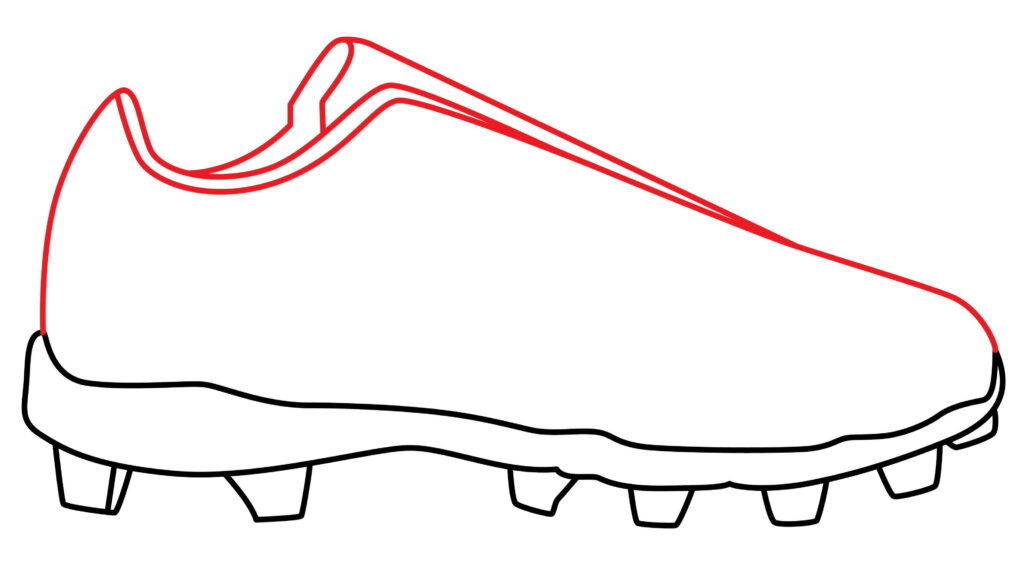
To frame the skate boot, lightly sketch lines for the upper part that secures around the ankle. Draw an oblong, rounded-corner outline on top of the sole, leaving the back part open. Add two small projections at the toe for thickness. Then, draw another design inside the base, following the curves more closely for an inner contour. Leave some middle space for future boot details.
- Sketch outer oblong outline attached on top of the sole
- Make rounded corners and open the back
- Add small toe thickness projections
- Draw another inner contour outline inside the base
- Leave open middle space for future detail
Step 3: Draw the Laces
Hockey skates fasten securely with laces spanning the front opening. Draw a vertical line down the center front of the upper outline for the lace area. Sketch rounded horizontal lines spanning the width to depict places evenly spaced down the boot for lace holes. This creates the look of laces crisscrossing snugly across the front opening for a tight fit.
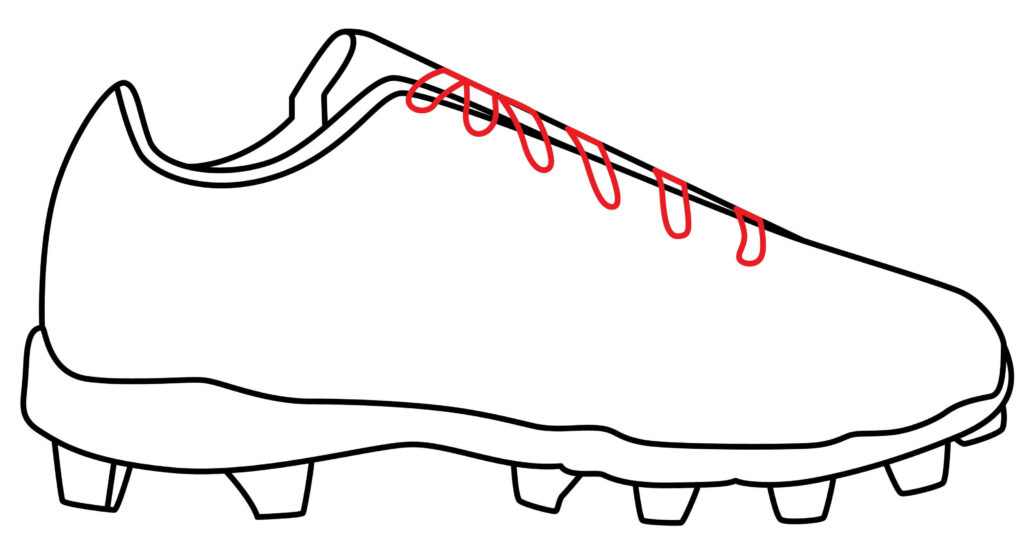
- Draw a vertical line down the center front for the lace area
- Sketch rounded horizontal lines for lace holes
- Space evenly down the boot for crisscross laces
- It creates the look of a snug fit across the front
Step 4: Add Details and Sew Line
To enhance your hockey skate further, lightly sketch a curved seam line on the front boot as a decorative detail. Use short dashed lines following the curve on each side of the back opening to indicate a reinforced stitch seam. These elements improve realism and dimension. You can observe real hockey skates to inspire small, realistic details to include.
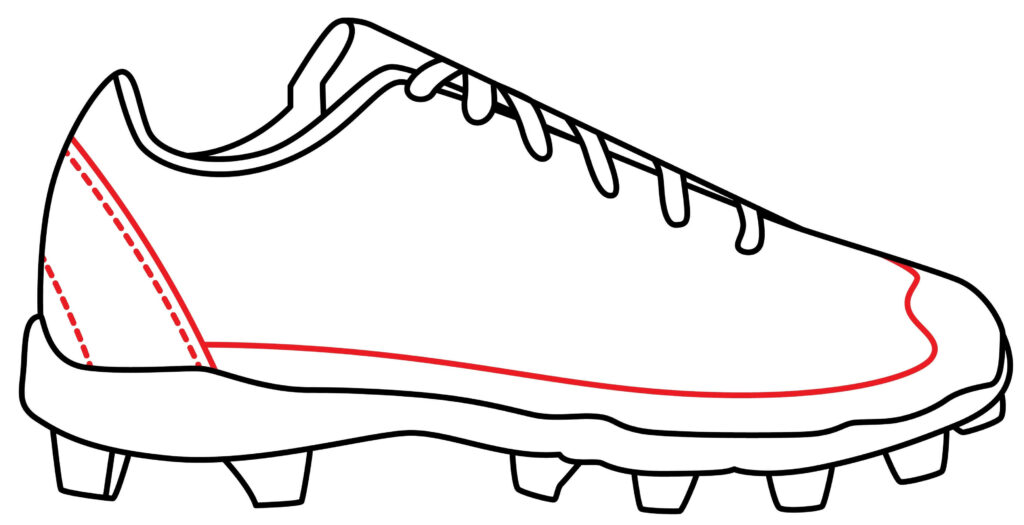
- Lightly sketch a small curved seam on the front
- Use short dashed lines on the back for stitch seams
- Improves dimension and realism
- Observe real skates for inspirational details
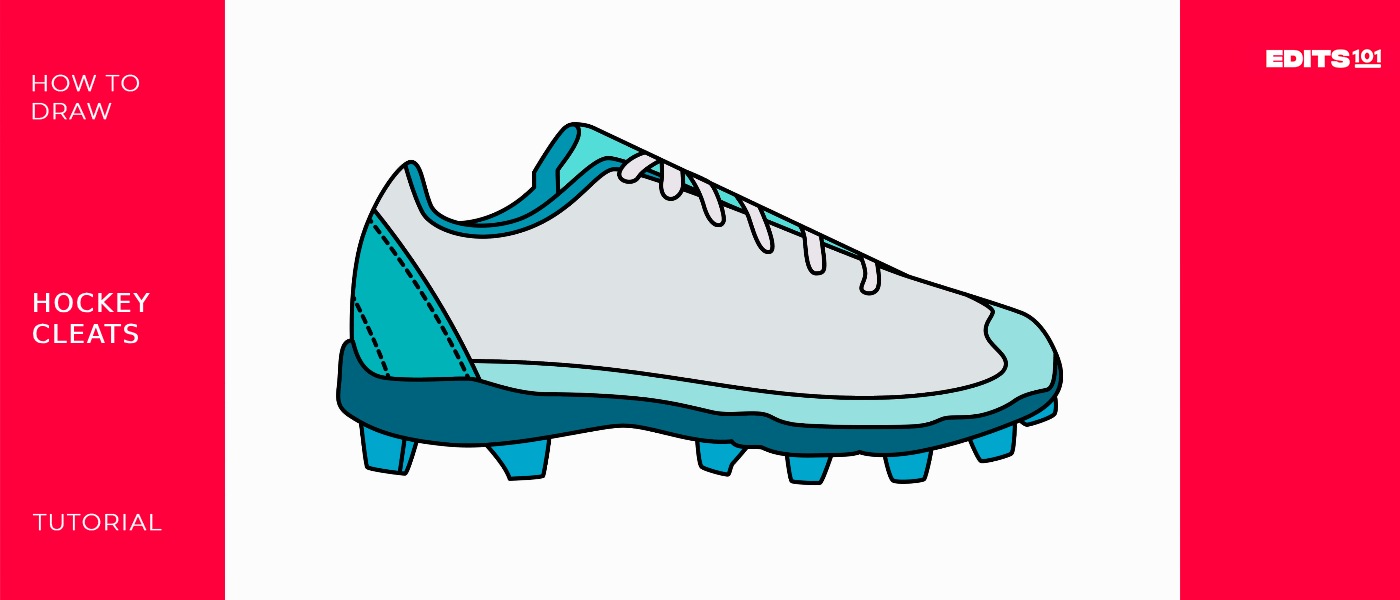
Step 5: The hockey cleats are ready
The hockey cleats are ready to be worn by a hockey player. You did an excellent job. You created your hockey cleats, and we’re sure you followed every instruction. You can use a marker to outline the drawing to make it stand out. To improve the appearance, we will remove the pencil marks after tracing.

The actual fun is about to start. We are going to improve and add authenticity to our drawing. Can you produce a more refined picture with your creativity and imagination?
Taking your hockey cleats to the next level
Like any other skill, sketching requires practice. Set aside time each day to sketch, even if it’s only for a little while. Be mindful of your surroundings. This enhances comprehension of details, dimensions, and forms. You can start with the basics and work up to more complex topics. Experiment with different drawing tools like charcoal, colored pencils, watercolors, markers, and pencils. Every medium has unique characteristics that could help you identify your preferences.
You can also play with basic hatching, blending, shading, and cross-hatching techniques. Understanding these techniques will greatly enhance the complexity and realism of your drawings. When you’re drawing, use your imagination and try out new concepts.
Adding a Background
Selecting a background environment for your drawn hockey skate can provide helpful context and increase interest. Consider sketching the vivid white ice of a hockey rink for an authentic game setting. Use angled lines and subtle shading to build the ice texture surrounding the focal skate. You could also draw the lower half of a player wearing the skate in action – make a dynamic movement with sweeping skate cuts into the ice. Consider adding a hockey stick lying nearby and a puck flying through the air for implied action.
For casual portrait styling, fill around the skate with neutral white or simple geometric shapes to highlight the central still-life equipment display. Get creative with relatable hockey backgrounds that complement your skate drawing! Play with implied motion or calm composition to make the context fit your artistic vision.
Adding Color
Vivid color conveys energy and brings realism to your hockey skate artwork. Use classic team colors like vibrant reds, whites, blues, and yellows. Shade fabric areas in alternating dark and light tones to convey form and sculpt the shape. Use black and gray tones on rubber boot parts like the sole and toe cap.
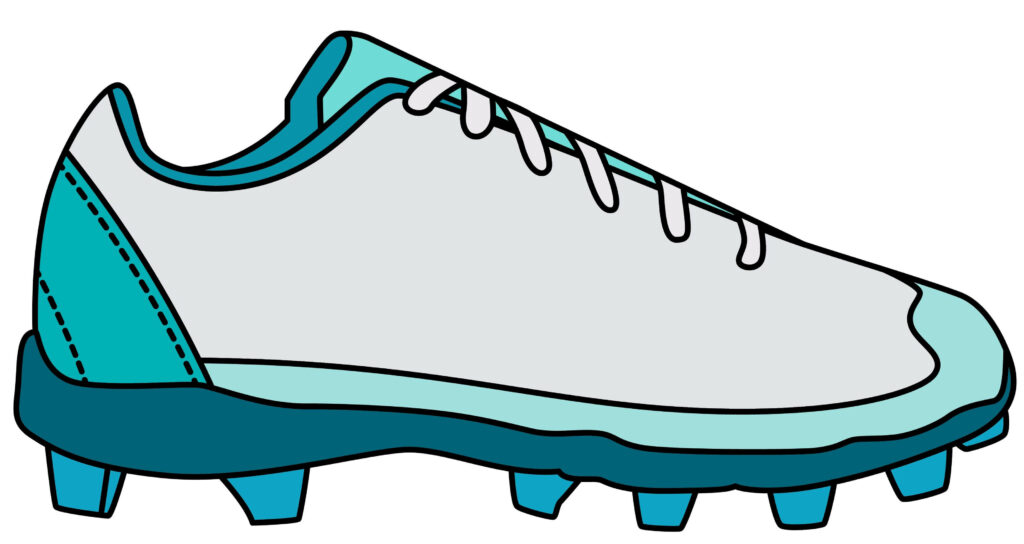
Paint any metal hardware like rivets or lace hooks a shimmering silver. Consider adding custom designs or logos in the center using team color combinations. Use cool blues and white to capture the icy sheen and texture of a frozen hockey rink background surface. Vary shades to make your focal skate drawing pop amidst the colors.
Bonus Tips
Establish the overall outline shape before small details. Use photo references of real hockey skates. Consider light source and shade accordingly. Observe and apply appropriate scale and proportions. Angle the skate pose for more dynamic results. Practice drawing skates from different perspectives. Mix media like colored pencils and paint pens. Use clean strokes and leave white highlights. Add texture by dotting or crosshatching small patterns. Focus on making the lace area and blade extra prominent. Have fun coming up with your innovative skate designs!
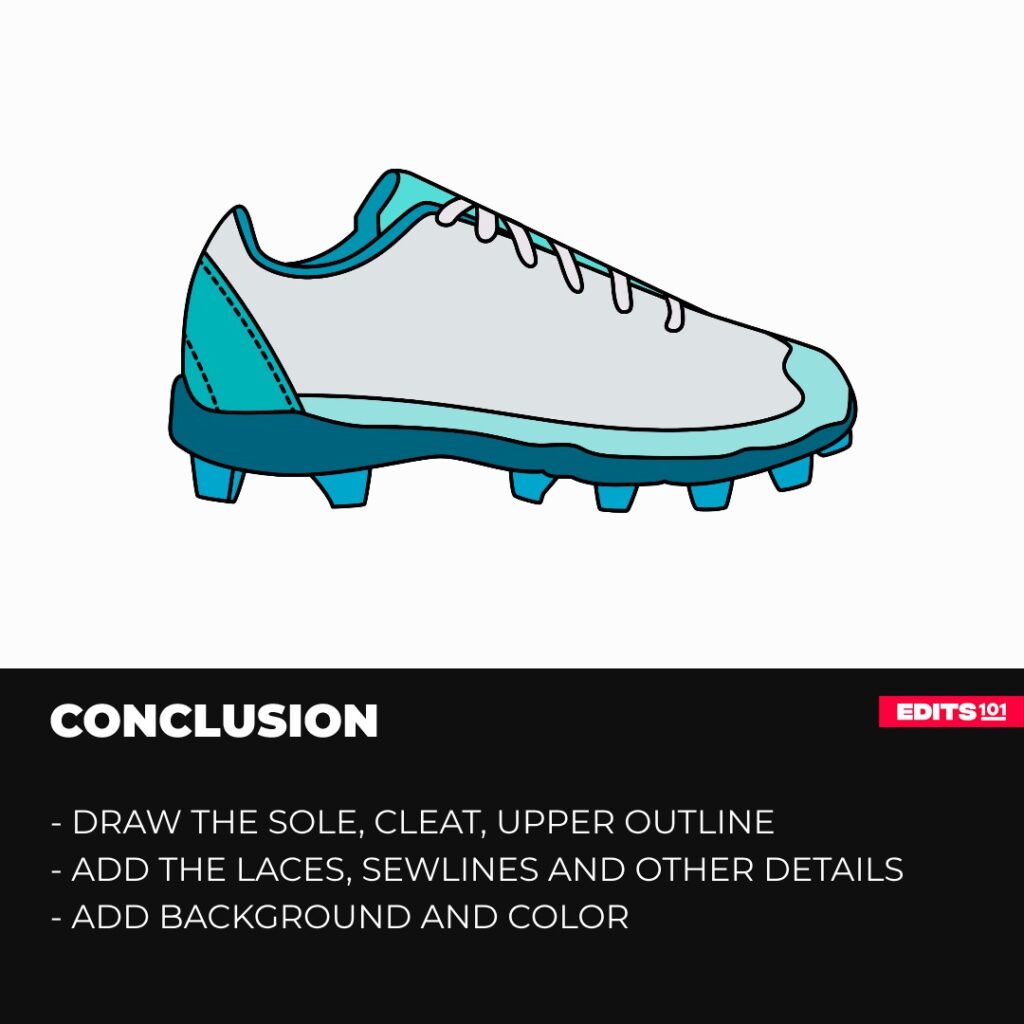
Conclusion
Drawing a hockey skate is fun and blends sports equipment and art. By following the simple steps in this guide, you can learn how to illustrate the curved form of a basic hockey cleat. Start by building the sole and cleat shape. Add essential elements like the upper boot contours and crisscross laces. Integrate your own creative choices for colors, textures, and backgrounds. The result will be a unique hockey skate drawing showcasing your artistic talents.
Hockey gear makes for an exciting still-life subject to depict through drawing. The athletic connection can appeal to sports fans seeking a new creative outlet. Illustrating cleats also allows appreciation for the specialized footwear needed in hockey’s fast-paced environment. So grab your pencils, find dynamic reference images, and prepare to give your drawing skills a lace-up! You’ll be artistically capturing the essence of iconic hockey cleats in no time.
Author Rating
Overall Rating
Summary
Learn how to draw an hockey cleats. You will also learn how to advance your drawing so that it looks amazing.