How to Draw a Golf Cart | Easy Drawing Tutorial
Hello artists! Get ready to go on an amazing golfing experience. We’ll take a swing at drawing a catchy golf cart.
Do you know that some golf carts can go as fast as 20 mph? Yeah, that’s right! The first golf cart was invented in the 1930s. That is way before smartphones and technology.
What you will need
- A pencil
- An eraser
- A sheet of paper
- Coloring kit
- Ruler
- 30 minutes
Draw a Golf Cart
Today, we’ll learn how to draw a golf cart by following simple steps in this guide. This guide aims to assist you in drawing. So buckle up, and let’s start the journey!

Step 1: Draw the baseline
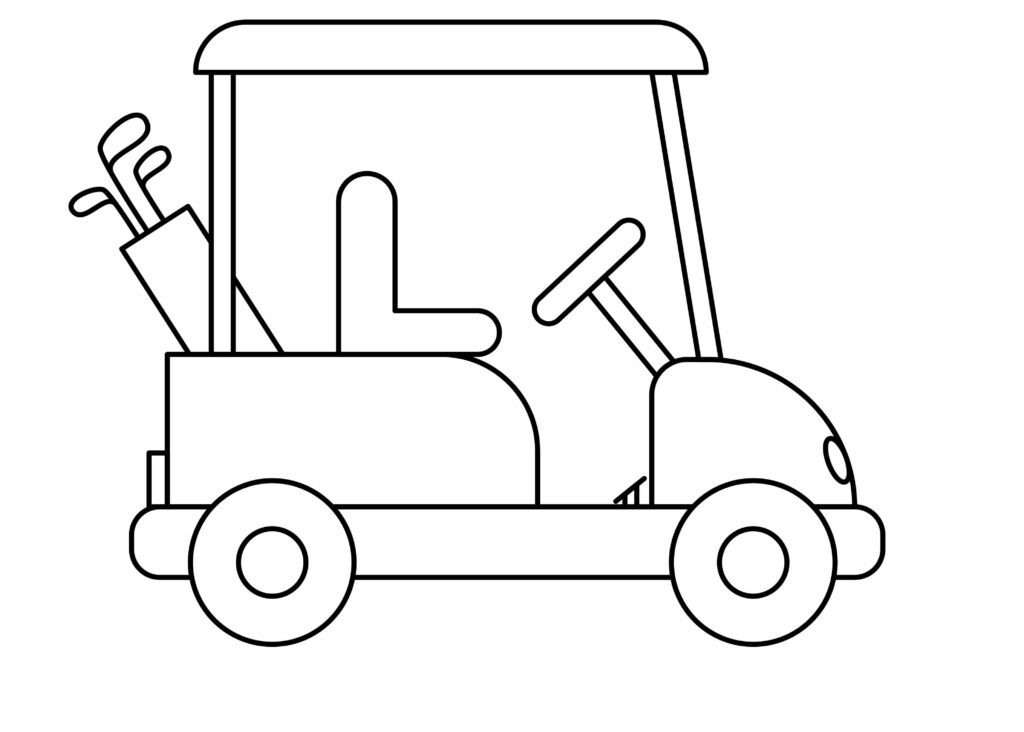
The first step in drawing a golf cart is making its baseline. This sets up the foundation for the body of the golf cart. We will draw a horizontal rectangle on the paper to draw the baseline. This rectangle is elongated and has curved corners, as shown in the image.

The first step is completed. The remaining process is as easy as this step.
Step 2: Draw the back part of the body
As we have drawn the baseline, we will draw the golf cart’s body on this baseline. The body of the golf cart has two parts. The front part and the back part.
We will draw a rectangle on top of the baseline, starting from the left side to draw the back part. This rectangle covers half the baseline. For an artistic touch, we will make the top right corner of the rectangle slightly curved.

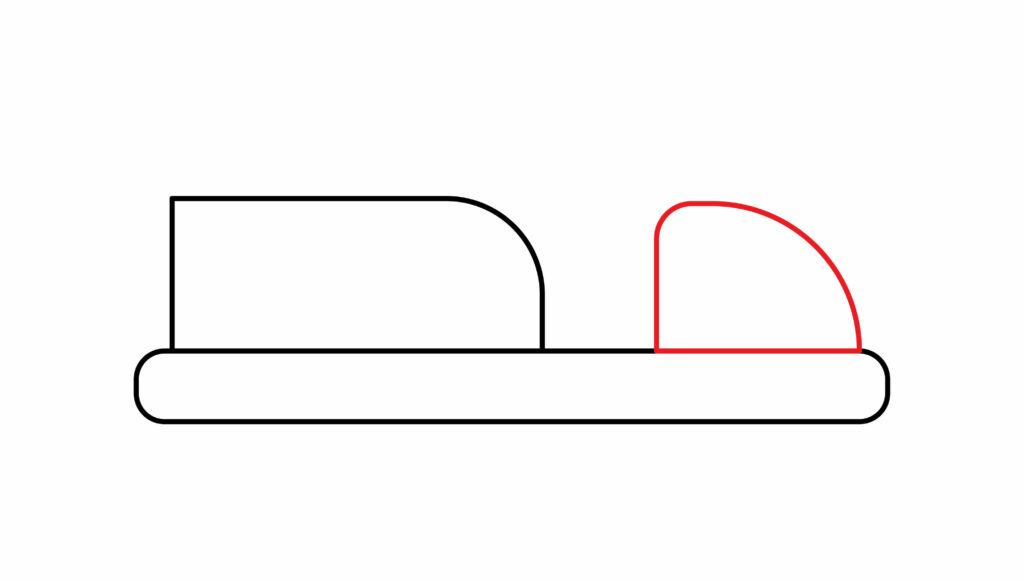
Step 3: Draw the front part of the body
The front part of the body is slightly smaller than the back part. The front part is like a semi-oval structure.
We will draw a straight vertical line on top of the baseline to draw the front part. At the point where the vertical line ends, we will draw a curve line that meets the baseline. This completes the front part of the body.
Step 4: Draw the roof
On hot summer days, the roof protects us from the sun’s blazing rays. Having a roof is a must for the golf cart.
First, we will draw two straight vertical lines of the same length to draw the roof. These lines are parallel to each other and are present on the back part of the body. These lines serve as the holder for the roof. Now we need another holder on the right side.
On top of the front part of the body, we will draw two straight parallel lines slanted towards the left. This is the second holder for the roof.

Finally, we will draw a horizontal rectangle in such a way that joins both of these holders. The top corners of the rectangle should be curved. The roof of the golf cart is ready.
Step 5: Draw the wheels
To draw the wheels, we will draw two circles on the baseline of the golf cart.
For the best-looking circles, mark a dot on the page as the center of the circle. From this dot, mark four more dots (top, bottom, right, and left) around it at the same distance. Now, gently connect all these dots with curved lines. That’s how we will make an amazing circle.
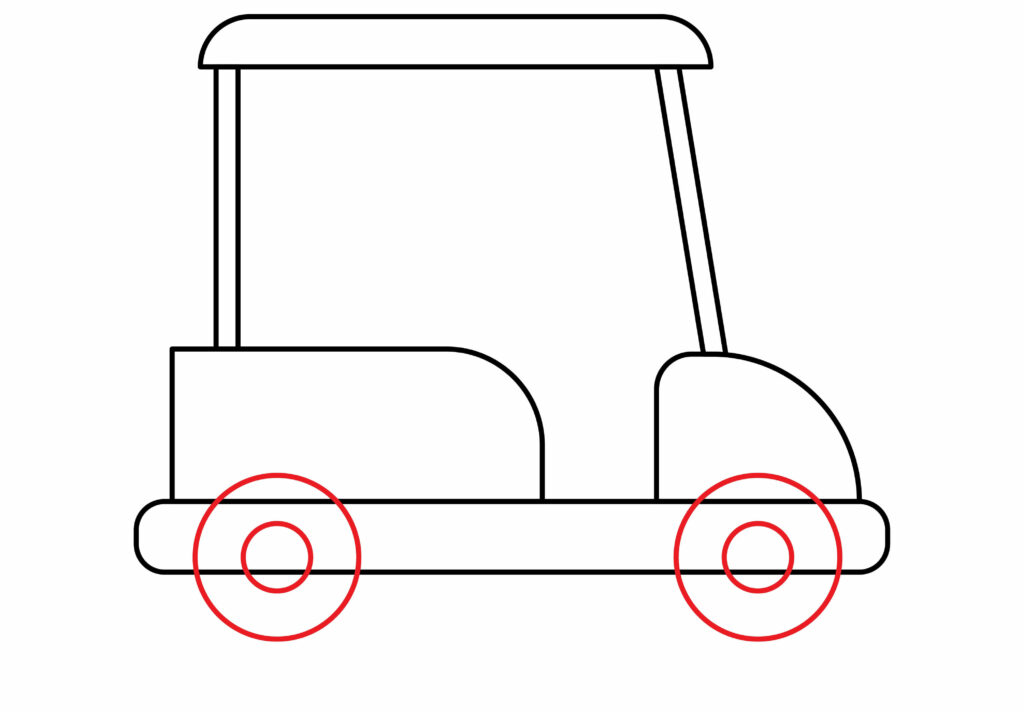
We can also use any round lid to make the circle. We’ll draw these circles at the bottom right and left of the baseline. Inside the left circle, draw another circle. Repeat the same pattern for the right circle. After making the wheels, we will erase the lines of the baseline that overlap the wheels.
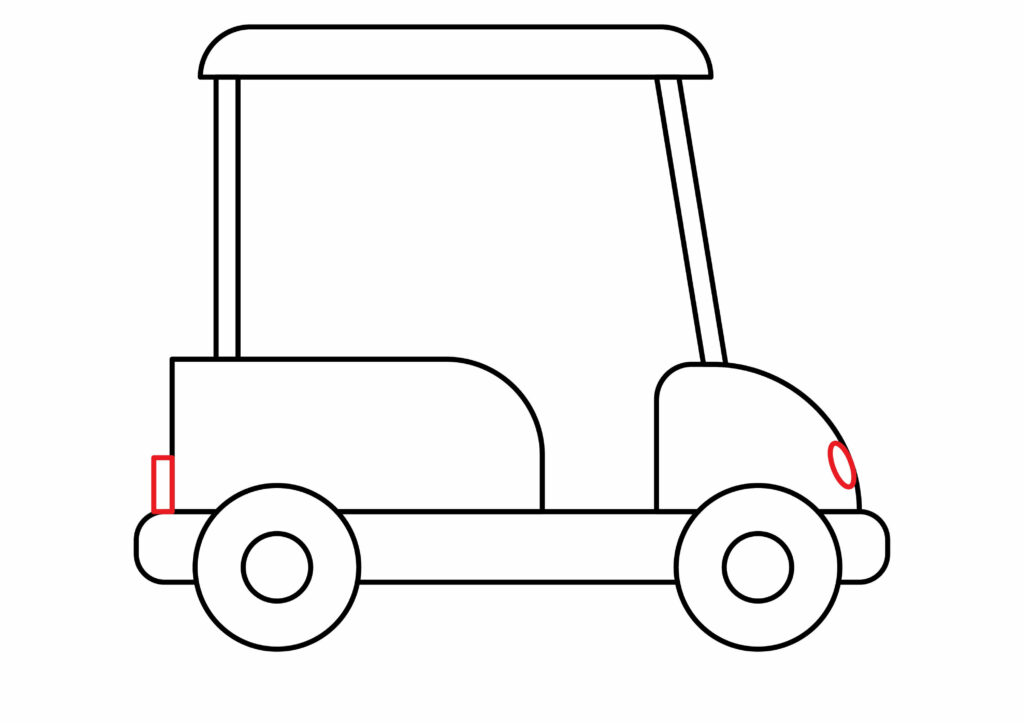
Step 6: Draw the lights
A golf cart has lights at the front and the back as well. We will draw an oval-shaped structure on the front side of the front body to draw the front light.
For the backlight, we will draw a small vertical rectangle at the back side of the back body. The lights are ready to shine.
Step 7: Draw the steering and brake
The steering wheel is always a round structure. But as we’re drawing the golf cart from a side view. From this angle, the steering wheel looks more like a rectangular structure.
But first, we will draw the holder of the steering wheel. For this, we will draw two vertical parallel lines on the top left corner of the front body. These lines must be slanting towards the left.
At the end of these lines, we will draw a small rectangle that is perpendicular to these lines. Overall, it gives a “T” structure.
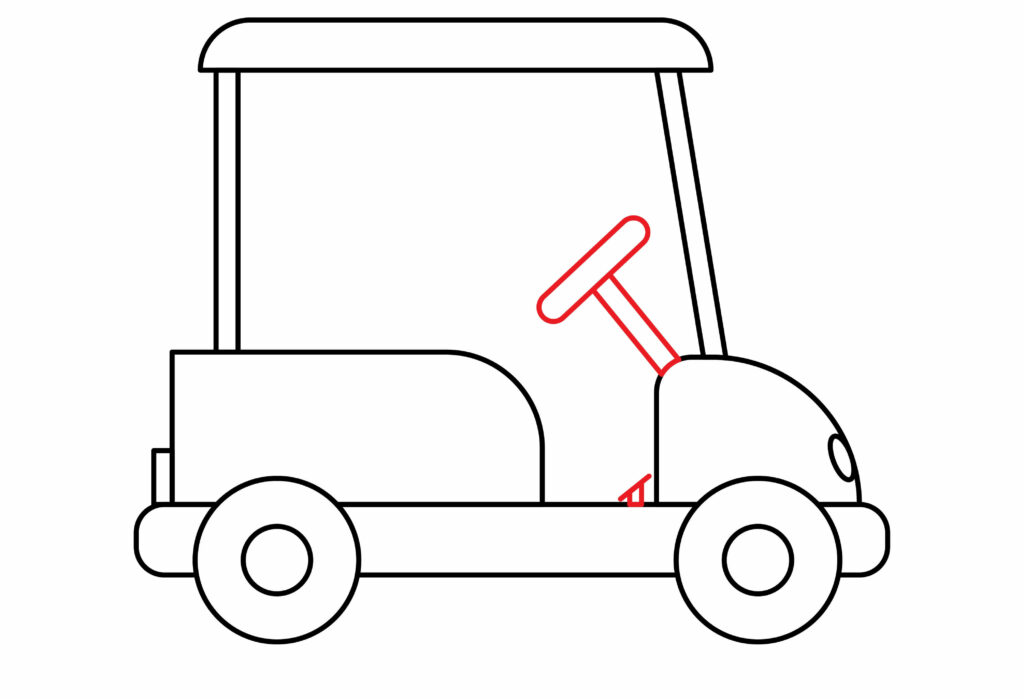
As we know, a golf cart can run at 20 mph; for that reason, it needs a strong brake as well. To draw the brake, we will draw a triangle-shaped structure. The brake is present on the baseline between the front and back body of the golf cart.
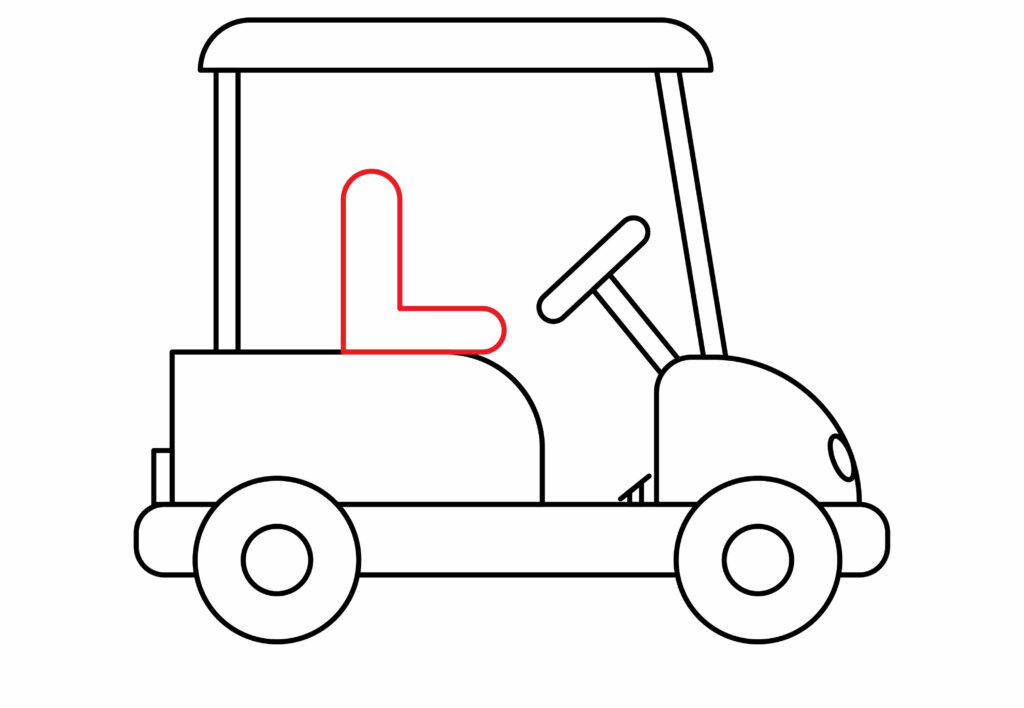
Step 8: Draw the seat
After a hectic golf session, one must rest. The seat serves this purpose. To draw the seat, we’ll draw a horizontal straight line on the back part of the body. We’ll draw a straight vertical line on this line, making an “L” shape. After this, we will draw the same shape slightly farther than the first. For the final touch, we will draw curved lines that connect both these shapes. The seat is ready.
Step 9: Draw the golf bag and sticks
The backside of the body carries the golf bag and the sticks. To draw the golf bag, we will draw a slanted rectangle on the backside of the body. The sticks are like mini flags. They have a thin body with a round structure at the end.
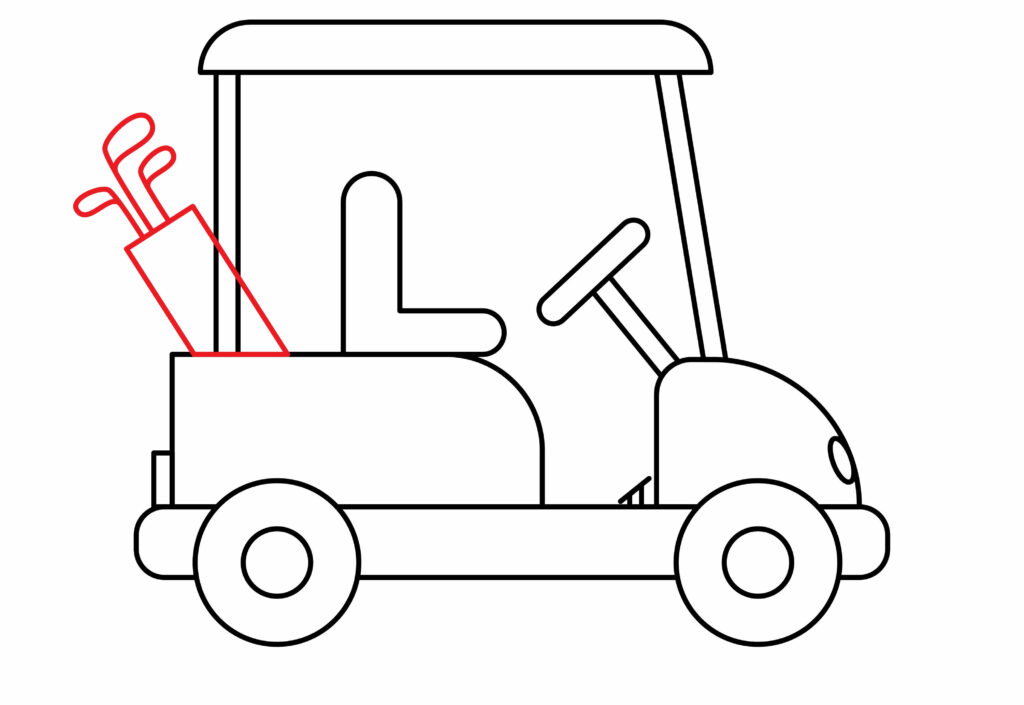
To draw the sticks, we’ll draw a straight line and a curved rectangle at its end. We can make as many sticks as we want.
Step 10: The golf cart is ready
Congratulations! Our golf cart is ready to make an impression on the golf course. We’re sure that you followed each step and made an amazing drawing. Did you enjoy the process? Hold tight! The real fun is about to begin. Yes, that’s right. We will do magical spells on your drawing.
Taking your Golf kart drawing to the next level
Now is the time to use our creativity and make our drawing exceptional. As we know, art is fun. We must try different things with our drawing and make it look the best. Don’t limit yourself to just the basic drawing; add charisma to it.
But the question is, how do we do this?
Don’t worry; we will assist you. The following are things you can do to make your drawing stand out.
Adding background to your drawing
Is our golf cart on the golf course? Or in the parking lot? We don’t know this. We have no background to our drawing that gives the perspective. To have a complete story, our drawing must have a background.
Most likely, a golf cart is on the field. So, we’ll draw a field as a background.

This is just an idea; you can add any kind of background to your drawing that suits you. Just make sure that no line from the background overlaps our golf cart.
Adding colors to your drawing
Now, pick up a paintbrush and cast spells on your drawing. These spells will make your drawing charismatic and attractive. The drawing will look alive. This section is all about creativity with colors. You can add colors of your choice in the background and as well as in the golf cart.
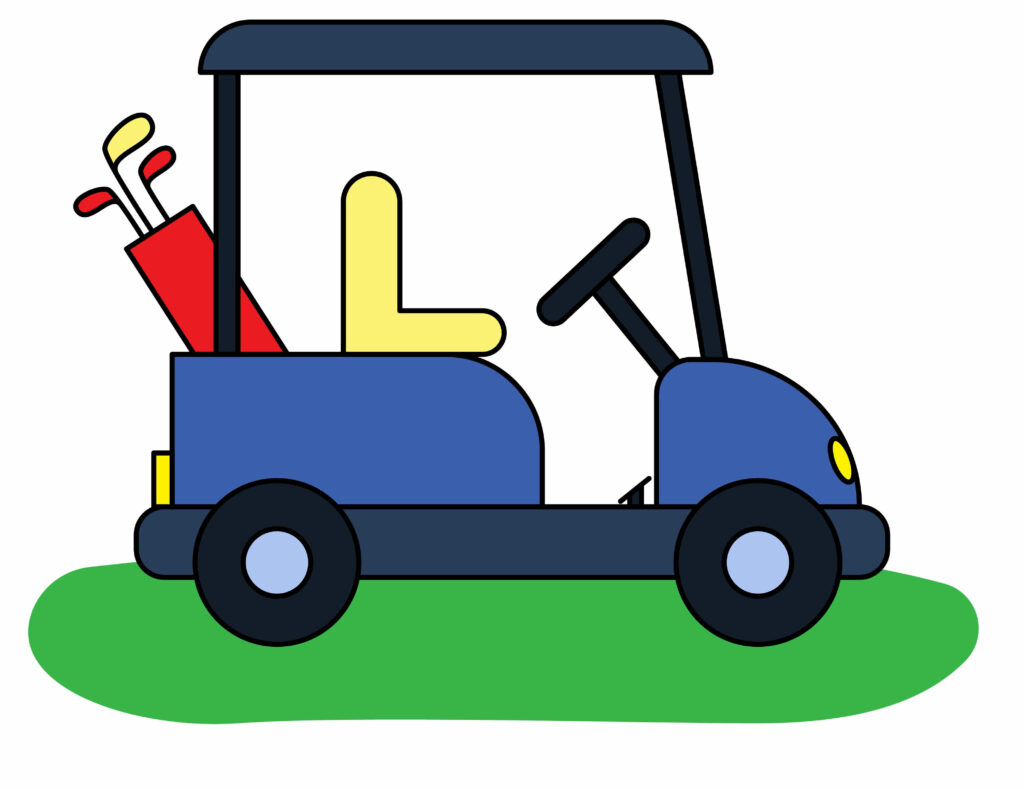
The secret to an amazing drawing is to color it nice and tidy. Try different colors in the different parts of the golf cart. In the end, you’ll love your art.
P.S Bonus Tips
Imaginations are limitless. By using your imagination, you can customize your drawing in any possible way. We will give you some ideas that can help you customize your drawing.
Imagine a small flag having your name on it waving at the top of the golf cart. How amazing that would be! You can draw such a flag and color it.
You can also draw a golf course in the background. Just draw curved lines in the background and color it lush green.
It is a lovely experience playing golf on a sunny day. To have a similar picture, draw a shiny sun on the top corner of your page.
Boom! Our drawing looks stunning! Let me tell you, these are just a few ideas. You must experiment with many ideas and see what goes best for your drawing.
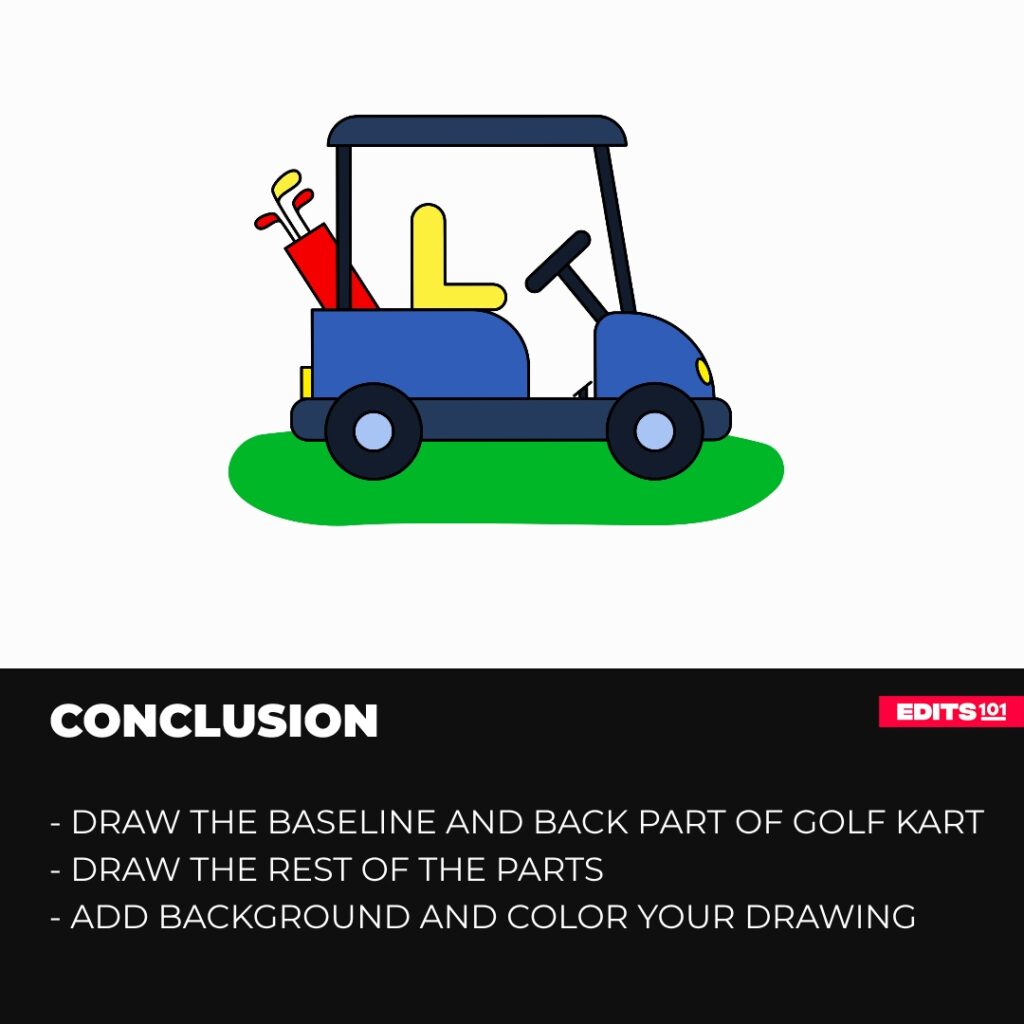
Conclusion
You’ve done it! Now, you’re standing on a whole new level in the drawing world. Within a few minutes, you have made an artistic art.
Drawing isn’t difficult if you follow the steps. For making the golf cart, we drew the baseline and then drew the golf cart’s body. Later, we made the roof, wheels, lights, steering wheel, brake, seat, and accessories.
Take the drawing process easy and follow each step. Remember, no one gets to perfection in the first attempt. You have to follow the process thoroughly.
Thanks for reading & feel free to check out more of our articles!
Author Rating
Overall Rating
Summary
Follow these steps to draw a convincing golf cart. You will also learn a few interesting facts about this vehicle.