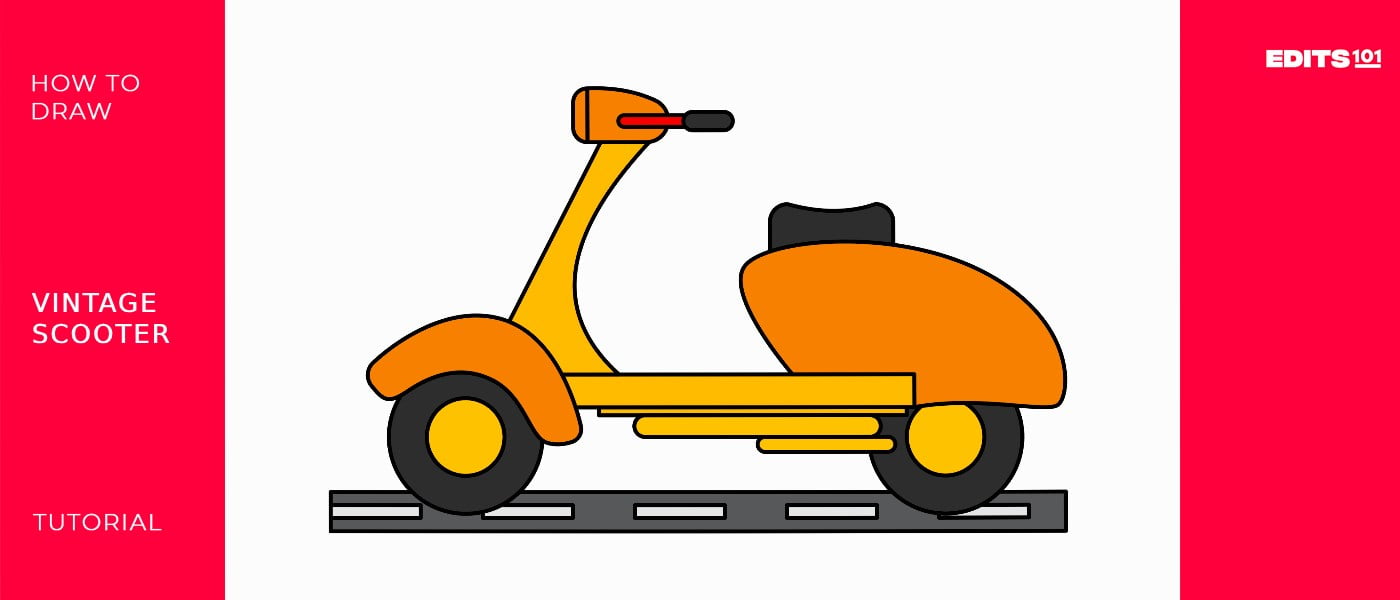
How to Draw a Vintage Scooter | 11 Simple Steps
Today, we will be learning how to draw a vintage scooter. Our focus will be on helping you grasp the concept of drawing a scooter so that you can be able to use our instructions to draw a scooter on any sketching app and even from real photographs. But first, let’s understand what a vintage scooter is.
A scooter is a two-wheeled open motor vehicle that allows the driver to sit over an enclosed engine with their legs together. This is what distinguishes it from a motorcycle. Vintage scooters can be distinguished from modern scooters by their unique, classic style. You have probably seen a vintage scooter in old movies or photographs.
What You Will Need
- A pencil
- An eraser
- A drawing piece of paper
- Coloring supplies
- A ruler
- 20 minutes
How to Draw a Vintage Scooter
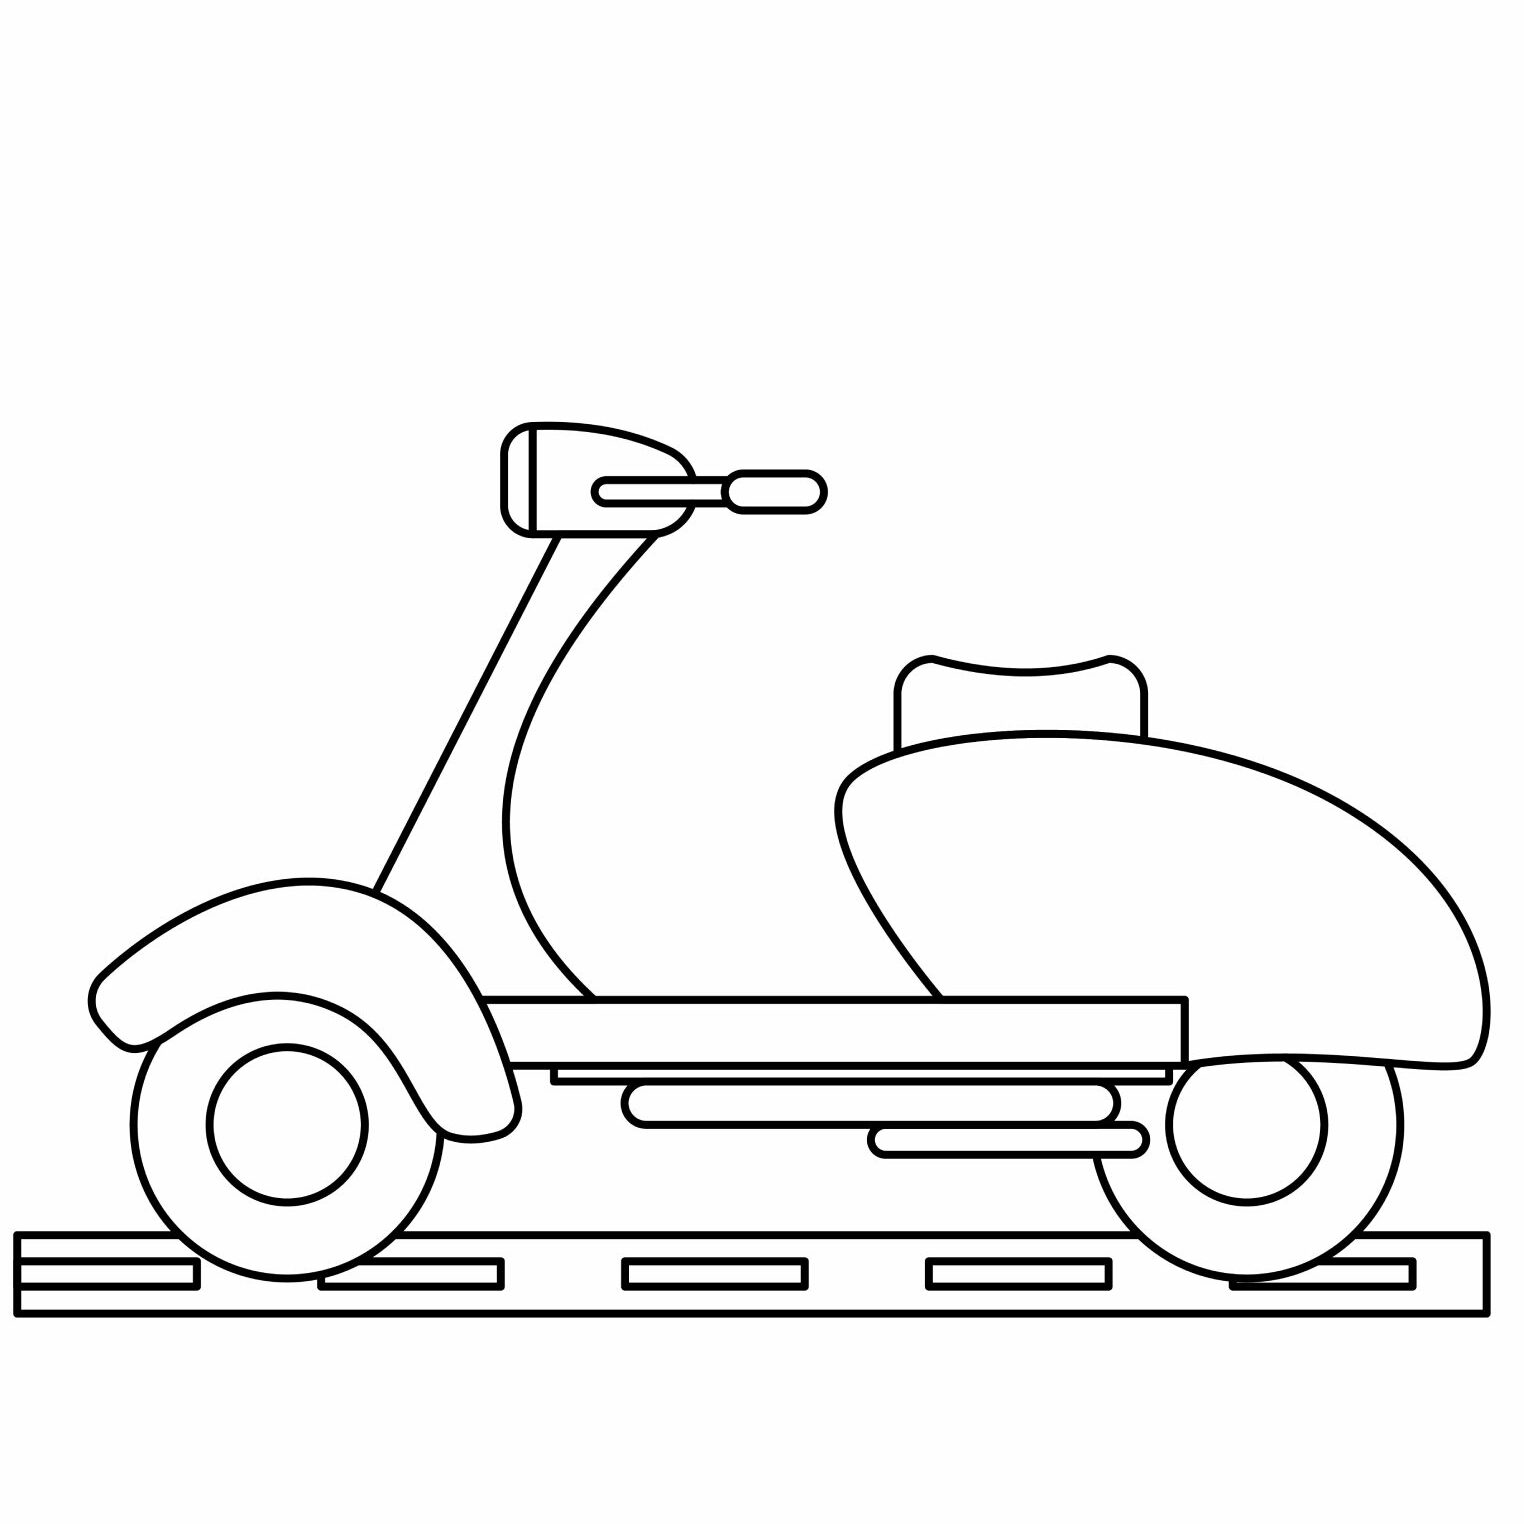
We will be drawing a very simple vintage scooter to make it easy for you to follow along. To start with, please study the below image. It has the steps we will follow to complete the drawing. Studying it will help you better anticipate each step in our process.
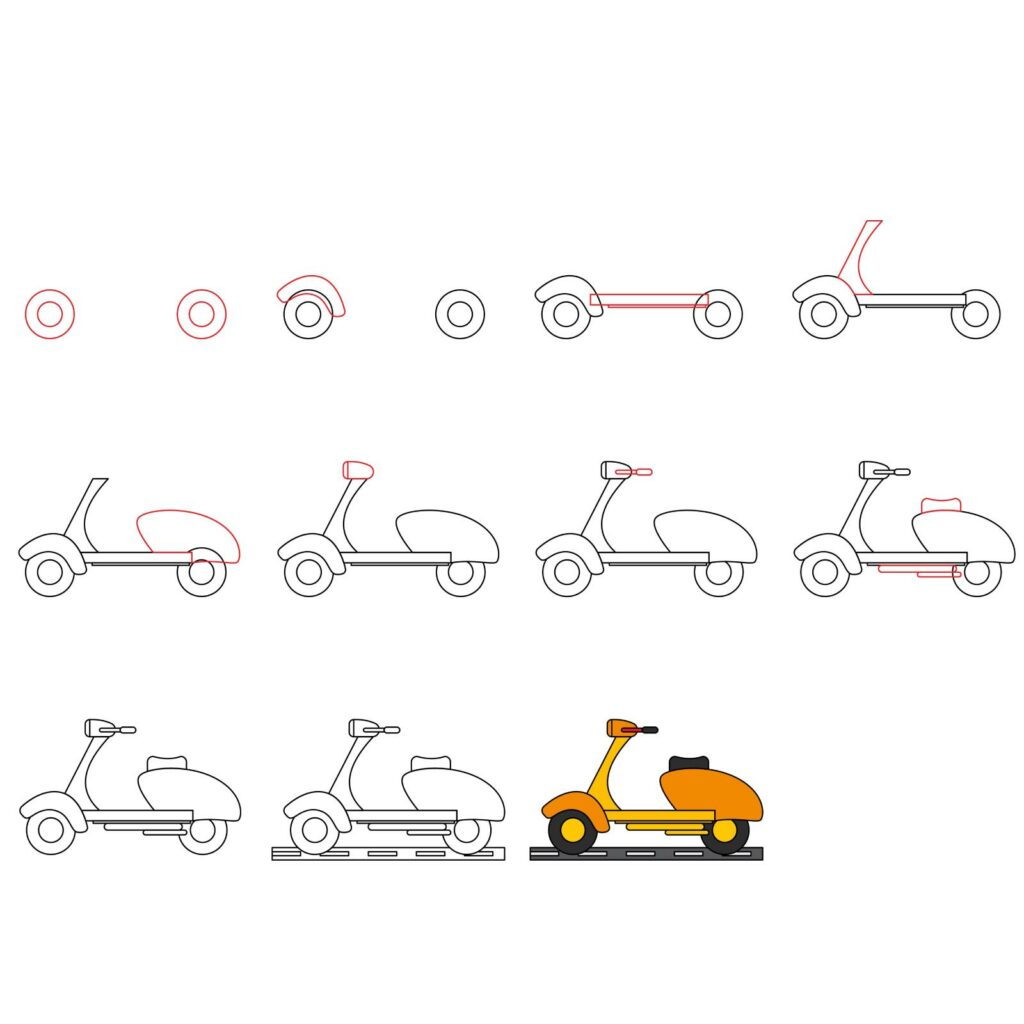
Step 1: Draw the Wheels
The first thing we are going to draw is the wheels. This is the simplest part of our drawing. From the bottom left corner of your drawing paper, you need to add a circle. This should not be too big or too small. It should also not be too close to the bottom of the page or to the left margin because we need the space for other components. Next, add another circle inside the first one to complete the front wheel.
For the rear wheel, you need to repeat the same process and add another wheel to the right of the first one. Again, make sure there is ample space between the wheel and the right margin. Make the rear wheel the same size as the first one and at the same elevation as the front wheel.
- Draw a circle on the bottom left corner of your drawing paper
- Add another circle inside the first circle
- Repeat the process to add a similar shape to the right

Step 2: Draw the Front Fender
Once the wheels are ready, we are going to add the front fender first. If you didn’t already know, the fender is the feature that goes over the wheels. Its purpose is to catch debris lifted by the rotating wheel. It keeps debris and water from spilling onto the vehicle.
To add the front fender, we are going to add a curved structure over the wheel. To do so, draw a curved line that sits slightly inside the upper part of the front wheel. You then need to add another similar curved line over the first one, leaving a small space between the two lines. To complete the structure, connect the two curved lines at the ends. Erase the part of the wheel that sits inside the fender.
- Draw a curved line over the front wheel
- Add another curved line under the first one
- Connect the two curved lines at the ends
- Erase the part of the wheel that cuts through the new shape
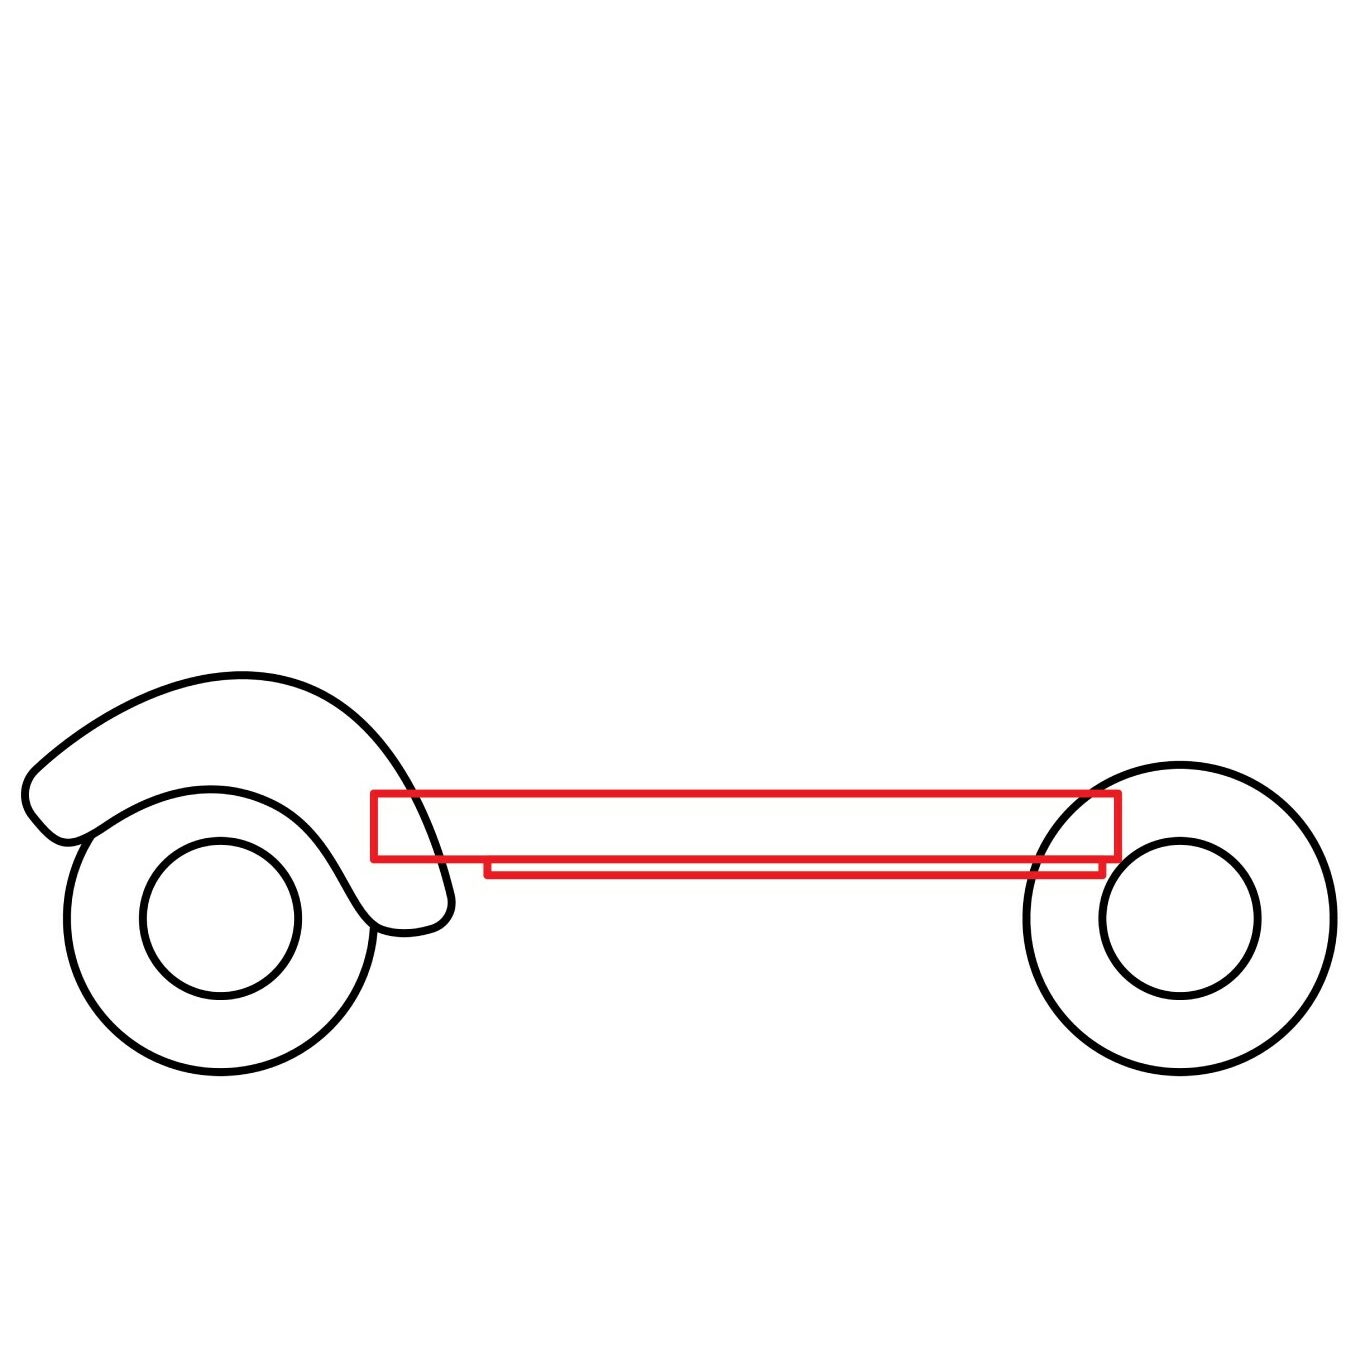
Step 3: Draw the Base
Every vehicle needs a solid structure on which all the components are mounted. A vintage scooter is no exception. We need to add the base structure between the wheels. For this, you will need to use your ruler.
Draw a horizontal rectangle that starts from the right side of the front fender and stops slightly inside the upper part of the rear wheel. To show that the base is reinforced, add another tiny rectangle beneath the first rectangle. Once you are done, erase the part of the base that cuts through the fender.
- Draw a rectangle between the two wheels
- Add another small rectangle below the first rectangle
- Erase the lines that cut through the front fender
Step 4: Draw the Front Part
We are now going to start working on the upper part. The first thing we are going to add is the front part. This is the section that houses the handlebars, speedometers, and other gauges.
The first thing we are going to do is draw a diagonal line starting from the top part of the front fender. The line should rise, slanting towards the right. Don’t make the line too long else the scooter will look unrealistic.
Next, we are going to add a short horizontal line at the top of the diagonal line. To connect the lines to the base, we will add a curved line to the right of the diagonal line. The line should bend slightly towards the diagonal line then bend to the right before connecting to the top of the base.
- Draw a diagonal line starting from the fender and slanting to the right
- Add a short horizontal line on top of the diagonal line
- Use a curved line to connect the top of the horizontal line to the base

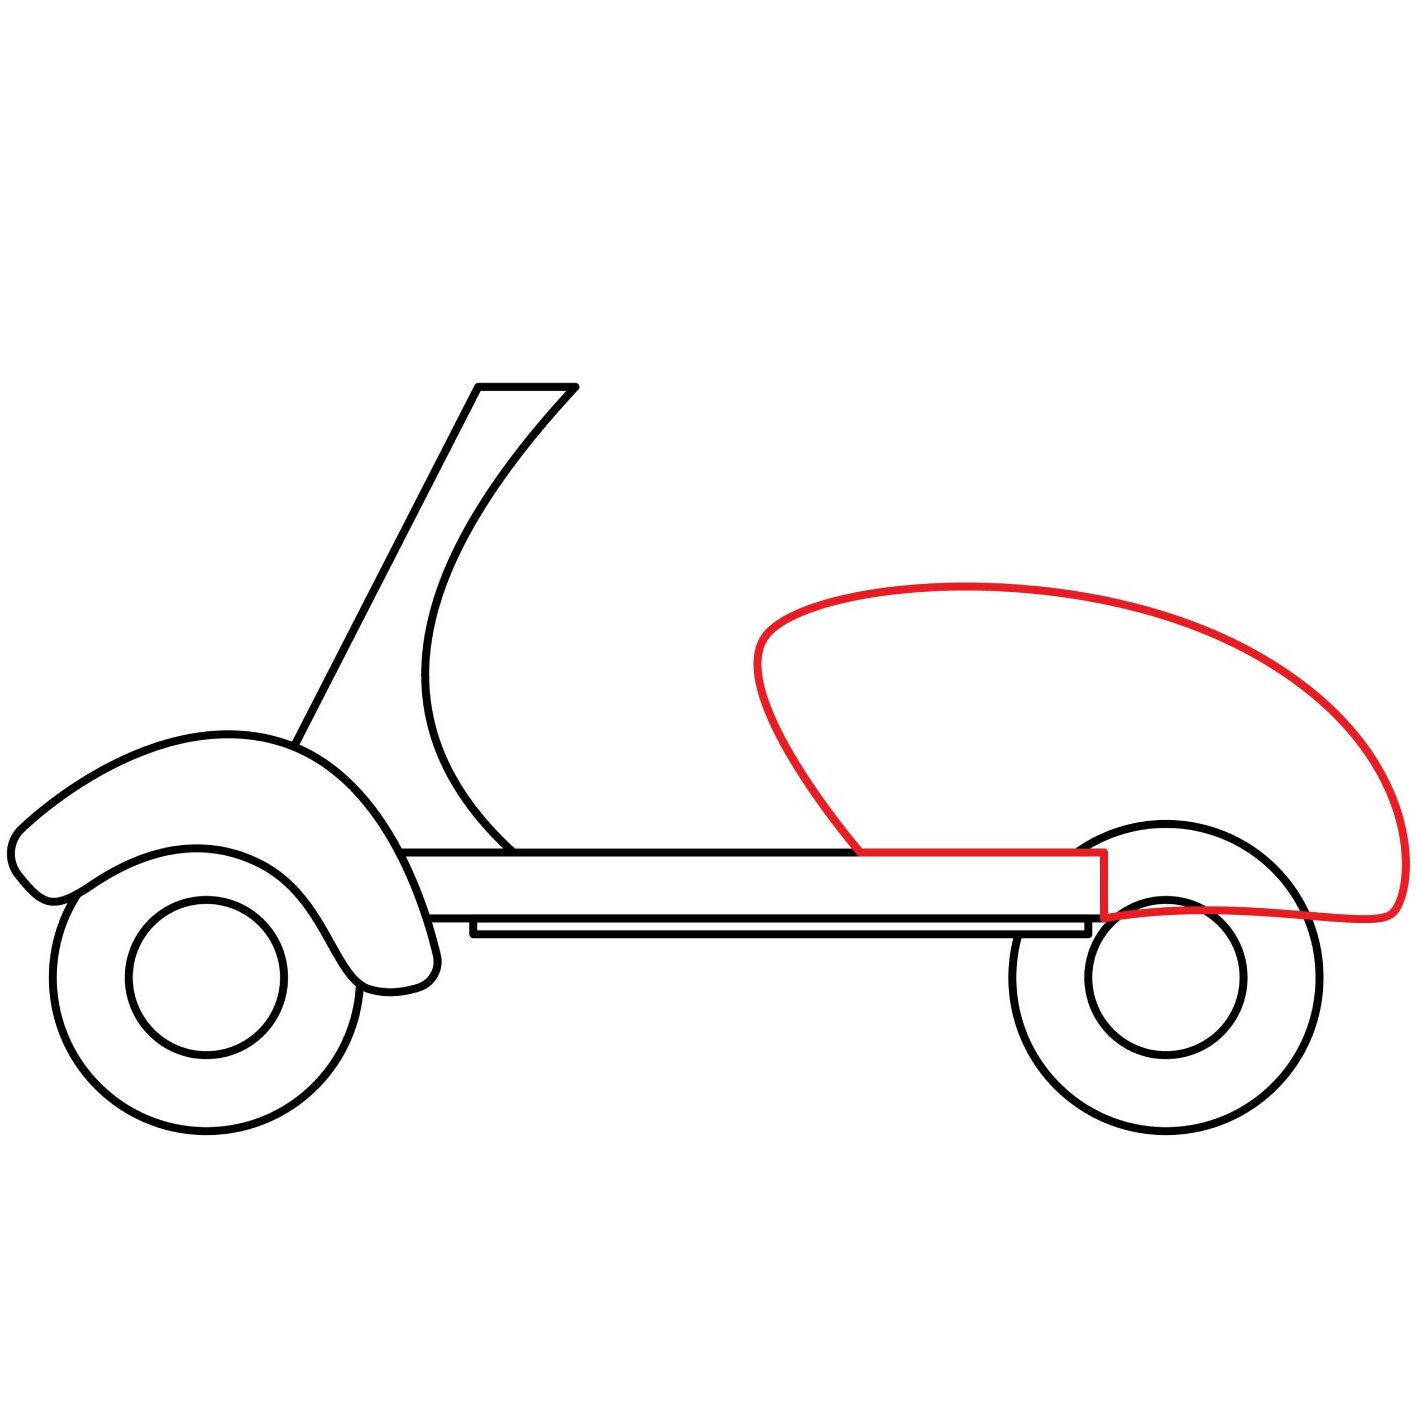
Step 5: Draw the Engine Compartment
The rider of a vintage scooter sits on a seat located above the engine. What this means is that the engine is located in the back of the scooter. We will be adding the engine compartment now.
For the engine compartment, we will start by drawing a diagonal line that starts from the middle of the base and rises towards the left. The line should cover half the height of the front pat.
From the top of the diagonal line, add a curved line that rises slightly and then bends downward so that it forms a shape that extends slightly behind the rear wheel and then connects to the base. You should then erase the part of the rear wheel that sits inside the new structure.
- Draw a diagonal line from the middle of the base and rise to the left
- Connect the top of the diagonal line using a line that curves upwards and connects to the back of the scooter
- Erase the part of the wheel that cuts through the new shape
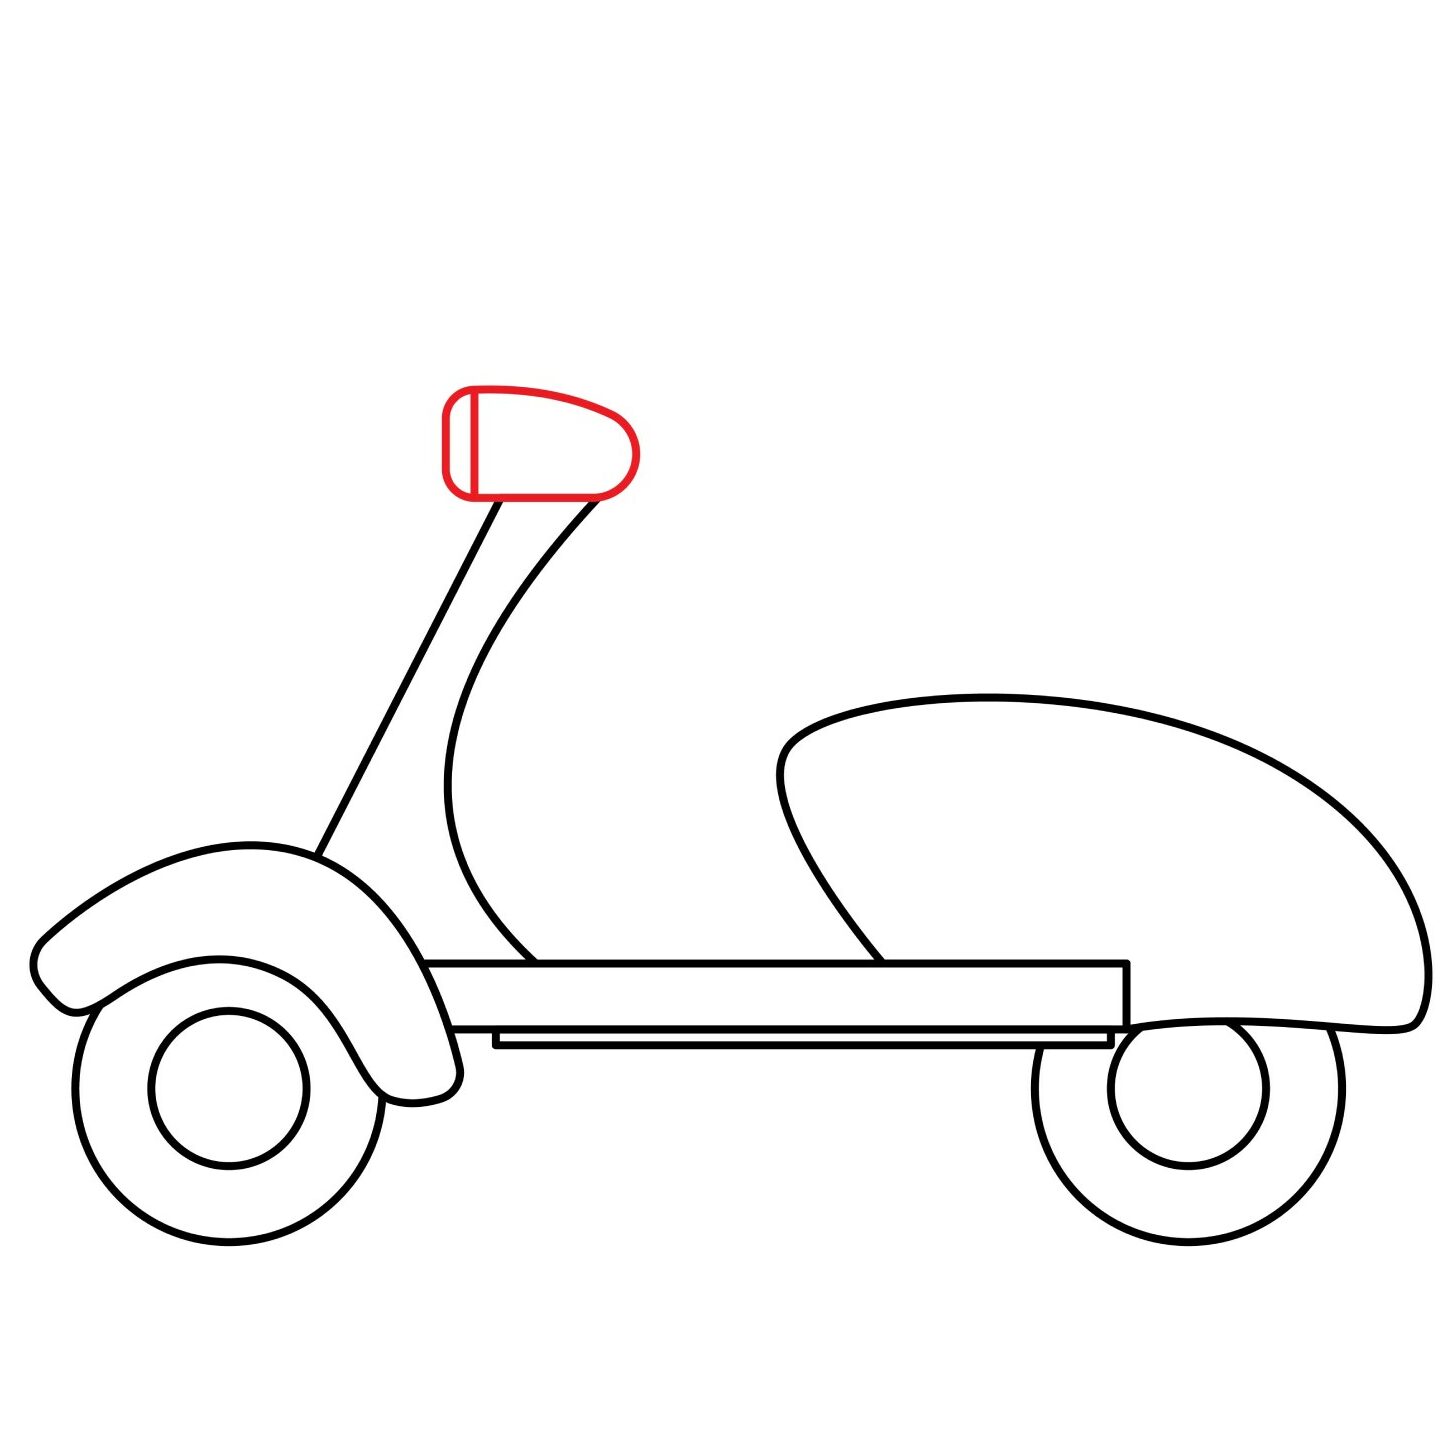
Step 6: Draw the Headlight
Just like modern-day scooters, vintage scooters can be used at night. For that reason, they too had a headlight. This is mounted on the top of the front part.
To draw the headlight, we will start by adding a semi-oval shape on top of the front part of the vintage scooter. The flat part of the semi-oval should be on the left. Make the corners rounded. To complete the drawing, simply add a line that cuts slightly inside the flat end of the semi-oval.
- Draw a semi-oval with the flat end on the left
- Make the corners of the flat end rounded
- Add a vertical line on the end with the flat end
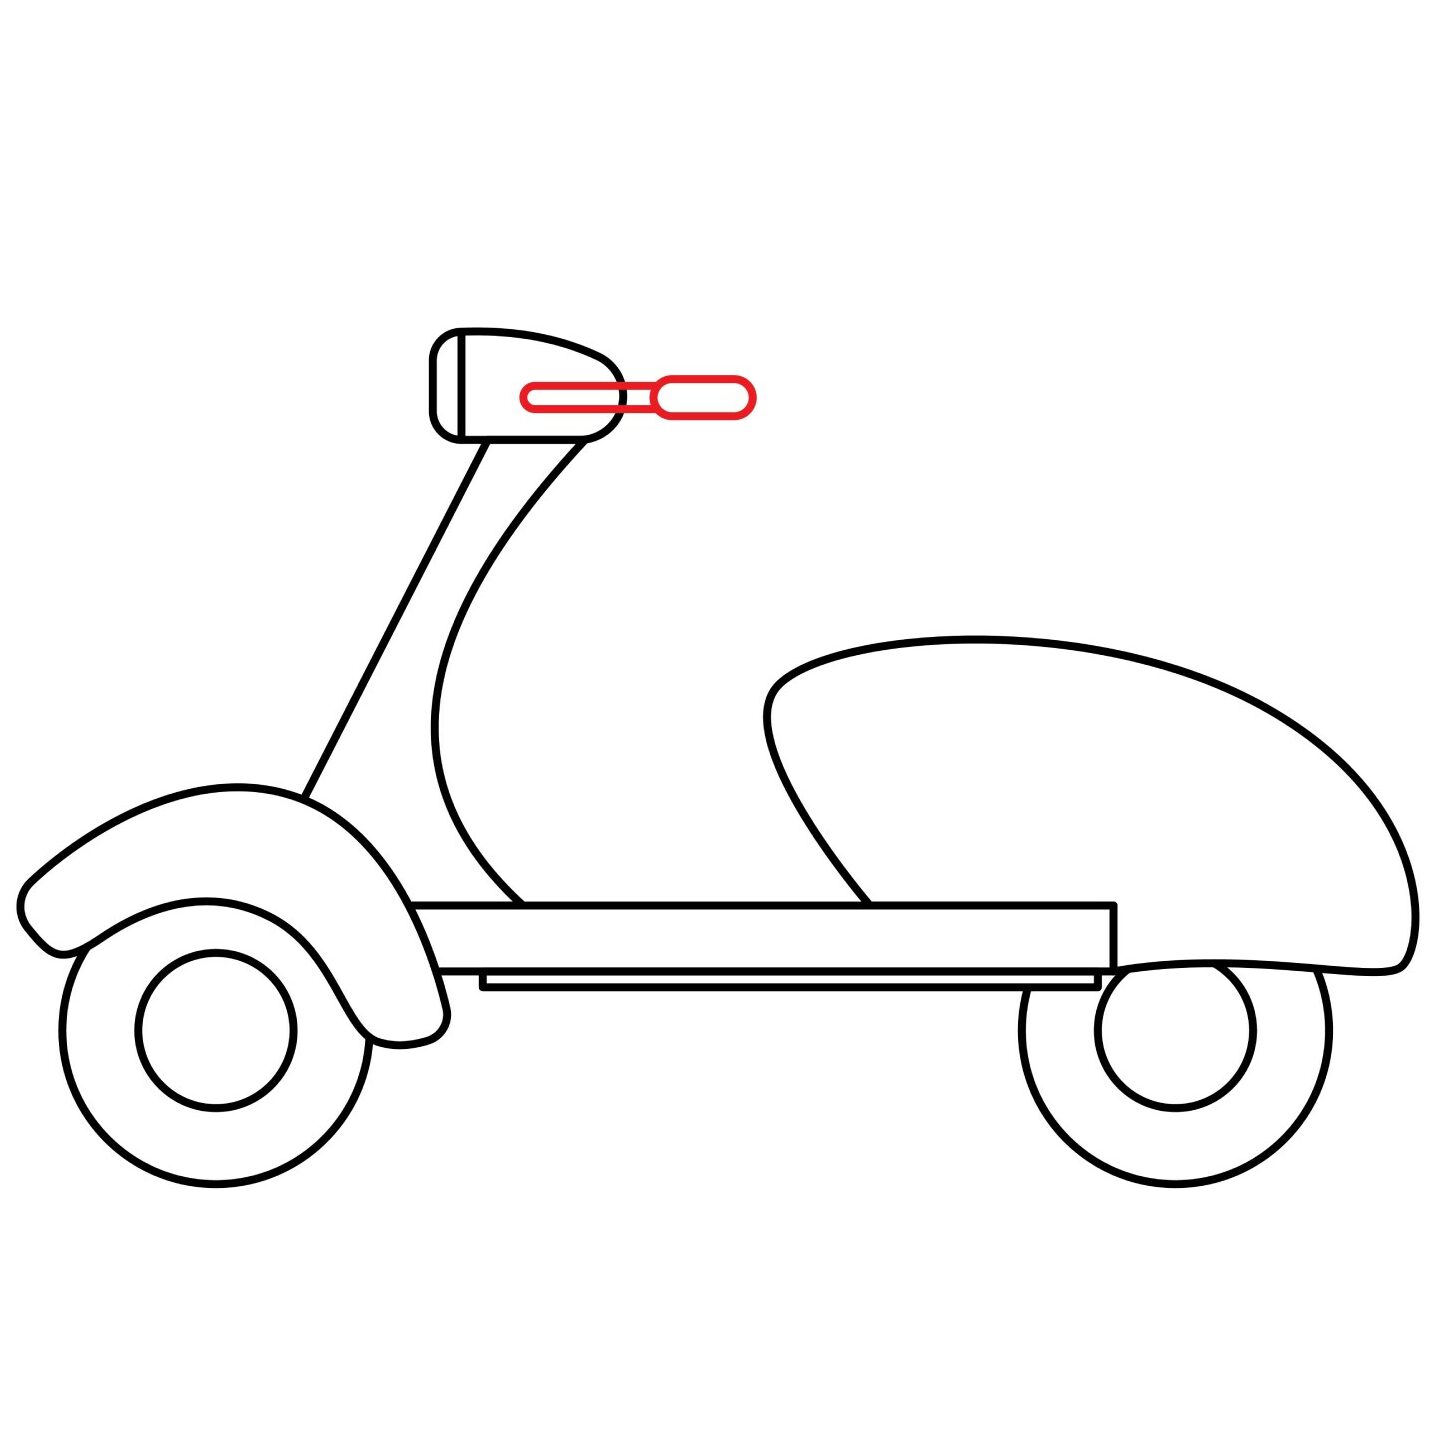
Step 7: Draw the Handlebar
To be able to steer the vintage scooter, speed up, and brake, a scooter has the relevant controls mounted on the handlebars. Due to the perspective of our drawing, we will only be able to add the left handlebar. The right handlebar will be hidden away.
To draw the handlebar, draw a small horizontal rectangle starting from the middle of the headlight and extending slightly to the right. Add another rectangle to attach to the first one. The second rectangle should be slightly thicker and have rounded corners.
- Draw a horizontal rectangle starting in the middle of the headlight
- Attach another wider, but shorter, rectangle to the first one
Step 8: Draw the Seat and Footrest
To complete the drawing of our vintage scooter, we are going to add two things. The first will be the seat. The rider’s seat is installed on the engine compartment. We will thus add it to the top left part of the engine compartment.
To add the seat, start by drawing a small rectangle on the engine then replace the top part of the rectangle with a line that curves downwards. Erase the section of the rectangle that cuts through the engine compartment and above the curved line.
For the footrest, we will start by adding a horizontal rectangle below the base. Give the rectangle rounded corners. We will then add another similar but smaller rectangle below the first one. Use your eraser to remove the parts of the rear wheel that cut through the footrest.
- Draw a horizontal rectangle on the engine compartment
- Curve the top part of the rectangle downwards
- Add a horizontal rectangle with rounded corners below the base
- Add another similar but smaller rectangle below the first one
- Erase the part of the rear wheel that cuts through the rectangles

Step 9: Our Scooter is Ready
Congratulations! Our vintage scooter is now ready. Don’t be frustrated if your scooter doesn’t look too good. You will do much better on your second attempt.

Take the Drawing to the Next Level
It is okay to leave the drawing as it is. But that is not a good idea especially when considering we want to turn you into a great artist. Great artists pay attention to detail. This is why we are going to advance our drawing by adding a few things.
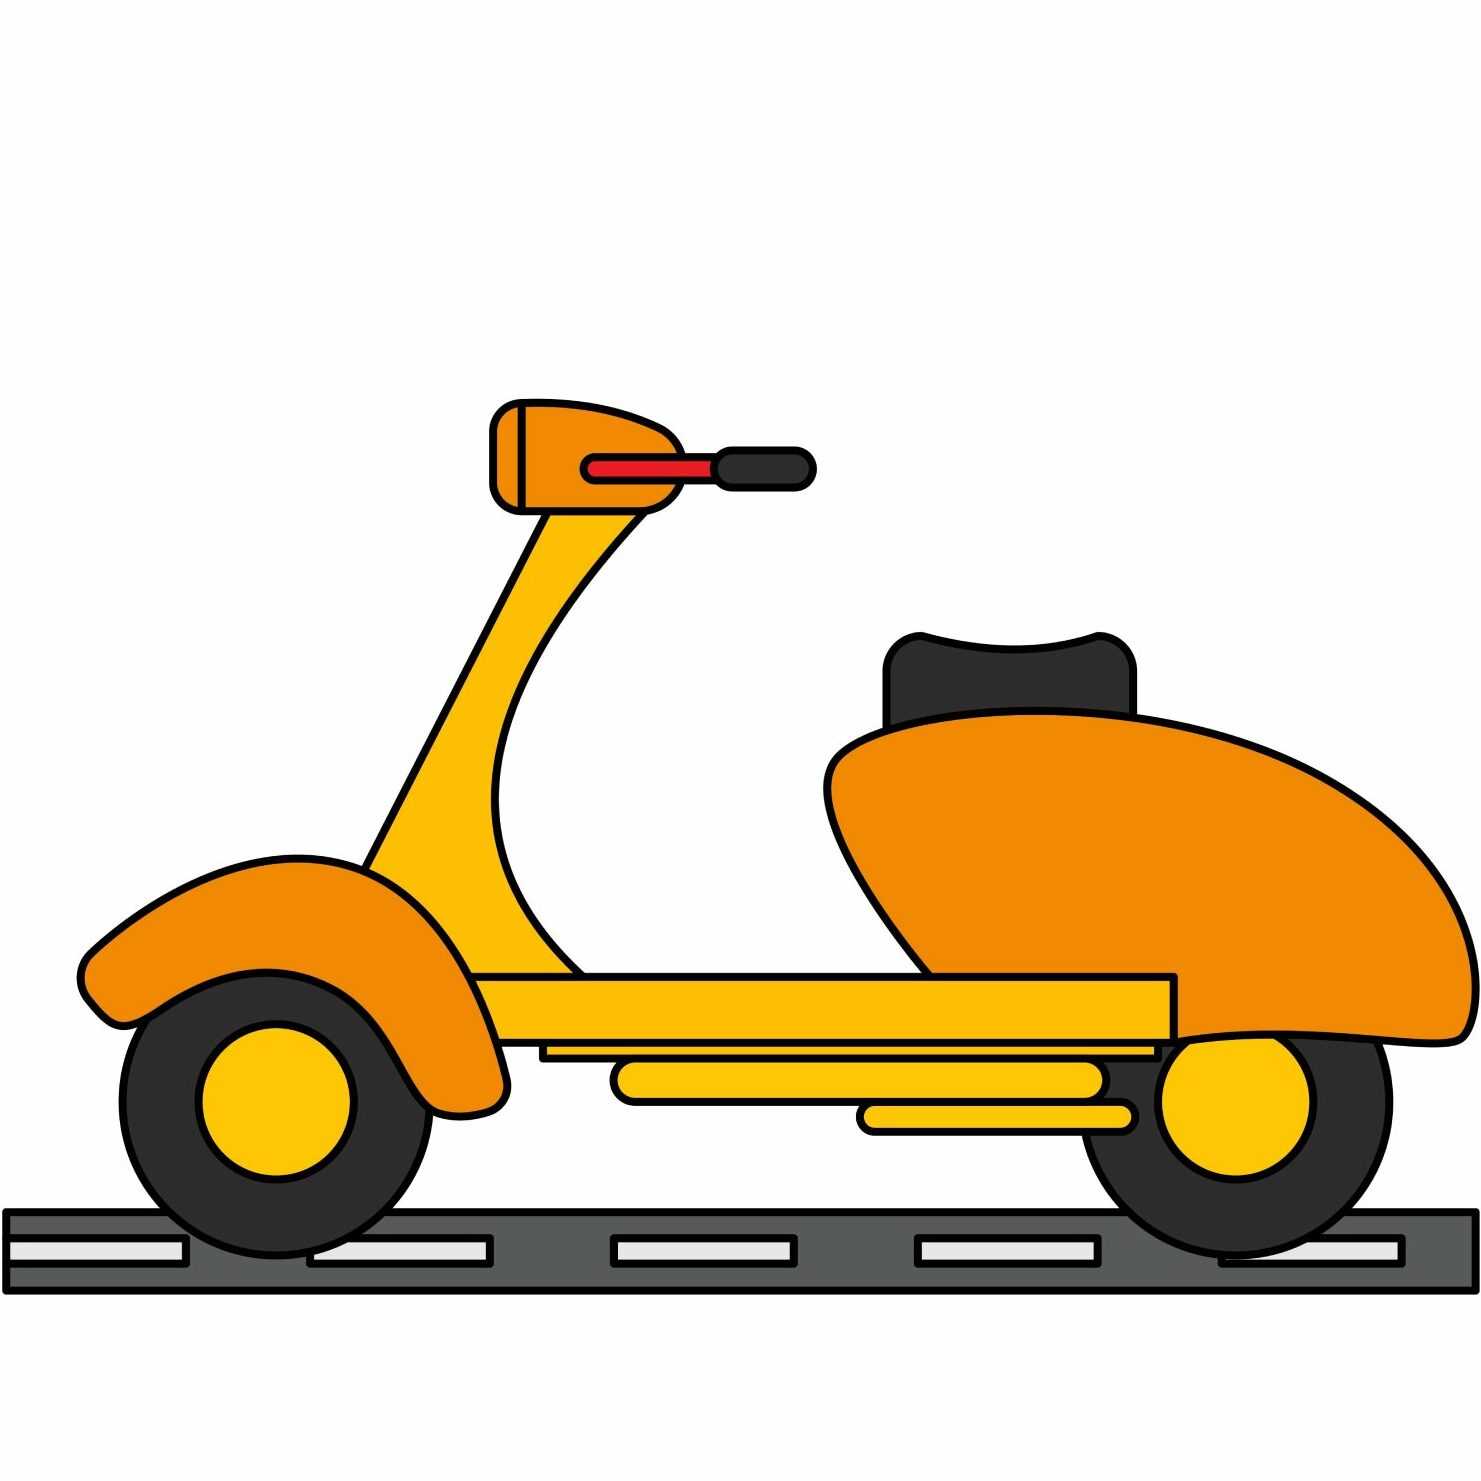
Step 10: Add Some Background
Adding a background to your drawing will help refine it. Adding something as simple as a road beneath the scooter really improves the drawing. Other things you can consider adding include a name on the engine compartment, some trees or electric poles in the background as well as some clouds. You are only limited by your imagination.
Step 11: Color the Drawing
The final step is the most fun. Take out your coloring supplies and add color to your vintage scooter. There are no rules on the colors you can use. Let your imagination run wild.
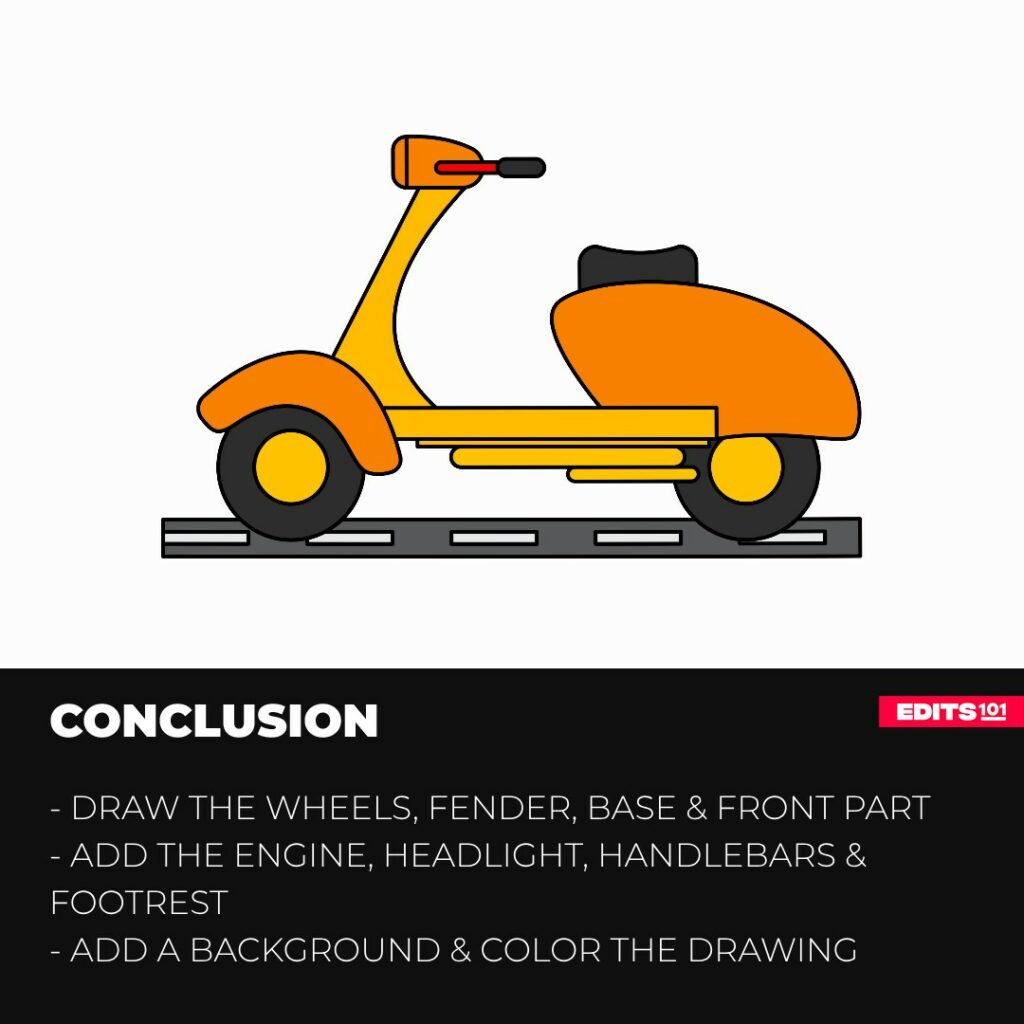
Conclusion
Drawing a vintage scooter is a lot of fun. In our lesson, we started by drawing the wheels, fenders, and the base. We then added the front part of the body, engine compartment, headlights, handlebars, and then the seat and footrest. To take our drawing to the next level, we added some background and then colored everything.
You can use these steps to draw a scooter on your favorite sketching app or draw one from a real-life scooter. The key is to keep practicing and never forget to have fun.
Thanks for reading & feel free to check out more of our articles!
Author Rating
Overall Rating
Summary
This guide will show you how to draw a realistic vintage scooter. The guide can be used by both kids and adults.