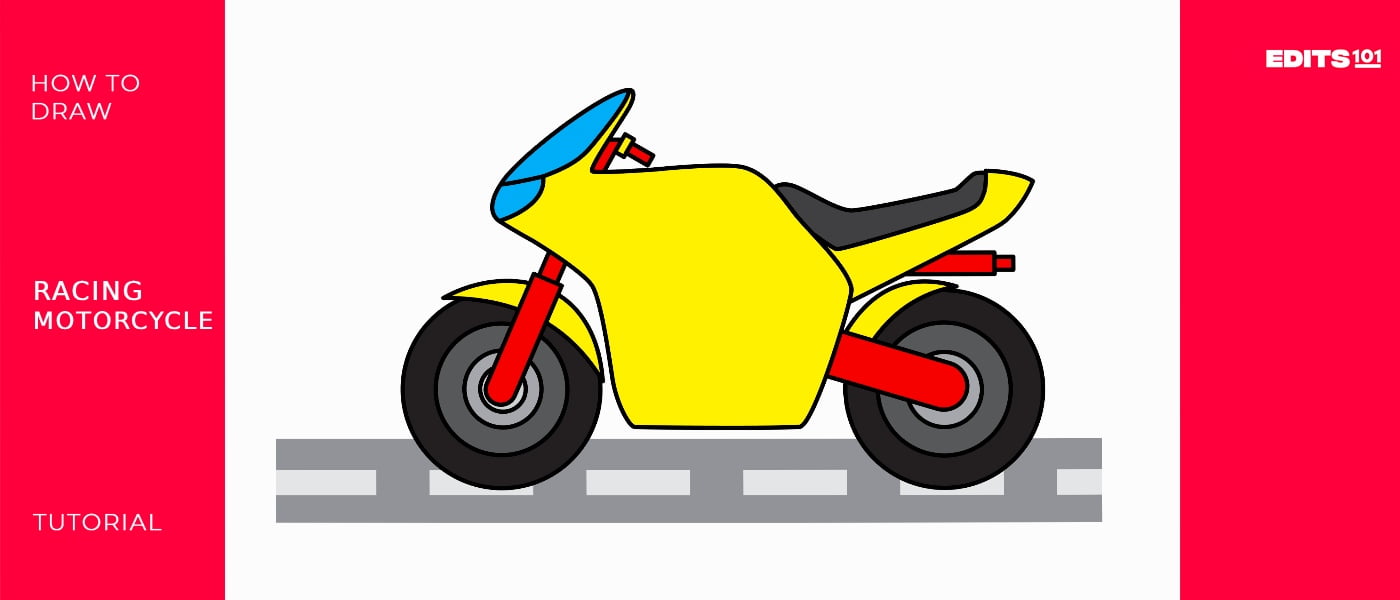
How To Draw A Racing Motorcycle | Simple Drawing Guide
In this tutorial we are going to teach you how to draw a racing motorcycle. A racing motorcycle is a custom-built motorbike for competition in races on tracks, circuits or enclosed courses. These bikes are enhanced for speed, maneuverability, and performance to provide racers an advantage in these contests.
It is known that the first practical motorbike was created in 1885 by the German inventor Gottlieb Daimler. The carburettor for the first Harley Davidson motorbike, created in 1903, was a tomato soup can. Evel Knievel currently holds the record for breaking the most bones while yet being alive.
What you will need
- A pencil
- An eraser
- A sheet of paper
- Coloring kit
- Ruler
- 30 minutes
how to Draw a racing motorcycle
We will go on a thrilling adventure and draw a beautiful piece of art. All you have to do is to follow each step carefully. By doing that, you will have a racing bike that will be ready to race. The following steps will show you how to do it. The process is very similar to drawing normal motorcycle or a police motorcycle.
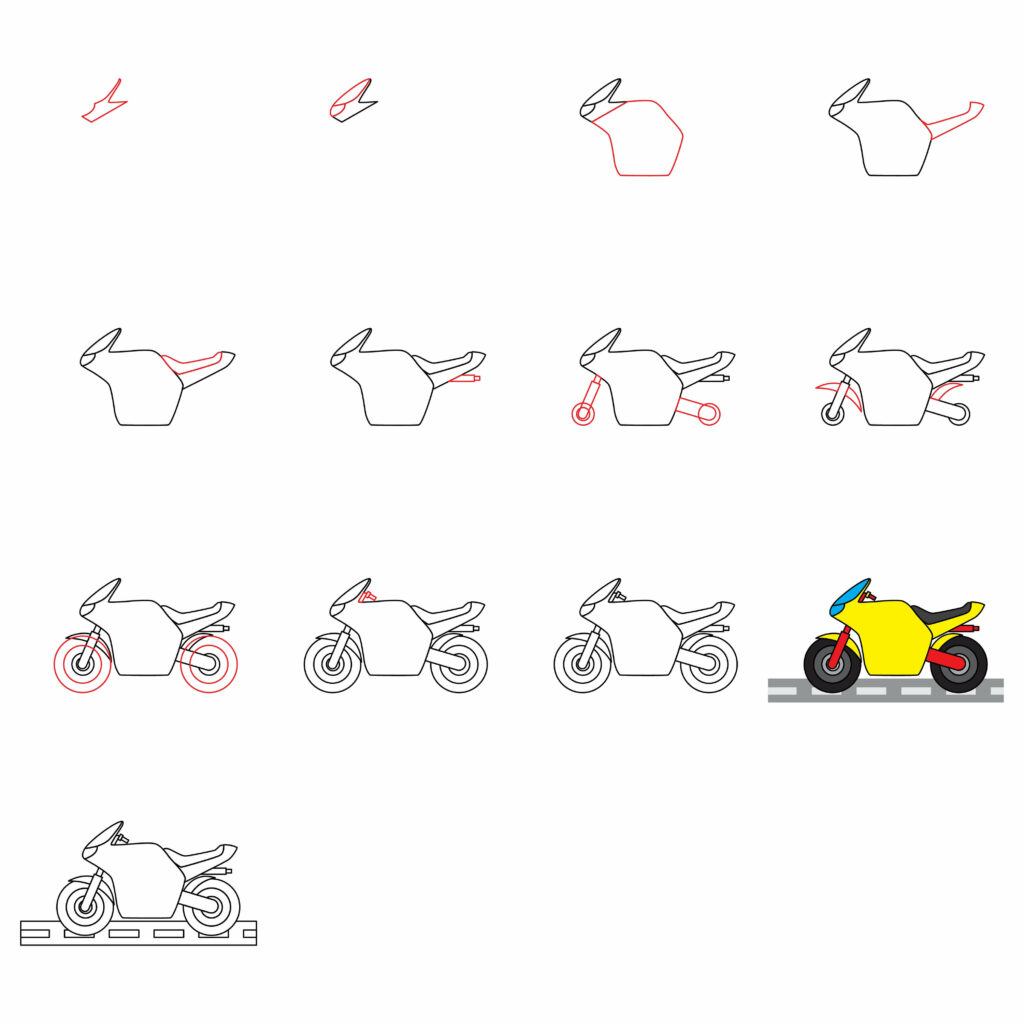
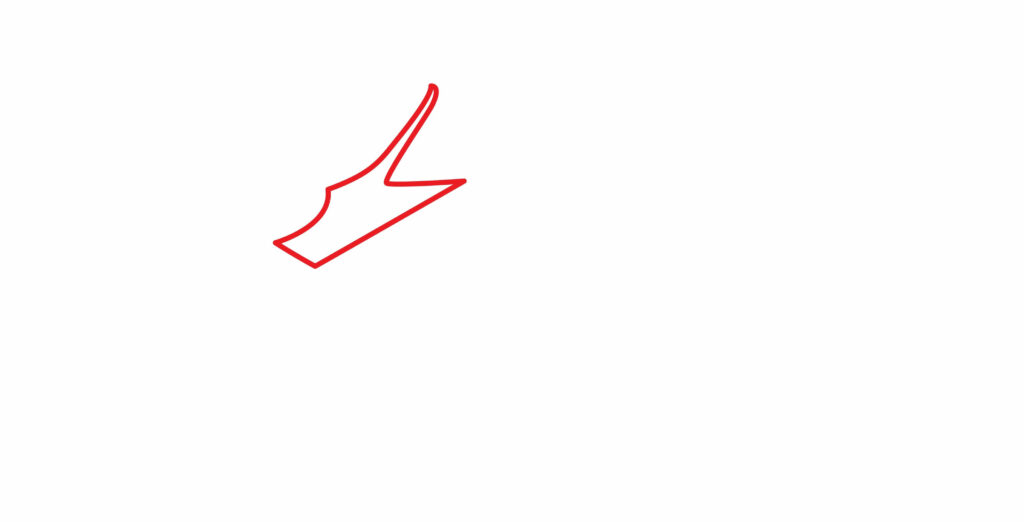
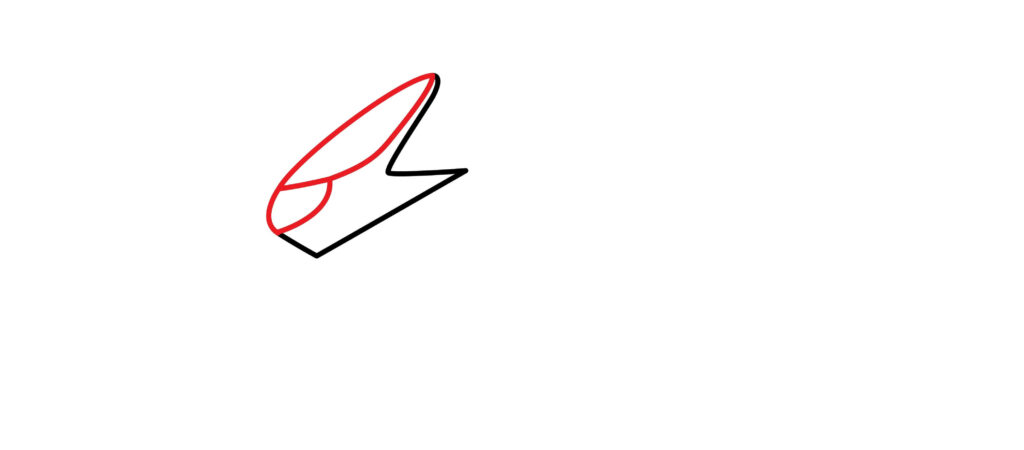
Step 1: Draw the bike head
The first step looks a little complicated in the image, but we will make it easy for you. To make the bike head, draw a ‘less than sign’ (<) in the upper left part of the page. Now, extend an oblique line from the bottom of the shape toward the left. Draw two curved or wave-shaped lines on the upper part. When you are done, just simply connect the upper and lower lines as shown in the image.
Step 2: Draw the windshield and headlights
The windshield protects you from flying rocks, insects, and debris when driving a motorcycle. A sun visor also covers your face from direct sunlight to allow better vision. Additionally, windscreens shelter you from wind noise and weariness. The headlight illuminates your way in dark areas and during the night.
To create the windshield and headlight, draw irregular ovals over the wavy lines that we drew in our previous step.
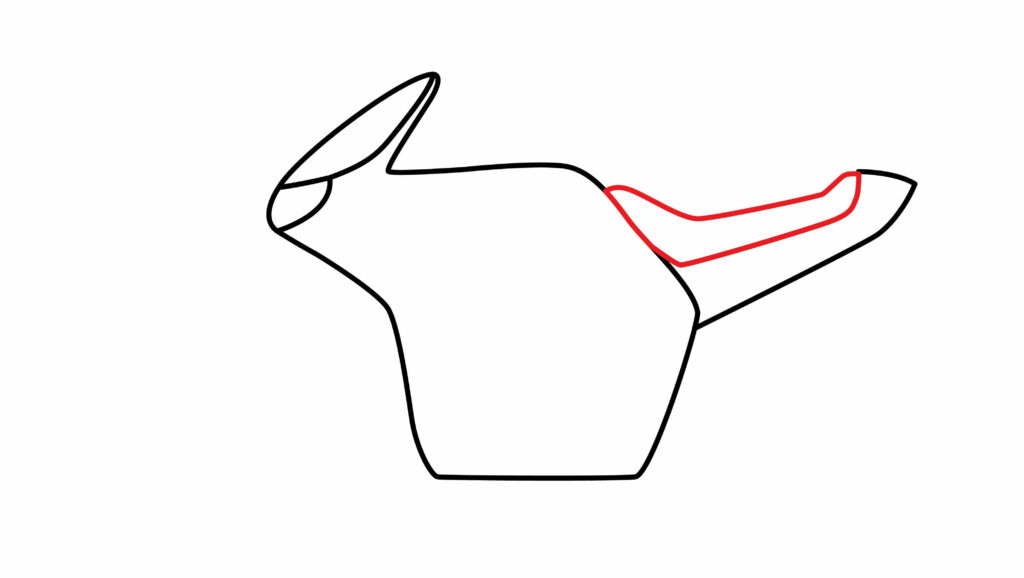
Step 3: Draw the main body
To make the main body of the motorcycle that contains the important parts of a bike, draw a pentagon in the middle of the page and connect its upper left side with the head of the bike. The corners of the shape will not be sharp. The pentagon is a shape with 5 sides. All sides have equal internal angles. Just follow the lines as they are drawn in the image.

Step 4: Draw the back part of the body
To make the back part of the main body of the motorcycle, extend two non-parallel horizontal lines directed towards the right. These lines are slightly bent towards each other. Now, curve the ends of the lines upwards and join them. There you have it- the back part of the body.

Step 5: Draw the back seat
Motorcycle seats are also known as saddles, and this is what we are going to draw. We will draw a similar shape to the one we drew in our last step. The only difference is that the curved upper part will be on the left. The back will be drawn on the back part of the body.
Step 6: Draw the silencer
The exhaust gases are made to bounce around and lose energy before they exit the exhaust pipe through a series of chambers and baffles that are created by the silencer. This procedure assists in lowering the exhaust’s noise levels and making it less noticeable. Silencer is also important to reduce the noise.
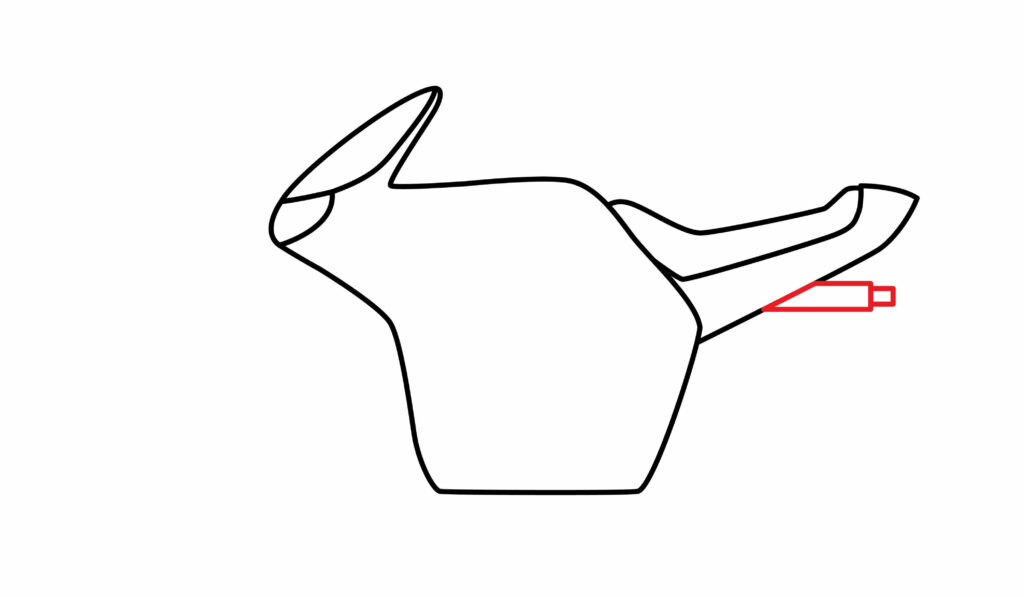
To draw the silencer, extend two straight horizontal parallel lines from the back part of the body and join them. Now, draw another small rectangle attached to it.
Step 7: Draw the front and back suspension of the motorcycle
Using a spring and damper combination, motorcycle suspensions shield the rider and chassis from road imperfections. Motorcycle suspension systems used on public roads aim to reduce the impact of obstacles, including potholes, humps, corners, and acceleration/deceleration forces.
The suspension system on your motorcycle prevents your spine from being crushed by bumps by allowing your wheels to follow the road so you can accelerate, stop, and steer securely.
To make the back suspension extend an oval from the back body of the bike. Now, draw a small circle on the rounded part of the shape. Your back suspension is done.
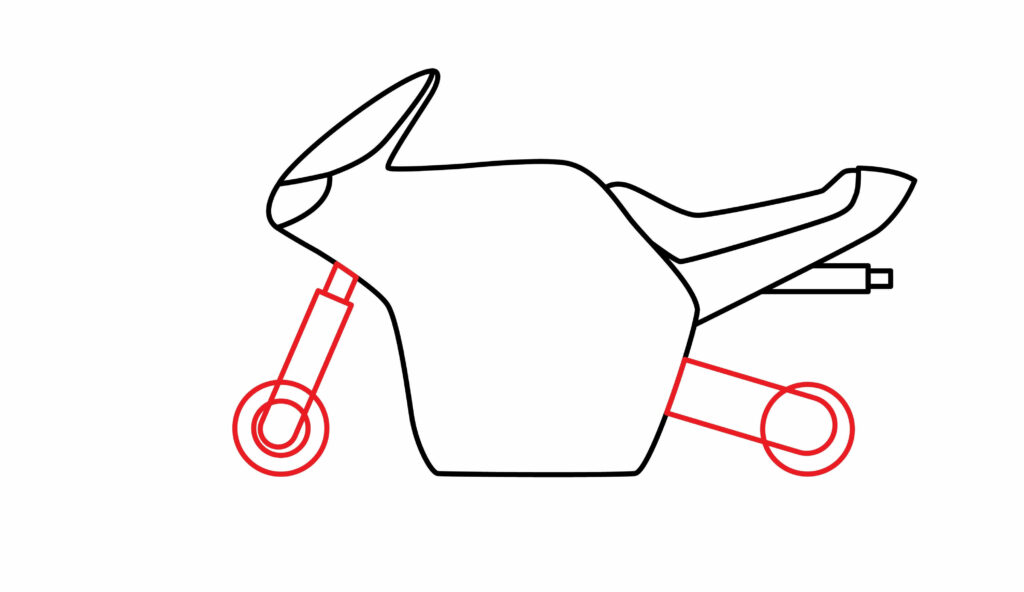
We will follow other steps to make the front suspension, as it is a bit different from the back suspension. Draw a small rectangle below the head of the bike. Now, draw another elongated and slanted rectangle that has a round edge on one side. This is the part where we will draw two concentric circles with little difference in their diameter.
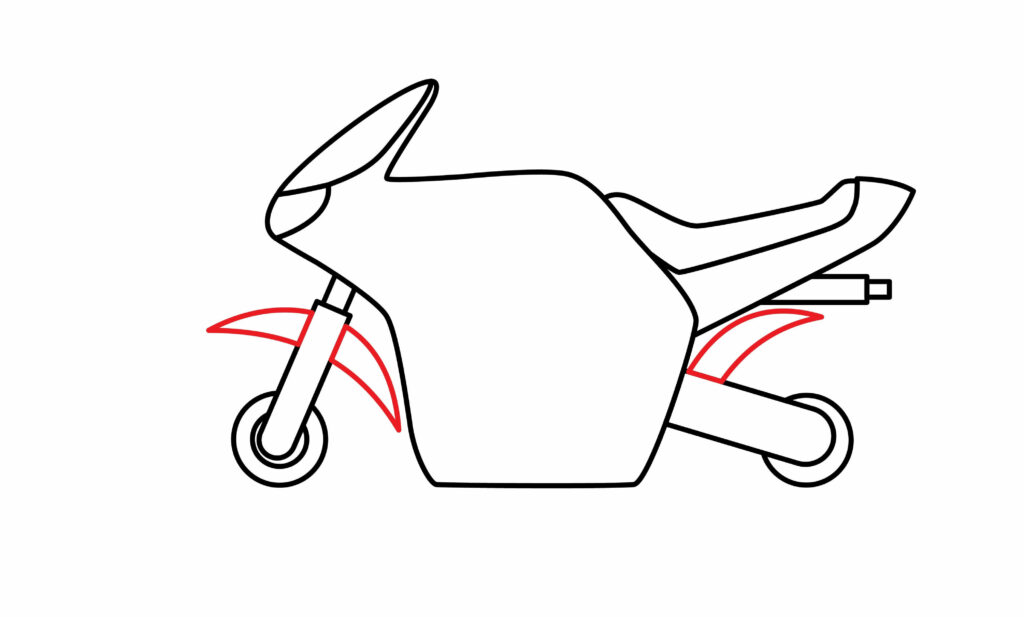
Step 8: Draw the front and back fender
The part of a motor vehicle that frames the wheel well and is intended to stop debris from shooting out from the moving tire is referred to as the fender. Motorcycles would probably lose most of their charm without fenders.
To make the fenders, draw two curved cones on both sides of the bike’s front suspension. For the back, draw only one curved cone shape on the suspension.
Step 9: Draw the wheels
To draw the wheels just like a double-decker bus but a bit smaller, we will draw two circles on the suspension of our motorcycle.
For the best-looking circles, mark a dot on the page as the center of the circle. From this dot, mark four more dots (top, bottom, right, and left) around it at the same distance. Now, gently connect all these dots with curved lines. That’s how we will make an amazing circle.
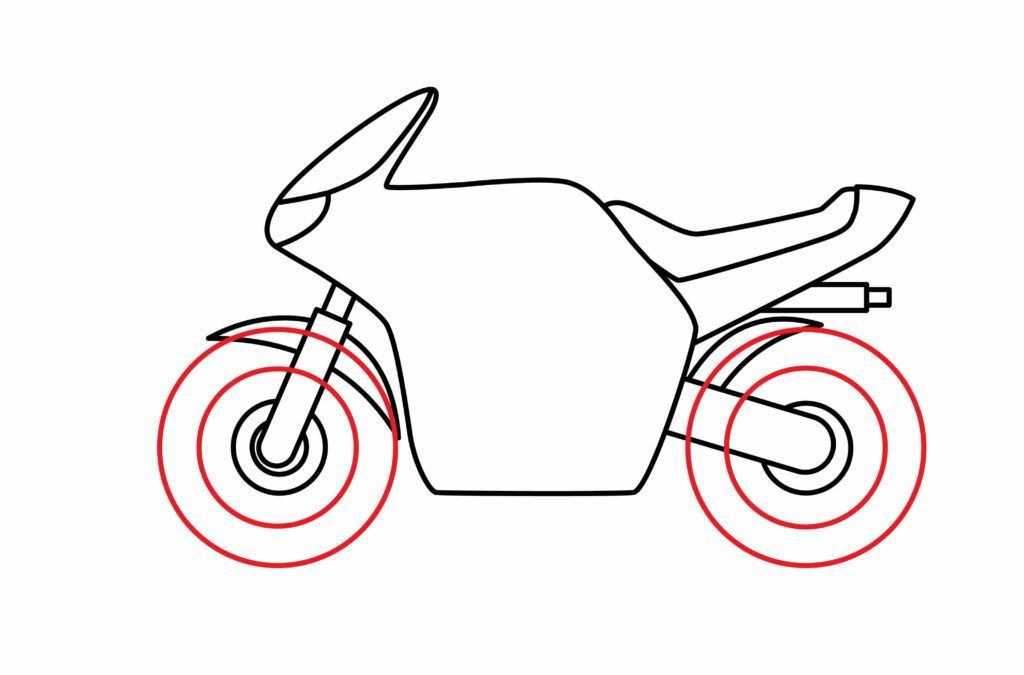
You can also use round objects like a bottle cap or jar lid. Draw two circles for each wheel, one slightly larger than the other. Then, draw a smaller circle inside the larger one to create the wheels.
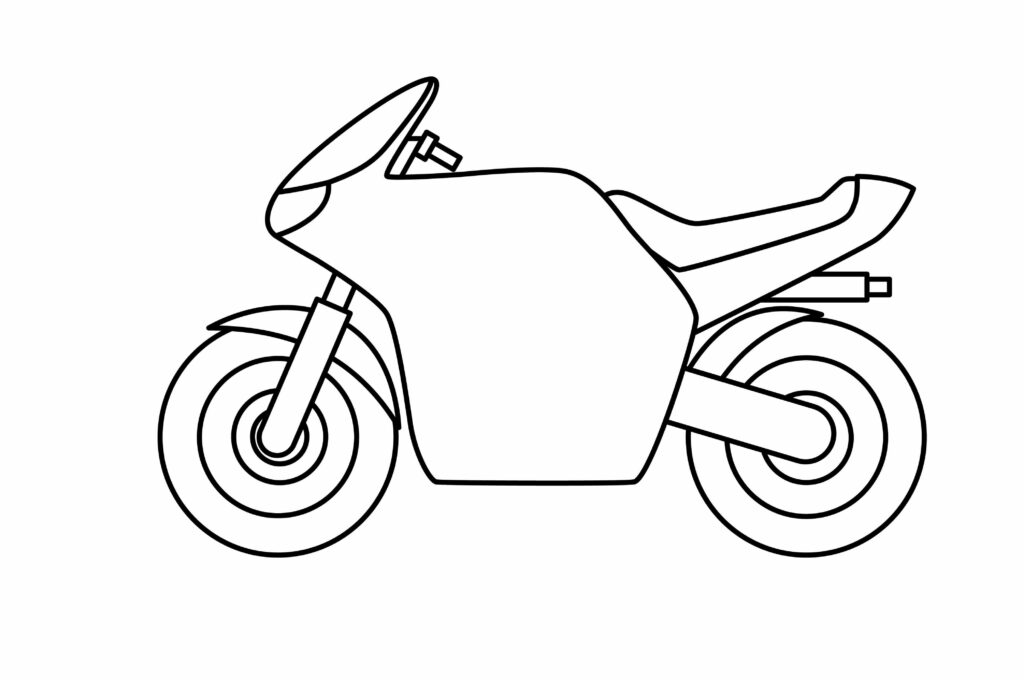
Step 10: Draw the handlebar and the grip
The handlebar and grip are some vital parts of a motorcycle. Draw three small connected rectangles to make the handlebar and the grip, as shown in the image.

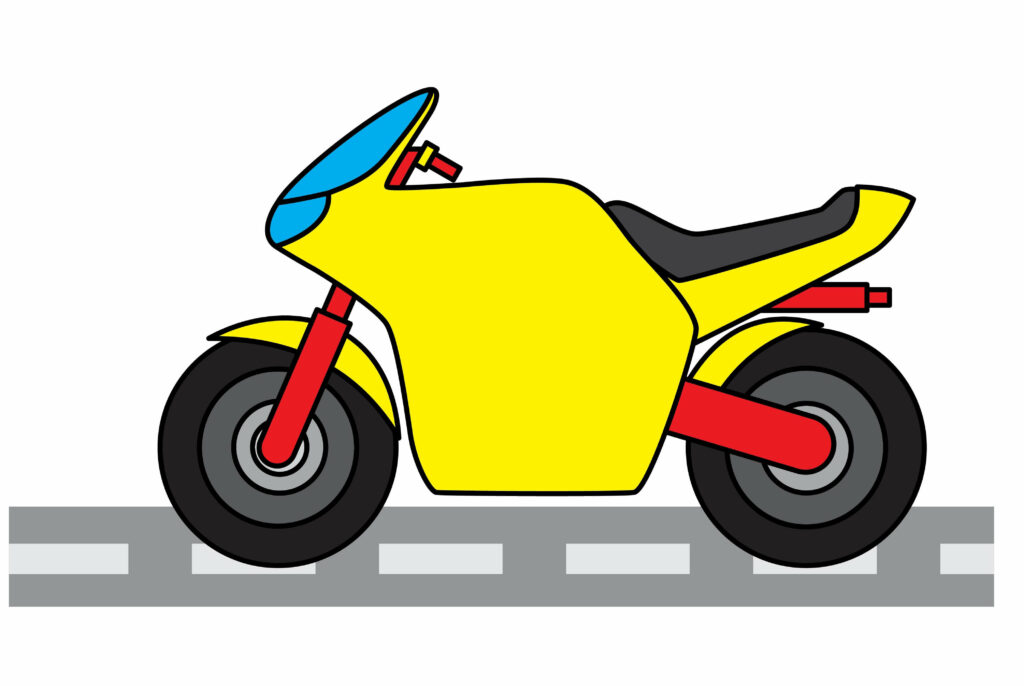
Step 11: The racing bike is ready
Congratulations, talented artists! The racing motorcycle is ready to hit the road. You did a wonderful job. We’re certain you followed each step and made your motorcycle. To make the drawing more prominent, we’ll outline it using a marker. After outlining, we’ll erase the pencil marks for a better look.
Hey, wait! The real fun is about to begin. We are about to upgrade our drawing and make it look more realistic. Are you ready to unfold your imagination and creativity to make your drawing professional?
Taking your racing motorcycle drawing to the next level
Practice, experimentation, and a willingness to push the limits are all necessary to advance your drawing. First, keep practicing consistently to improve your technical abilities while paying close attention to proportions, perspective, and details.
Try out various tools and methods to see what appeals to you, whether it’s pencil, ink, digital tools, or a combination of them. Grab your stationary and let the magic begin.
Adding background to your drawing
Everyone can tell a story. It can be told in words or even through images. By giving your drawing a background, you can describe your story. A drawing takes on a completely new appearance with a background. It adds depth to the specifics and provides perspective.
You can draw a road. A shining blue sky or some bushes around your bike.
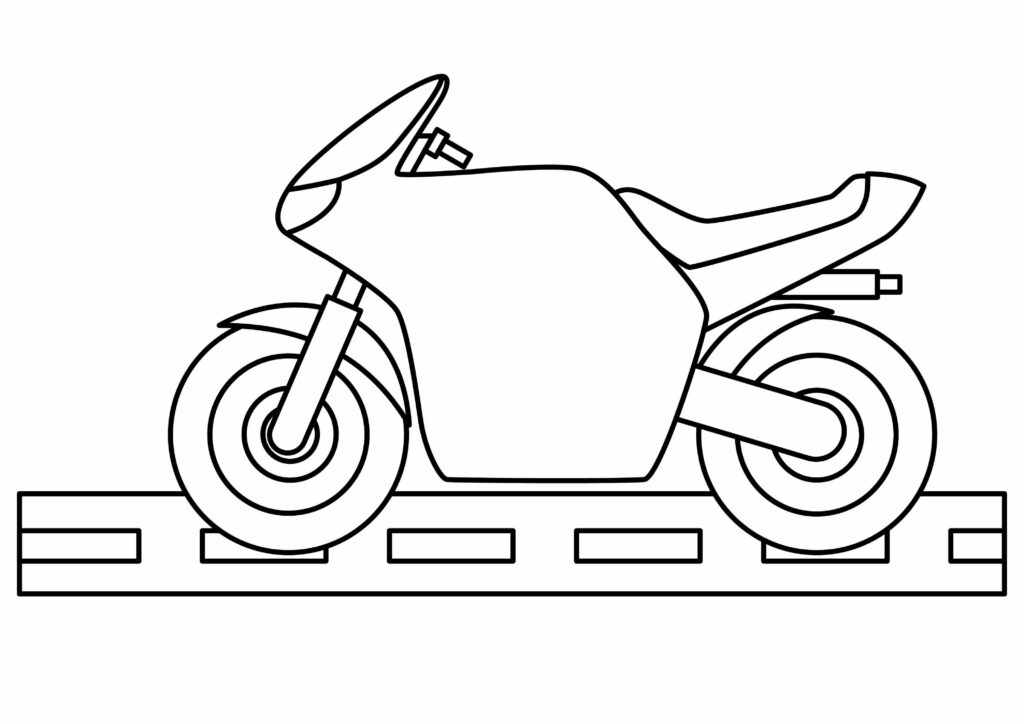
As we draw the background, we will ensure it doesn’t overlap our racing bike. If you notice any line overlapping our camper, erase it carefully.
Adding colors to your drawing
Let’s get to the fun part. Use your imagination to explore different colors and shades that you like, then color your beautiful drawing. Your creativity determines the coloring.
P.S. Bonus Tips
Our drawing is completed, and we’re sure you enjoyed it as much as we did. As mentioned earlier, there’s no limit to one’s creativity. The drawing can be upgraded in any way. We added background and colors, but there’s more you can do.
You can draw some patterns on the bike or make a logo of your favorite brand of bike. You can also draw a person sitting on the bike, ready to race.
These are just a few ideas. Don’t limit yourself to these ideas only. Use your creativity and give your drawing a new look. It is a hit-and-trial method. If you won’t get right on the first attempt, practice and try again.
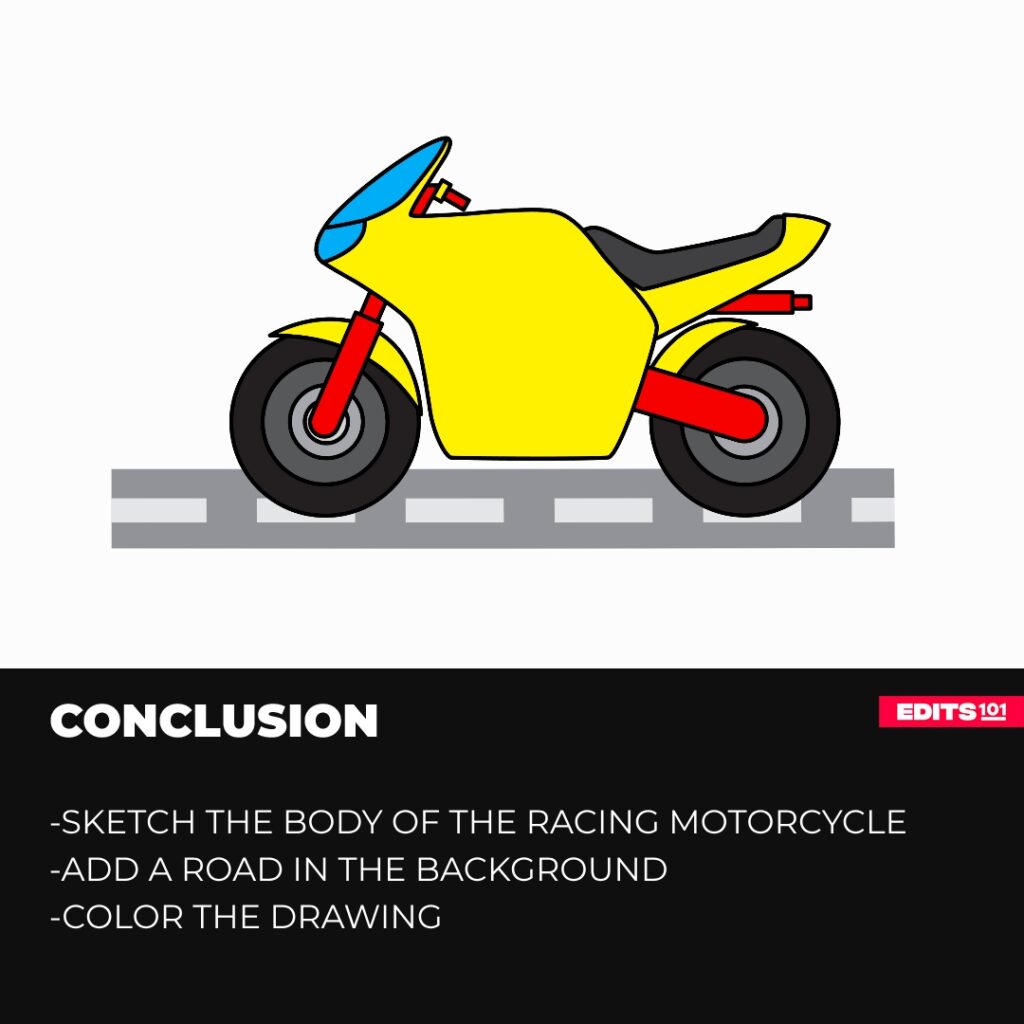
Conclusion
That’s it! Our drawing is completely ready now. It was a fun and easy process. We’re sure that you followed each step without skipping and made an amazing drawing. We started by making the head part. Then we drew the windshield, headlight, front and back part of the body, seat, suspension, fender, wheels, and handlebar. In the end, we upgraded our drawing using our creativity.
Thanks for reading & feel free to check out more of our articles!
Author Rating
Overall Rating
Summary
The post is a step-by-step guide on how to draw a beautiful racing motorcycle. You will also learn the names of the parts that make up a police motorcycle.