How to Draw a Police Helicopter | 10 Easy Steps
It’s amazing how a helicopter looks as it flies. Even with all the noise, helicopters are pretty impressive vehicles. For this reason, in today’s lesson, we will be learning how to draw a police helicopter. We will do so using very simple steps so that you can follow along and also be able to use what you learn here to draw an even better helicopter.
An important fact to understand is that the first helicopter was the Sikorsky R-4 which was produced in 1942. Over the years, helicopters have advanced and they continue to gain more popularity. This is why we even have police helicopters today. The police helicopter is a bit different because it is mostly a military surplus rotary-wing aircraft. We will not get into the details because our goal is to help you draw a beautiful police helicopter. Here are the items you will need.
What You Will Need
- A pencil
- An eraser
- A ruler
- A drawing piece of paper
- Coloring supplies
- 30 minutes
How to Draw a Police Helicopter
Our lesson for today is very straightforward. We will only be using simple shapes to complete the drawing. You can then use what you learn here to draw an even better police helicopter either on paper or on your sketching app. By the end of the lesson, you will also be able to draw a helicopter from a photograph.
To ensure you are not left behind or make mistakes that force you to start over, we encourage you to study the below image. It has the steps we will be taking to complete the drawing.
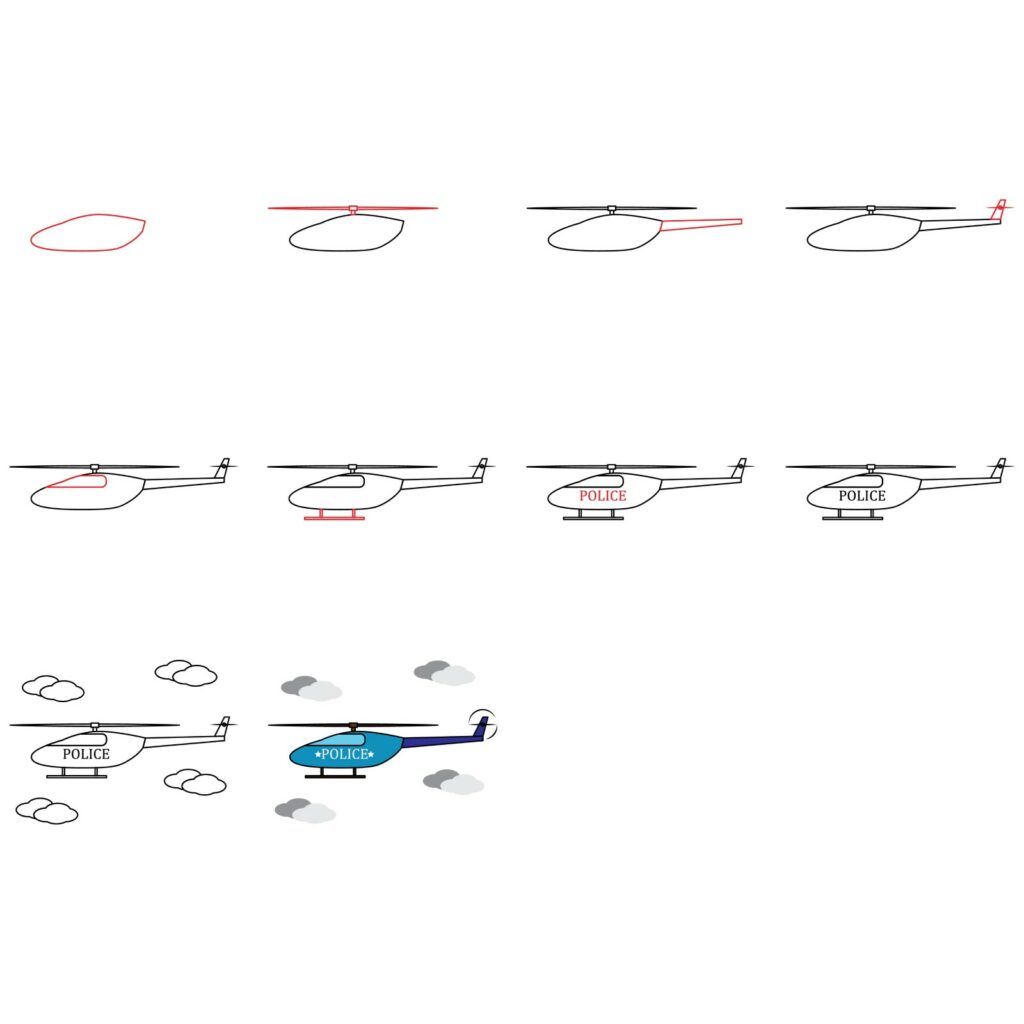
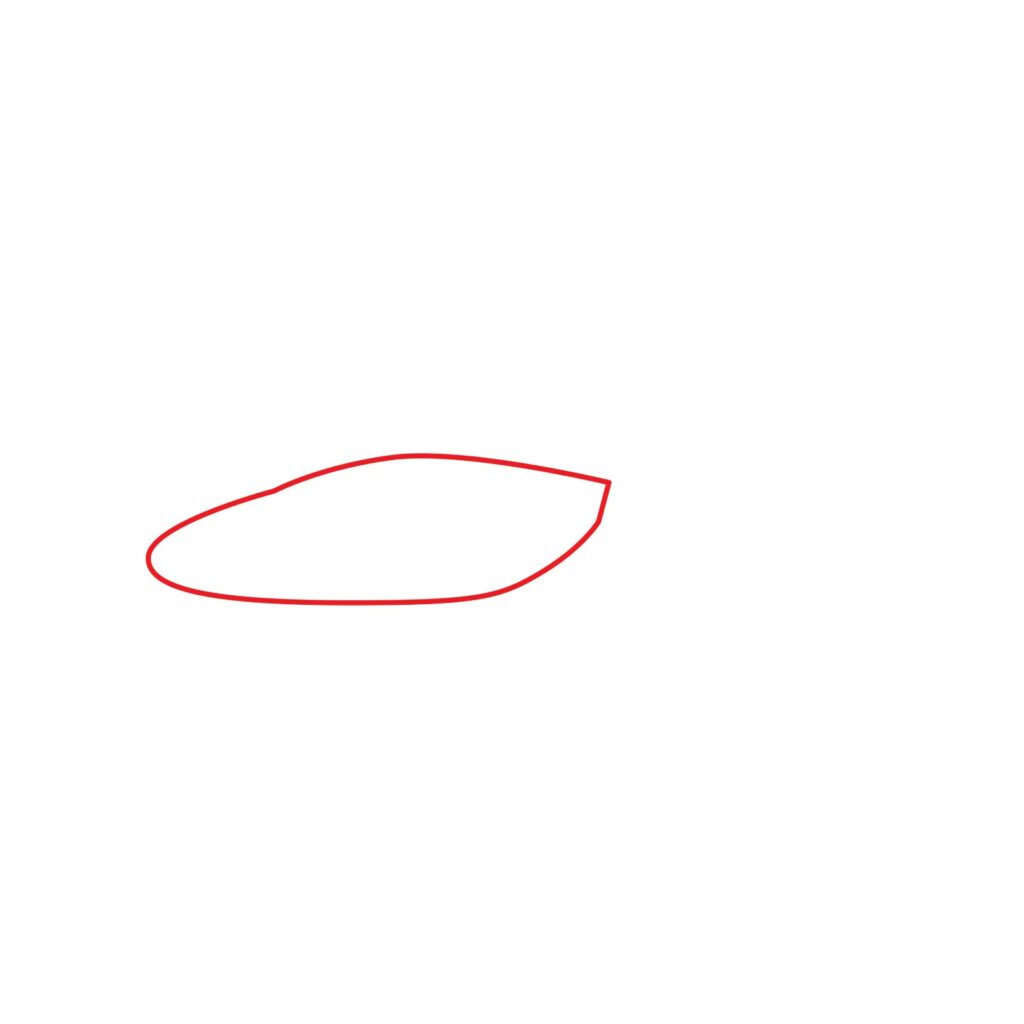
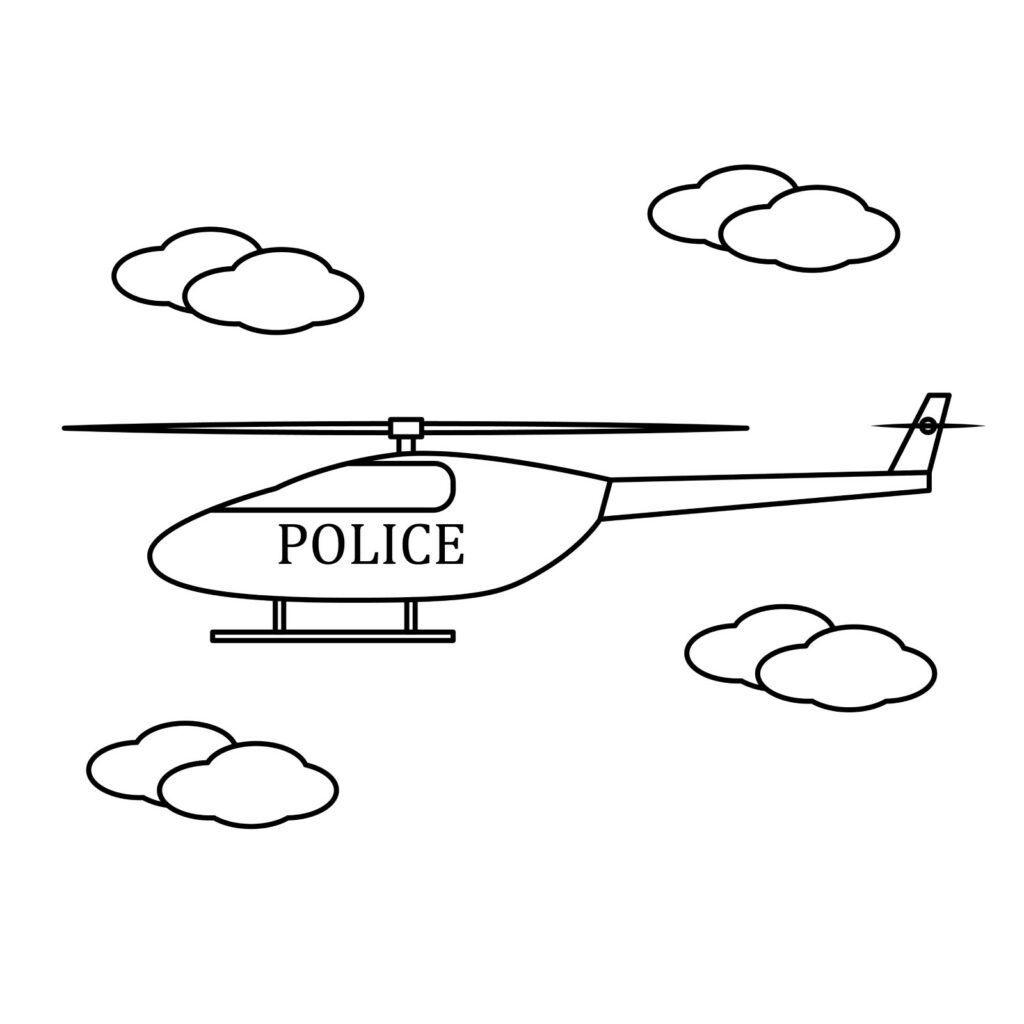
Step 1: Draw the Body
If you have completed our other how-to-draw lessons, you will note that in today’s lesson, we will start things a bit differently. Instead of starting with the wheels or the chassis as we normally do, we will jump straight to the body of the police helicopter. This is because the helicopter doesn’t have wheels or a visible chassis. Everything is enclosed in the body.
To draw the body, we need to draw an oval shape to the left part of our drawing paper. The oval shape should be horizontal. Make the left part of the oval shape a bit narrow and the rear part should narrow towards the top. Your drawing should look like this.
Keeping in mind we will be adding several components to the right part of the body, make sure you leave ample space between the oval shape and the right margin.
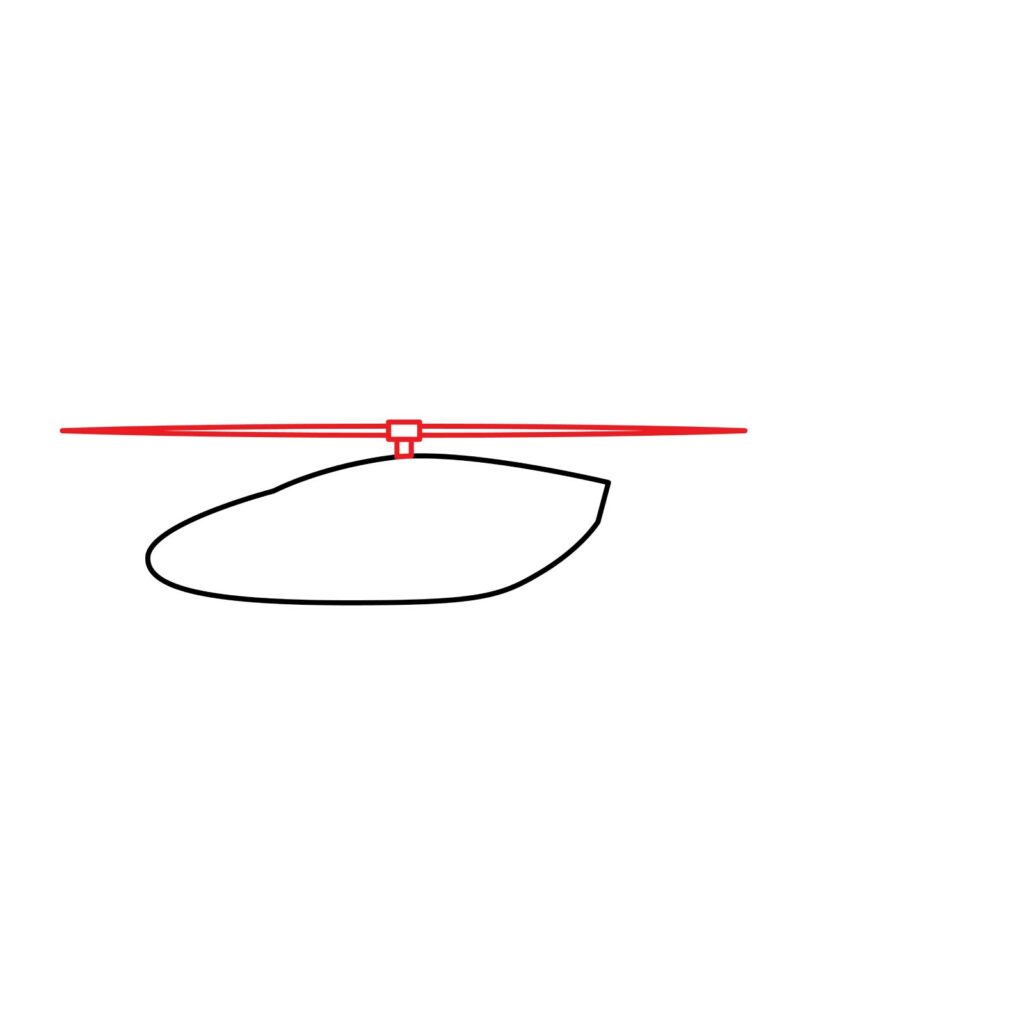
Step 2: Draw the Main Rotor Blade
The main rotor blade is the top part of the helicopter that rotates. The work of the main rotor blade is to provide lift when the blade starts rotating. Lift is the force that enables the police helicopter to fly. The pilot can affect the lift by changing the number of rotor revolutions per minute. The more the revolutions, the more lift force a helicopter gets.
To draw the main rotor blade, we will start by drawing the mounting for the rotor. For that, we will start by adding a rectangular shape on top of the helicopter’s body. We will then add another tiny, horizontal rectangle on the first rectangle.
The main rotor blades will be mounted in a rectangular shape we added at the top. To add the blades, use your ruler to draw a line that starts from the top rectangular shapes and extends to the left, close to the left margins. Next, add another line below the starting point of the first one. The line should slant upwards to connect with the first line. Do the same for the right part of the blade. Your drawing should look like this.
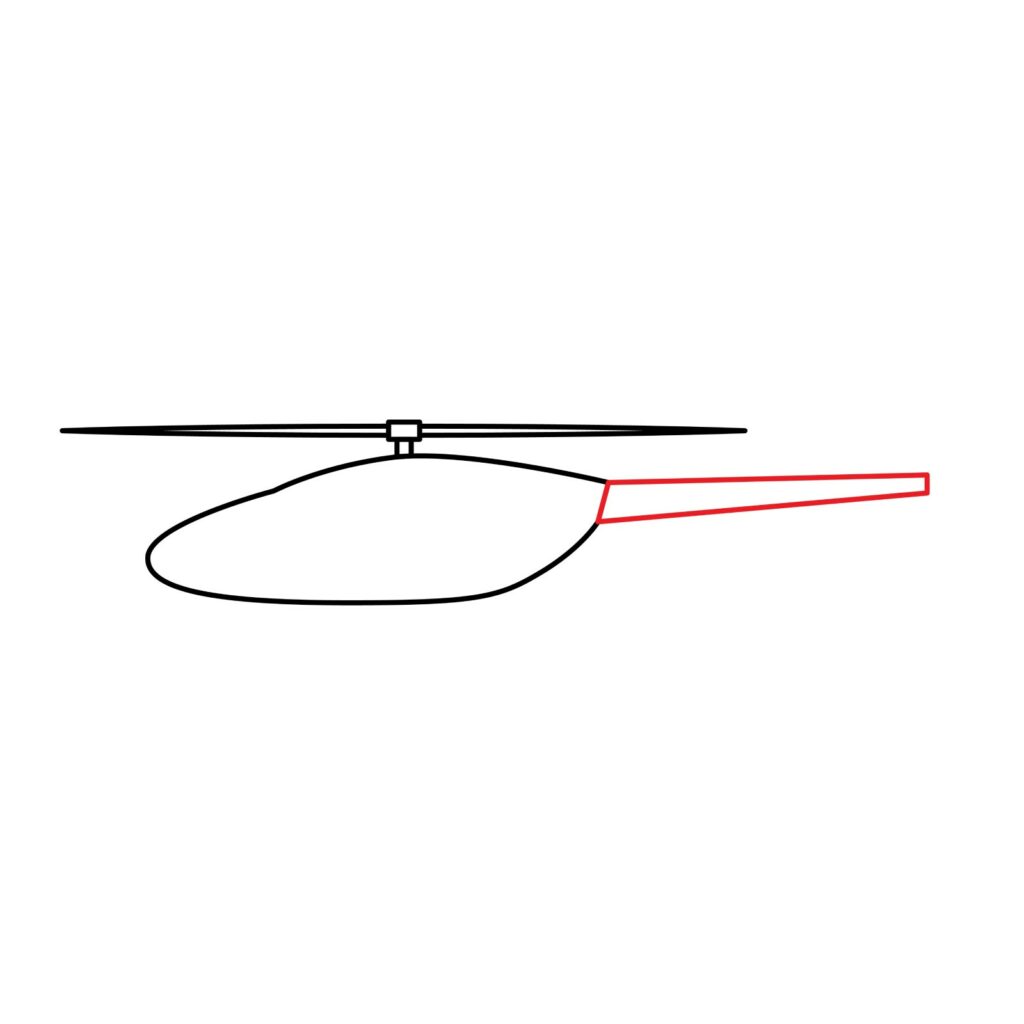
Step 3: Draw the Tail Boom
The tail boom is the structure that sits behind the police helicopter. It offers mounting for the stabilizers, rudder, and the tail rotor. To draw this structure, we will again need to use a ruler to achieve perfectly straight lines.
Start by drawing a line that starts from the back part of the helicopter’s body and extends towards the right margin. Add another line below the starting point of the first line and extend it towards the right. The second line should slant slightly upwards so that the tail boom is bending slightly towards the back. Connect the two lines at the end with a vertical line.
Step 4: Draw the Rudder and Tail Rotor
The next thing we are going to add now is the rudder. This is a control surface that controls the movement of the helicopter left and right. To do so, the pilot can turn the rudder left and right. Adding this essential structure is very easy. We simply need to add a triangular shape on top of the left part of the tail boom. Make sure the top of the triangle is flattened.
Next, we will add the tail rotor. The work of the tail rotor is to pull against the force of the main rotor. The tail rotor thus keeps the helicopter from spinning round and round once it is airborne. The tail rotor is also used to vary the angle of the helicopter as well as to steer.
There are different designs used in the tail rotor. In our case, we are going to add the tail rotor on the side of the rudder. This will be very easy. Start by drawing a small circle on the top part of the rudder. This will serve as the mounting for the tail rotor. Next, add a line that cuts through the small circle. You can make the ends of the line narrower so that they look like a blade.

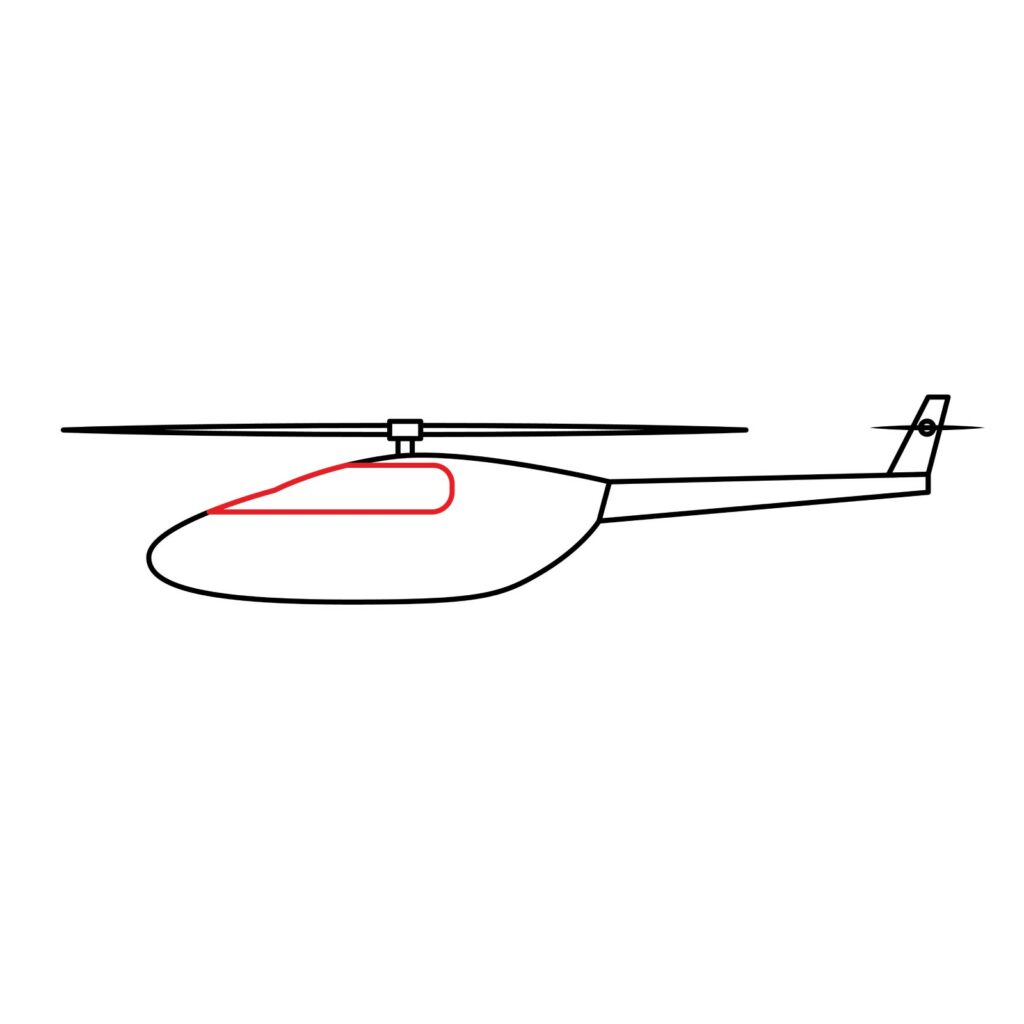
Step 5: Draw the Cockpit Window
The pilot needs to be able to see outside. For that reason, the cockpit needs a large window that enables the pilot not just to see what is in front but also what is around. This is important especially when a police helicopter is being used to pursue some bad guys.
To draw the cockpit window, start by drawing a horizontal line that sits right below the mounting for the main rotor blade and extends slightly to the left of the mounting. Add another parallel line, a short distance below the first one, and extend it to the right until the end is below the first one. Connect the two lines with a curved end as shown in our illustration below.
Step 6: Draw the Landing Skid
A helicopter usually has two landing skids. This is the structure that enables the helicopter to land safely while keeping the main body above the ground. Due to the perspective of our helicopter, we will not be able to draw the two landing skids. We will only add one landing skid because the other one is hidden away.
Start by adding a tube-like structure a short distance below the body of the police helicopter. Next, use two vertical tube-like shapes to connect the horizontal shape to the body of the helicopter. It is that simple!

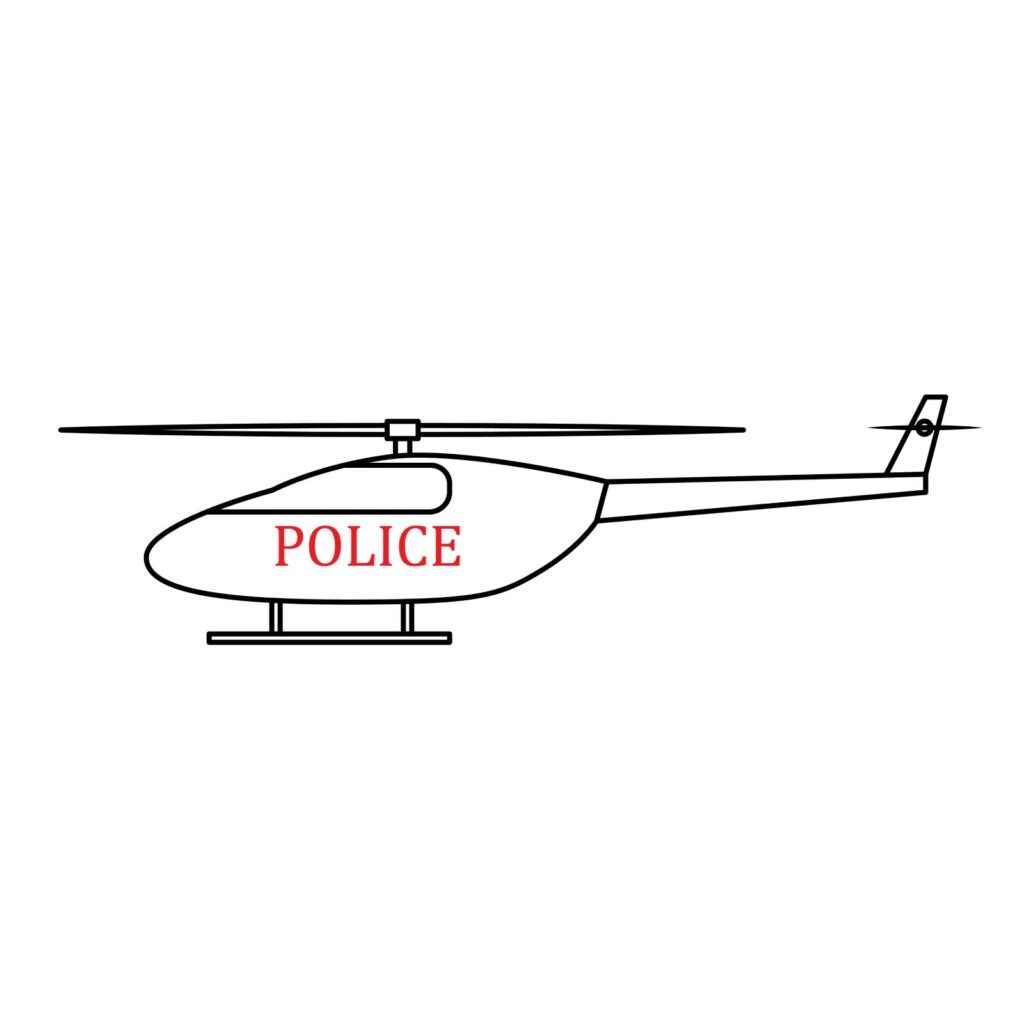
Step 7: Write Police on the Body
Our helicopter is now ready. However, to turn it into a police helicopter, we need to add the word “Police” to the area below the cockpit window.
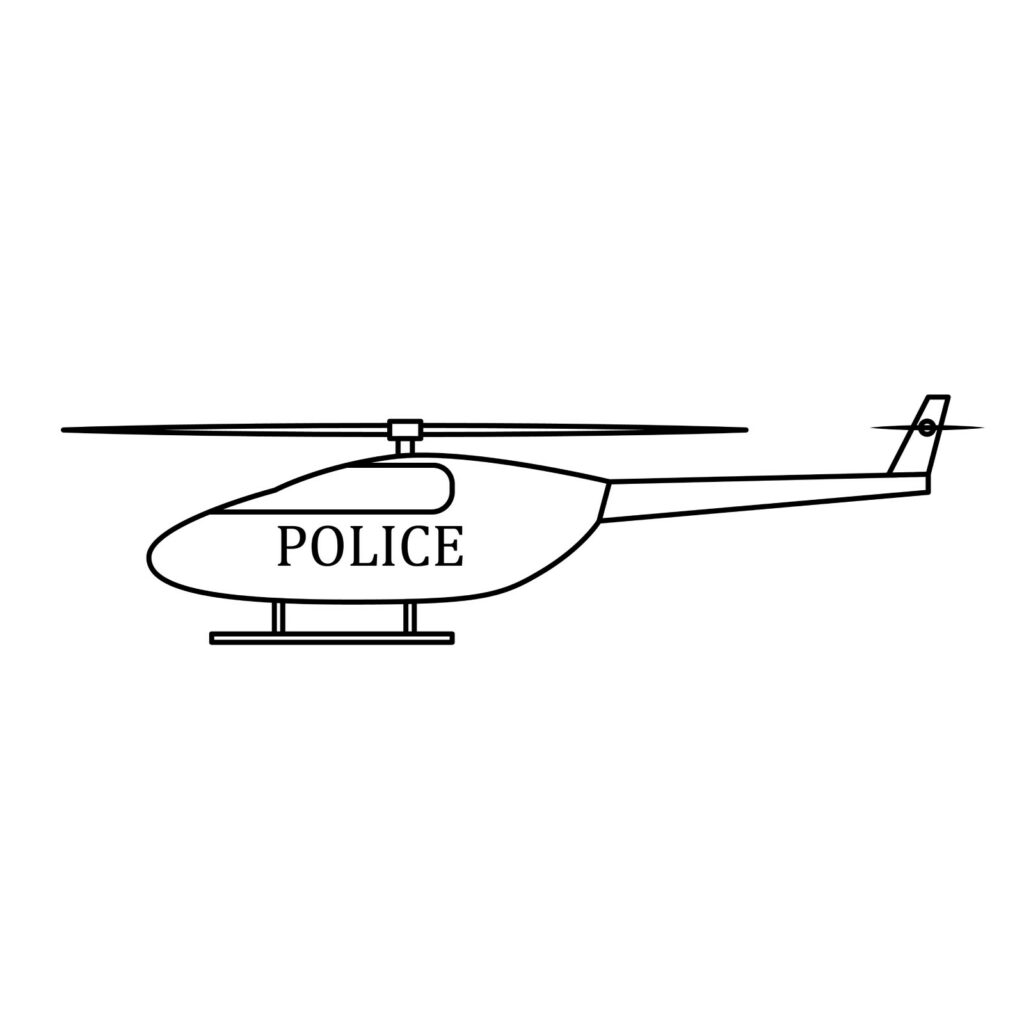
Step 8: Refine Your Drawing
If you followed all our steps, your police helicopter drawing should now be ready. Congratulations on work well done. If your drawing doesn’t look great, there is no need to be frustrated. It takes practice to become a good artist. You will do a better job on your next attempt.
Take the Drawing to the Next Level
While it is tempting to leave our drawing as it is in fear of ruining it with added details, you must always be willing to go the extra mile if you want to become a great artist. Adding more details to your drawing is what will set it apart from other boring police helicopter drawings.
Step 9: Add Some Background
To indicate that our police helicopter is up in the air, we are going to add some clouds. This is very easy. Simply use several shapes that look like clouds.
That is not the only thing you can do to your drawing. If you want, you can add more details such as a road below the helicopter, some tiny buildings along the road, and some hills. You can also add some stars on either side of the word ‘Police’ that we added earlier. You are only limited by your imagination.
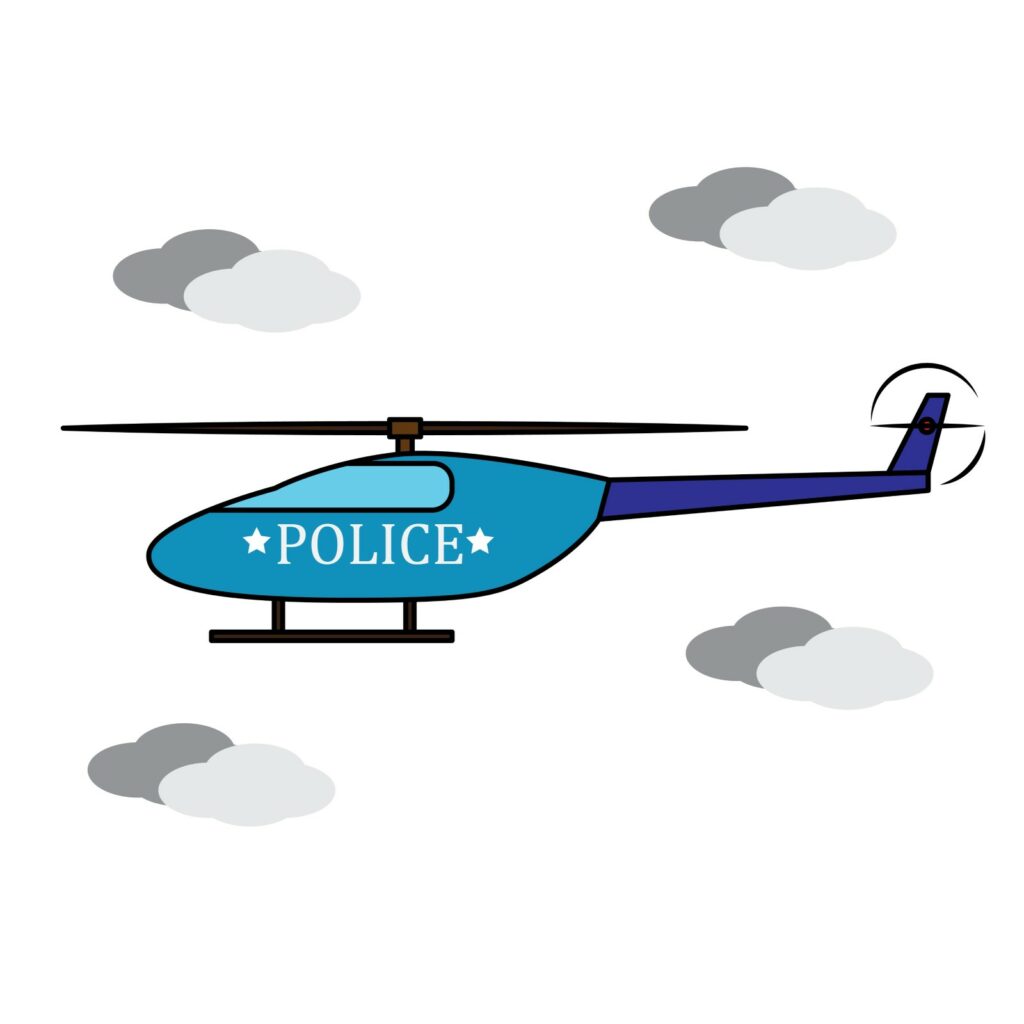
Step 10: Color the Drawing
The final step is all about adding color to your police helicopter. Take out your coloring supplies and show us how good you are at coloring. Here is what we did to our drawing.
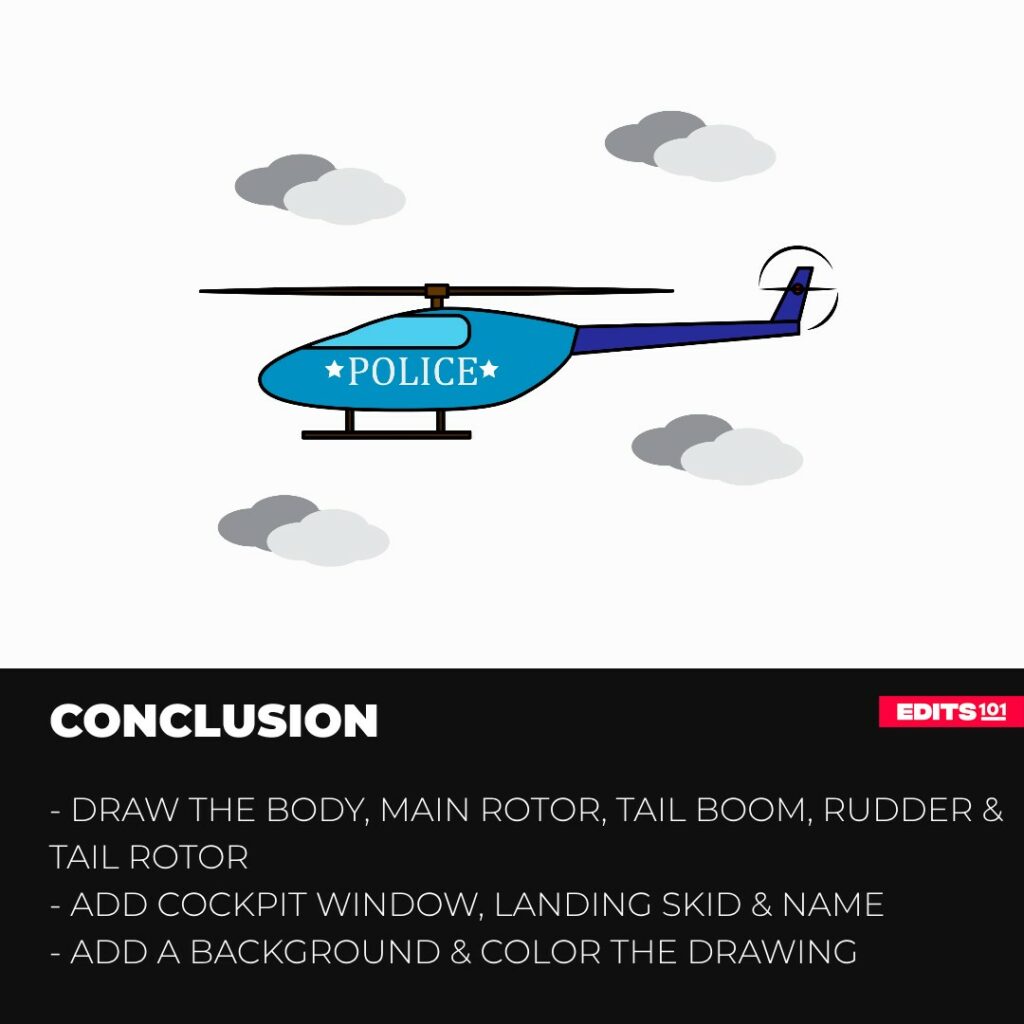
Conclusion
Completing a police helicopter drawing is very easy. In our lesson, we started by using an oval shape to add the main body of the helicopter. We then added the main rotter, the tail boom, the rudder, the tail rotor, the cockpit window, and then the landing skid. We advanced our drawing by writing the name police on the side then added some clouds and colored the drawing.
Hopefully, you had as much fun as we did drawing a police helicopter. Keep in mind that it is only with practice that you will become a better artist. See you in the next lesson.
Author Rating
Overall Rating
Summary
Learn how to draw a police helicopter the easy way. This guide is for kids who want to become good artists.
Useful Links
Thanks for reading & feel free to check out more of our articles!