How To Draw An RV Camper | A Step By Step Guide
Hello artists and adventurers! It’s time to go on an adventure. This journey will offer you some new and exciting things.
Do you know that RV stands for “recreational vehicle“? The name itself explains the purpose of this camper. It’s solely made for adventures. These campers offer cozy spaces for people to live in while on an adventure. It won’t be wrong to say that an RV camper is like a moving house. It provides all the basic facilities needed for daily life.
What you will need
- A pencil
- An eraser
- A sheet of paper
- Coloring kit
- Ruler
- 30 minutes
How to Draw an RV Camper
Today, we’ll learn how to draw an RV camper by following simple steps in this guide. This guide aims to assist you in drawing. So buckle up!

Step 1: Draw the camper’s body
The camper’s body is a big structure that contains all the stuff inside it. The body has a living space inside, just like a vintage car, it where people can rest and live.
To draw the camper’s body, we will draw a horizontal rectangle on the right side of the body. We will draw two straight horizontal lines parallel to each other. Then, we’ll connect them by drawing straight lines. Since the body of the camper is big, we’ll draw a rectangle that provides enough space for living.

Step 2: Draw the camper head
The camper’s head is also known as the cabin of the camper. The driver sits in this cabin and drives the RV camper.
To draw the head, we need to draw a rectangular structure. First of all, we’ll draw a horizontal straight line starting from the bottom left corner of the camper’s body.
At the point where this horizontal line ends, we will draw a straight vertical line half the length of the horizontal line. Now, we’ll draw two angled lines, as shown in the image, and connect them with the camper’s body with a horizontal line. The camper’s head is ready.
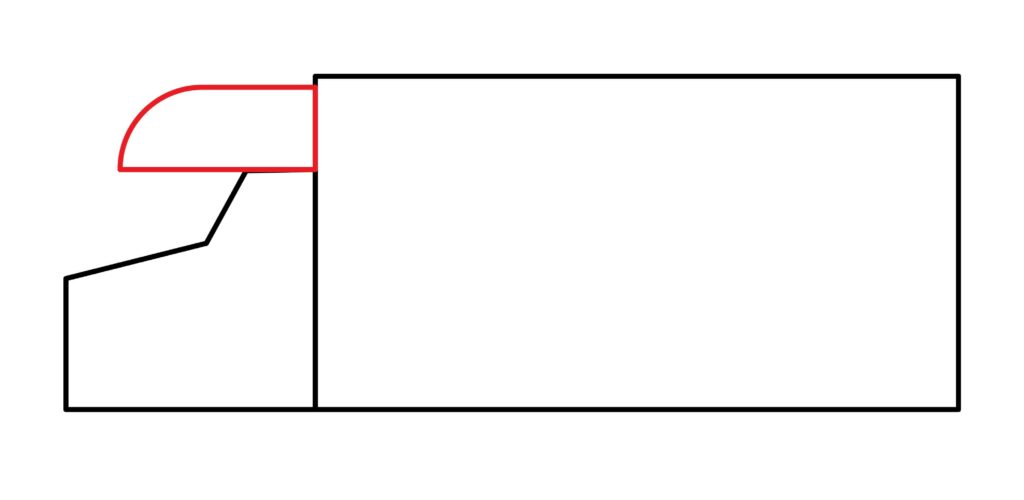
Step 3: Draw the head roof
The head roof protects the camper’s head from intense sunlight. To make the head roof, we’ll draw a horizontal rectangle on top of the camper’s head.
Now, we’ll erase the left vertical line of the rectangle and replace it with a curved line. This makes the top right corner of the rectangle slightly curved.

Step 4: Draw the wheels
The wheels are the most important component of any vehicle. Like the other vehicles, RV campers have front and back wheels just like a trolley bus. In total, there are six wheels: two front wheels and four back wheels. Since we’re drawing a side view of the camper, we’ll draw only three wheels.
To draw the front wheel, we’ll draw a small circle on the baseline of the camper’s head. Around this circle, we’ll draw another circle that encloses it. The first circle represents the rim, and the second represents the wheel. We’ll use any round lid to make the circle. If we don’t have the round lid, we’ll use the freehand technique to make the circle. The front wheel is ready.
We’ll repeat the same procedure to make the two back wheels. These wheels are located under the camper’s body. Finally, we’ll erase any line overlapping the wheels.

Step 5: Draw the door and the windows
There’s no point in having an RV if one cannot enjoy the scenic views from inside of the camper. The camper has windows for the people to enjoy the aesthetic views while lying inside the camper.
First, we’ll draw the door. We’ll draw a vertical rectangle on the camper’s body across its entire length. This rectangle represents the door.
To draw the windows, we’ll draw four small-sized rectangles slightly above the camper’s body, as shown in the image.

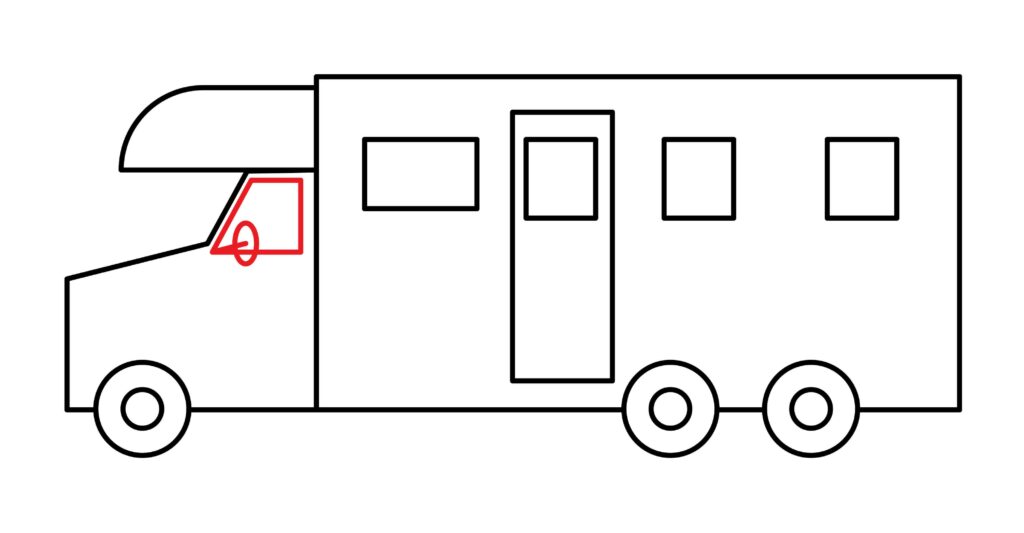
Step 6: Draw the front window
On other vehicles, the front window is present on the side door of the cabin. In the case of an RV, there’s no front door. There’s only a window on the side of the cabin.
To draw the front window, we’ll draw a rectangle on the top corner of the camper’s head. Then, we’ll erase the left vertical line of the rectangle and draw a slanted vertical line. The rectangle represents the front window, just like the car we drew earlier.
On the bottom left corner of the window, we’ll draw a small line inside the window. At the end of this line, we’ll draw a tiny oval. This oval represents the side mirror.
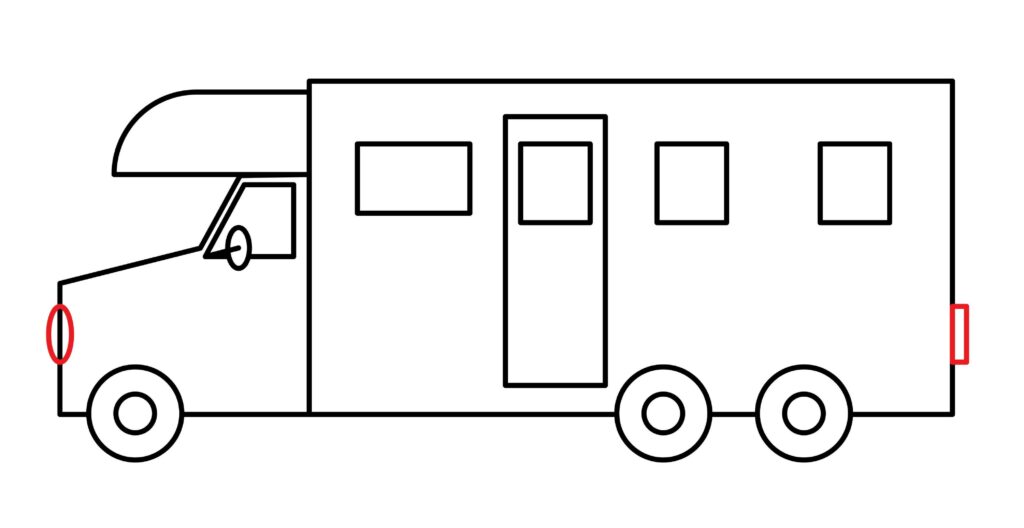
Step 7: Draw the lights
Adventures never stop. Whether it’s day or night, an RV is always on the mission. Lights are important if you’re driving an RV during nighttime.
To draw the front light, we’ll draw a vertical oval on the front side of the camper’s head. This front light will light our way during the dark.
To draw the backlights, we’ll draw a small vertical rectangle at the back side of the camper’s body. The backlights are the safety lights for the other vehicles to notice if there’s any other vehicle in front of them.
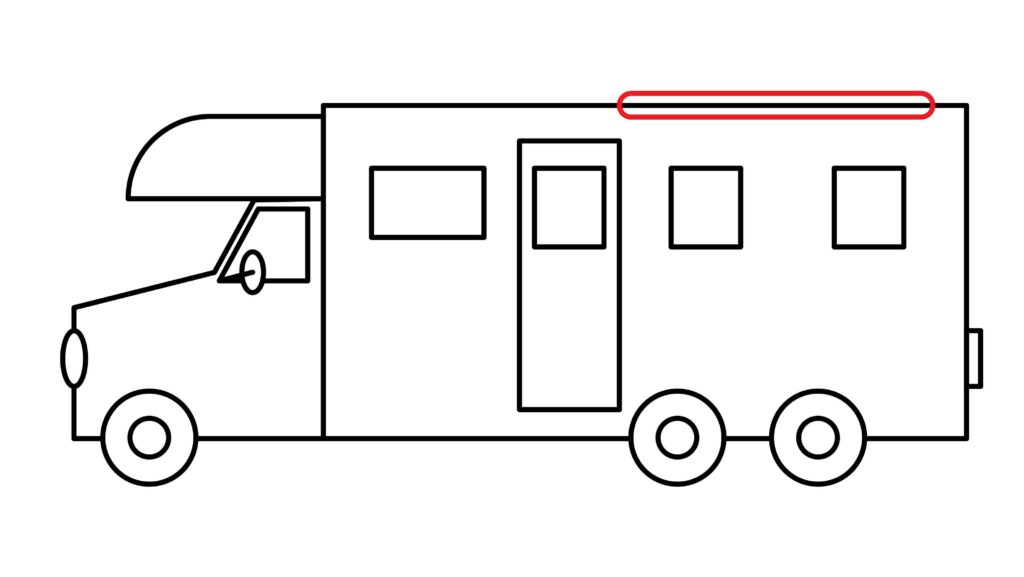
Step 8: Draw the outer shelter
To draw the outer shelter, we’ll draw a narrow horizontal rectangle on top of the camper’s body. This rectangle covers half of the camper’s body from the above. After making the rectangle, we’ll erase the vertices and make curves. This adds an artistic touch to our drawing.
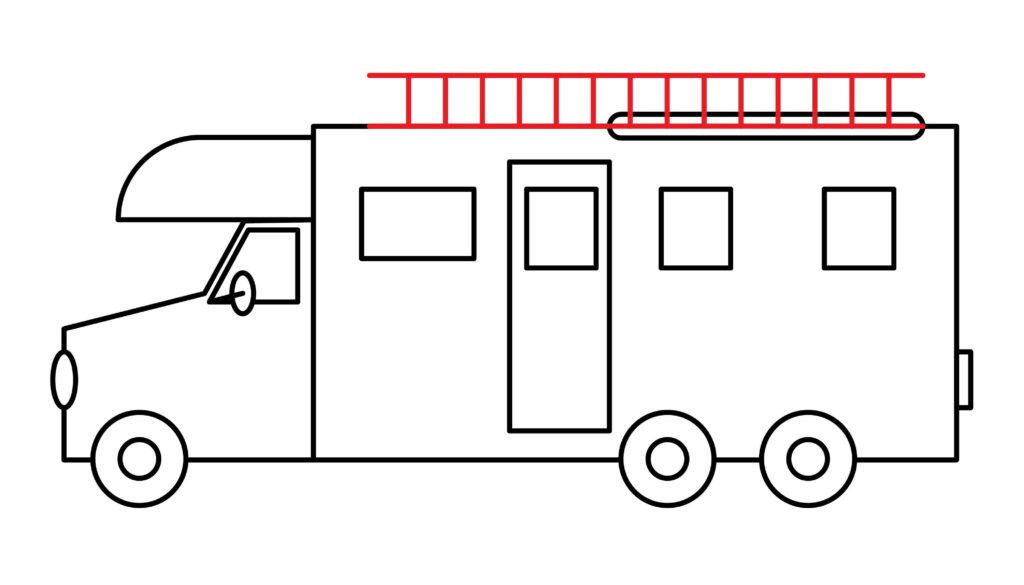
Step 9: Draw a convertible stair
An RV camper has an outer shelter that is present on top of its body. But how to access this shelter? Convertible stairs are present on top of the camper’s body to access this shelter.
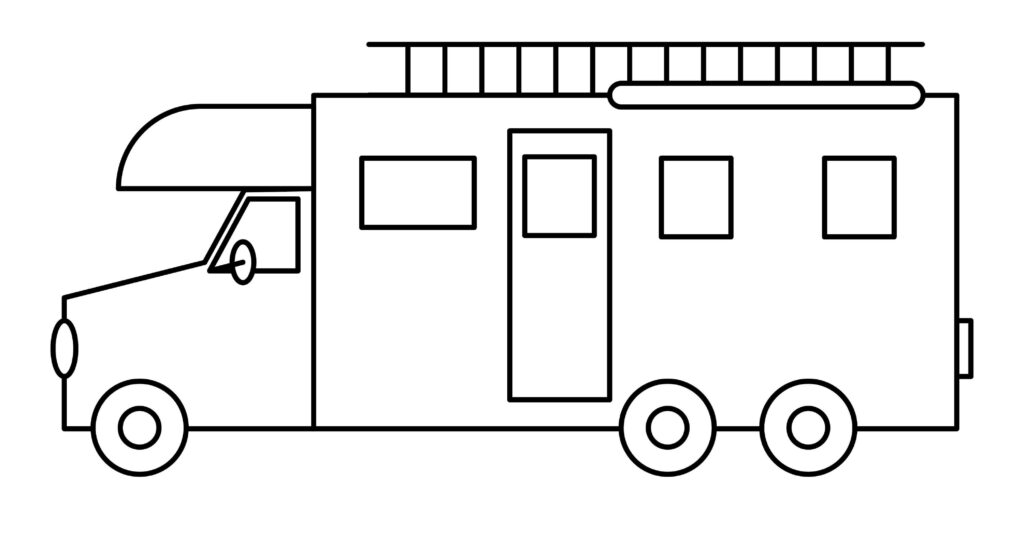
To draw these stairs, we’ll draw two horizontal lines across the length of the camper’s body. These lines are of the same length and parallel to each other. After that, we’ll draw small vertical lines to connect the horizontal lines. We’ll make sure no line bisects another line. In case it does, erase it and draw it again, as shown in the image.
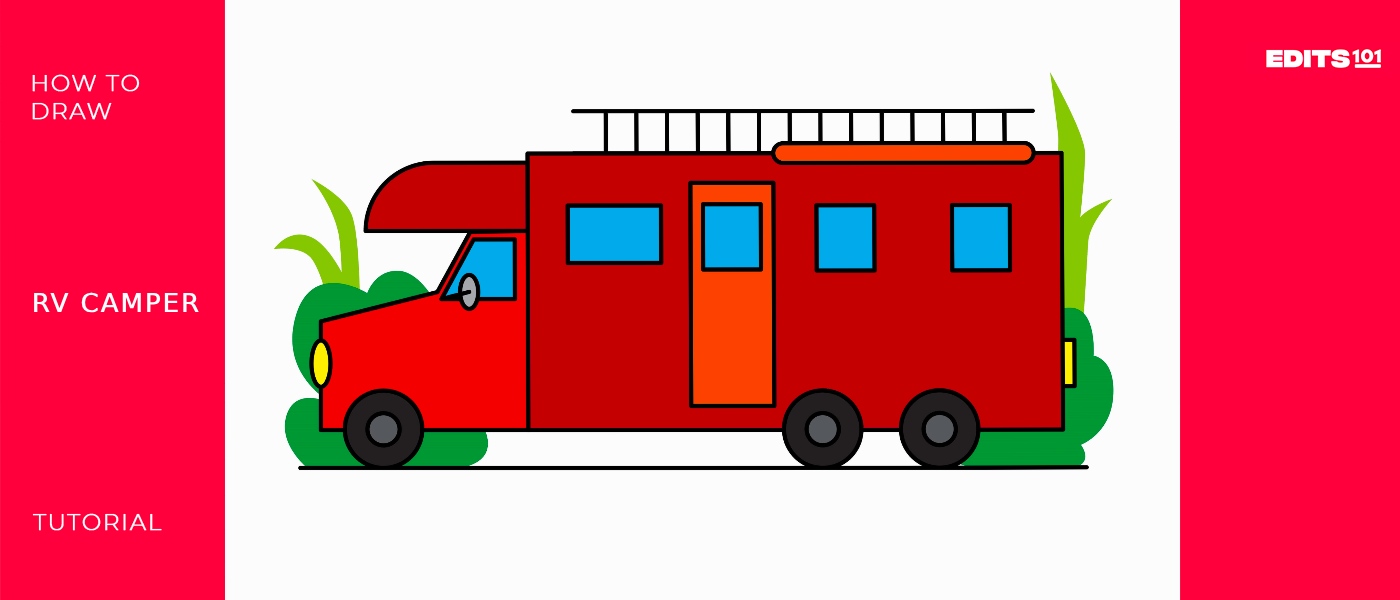
Step 10: The RV camper is ready
Yayyyy! Our RV camper is ready for the adventures. You’ve done an incredible job. You’ve shown your talent and made an amazing drawing.
Good news for you! The real fun is about to begin. Yes! Now, we’ll experiment with our drawing with different ideas and make it look catchy.
Taking your RV Camper drawing to the next level
Art has no limits. It can be as magnificent as we want it to be. Why not make our drawing more attractive? But how to do it? Don’t scratch your head! We’re here to assist you.
We can add a beautiful background to our drawing and color it. This will make our drawing stand out.
As of now, our drawing is completely okay. But it’s always a good idea to make it more comprehensive and attractive.
Adding background to your drawing
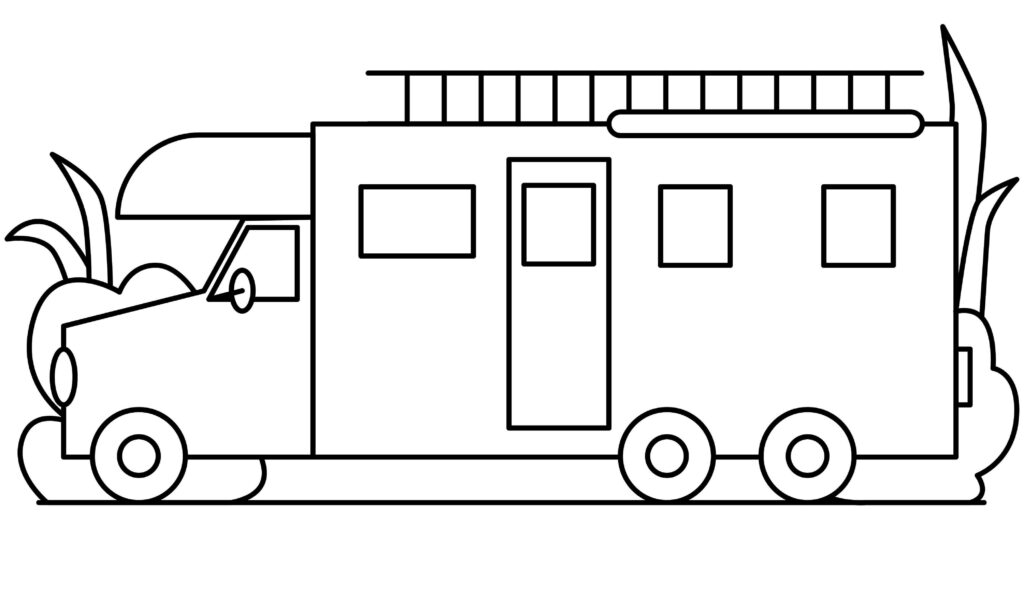
A background is the missing piece of the drawing. Without a background, our drawing has no story to tell. Viewers won’t get any idea about the subject in the drawing. That is why it is really important to add a background.
You can add any type of background to your drawing. It is all dependent on your imagination and creativity.
As an RV is made for adventures, we’ll add some trees and bushes as our background to give the indication that our RV is hitting the road.
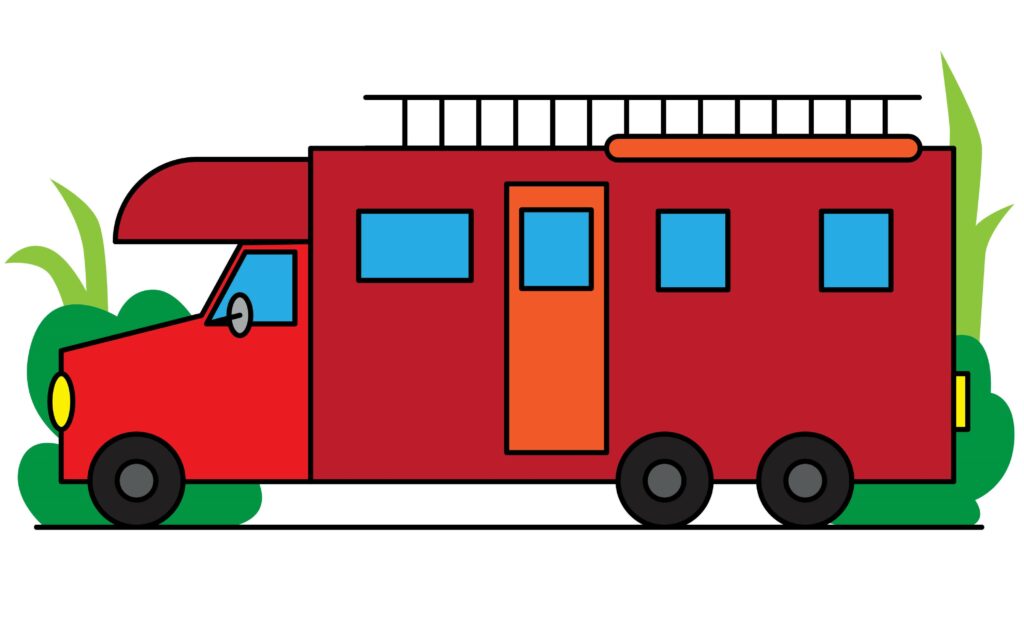
Adding colors to your drawing
Have you ever imagined a world without colors? That seems odd and unattractive. As we are surrounded by colors, we want our drawing to be full of beautiful colors as well. Coloring is a fun way to let out your inner imagination onto a page.
Unleash your artist and color your drawing to give it a meaningful look. You can color the way you want. You can use poster colors, crayons, or pencil colors. It’s all up to your preference.
The secret sauce to an attractive drawing is the neatness and tidiness in it. So make sure you color it beautifully.
P.S Bonus Tips
That’s not it! There’s a sea of ideas for you to explore. Dive deep into this sea and get yourself equipped with sparkling ideas. Apply these ideas to your drawing, and we’re certain that you’ll be shocked by the results.
We’ll give you a few ideas that you can implement. You can add your name to the camper’s body to flaunt your ownership. Write your name with beautiful handwriting and fill it with beautiful colors. You can draw a road underneath the camper or a rocky surface. You can also do modifications in the background by adding stars or sun.
And the ideas go on. Experiment with your drawing with multiple ideas and get the best results.
Conclusion
Drawing is all about having fun. We’re confident you enjoyed the process of drawing an RV camper. In this step, we drew the camper’s body as the first step. Then, we drew the camper’s head. After that, we added the head roof and the wheels. The next step was installing the doors, windows, and lights. When we were done with the lights, we made the outer shelter and convertible stairs. Finally, we upgraded our drawing to give it an exclusive look.
Remember, drawing is a continuous process and requires practice. If you don’t get the desired results on the first try, try again without getting upset. The more you practice, the better you’ll get.

Thanks for reading & feel free to check out more of our articles!
Author Rating
Overall Rating
Summary
this guide explains how to draw an RV camper.