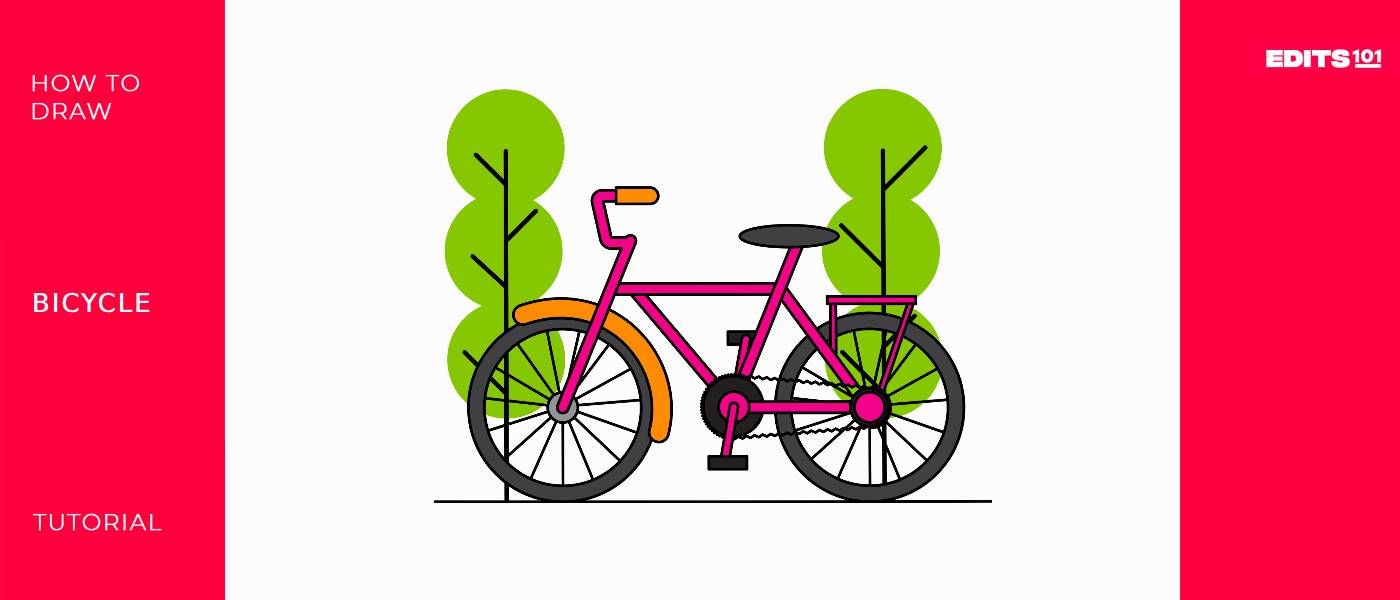
How to Draw a Bicycle | Step-by-Step Guide
We’re back with another fun, informative and easy tutorial on how to draw a bicycle for both young and seasoned artists alike!
You may or may not be wondering, why a bicycle? Well, drawing a bike is not only an enjoyable way to pass the time, but it’s also a great activity for both kids and adults as it stimulates creativity, improves focus, concentration, and fine motor skills.
Before we go any further, let’s take a closer look at what a bicycle is:
A bike is a human-powered vehicle that typically has two wheels and is propelled by pedaling. It consists of a frame, handlebars, pedals, gears, and brakes and are commonly used for transportation, exercise, recreation, and sport.
| Steps | Complexity Table |
| The Wheels | 2 |
| The Handlebar and Handle | 3 |
| The Front Frame | 3 |
| The Back Frame | 4 |
| The Fender and Carrier | 3 |
| The Chain Wheel and Chain | 3 |
| The Pedals | 1 |
| The Seat | 1 |
What you will need
- A4 sheet of paper
- Pencils (2b, 3b or 5b)
- An eraser
- A ruler (optional)
- Color supplies
- 35-40 minutes
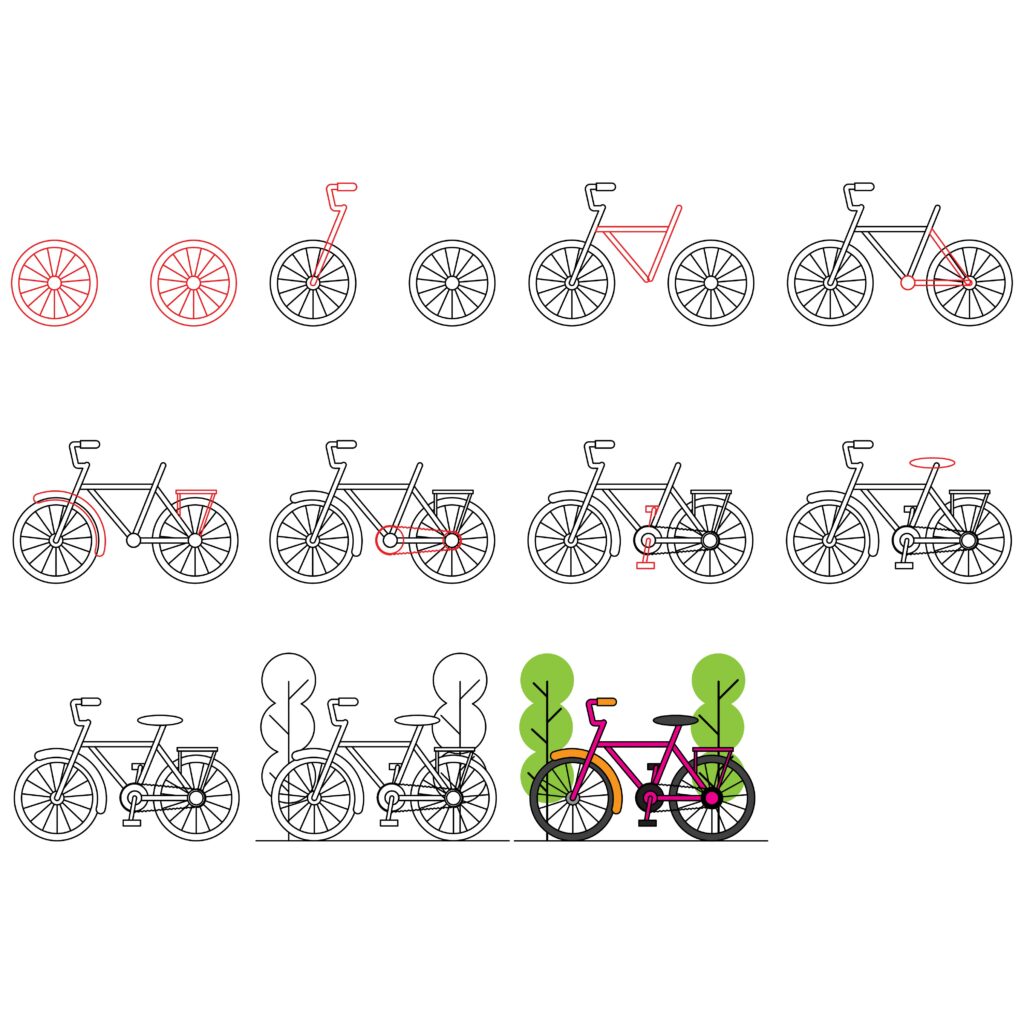
How to Draw a Bicycle in 10 Steps
Make sure you’ve got everything you need to draw the perfect bike! Take your time and go over the outline below so you’re up to speed on everything before getting started with the steps.
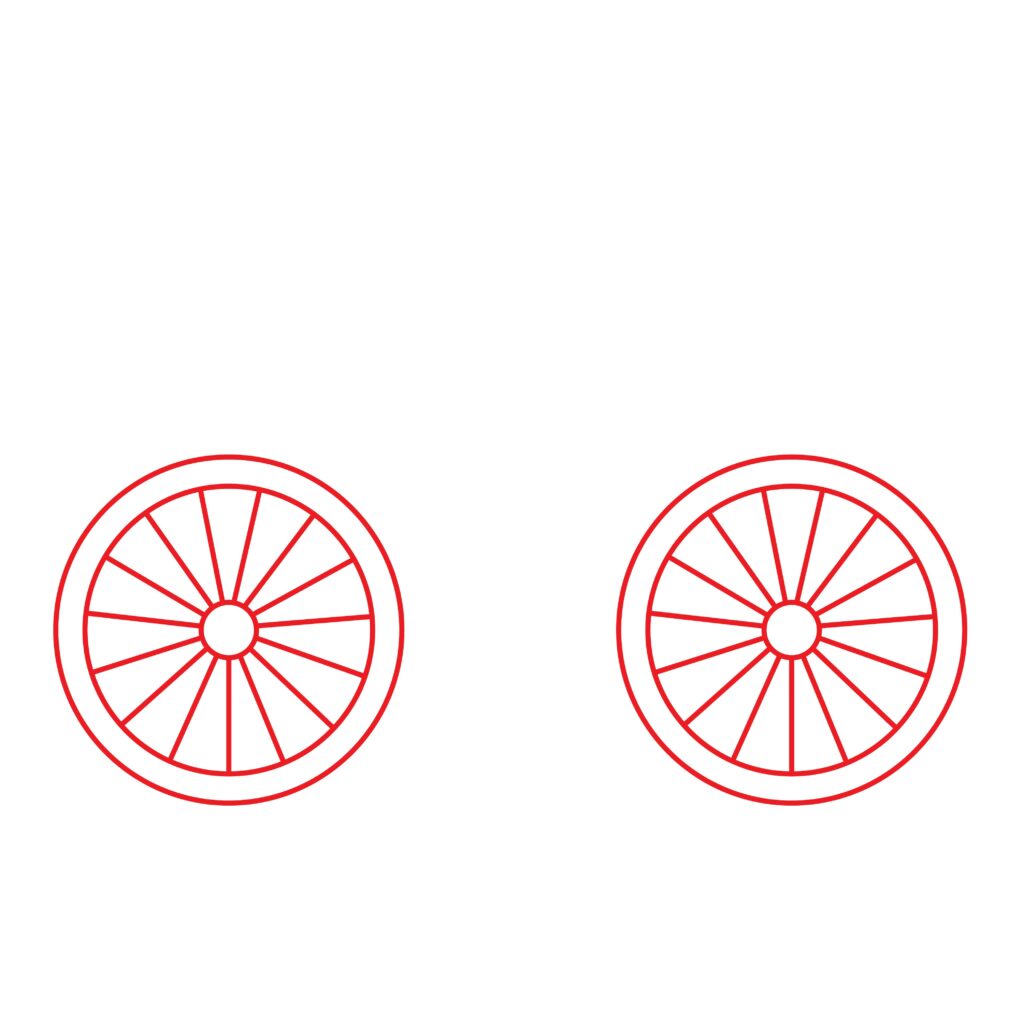
Step 1: Draw The Wheels
Start by drawing two big circles next to each other on the bottom half of your page. You can use a compass or anything with a circular surface, like a bottle cap or plastic cup to trace smooth circles.
Inside the big circles, draw a smaller circle. Then draw a very small circle in the center of each “wheel”. When you’re done, fill in the space in the middle of the wheels by drawing diagonal lines that will resemble the spokes.
- Draw two large outer circles for the wheels
- Add two smaller concentric circles inside each wheel
- Draw spokes connecting the inner circles to the outer circles
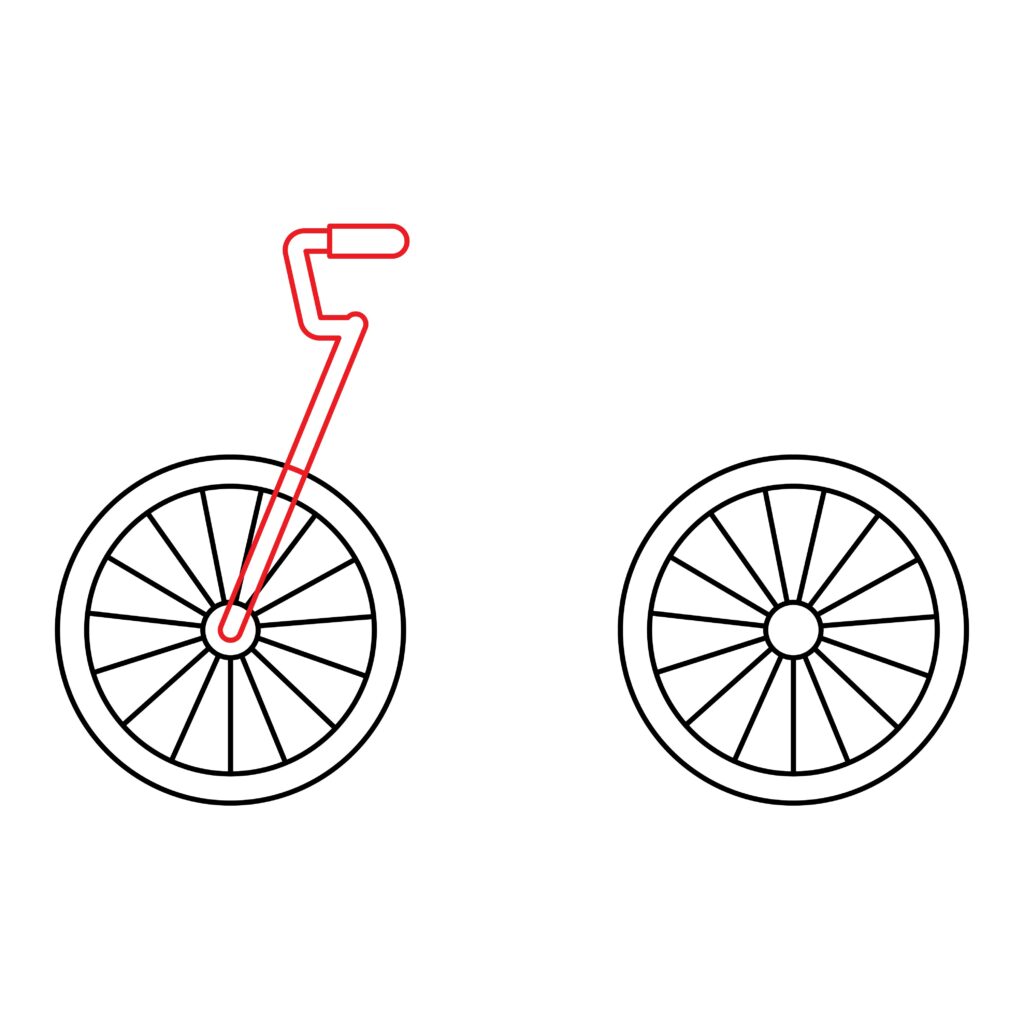
Step 2: Draw the Handlebar and Handle
Starting from the center of the first wheel, draw a diagonal rectangle extending upward. Curve the rectangle outwards and then inwards again, and add a slightly bigger rectangle for the handle.
- Draw a diagonal rectangle upward from the center of the first wheel
- Curve the rectangle outwards and then inwards along the top
- Add a small rectangle to the top to resemble the handle
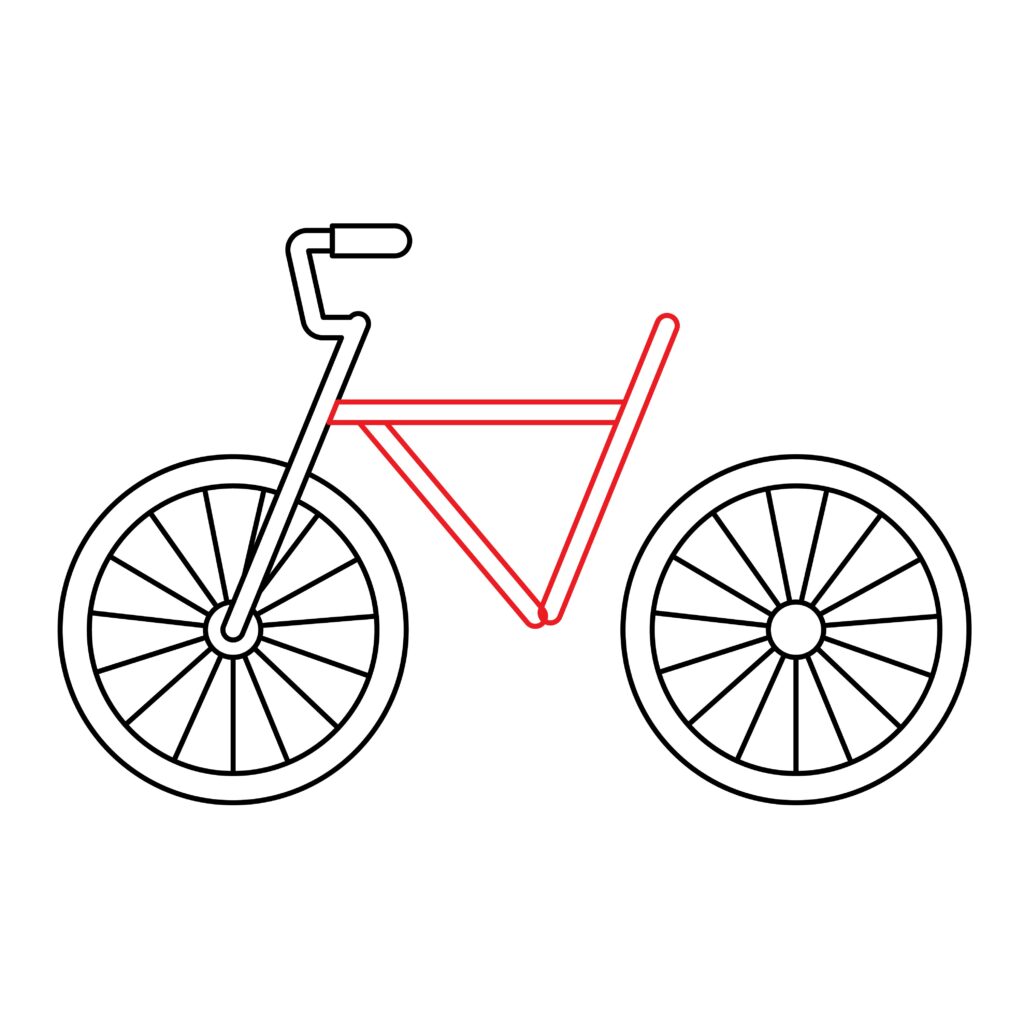
Step 3: Draw the Front Frame
Start by drawing a horizontal rectangle extending from the top right side of the handlebar, and draw two angled rectangles beneath and to the side.
Make sure the lines connect seamlessly with the handlebar and the front wheel. If necessary, grab your ruler for some neat lines.
- Draw a horizontal rectangle from the top of the handlebar
- Add angled rectangles below the horizontal rectangle
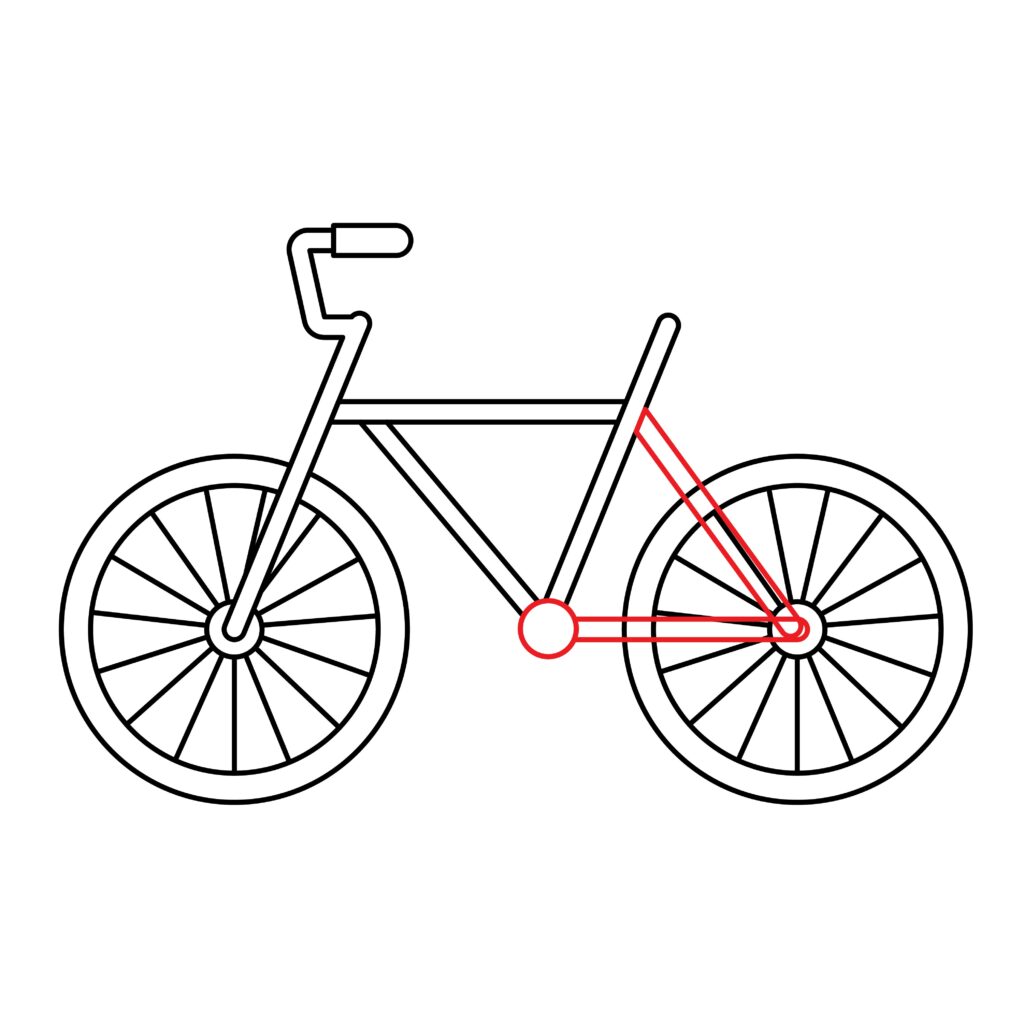
Step 4: Draw the Back frame
First, draw a small circle on the point where the two angled rectangles connect. Then draw a horizontal rectangle from the circle and connect it to the inner circle of the back wheel. Erase any spokes or lines visible within the rectangle.
Lastly, draw a diagonal rectangle from the inner circle of the back wheel that extends upward towards the another similar angled line reaching the back wheel.
- Draw a small circle at the bike frame’s center point
- Connect this circle with angled lines to the back wheel
- Make sure the button line touches the top of the back wheel
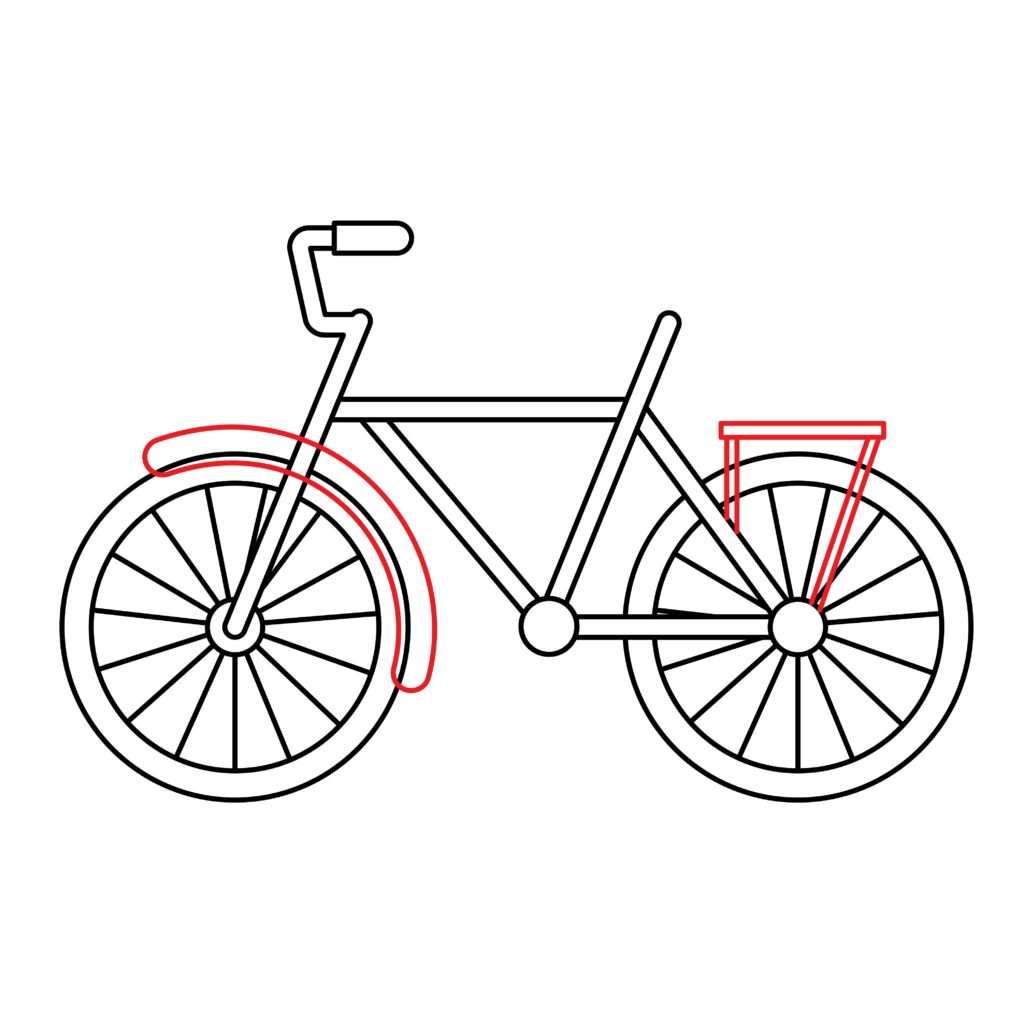
Step 5: Draw the Fender and Carrier
Above the front wheel, draw a smoothly curved rectangular shape following the wheel’s curve to create the fender.
Draw a horizontal rectangle sitting on the back wheel for the carrier. This is like a seat to carry things ranging from backpacks, boxes and even a person.
- Draw a curved line over the front wheel for the fender
- Draw a rectangle above the back wheel for the carrier
- Draw two more lines from the carrier down to the wheels for support
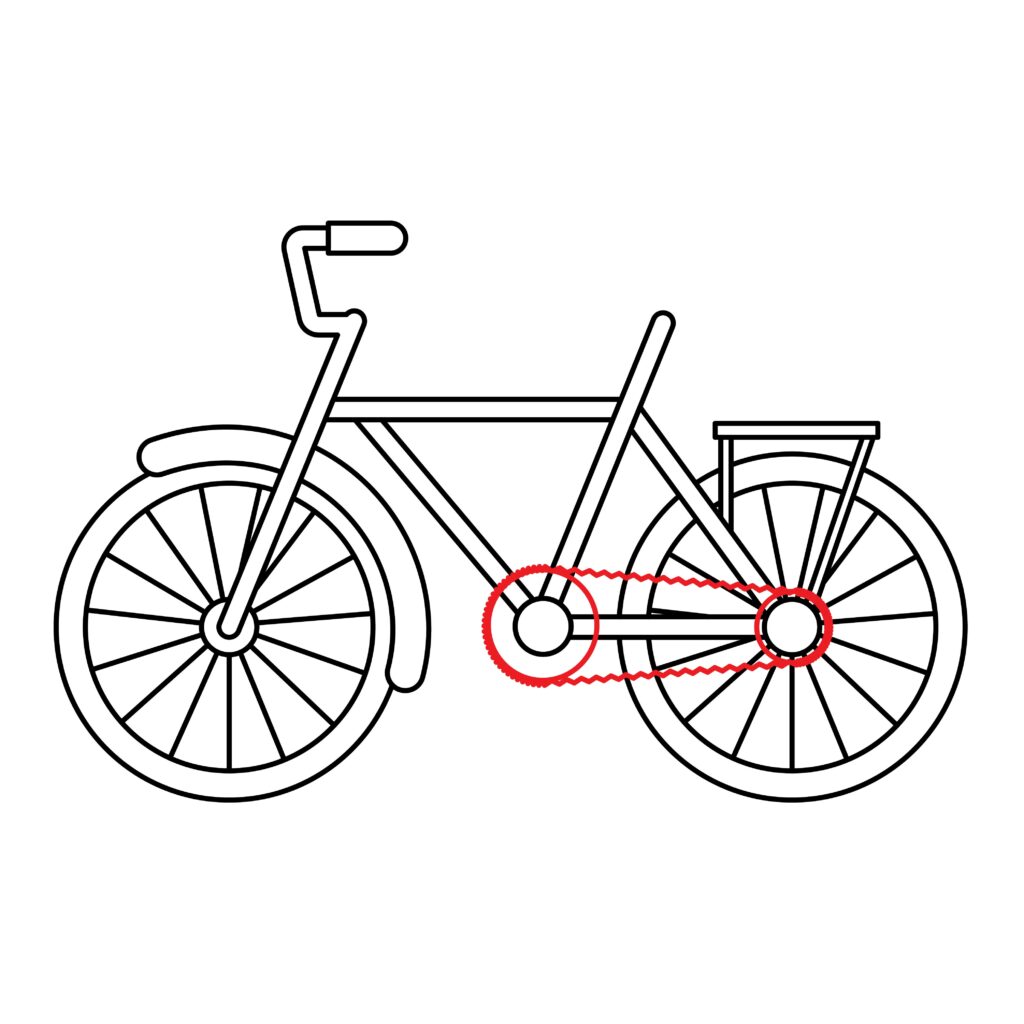
Step 6: Draw a Chain Wheel and Chain
Draw a medium-sized circle around the circle you drew in step four for the chain wheel. Then, draw another circle around the center circle of the back wheel.
Create a realistic depiction of a chain by drawing a zigzag line that wraps around both circles and connects together perfectly.
- Draw a medium-sized circle below the seat tube for the chain wheel
- Draw another circle around the center circle of the back wheel
- Draw a zigzag line connecting the chain wheel to the back wheel
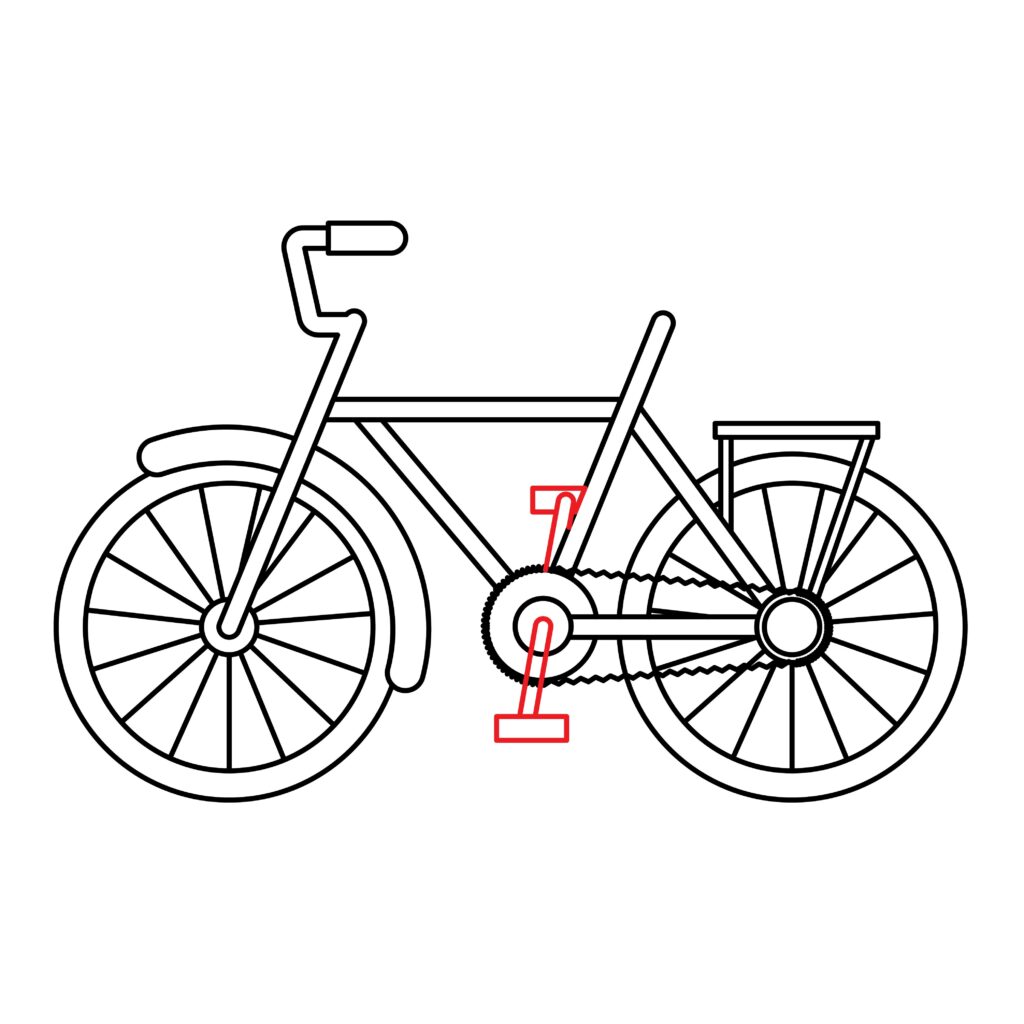
Step 7: Draw the Pedals
Draw a diagonal rectangle that seemingly goes through the center chain wheel. Pay attention to proportions and dimensions as you draw.
Finally, add a small horizontal rectangle against both ends of the diagonal one to resemble life-like pedals.
- Draw a thin diagonal rectangle extending down from the center chain wheel
- Draw a thin diagonal rectangle extending up from the center chain wheel
- Add small rectangles at the ends of these rectangles for the pedals
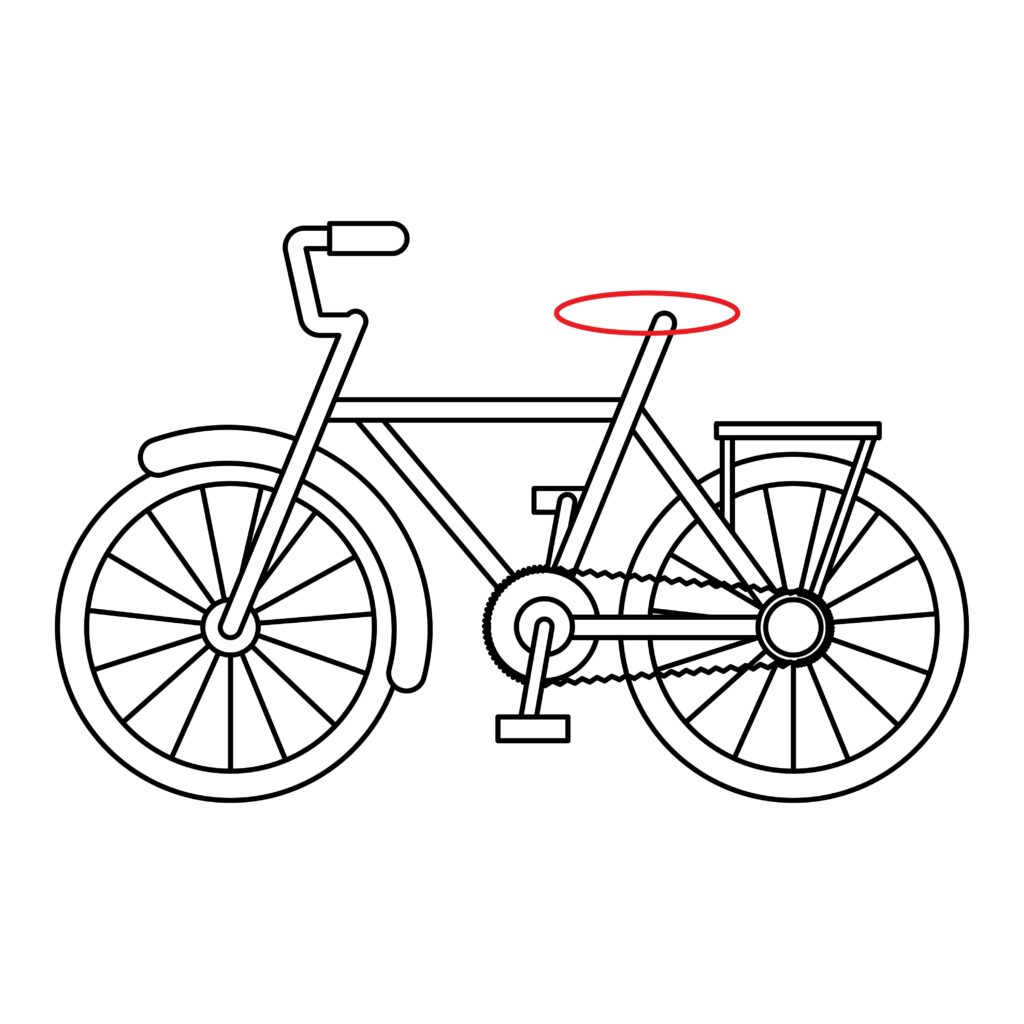
Step 8: Draw The Seat
Draw a horizontal oval above the part of the back frame that points upward. Make sure it’s nice and big to represent a realistic seat for a driver to sit on.
- Sketch a horizontal oval above the seat tube for the saddle
- Draw the saddle at the center of the bike frame
- Select the correct height and size for the saddle
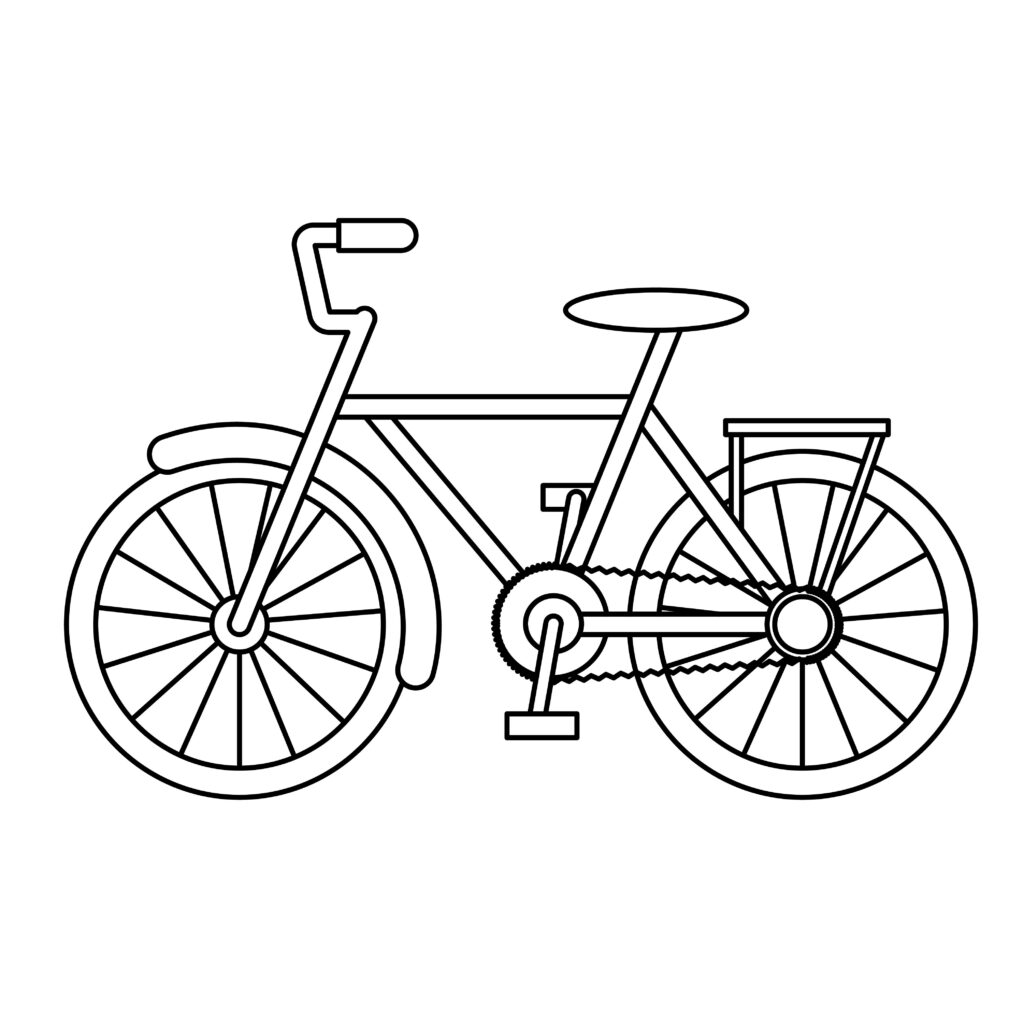
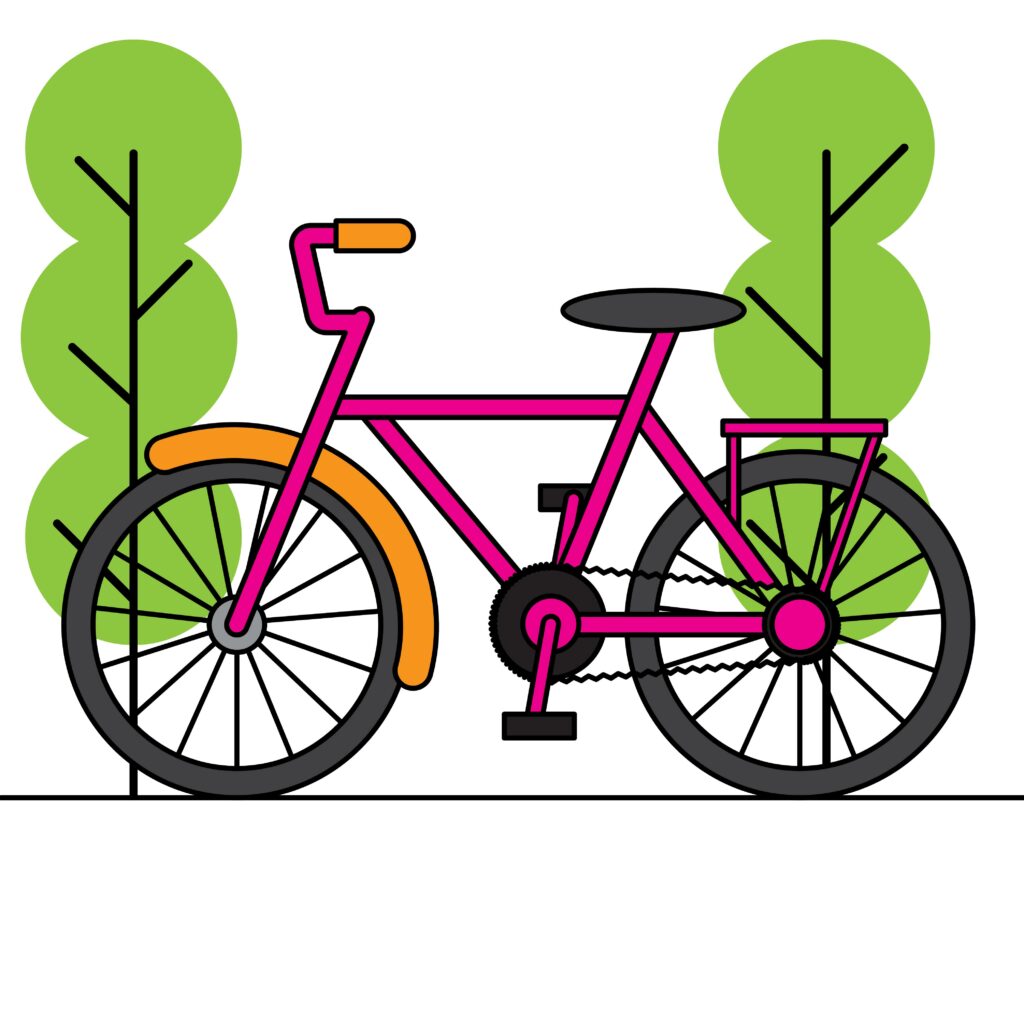
Congratulations! your bicycle drawing is complete
So what do you think? Is a bike easy to draw or is it a bit difficult? Don’t forget to run your eyes over your drawing and fix anything that may require some tweaks.
Perhaps you noticed that we only covered eight steps while mentioning ten in the beginning of this lesson. That’s because we’re not exactly done yet.
Taking your drawing to the next level
If you’re asking yourself something like; “What? It’s not over yet?” I want to let you know that I completely understand. You’ve just done all that work to find out you still got more to do.
That’s why here at Edits101, we always leave the choice up to our students. You can go ahead and call it a day. After all, you drew a bicycle! Not a stick-figure bike, but a fender-plus-carrier wielding bicycle. That’s some great work right there.
Before you drop the pencils though, scroll all the way down to the bottom of the lesson and check out the final image. Compare that with what you’ve already completed, and ask yourself which one you’d proudly call yours.
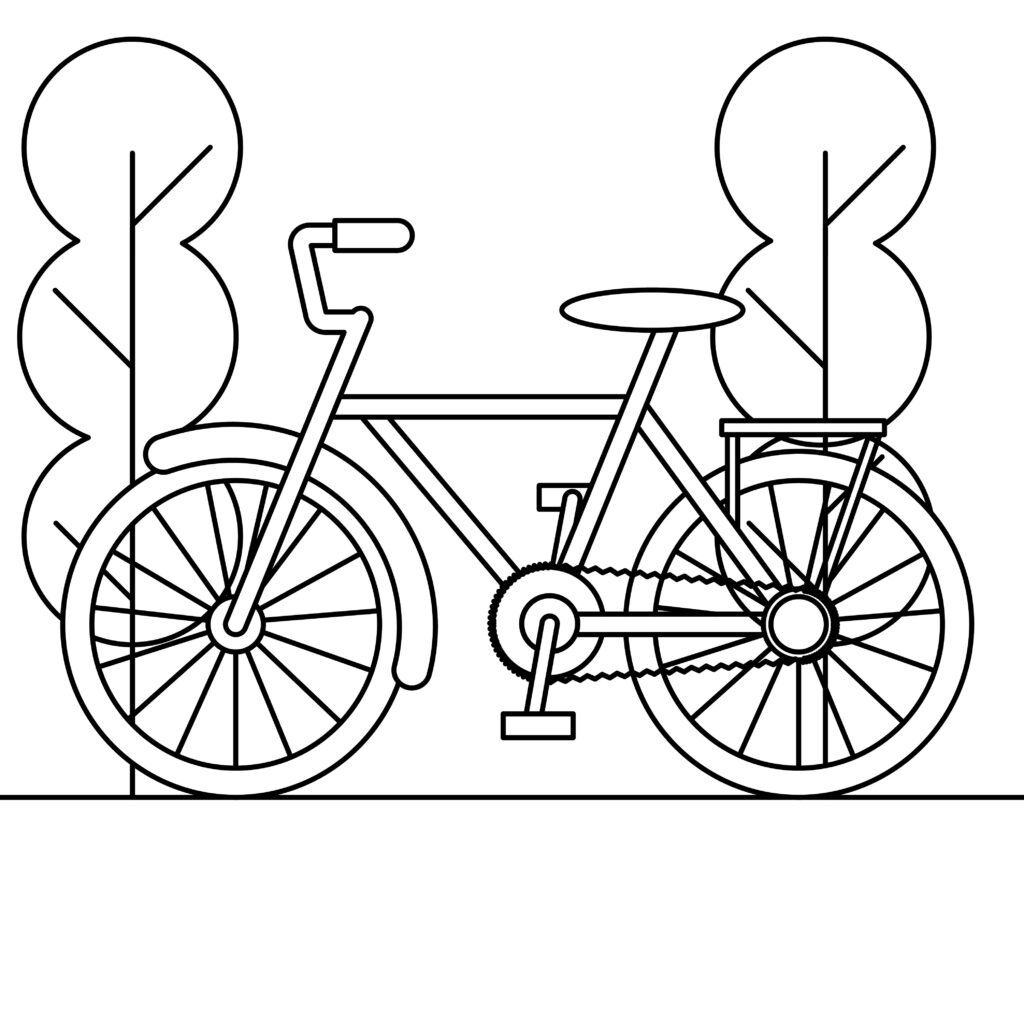
Step 9: Adding a background
Draw a line beneath your bicycle to indicate a road. Once you’ve completed that, you can add a few trees in the background, a building, or other vehicles like cars, trucks and trains to represent a busy city landscape.
You can even add a person driving your bike. If you need a few tips on how to get the proportions right, head on over to this tutorial for some insights!
Step 10: Adding Colors
At last, it’s time for the most exciting part—colors! Think about what colors make you happy. Your bike can be a fiery red or a calm blue. Or perhaps a rainbow of colors!
The trick is to begin coloring the frame of your bicycle, then the wheels and spokes. Don’t forget to choose colors for the seat, handles, and pedals that complement your bike frame. Color your background with care. The colors should make your bike pop, not overshadow it.
Bonus Tips
Use different pencil grades for shading and adding detail to your bicycle drawing.
Interact with people on visual learning platforms or YouTube pages who have similar interests to gain a sense of community or some extra knowledge.
Add your name to the page to showcase your work.
Add some distinctive features of a bicycle like brakes and gear sticks on the handlebar.
Conclusion
And there you go. Beginning with the wheels, you drew circles and spokes to form the foundation. The handlebar and seat gave the bicycle a structure, while the front and back frames connected these elements together.
Details like the chain wheel and pedals were drawn for functionality. A background and colors were then applied to bring your bicycle drawing to life, completing a vibrant drawing ready to show off to others!

Thanks for reading & feel free to check out more of our articles!
Author Rating
Overall Rating
Summary
This tutorial teaches young kids and older artists how to draw a detailed bicycle in 10 steps!