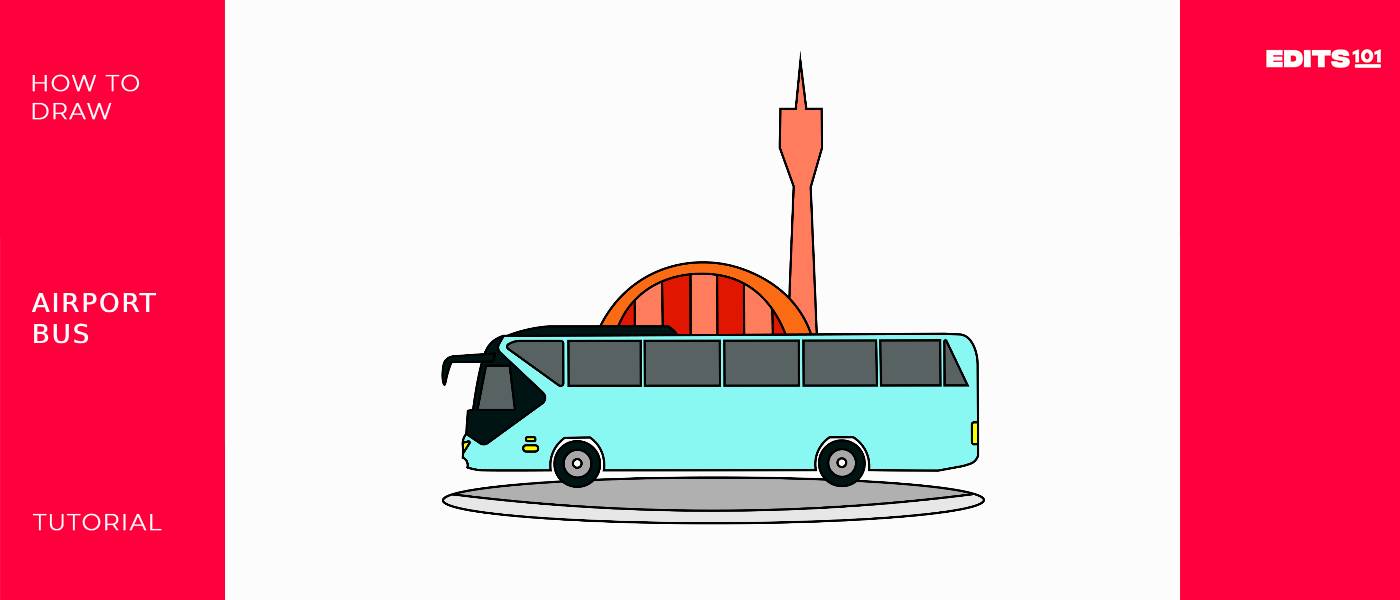
How to Draw an Airport Bus | In 7 Easy Steps
Have you ever wondered how people get to an airplane from an airport terminal? Or how people without their own vehicles manage to travel to their nearest airports or hotels after getting off a plane? Don’t worry, we have too.
After scouring the internet – as you naturally do when curious – we’ve managed to figure it out, and the answer is – drumroll please…airport shuttles. Or simply put, an airport bus.
An airport bus is a convenient and cost-effective mode of transportation that transports passengers between an airport and various locations such as hotels, city centers, or other designated spots.
If you enjoy drawing large things, or vehicles in general, this is the perfect drawing project to add to your collection!
| Steps | Complexity Level |
| The Body of the Bus | 2 |
| The Fender Mirrors & Vents | 2 |
| The Wheels | 1 |
| The Windows | 1 |
| The Lights | 2 |
What You Will Need
- A4 sheet of paper
- Pencils (2b, 3b or 5b)
- An eraser
- A ruler (optional)
- 30-35 minutes
How to Draw an Airport Bus
Make sure you have all the required drawing materials and that you check out the outline below to envision each step you will need to complete.
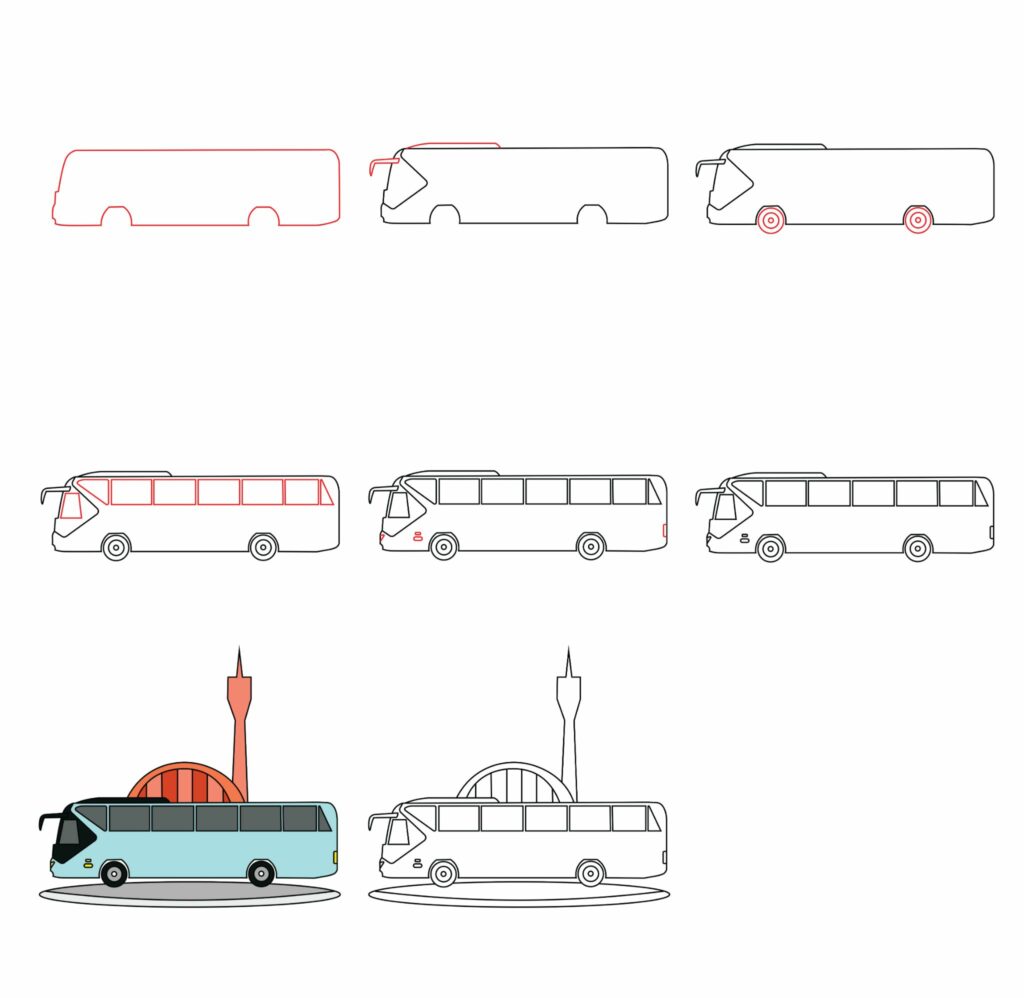
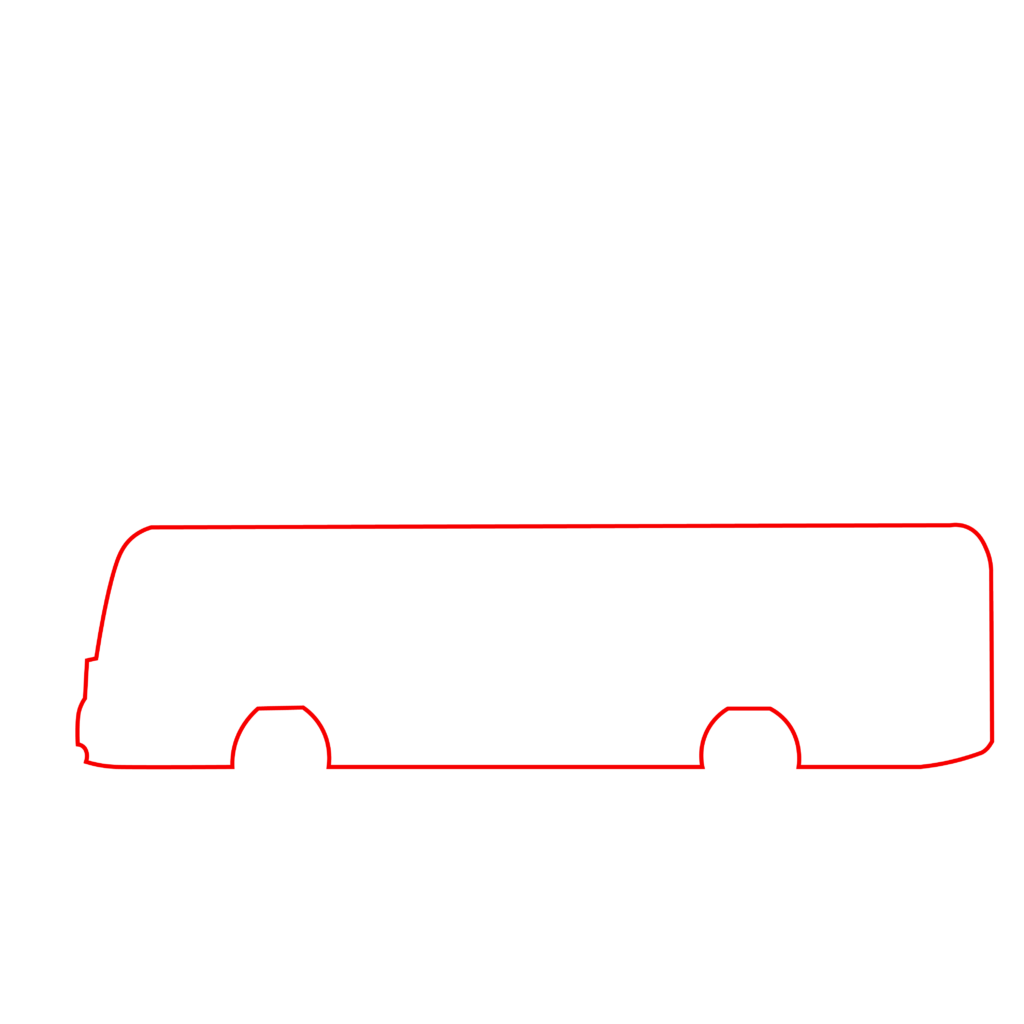
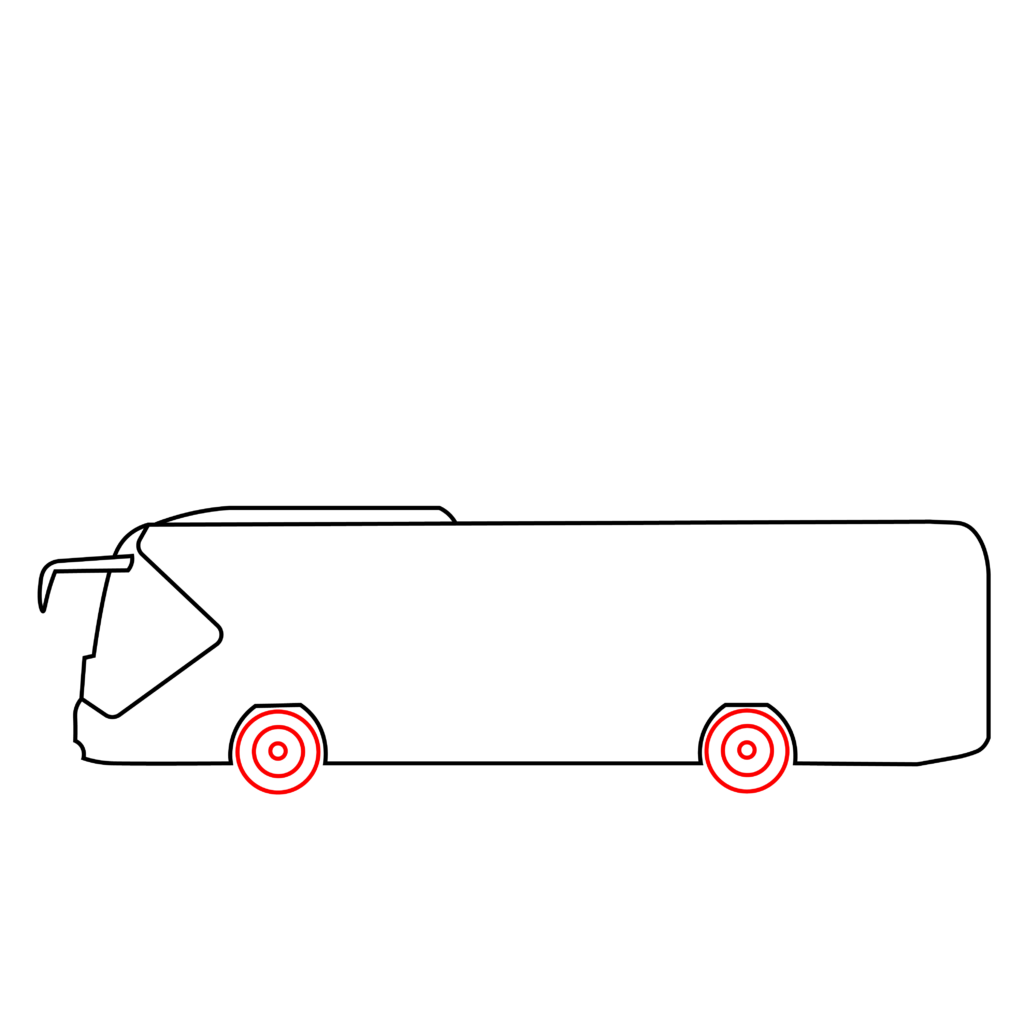
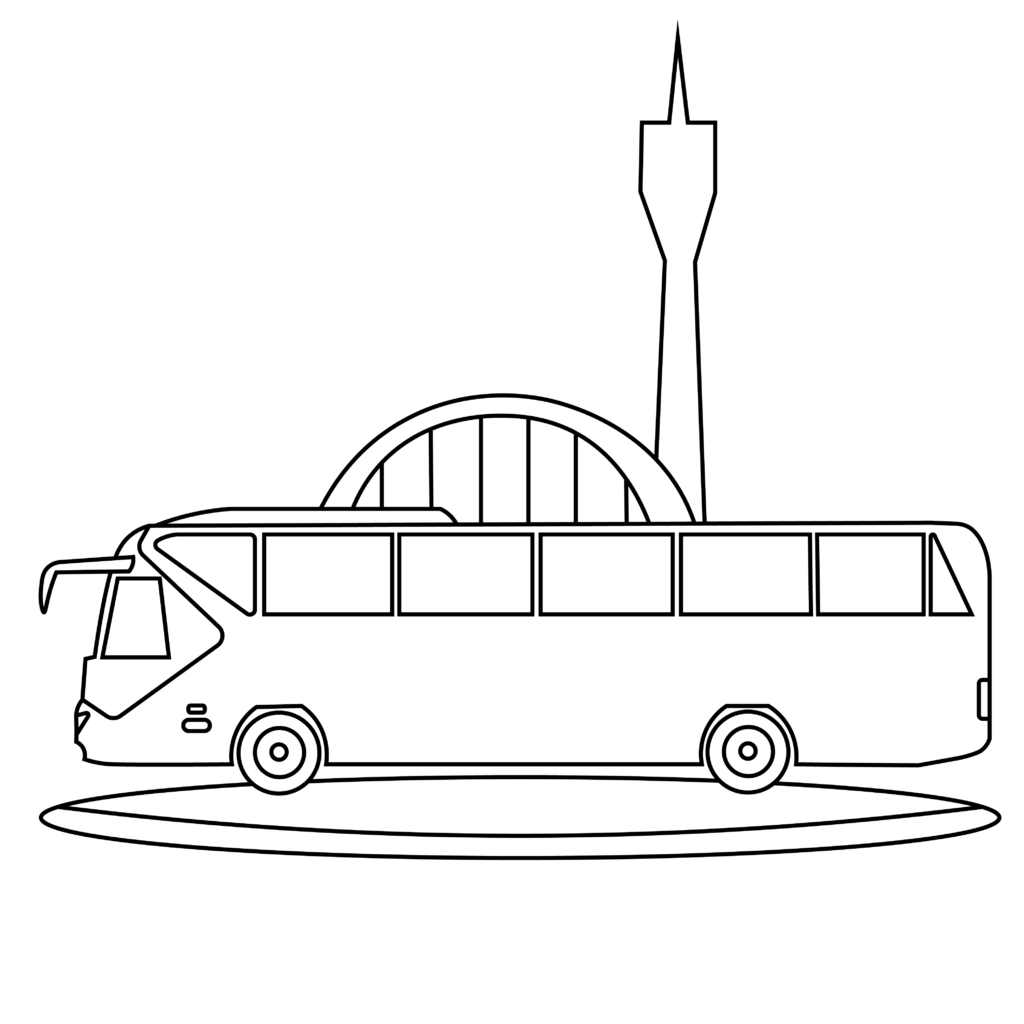
Step 1: Draw the Body of the bus
Draw a big horizontal rectangle with curved corners in the center of your drawing paper. Erase the left side and two sections of the bottom line of the rectangle.
Replace the left side with a diagonal line and draw horizontal curves that look like semicircles along the bottom line, on those spots you erased.
- Draw a long rectangle with rounded corners to represent the bus’ main body
- Erase the left side and two small parts of the bottom line
- Draw two semicircles for the wheel outline and a diagonal line on the side
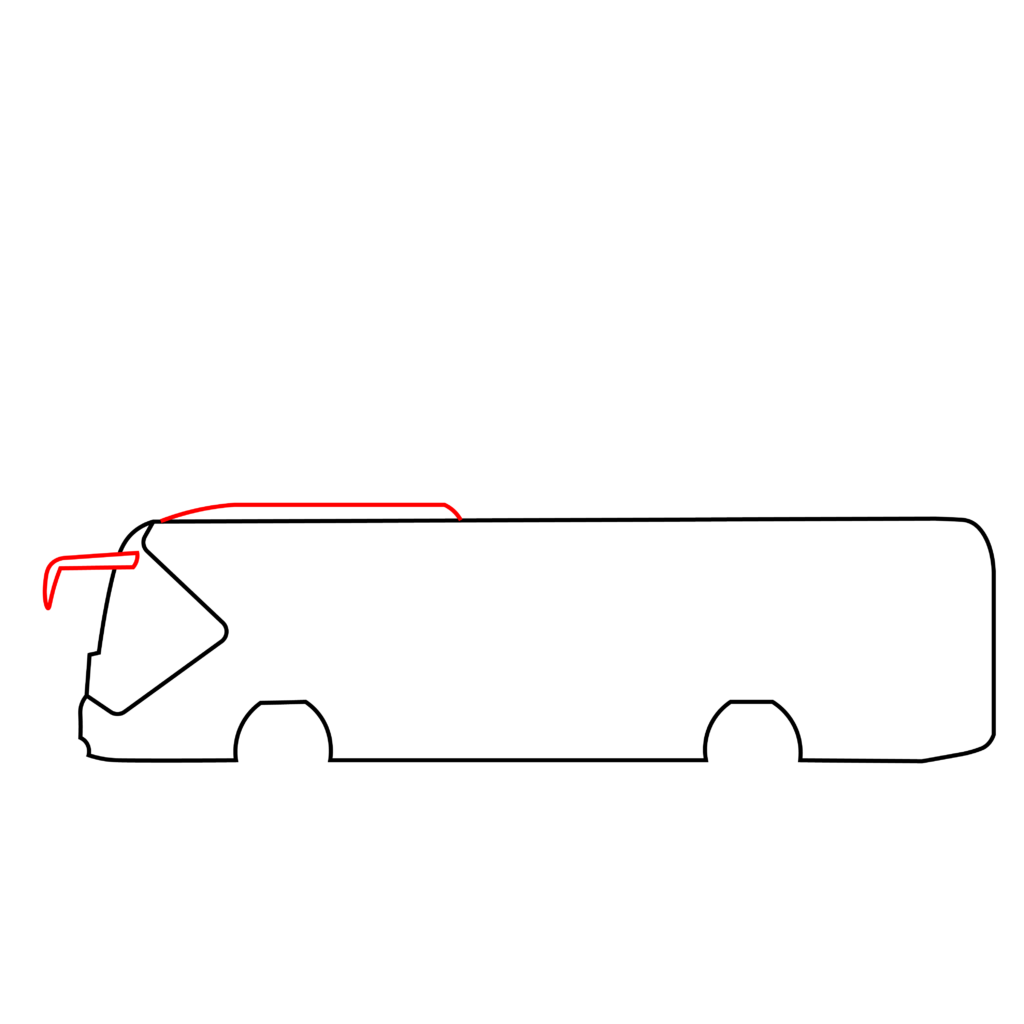
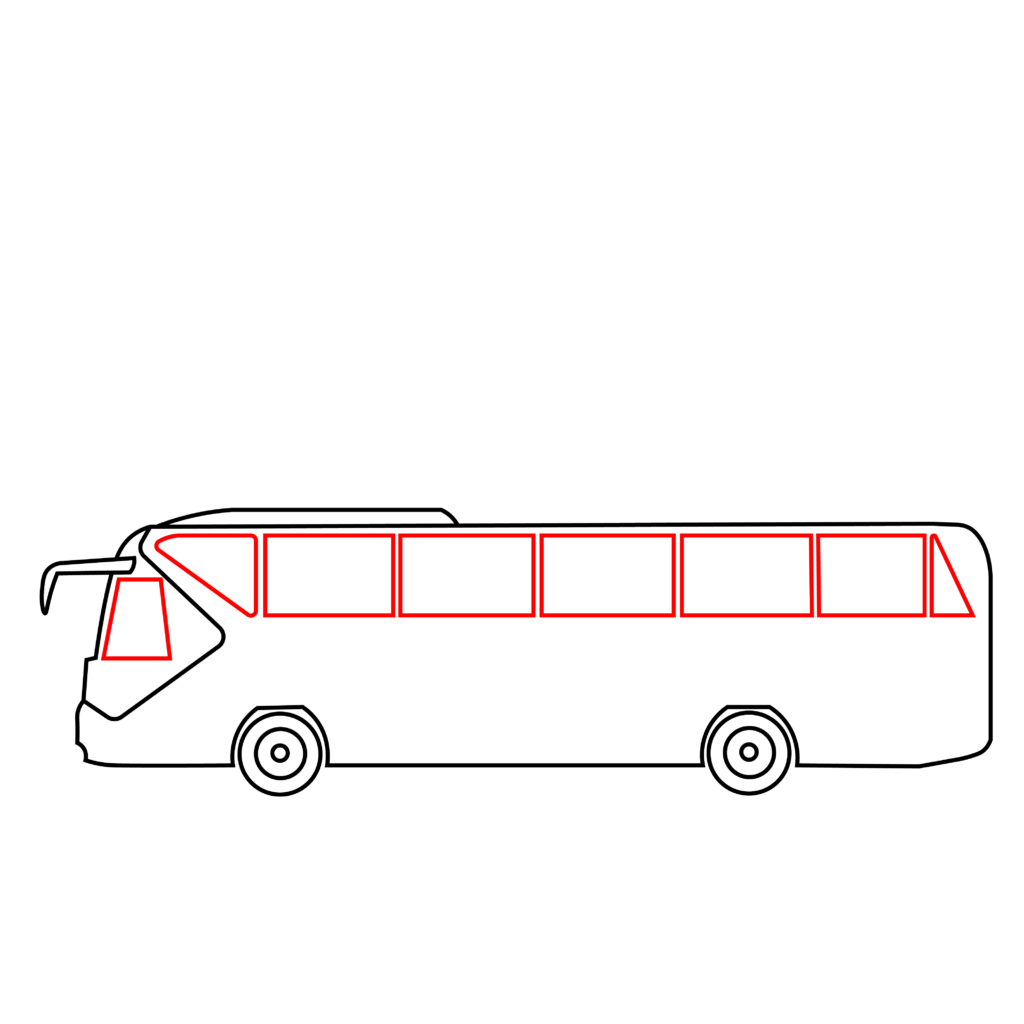
Step 2: Add Fender Mirrors and Vents
Draw a small horizontal line above the front of the bus for the vent. Then, draw a curved rectangle that starts out horizontal and curves downward against the left-side of the bus for the fender mirror!
Oh, and while you’re at it, add an inverted triangle across the inner left-side of the bus to indicate the driver’s seat.
- Draw a horizontal line above the front of the bus for the vent
- Draw a curved line extending from the left-side for the fender mirror
- Add a small inverted triangle over the inner-left side of the bus
Step 3: Draw the Wheels
If you completed our lesson on how to draw a target face, you will glide through this step! Beneath those two curves on the bottom line of the bus, draw two small circles. Then, add two smaller circles in each big circle that inch toward the center.
- Draw a circle below each curve on the bottom line of the bus
- Add two smaller circles within each big circle
- Use a drawing compass for smooth circles if you need to
Step 4: Draw the Windows
Draw a wide rectangle across the upper part of the bus. Add vertical lines in the center to carve out five small squares. Erase any lines that make it difficult to visualize the squares.
Then, add two inverted triangles on the sides of the center windows and a small isosceles trapezium on the left-side.
- Draw a wide rectangle along the upper part of the bus
- Draw vertical lines within the rectangle to divide it into small squares
- Add two inverted triangles on the sides of the center windows
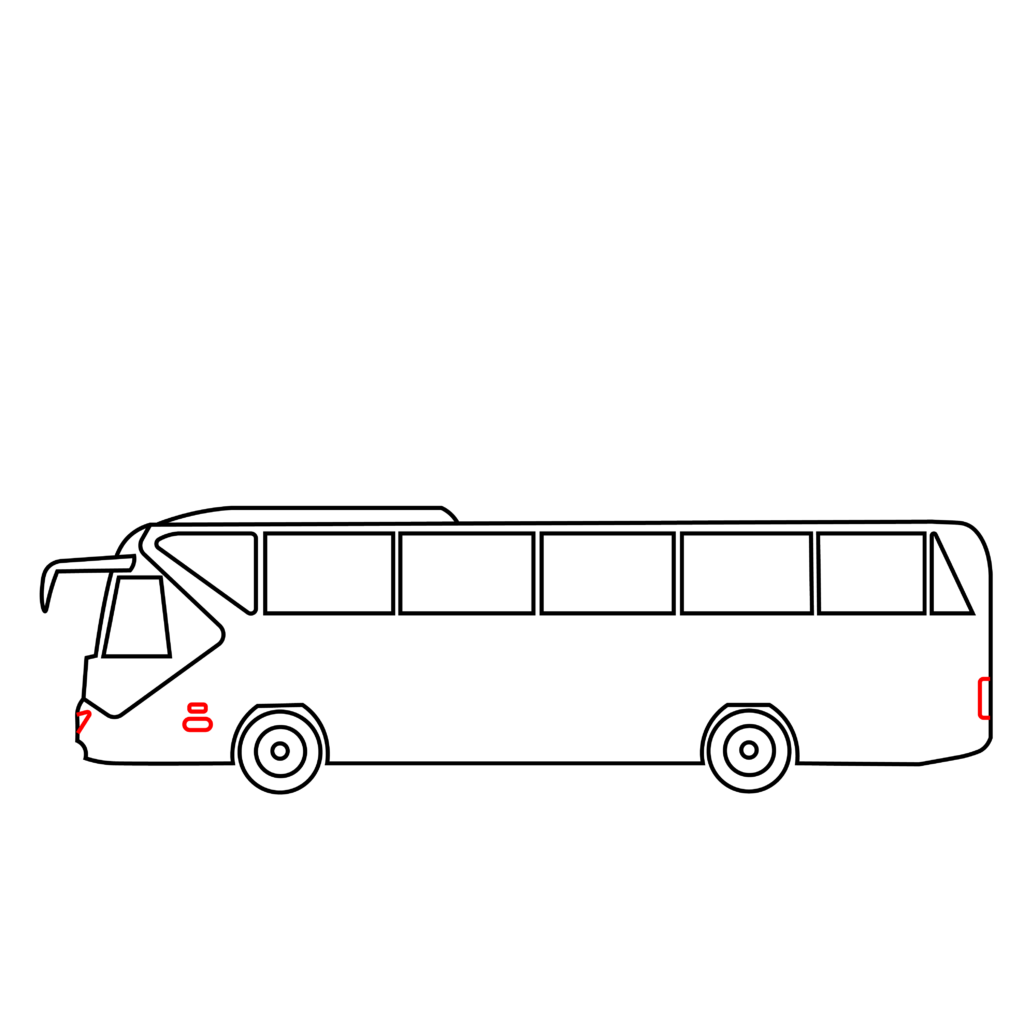
Step 5: Add Lights
Draw a small inverted triangle along the bottom-left side of the bus. Then, draw two small ovals on the left of the front wheel.
Finally, add a thin rectangle against bottom-right side of the bus and you should have some minor details that enhance your drawing.
- Draw a small inverted triangle along the bottom-left side of the bus
- Draw two small ovals on the left of the front wheel
- Add a thin rectangle against bottom-right side of the bus
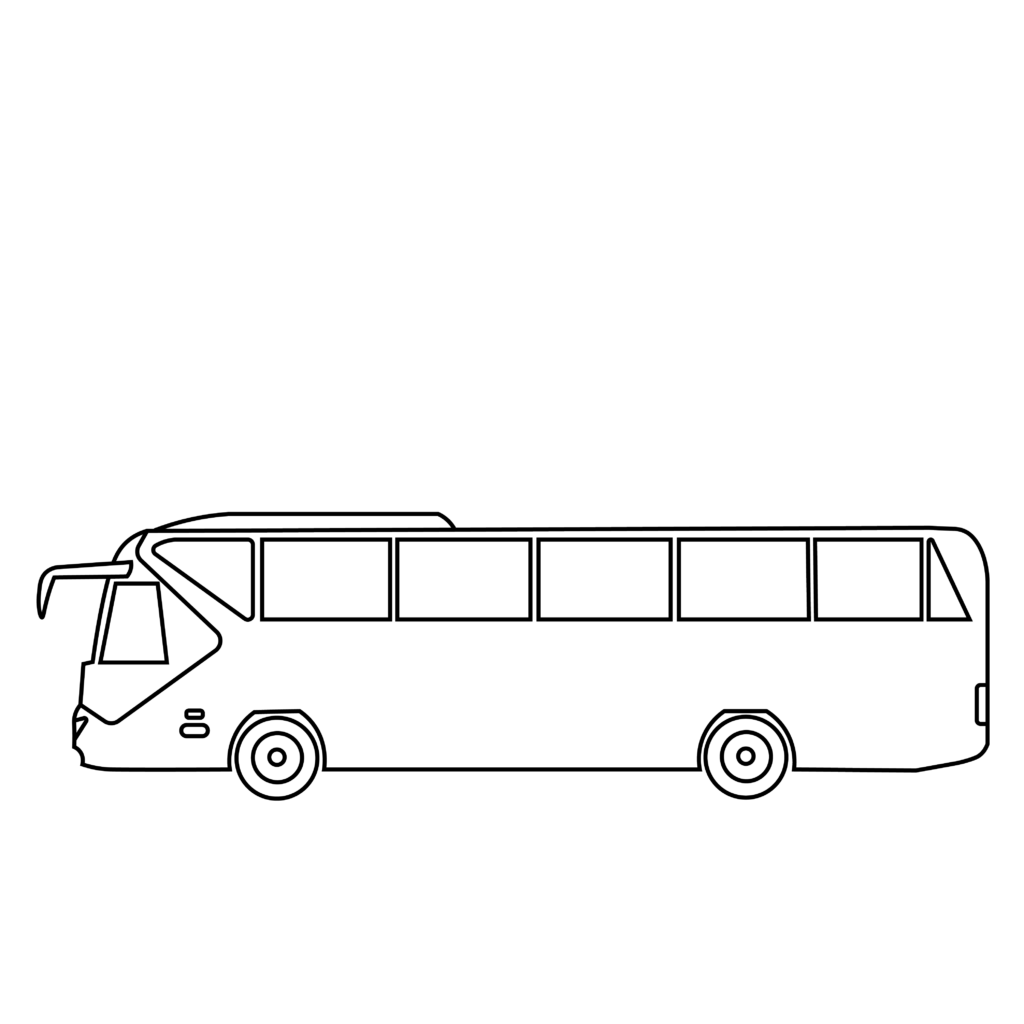
Congratulations! Your Airport Bus Drawing is Complete
Double check your drawing to make sure you’re happy with the results while you take a little break. Notice how the title mentions seven steps but you’ve only completed five? That’s because there’s more work to complete.
Taking Your Drawing to the Next Level
Here at Edist101, we often encourage young artists to push their limits and take things as far as they can go. Ask yourself this: why leave your airport shuttle bus as it is when you can add a cool background and color it in?
We believe that the foundation of art is built upon the principles of creativity and imagination, so keep on refining your airport bus drawing by completing the following steps.
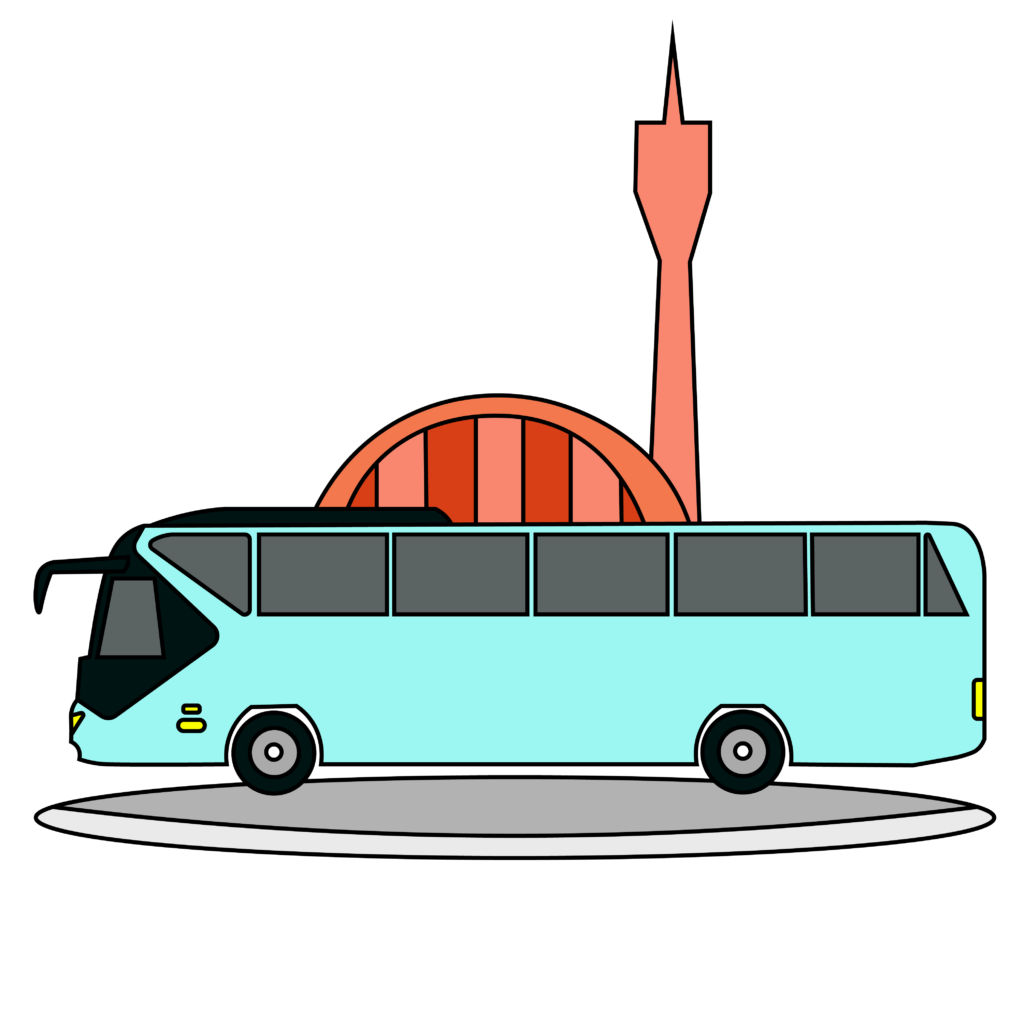
Step 6: Adding a Background
You can draw a long, straight runway next to the bus where planes take off and land. Or maybe you’d like to draw the airport terminal with big windows and lots of doors.
It’s also a great idea to add a variety of planes, like a standard airplane, biplane, jet or a jumbo jet in the background. Or perhaps a control tower that watches over all the airport activity. You get to decide what’s in the scene.
Step 7: Adding Colors
For the bus, a cheerful sky blue makes it look friendly and ready for travelers. The windows can be a lighter shade, almost like a soft gray, to show they’re see-through.
For the lights, yellow and red are great choices – yellow for the headlights and red for the taillights. The wheels can be colored black, and the rims can be gray to show they’re made of metal.
The background can have bright colors too; maybe the control tower is a bold orange, and the runway is a nice gray. You can pick any colors you like to make your picture bright and happy.
Bonus Tips
Personalize your airport bus by adding a fun license plate or a name to your sketch.
Utilize shading techniques like cross-hatching or stippling to add texture and realism to your artwork.
Use reference images of airport buses or other vehicles for inspiration and guidance on proportions and design elements.
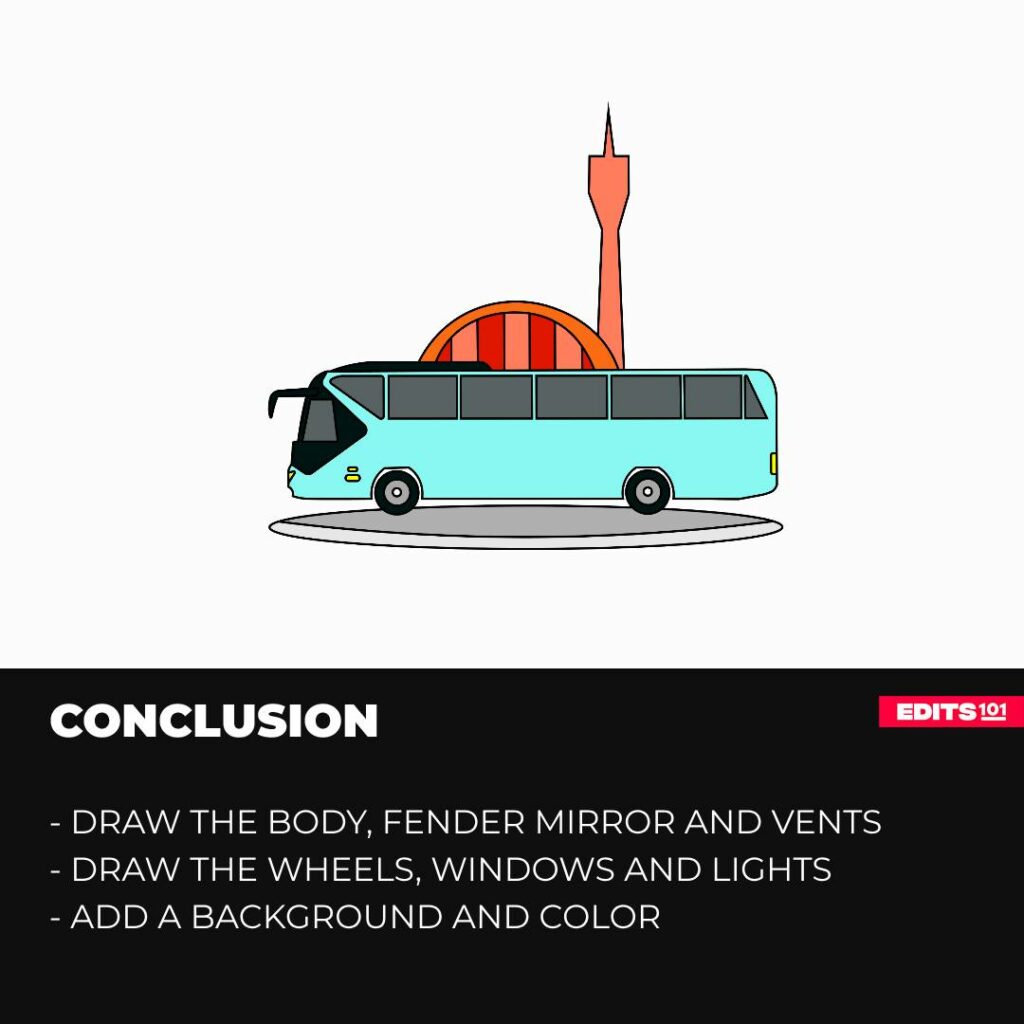
Conclusion
Congratulations on completing your very own airport bus drawing. Starting with a big rectangle for the body, you added the driver’s area and a curved roof, and then drew some wheels. Next, you sketched out windows for passengers to look through and finished up your drawing by adding bright headlights and taillights.
Great job on completing all of the steps. Challenge yourself and pursue other drawing projects to hone your skills even more. From Edits101 to you, see you next time!
Thanks for reading & feel free to check out more of our articles!
Author Rating
Overall Rating
Summary
This tutorial is for young artists and older sketchers as well, teaching them how to draw an airport bus in 7 easy steps.