How To Draw A Fighter Jet | A 7 Step Tutorial
Today, we’ll cruise through the sky in a sleek, elegant fighter jet. Fighter jets are not regular airplanes. It is smaller in size and carries only a minimal number of people.
Do you know that fighter jets are faster than a cheetah and can fly at a speed of 1500 miles per hour? That is extremely fast. Sports cars are the fastest road vehicles. Likewise, a fighter jet is the fastest vehicle that can cruise through the air.
Grab your pencil and paper as we’re about to begin drawing an amazing fighter jet. Your blank paper will be turned into an amazing drawing within a few minutes.
What you will need
- A pencil
- An eraser
- A sheet of paper
- Coloring kit
- Ruler
- 30 minutes
Draw a Fighter Jet
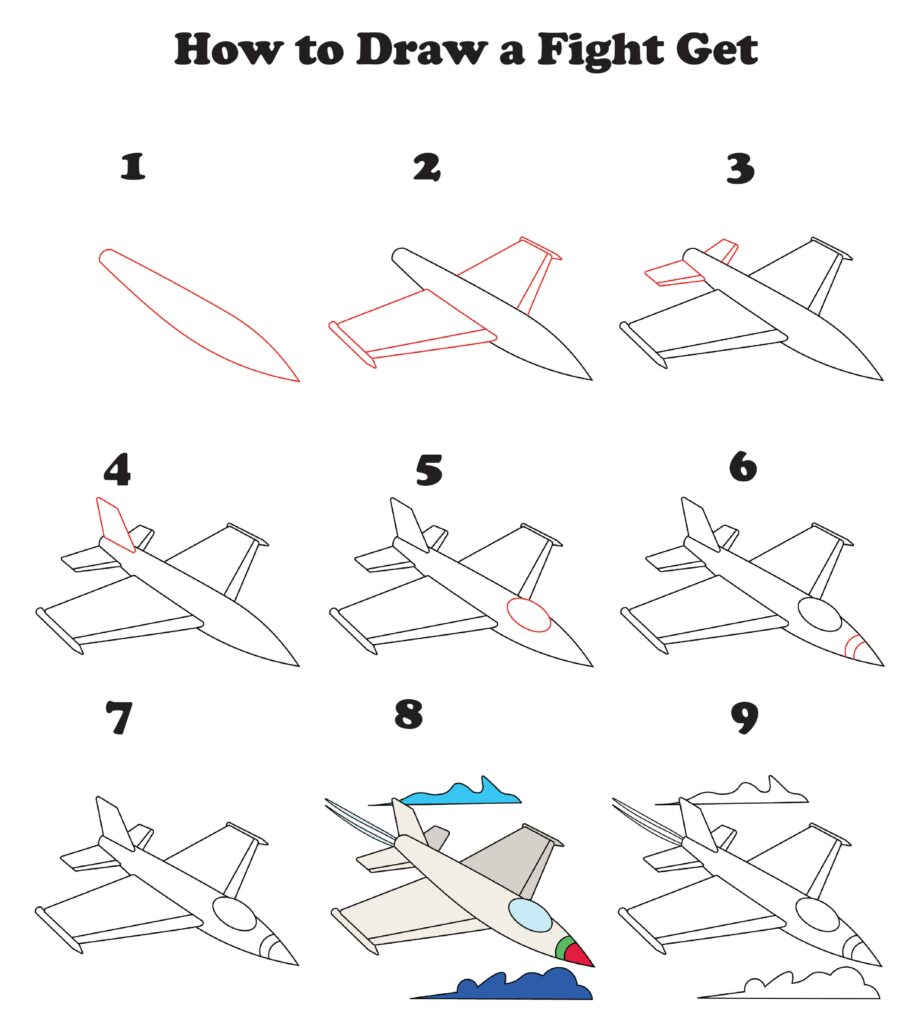
In this turbo-charged guide, we’ll learn how to draw a fighter jet from scratch. This guide has all the steps that are required to draw an amazing fighter jet. So hold tight, and let’s begin the process.
Step 1: Add the Passenger Cover to the Fighter Jet
The passenger cover of the fighter jet is where the pilot sits and controls the jet. This part has all the control centers to fly the jet. Its shape is sleek and thin.
To make the passenger cover of the fighter jet, we’ll draw two diagonal lines at the bottom right of the paper. Both of these lines are curved at their ends and meet each other. Overall, the passenger cover of the fighter jet gives a spearhead shape. It is pointy at the front and rounded from the back.

The pointy structure is because of the aerodynamics. It provides less friction during the flight and delivers more speed.
Step 2: Draw the Airplane Wings
The wings of the fighter jet give it stability and help it to lift during the flight. Some aircraft also have compartments inside the wings that carry the fuel for the aircraft.
To draw the left wing, we’ll draw a slanted horizontal line touching the cabin of the fighter jet almost at its rear. Now, we’ll draw two more angled lines at the front side of the cabin, as shown in the image. Finally, we’ll connect the rear line with the front lines by drawing a cylindrical shape with a pointy end.
Following the same process, we’ll draw the right wing. Keep in mind that the length of both these wings should be equal. Unequal lengths wouldn’t be able to give stability to our fighter jet. So, it is important to have stabilized wings.

Step 3: Draw the Small Wings to the Bottom of the Plane
The small wings are also known as the canards or strakes. They’re located at the rear end of the fighter jet. It helps in the aerodynamic control and supersonic flights. These wings can manage the shockwaves and airflow, improving the overall stability of the jet.
To draw the small wing on the left side, we’ll draw a small slanted horizontal line right at the rear end of the jet. Now, we’ll draw two more angled lines just a little away from the back line. Now, we’ll draw a vertical line to connect both these lines.
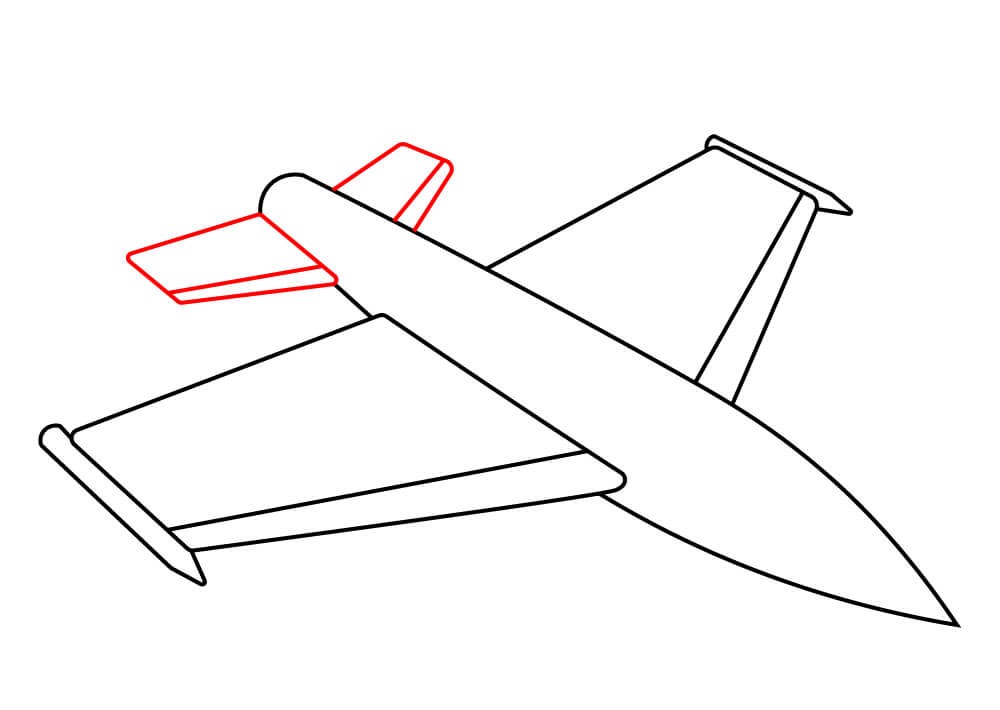
We’ll follow the same procedure to draw the right wing. Note that these wings are similar in shape to the main wings but smaller in size.
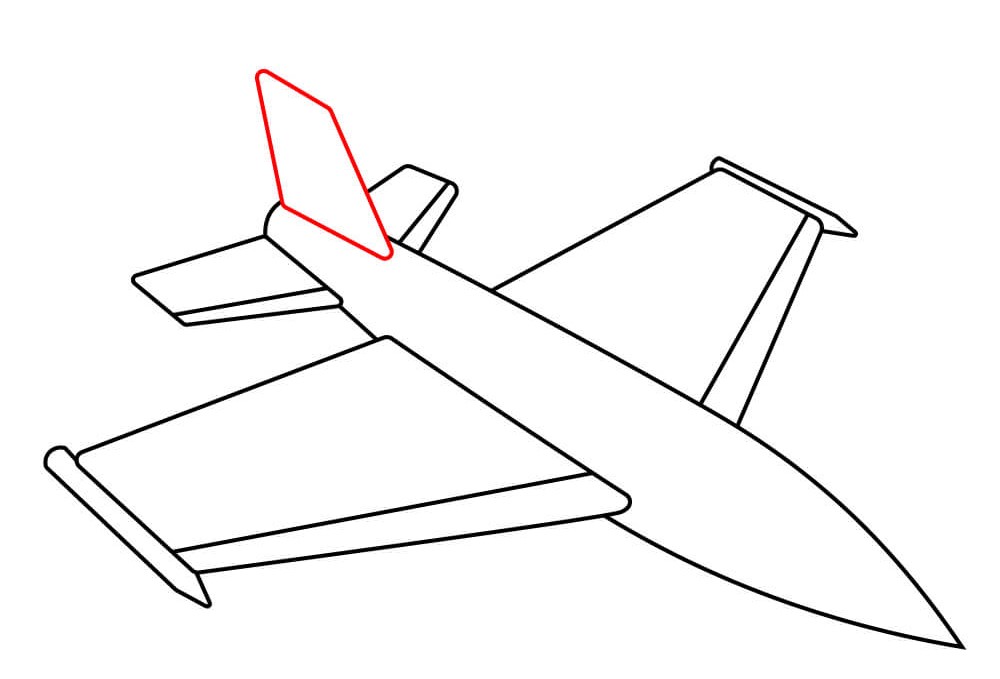
Step 4: Add the Upper Wing to the Plane
The upper wing has a special pivotal role. It is used for weapon mounting, increases maneuverability, and enhances additional lift. The upper wing is located on the top of the fighter jet.
To draw the upper wing, we’ll draw a rectangular structure at the top of the rear end of the jet. We’ll draw a vertical line at its rear end. We’ll draw another slanted vertical line to make the wing a bit wider. To connect both these lines, we’ll draw a horizontal line. The upper wing of the plane is all set.
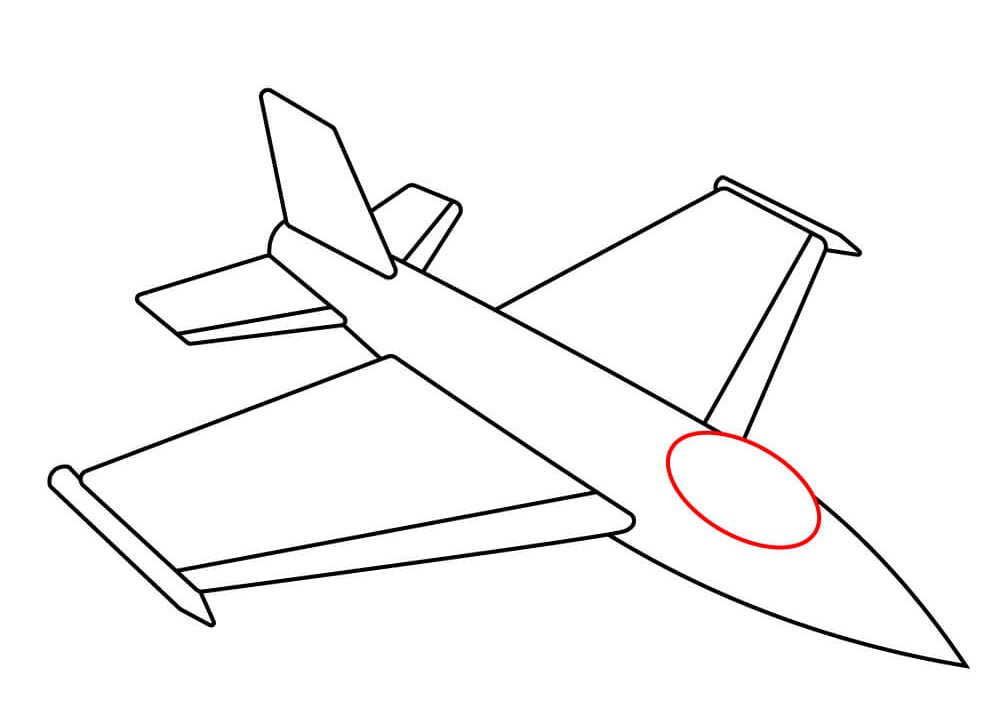
Step 5: Draw the Upper Window
The upper window of the fighter jet is not just another component; rather, it is a necessity for the pilot. The pilot gets a better view through this window and helps during the aerial combat situation.
The upper window is located at the upper side of the fighter jet at its frontal end. To draw the upper window, we’ll draw an oval-shaped structure on the upper side of the fighter jet, as shown in the image. Make sure the size of the window is optimal and fits the overall size of the fighter jet. Erase any line overlapping the window.
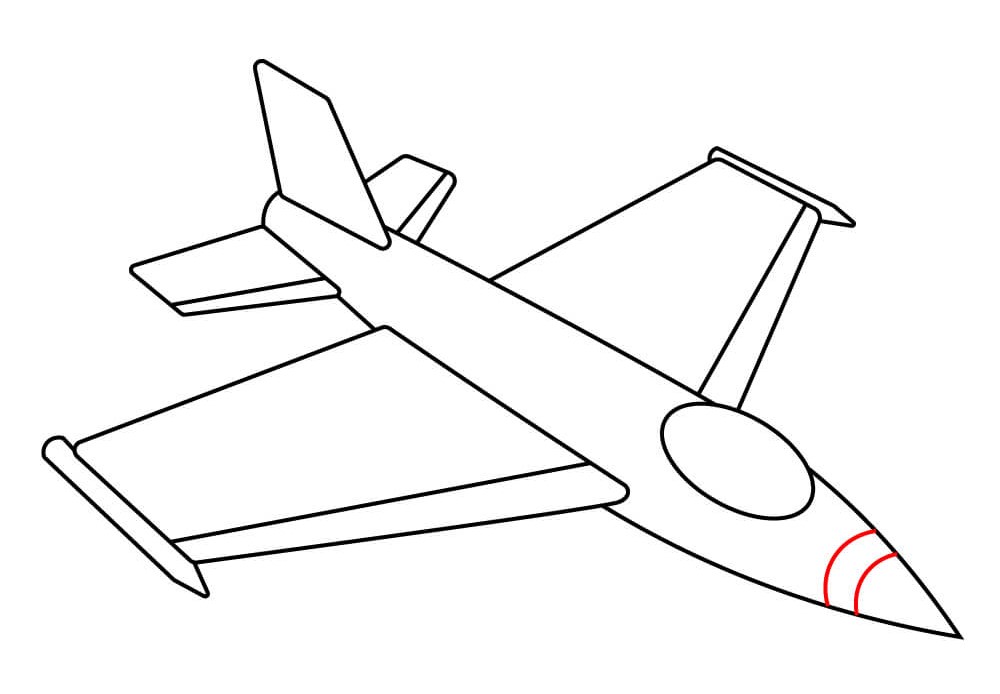
Step 6: Add the Bent Shape
At the front side of the jet, we’ll draw two curved lines to make the bent shape. This shape enhances the stability of the fighter jet. Make sure that the curved lines do not overlap each other.
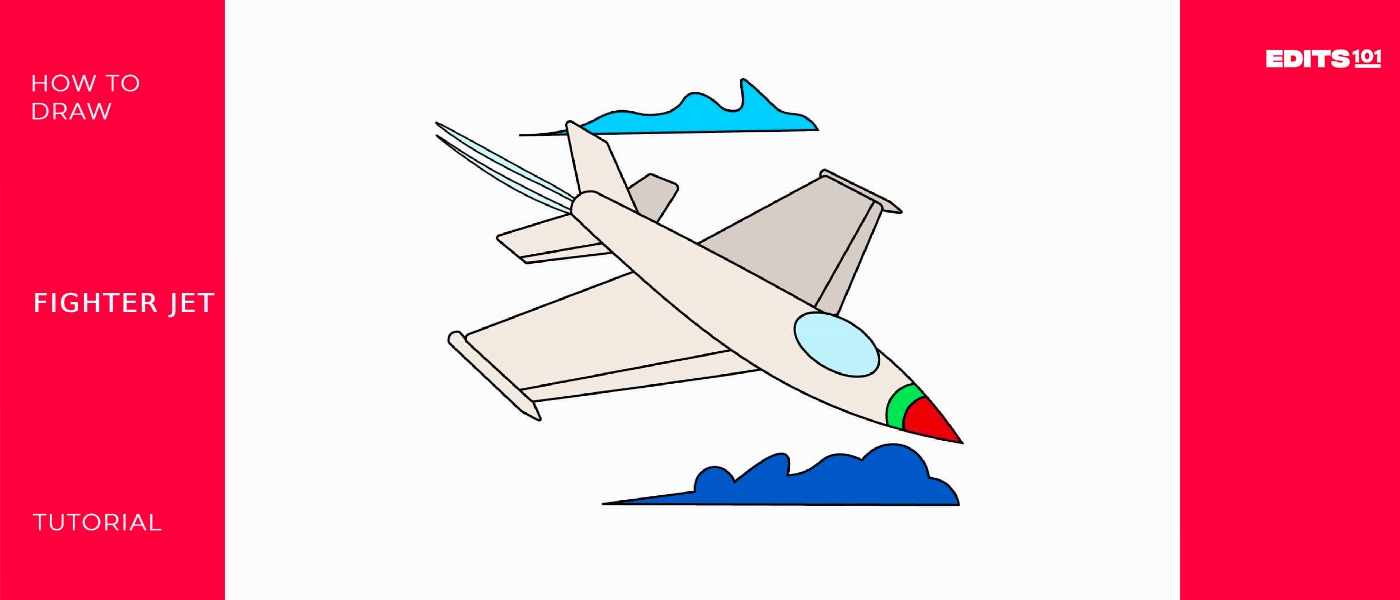
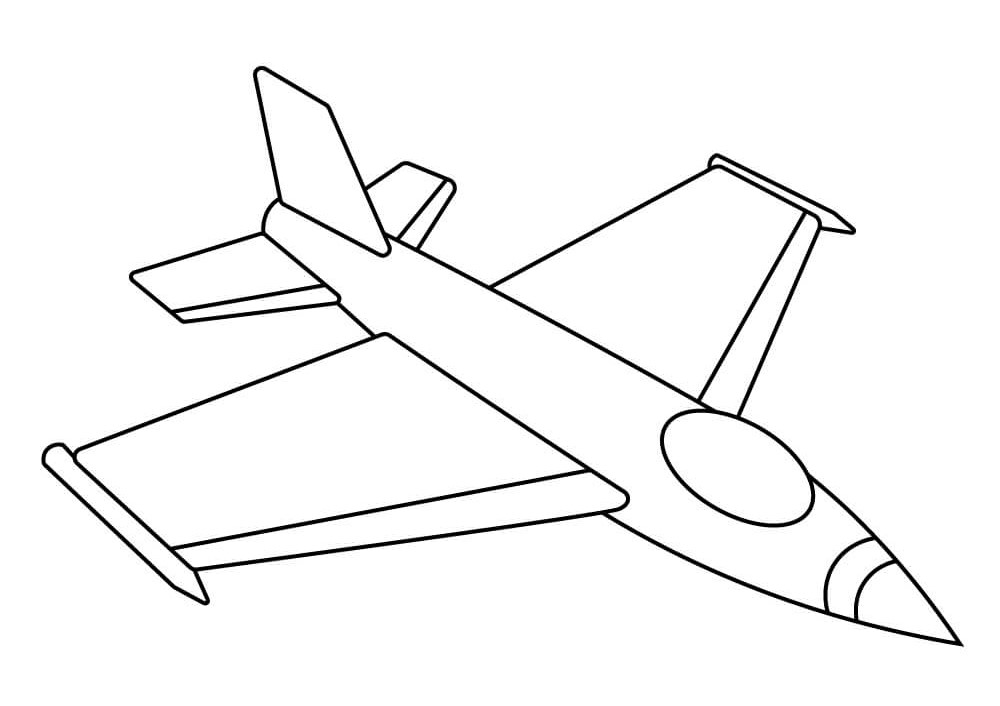
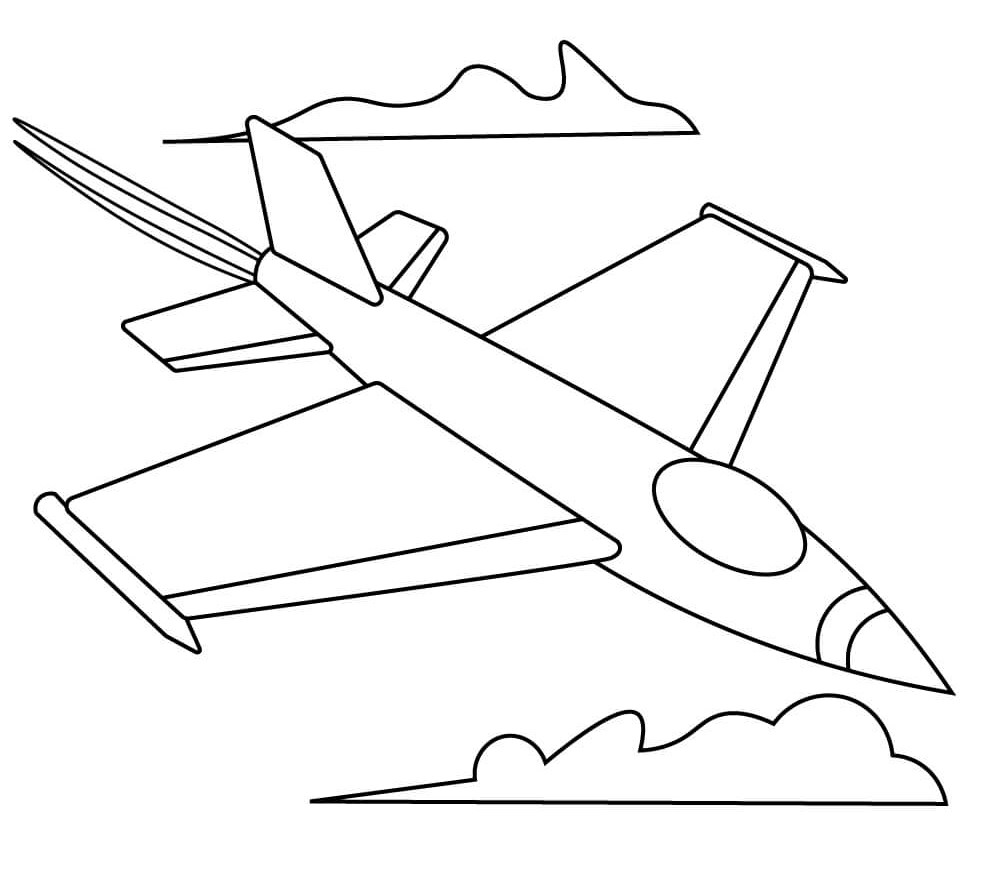
Step 7: Your fighter jet is ready
Fantastic job! Your fighter jet is all set for combat. We are confident that you had a fun time drawing this amazing fighter jet.
Pick up your eraser and remove the unnecessary lines on your paper. It will enhance the beauty of your drawing and make it look cleaner.
We have good news for you! The real artistic journey is yet to begin. Yes, our fighter jet is completed, but it lacks the minute details. These details are necessary for the artistic and professional touch. Let’s make this happen!
Taking your Fighter Jet drawing to the next level
Do you wish to take pride in your artwork? Let us tell you that you can upgrade your drawing just by following simple steps. This upgraded version of your drawing will give you more confidence and pride in your work.
Unleash your inner designer and spill magical beans on your drawing. You’ll be surprised by the results.
But are you confused about how to do this? Don’t worry! We’re here for you. We’ll guide you through simple steps that will transform your drawing into something magical. All you have to do is to follow these steps.
Adding background to your drawing
Adding a background to any drawing is an important component. It adds context to the story. If we add clouds as a background, it’ll depict that the fighter jet is flying in the air. Adding a runway will give the notion that our fighter jet is preparing to take off.
Just by changing the background, the whole context changes. Now imagine a fighter jet drawing without any background. We wouldn’t know if it is flying or resting on the runway. The story seems incomplete and unattractive.
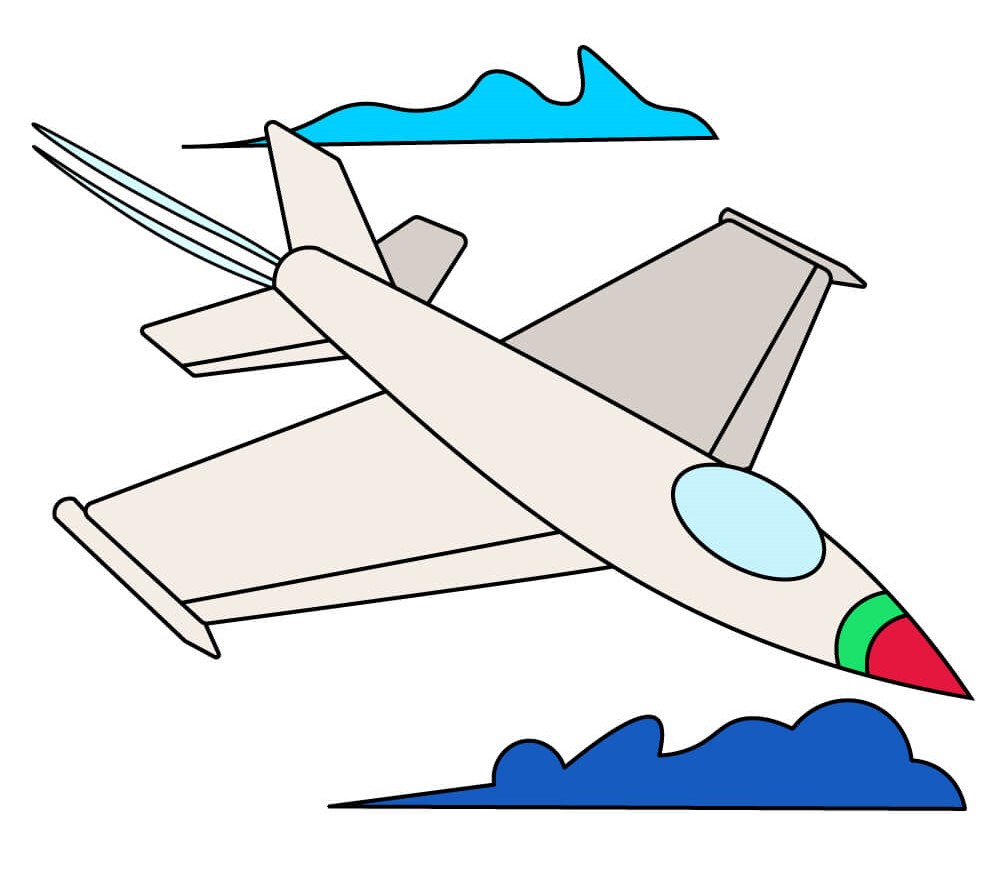
A flying fighter jet seems more attractive. For that reason, we have drawn clouds as the background. These clouds give a visual aspect to our drawing.
Moreover, having a background gives depth and dimension to our drawing. The subject appears to be in a 3D dimension and is very close to reality. Such artworks look professional.
Adding colors to your drawing
Colors are a fun way to express your mood and inner feelings. Colors add realism, focus, attention, and visual appeal to a drawing.
Without colors, life is dull, and so is drawing. There must be colors in the drawing to lift the mood of the viewers as well. We’re sure that you’re skilled in coloring. You can use any type of color for your drawing. Make sure you color it nice and tidy.
You can use crayons, poster paints, marker colors, or oil paints. It depends on your preference. You’ll be amazed to see the difference between your drawing before and after coloring. The secret sauce for a fantastic artwork is tidiness. So make sure you leave your tidy prints on your drawing.
P.S Bonus Tips
The art doesn’t end here. Imagination and creativity are limitless. You can take it as far as you want. All you have to do is enjoy creativity and experiment with your drawing with multiple ideas.
We’ll give you a few more ideas that you can play with. You can add a thin layer of fuel emitting from its posterior end. It’ll tell us that the fighter jet is cruising at a really high speed. You can also add your name to the cabin of your jet. A pilot sitting inside the upper window will enhance the overall realism of your drawing.
Note that there are millions of ideas like these. Don’t stick to these ideas only. Use your creativity and enhance your drawing. See what goes best with your drawing and stick to it.
Conclusion
Drawing a fighter jet is such a simple task if you follow this guide. We started by drawing the passenger cabin. Then, we drew the main, back, and upper wings. All these wings are connected to the passenger cabin of the fighter jet. Finally, we upgraded our drawing by adding details to it, like colors, backgrounds, and other things.
Remember that drawing is a fun process and must be enjoyed thoroughly. If your results aren’t as good, just try again and again until you get perfection. Practice is the key to success. You got this!

Thanks for reading & feel free to check out more of our articles!
Author Rating
Overall Rating
Summary
This guide explains how to draw a fighter jet. You will also learn a few interesting facts about this vehicle.