How to Draw a Surfing Wetsuit | Step-by-Step Guide
A surfing wetsuit is specifically designed for individuals who engage in water sports such as surfing, bodyboarding, or paddleboarding.
These wetsuits are usually more flexible and lightweight than standard wetsuits to allow for a greater range of motion while riding waves.
Surfing wetsuits also often feature reinforced seams and padding in high-impact areas to provide additional protection from the rough surf conditions.
Additionally, they may have specific features like extra insulation in key areas to help keep surfers warm in cold water environments.
| Steps | Complexity Level |
| The collar | 2 |
| The body’s outline | 3 |
| The sleeves | 3 |
| The extra details | 1 |
What You Will Need
- Drawing paper or sketchbook
- Pencils (2b, 3b or 5b)
- An eraser
- A ruler (optional)
- Colored pencils or markers
- 20-25 minutes

How to Draw a Surfing Wetsuit
With this tutorial, you will learn how to draw your very own surfing wetsuit in 6 easy steps—4 of them comprise the sketching process, while the remaining two will provide you with key points to dramatically enhance your black-and-white sketch.
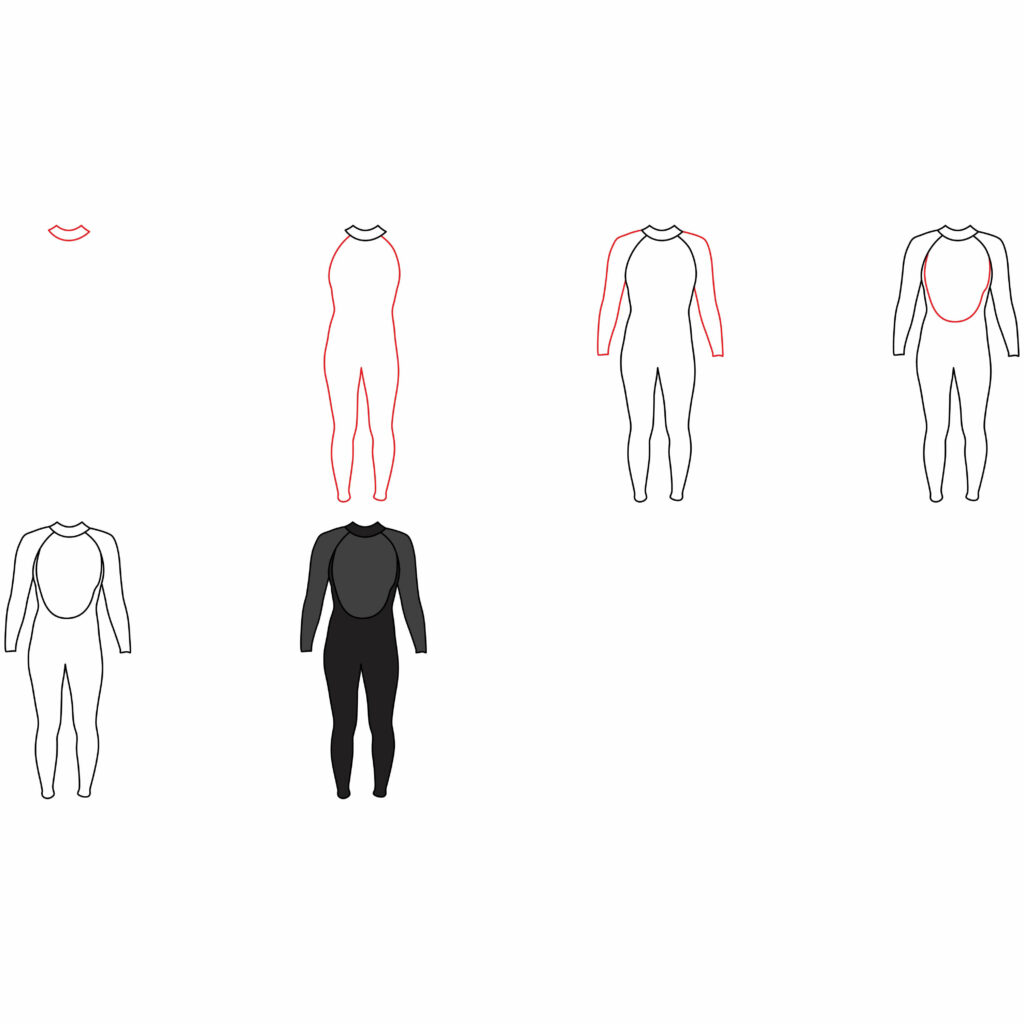
Step 1: Draw the Collar
Before you begin sketching, first decide which way you would like to angle your drawing paper. For a big surfing wetsuit, flip your page into portrait orientation.
Flipping your paper into landscape orientation will make your drawing appear smaller, though you will have more room to add other objects surrounding it.
Start by drawing a small curve that resembles a wet moon (crescent moon on its back) along the upper half of your paper. Next, draw a slightly longer curved line beneath the first.
Ensure that there’s a nice amount of space between both of them and connect the two lines on the sides using small diagonal lines.
- Draw a slight curve resembling a wet moon along the upper half of your page
- Add a similarly curved, longer line beneath the first one
- Connect the two lines using diagonal lines

Step 2: Draw the Body Outline
For this step, you are going to draw the torso region and both legs of the surfing wetsuit. Thus, ensure that your drawing hand remains loose for some seamless curves.
Begin by drawing two downward curves starting from the outer sides of the collar. The slight bumps of these curves represent the upper chest area.
Next, curve the lines inward on each side to represent the waistline, which is usually the narrowest point on the torso region.
Once you’ve completed the upper body, it’s time to move on to the lower half.
Start by adding slight protrusions for the thighs, inward curves for the knees, and small bumps for the calves. Finally, draw another inward curve for the ankles.
The outer lining of the body’s outline (torso and legs) is now complete.
To add the inner outline of the legs, start by drawing a slight outward curve on the bottom of each leg to resemble the calves.
Bend the line inward for the knees and then slightly curve the line outward to resemble the upper thighs.
Both lines should move in a diagonal fashion, so once you reach the crotch area, the lines ought to easily connect to each other.
- Add a series of curved lines to sketch the outline of the body
- Ensure that both side of the outline are symmetrical
- Use the image as a guide, if necessary

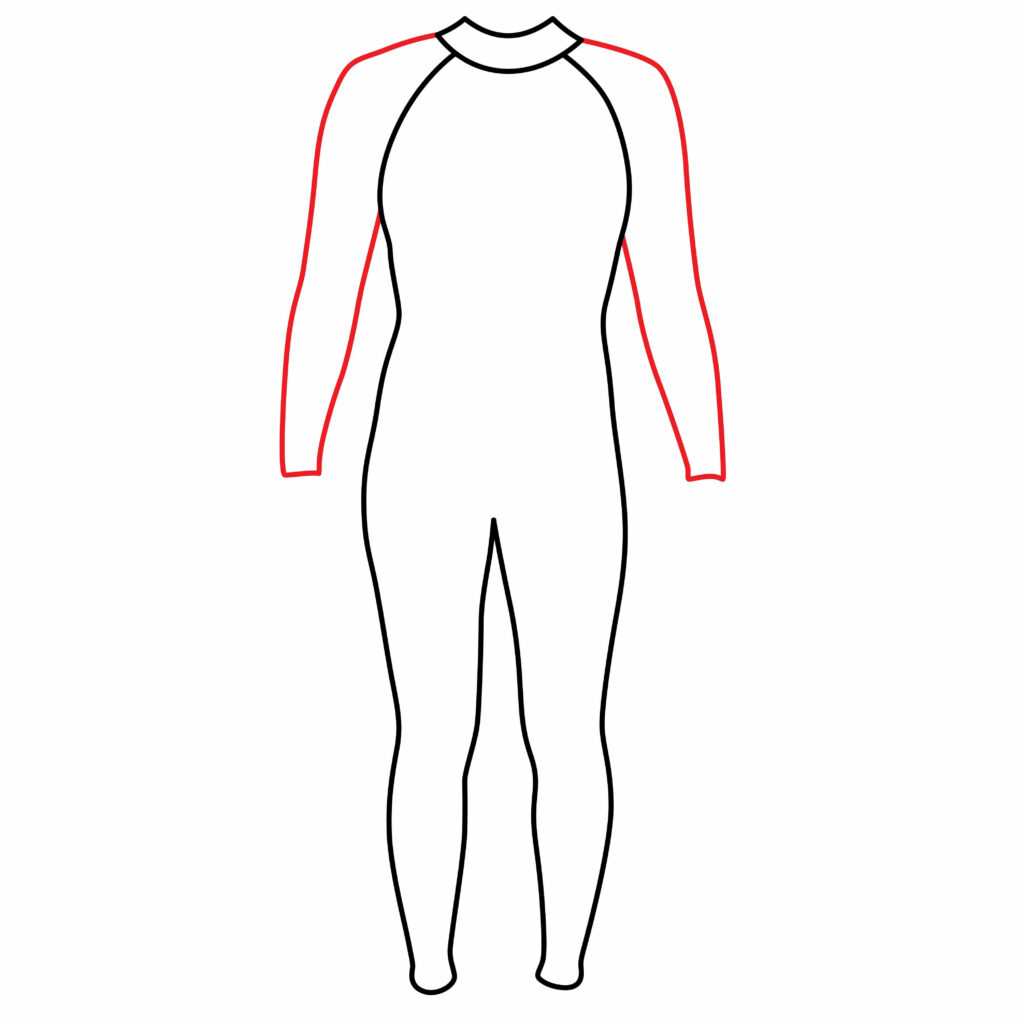
Step 3: Draw the Sleeves
As aforementioned, surfing wetsuits are more flexible than standard diving suits. This difference can be pointed out by their sleeves, which are often thinner than those of other wetsuits.
To complete this step, start by drawing a slight diagonal line from the corner of the collar.
Once the line is longer than the width of both the chest and hip, curve it into a downward diagonal line.
When the line reaches the hips, draw a small horizontal line inward and then curve it upward again in a slight diagonal line until it connects to the bust of the torso.
Complete the same process on the other side of the wetsuit, and you should now have two long sleeves.
- Start by drawing a slight diagonal curve to resemble the shoulders
- Draw lengthy diagonal lines for the arm length
- Complete the same process on the other side
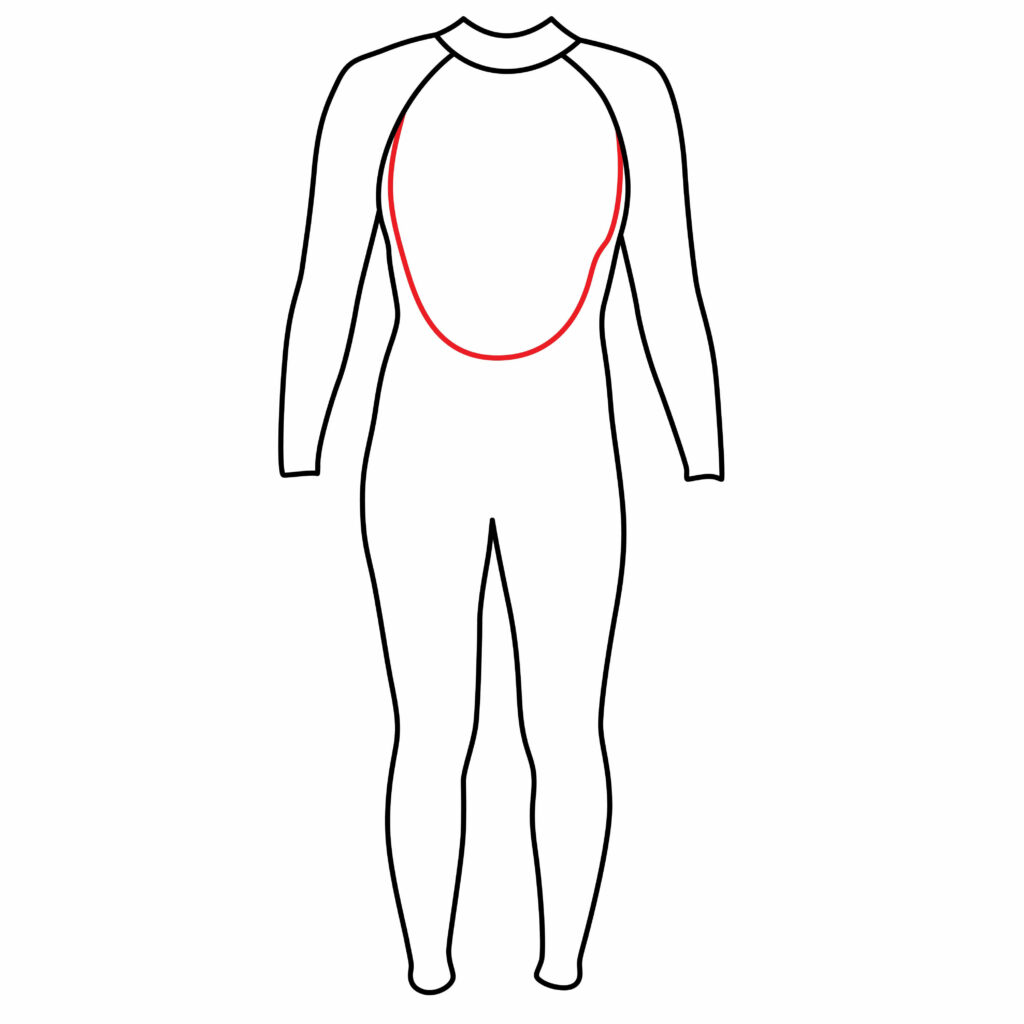
Step 4: Add Details
Adding some extra detailing is essential in making your drawing appear more realistic.
Complete this step by drawing a downward curve starting from the upper left side of the chest area, dipping down in the center of the torso, and then connecting to the upper right side of the chest area.
This curve will resemble those extra seams and padding mentioned before and heighten the realism of your sketch.
- Draw a downward curve across the upper center of the torso
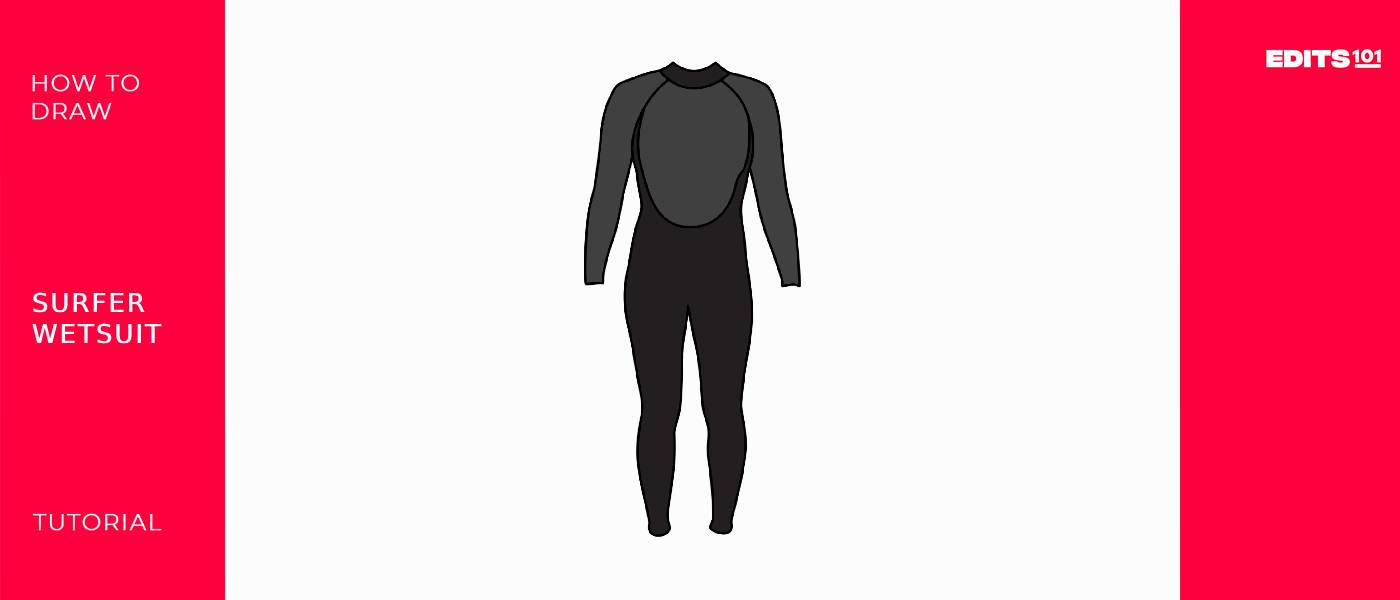
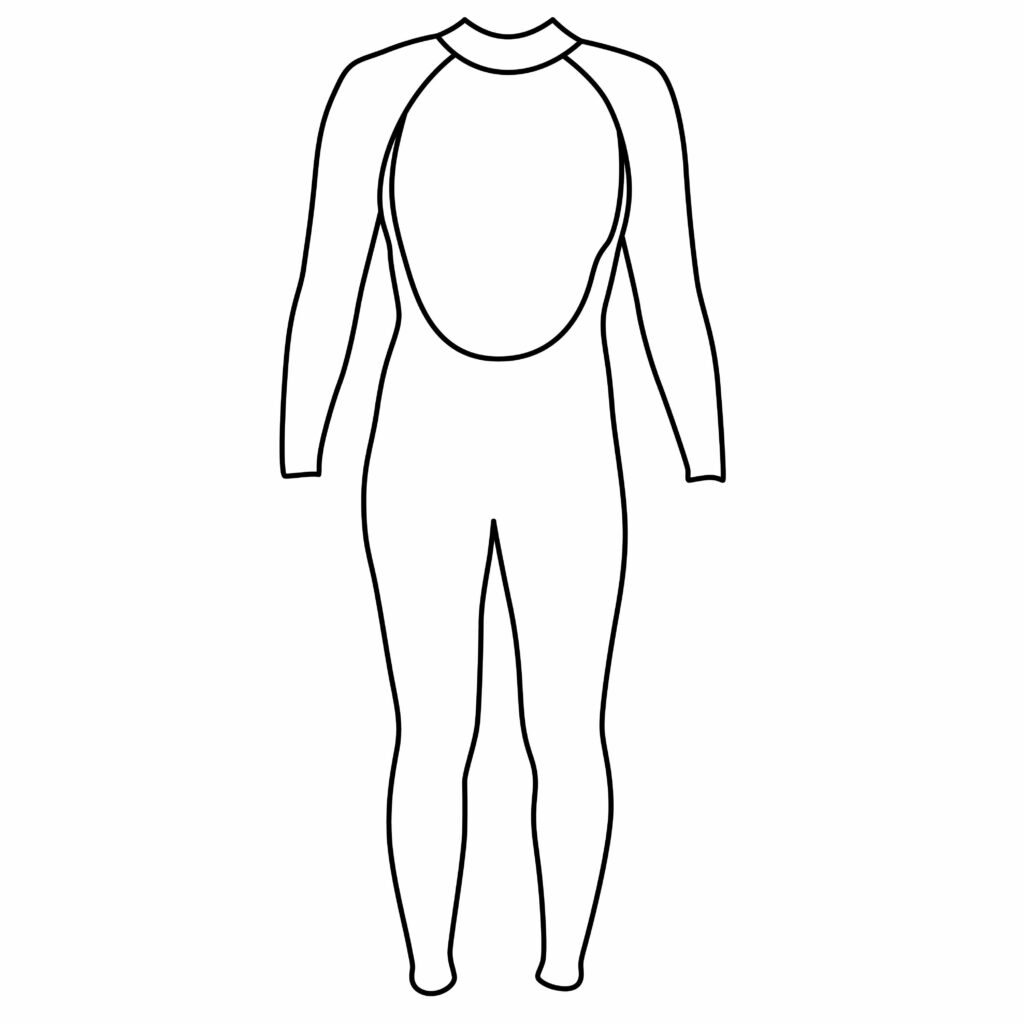
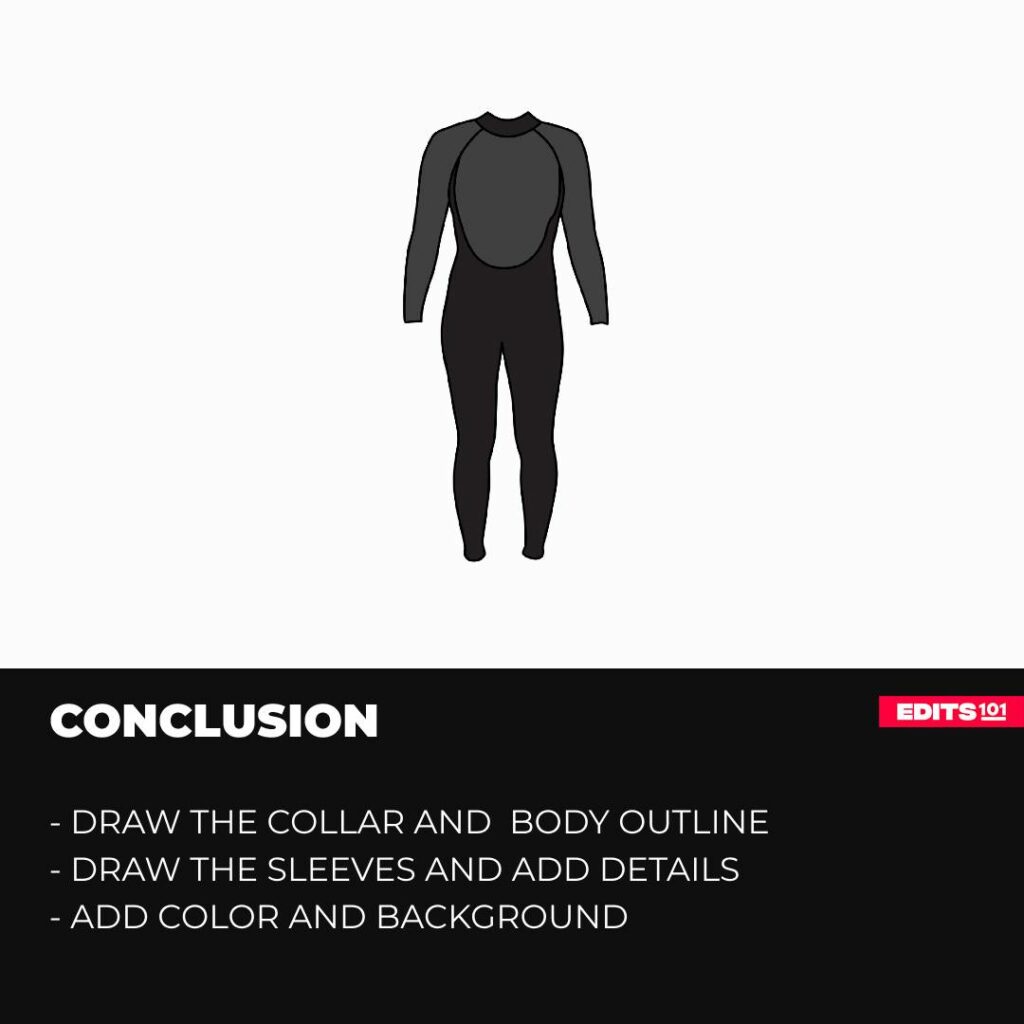
Congratulations! Your Surfing Wetsuit Drawing is Complete
Assess the quality of your drawing by ensuring lines don’t overlap each other and that the dimensions of each step are accurate. You are welcome to use the image provided below as a guide.
Taking Your Drawing to the Next Level
Now that the technical aspects are out of the way, it’s time to have some fun and let your creativity out to play!
step 5: adding a background
Adding a background to a drawing is like framing a picture. It completes the scenery and provides an absolute surrounding ambiance that encourages imagination and storytelling.
There are endless background ideas for a surfing wetsuit. First, decide what story you’re trying to tell with your drawing.
Would you like your wetsuit on a hanger in a store? Would you like it worn by a surfer who is currently threading waves on a surfboard?
Perhaps your wetsuit is hanging over the back of a truck, out to dry after a fun day at the beach?
The key to completing this step is to allow your imagination to roam free. You’re encouraged to be both realistic and questionably “unrealistic” when adding a background. Art is not linear and can ultimately be whatever you decide.
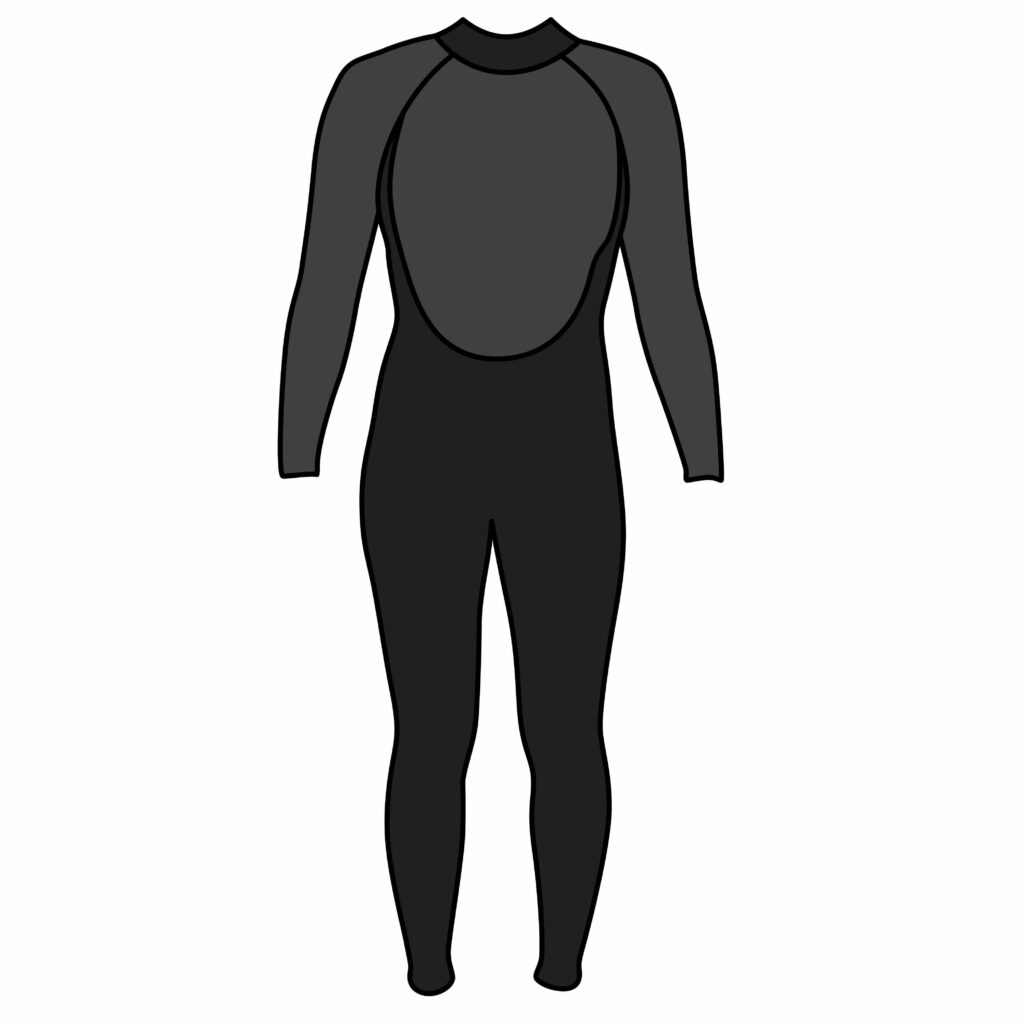
step 6: adding color
Adding color makes your drawing more distinguishable. It also instantly makes a black-and-white sketch stand out.
Choose realistic colors for a surfing wetsuit. In our drawing, we have colored the sleeves and center chest area with dark gray while adding black to the collar, remaining torso areas, and legs.
This color combination is often found on real-life surfing wetsuits, so if that’s the look you’re going for, feel free to follow the image below as a guide.
Remember to color within your lines, especially over the chest area, as this will improve quality and definition.
Bonus Tips
Use references such as photographs or videos of surfers wearing wetsuits for accuracy.
Practice by drawing similar designs, like a basic human anatomy to accurately portray how the wetsuit fits on the body.
Experiment with shading techniques to add depth and texture to your drawing.
Consider adding small details like logos or patterns commonly found on wetsuits to enhance realism.
Add your name somewhere on the drawing for a personalized touch.
Conclusion
If you’ve followed all the steps and completed your surfing wetsuit drawing, we commend your hard work and commitment heartily.
Drawing a surfing wetsuit requires skill, especially when creating a life-like representation of a body outline, so well done for putting your best foot forward.
You’ve completed the black-and-white sketch, learned a few fun facts about surfing wetsuits, and incorporated background details and color to enhance your composition.
Remember, the more effort put in, the greater the outcome. So, keep on honing your skills and exploring other drawing tutorials. From Edits101 to you, see you next time!
Thanks for reading & feel free to check out more of our articles!
Author Rating
Overall Rating
Summary
This tutorial will guide you through sketching a fundamental surfer wetsuit design and then enhancing it to achieve a more authentic and intricate look.