How To Draw A Boxing Corner Stool | In 6 Easy Steps
A boxing corner stool is a small – sometimes foldable – stool that is placed in the corner of a boxing ring during breaks between rounds. It’s commonly used by boxers to sit down and rest during these brief intervals.
The stool provides a comfortable and stable seat for the boxer to catch their breath, receive instructions from their coach, and have any necessary adjustments made to their gear or attire.
The use of a corner stool helps fighters conserve their energy and stay focused during the match by allowing them to recuperate before returning to the action in top form.
In today’s tutorial, we’re going to be breaking down the process of drawing a three-dimensional boxing corner stool in 6 easy-to-follow steps!
| Steps | Complexity Level |
| The Sitting Area | 2 |
| The Front Legs | 3 |
| The Back Legs | 4 |
| The Leg Support | 2 |
What You Will Need
- Drawing paper or sketchbook
- Pencils (2b, 3b or 5b)
- An eraser
- A ruler (optional)
- Color pencils or markers
- 25-30 minutes
How to Draw a Boxing Corner Stool
While it may seem complicated at first glance, this step-by-step guide will provide you with easy-to-understand instructions and comprehensive bonus tips on how to improve the overall quality of your drawing.
Check out the image below for an outline of all the steps you will be doing. While you’re at it, be sure to steal a peek at the last one. It looks so cool! Are you ready to get started?
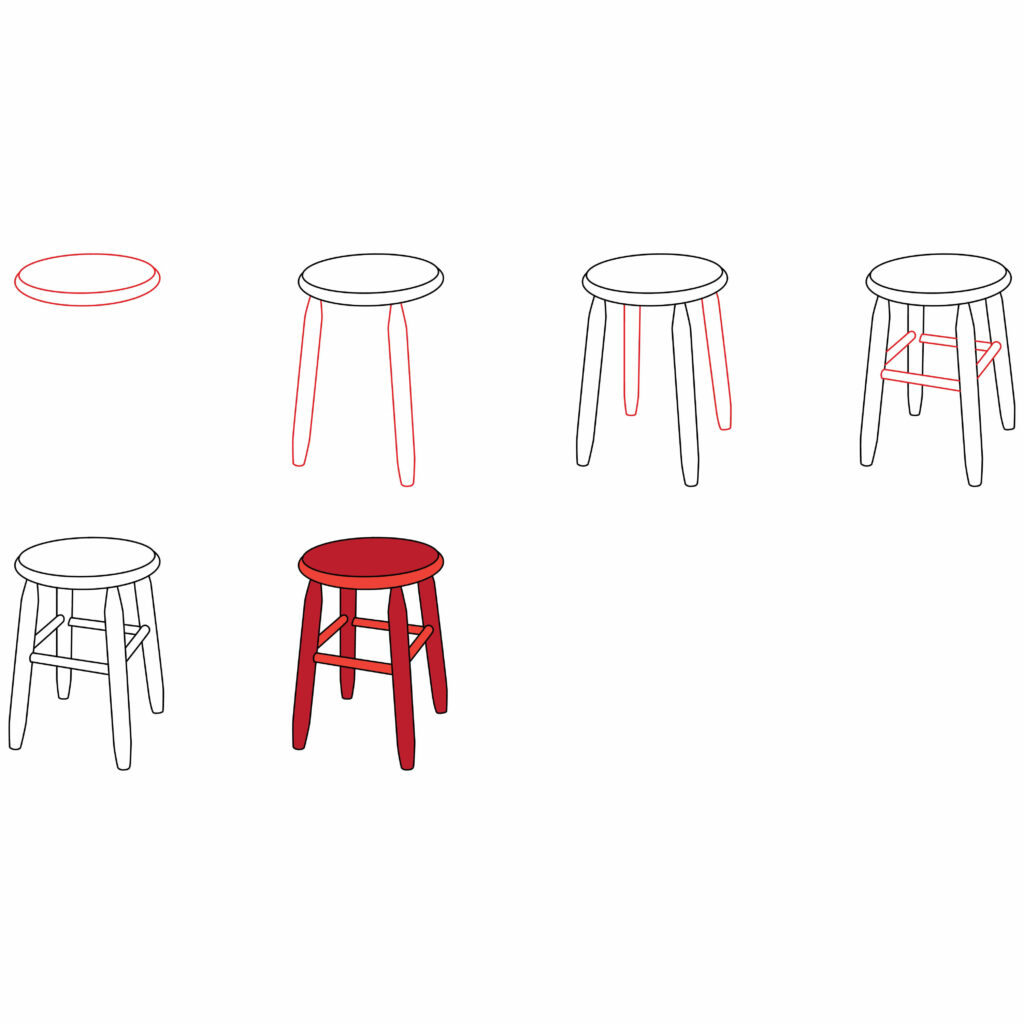
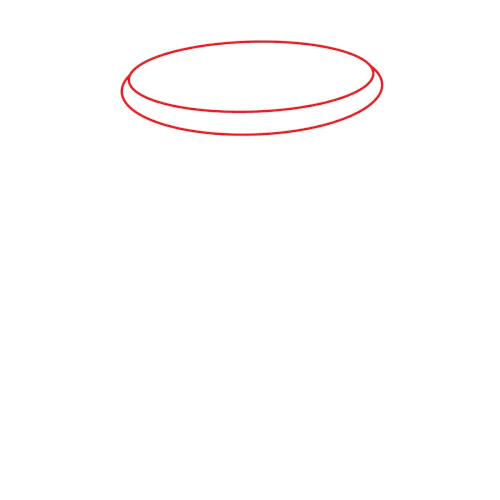
Step 1: Draw the Sitting Area
Start by drawing a slanted wide oval in the middle of your drawing paper.
Once complete, draw a curved horizontal line below the oval, starting from one side of the oval and connecting to the other side.
Ensure an excellent breadth between the line and the oval.
Check out the image below to make sure you’re on the right track.
- Draw a slanted wide oval in the middle of your paper
- Add a curved horizontal line beneath the oval shape
- Ensure that there’s a nice amount of space in between the line and oval

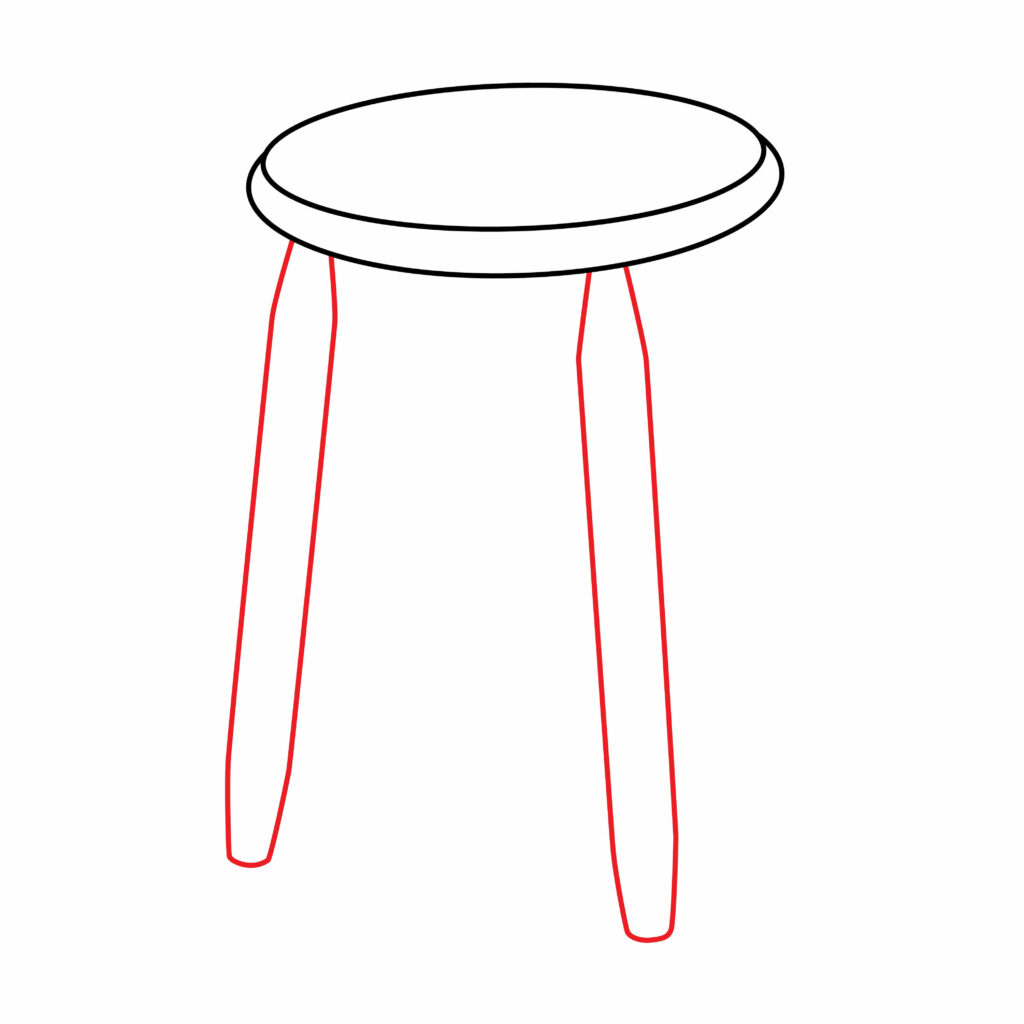
Step 2: Draw the Front Stool Legs
Now, it’s time to start adding the elements that support the stool’s upright position. We’ll begin by drawing the front stool legs.
First, draw a wavy diagonal rectangle starting from the bottom-left side of the sitting area.
Ensure that the rectangle starts off narrow, widens in the middle, and then narrows again towards the end.
Complete the same process for the other front stool leg. However, start this one slightly next to the mid-point of the bottom sitting area, towards the right side.
- Draw two thin diagonal rectangles starting from the bottom of the sitting area
- Ensure that each rectangle follows a similar curve pattern
- End the rectangle on the right slightly lower than the one on the left
Step 3: Draw the Back Legs
Since the drawing is three-dimensional, it’s essential to remember that the legs at the back ought to be shorter than the front legs.
To complete this step, draw a long vertical rectangle attached to the bottom of the sitting area between the two front legs.
End the rectangle once it reaches the mid-length of the right front leg.
Finally, draw a long diagonal rectangle next to the right front leg that ends slightly lower than the first back leg.
Periodically make use of the image provided for accurate dimensions.
- Draw a long vertical rectangle between the two front legs
- Add a long diagonal rectangle on the right side of the stool
- Ensure that both rectangles curve inward along the bottom

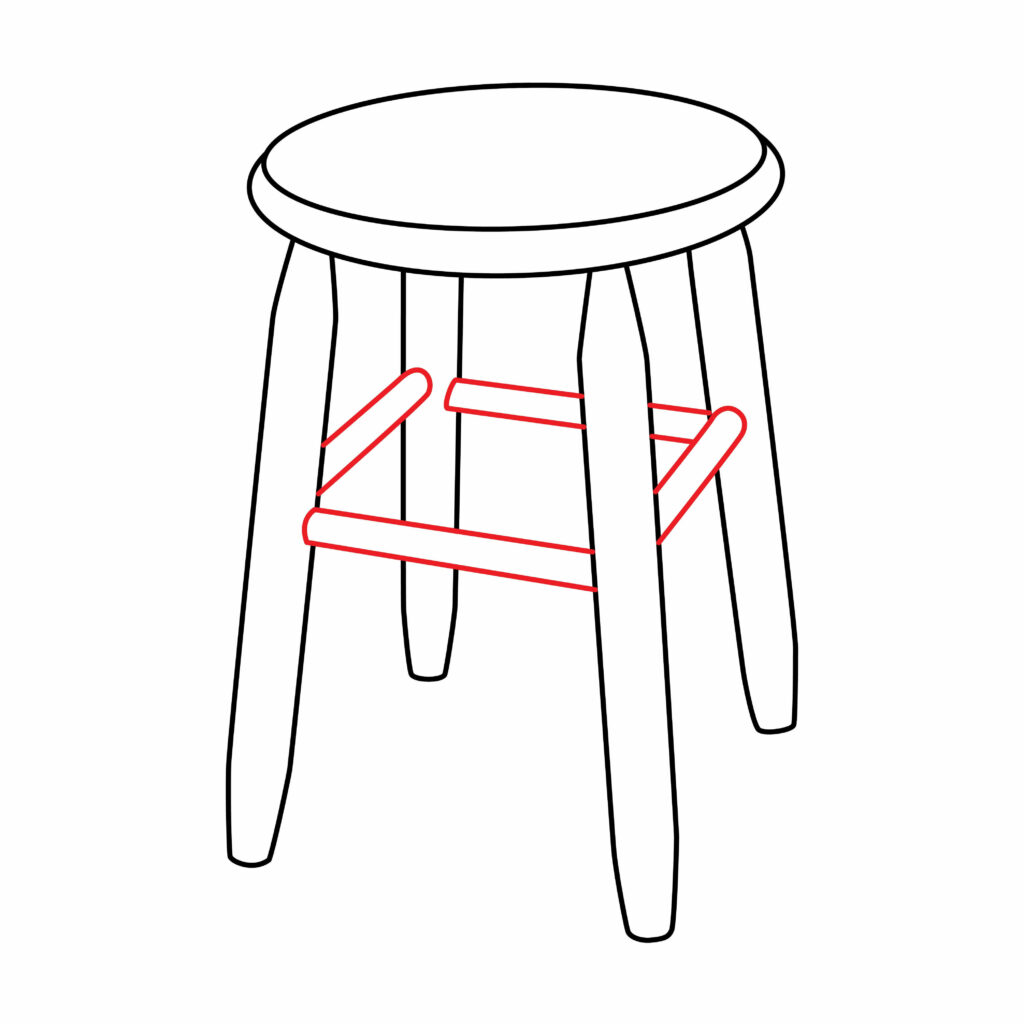
Step 4: Draw the Leg Support
To ensure that each leg is connected, we need to draw four attachments resembling the leg support.
Draw a thin diagonal tube connecting the back-left leg to the front-left leg.
Draw another thin tube; however, this one ought to start from the side of the front-left leg and connect to the side of the front-right leg.
Add a diagonal tube starting from the outer side of the front-right leg and connect it to the middle of the back-right leg.
Finally, draw a thin diagonal tube attached to the inner side of the back-right leg and connect it to the side of the back-left leg.
Erase the lines running over the front-right leg.
- Add a series of diagonal tubes connecting each leg to each other
- Make sure that the lines do not overlap each other
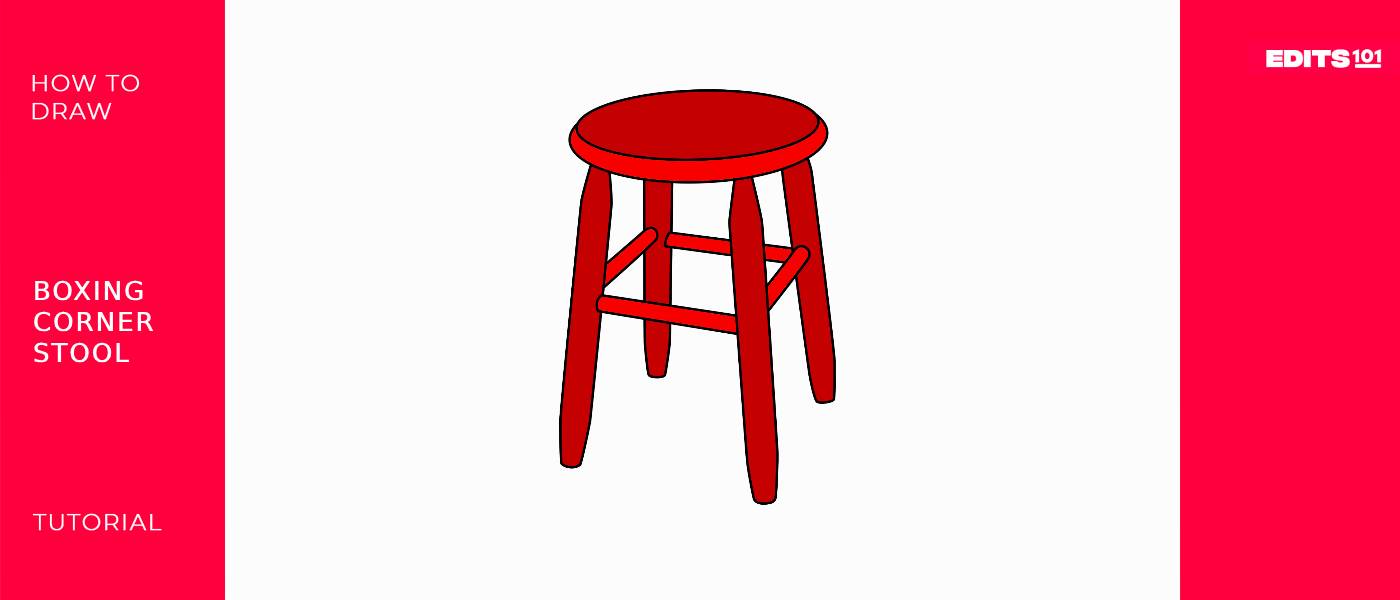
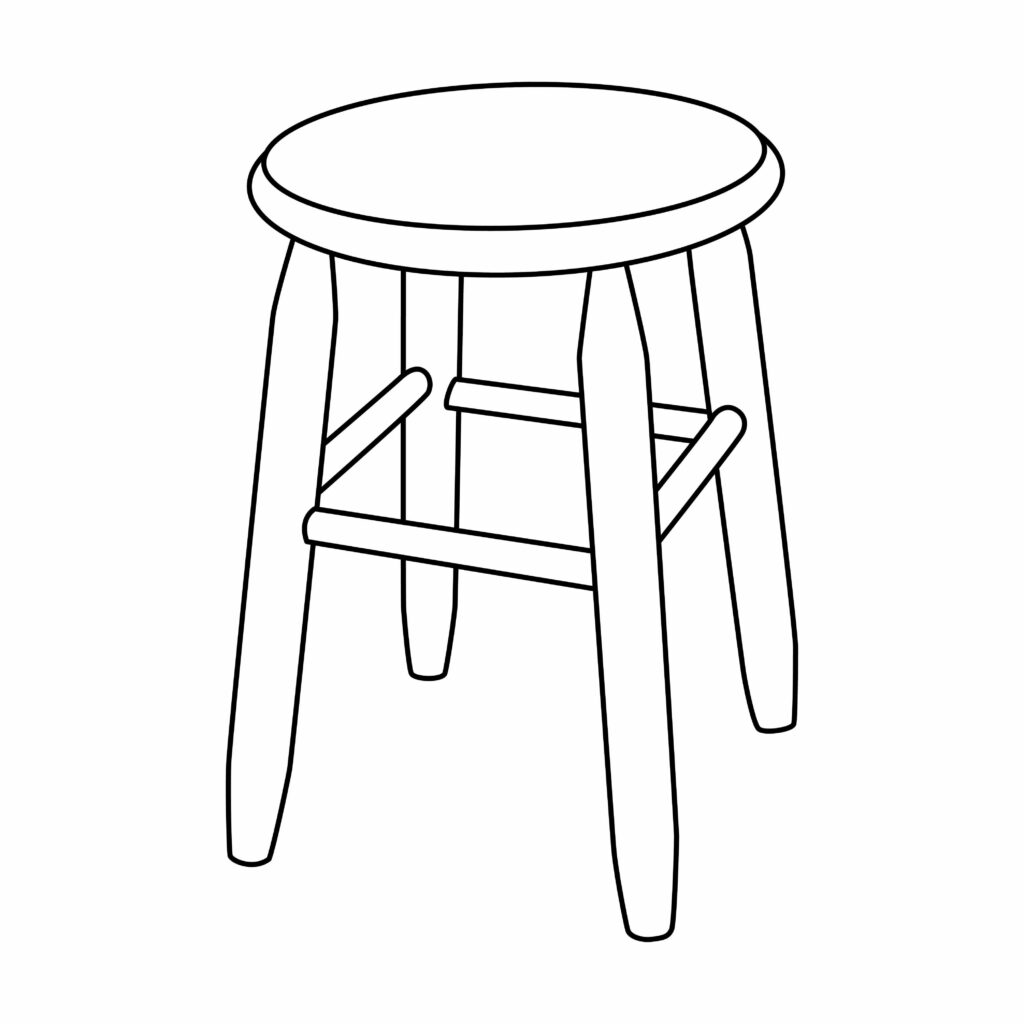
Congratulations! Your Boxing Corner Stool Drawing is Complete
Take a well-deserved break and assess the outcome of your drawing. You’re welcome to use the image provided below for comparison. If any corrections ought to be made, do so now before completing the rest of the tutorial.
Taking your Drawing to the Next Level
Now that all the technical work is out of the way, it’s time to have some fun! If you’re happy with your results so far, you can leave your drawing as is, but if you want to add some flavor and make your drawing stand out, follow these steps.
step 5: adding a Background
Adding a background to a drawing is like painting the walls of a room – it provides depth and context to the space, enhancing the overall visual experience.
For your boxing corner stool drawing, there are various background ideas to play around with.
Deciding what story you’re trying to tell with your drawing is essential. Ask yourself what surrounding objects will best complement your boxing corner stool.
For a subject-orientated drawing, consider adding a boxing ring with a boxer currently sitting on your newly designed stool.
You could also add some other boxing equipment to your sketch, like gloves, a robe, a mouthguard, and some shoes.
These are only a few suggestions. We’re sure whatever you add to your background will be amazing!
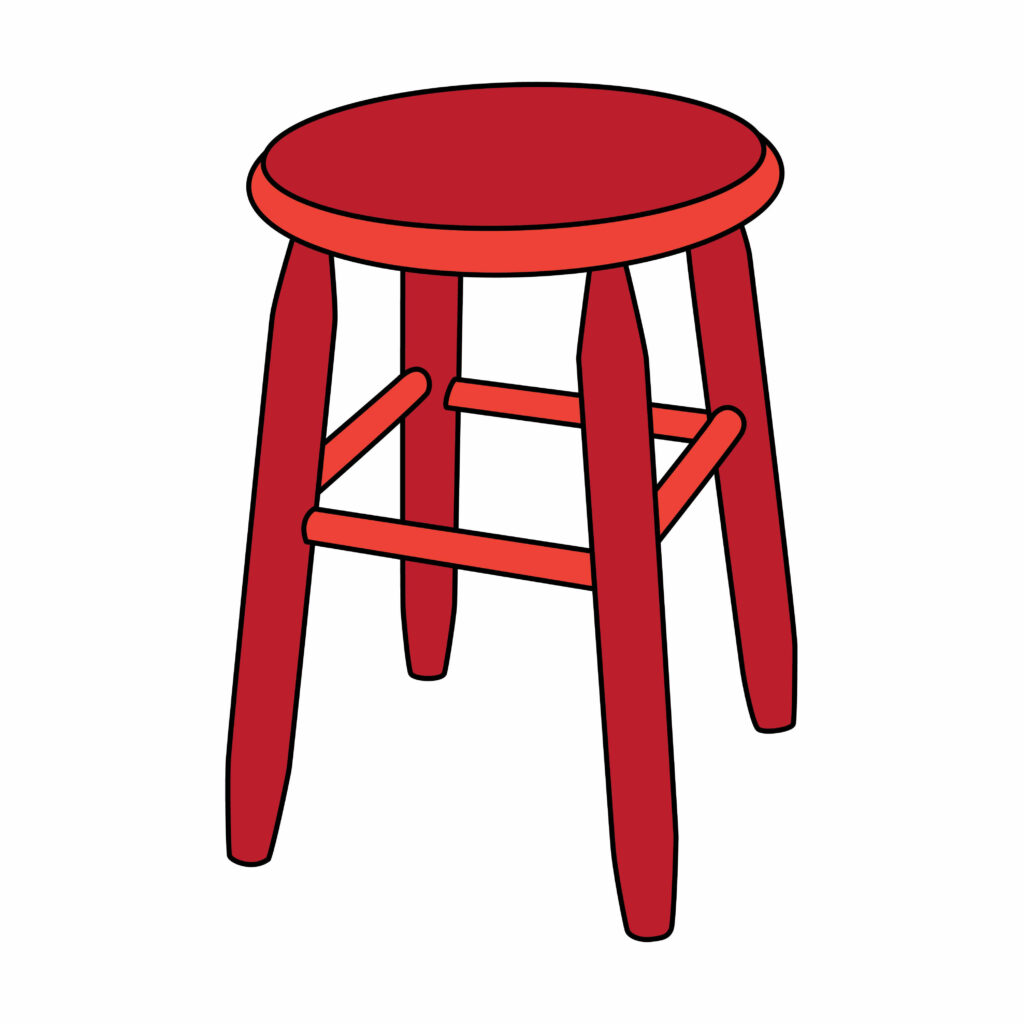
step 6: adding Color
Just as music can transform a movie scene, adding color to a drawing can elevate its impact, turning a simple black-and-white sketch into an eye-catching piece.
In this tutorial, we have drawn a wooden boxing corner stool, which is often brown, black, red, or blue in real life.
For a realistic depiction, we encourage you to use one of those as the base color.
Be sure to use varying shades of your chosen color on different elements of the drawing.
For example, dark red on the sitting area and legs and then a lighter red on the rim of the seat and the leg support.
Feel free to color your drawing similarly to ours using the illustration below.
Bonus Tips
Practice sketching different parts of the stool separately before attempting a complete drawing to master each element individually.
Add some distinctive features of a boxing corner stool like a seat cushion or some grooves on the lower part of the legs.
Use shading techniques to create depth and dimension in your drawing, making it more realistic.
Incorporate subtle highlights and shadows to make the stool appear more three-dimensional.
Don’t be afraid to add personal touches or embellishments that showcase your unique style.
Watch a few YouTube videos to inspire background ideas and gain a few sketching tips.
Conclusion
You have read and learned much from today’s tutorial, like the functions of a boxing stool, how to draw a three-dimensional stool, and some additional tips and tricks to elevate your sketch.
For that, pat yourself on the back. Remember, the more practice you put in, the better your results will be.
So keep on pushing and try out some other tutorials as well. See you next time!

Thanks for reading & feel free to check out more of our articles!
Author Rating
Overall Rating
Summary
This tutorial will walk you through creating a fundamental representation of a boxing corner stool and then refining it to achieve a more realistic appearance.