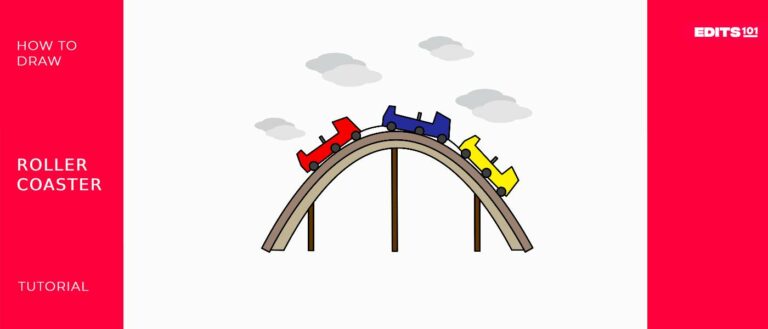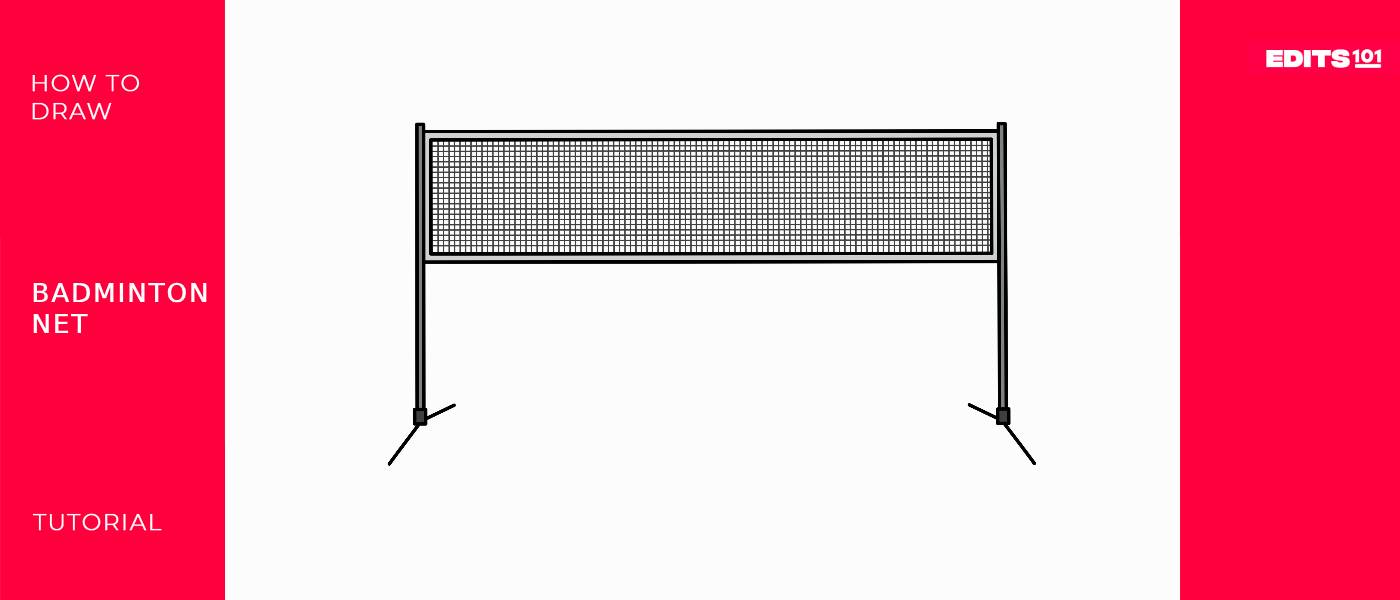
How to Draw a Badminton Net | In 5 Easy Steps
A badminton net is a crucial piece of equipment used in the sport of badminton to divide the court into two sides!
It’s usually made of nylon and is suspended between two posts, creating a barrier that players must hit the shuttlecock over during a game. The net serves as a boundary for play and helps to determine points scored in competitive matches.
In today’s tutorial, you will learn how to draw a badminton net in only 5 easy steps.
| Steps | Complexity Level |
| The Posts | 3 |
| The Net’s Border | 2 |
| The Mesh | 2 |
What You Will Need
- A drawing paper or a sketchbook
- Pencils (2b, 3b or 5b)
- An eraser
- A ruler
- Color pencils or markers
- 10-15 minutes
How to Draw a Badminton Net
Drawing a badminton net can be a fun and relaxing activity as it’s quite easy to execute! In this guide, we will cover everything ranging from the use of a badminton net, how to draw the posts, the net border and the mesh.
You will also be provided an additional two steps to complete that will really boost the quality of your sketch, so be sure to check those out. Grab all of your drawing tools, peruse the outline below before sketching, and without any further ado, let’s get started.
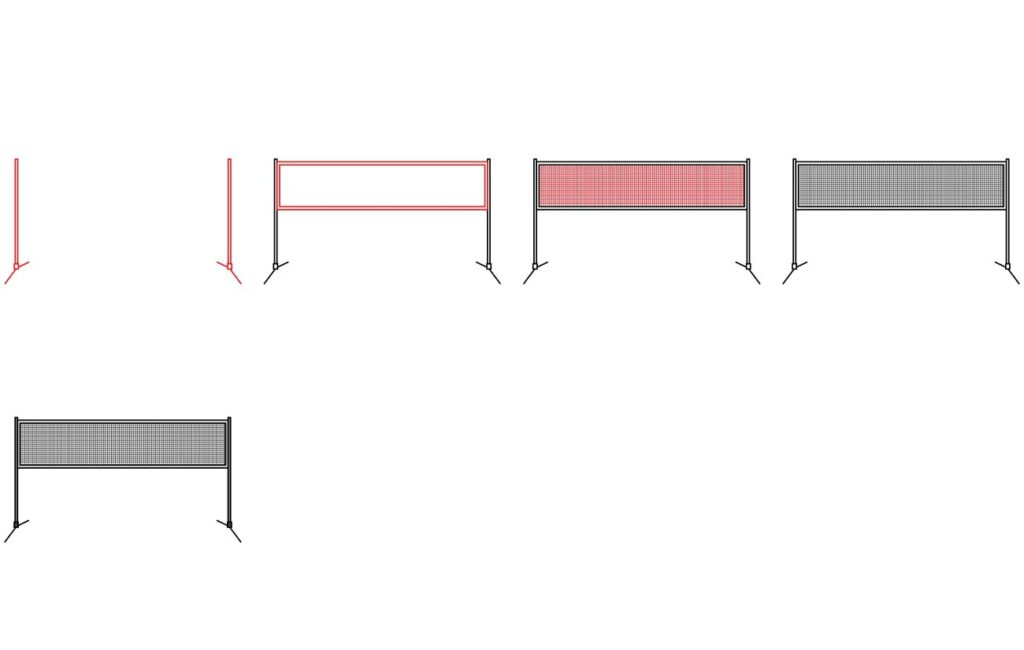
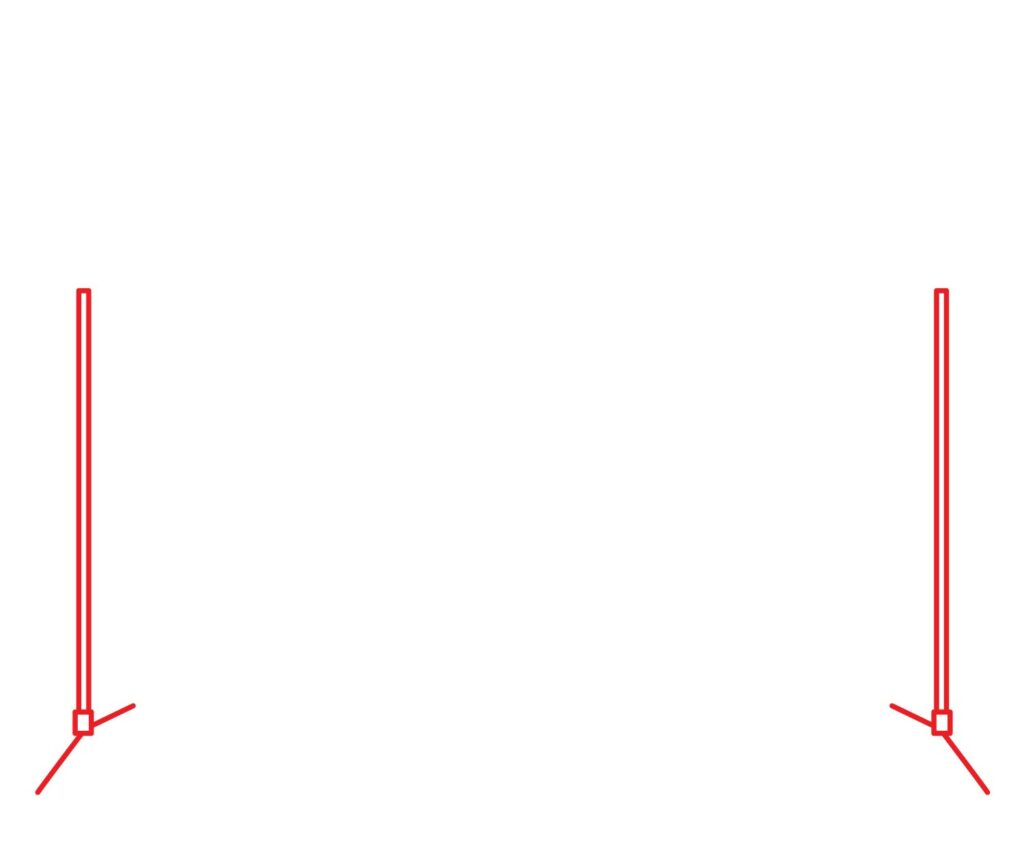
Step 1: Draw the Posts
To draw the badminton posts, start by positioning your drawing paper in a landscape orientation. Next, use your ruler to draw a thin vertical rectangle close to the left margin. Add another similar rectangle close to the right margin. This will form the posts.
To refine them, use your ruler to add a small square at the base of each post. The small squares will serve as the base of the posts.
Since we are drawing an indoor badminton court where the posts cannot be dug into the ground, we will create a stand. For this, we are going to add two diagonal lines under each square to form two stands.
- Draw two thin vertical rectangles, slightly apart from each other
- Add two small squares at the base of each rectangle
- Add two diagonal lines on the base of each post to form the base
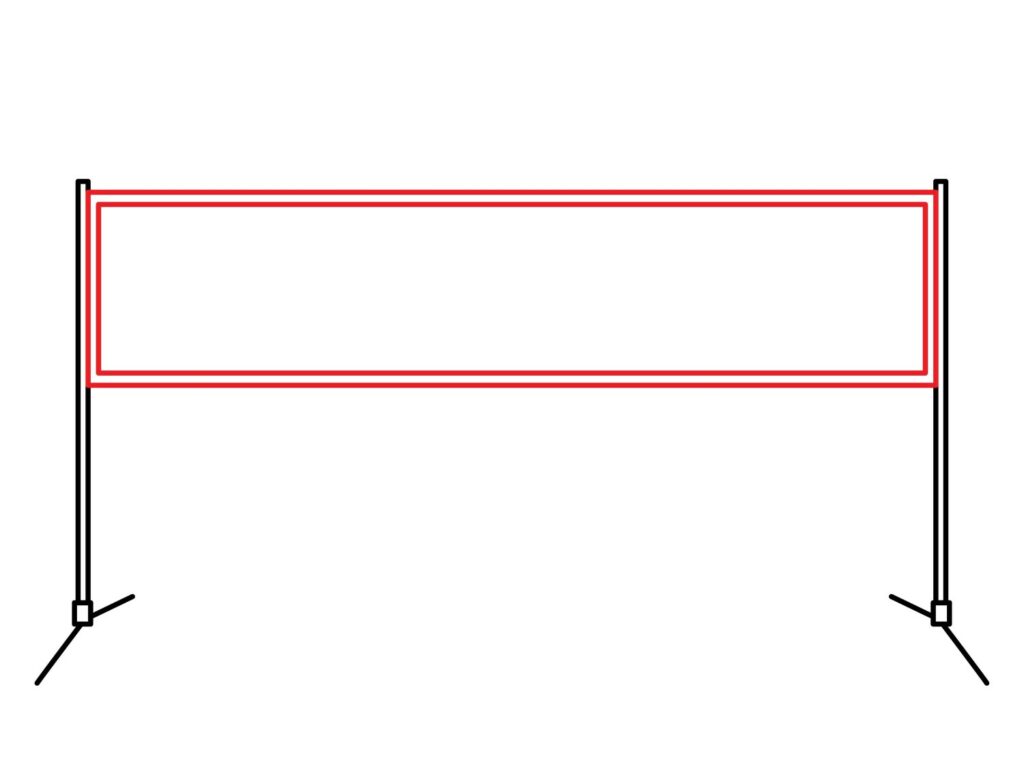
Step 2: Draw the Net Border
With the badminton posts ready, it’s time to add the net border. The net border is primarily used to provide reinforcement and stability to the edges of the net.
It also helps maintain the shape and tension of the net, preventing it from sagging or becoming misshapen during gameplay.
To complete this step, start by drawing a horizontal rectangle that connects at the top of the posts and extends to almost half the height of the posts. Then, add another rectangle inside the first one to complete the net border.
- Draw a horizontal rectangle that connects to the top of the net post.
- Add another rectangle inside the first one which will resemble the net border
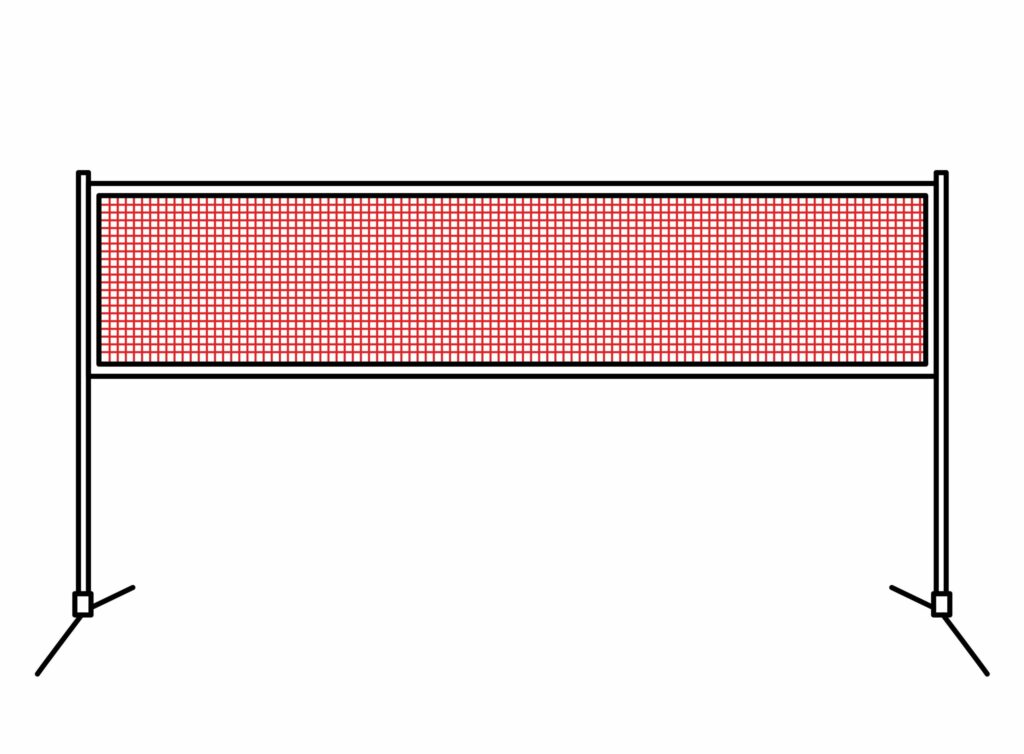
Step 3: Add The Mesh
It’s now time to add the mesh to your net border. While it might seem difficult, especially when looking at how our drawing looks, it is actually very easy. You simply need to use vertical and horizontal lines to create the mesh.
Using your ruler, start by drawing a series of horizontal lines that sit inside the net border. The lines should be close together and at an equal distance from each other.
Once you cover the entire length, start adding closely packed vertical lines. Maintain the same distance between the lines as the one you maintained for the horizontal lines. You will have something that looks like what we have below.
- Draw several horizontal lines within the net border
- Add vertical lines over the horizontal ones running from left to right
- Use a ruler for accuracy
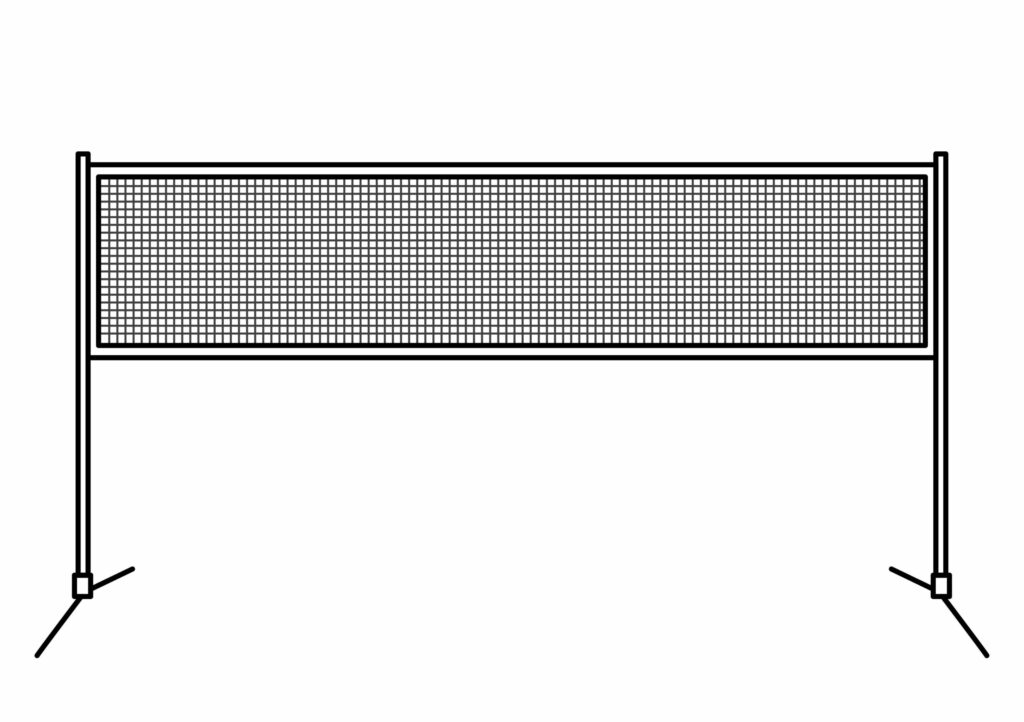
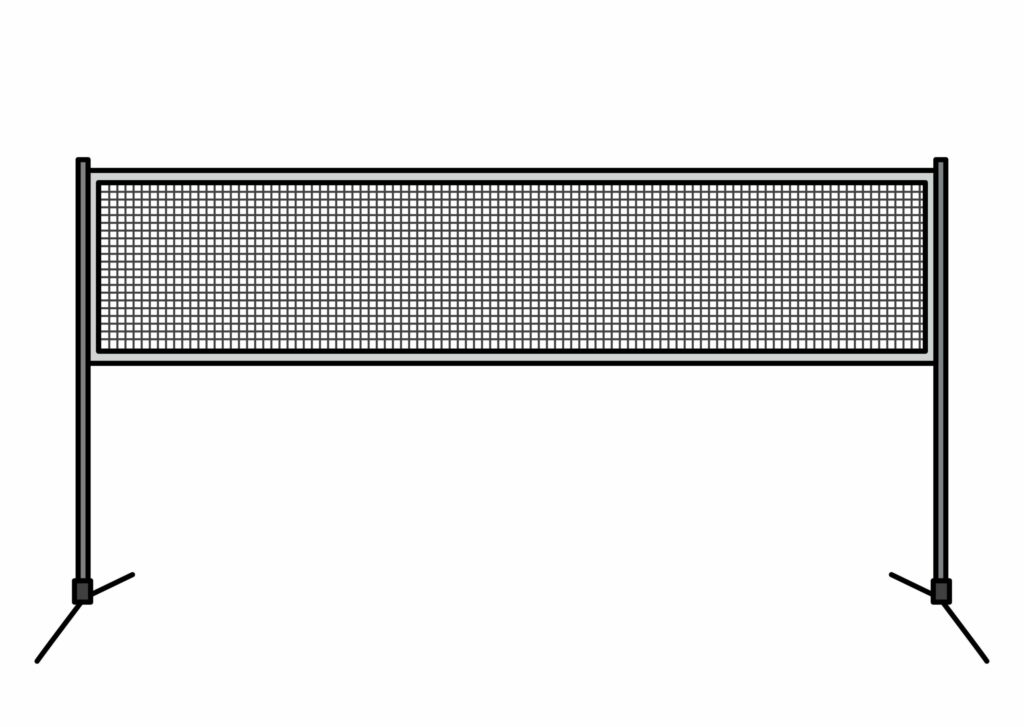
Congratulations! Your Badminton Net Drawing Is Complete
The basic structure of your badminton net is now ready! Take a second to admire your work. If something is amiss, use your eraser and pencil to make necessary corrections. You are welcome to use the image provided below for comparison. Once you’re finished, be sure to follow the rest of the tutorial to enhance your sketch!
Taking Your Drawing To The Next Level
While you’re more than welcome to leave your drawing as it is, we always encourage budding artists to push themselves a little bit further and incorporate some color and background accents into their work. This will not only make your drawing stand out, but also heighten its realism.
Step 4: Adding a Background
There are a vast number of things you could add to a badminton net drawing to make it look more realistic. First, you need to take your time and figure out what story you’re trying to tell with your drawing.
You could consider adding some bleachers way off in the distance and a few spectators around your net to make it seem as though they’re watching a match. Additionally, you could draw a badminton court below your net for added detail.
Incorporate other badminton equipment, like a shuttlecock or a racket for additional appeal. You could even add a banner above your net indicating a specific tournament or competition. The key is to make your drawing unique, so let your imagination run wild and include whatever you’d like.
Step 5: Adding Color
To color in a badminton net drawing, you could use shades of white and gray to represent the mesh material of the net. Additionally, adding touches of light blue and yellow can create a vibrant look that mimics the colors often seen on badminton courts.
To add depth and dimension to the drawing, shading with a blending tool or pencil can create a realistic appearance. Consider using light strokes to show shadows and highlights for a more dynamic effect.
Bonus Tips
Pay attention to proportions and spacing to maintain accuracy in your depiction of the net.
Watch a few YouTube videos for some additional guidance on how to incorporate a background into your drawing.
Check out similar drawing tutorials to provide you with a greater insight on how to sketch mesh patterns and posts. These will make the drawing process much smoother.
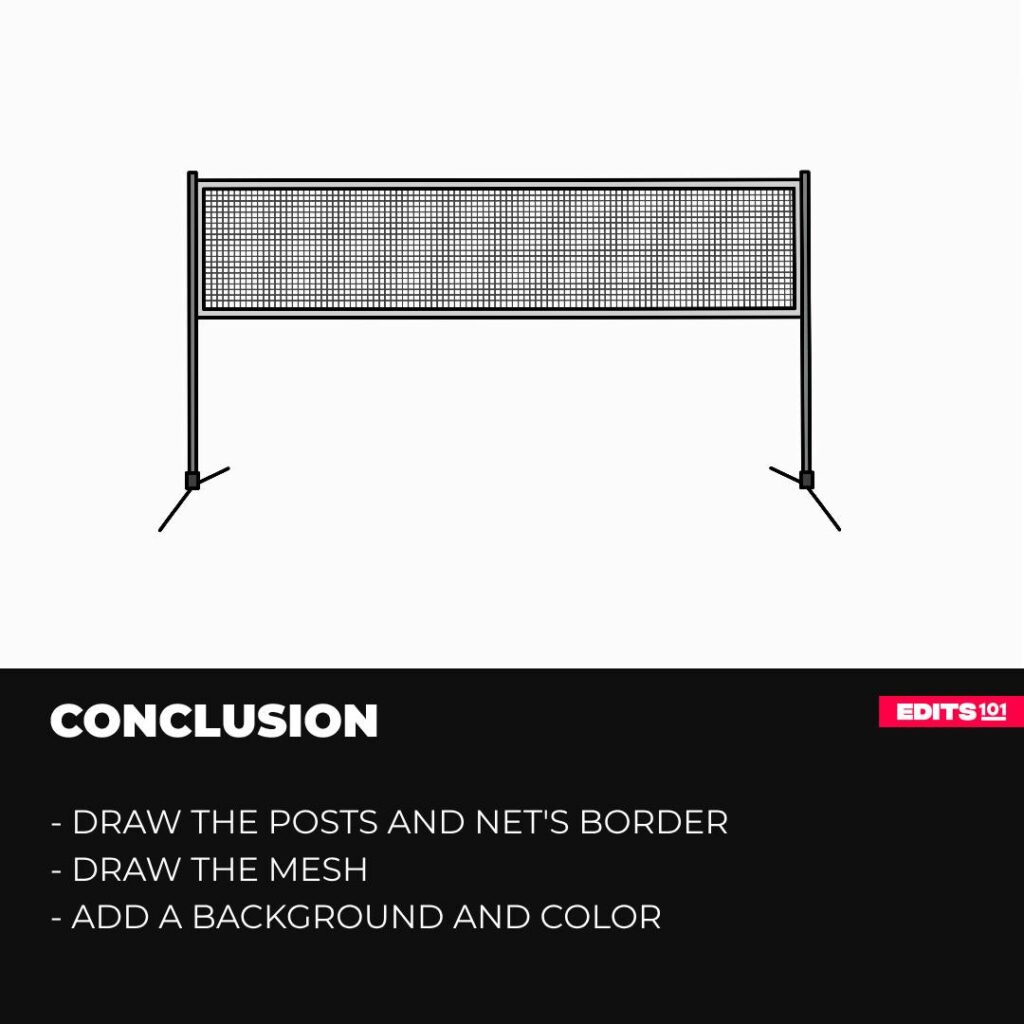
Conclusion
By completing this tutorial, you have learned a few facts about badminton, how to draw posts, outline a net border and add the net mesh.
Give yourself a pat on the back for that and acknowledge the hard work put into creating something from scratch.
Remember, improvement takes time, practice and dedication, so keep on exploring your talents by drawing more things!
Thanks for reading & feel free to check out more of our articles!
Author Rating
Overall Rating
Summary
This tutoral provides you with easy-to-understand instructions on how to draw a badminton net.