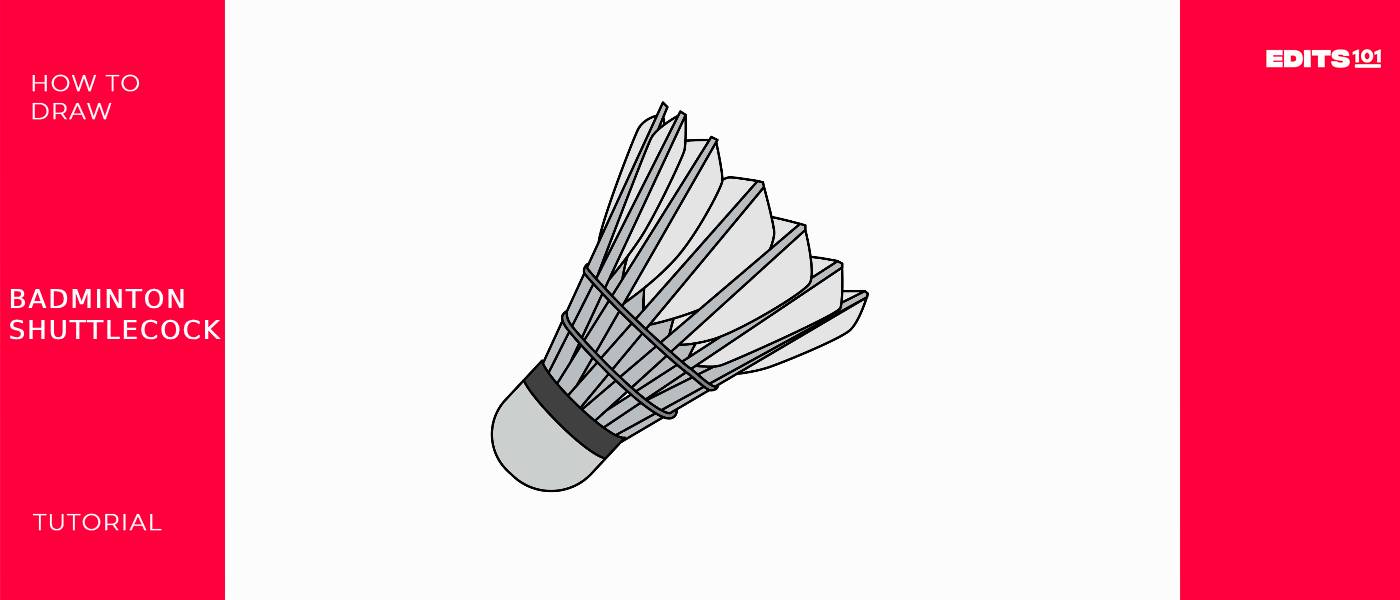
How to Draw a Badminton Shuttlecock | In 6 Steps
A badminton shuttlecock, also known as a birdie, is a conical projectile with stabilizing feathers that is used in the sport of badminton. It is usually made of cork and covered with thin leather or synthetic materials.
The shuttlecock is hit back and forth over the net by players using rackets, with the objective of keeping it airborne and landing it within the opponent’s court boundaries.
In today’s tutorial, you will learn how to draw your very own badminton shuttlecock in 6 steps. Four of those involve the sketching process, while the final two will provide you with tips and tricks on how to enhance your drawing’s visual appeal.
| Steps | Complexity Level |
| The Cork | 3 |
| The Feather Sticks | 4 |
| The Feather Hair | 3 |
| The Stitches | 2 |
What You Will Need
- Drawing paper
- Pencils (2b, 3b or 5b)
- An eraser
- A ruler
- Colored Pencils or Markers
- 20-25 minutes
How to Draw a Badminton Shuttlecock
This tutorial will effectively teach you how to draw a realistic badminton shuttlecock; starting from the cork, tackling the feather sticks and hair, before completing the sketching process by adding the stitches.
Before you begin, ensure you have all of the required drawing tools, and steal a peak at the outline provided to gain a better sense of each step. Once you’re ready, jump right in!
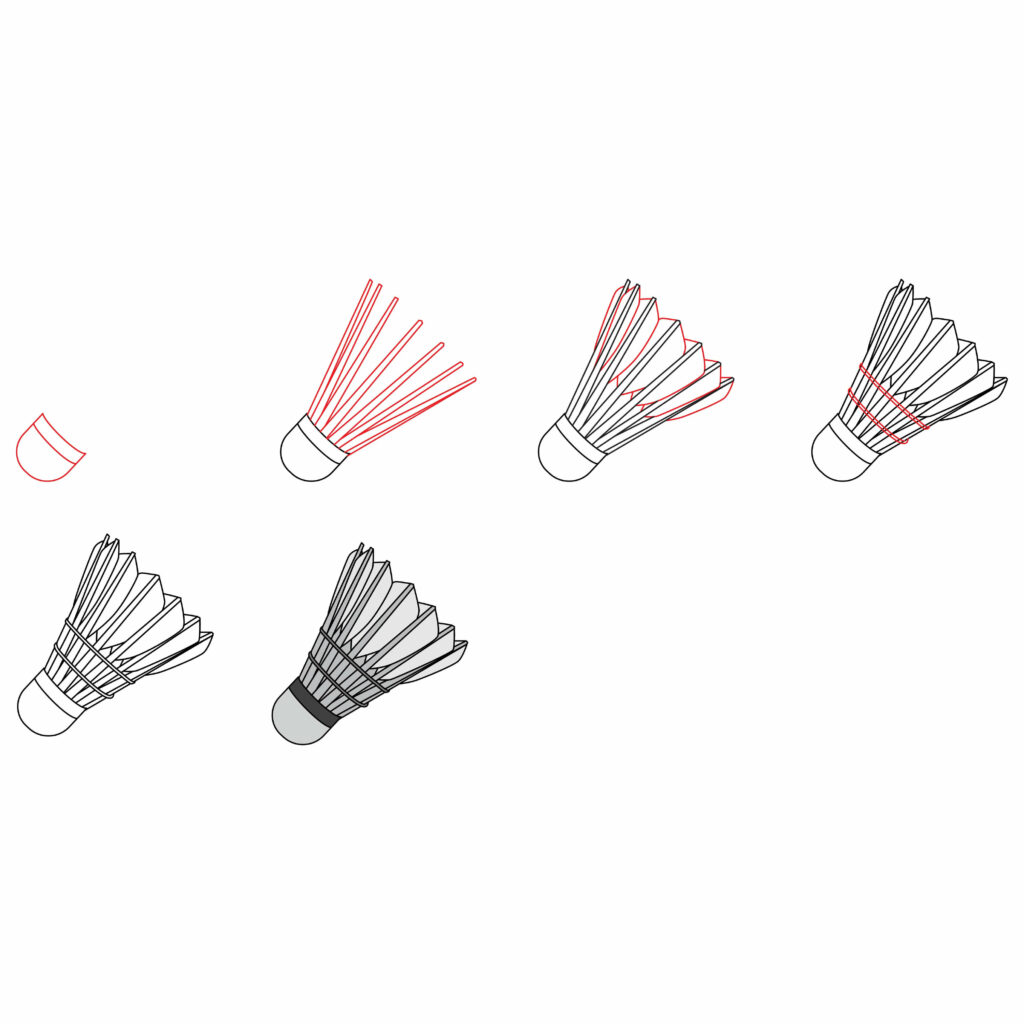
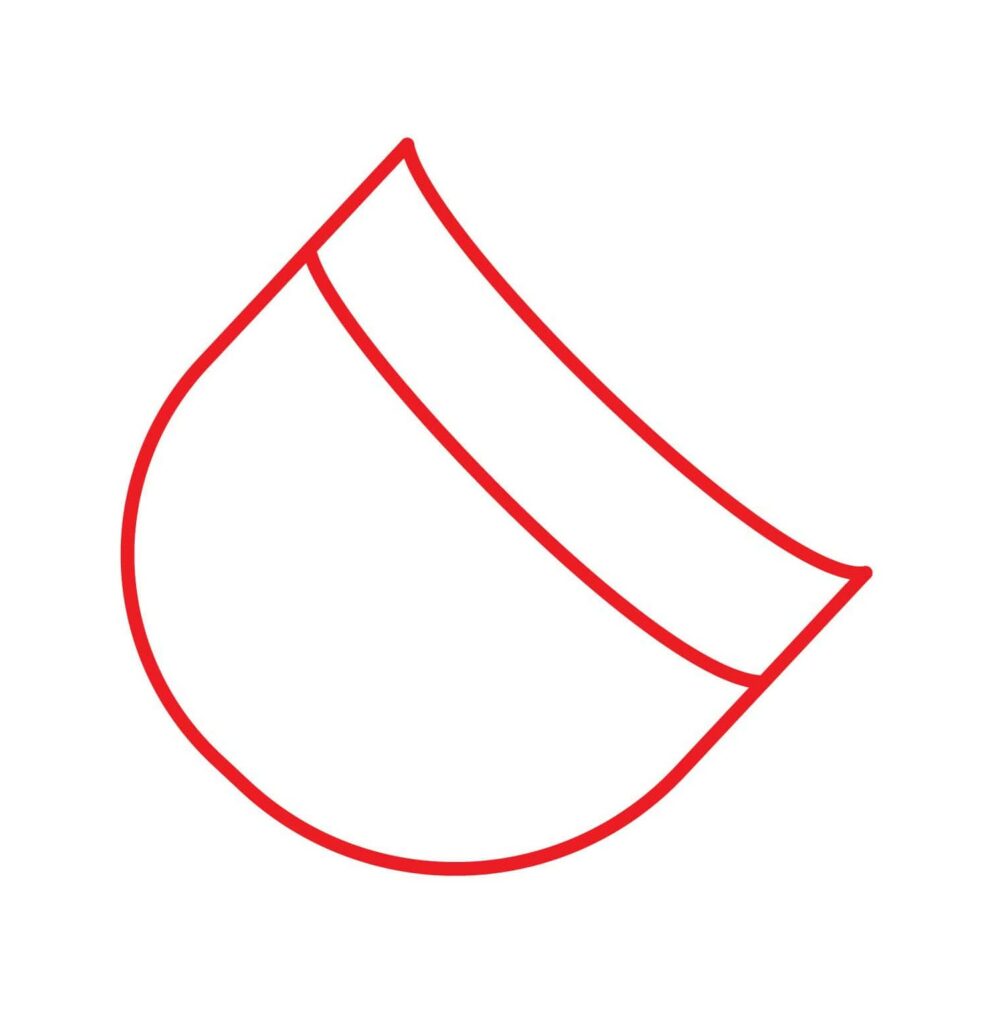
Step 1: Draw the Cork
The cork is primarily the base of the badminton shuttlecock. It’s used to provide weight and stability for the shuttlecock during gameplay.
To complete this step, first draw a big “C” curve on the left side of your drawing paper. Ensure the open space of the curve is not angled to the side, but more so pointed towards the upper-right corner of your page.
Once complete, add a diagonal line on the upper side of the curve to connect the lines together. Then, add another diagonal line beneath the first one within the width of the curve, maintaining a nice amount of space between each line.
You should have something resembling the shape below once you’re finished.
- Draw a big “C” curve on the left side of your drawing paper
- Add a diagonal line at the open space to connect the lines
- Draw another diagonal line within the width of the shape for detail
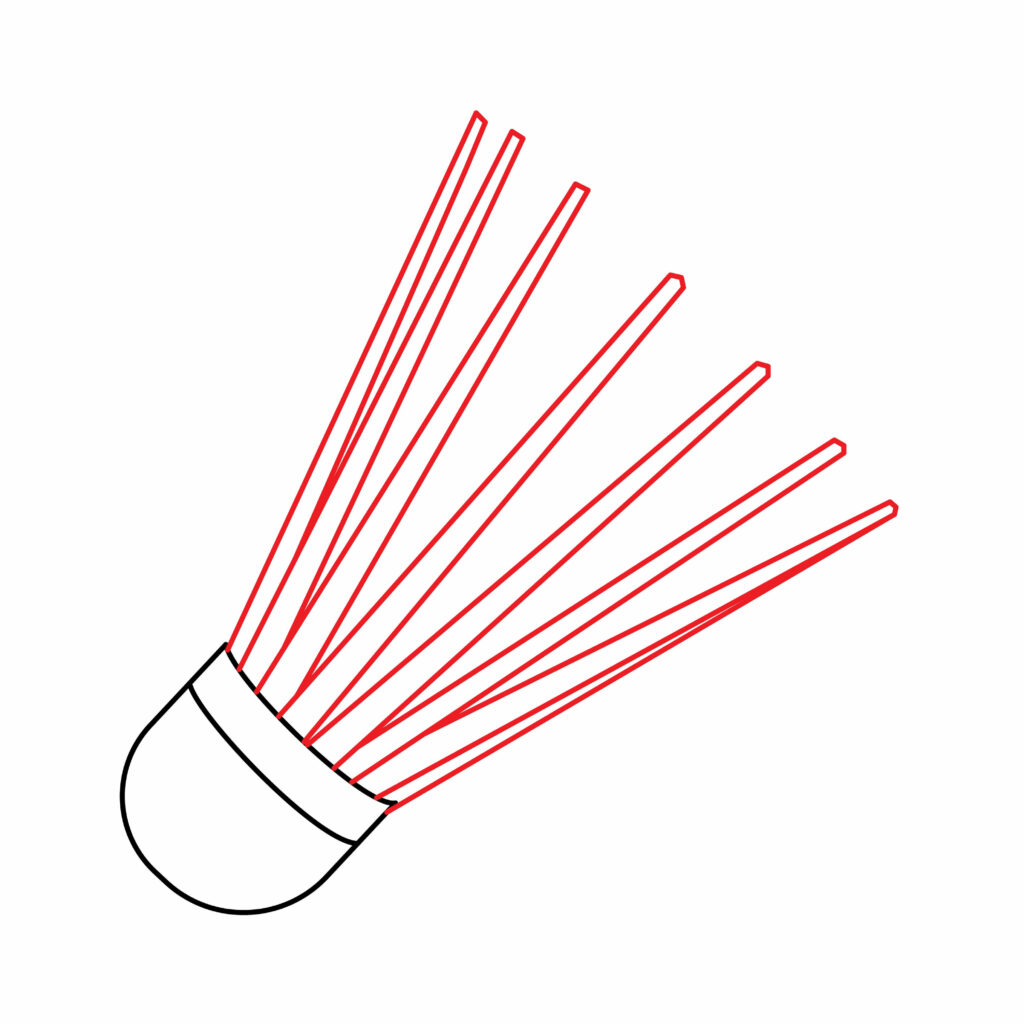
Step 2: Draw the Feather Sticks
High quality badminton shuttlecocks are usually made from goose or duck feathers. These are used to ensure the shuttlecock flies smoothly over the court after being struck.
In the case of your drawing, we’re going to section off the feathers in two parts and first add the sticks. Grab your ruler and draw seven thin diagonal rectangles starting from the upper-right side of the cork.
Ensure that each rectangle narrows towards the top, sort of resembling chop-sticks, and that there’s an equal amount of space between each stick to avoid making them appear too clustered.
Once complete, add the eighth feather stick on the right side directly next to the last one, without a space in between.
- Draw seven thin diagonal rectangles that narrow towards the top
- Ensure that there’s an even amount of space between each rectangle
- Add an eighth feather stick directly next to the last one on the right
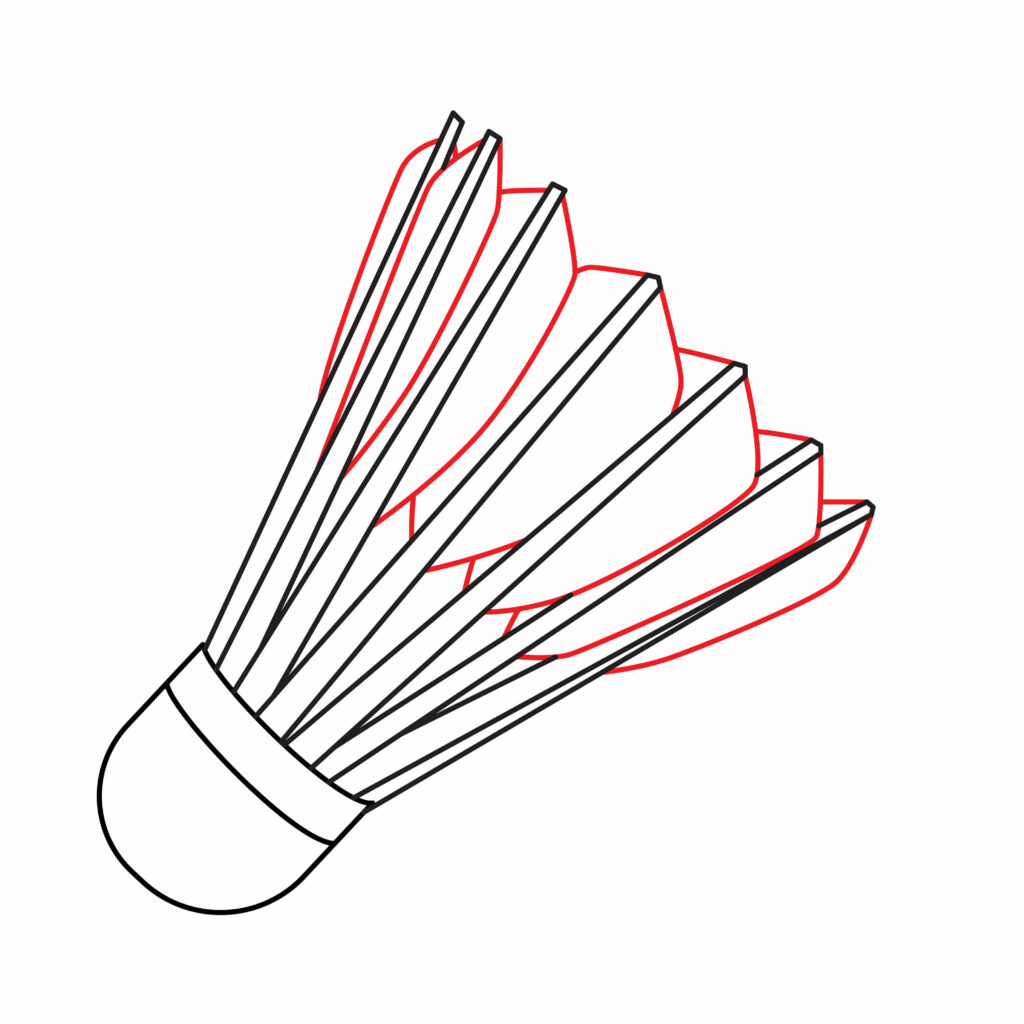
Step 3: Draw the Feather Hair
To draw the feather hairs, first start by identifying the top part of the shuttlecock where the feathers would go.
Then, use your pencil to carefully draw small curved lines radiating out from the sides of the feather sticks in a circular pattern like actual feathers. Make sure to space them evenly around the upper-side of the shuttlecock.
Additionally, check out the image below periodically as you draw to ensure you’re on the right track, and avoid overlapping any lines with that of the feather sticks.
- First identify where you will be placing the feather hairs
- Draw small curved lines radiating out from the sides of the feather sticks
- Ensure each feather is evenly spaced so they look realistic
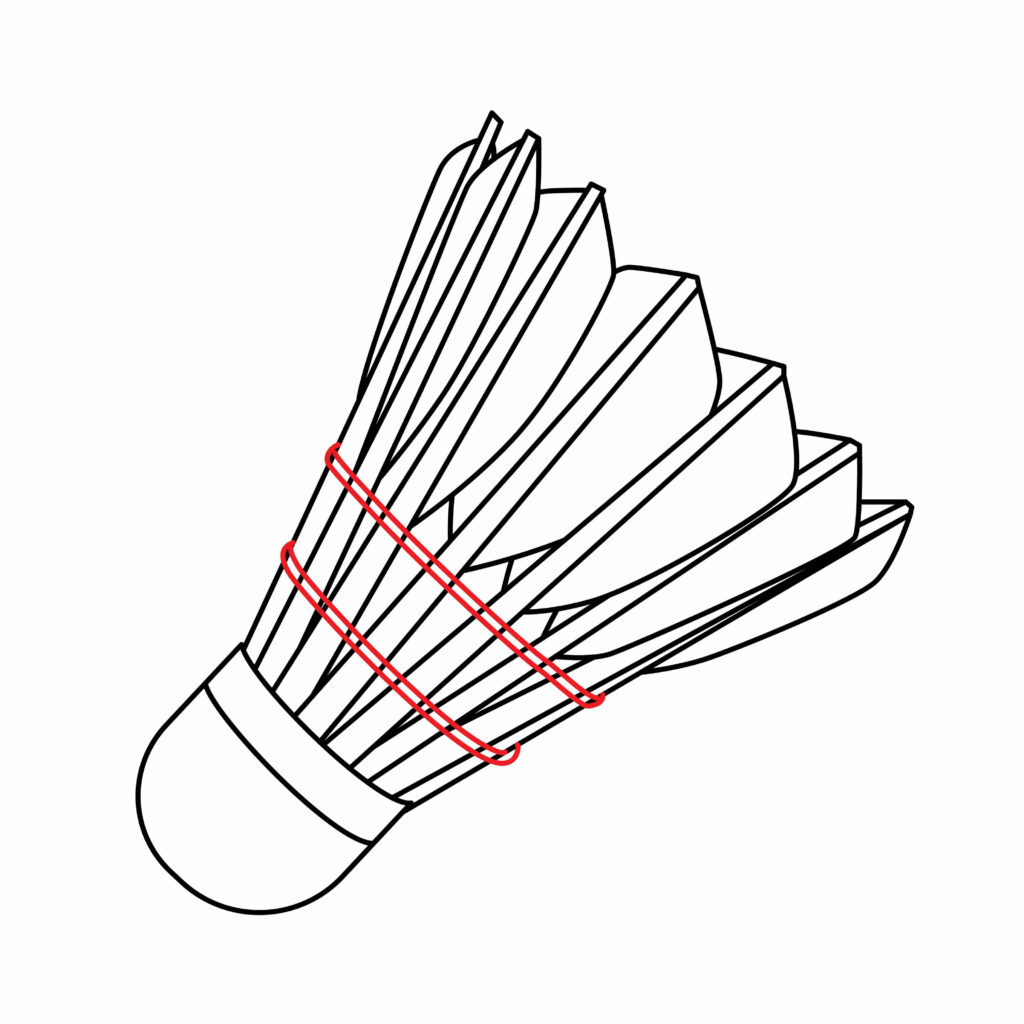
Step 4: Draw the Stitches
Shuttlecock stitches are usually found along the bottom of the feather sticks, operating as threads to keep the feathers in place during flight.
It’s the last step in the sketching process – and the easiest – so let’s get right into it. Grab your ruler again and draw two thin diagonal rectangles over the bottom half of the feather sticks.
It’s important to add the first rectangle just above the cork, and the second one just below the base of the feathers. Add a little curve on the sides of the rectangles as well to indicate they’re securely wrapped around the feathers.
- Draw two thin diagonal rectangles across the bottom half of the feathers
- Ensure they’re accurately spaced apart to resemble real-life stitches
- Add small curves on the sides of the rectangles
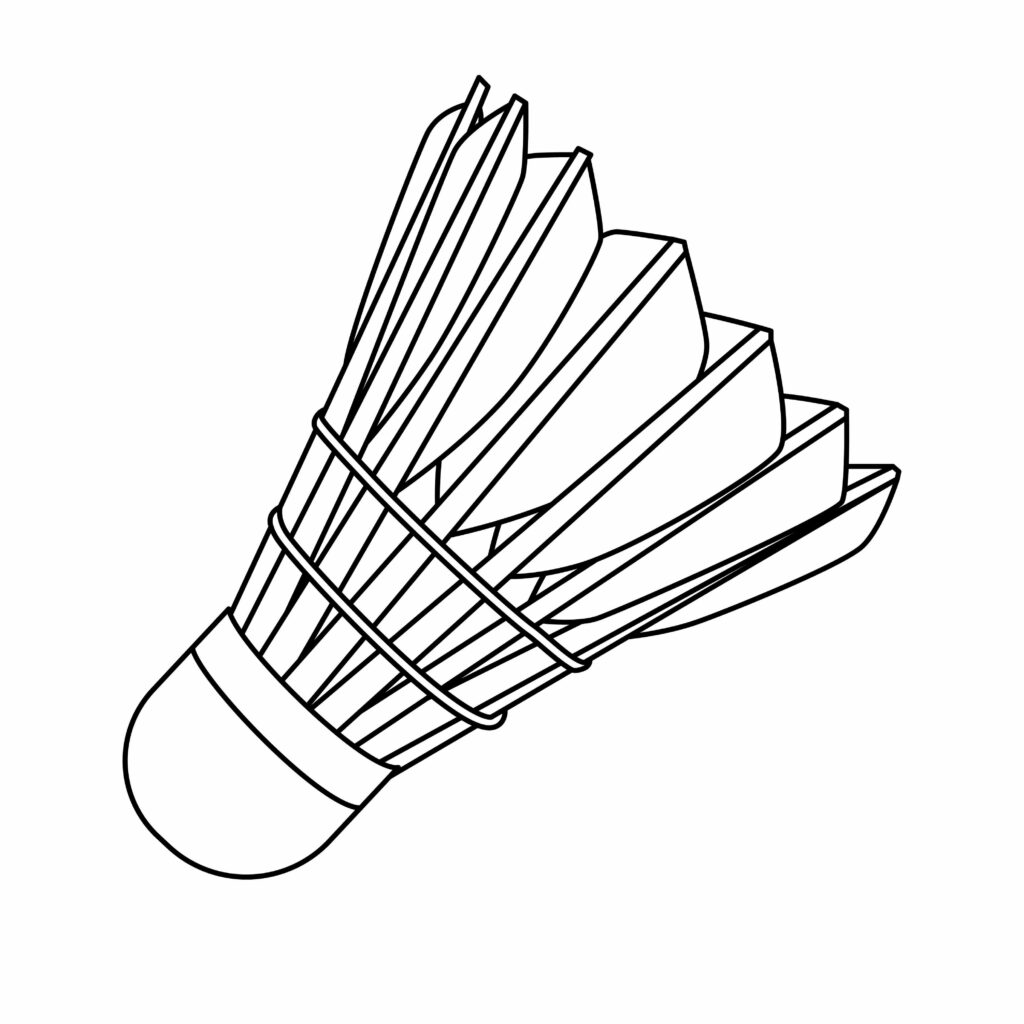
Congratulations! Your Badminton Shuttlecock Is Complete
And there you have it: a black-and-white badminton shuttlecock, complete! Take a little rest and give your drawing hand a well-deserved break. Additionally, use this opportunity to assess the outcome of your drawing. If there are any parts you’d like to redo, now would be the time to do so. Use your eraser and pencils to refine any possible inconsistencies.
Taking Your Drawing to the Next Level
Now that all of the technical work is out of the way, it’s time to add some creative touches that are definitely going to increase the allure and appeal of your sketch.
step 5: adding a Background
There are plenty background ideas to play around with for a badminton shuttlecock drawing. First, you have to decide what image you’re trying to portray with your sketch.
Ask yourself a few questions first, like; is your shuttlecock currently on a badminton court? Is it being propelled over a badminton net, feathers spread wide as it flies over the structure? Maybe someone’s done a bad serve, and it’s landed square against the net.
When you identify what story you’re telling with your sketch, you can then proceed to add in the background details. We’re sure whatever you decide to add will be brilliant. Remember to take your time, and add your name along the boundary of your sketch for a personalized touch!
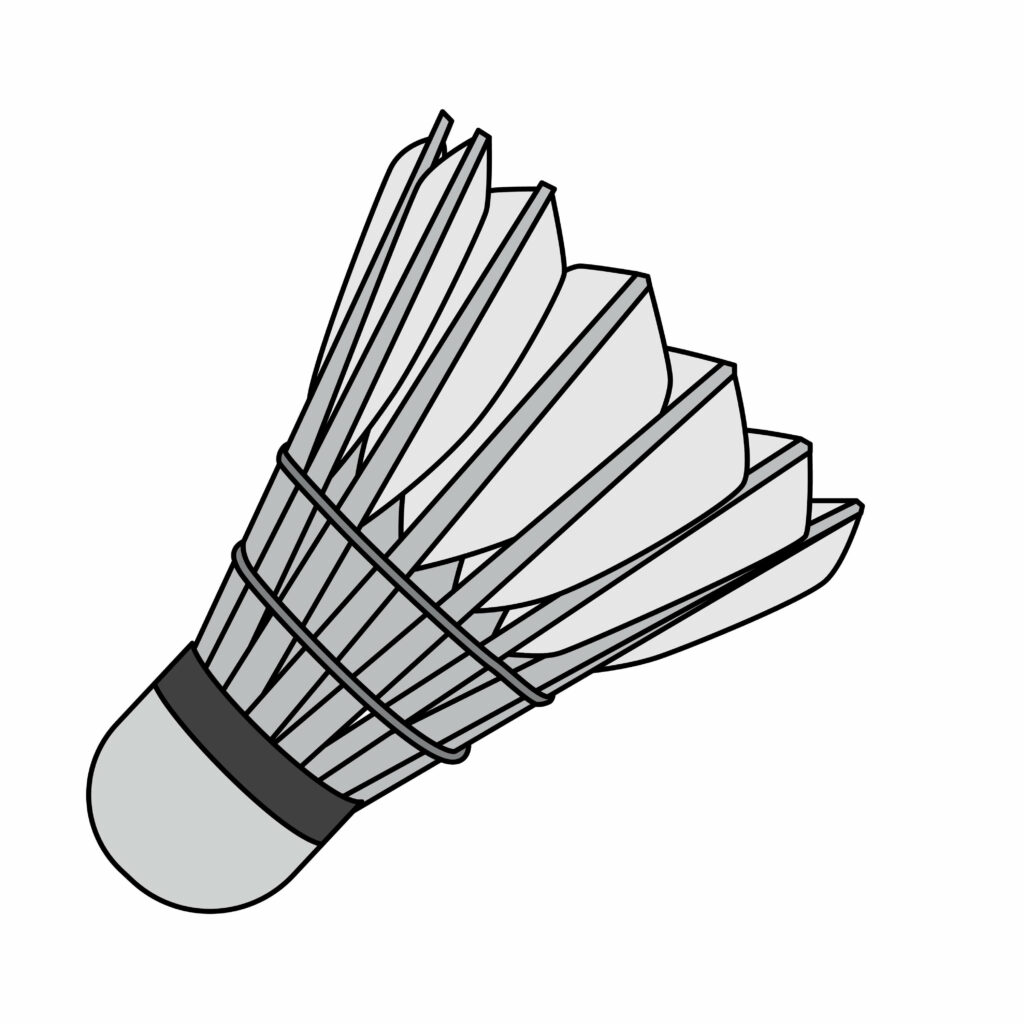
step 6: adding Color
Adding some color is key when creating realistic art. Since badminton shuttlecocks are usually white, and your drawing paper is most likely white as well, choose a similar color that will still stand out on your page.
In our case, we’ve used a few gray tones to accurately compliment our drawing. You’re welcome to use the same for yours.
Though bear in mind that it’s best to leave the black outline created with your pencil for some depth, and use varying shades of gray on different parts of the sketch to make each part stand out!
Bonus tips
Experiment with using different types of pencils or pens to create different textures for the feathers of the shuttlecock. You can even incorporate other mediums entirely such as charcoal or crayon.
Incorporate shading techniques to add depth and dimension to your shuttlecock illustrations, making them more realistic.
Take breaks during long drawing sessions to prevent eye strain and maintain focus on fine details.
Check out our YouTube channel and be sure to drop a comment on any one of our videos, detailing your experience with drawing a badminton shuttlecock! It’s a great way to get some feedback from other budding artists.
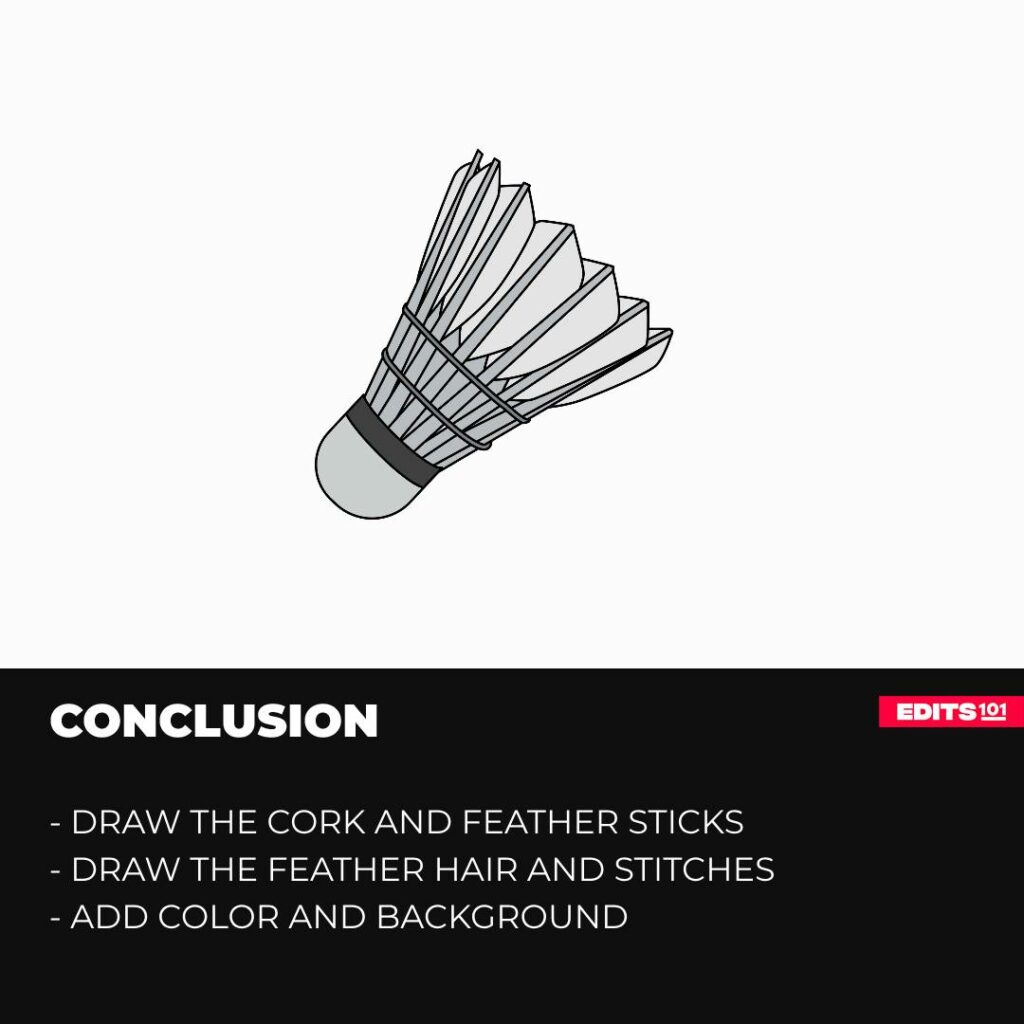
Conclusion
Congratulations for reaching this point of the tutorial! If your drawing doesn’t immediately resemble a real-life shuttlecock, don’t even sweat it! Practice, and dedication is what will determine the outcome of your sketch.
You have read and hopefully learned some new things from today’s tutorial; like the functionality behind badminton shuttlecocks, how to draw a cork, feathers and stitches. For that, be proud of yourself, and always remember, you can only improve from here!
Thanks for reading & feel free to check out more of our articles!
Author Rating
Overall Rating
Summary
This tutorial will walk you through creating a simple representation of a badminton shuttlecock and then refining it to achieve a more lifelike appearance.