How to Draw Olympic Rings | A Step-by-Step Guide
The Olympic Games are a historic sporting event that brings together athletes from all around the world to compete in various sports. The modern Olympics were inspired by the ancient Olympic Games held in Olympia, Greece, and have been held every four years since 1896!
Seeing as the 2024 Summer Olympics are coming up in August, a drawing of the famous Olympic Rings could be a wonderful new work of art for your growing collection!
In this tutorial, we will show you how to draw your very own Olympic Rings illustration in only 7 easy steps! Are you ready to get started?
| Steps | Complexity Level |
| The First Ring | 2 |
| The Second Ring | 3 |
| The Third Ring | 3 |
| The Fourth Ring | 3 |
| The Fifth Ring | 3 |
What You Will Need
- Drawing paper or a sketchbook
- Pencils (2b, 3b or 5b)
- Eraser
- Colored pencils or markers for coloring
- Mathematical drawing compass
- Circular household objects of different sizes, like plastic cups, perfume or spray bottles (optional)
- 25-30 minutes
How to Draw Olympic Rings
Drawing Olympic Rings can be a fun activity to do, either for a project or even in your free time, because even though it may seem slightly complex at first glance, it’s not very difficult to do once you’re in the groove.
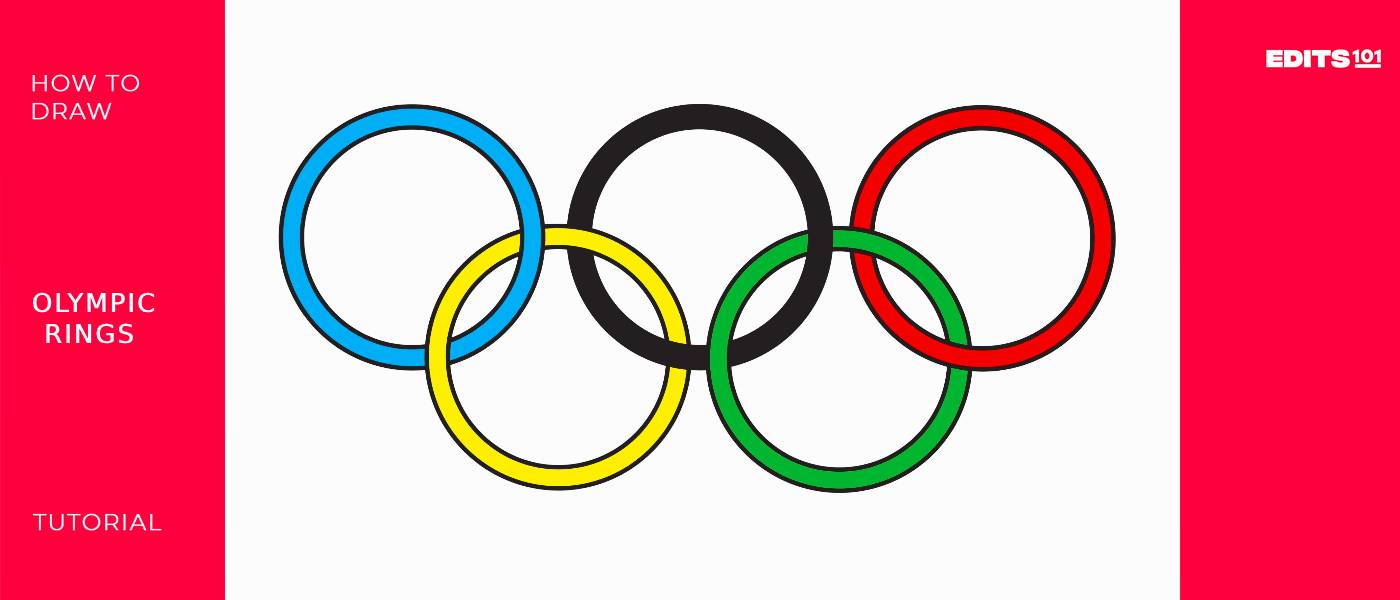
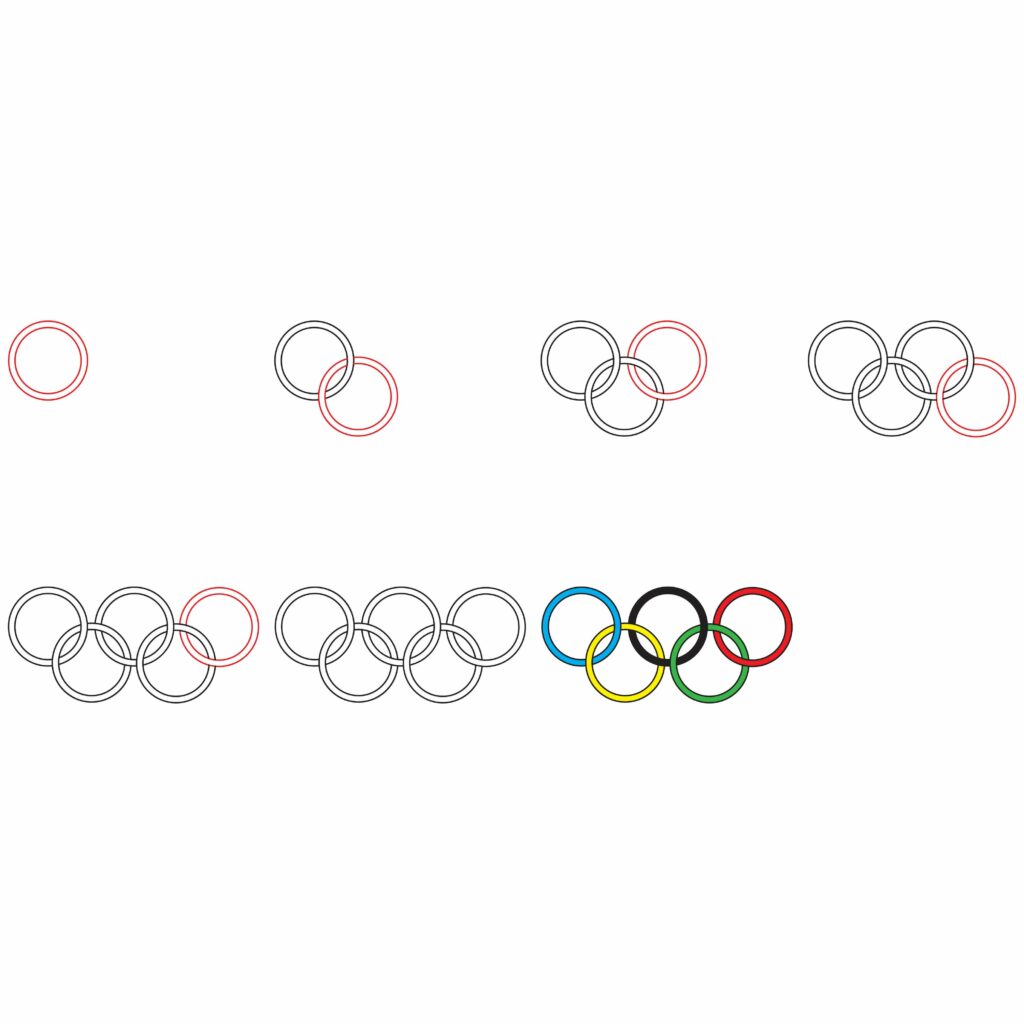
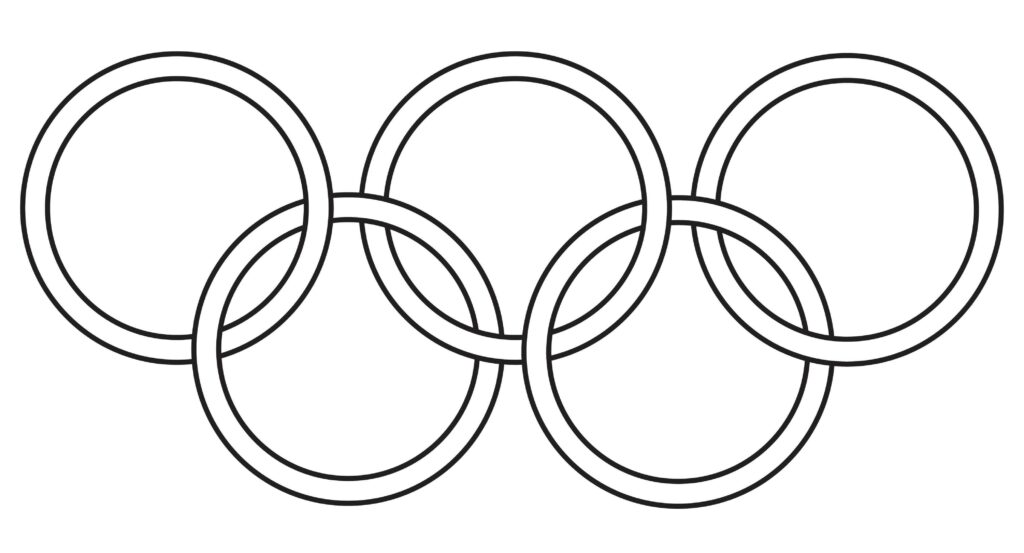
Check out the image below for an outline of all the steps and what the final product will be before you begin, and without any further ado, let’s get cracking!
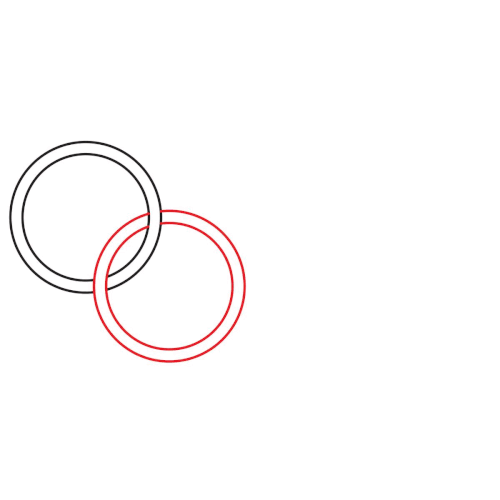
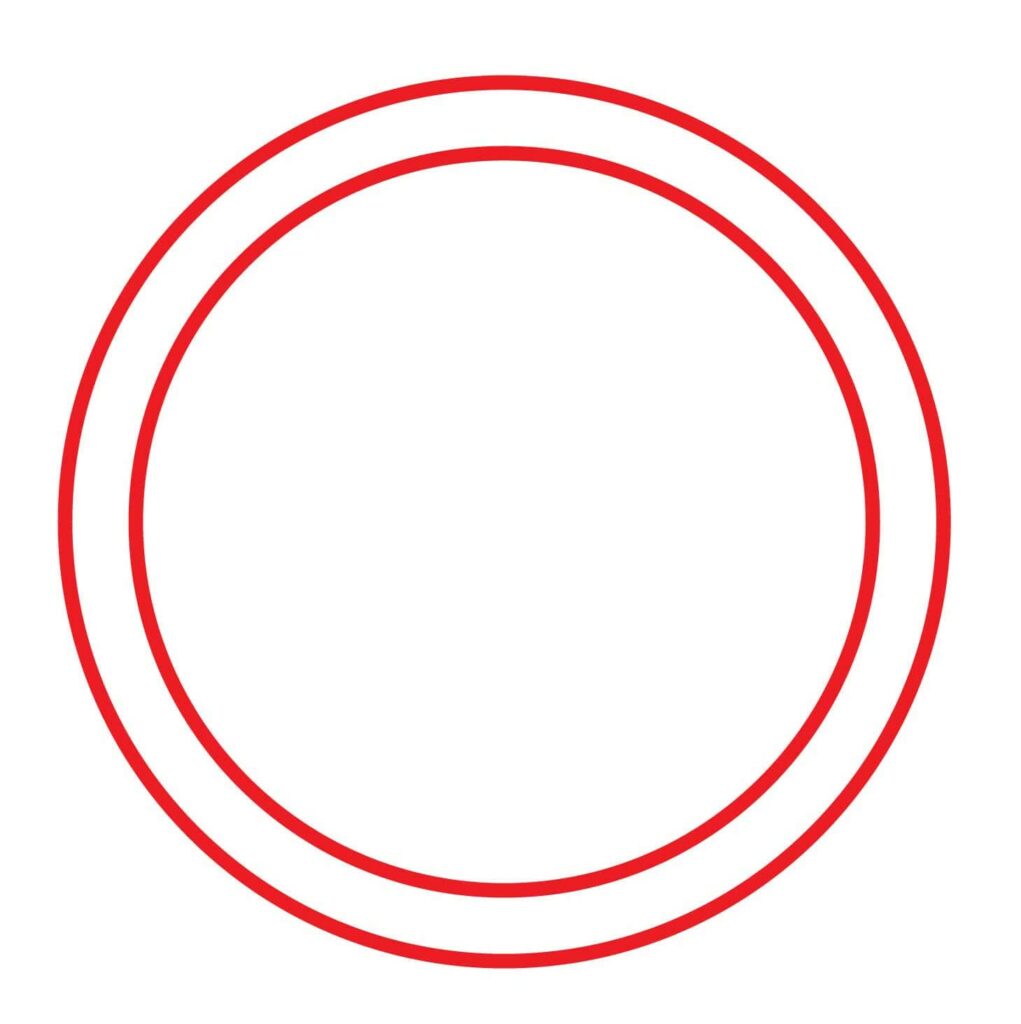
Step 1: Draw the First Ring
Let’s begin your drawing process by flipping your paper onto a landscape orientation and placing the first ring on the left side of your drawing paper. Placing the first ring here will provide enough room for you to add in the other rings later.
To start, draw one large circle, either using a mathematical drawing compass, or a small spray bottle you might have on hand. Then, draw another, slightly smaller, circle within the one you first drew. These two circles together represent your first ring.
While doing this step, it’s important to remember that this part determines your leeway for the rest of your drawing, so be sure to take your time and finish once you’re feeling good about the lines, dimensions and placing of your first ring.
- Flip your drawing paper onto a landscape orientation
- Start drawing on the left side of your paper
- Use a mathemathical drawing compass for smooth circles
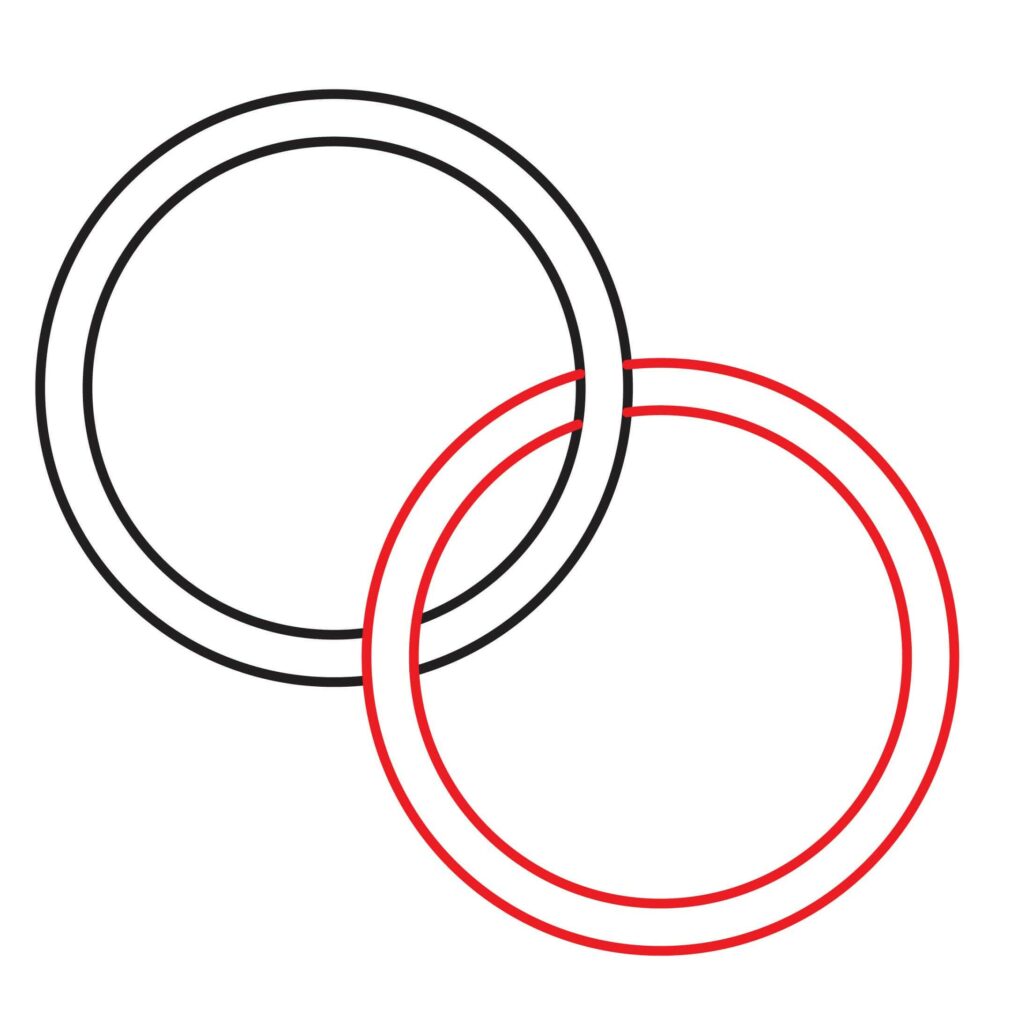
Step 2: Draw the Second Ring
As briefly aforementioned, the Olympic Games are special and unlike any other sport competition in the world primarily due to the fact that they bring together athletes from all over the globe.
Thus, the reason why the Olympic Rings were designed the way they were is to signify the nature of unity the games inspire and represent.
This is why the rings interlock with each other.
In order to complete this step, you will need to be mindful of the places where the rings interlock. The rule of thumb to remember here is; the ring will always go over the other ring once, and under the other ring once, at different places.
You will also need to bear in mind your dimensions. So before you start, check out the image we’ve provided below to get a sense of what you will need to draw.
Your second ring should be placed a little lower than the first. Start by drawing a circle from the middle of the right part of your first circle.
Your new circle should go over your first one at the bottom, and connect to the inside line of the first circle along the side.
Draw another circle within the one you just did, in exactly the same way, to represent the ring shape.
Remember, over once, under once!
To make sure everything looks as it should, take a step back and assess your drawing.
Do the lines interlock on the side? And does the second ring go over the first one along the bottom? If they do not, make sure to adjust them by utilizing your eraser.
- Check out the provided image to get a sense of what needs to be done
- Start your outer circle along the middle and right side of your first ring
- Erase the lines of the first ring that’s inside the second ring’s width
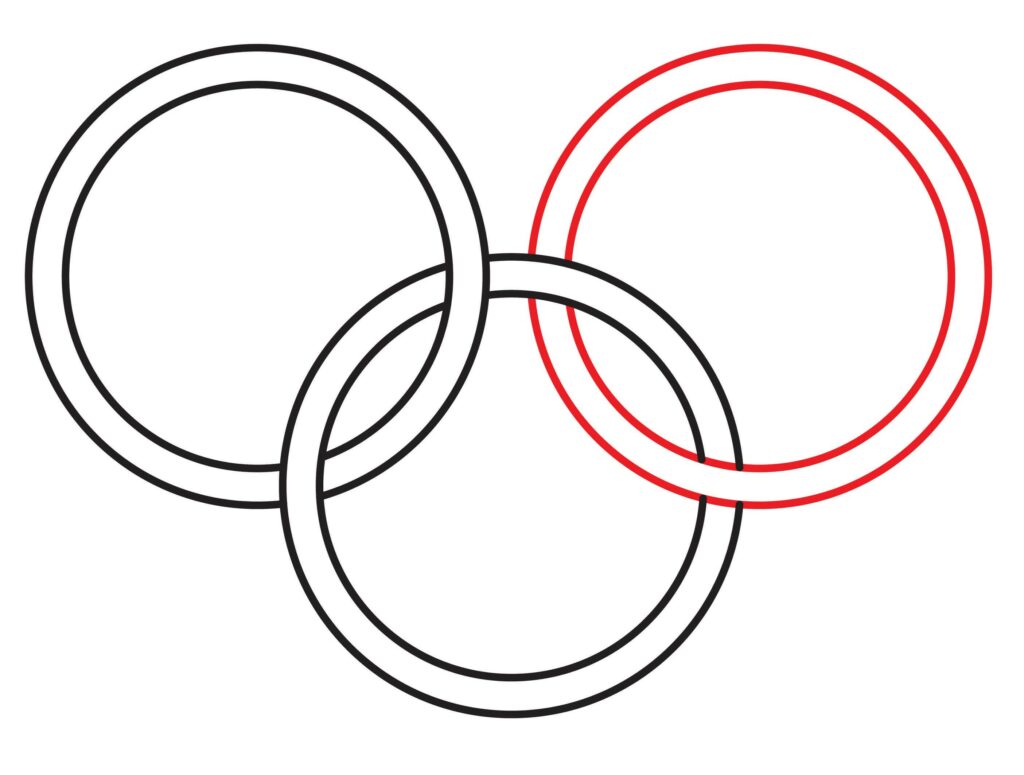
Step 3: Draw the Third Ring
Now we need to add the third interlocking ring!
Before you start, make sure you are going to draw this ring on a similar spot as the first one. Their size and placing should align nicely on your page.
Like you did in the other steps, start by drawing the outer circle first, and then add in the inner circle after. If you find it easier to draw both at the same time though, go ahead!
With this step, the third ring needs to interlock with the second ring by going underneath it on the left, and then going over the second ring on the bottom.
Be sure to check out the drawing below if you have any difficulty completing this step.
- The placing of the third ring should match the placing of the first ring
- Make sure the lines don’t overlap with the second ring on the left side
- Erase the second ring lines that connect with the third ring along the bottom
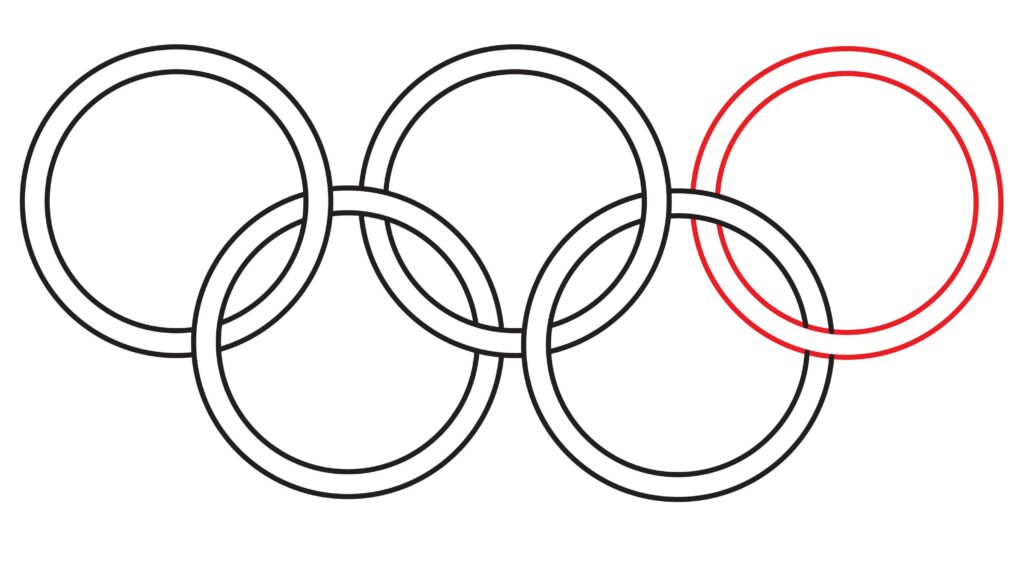
Step 4: Draw the Fourth Ring
Your Olympic Rings drawing is now coming together beautifully. We’re almost at the finish line, so keep on going!
Before you begin with this step, make sure the fourth ring aligns with the second ring in regards to its size and where it is placed on the page!
Now, in order to draw the fourth ring, start by drawing the outer circle against the middle edge of your third ring. Wrap your circle right around, while being mindful of drawing the line over the bottom part of the third ring.
Remember to erase the lines inside your fourth ring as you did in step 2, and to not overlap your lines on the right side of the third circle.
Lastly, draw another, slightly smaller, circle within the one you just drew to represent a ring.
- Make sure the fourth and second ring are similar in size and placing
- Start by drawing the outer circle against the middle edge of the third ring
- The lines should not overlap with the third ring against the middle edge
- Erase the lines of the third ring that intersect with fourth on the left side
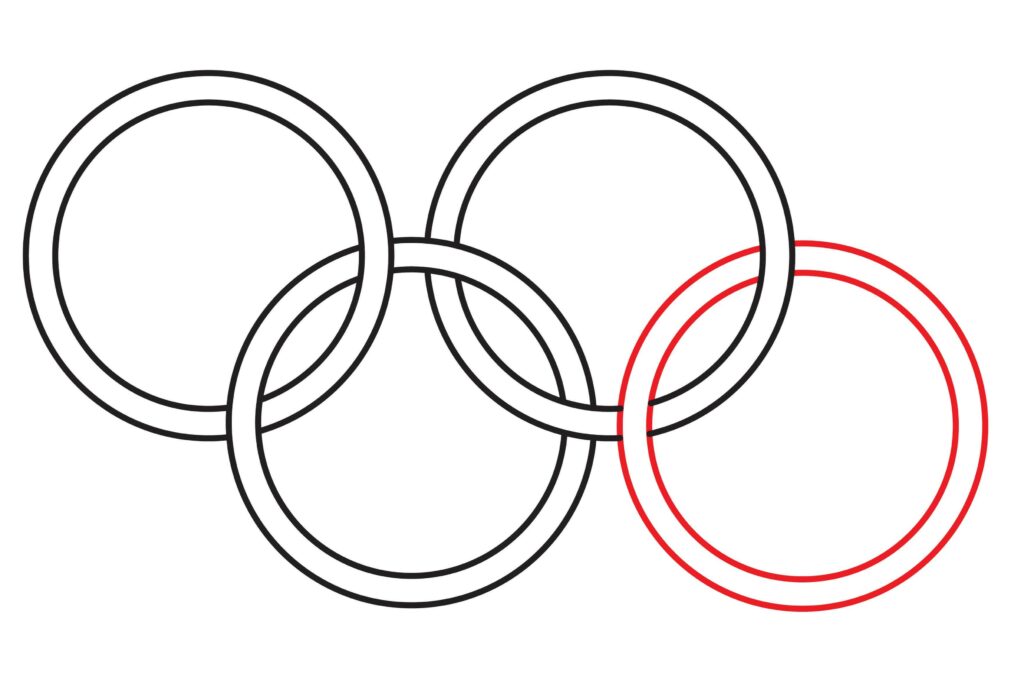
Step 5: Draw the Fifth Ring
In order to draw the fifth ring, you will need to make sure the size and placing matches the first and third ring you’ve already completed.
After that, start by drawing the outer circle against the top of the fourth ring. Wrap the circle around by drawing a line going over the side of the fourth ring.
Draw another, slightly smaller, circle within this one, following the same pattern, to represent a ring.
Erase whatever lines overlap within your new circle, and make sure your overall circle is not squiggly and that the lines are nice and smooth.
Take your time and make sure the drawing looks exactly the way you want it to.
- Make sure the fifth ring is similar to the first and third in size and placing
- The ring goes under on the left, and over along the bottom
- Use your eraser to make sure the lines don’t overlap
Congratulations! Your Olympic Rings Drawing is Complete
Once you’re ready, assess your drawing again and make sure the spaces in between your outer circles and inner circles of each ring are relatively the same. If they’re not, try your best to make them look as similar as possible.
Additionally, because all of these rings are interlocking, make sure there’s a nice amount of space in between the spots where these rings interlock with each other.
You don’t want them to be too clustered, as it might overwhelm the eyes, so make sure they’re spaced evenly apart. Not too far, but also, not too close.
Taking your Drawing to the Next Level
Your Olympic Rings drawing now looks wonderful! If you want to leave it as is, you may, but if you’d like to push yourself even further, follow the steps below.
Step 6: adding a Background
Adding a background to any drawing almost immediately boosts the quality of it. It gives your drawing context, makes it visually interesting, adds a touch of realism to your art, and finally, it creates visual harmony by rounding off an idea and inspiring imagination.
There are many background ideas to choose from when it comes to Olympic Rings. You could place them on a flag, or you could include some monuments in the background that relate to the Olympics.
Considering the fact that the games will be held in Paris this year, why not go big and draw an Eiffel Tower in the background?
Alternatively, you could draw your very own Olympic Game inspired contest.
Think about it; different elements of different sports floating around the bottom of your page, and then right on top, bright and eye-catching, are your newly designed Olympic Rings…
Check out some other drawing tutorials of sports like, archery, fencing, surfing, hurdling, cycling, boxing, tennis, or badminton for some inspiration if you like this idea. You could add names and personalized touches to each sport, sort of like a Marvel movie poster!
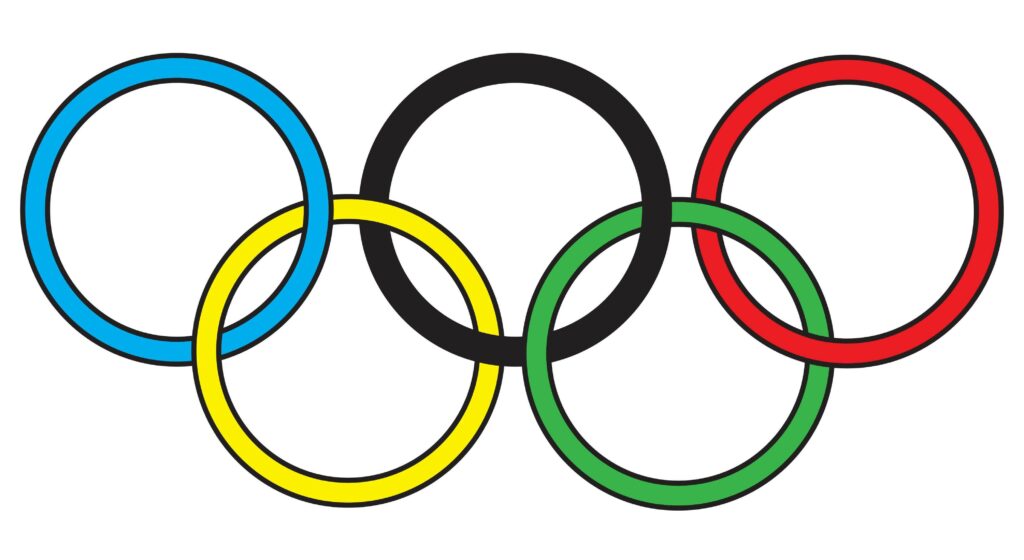
step 7: adding Color
Adding color to any drawing is important because it transforms a black and white sketch into something eye-catching and thought-provoking. It also immediately adds depth to drawings by giving it a touch of realism.
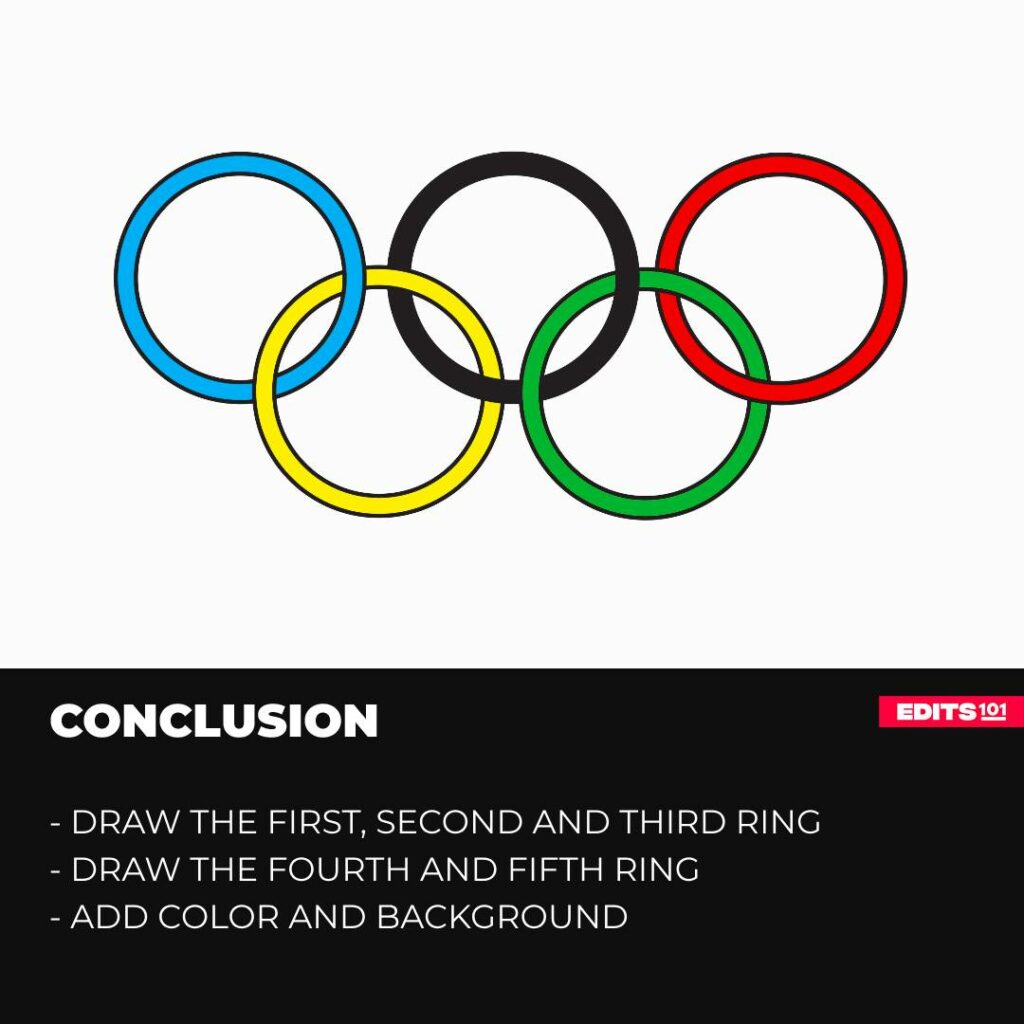
For a realistic drawing, add a light blue color to the first ring, a bright yellow to the second, black to the third ring, a vibrant green to the fourth, and a spicy red to the fifth ring.
Be careful to color within your lines and to not let any of the color mix with the others.
Bonus tips
If you’re up to it, add some shading to your drawing by coloring in certain parts darker and then adding a touch of silver or white to other parts.
Art is not linear, and can ultimately be whatever you want it to be, so play around with some ideas and let your creativity speak for itself.
If you want to add your own spin to an Olympic Rings drawing, then use whatever colors you want. Make sure your colors are important to you, and carry a meaning behind them.
Play around with different background ideas as well. There are many to choose from. The most important thing to remember is to take your time and be patient with yourself and your drawing abilities.
Conclusion
If you’ve followed all the steps and completed your Olympic Rings drawing, well done! We’re super proud of you.
Today you’ve learnt quite a lot, like how to draw interlocking rings, some fun facts about the Olympic Games, and how to play around with your imagination.
Give yourself a nice pat on the back for completing something you set out to do! And remember, there are so many more drawings for you to get started on, so from Edits101 to you, see you next time!
Thanks for reading & feel free to check out more of our articles!
Author Rating
Overall Rating
Summary
Explore an accessible method for depicting lifelike Olympic Rings. This tutorial also offers insights into elevating your artistic creations.