How to Draw an Ice Hockey Helmet | A Step-by-Step Guide
Just like with other contact sports like American Football, ice hockey players wear a helmet. This is meant to protect them while playing this fast-contact sport. We are going to learn how to draw an ice hockey helmet today. But first, let’s learn a few things about this crucial piece of equipment.
An ice hockey helmet is a headgear worn by players to protect their heads from injury when they are hit by the hockey puck, skates, sticks, boards, or other players. It also protects their head when they fall onto the ice rink. There are many types of hockey helmets. In our lesson, we are going to learn how to draw a half-shield helmet. This is the helmet that covers the head, eyes, and nose and leaves the mouth exposed.
| Step | Complexity Level |
| Drawing the Helmet Outline | 3 |
| Drawing the Visor | 2 |
| Adding Details to the Shell | 2 |
| Drawing the Airflow | 3 |
| Drawing the Ear Guard | 2 |
| Decorating the Top Part of the Helmet | 2 |
| Adding Helmet Straps | 2 |
| Drawing the Chin Strap | 2 |
| Coloring | 1 |
What You Will Need
- A drawing piece of paper or a sketchbook
- Pencils, preferably ones with varying line thickness
- An eraser
- A ruler
- Coloring supplies
- 25 Minutes
How to Draw an Ice Hockey Helmet
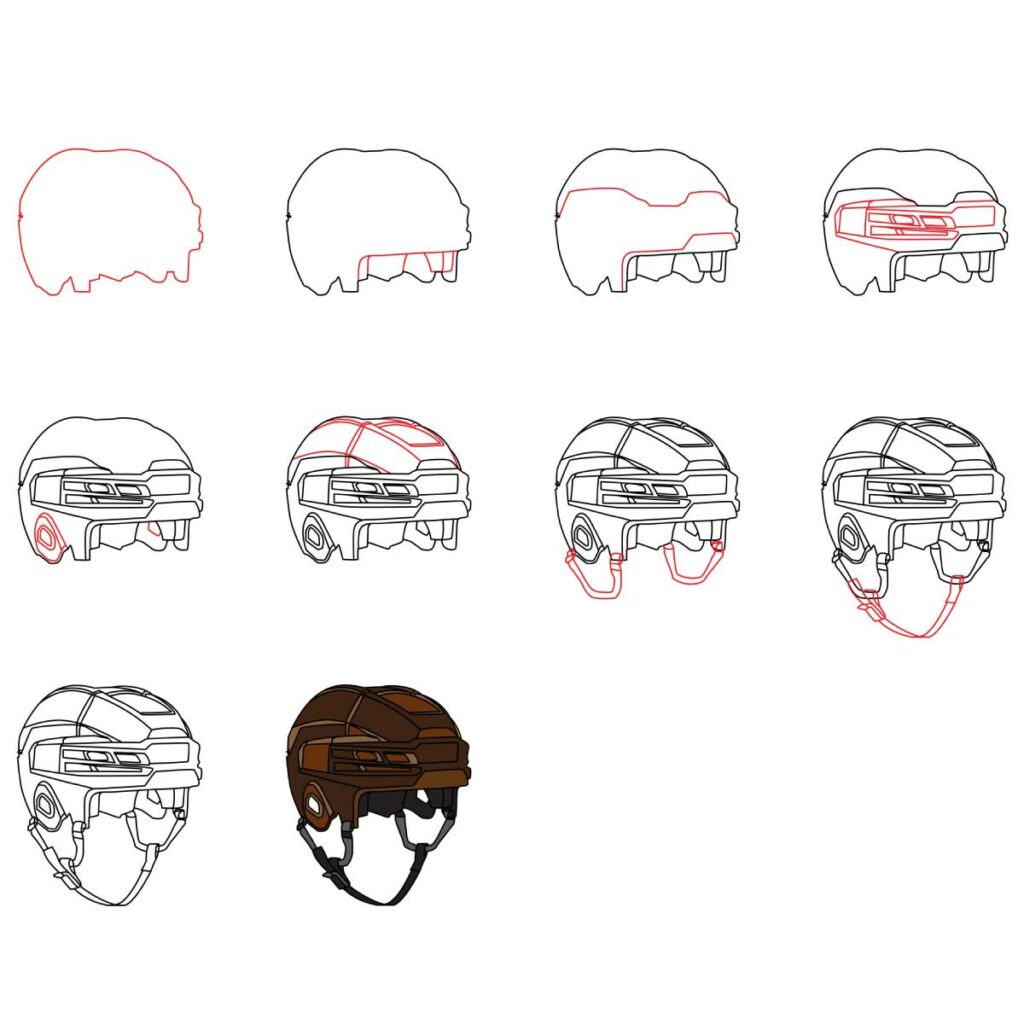
An ice hockey helmet has so many components. This can make drawing the helmet a tad intimidating. However, when you understand the steps you need to take, drawing the helmet is quite easy. In this guide, we will be teaching you the easiest way to draw a realistic hockey helmet.
Before you get started, take a moment to study the below image. It contains all the steps we will be taking in today’s lesson. Reviewing the steps will help you better anticipate the steps.
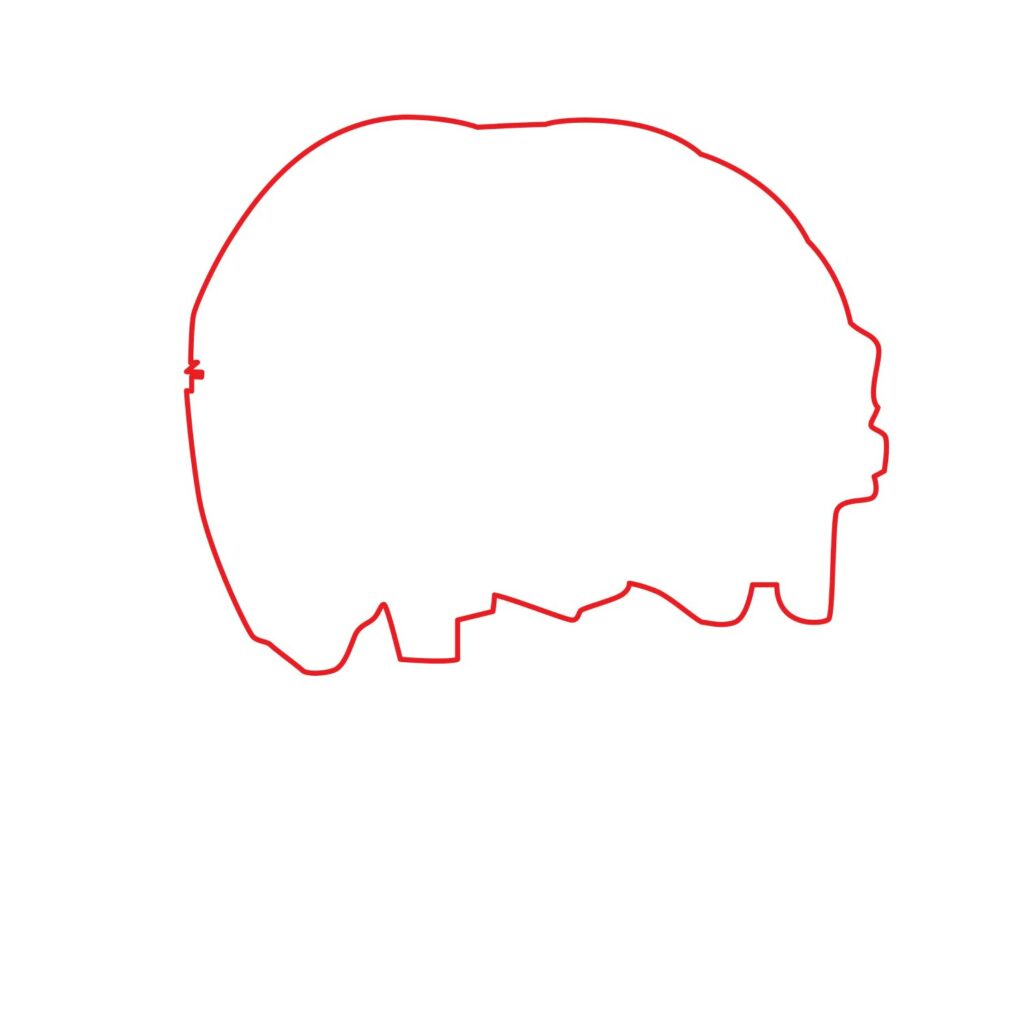
Step 1: Draw the Helmet Outline
The first thing you need to do when drawing an ice hockey helmet is to sketch out the basic structure of the shell. The shell is the part that goes over the player’s head. To do so, you need to sketch something that looks like what we have below.
Using faint lines, start by drawing a square that covers at least half of the top part of your drawing paper. This will give us an outline for the helmet. Next, we need to replace the bottom part of the square with some zig-zag and curved lines so that we have something that looks like what we have below.
Replace the sides and the top of the square with some curved lines. Add a slight bump to the right side to distinguish the front end from the back. To complete the drawing, erase all the remaining lines of the square. Now we have the foundation for our drawing.
- Draw a square using faint lines to serve as the outline for the helmet
- Replace the bottom part of the square with zigzag and curved lines
- Replace the sides and the top with curved lines
- Add a bump to the right side to distinguish the front from the back
- Erase the remaining parts of the square
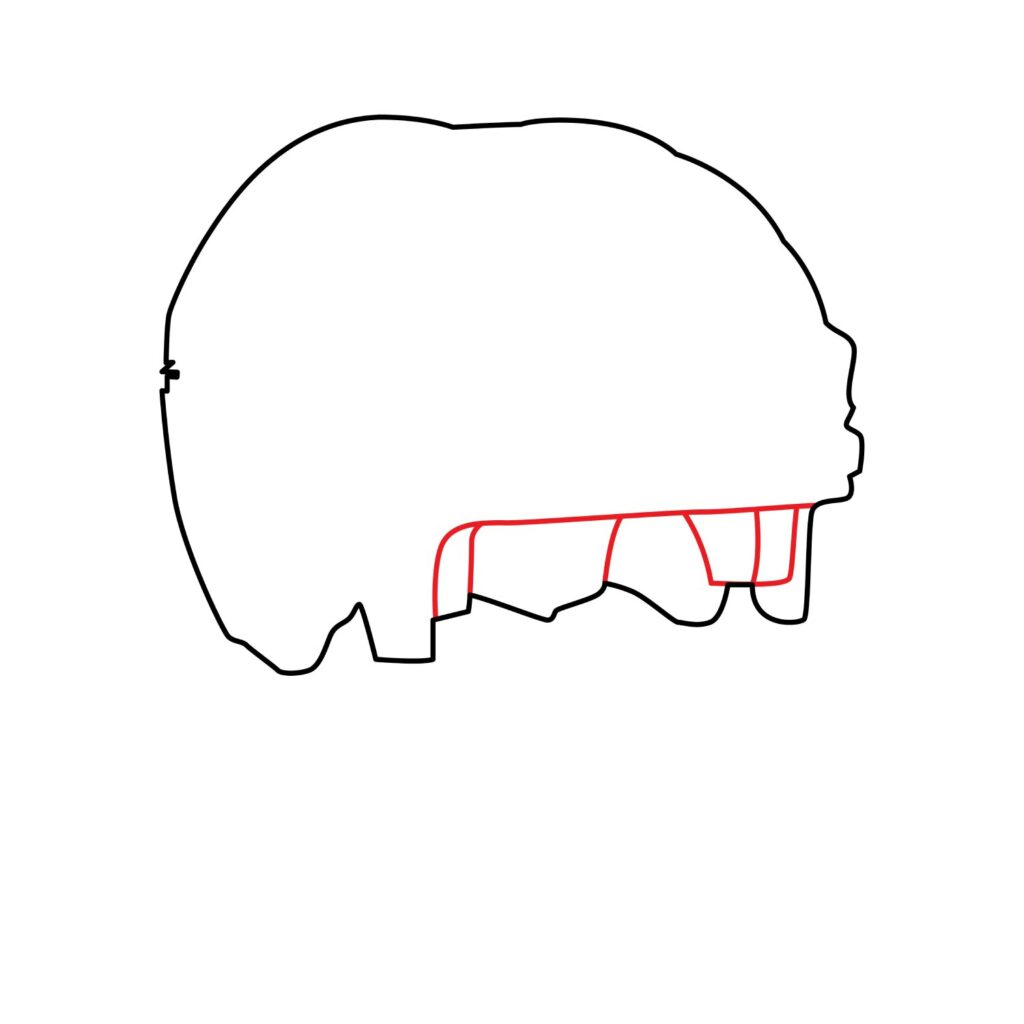
Step 2: Draw the Visor
Now that the shell is ready, we are going to add the visor. The visor is a plastic shield that protects the eyes from debris and impact. To add to it, we are going to do two things. The first is to use our ruler to draw a horizontal line starting from the bottom of the bump we added to the right side of the drawing. The line should extend to the left and curve downwards about halfway through the width of the shell.
Next, we will add the plastic shield by adding two horizontal rectangles below the horizontal line we just added. For realism, make the bottom part of the rectangles narrower. You should have something that looks like what we have below.
- Draw a horizontal line starting from the bump we added to the right and curve it down halfway through the width. This will form the front of the helmet.
- Draw two horizontal rectangles below the horizontal line to form the plastic shield
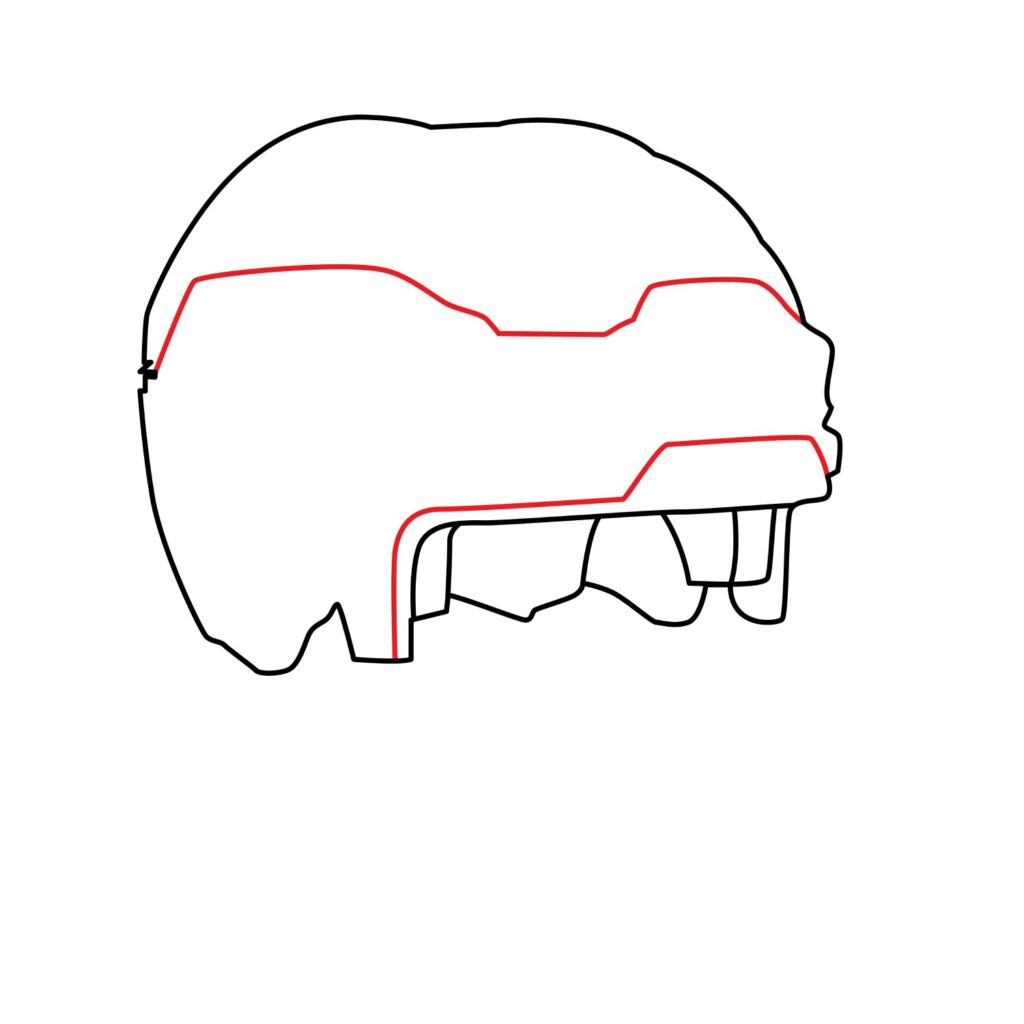
Step 3: Add Details to the Shell
An ice hockey helmet is not as smooth as a motorcycle helmet. It has some bumps which improve structural integrity while at the same time adding protection. For that reason, we are going to add some of these bumps to the shell of our helmet.
Start by drawing a line that is parallel to the horizontal line we added above the visor. Rise the line higher close to the right to indicate that the front end of the helmet is raised to offer better face protection. You also need to add another wavy line that cuts through the middle of the shell, horizontally as shown in our illustration.
- Draw a line above the visor for decoration
- Add another curved line across the width of the shell in the middle
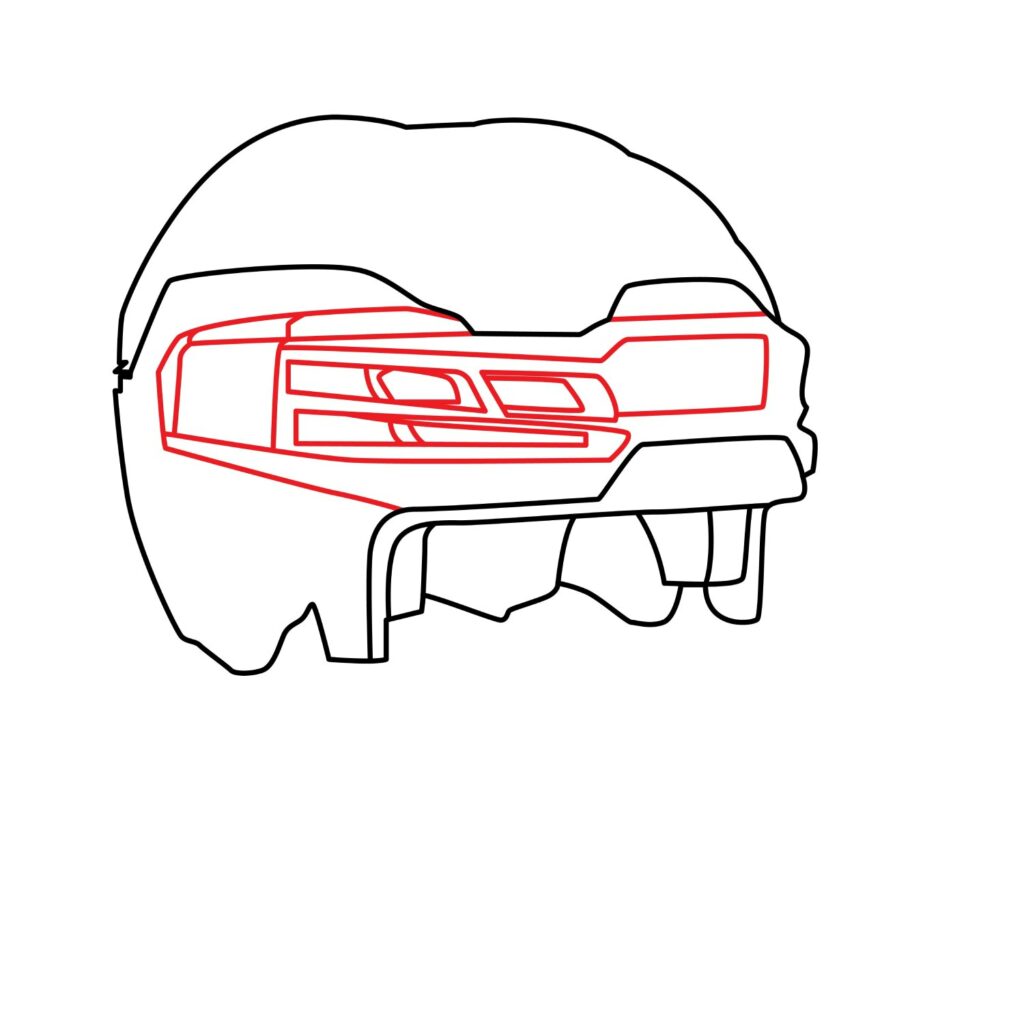
Step 4: Draw the Airflow Part of the Helmet
Being a fast-contact sport means that the players sweat a lot when playing ice hockey. To make sure they are comfortable while wearing the helmet, the ice hockey helmet has ample ventilation on the shell. We will add them using a series of diagonal and horizontal lines. These details should be added in the area between the two lines we added for the shell bumps.
- Use diagonal and horizontal lines to add ventilations on the helmet
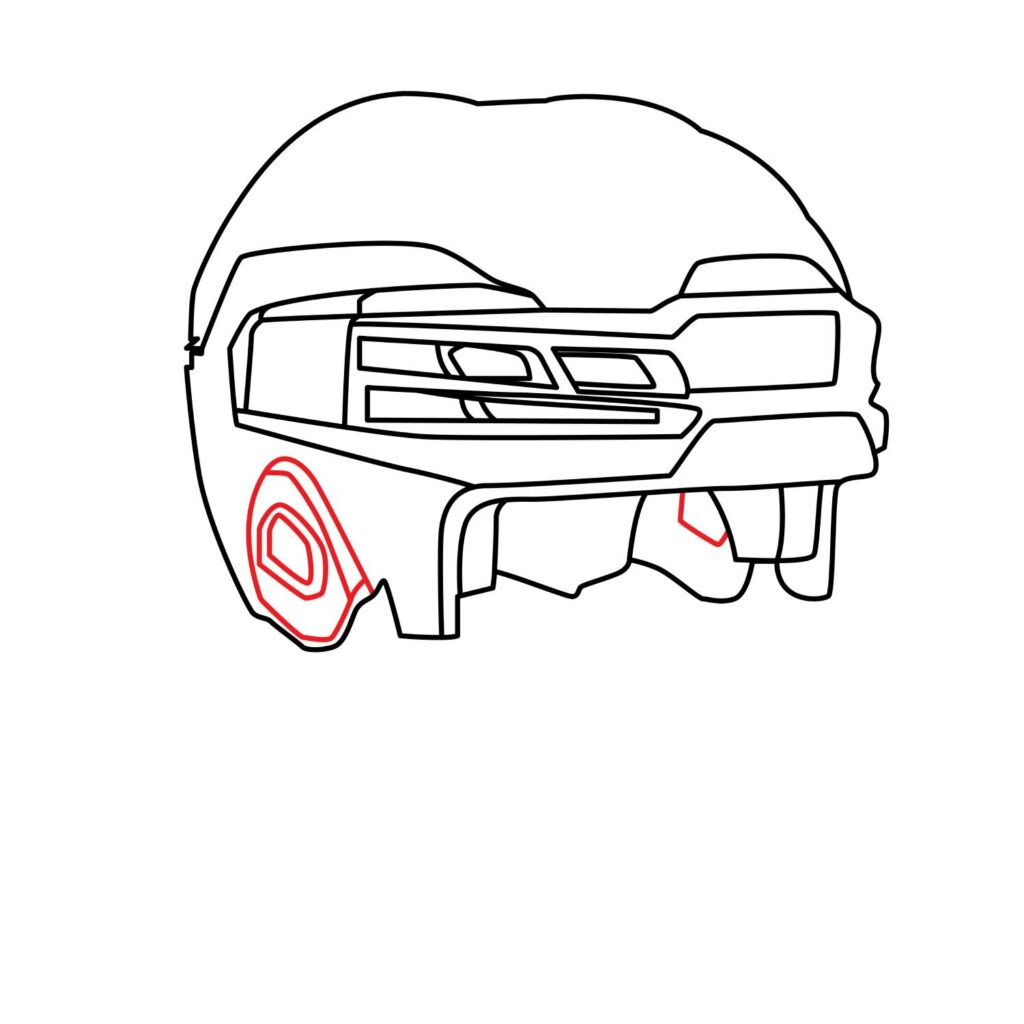
Step 5: Draw the Ear Guard
While head protection is important, ice hockey players also need to be able to communicate with each other and listen to instructions from the referee and coach. For this to be possible, their ears need to be unobstructed. That is why ice hockey helmets have openings for the ears.
To add the ear guards, simply add a rough oval shape to the bottom left part of the helmet. You should then add a couple more oval shapes inside the first oval to depict an ear guard. You also need to add a small shape to the right, on the inner part of the helmet, for the other ear guard. Take a look at how our drawing looks.
- Add an oval shape to the bottom left corner of the helmet
- Add a couple more oval shapes inside the first one to form the ear guard
Step 6: Decorate the Top Part of the Helmet
To complete the drawing of the shell, we are going to add some more details to the top part of the helmet. Here, you need to use curved lines to add some depth to the top of the helmet. Take a look at how our drawing looks.
- Use curved and diagonal lines to add details to the top part of the helmet

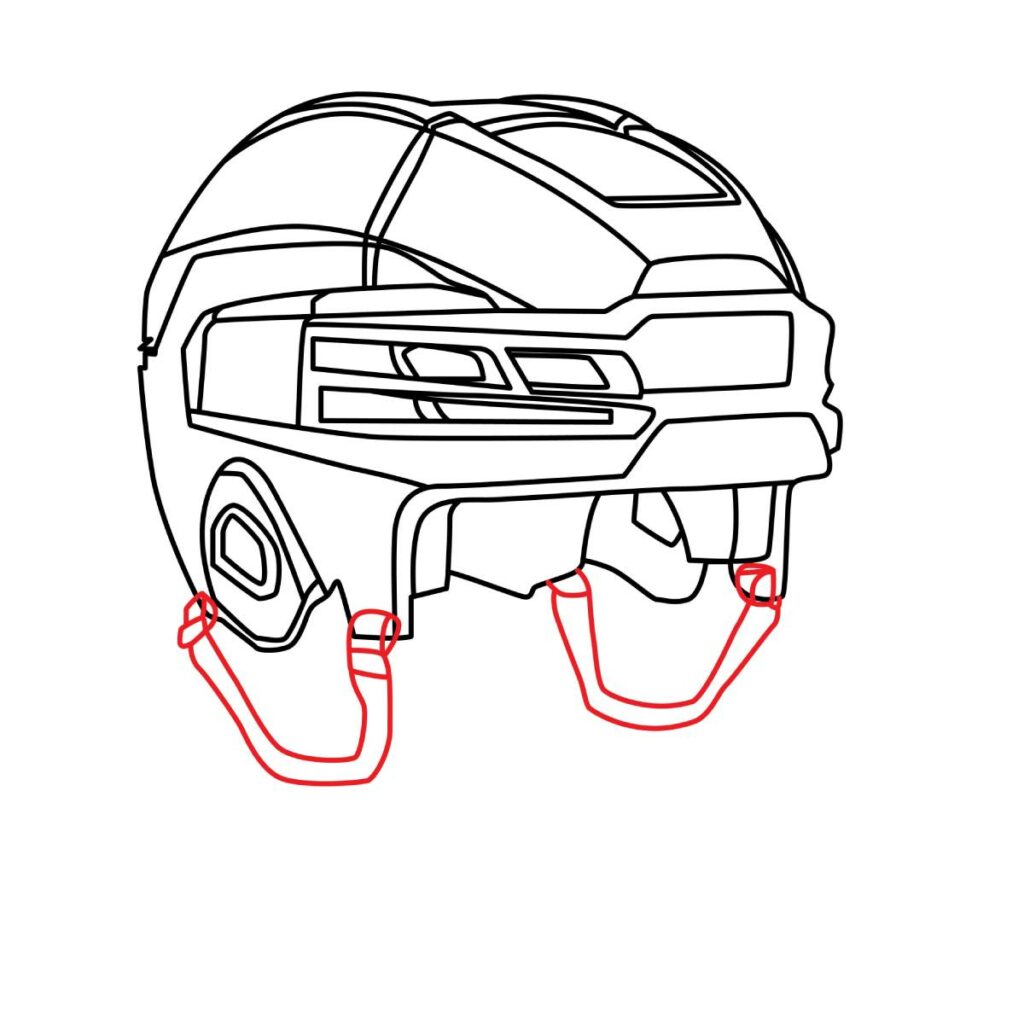
Step 7: Add the Helmet Straps
To turn the drawing into a realistic ice hockey helmet, we are going to add some straps. To do so, start by drawing curved lines below the ear guards. Use two parallel curved lines in order to create a shape that looks like the one we have in our illustration.
Next, you need to add some horizontal rectangles at the point of the straps that are closest to the ear guard. This will show that the straps are adjustable. The tiny detail will also add some realism to the straps. Erase the lines of the shell that cut through the straps.
- Use a pair of parallel curved lines to create helmet straps below each ear guard
- Add horizontal rectangles at the points close to the helmet to add depth to the straps
- Erase any lines that cut through the straps
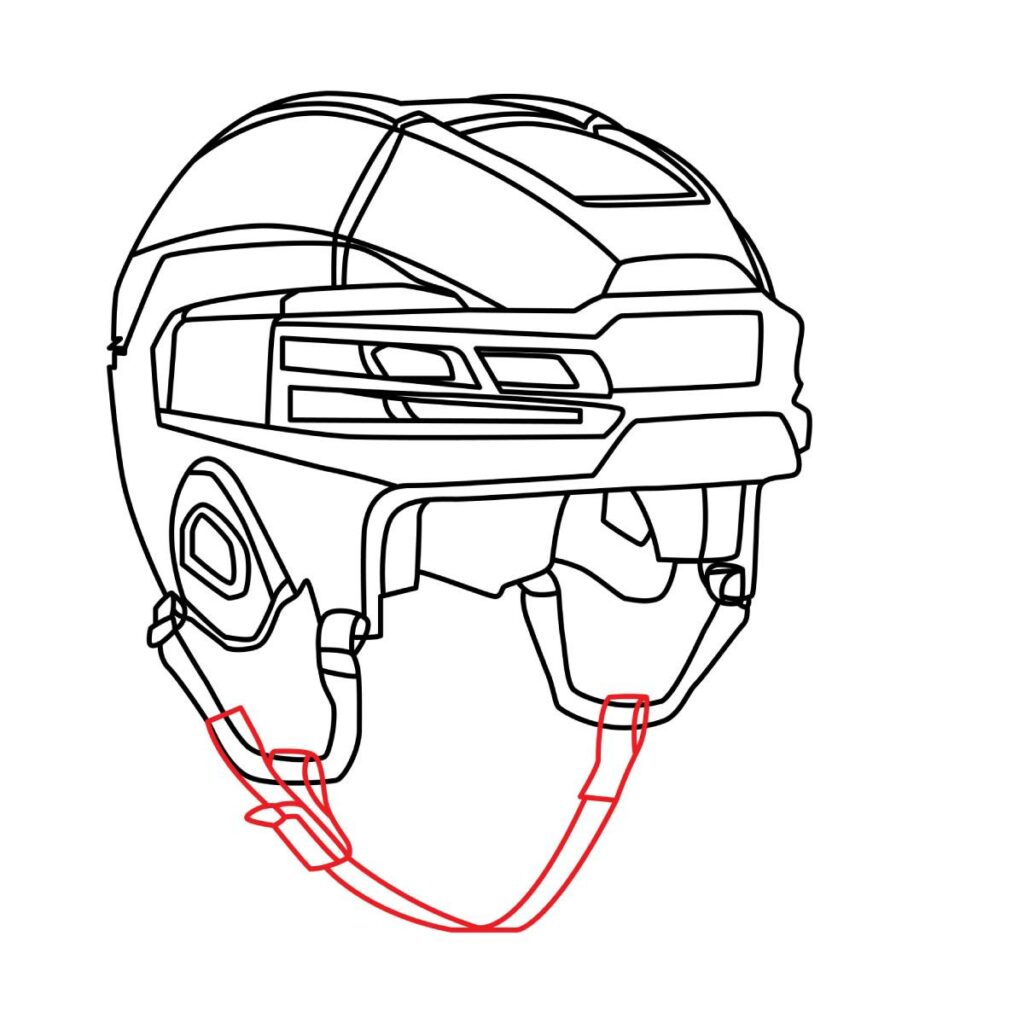
Step 8: Draw the Chin Strap
The chin strap is the strap that goes under the chin and connects the two helmet straps we added in the previous step. The chin straps are what keep the ice hockey helmet from falling off even after a serious impact.
To add the chin strap, start by drawing two curved lines that start from the bottom of the left helmet strap and connect to the right helmet strap. You should then add some depth to the left part of the chin strap to show that the strap is adjustable. Do the same for the right part to add some realistic details like the ones we have in our illustration.
Erase the lines of the helmet straps that cut through the chin strap.
- Draw a curved shape that connects the two helmet straps. This will form the chin strap
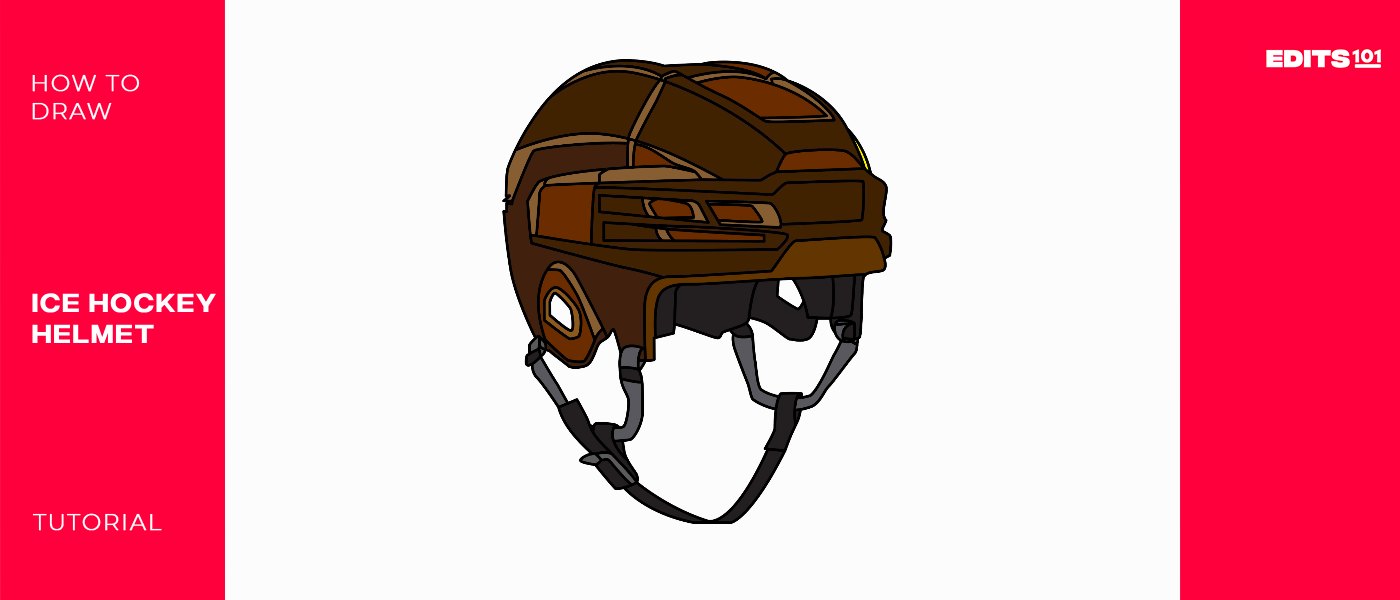
Step 9: Congratulations! Your Ice Hockey Helmet Drawing is Done
Your ice hockey helmet is now ready. Sit back and appreciate your creation for a moment. If you feel the drawing is not that good, you will have better results when you try drawing it again because you now understand what is required.

Take the Drawing to the Next Level
Taking your ice hockey helmet drawing to the next level involves adding some more details, background, and color. Some details you may consider adding include a hockey rink in the background, a name on the side of the helmet, or anything else that inspires you. In our drawing, we are simply going to color it.
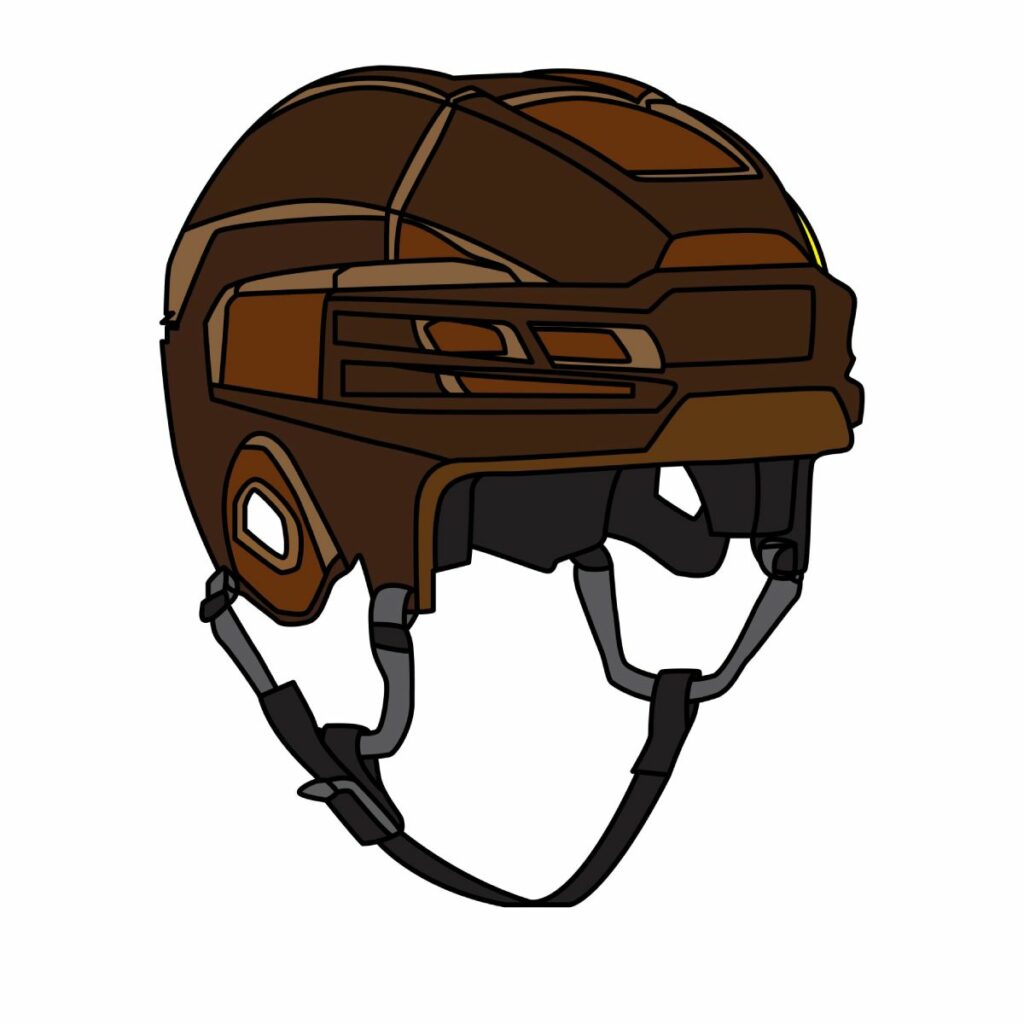
Step 10: Color
Coloring your drawing should only be done once you have added all the details that you want. That is important because you don’t want colors to spill outside your target areas. You should also keep in mind that this is your helmet so you can use any color that you want. Consider using different shades for various parts of the helmet so as not to conceal crucial details.
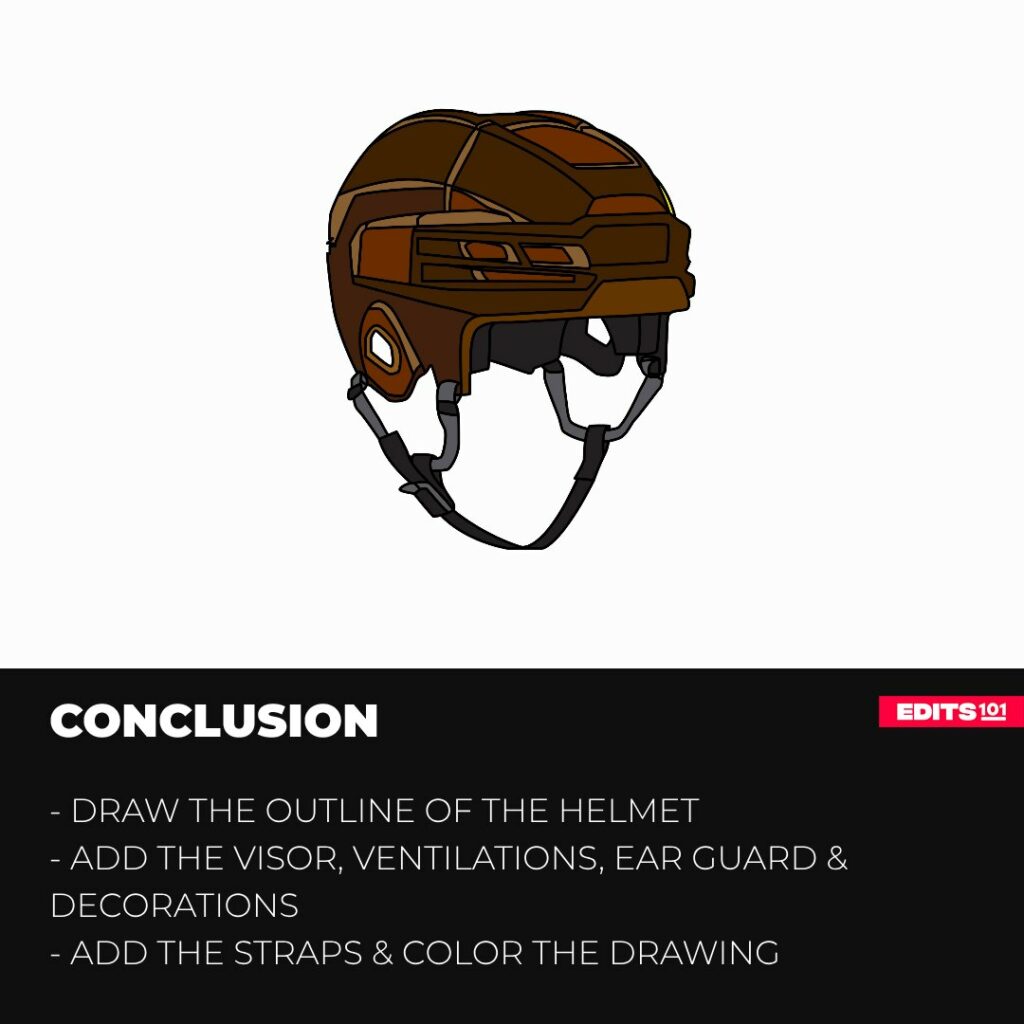
Conclusion
Drawing an ice hockey helmet is quite rewarding. In our drawing, we started by drawing the outline for the shell then added the visor, ventilations, ear guard, and decoration details to the top of the helmet. We then added the helmet and chin straps to make our helmet more realistic. To make our drawing pop, we colored it.
You can use these steps to draw an ice hockey helmet from any perspective and even on your favorite sketching app. The key is to tackle the drawing step by step. Don’t forget to have fun!
Thanks for reading & feel free to check out more of our articles!
Author Rating
Overall Rating
Summary
The guide shares simple steps you should follow to learn how to draw an ice hockey helmet. You will also learn how to advance your drawing so that it looks realistic.