How to Draw a Fencing Sword | A Step-by-Step Guide
A fencing sword, also known as a foil or épée, is a slender and lightweight instrument used in the sport of fencing, that dates back all the way to the 12th Century!
Fencing swords have flexible blades that are pointed at the tip and designed for thrusting rather than cutting. They’re used by fencers to score points by touching specific target areas on their opponent’s body during a match – that’s why they’re so integral for the sport.
In this tutorial, we’ll show you how to draw your very own fencing sword using 6 easy steps. We’ll also show you how to make your drawing stand out among others by adding a background, utilizing colors and providing you with some bonus tips.
| Steps | Complexity level |
| The Grip | 3 |
| The Guard | 2 |
| The Blade | 1 |
| The Button | 1 |
What You Will Need
- A piece of paper
- Drawing pencils
- An eraser
- A sharpener (optional)
- Ruler
- 10-15 minutes

How to Draw a Fencing Sword
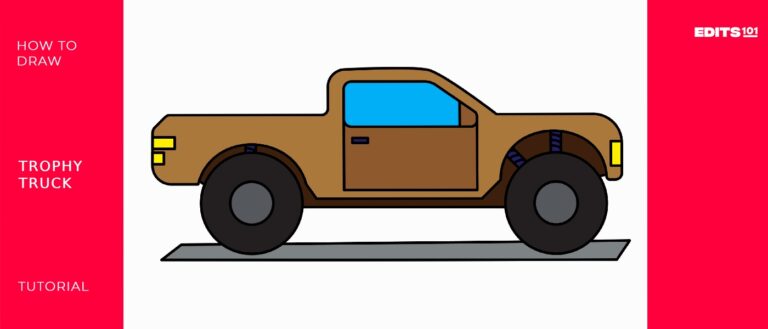
Drawing a fencing sword can be a satisfying experience mainly because it’s not very difficult to complete at all. They’re basically only comprised of three parts; the grip, the guard and the blade.
Check out the image below for an outline of all the steps and what the final product will be, grab all of your drawing tools, find a nice quiet area to get to work, and without any further delay, dive right in!
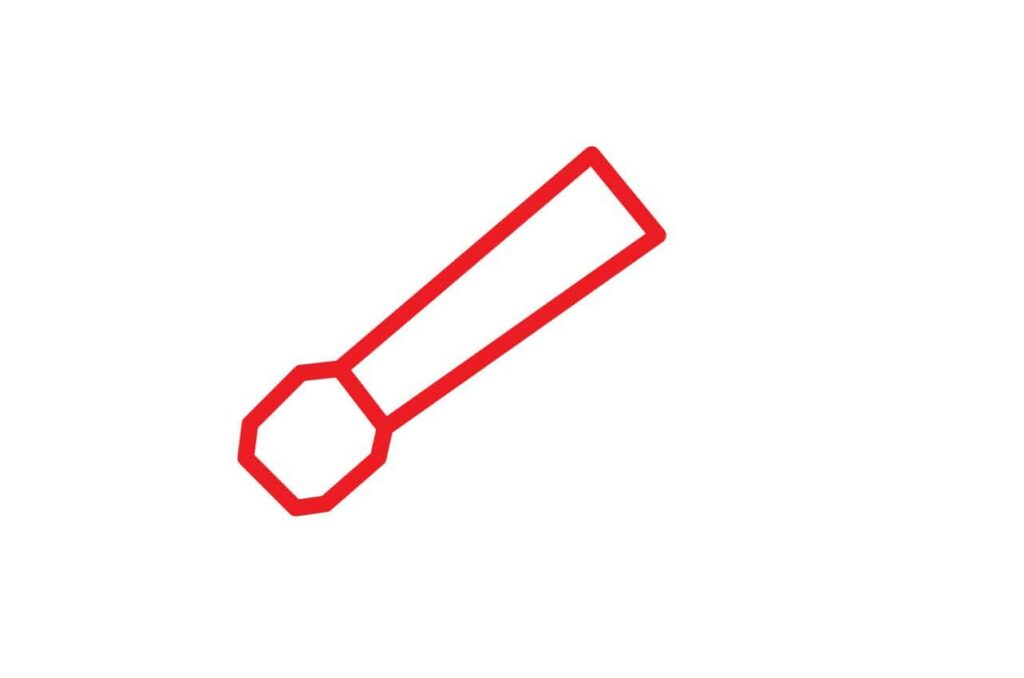
Step 1: Drawing the Grip
The handle at the bottom of a fencing sword is called the grip. Some fencing lovers consider this part to be the most important part of the sword, because it’s where the fencer’s hand connects and yields his/her instrument.
First, draw a square with indented corners a little to the left of the middle of your page.
Once you’re finished, draw a line starting from the top corner of the square. You are free to decide which corner to start from, but the line should be diagonal, end a few centimeters away from the top of the square. If you’re unsure of the dimensions and length, check the image below to help you navigate it.
Then, draw a line starting from the other top corner of the square that aligns nicely with the one you just drew. After that, connect the top of both your lines with one line and you should have something that looks like a handle!
This step is all about making sure your sword looks like a real fencing sword, capturing its unique shape and style, so take your time and do your best!
- Draw a square with indented corners a little to the left of your page
- Draw two diagonal lines starting from the top corners of the square
- Connect the two diagonal lines with a small diagonal line
Step 2: Drawing the Guard
Now, let’s make our fencing sword even cooler by adding the guard. Imagine you’re creating the shield that protects the fencer’s hand just like we did in a cricket hand glove.
In order to do this, draw a straight line starting from the top of the grip. Think of it as a bridge, or the glue of a fencing sword, because this part connects the grip to the blade.
Once you’re done, draw a semi-circle starting from one point of the line you drew and linking it to the other point.
Check out the guide we provide if you perhaps feel stuck while drawing certain parts.
- Draw a straight diagonal line starting from the top of the grip
- Draw a semi-circle starting from one edge of the diagonal line and connect it to the other edge
- Make sure the semi-circle is round enough for ample empty space in between

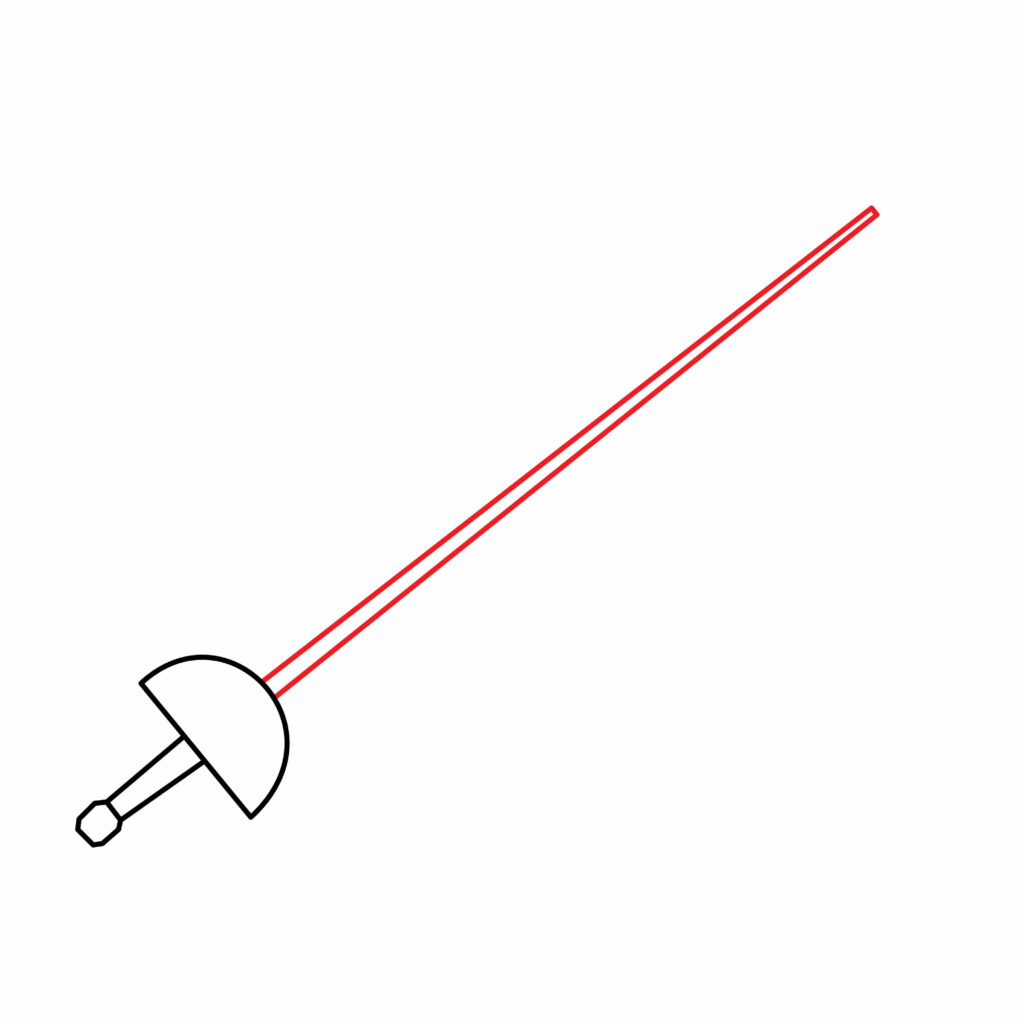
Step 3: Drawing the Blade
The blade of a fencing sword is made with low-carbon steel, which is why the blade is so flexible. The sport of fencing hardly ever reports any serious injuries during or after matches, so the blade isn’t meant to hurt, as mentioned before, but only to touch specific target points on the opponents vests.
In order to complete this step, you will need to draw some more lines. Pro-tip: use a ruler for accuracy.
First, start by drawing a line that runs upward from the middle of your guard. Make sure your line is straight, and relatively long because it needs to resemble a blade.
Then, draw another line starting from the same place you did with the first one, but make sure there is a small space in between them. Use your ruler and extend your line upward until it matches the length of your other line.
Finally, connect these two lines with a diagonal line.
To give you an idea of what the dimensions and length should look like, check out the image below for some inspiration!
- Start by drawing a thin, long diagonal rectangle from the middle of the guard
- Use a ruler for accurate lines
- Check out the image guide for an insight on the dimensions to aim for
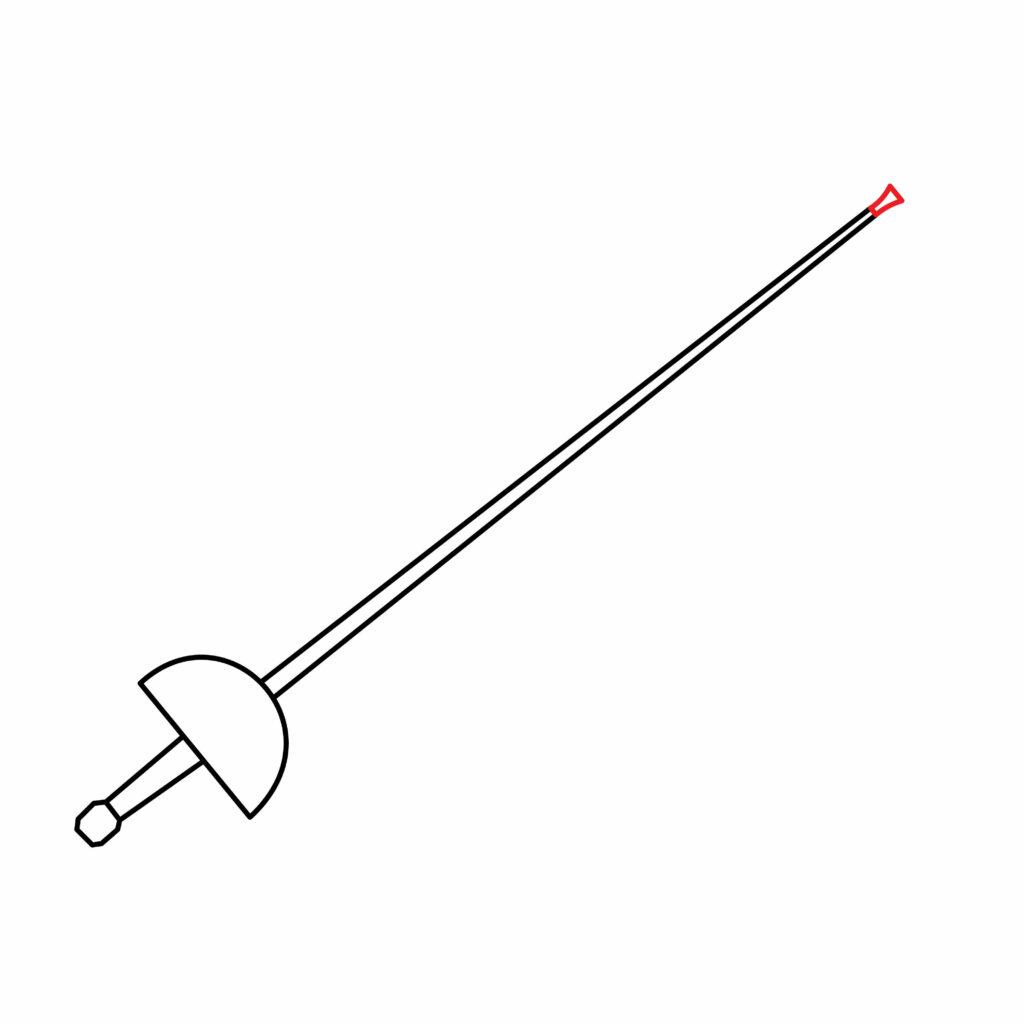
Step 4: Drawing the Button
Buttons are placed on the tip of the blade because they’re blunt enough to avoid injuring opponents during a match. Not only does it avoid hurting other people, but it also has a special pommel that makes the sword super balanced and ready for action.
In order to complete this step, you’re going to need to draw something that resembles a small rectangular shape.
First, draw a line starting from one point of the tip of the blade. Make sure your line isn’t very long and that it flares out a little bit.
Then, starting from the other point of the tip, draw a similar line. Remember, it shouldn’t be very long, and it needs to flare out only a little bit to avoid making it far bigger than the width of your blade.
Finally, draw a horizontal – or diagonal line depending on which way you look at it -that connects the tips of your flared lines.
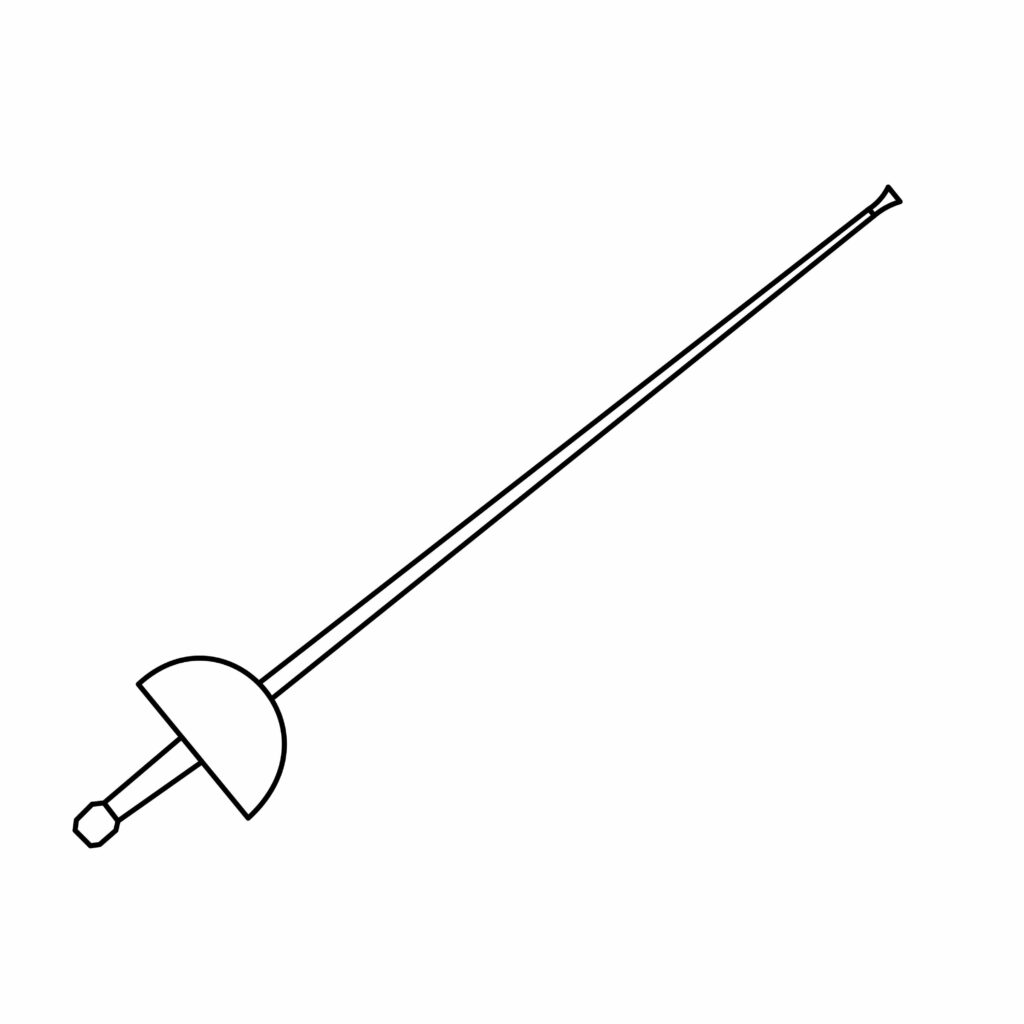
By now, your drawing should look something like the one below. And if it doesn’t, don’t be dismayed. You have all the tools handy to make sure your drawing is a success. Don’t forget to make use of your eraser, and to re-do some mistakes if you need to.
- Draw a small rectangular shape starting from the tip of the blade
- Make sure the top of the rectangle flares out (i.e, widens)
Congratulations! Your Fencing Sword Drawing Is Complete
If you’ve managed to make it to this point, well done! You’ve completed all the steps and hopefully learnt a few new things about fencing swords.
Take a moment to enjoy what you’ve just accomplished, and be proud of yourself. You went from a blank page to an awesome drawing, so good job!
Double check your drawing and make sure everything fits together perfectly. If, for any reason, you’re not happy with your results, now would be the time to correct some fine details.
Taking your Drawing to the Next Level
Once you’re done, or if you don’t have any corrections to make, get ready to have some fun. We’re going to help you take your drawing to the next level by adding a background and giving it some color!
Step 5: Adding a background
Now is really the time to set your imagination loose and let go. Think about where you want your fencing sword to be. Is it lying on the floor? On some grass? Is it outside, or inside a building? Or is your fencing sword actively partaking in a match? In that case, it might be in an arena.
Whatever the case may be, the most important part of this step is reminding yourself that you can choose whatever you want.
If what you choose is similar to the ideas we’ve thrown your way, check out some of these tutorials for some inspiration. They include some of the background ideas, like grass, sand for the ground, and a sunny outside area. For more inspiration, check out some YouTube videos as well.
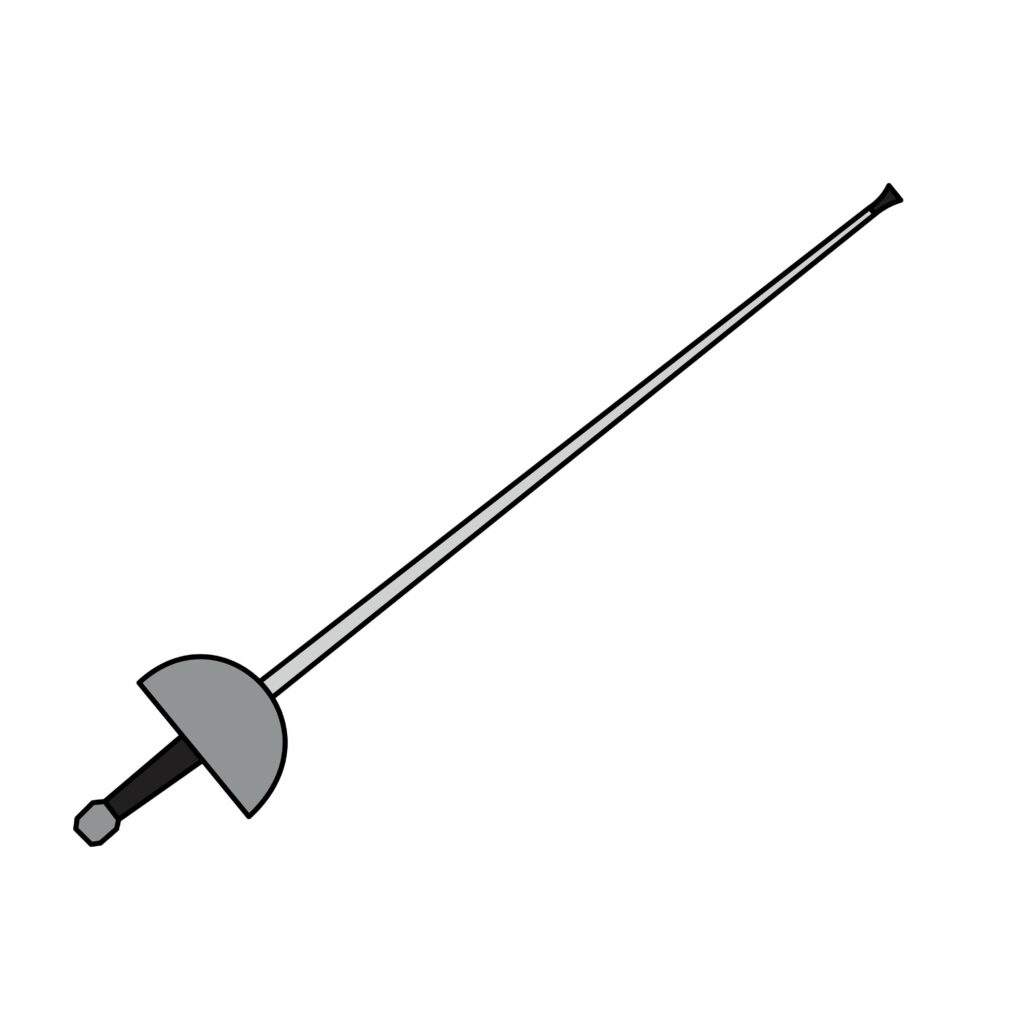
Step 6: Adding Color
Now, after you have drawn your fencing sword and added your background, let’s make your fencing sword come to life with some colors!
First, decide if you want to use colored pencils or markers. Both are fantastic choices, and each one gives a different look to your artwork. Pick the one that feels just right for your artistic ideas.
For a realistic-looking sword, you might opt for using some gray and black colors. Gray to resemble the shiny metal of the blade, and then some black for the guard and button to make them stand out against the rest of your drawing.
Alternatively, if you want to go all out, you can.
Fencing swords can be all sorts of colors, so there are no rules here. You can go for the classic silver blade or go wild with vibrant and unique colors.
Bonus tips
If you want to go even further, be sure to add some more distinctive features of a fencing sword. You can go ahead and try giving your blade a bend by curving the lines slightly, to make it appear even more as though it’s low carbon steel.
Draw some inspiration by checking out other fencing equipment, like fencing masks, fencing gear or some fencing gloves.
Add your name somewhere on the page to give your art a personalized touch!
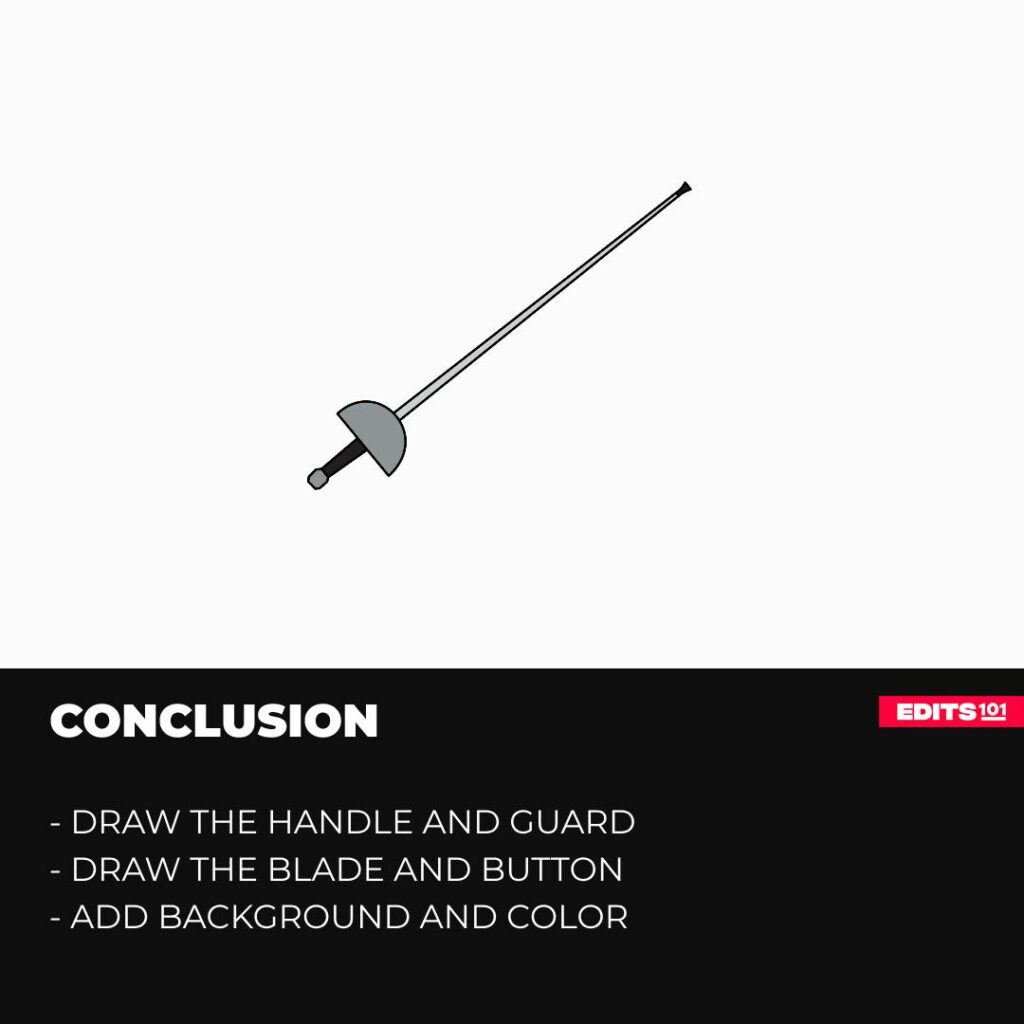
Conclusion
Drawing a fencing sword requires attention to detail and precision. With practice and patience, you can improve your artistic skills by creating a lifelike representation of an épée fencing sword.
So keep improving your drawing abilities and also exploring different techniques as you take your journey with art to new heights. See you next time in another tutorial!
Thanks for reading & feel free to check out more of our articles!
Author Rating
Overall Rating
Summary
This guide outlines drawing a fencing sword, highlighting key design elements and distinctive features of this essential fencing gear.