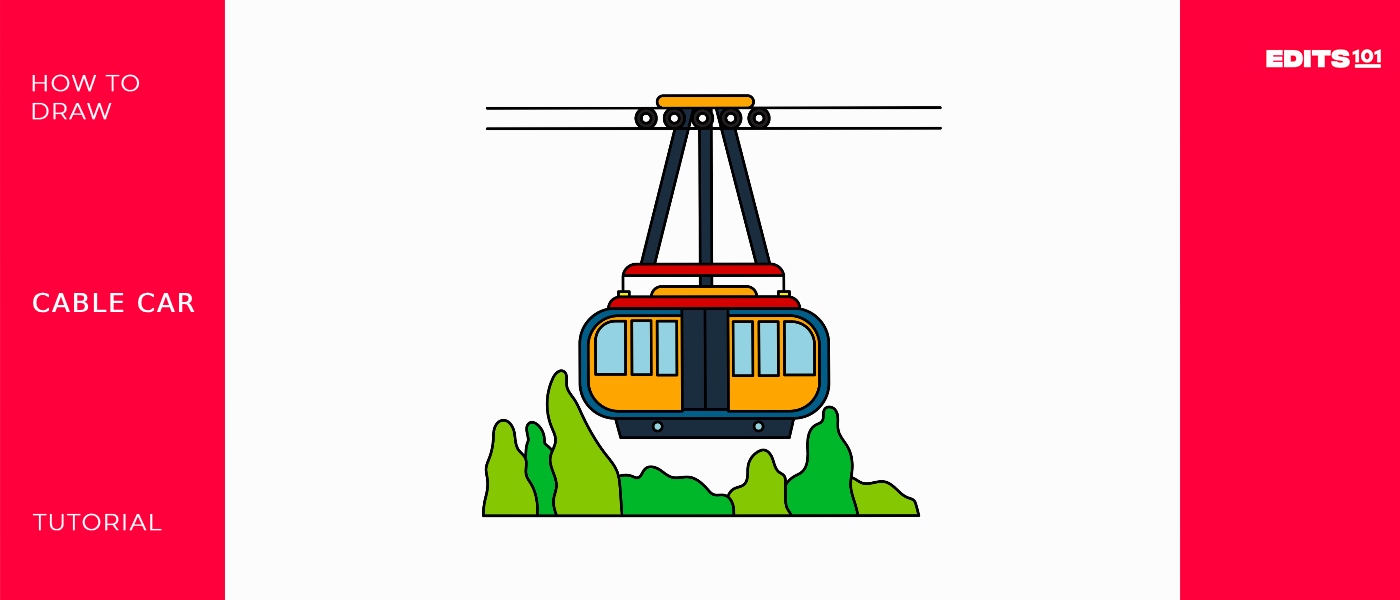
How To Draw A Cable Car | A Fun Tutorial
Are you guys ready to ride up to the mountains or steep hills? Today, we will take a thrilling and adventurous ride while drawing a cable car.
In San Francisco in 1873, Andrew Smith Hallidie created the first cable car. Hallidie’s cable car system dominated the city’s transit landscape for more than 30 years based on early mining transportation methods. The primary materials used to construct cable cars are oak, canvas, Alaskan spruce, brass, and steel. The total weight of the car exceeds 15,000 pounds. The Cable Car Museum claims that modern vehicles maintain a cruising speed of 9.5 miles per hour, whether traveling uphill or downhill.
What you will need
- A pencil
- An eraser
- A sheet of paper
- Coloring kit
- Ruler
- 30 minutes
How To Draw a Cable Car
Get ready to make an extraordinary piece of art. To make a perfect drawing, follow each step in this guide carefully.
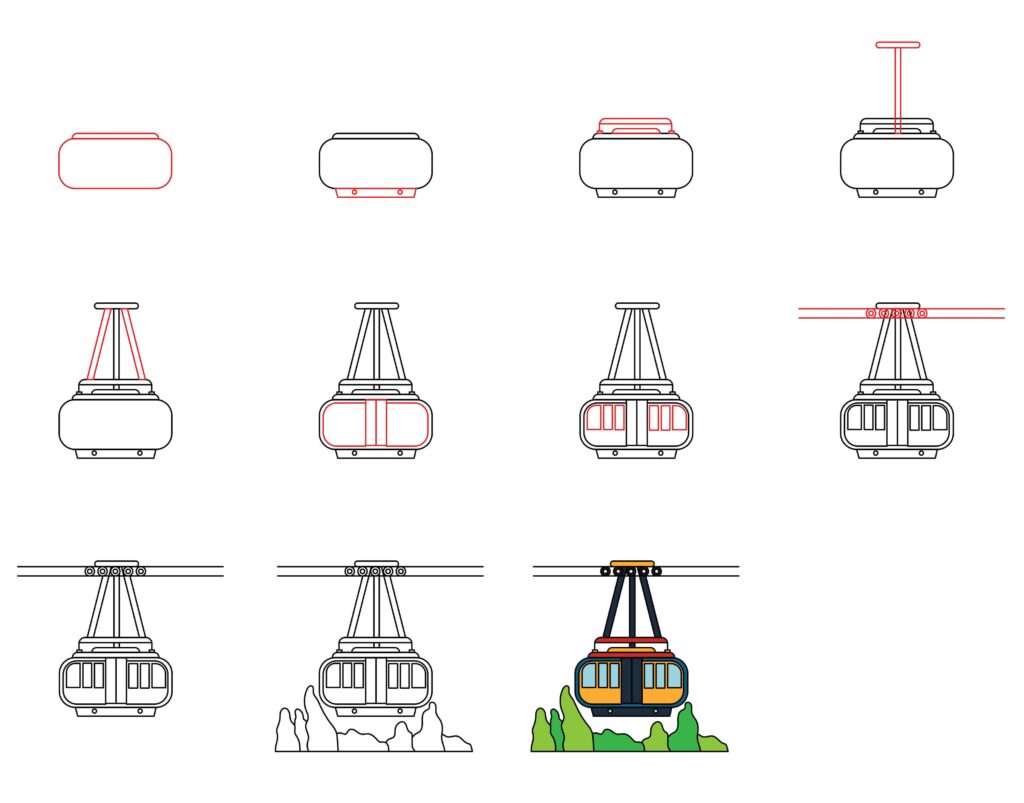
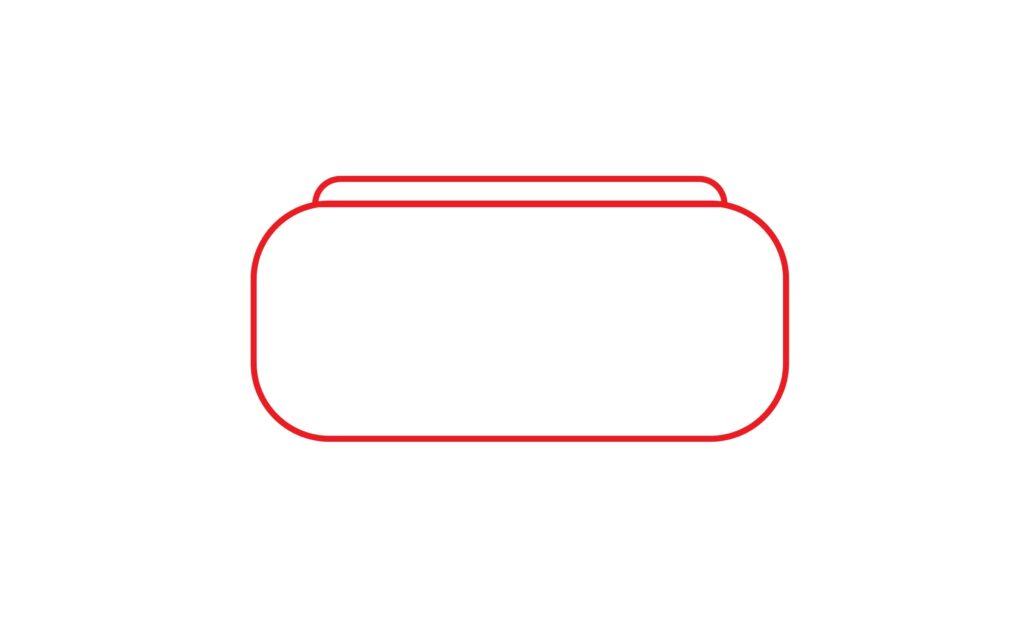
Step 1: Draw the main body
As always, in our first step, we will draw the main body of the cable car, which will act as a base for us to draw other parts. This is an effortless step. All you have to do is to draw a rectangle with curved sides for an artistic touch. To draw a rectangle, make two vertical and two horizontal parallel lines. Then, join the corners with curved lines. This rectangle will be removed in the center of the page.
Make another narrow rectangle on the top of our main body. This marrow rectangle will have a common side with the central curved-sided rectangle. Our first and foremost step towards our drawing is done.
Step 2: Draw the down part of the body
In this step, we will make the down part of the body and learn some new facts about the cable car. Do you guys know that cable car is also known as ropeways? To make the down part of the body, draw another rectangle with slightly bent sides. Then, draw two small circles on the lateral sides of this rectangle.
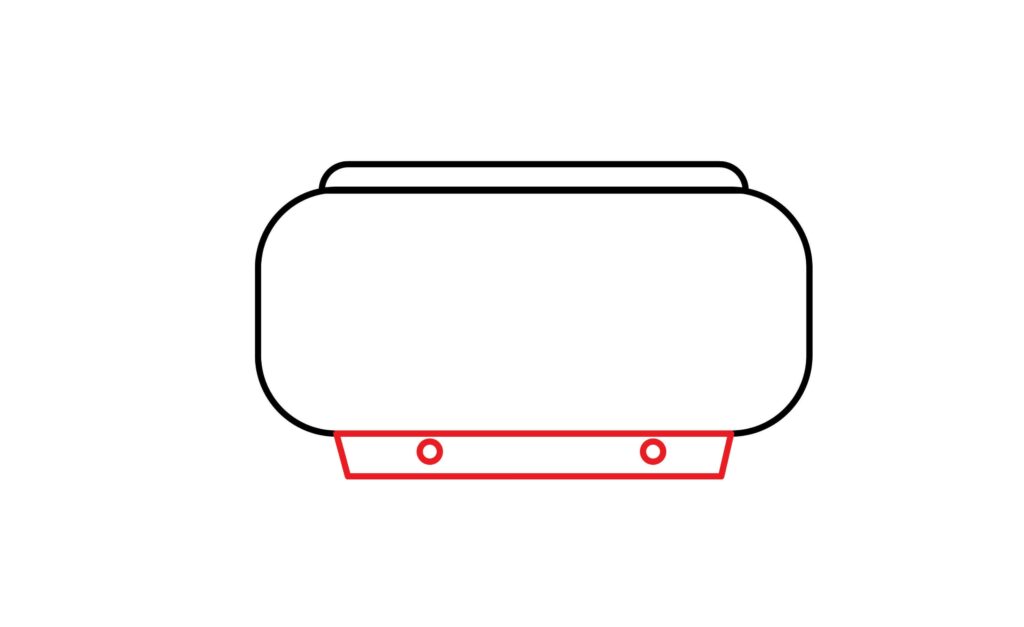
Keep up the good work; you will finish your drawing quickly.
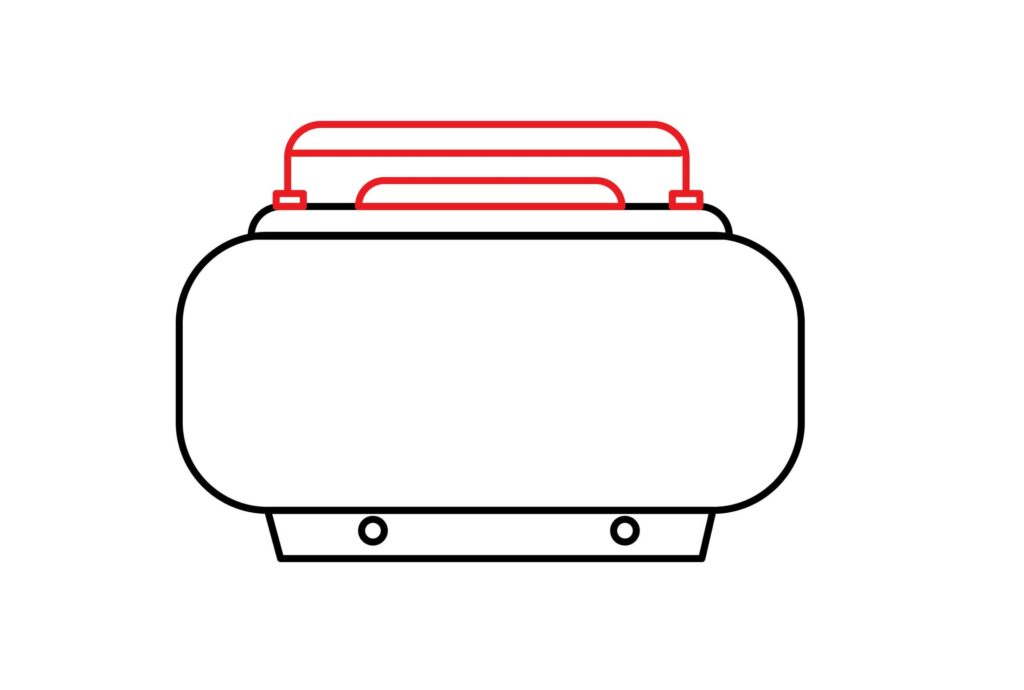
Step 3: Draw the connecting part
As the name suggests, this part of our cable car can be connected to the cables to move the cabin. To make the connecting part, draw a rectangle at the upper part of the main body. A description of how to draw a rectangle is already provided in the above steps. This rectangle will have little support attachment to the main body of the cable car. For this, you can draw two small horizontal rectangles. There are a lot of rectangles in our drawing today; well, of course, it is a geometric object.
Moving on to the connecting part, cut the rectangle with a line just above the middle drawn in this step. Draw another small rectangle above the main body.
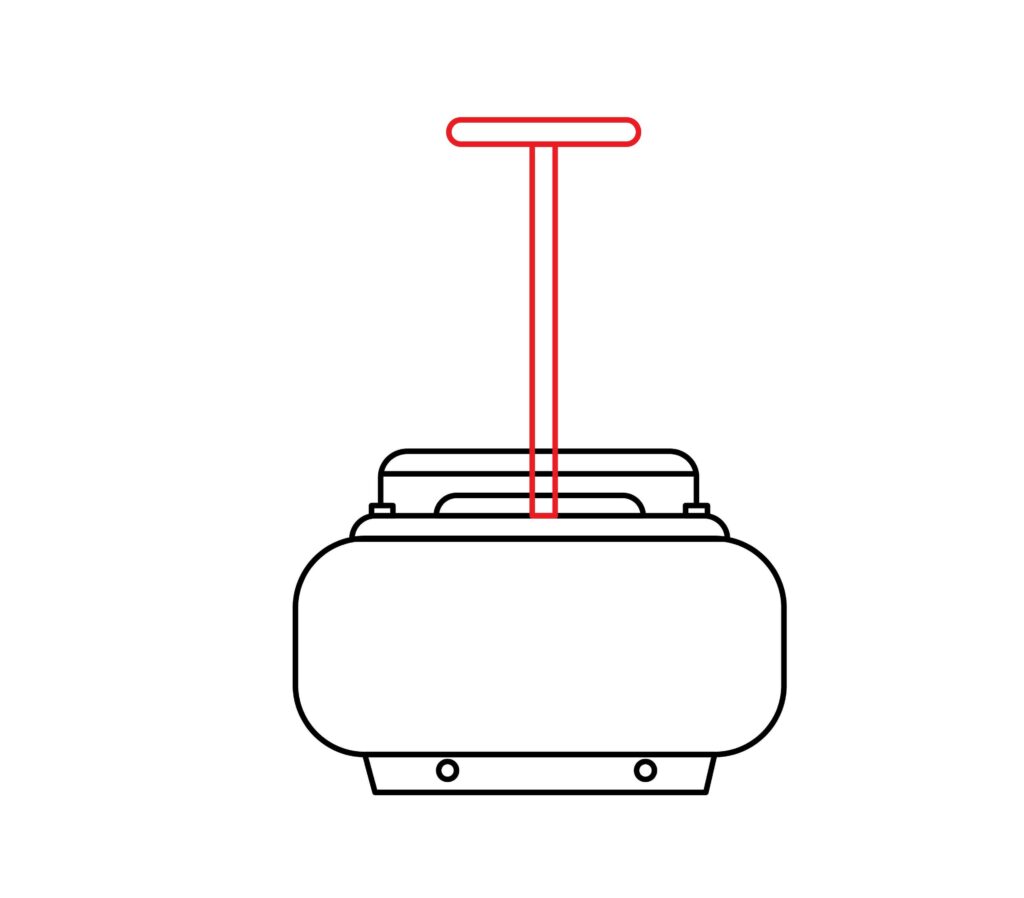
Step 4: Draw the cable handle
Now, we will draw the cable handle. This is a very crucial part of the function of a cable car. This handle should be firm and steady so our cable car won’t fall. Draw long vertical parallel lines or a very narrow vertical rectangle to make the cable handle. When you finish this rectangle, draw parallel horizontal lines over the top of our vertical parallel lines.
Keep up the excellent work; we will finish our drawing in no time.
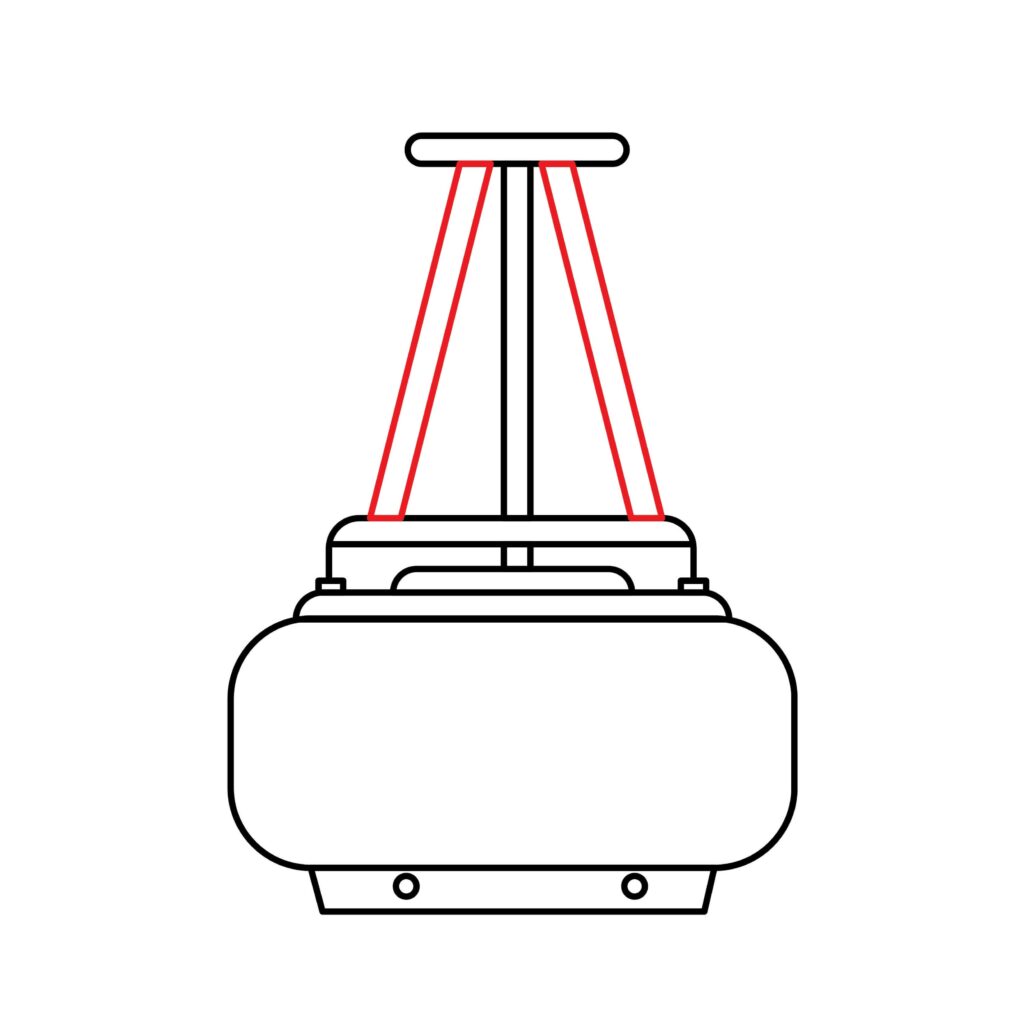
Step 5: Draw the connector stand
A cable connector is an accessory attached to the cable’s end, allowing the line to be connected to any port. In this step, we will draw the cable connector or connector stand. This is an elementary step. You have to oblique lines on both sides of the cable handle. First, draw diagonal lines bent towards the right on the left side of the cable car beside the cable handle. Repeat this same step on the right side, and the diagonal lines will be bent towards the left.
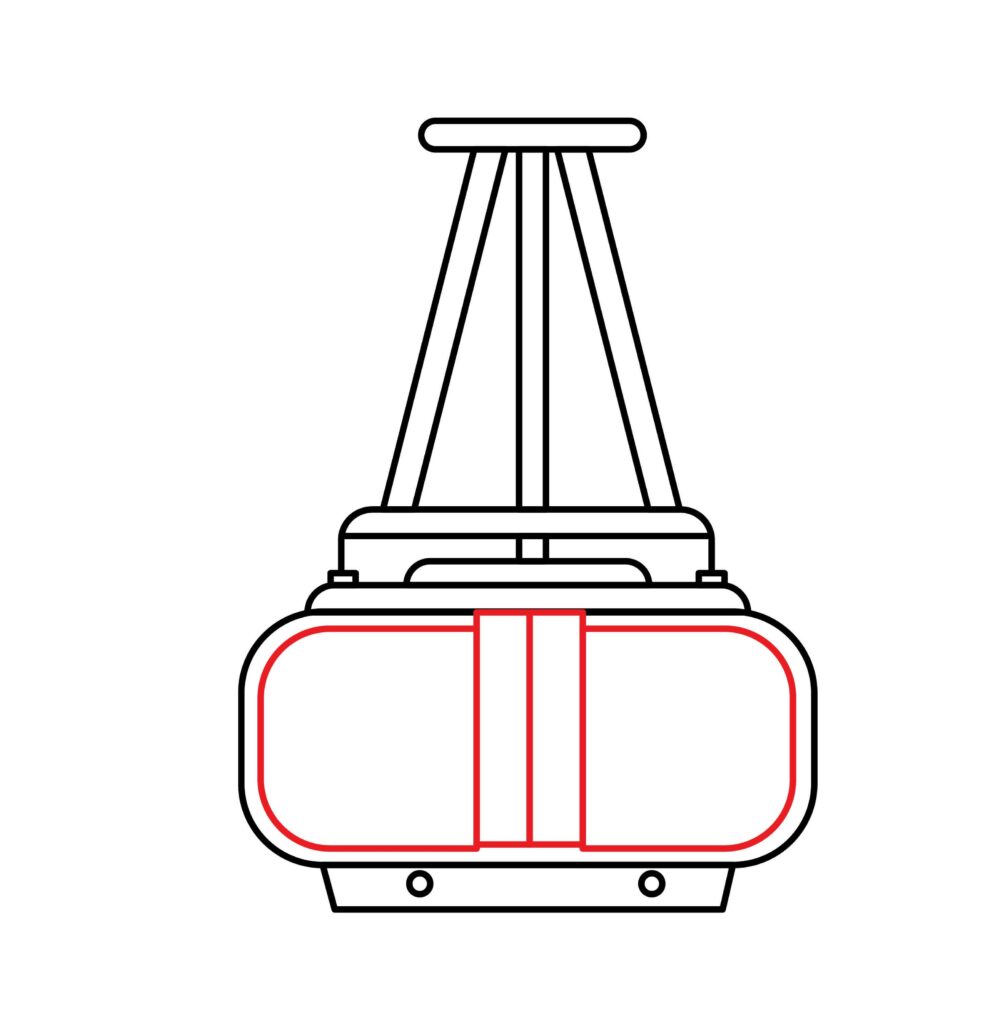
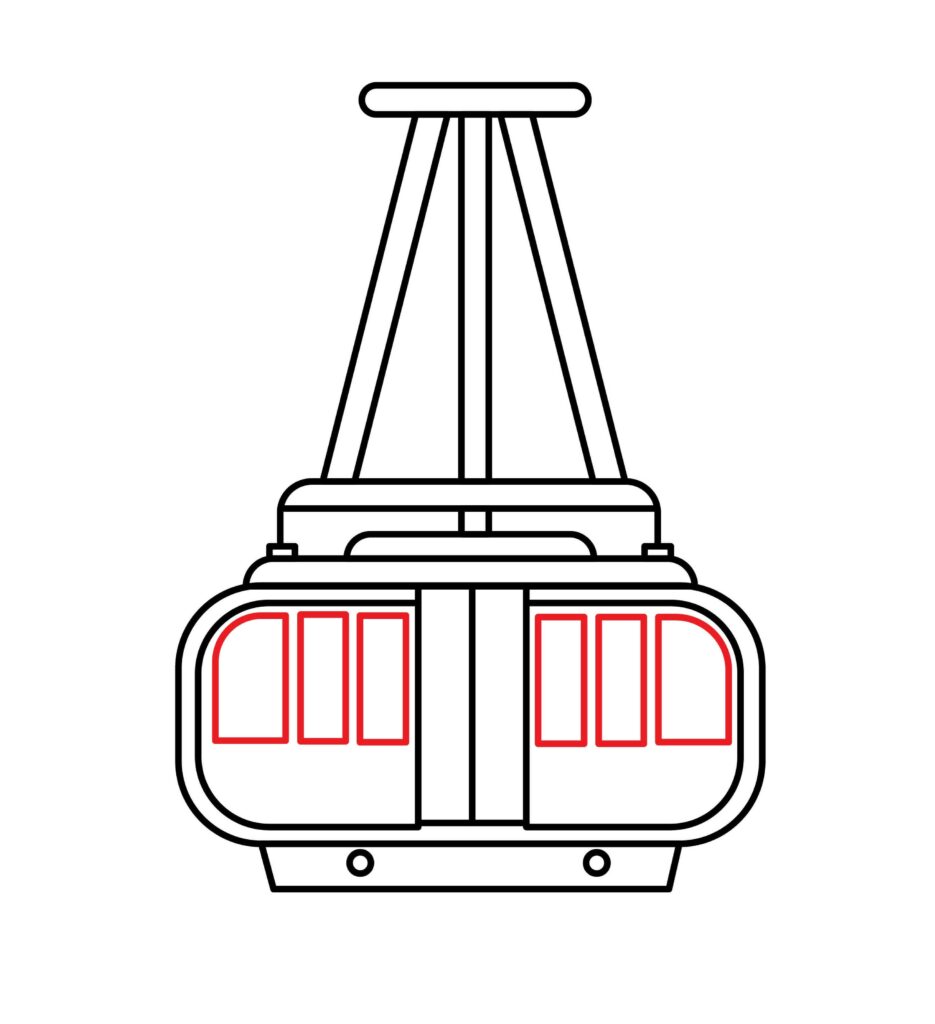
Step 6: Draw the door
Our cable car needs a door from where people enter to enjoy their ride up to the mountain. For the doors, draw two vertical rectangles in the center of the main body of the cable car. These two rectangles will share a common boundary, as shown in the picture.
For some detailing, we will double-line the main body of the cable car extending from the doors.
Very good, you are almost done with your drawing. Further steps are as easy as the above steps.
Step 7: Draw the window
Our cable car also needs windows; in fact, many windows as people riding cable cars would want to enjoy the beautiful scenery of landscapes. For the windows, make vertical rectangles on both sides of the door. Well, this drawing sure has a lot of rectangles. Make the corners of the window curved that is present near the boundary of the cable car. Repeat this same procedure on the other side of the cable car as well.
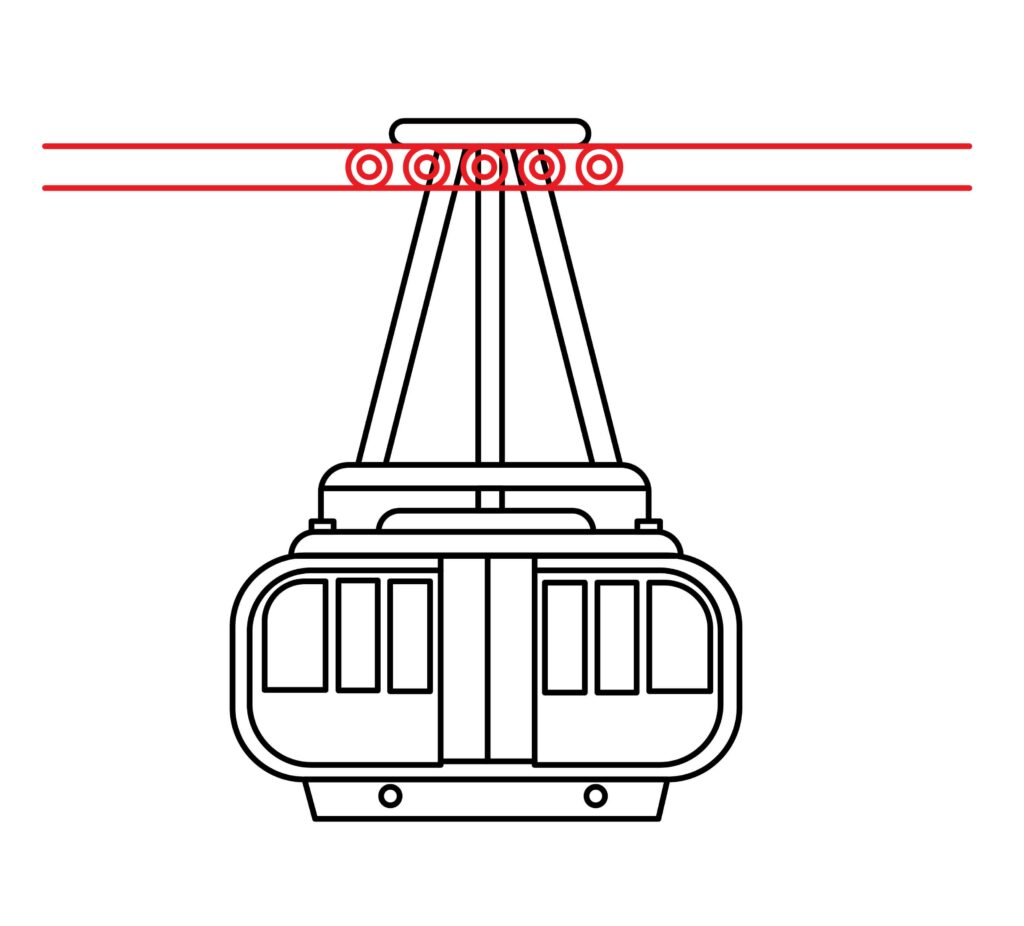
Step 8: Draw the cable lines
Now it’s time for our last step, in which we will draw the cable lines that are the most critical component of the cable car as it runs on these cable lines. To make the cable lines, draw two horizontal parallel lines along the width of the paper. Then, draw five small circles between these lines at the central part.
And that’s it! Amazing job.
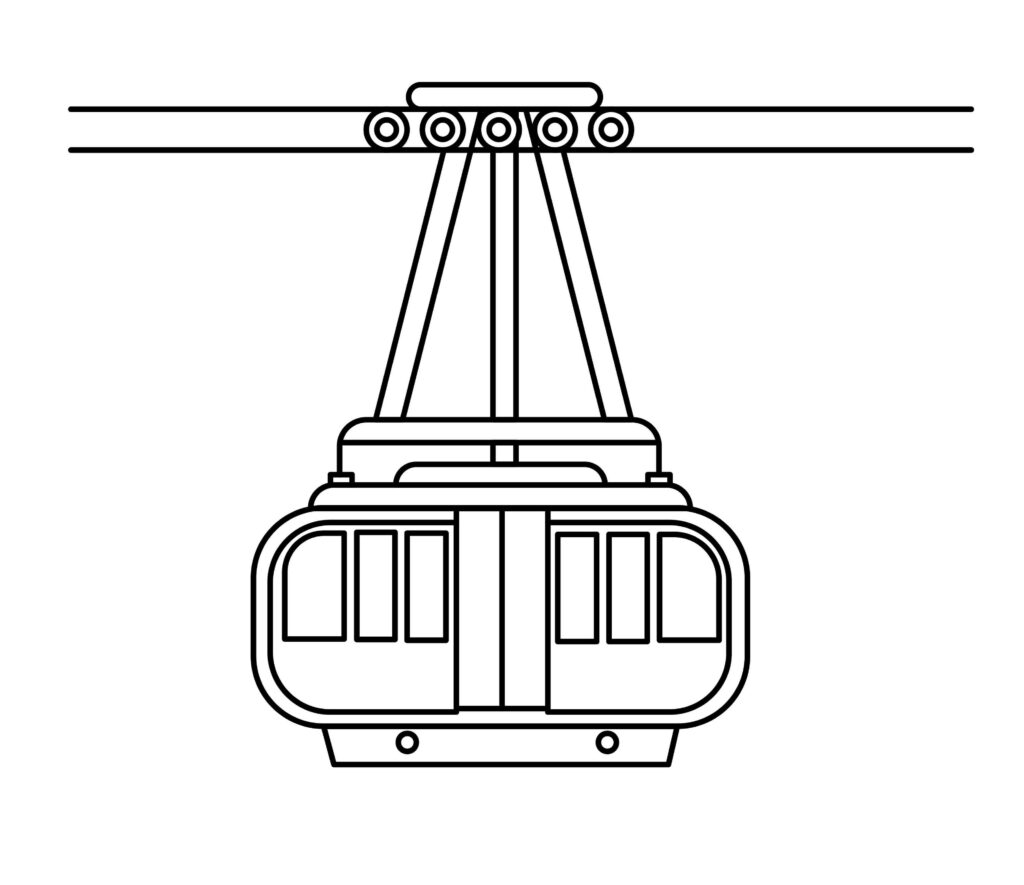
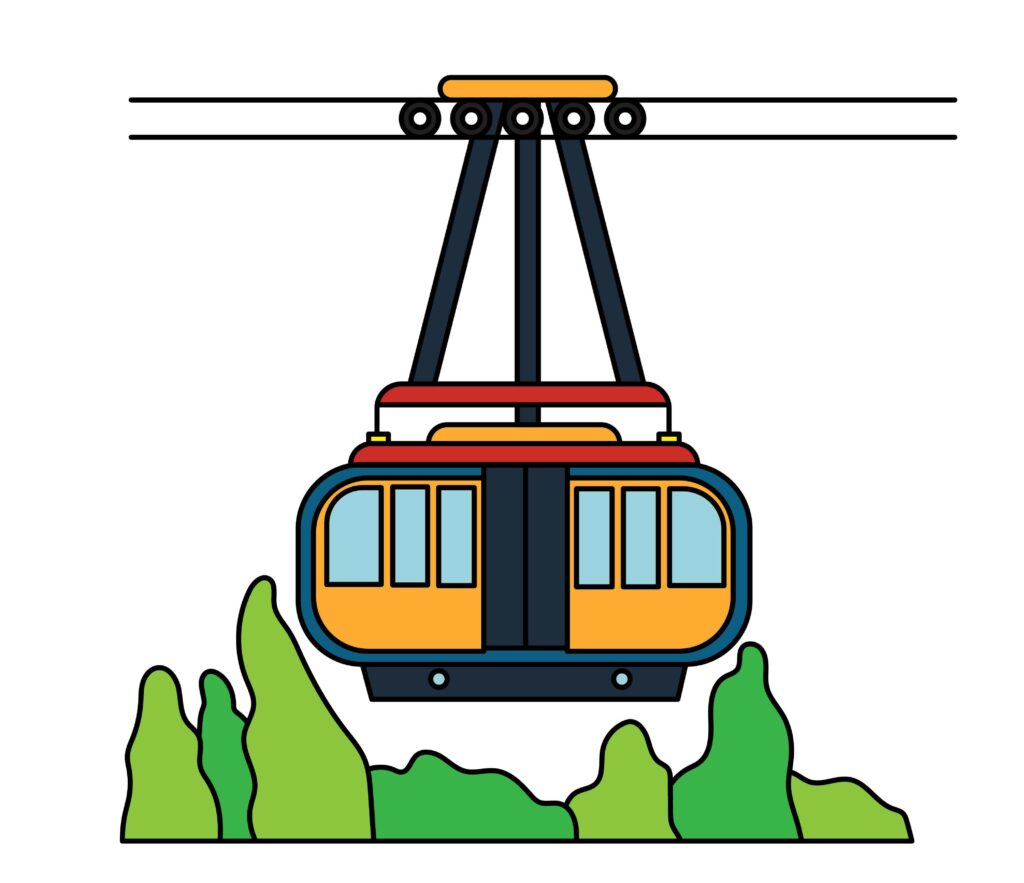
Step 09: The cable car is ready
Excellent! You are done with your drawing. Your cable car is ready to take people on a mountain trip. You did a commendable job. Without a doubt, you created your cable car and followed all the instructions. We’ll use a marker to outline the drawing to make it stand out more. We’ll remove the pencil traces for a clearer view after outlining.
Stay put! The good is just getting started. We’re about to make our drawing better and more lifelike. Are you willing to let your imagination and creativity soar to produce a flawless picture?
Taking your Cable Car drawing to the next level
The scope of your creativity is limitless. Everything is possible when you know how to use it properly. Similar to how using creativity, you may enhance your artwork. Give your imagination a free run to create a genuinely stunning drawing.
Doing this will boost your confidence and enhance your willingness to sketch more. Innovation and experimentation are the main points of this section. We’ll add numerous things to adorn our drawing.
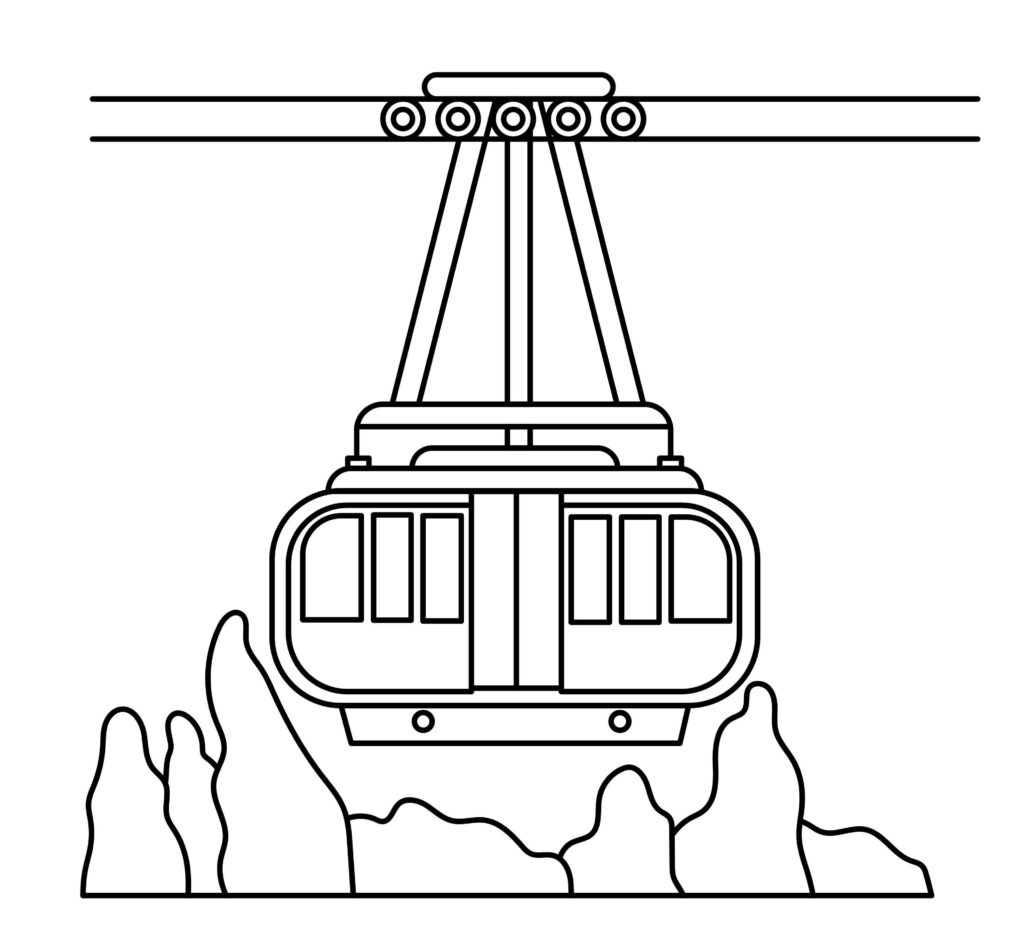
Adding background to your drawing
A drawing’s background is essential for creating context, dimension, ambiance, and storyline. Enhancing the composition and providing more evidence for the theme raises the artwork’s importance and overall impact. Everyone has a story to tell. It can be communicated verbally or even visually. You can describe your account by mentioning the background of your drawing. With a set, a picture appears entirely different. It provides context and gives the specifics more depth.
For our cable car background, we can add trees and bushes under or beside it. A bright blue sky can never go wrong with any drawing. You can make some pretty flowers on the plants. While adding the background, make sure no lines overlap with our sketch.
Adding colors to your drawing
Color is significant in drawings because it may evoke feelings, convey meaning, and create an atmosphere. They give the work new life by converting flat lines into lively, dynamic compositions. The color scheme you choose could affect how you feel. Cool colors conjure serenity or melancholy, whereas warm colors may radiate coziness. Additionally, colors help define form and depth, allowing things to advance or retreat visibly.
For the drawing, you can use crayons or colored pencils. You can paint the cable car in whatever color you like. The plants and trees can be painted with shades of green. Add a light blue tint to the sky to jazz up our drawing. Try brushing the pigment in a single direction and staying within the lines for tidy coloring.
P.S. Bonus Tips
Our drawing is completed, and we’re sure you enjoyed it as much as we did. As mentioned earlier, there’s no limit to one’s creativity. The drawing can be upgraded in any way. We added background and colors, but there’s more you can do.
You can add mountains or some people riding the cable car. You can make some designs on the cable car or write some words. These are a few suggestions; you can go wild with your ideas.
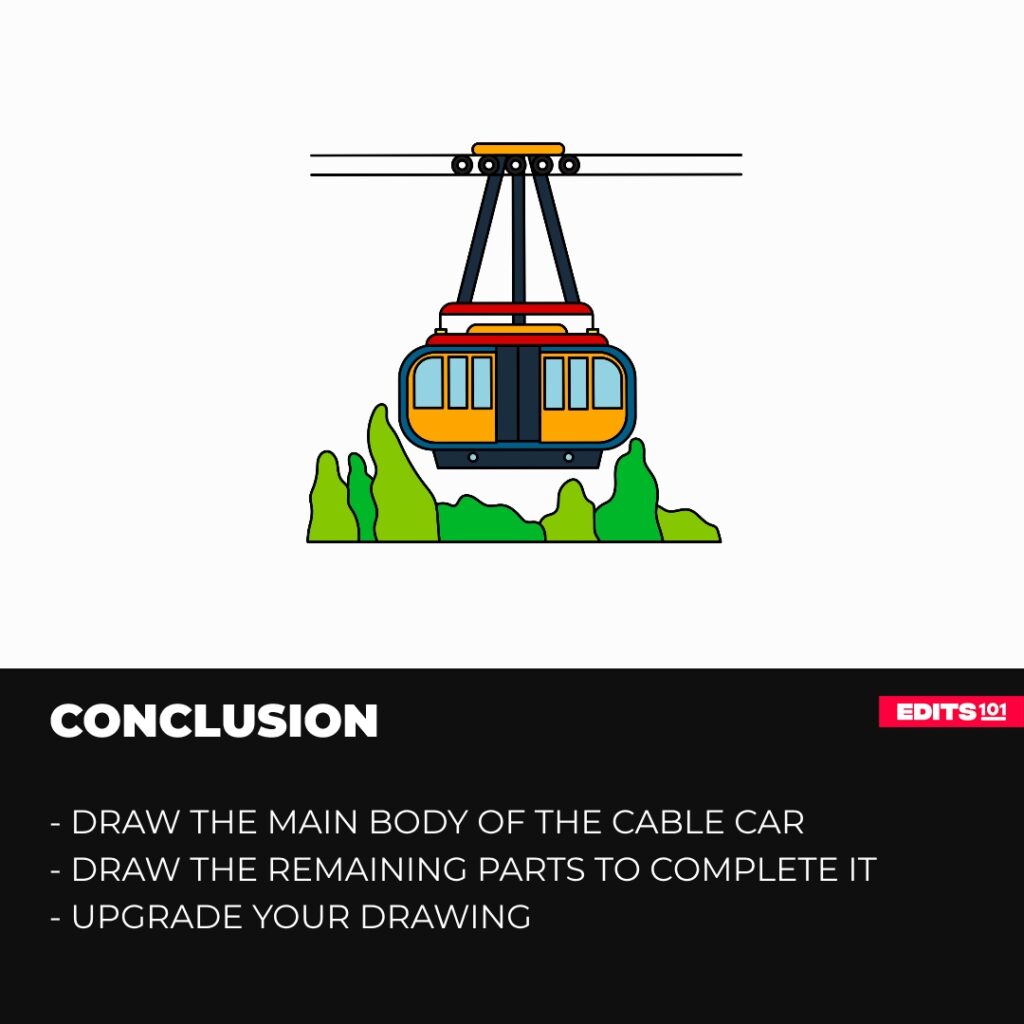
Conclusion
That’s it! Our drawing is done now. It was a fun and easy process. We’re sure you followed each step without skipping and made a fantastic drawing. We made the main body and drew the connecting part, cable handle, connector stand, door, windows, and cable lines.
Remember that drawing is a pleasant approach to exploring our possibilities. It should always be enjoyable to sketch various objects. No worries, try again if the first time yields different results. There is never a time to give up. You should practice till you are an expert.
Thanks for reading & feel free to check out more of our articles!
Author Rating
Overall Rating
Summary
Have a look at the process of drawing a cable car.