How To Draw A Miniature Car | Easy Drawing Tutorial For Kids
Are you ready for another exciting drawing? Today, we will draw a miniature car.
A miniature car is a small automobile, also known as a subcompact. A mold is used to shape molten metal into a desired shape. Zinc alloys are used in the production of diecast toys. Toy motorcycles and vehicles often have a metal frame, with glass, rubber, or plastic used for the stand, mirror, and tires.
What you will need
- A pencil
- An eraser
- A sheet of paper
- Coloring kit
- Ruler
- 30 minutes
How To Draw a Miniature Car
Are you guys ready for an amazing drawing experience while learning some facts about miniature cars that are used as play toys? All you have to do is to follow each step carefully. By doing that, you will have a perfect drawing.
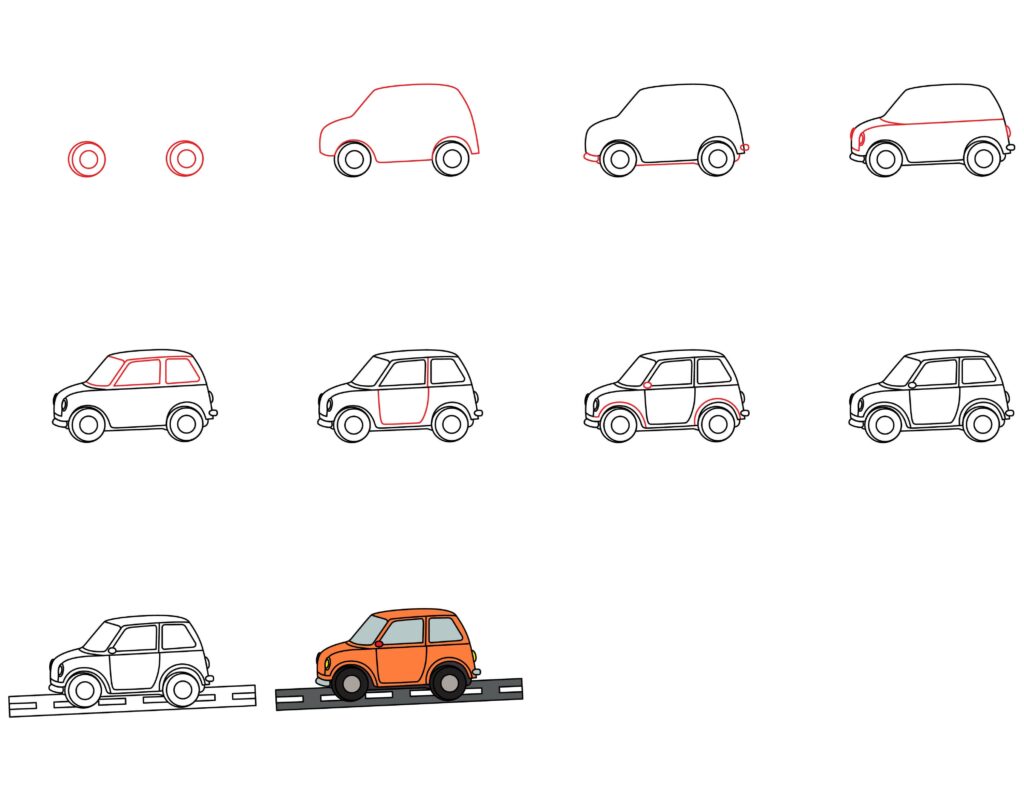
Step1: Draw the wheels
In our first step, we will start by making the wheels of our miniature car. To make the wheels, draw two circles on the lower left and right side of the paper. You can use a compass to make perfect circles by placing its sharper end where you want the wheel. You can also use a round object like a bottle cap or a small disc.
Do not worry if any of the things mentioned above are not available. We will guide you to draw a circle with free hand. Place a dot where you want your wheel, then put four dots around it (top, bottom, left, right). Remember, all these dots will be equidistant from our reference dot. Now, connect all these dots using curved lines. Repeat this same method to draw another wheel. Draw a small concentric circle inside the wheels to make the rim. You can also outline the upper left part of the wheel to give a 3D effect.

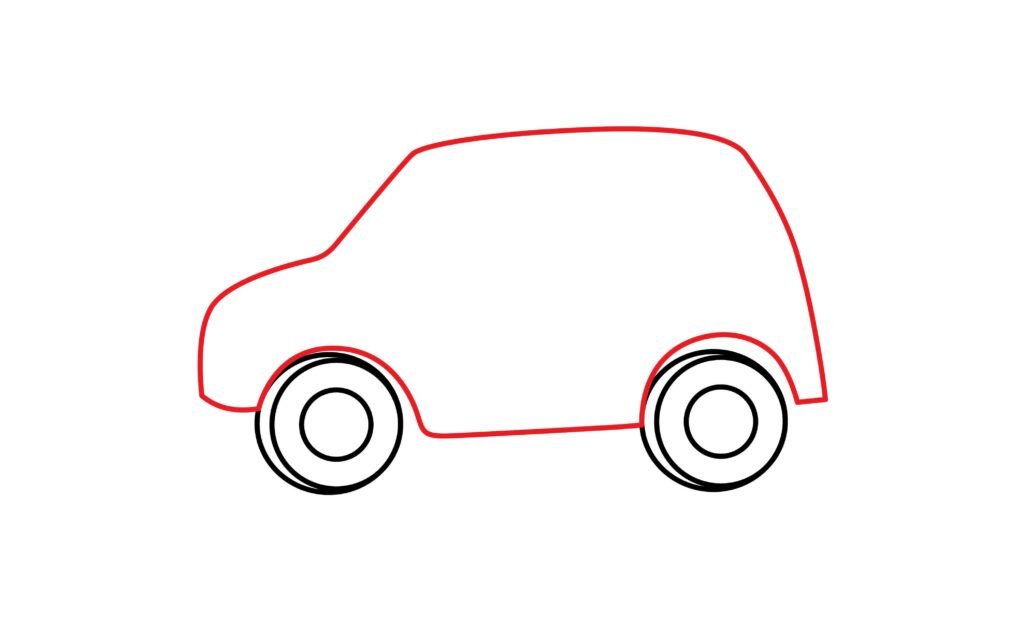
Step 2: Draw the body
Now, it’s time to draw the body of the car. This step is a little tricky as there is no specific shape for the car’s body, but do not fret; we will make it easy for you. Draw a line that connects the two wheels. Make curved lines to make the upper body of the car. The curved lines on the right side of the car look like an inverted ninety-degree angle with curved corners. Draw a step for the upper left part and extend it to the left wheel.
Great job! The main part of the drawing is done. Further steps are simple.
Step 3: Draw the bumper and a baseline
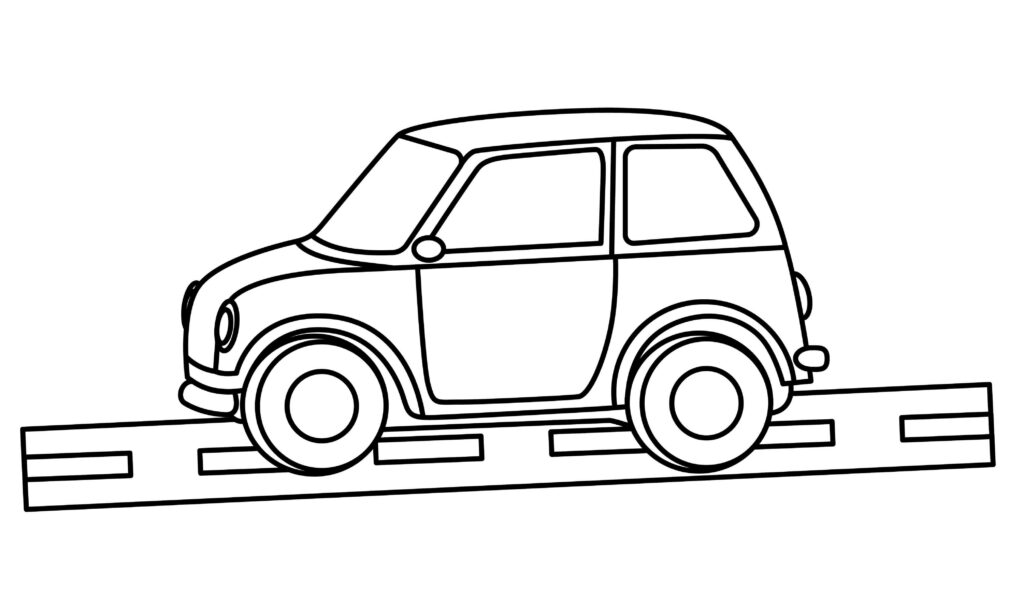
In this step, we will draw the bumpers and the car’s baseline. For the baseline, all you have to do is outline the lower part of the car connecting the two wheels. Draw the bumpers and baseline with several lines like the image as well.
A bumper is a structure incorporated or attached to a car’s front and back ends to reduce damage in the event of a minor collision. To make the bumpers, draw an oval shape on the left of the paper for the front bumper. Draw a small oval shape on the right for the rear bumper.

Step 4: Draw the headlights and front and middle line
Our car also travels during the night so we need a headlight. Car headlights’ main purpose is to illuminate the road, which promotes alert and safe driving. Therefore, headlights and their light sources are parts of the vehicle that are important for safety. To make the headlight, we will draw small ovals on the front and back of the car. Now, join these lights or the front and back part of the car with a horizontal line and a curved line emerging to the front side to highlight its bonnet.

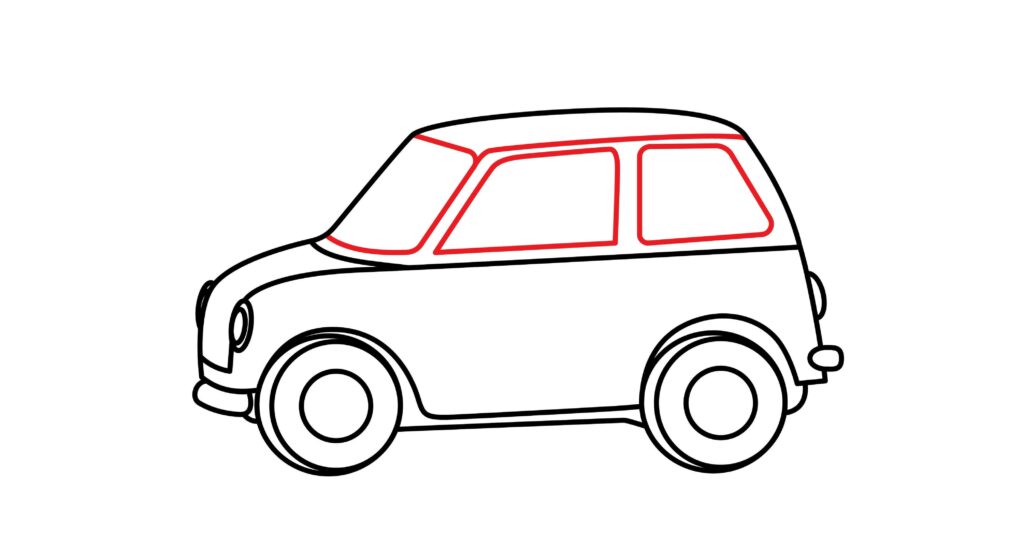
Step 5: Draw the front windshield and window
The windshield lets the driver look at what is in front of the car. To make the front windshield, draw a slanted rectangle on the car’s front side, as drawn in the image. For the side windows, draw two trapeziums. The trapezium is quadrilateral, having four unequal sides. Also, draw a horizontal line above the windows for details.
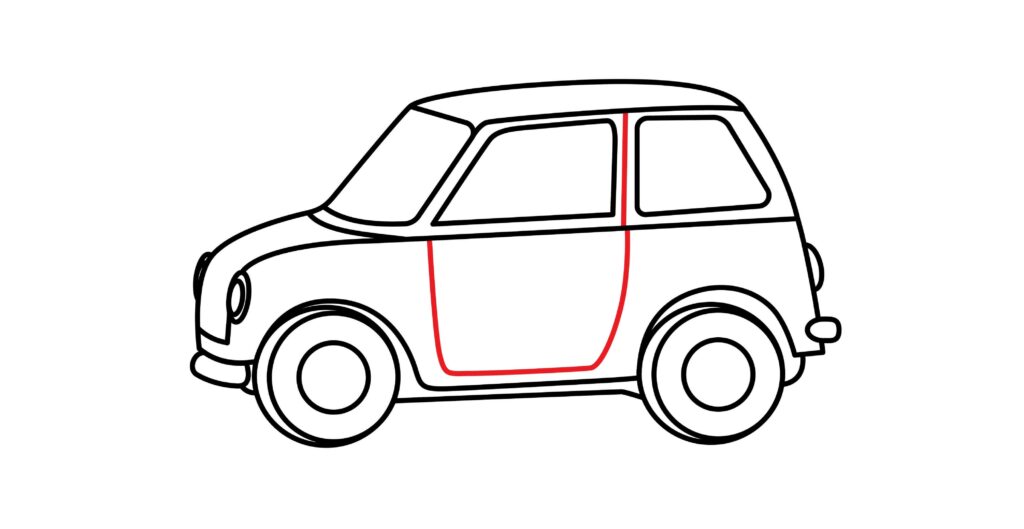
Step 6: Draw the door
We will draw the door of the car in this step. Note that this is a miniature car, so it will have only one door to enter in the car. To make the door, draw a quadrilateral below the front side window of the car. Also, draw a vertical line between the front and back window.
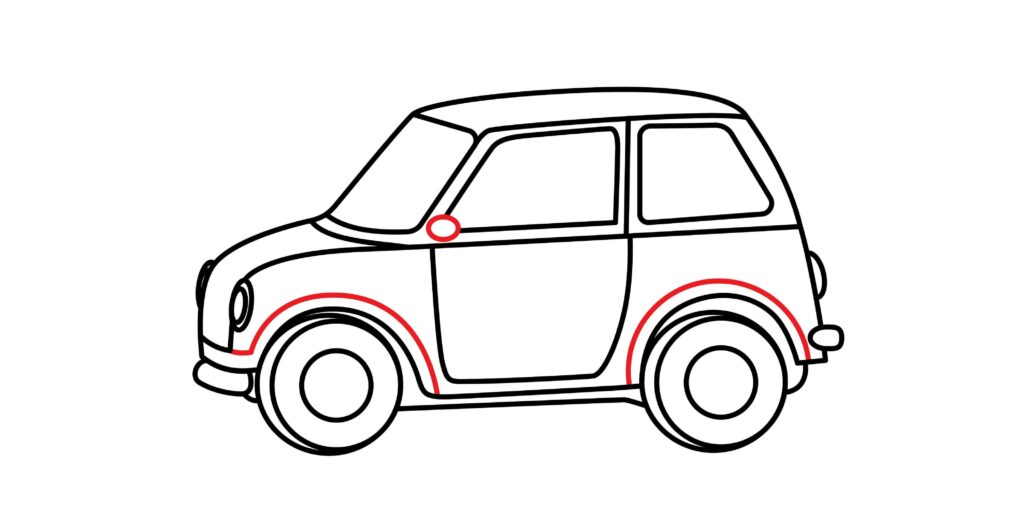
Step 7: Draw the fender lines
In this step, we will make the fender lines. A car’s fender is the portion that shields and frames the wheels while also preventing mud splashes. On their front wheels, most modern cars have fenders. Your fenders were likely slightly dented in a “fender bender,” which is the term for a minor auto collision. To make the fenders, draw a line from the front wheels to the back wheels to make the fender line like the image.
Step 8: Your miniature car is ready
Well done! Your drawing is complete. As mentioned in the steps, we are so excited and hopeful that you created a spectacular image. You can make mistakes when drawing, so give it another look after completion. If it doesn’t look right, erase it and make it better; then, use an outliner to make it look better.

Wait to put your things away. The real magic is about to begin. We will make your drawing from looking like a drawing to a masterpiece picture.
Taking your miniature car drawing to the next level
There are hundreds of millions of people on the planet, each with their preferences and other items, and our brain is as different as the area we are about to investigate. Anything is possible for the human intellect. If you want to make an image more original, you can always add your thoughts. Your enhanced self-confidence and idea-filled mind will also raise your willingness to produce more original work. We will add colors and backgrounds to our drawing in the following steps.
Take out your art supplies, and let your creativity run free.
Adding background to your drawing
The composition of the drawing can be balanced with a well-designed background. It can serve as a point of reference for the spectator and foster harmony between the subject and its surroundings. Background information is essential to a good narrative. They can include further details about the story, including the day of the week, the time of year, or a specific location. This may enable the audience to receive a more thorough report. A complete and precise backdrop is necessary for realistic or representational art to convey the illusion of reality successfully. It aids in placing the subject in a plausible setting.
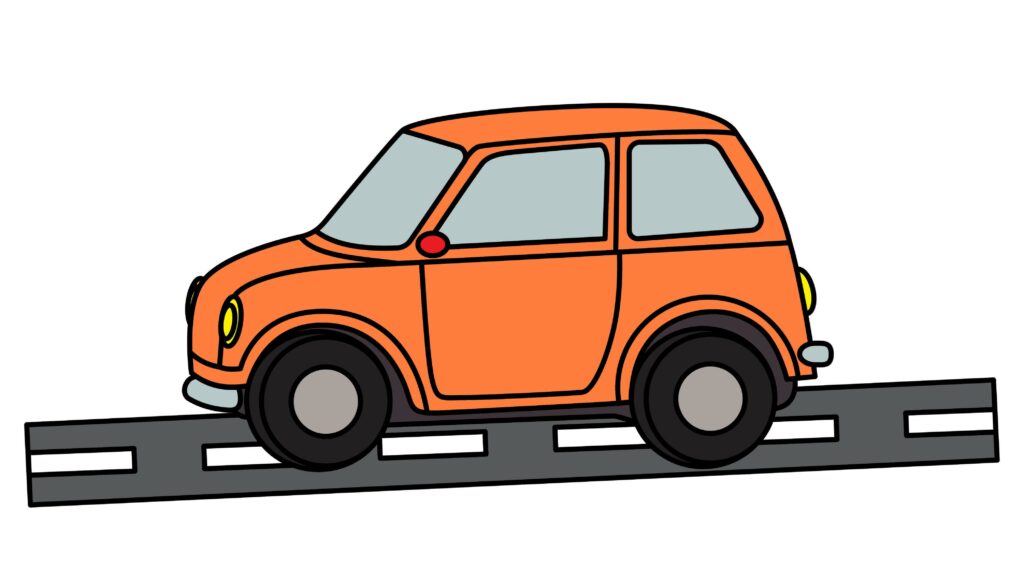
For our miniature car, you can draw a road track. You can also draw a footpath beside the road with bushes or small plants. You can make a traffic at the side of the if you like.
Adding color to your drawing
Now is the time for you to express your creative side. Utilize your artistic talents to the fullest when coloring your drawing. Including color in your picture will make it more vibrant and alive. With color, the image seems full of life and exciting. We need to color it so it looks lively and new.
Do you guys also realize that coloring is a healthy method to unwind? It encourages physical relaxation while reducing mental stress. Heart rate, breathing, and depressive and anxious thoughts can all aid with sleep and fatigue and reduce physical pain. Crayons, poster paint, markers, or pencils can be used to color it. Everything is up to individual taste. Clean, exact coloring is the key to a good drawing.
You should use any color want for your car. You can color it with bright colors like red, blue, or green. You can use blue for the windows and light blue for the sky. For the road tack, you can use either grey or white color. By merging and mixing, you can use different shades of colors to give an artistic effect to your drawing.
P.S. Bonus Tips
We’ve finished our drawing, and we hope you liked it as much as we did. There are no restrictions on one’s imagination, as was previously said. Any improvement can be made to the drawing. Although we provided a background and some colors, there is still more you can do.
You can make designs or patterns on the car’s body, like fire or your favorite car design, and many more things that show your personality. These are very few ideas, but as we know, we can do anything, so don’t limit yourself to ideas.
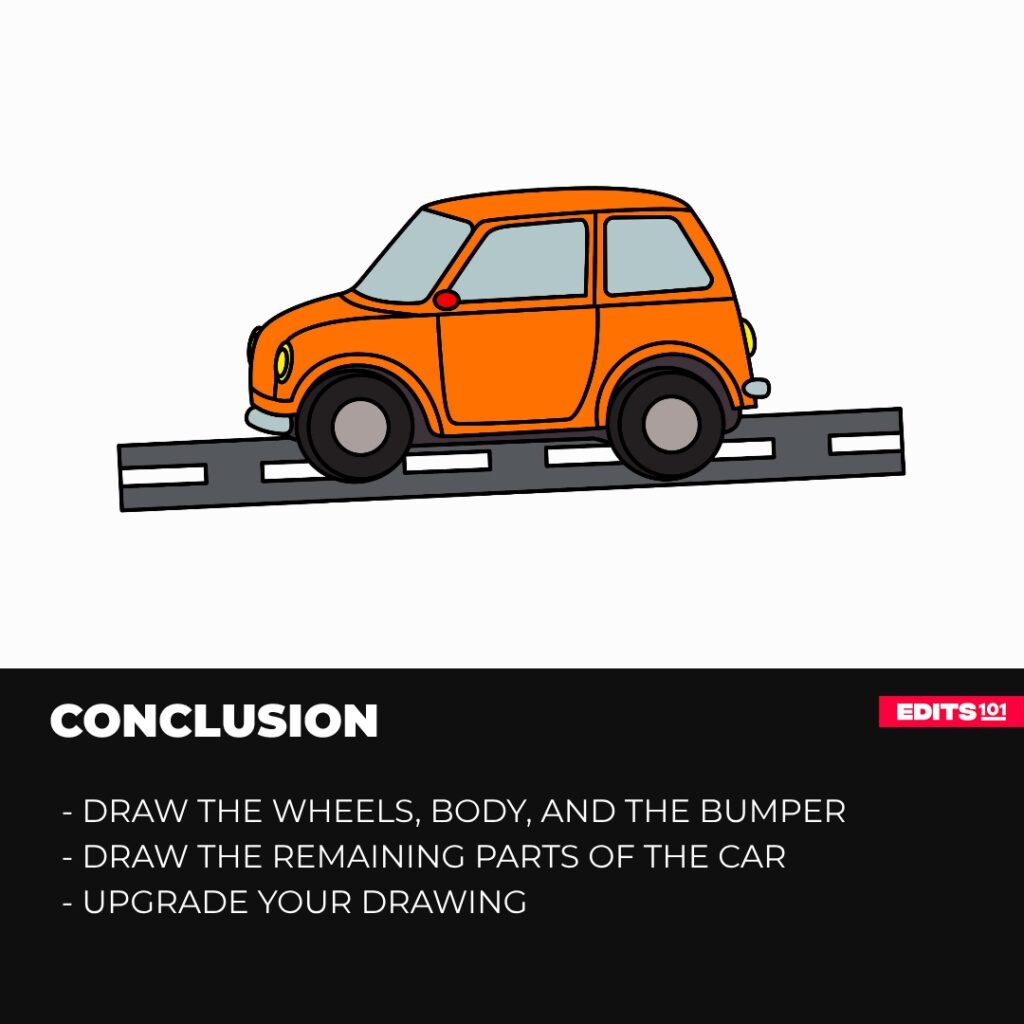
Conclusion
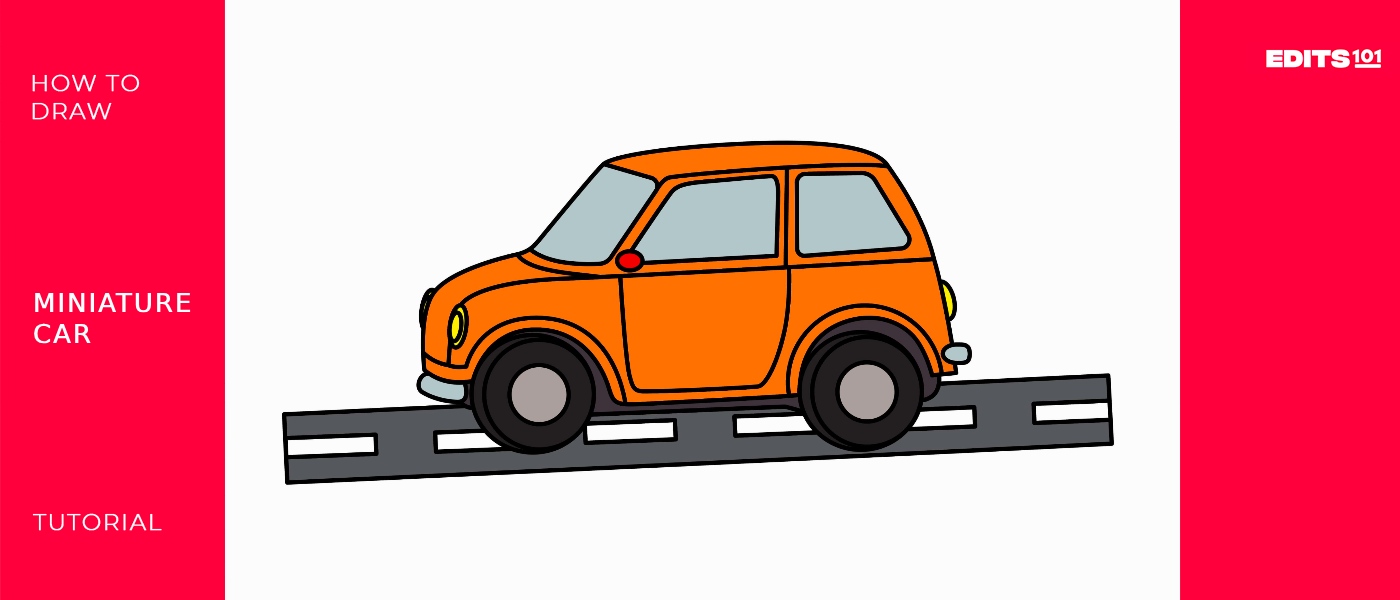
And done! Our drawing is all ready now. It was a fun and easy process. We’re sure you followed each step without skipping and made a fantastic drawing. This guide explained everything in the simplest and most effective way. To draw the miniature car, we made the wheels and drew the main body, headlights, windshield windows, fenders, and the door.
The more you sketch, the better you’ll get, and the more ideas will come to you. Remember that sketching is a smart and creative approach to expressing yourself. Keeping them in mind will be quite beneficial in ensuring that the artwork is yours. You should always keep going, so if you’re unhappy with the outcomes, you can try again.
Thanks for reading & feel free to check out more of our articles!
Author Rating
Overall Rating
Summary
This guide explains how to draw a miniature car. You will also learn a few interesting facts about this vehicle.