How to Draw a Police Car | Fun Drawing Tutorial
The police use a police car. It is used for the commute of the officers, to patrol, to reach the area of interest, to transfer the alleged people, and many more. A police car is also considered a “symbol of deterrence.” The other names for the police car are squad car, patrol car, area car, and cruiser.
Due to its uniqueness, kids are always attracted to it. They love it. It’s no wonder that most of the kids try to draw their imaginary police car. Without proper guidance, their drawing doesn’t satisfy them.
In this guide, we will explore each step on how to make a police car. You will have an amazing police car on your paper within a few minutes.
What you will need
- A pencil
- An eraser
- A sheet of paper
- Coloring kit
- Ruler
- 30 minutes
How to Draw A Police Car
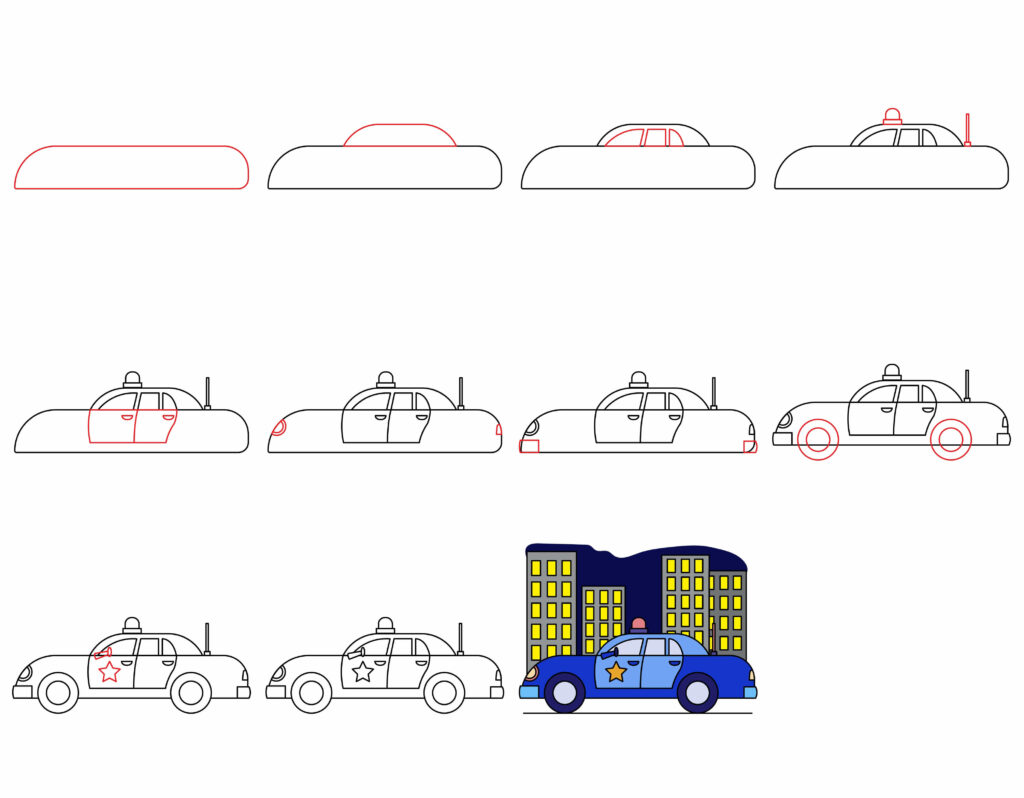
From the beginning, it is going to be an interesting journey. We will start by making the body of the car. After that, we will add the rest of the parts.
A good drawing is always appealing. To make our drawing appealing, we’ll add colors and other specifications at the end of the drawing. Get your stationary and follow this guide. You’ll love the end product!
Step 1: Draw the main body of the car
We will begin by drawing two horizontal parallel lines. Make the first line using a ruler. In the same pattern, make another line on top of the first line with some gap, as shown in the image below. Remember that the second line is smaller than the first line. Connect the ends of these lines by drawing slightly curved lines, as shown in the image below.
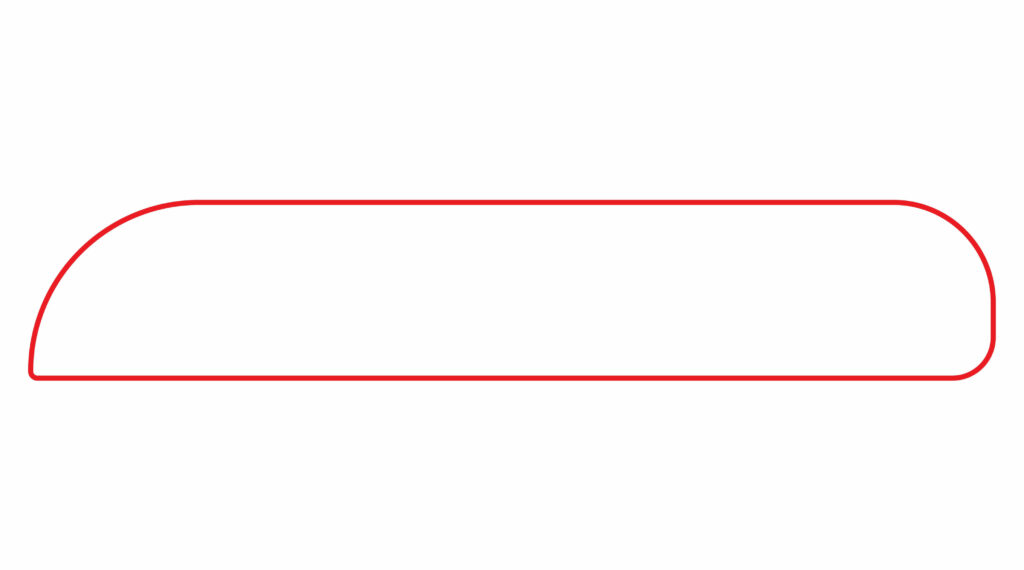
The main body of the car is ready. It is quite simple, isn’t it? The rest of the steps are of similar style. You got this!
Step 2: Draw the roof
Police cars aren’t fancy like sports cars. Nonetheless, they are well-equipped and protected. We have to ensure the suspect doesn’t run away from our car. For that purpose, we will make a roof for our car.
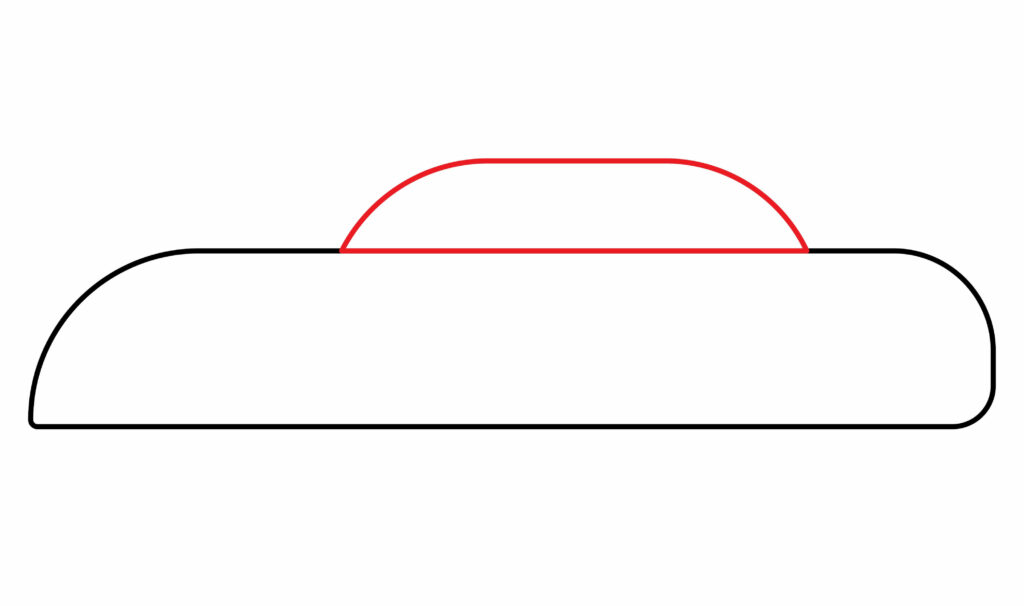
Draw another rectangle on top of the first rectangle. Make this rectangle slightly narrower than the first one. The rectangle should be curved from both sides to give a realistic look.
Step 3: Draw the windows
Windows are used for ventilation. To draw the windows, we will make three rectangles inside our car’s roof (step – 2). All three rectangles should be similar in size.
These three rectangles represent the front, middle, and back windows.
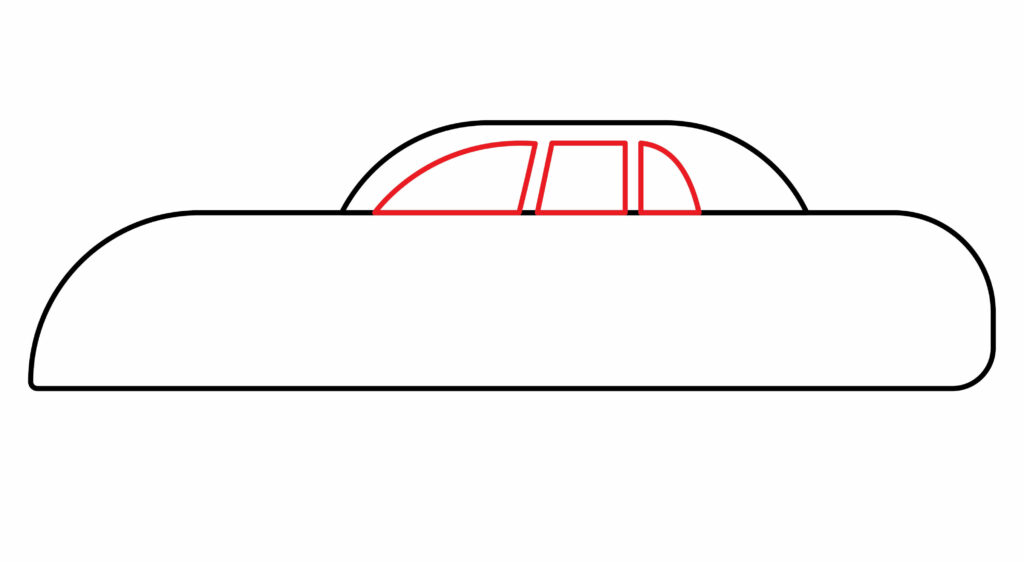
Remember that the sides of the front and the back windows are curved. The curve of the front window should be aligned with the curve of the roof to have symmetry.
Step 4: Draw the police car’s siren lights
No ordinary car has these siren lights. This feature is only attributed to the police car. In any emergency situation, these siren lights are fully operational. We will add this feature to our car as well.
There are two siren lights on a police car. One on the rooftop and one at the back. To make the one on the rooftop, draw a small rectangle on top of the roof (step 2). This rectangle should be above the front window. Make a semi-circle on top of this small rectangle. Make sure the semi-circle rests on the rectangle.
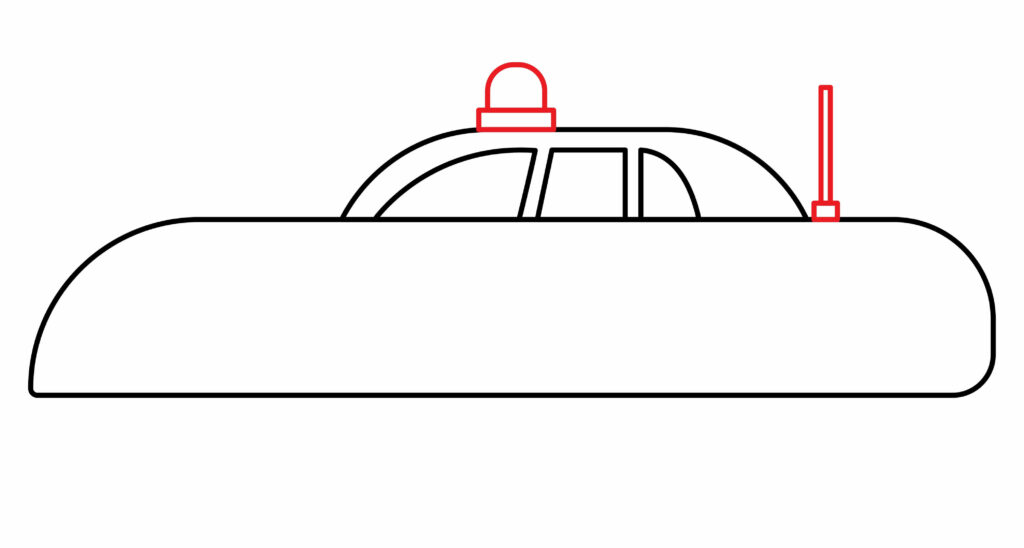
To make the light on the back, start by drawing a small rectangle. Draw very narrow parallel lines pointing upwards.
Step 5: Draw doors for the car
How do you get in the car? Of course, by its doors. We will draw two rectangles inside the body of the car (step – 1). The sides of these rectangles must be curved. The position of the doors is vital. Draw the doors in the middle of the body to maintain its geometry.
We have made the door, but how to open it? Are we missing anything? THE KNOBS!
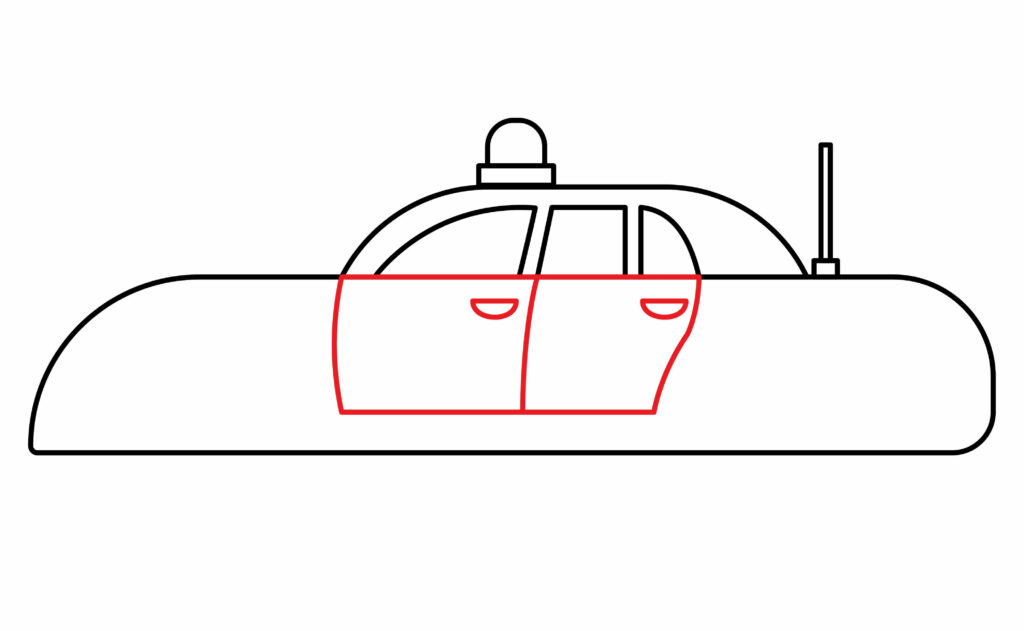
We will draw two small semi-circles in the upper right area of the doors.
Step 6: Draw car lights
Ordinary lights are different from the siren lights. These lights are operated when it’s dark or the visibility is low. There are two divisions of these lights: front lights and back lights.
To draw the front lights, we will make a semi-circle on the front side of the car body. This semi-circle should be on the curved line of the body, as you can see in the image below.
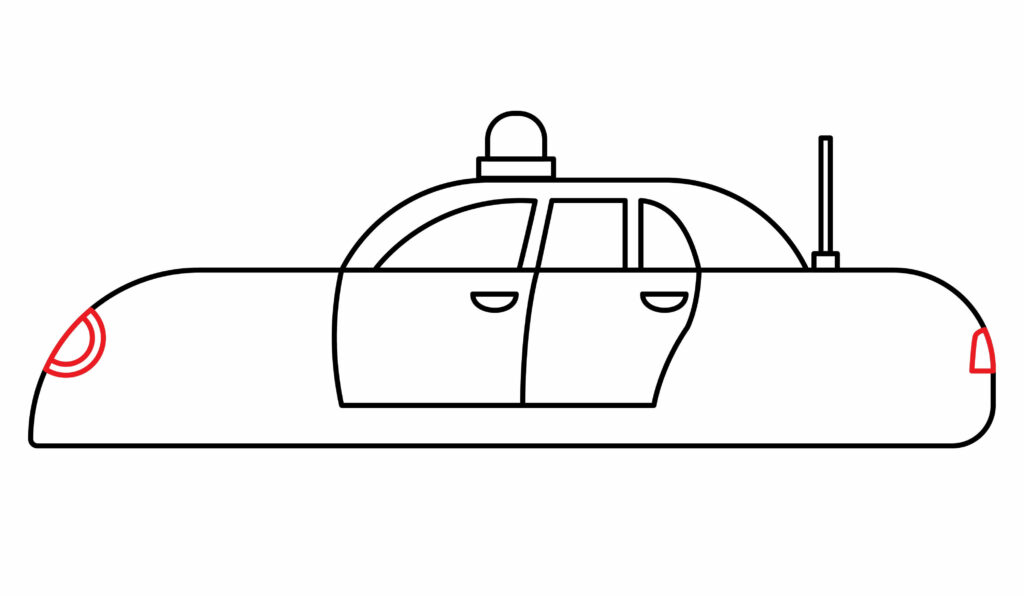
We will make another semi-circle in the same pattern as the first semi-circle. These are our front lights.
To draw the backlights, we will make a small rectangle on the opposite curved line of our car body. Our lights are ready to shine.
Step 7: Draw front and back bumpers
Bumpers are horizontal structures that minimize the effect of any collision. That is why it is present at the front and at the backside. Both bumpers are of similar shape.
We will draw a small rectangle at the bottom left of our car body. This is our front bumper.
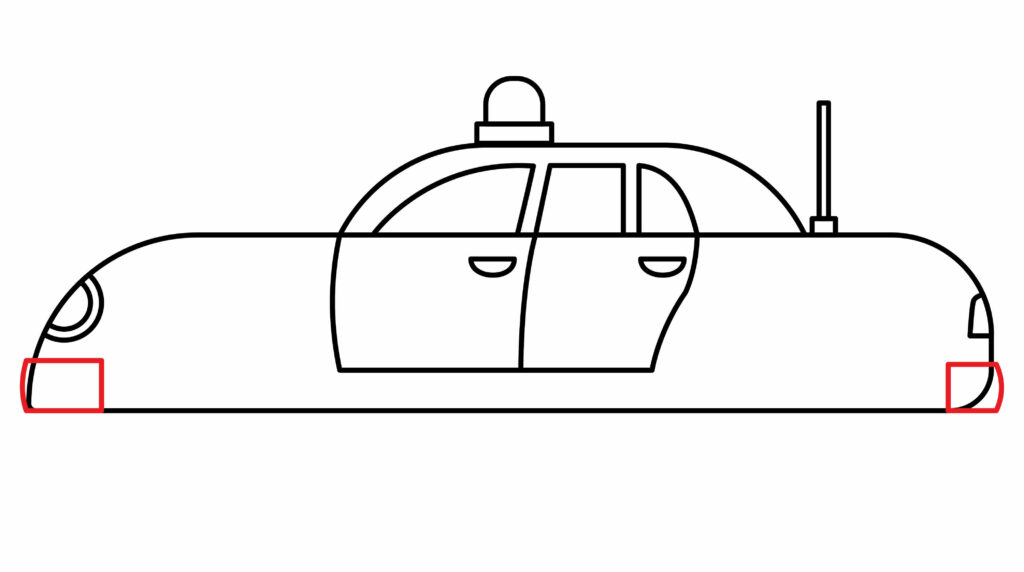
Draw another small rectangle at the bottom right of our car. This is our back bumper.
Step 8: Draw the wheels
A police car doesn’t have wings. It needs wheels for a smooth ride. The entire body is resting on the wheels. For the wheels to operate effectively, they must be smooth.
Draw a big circle in a way that half the circle is inside the body and the other half is outside the body from the bottom left. We can make the circle using the freehand technique, or we can use a round lid as well. Make another circle inside the first circle. This completes our front wheels.
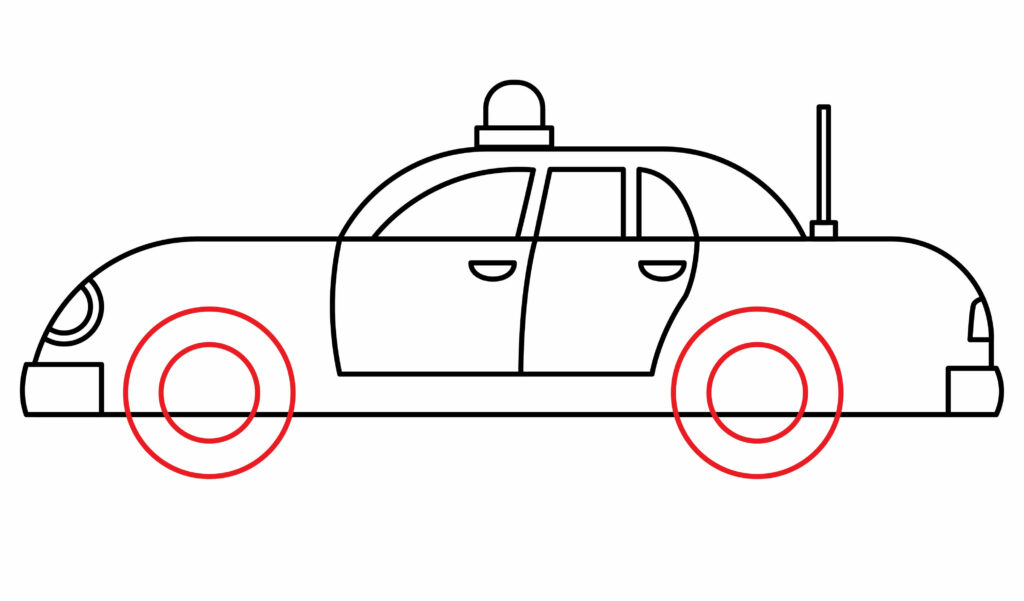
For the back wheels, draw a similar-sized circle in the same pattern on the bottom right of our car body. Erase the lines of the car body that bisect the wheels.
Remember that the wheels should not be in contact with the bumper or the doors. Our police car would seem deformed.
Step 9: Draw the mirror and Star for the police logo
Safety is our first priority. We need to add a looking mirror to our car so it can make a turn safely on busy roads. To begin with, draw two small horizontal lines on the upper left side of the front door. Then, we will add a small oval-shaped structure at the end of these lines. This oval-shaped structure is our looking mirror.
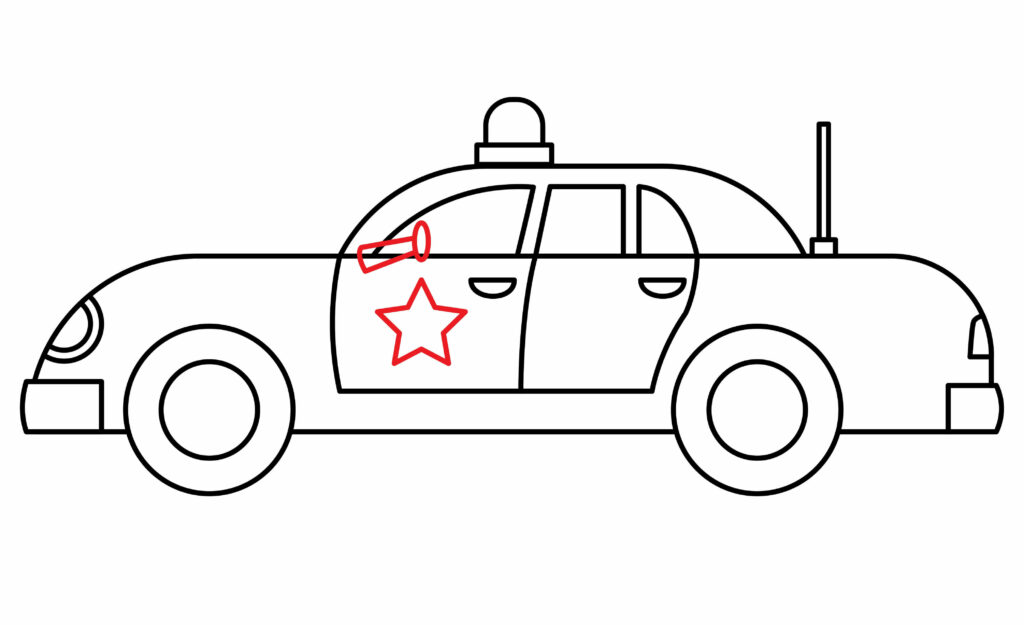
To make our car look professional, we will add the police logo. The police logo is a big star; we will add it to our front door. We will use a ruler to draw the star.
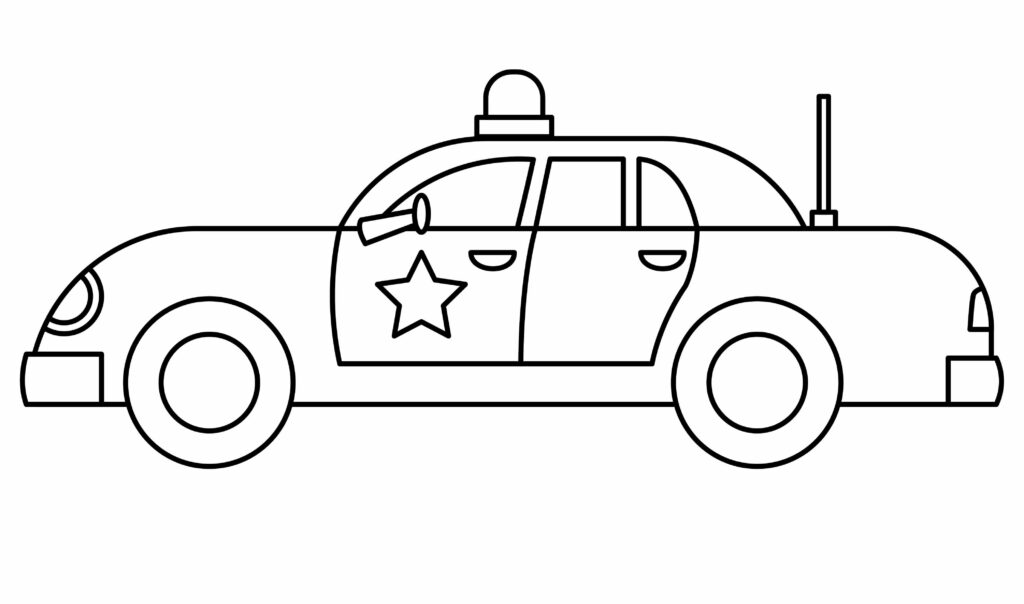
Step 10: The police car is ready
It’s all fun making a police car, right? It seems tricky to make it. The structure and details of the car can be tricky, but when you start it, it’s just a piece of cake (thanks to this guide).
Taking your police car drawing to the next level
There’s no energy in the drawing without the charismatic look. Adding more details to our drawing can provide us with this look. These details could be adding a background, adding colors, or both.
Adding background to your drawing
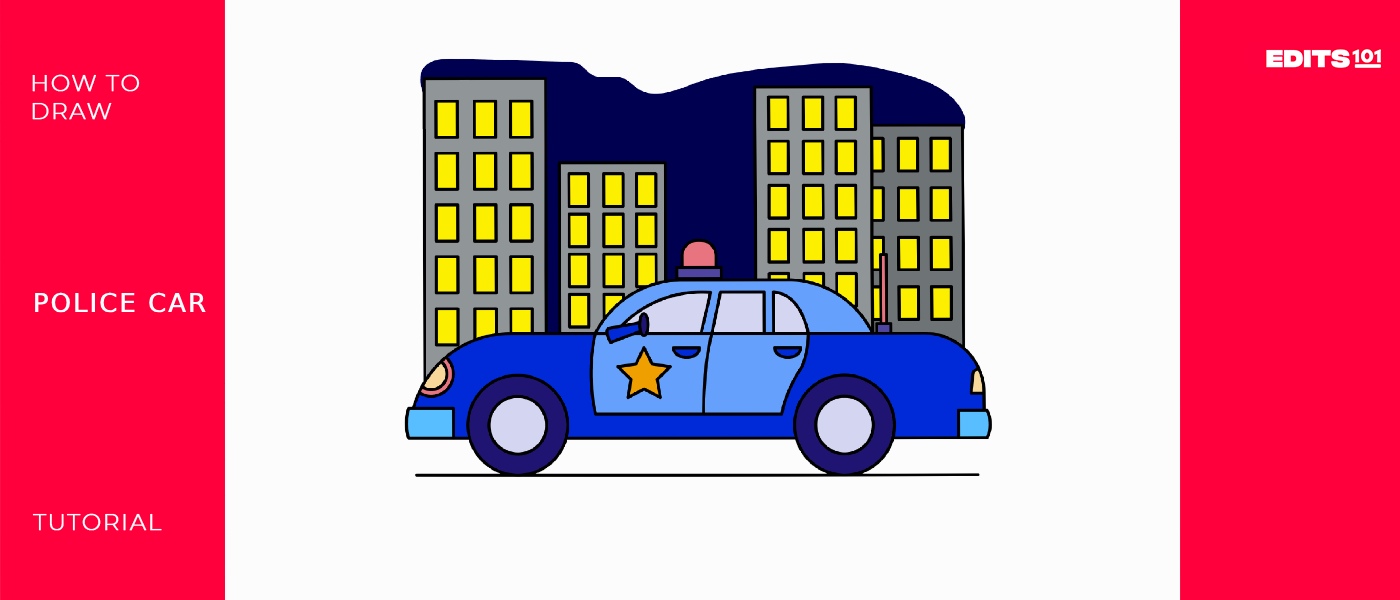
There is no limit to our imaginations. You can think of any kind of background and add it to your drawing. In our case, we selected tall buildings as a background. Imagine our car is patrolling in the big city at night time.
Draw four big rectangles behind our car. After that, make small rectangles inside each big rectangle. The small rectangles represent the windows on the buildings.
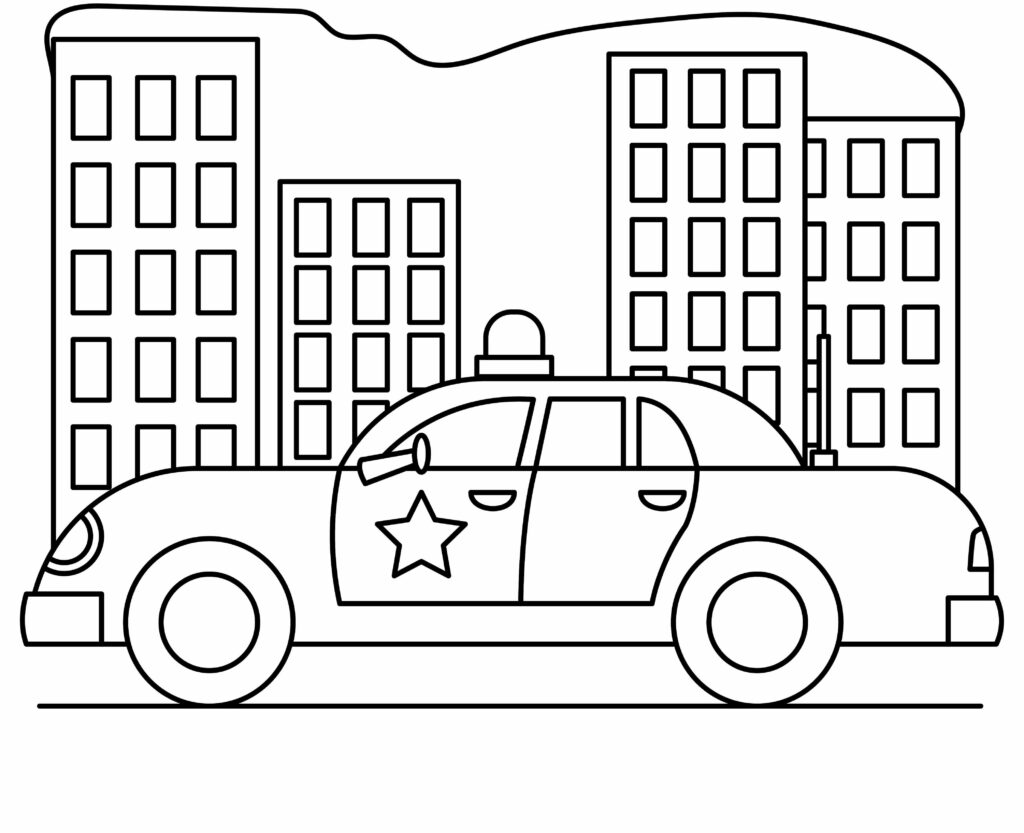
Keep in mind that no line from the background should overlap our police car. If it does, erase it carefully. Our background is ready.
Adding colors to your drawing
Remember to add symbolic colors to the car. You can add any color in the background, but the police car must have the designated color. We will fill the siren with red color, logo with the yellow color, and light yellow colors in the front light. We will give a blue theme to the body of our car.
Now it’s depicting itself as a police car, isn’t it?
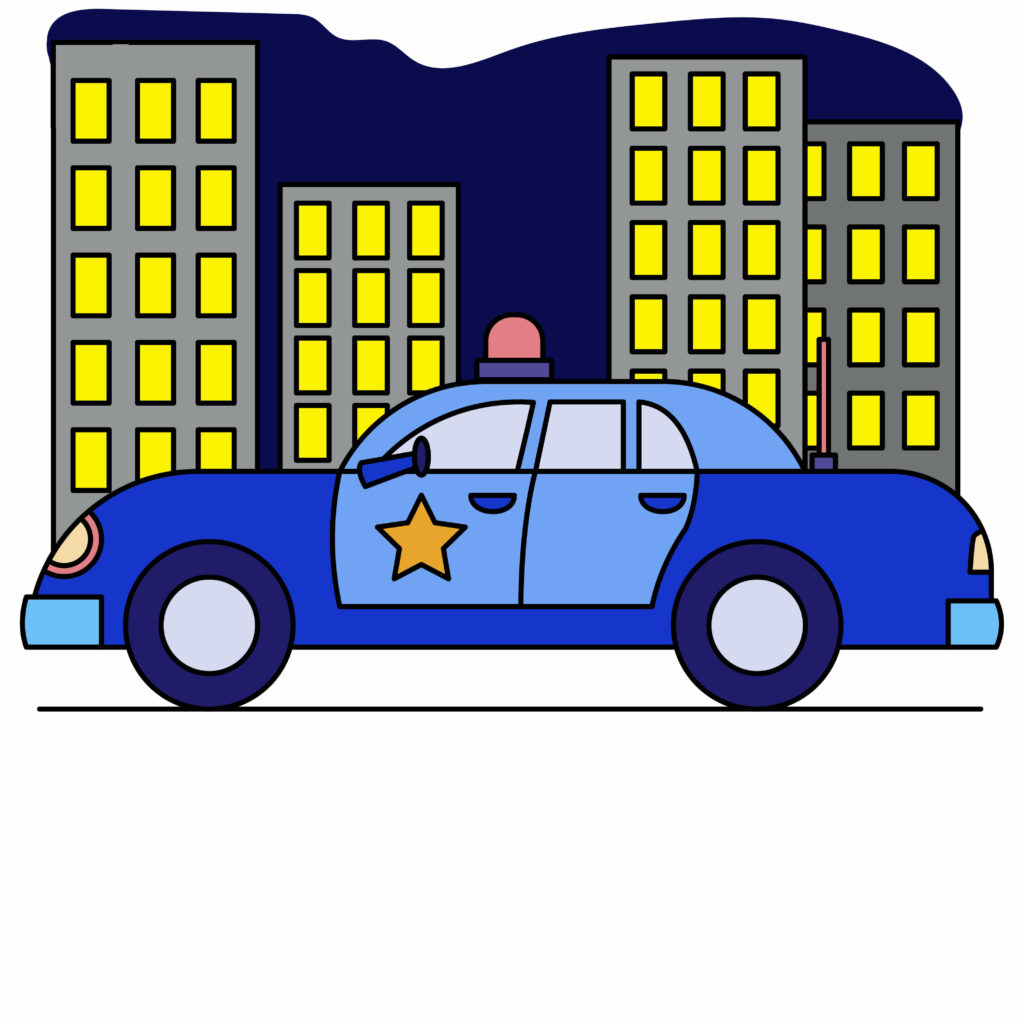
p.s bonus tips
Since we have imagined our car patrolling at night, we will add dark color to the sky. The windows will have a yellow color as the people inside are awake. Our police car is ready to patrol.
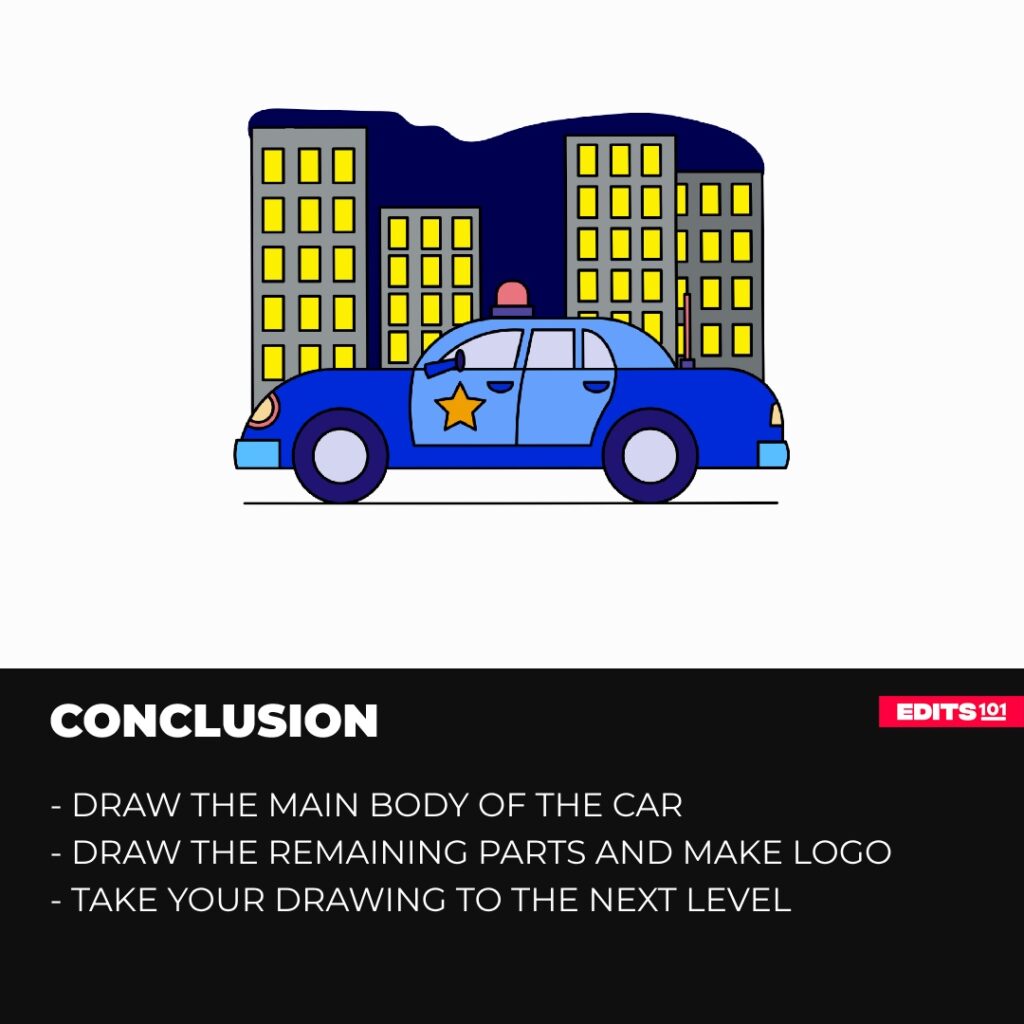
Conclusion
Drawing a police car is pretty simple if you follow the steps provided. We started by making the body of the car. Later, we drew the roof, windows, doors, siren lights, front and back lights, wheels, and other things.
We are confident that you followed our steps and made amazing art. If you didn’t get it on the first try, go for another try. Remember, practice is what makes us perfect.
Thanks for reading & feel free to check out more of our articles!
Author Rating
Overall Rating
Summary
This guide explains how to draw an amazing police car. It also explains fun facts about the vehicle