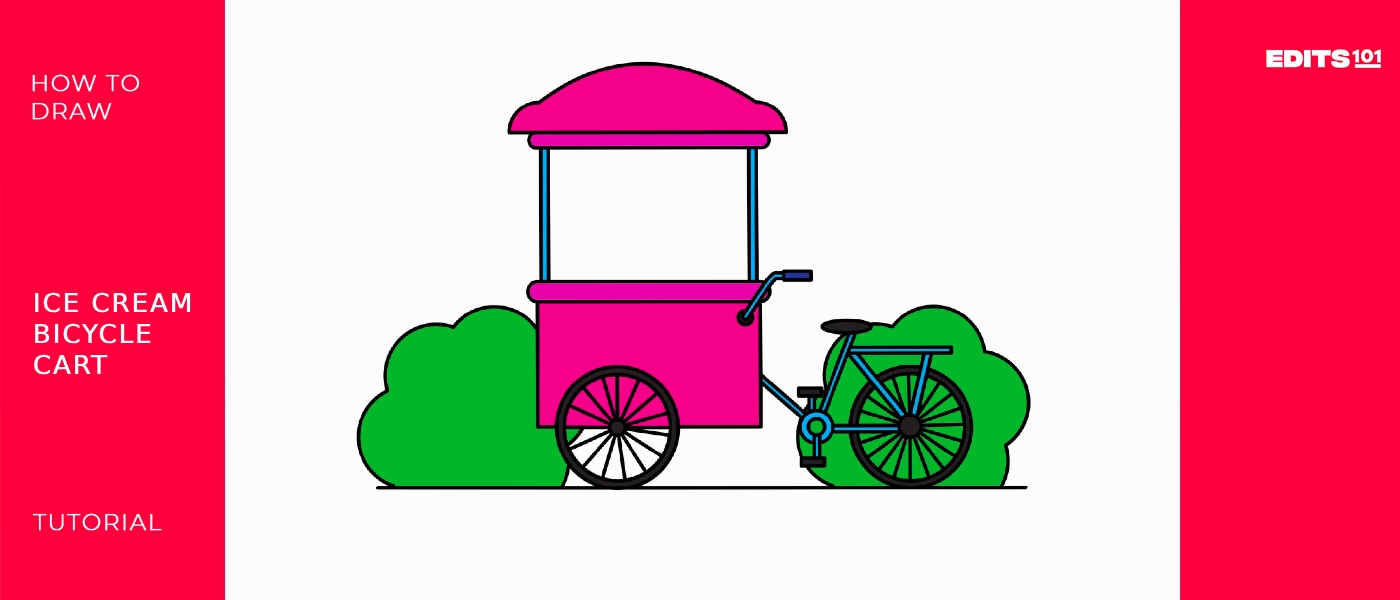
How to Draw an Ice Cream Bicycle Cart | Simple Fun Guide
Today, we will go on a sweet ride. We will draw an ice cream bicycle cart with loads of ice cream for our sweet tooth.
Popsicle and Ice Cream Tricycles are perfect for providing cold refreshments at events. At weddings, anniversaries, family gatherings, corporate team-building exercises, or private parties, ride in elegance and pass out frosty treats! Or simply set up shop wherever you think someone could use a tasty treat!
Now get ready! We are going to draw a wonderful piece of art.
What you will need
- A pencil
- An eraser
- A sheet of paper
- Coloring kit
- Ruler
- 30 minutes
How to Draw an Ice Cream Bicycle Cart
We will use the simple directions that are provided in this article to draw a beautiful ice cream bicycle cart. The steps are little more than 10 or 11, but all this effort will be worth it.

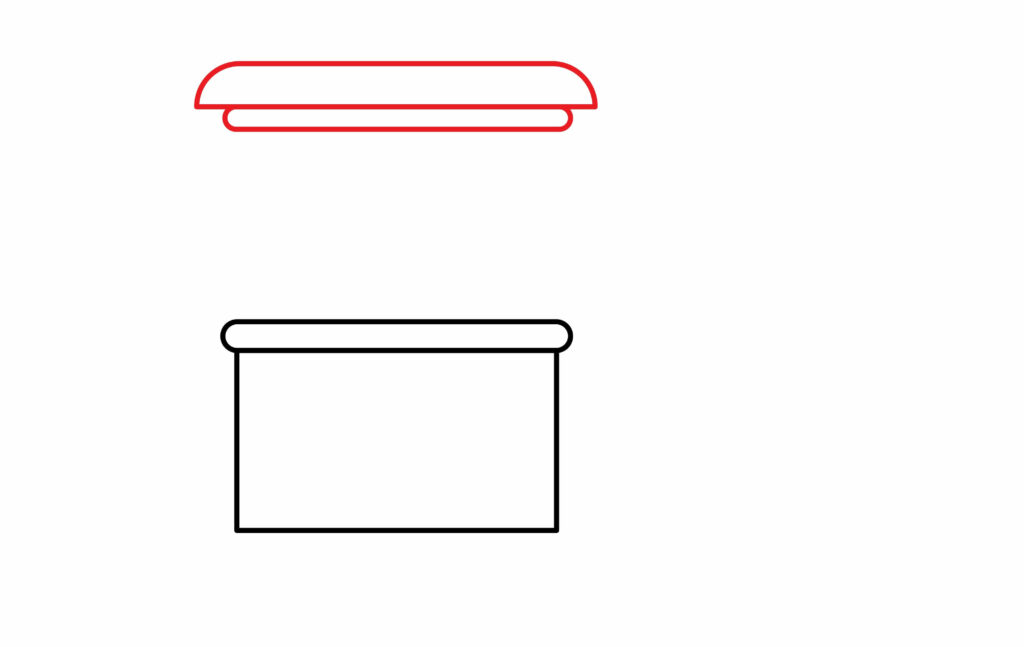
Step 1: Draw the cart
The first step is drawing the cart of the ice cream bicycle. We always have to start with the basic foundation of our drawing, and in the case of an ice cream bicycle, we are going to draw the cart. This is a simple step. All you have to do is draw a rectangle lying vertically on the left lower side of the page.
To draw a rectangle, draw two horizontal parallel lines and two vertical parallel lines. All these lines should be perpendicular to each other and should connect. You may draw it using a ruler to get perfectly straight lines.
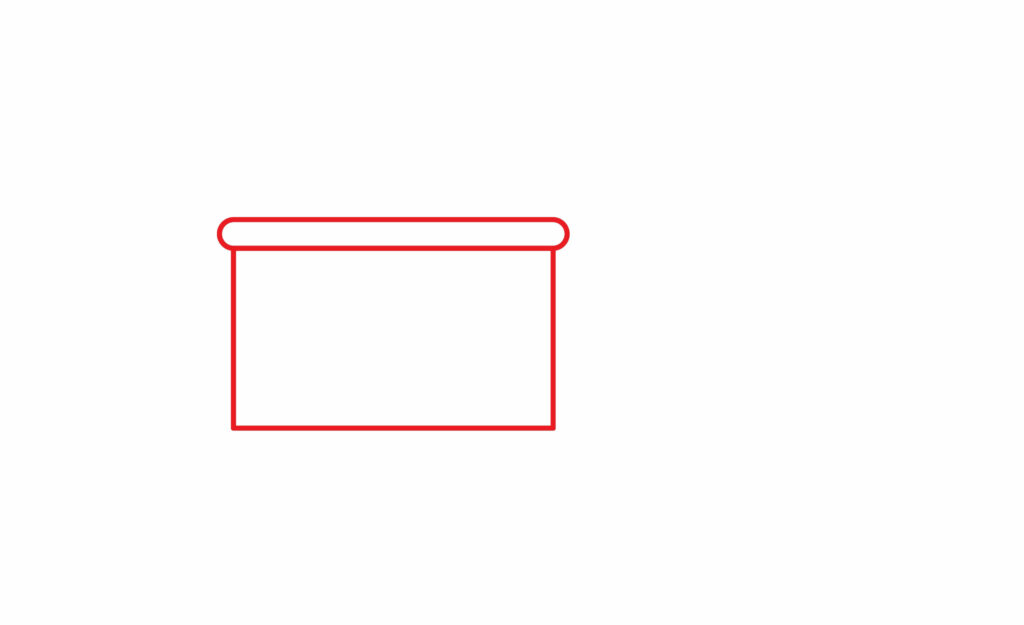
When you are done with the rectangle, draw two horizontal lines lying on the top of the rectangle. Make sure that one of the lines overlaps the top boundary of the rectangle and makes its edges round. You finish the first step by making the cart carrying all the delicious ice cream.
Step 2: Draw the cart roof
To draw the cart roof, draw an oval floating above the cart. The lower part of the oval should be flat, as shown in the image. Now, draw two horizontal lines below the oval and connect them.
The roof cart is present in some ice cream bicycles as it can protect from harsh weather like rain or hot sunny days. Some ice cream bicycles do not come with the car roof, but we will draw it anyway.
Step 3: Draw the roof holder
Now, we do not want our roof to be floating in the just like that. We are going to need a roof holder. Draw two vertical lines on each side of the cart to make the roof holder. There you go, now our roof has something to hold it.
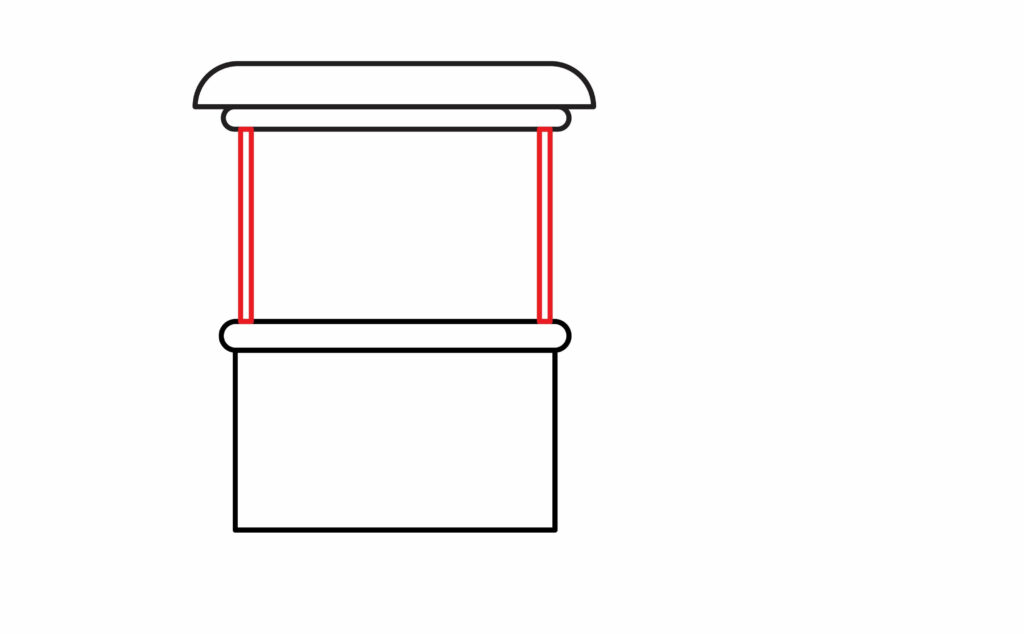
Yes, the steps are as easy as this.
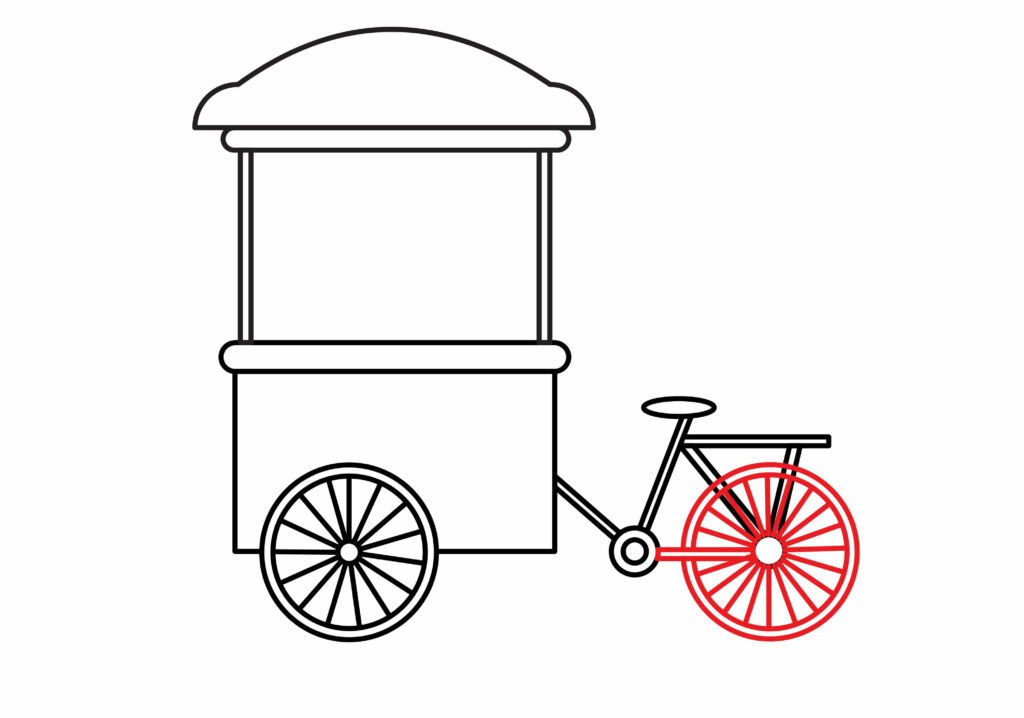
Step 4: Draw the wheels
An ice cream bicycle, which is also called a tricycle, has three wheels on which it moves. There are two wheels in the front and one wheel in the back. In this step, we are going to draw the wheel in the front.
Draw two circles with slightly different diameters and the same center to make a wheel. These circles should be drawn on the lower part of the cart. Now, draw another circle in the middle of these circles and extend some lines going towards the bigger circles, just like the picture provided.
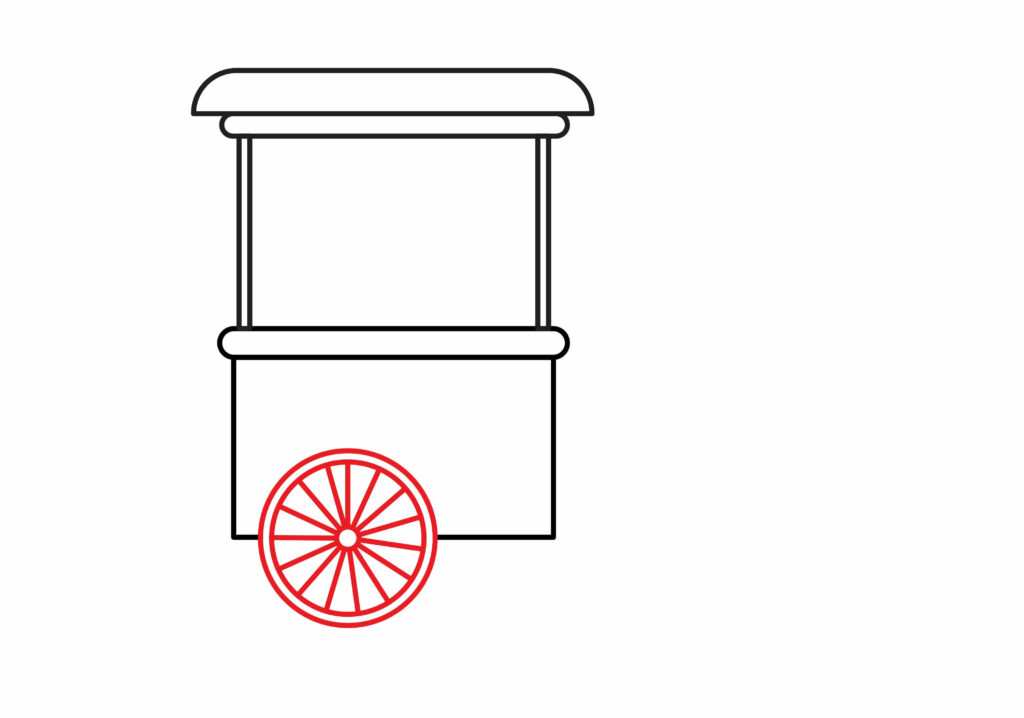
To draw a perfect wheel, Mark a dot as the circle’s center on the page for the circles that will appear the finest. Mark four additional dots (top, bottom, right, and left) at equal distances from this one. Now, use curved lines to connect each dot carefully. We will create an awesome circle in this manner. You can also use some bottle caps or round-shaped objects.
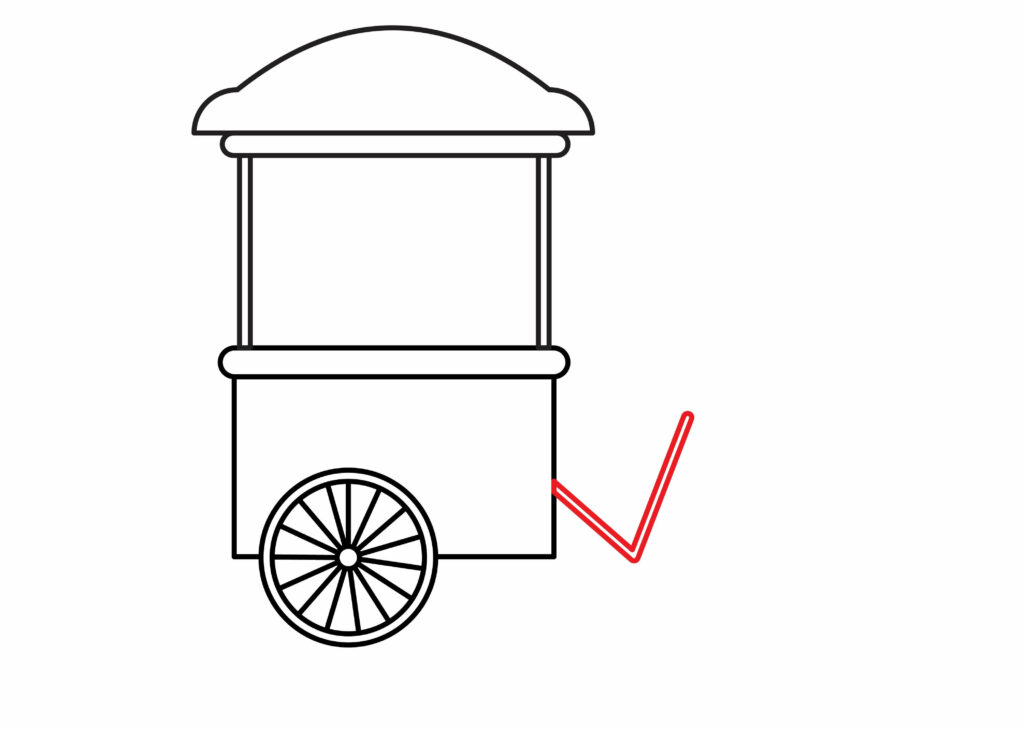
Step 5: Draw the cycle stand
The cycle stand is a part that will join the front and back parts of the ice cream bicycle. To make the cycle stand, draw a pair of angular lines connected with each other. The angle between these lines might be 45 degrees or something. The lines should be double, just like in the image.
Step 6: Draw the seat and middle bar
Now, we will draw the seat, where the ice cream man will sit and ride this cycle to distribute the yummy ice cream. In this step, we will draw another thing: the middle bar of the cycle.
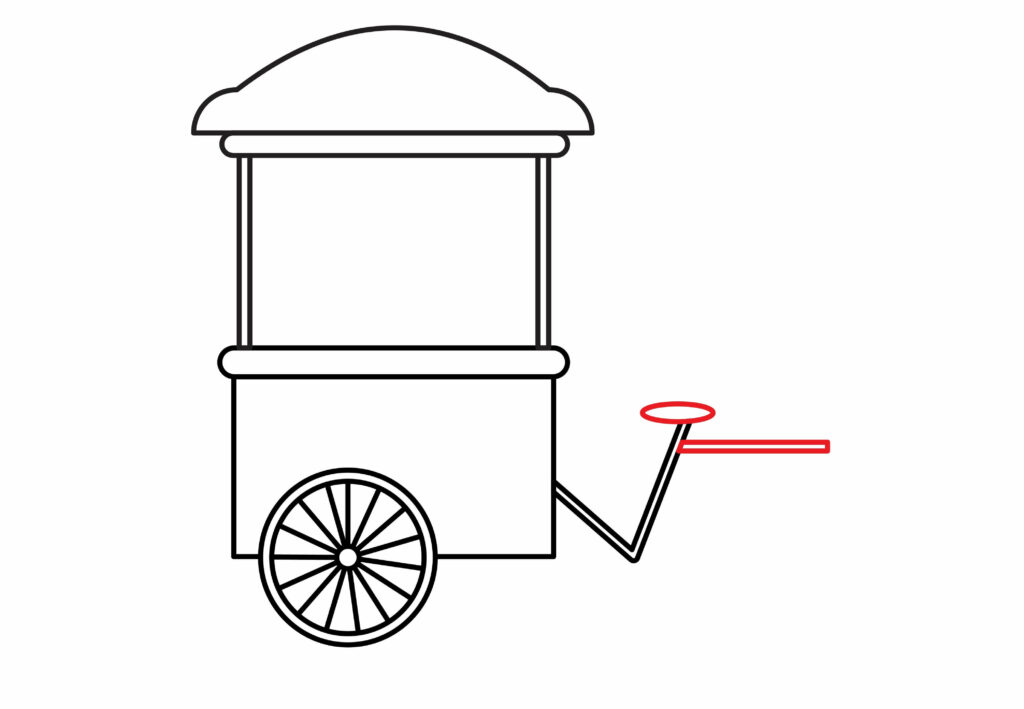
Make an oval over one of the angular lines drawn in the previous step to draw the seat. For the middle bar, just extend two lines horizontally from the side of the angular line on which the seat is present.
Step 7: Draw the back wheel holder
As it is a tricycle for the third wheel of the ice cream bicycle, we will draw the back wheel holder.
To make the wheel holder, draw a pair of angular lines similar to the angular lines drawn in the previous step. These lines will be drawn beneath the middle bar.
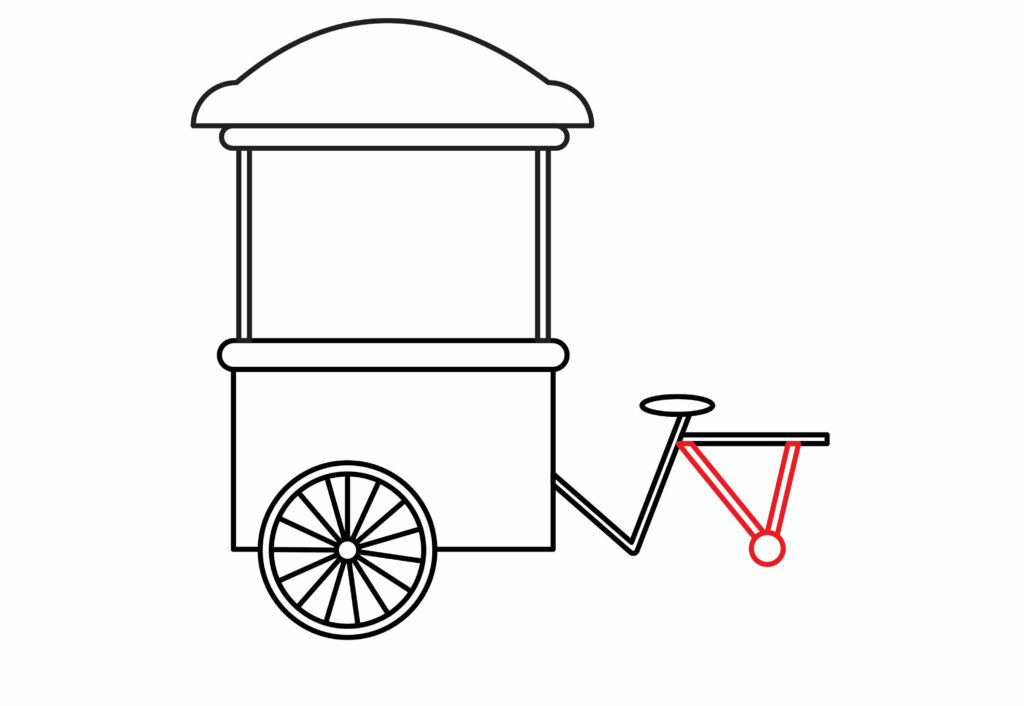
In the part where these angular lines are meeting, draw a small circle on that part. We have drawn more than half of the ice cream bicycle, so be patient.
Step 8: Draw the chain holder
There are chain holders in a cycle with pedals to make the cycle move. We will give a chain holder to our ice cream bicycle. To make the chain holder, we will draw two concentric circles (circles having the same center) on the part where our first pair of angular lines meet, as shown in the picture.
Step 9: Draw the back wheel
Now, we will draw the third wheel of this tricycle. To draw a wheel, follow the same step provided in step 4. The only difference is that this wheel will be drawn on the back part, where we drew a small circle.
Just a couple of more steps, and we will be done with our ice cream bicycle.
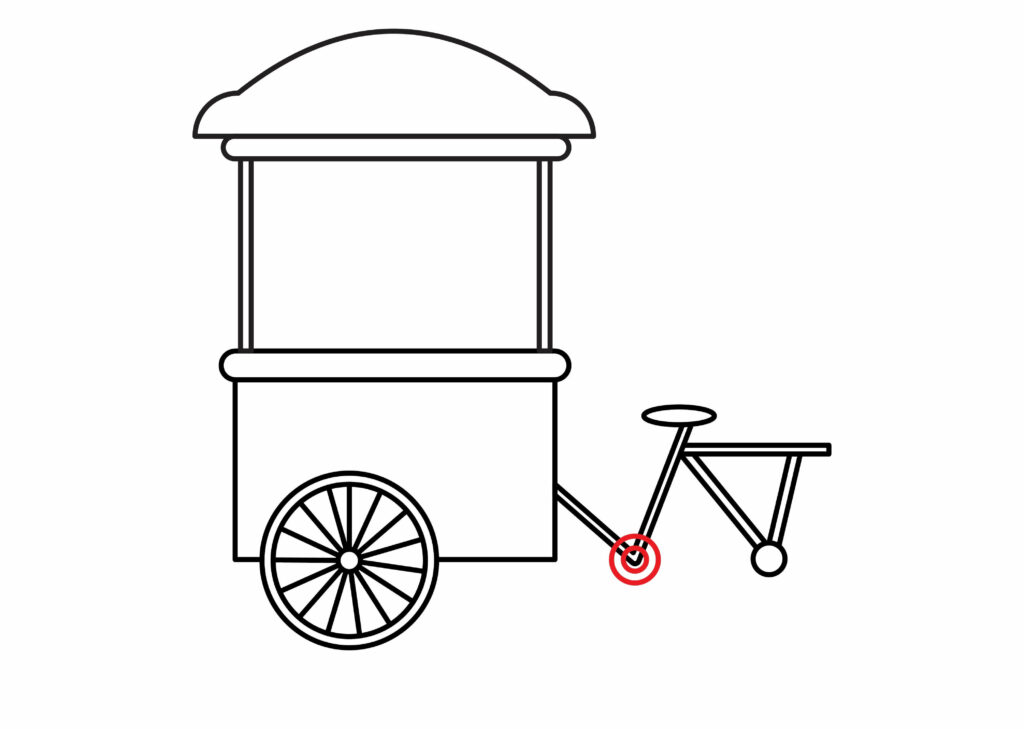
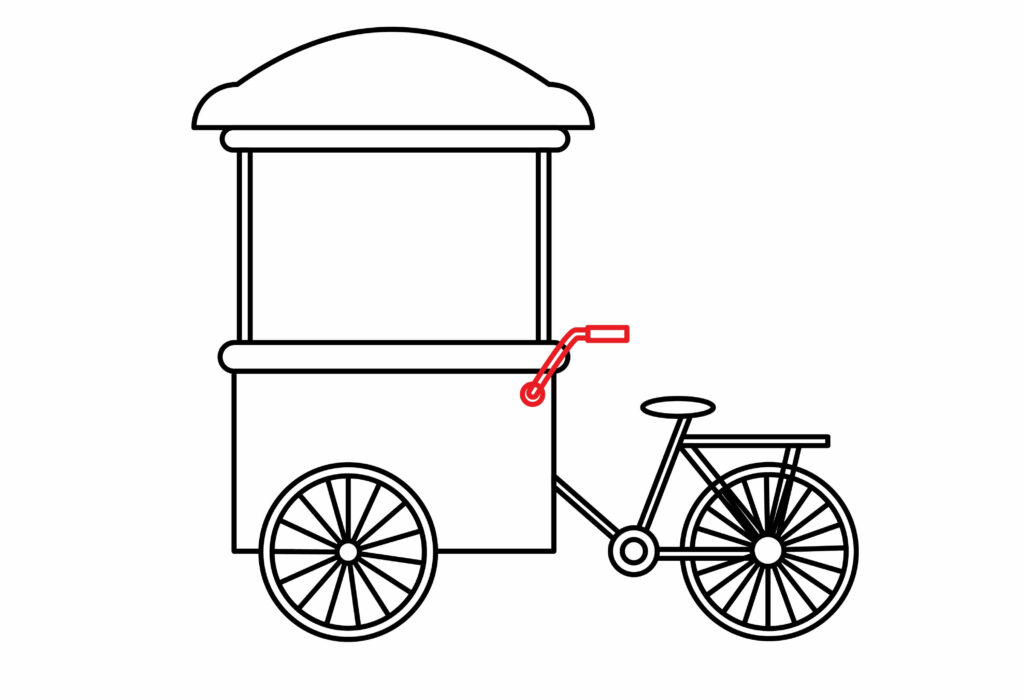
Step 10: Draw the handle
We will draw the handle that is used to control the bicycle by the person riding it. This handle will be drawn on the rear side of the cart.
To make a handle, we will draw a small circle on the rear part of the cart. Now, extend two oblique lines bent toward the right and make a small horizontal rectangle on the top of these lines.
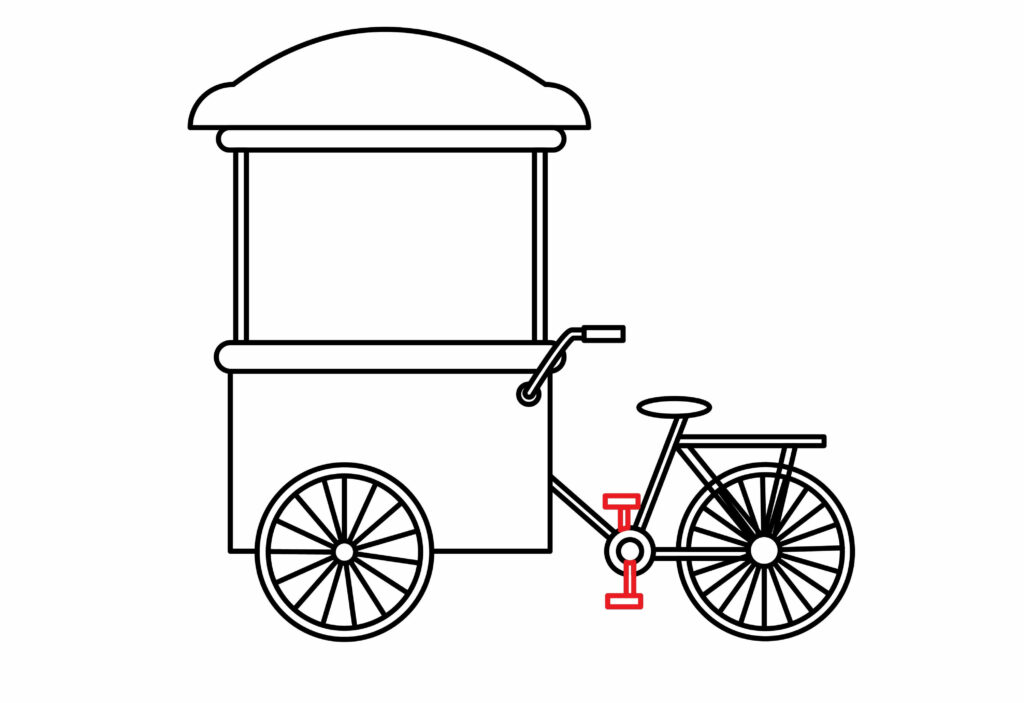
Step 11: Draw the pedal
Finally, we will make a pedal. It is the most important part of moving the bicycle. Extend a pair of vertical lines from the chain holder to make the pedal both upward and downward. Now, draw a small horizontal rectangle on each line.
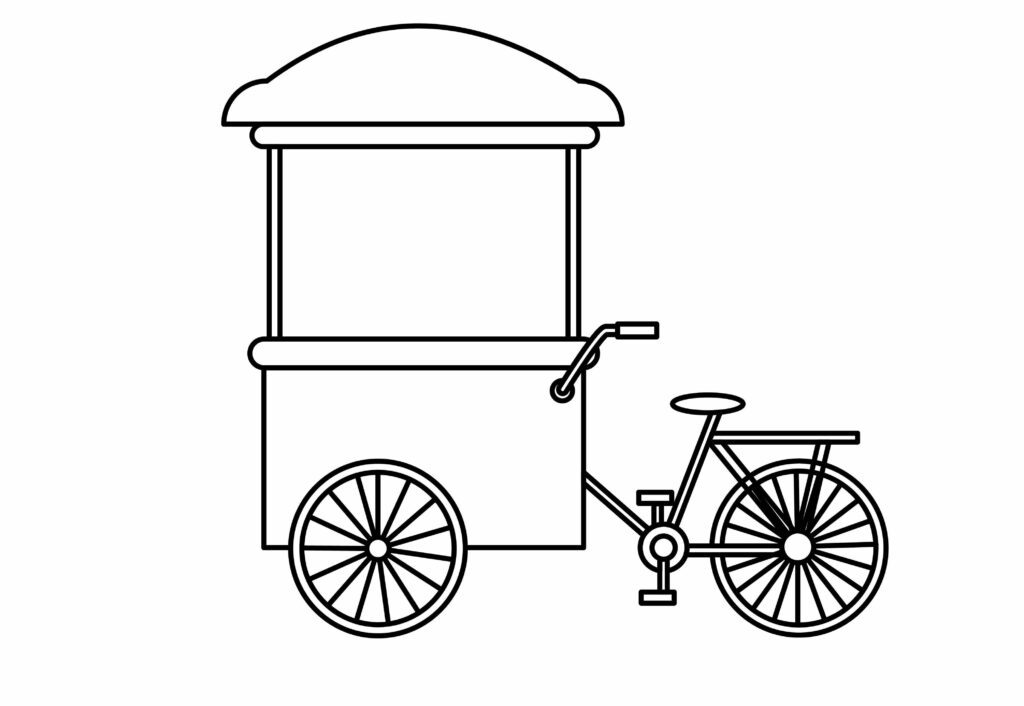
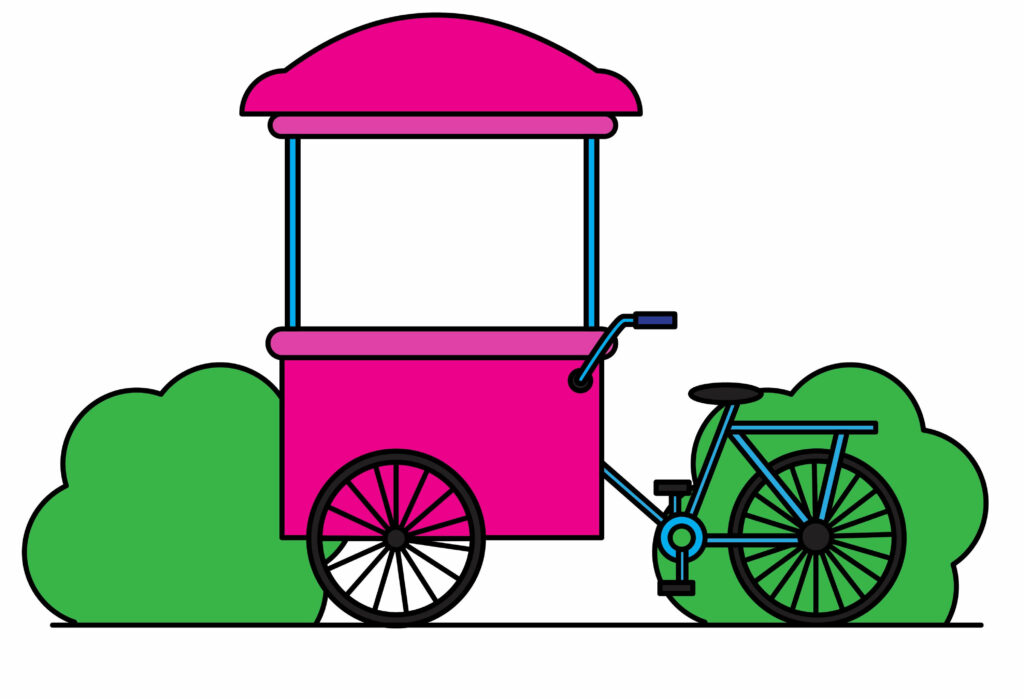
Step 12: Ice Cream Bicycle Cart is ready
Voila! Our ice cream bicycle is all done. It is ready to set out to distribute ice cream to everyone.
Taking your Ice Cream Bicycle Cart drawing to the next level
It’s time to put your imagination to the test and create a truly remarkable drawing. As we all know, art is fun. We must experiment in many ways to make our drawing appear its finest. Give it an upgrade; don’t just leave it as a basic drawing. How do we approach achieving this, though? Don’t worry; we’ll take care of you. The following actions can make your drawing stand out.
Adding background to your drawing
A painting’s background is referred to as its matrix. Something that is the focus of our attention in the foreground or main subject. Our ice cream bicycle is also lacking a background. To make our story complete, you can place your ice cream bicycle on a roadside or put it in some kind of event.
You can draw some bushes around the cycle. And how can we forget the sky? You can either draw a clear blue sky with a sun or a sky with white clouds.
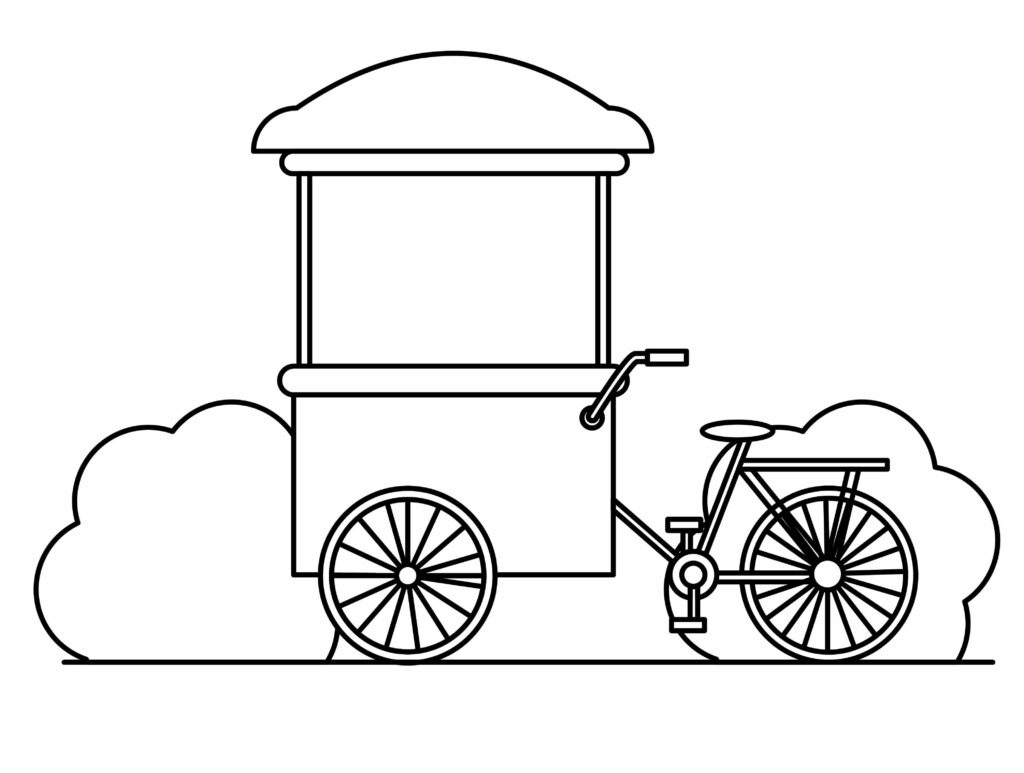
This is just an idea; you can add any background to your drawing that suits you. Just ensure no line from the background overlaps our ice cream bicycle.
Adding colors to your drawing
Now, grab a brush and work some magic on your creation. This step is important for you to know about colors and have fun with them. There are no strict rules to colors. You can paint your drawing with whatever color you want. In the end, you’ll love your art.
P.S Bonus Tips
Imaginations are limitless. By using your imagination, you can customize your drawing in any possible way. We will give you some ideas that can help you enhance your drawing.
Imagine having some ice cream drawn on the cart. Or some children gathered around the ice cream bicycle. You can even draw an ice cream man distributing the ice cream.
Our drawing looks amazing! Let me tell you, these are just a few ideas. You must test out a ton of concepts to see what works best for your drawing.
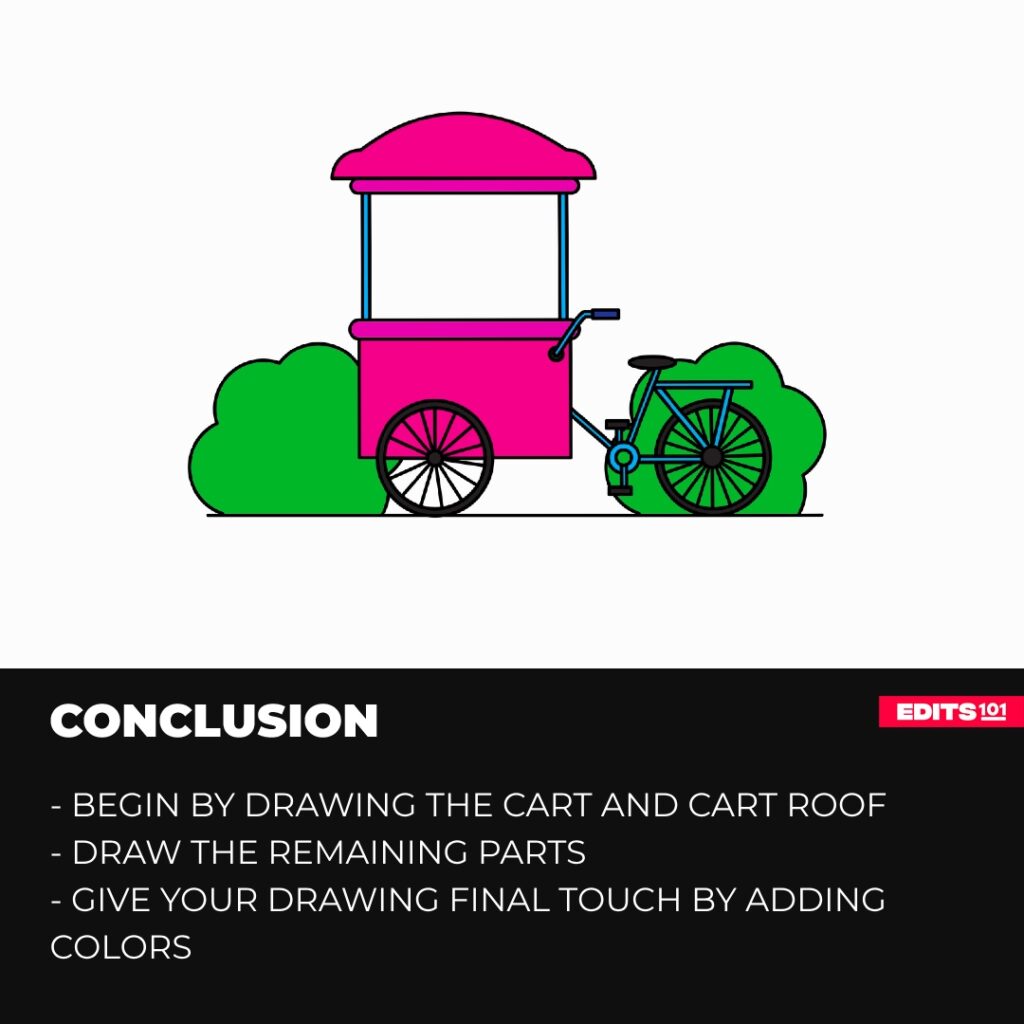
Conclusion
You are all set! You created an artistic work of art in a short period of time.
Make sure you have followed every single step. For making the ice cream bicycle, we drew the cart and then drew the roof of the cart. Later, we made the roof holder, wheels, cycle stand, seat, middle bar, chain holder, handle, and pedal.
As you sketch, go carefully and pay attention to each step. Remember that it takes practice to acquire perfection. To become a perfectionist, continue to improve your craft.
Thanks for reading & feel free to check out more of our articles!
Author Rating
Overall Rating
Summary
This guide explains how to draw an ice cream bicycle cart in a simple and effective way. You will get an insight about some interesting facts about this vehicle by reading this guide.