How to Draw a Cricket Pitch | An Easy Step-by-Step Guide
Cricket is a bat-and-ball game that is played between two teams of 11 players. While the sport has many distinguishing features that set it apart from such games as softball, the game is mainly defined by the shape of the cricket pitch.
A cricket pitch is made up of a central strip of the field between the wickets. The dimensions are usually 20.12 meters long (from the stump to the stump) and a minimum of 1.22 meters behind the stumps to allow for the return crease and bowler approach area. The width of the pitch is usually 3.05 meters. The dimensions of the pitch vary depending on the level of cricket competition that is being played.
| Steps | Complexity Level |
| Drawing the Outline of the Pitch | 1 |
| Drawing the Batsman’s End | 2 |
| Drawing the Bowler’s End | 2 |
| Coloring | 1 |
What You Will Need
- A drawing piece of paper or a sketchbook
- A pencil
- An eraser
- A ruler
- Coloring supplies
- 10 Minutes
How to Draw a Cricket Pitch
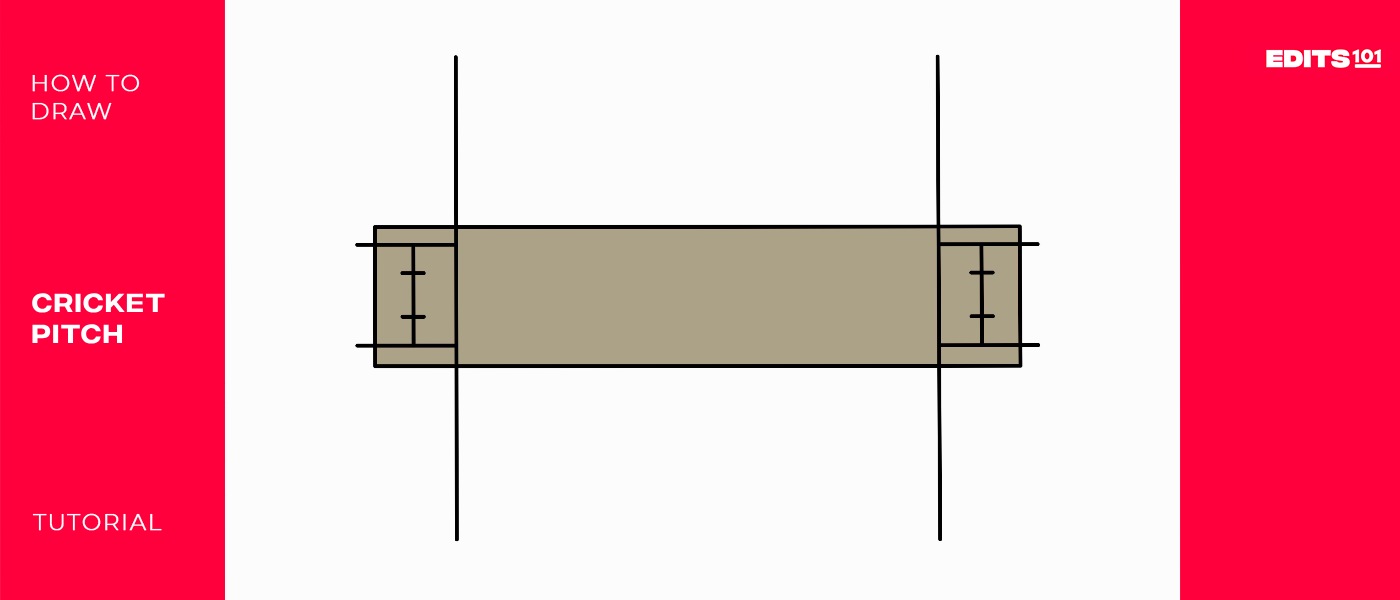
Drawing a cricket pitch is very easy. You will only need to use a combination of straight lines and watch your drawing take shape. To make it easy for you to follow along, we have included the below image which has all the steps we will be taking. Study it keenly before getting started.

Step 1: Draw the Pitch
The first thing we are going to do is outline the pitch. The pitch is longer than it is wide. As a result, we will be holding our drawing paper in a landscape orientation and drawing a horizontal rectangle in the middle of the page.
The rectangle will represent the pitch’s main playing area. For good results, make sure that the rectangle is evenly centered on the drawing paper. You should also take your time to make it as proportional as possible.
- Position your drawing paper in a landscape orientation
- Draw a horizontal rectangle in the middle of the paper

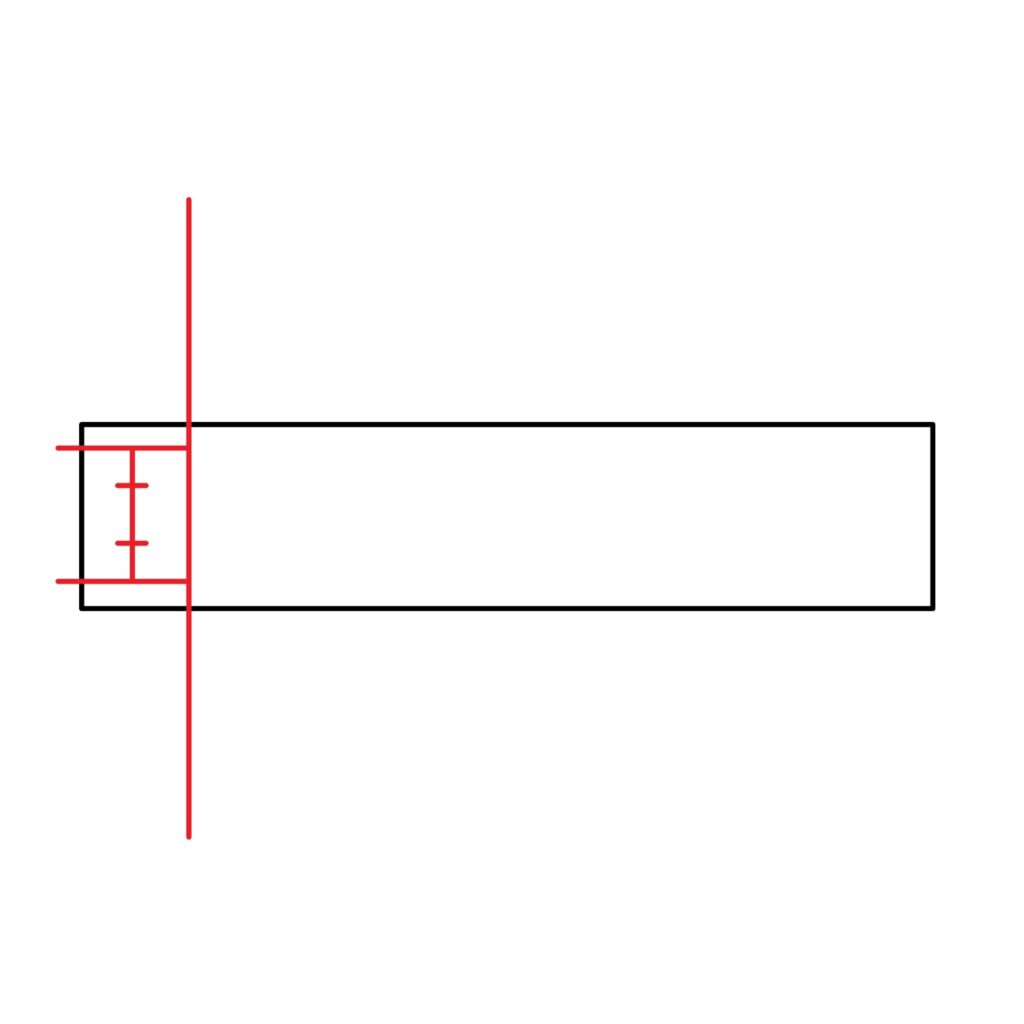
Step 2: Draw the Batsman’s End
To turn the horizontal rectangle into a realistic cricket pitch, we are going to start by adding the batsman’s end. This is where the batsman stands. The area is demarcated by a white line that is usually painted or chalked on the field of play.
Using your ruler, draw a vertical line that cuts through the left side of the horizontal rectangle. The line should cut through the rectangle at about a quarter in. This line will form the batsman’s crease.
Next, we need to add the leg-side lines. The leg side is the half of the field behind the batsman. The half of the field that is in front of the batsman is known as the off side. To add the leg-side lines, draw two horizontal lines on the inside of the pitch, behind the batting crease. The two horizontal lines should connect with the batting crease at right angles as shown in our illustration.
To complete the batsman’s end, add a vertical line that connects the two horizontal lines we added for the leg side. In the middle of the vertical line, add two short, horizontal lines. These will represent the stumps.
- Draw the batsman crease by adding a vertical line that cuts through the left side of the horizontal rectangle
- Add two horizontal lines to the left of the batsman crease to form the leg side
- Add a vertical line that connects the two horizontal lines we added for the leg side
- Add two short horizontal lines to create the stumps
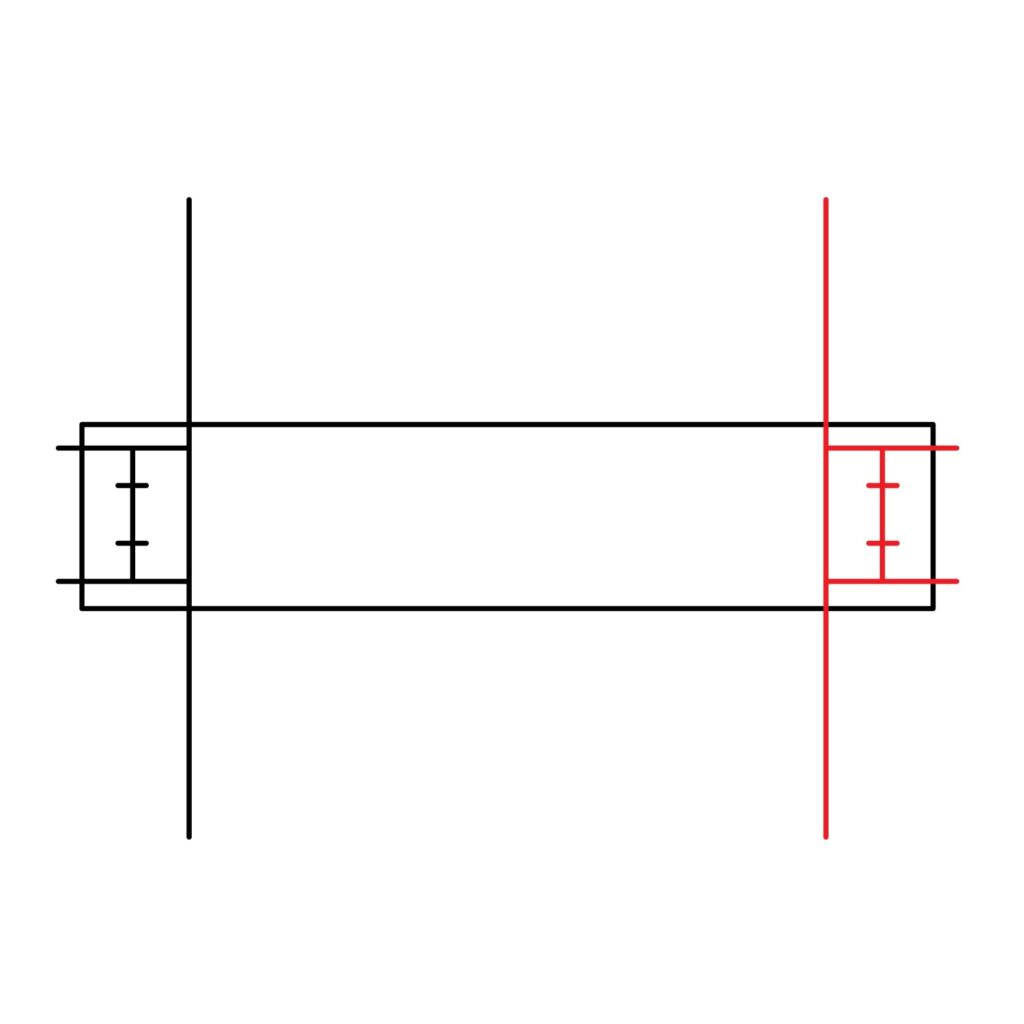
Step 3: Draw the Bowler’s End
The next thing we are going to do is repeat the same process to add the bowler’s end. Start by adding a vertical line, then horizontal lines for the crease lines, and then the small lines for the stumps. Your drawing should look like what we have below.
- Repeat the process in step 2 to add the bowler’s end on the right side of the pitch.
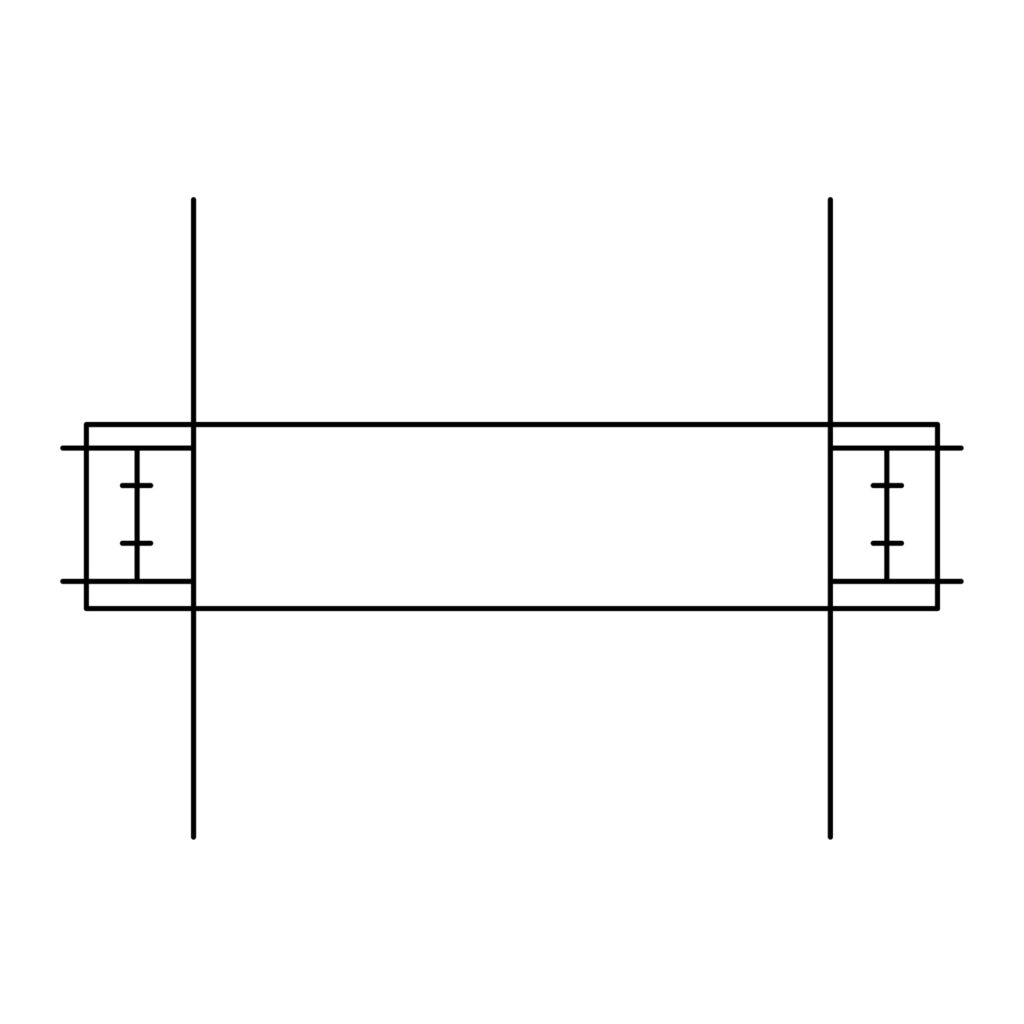
Congratulations! Your Cricket Pitch Is Done
With just three easy steps, the cricket pitch is now ready. Take a minute to admire your work and make the necessary touch-ups if there are areas that seem way off.
Take the Drawing to the Next Level
You should not leave your cricket pitch as it is. This is because it might be a bit confusing and you will have to keep telling everyone what it is. To make it self-explanatory, we are going to add a couple of crucial details.
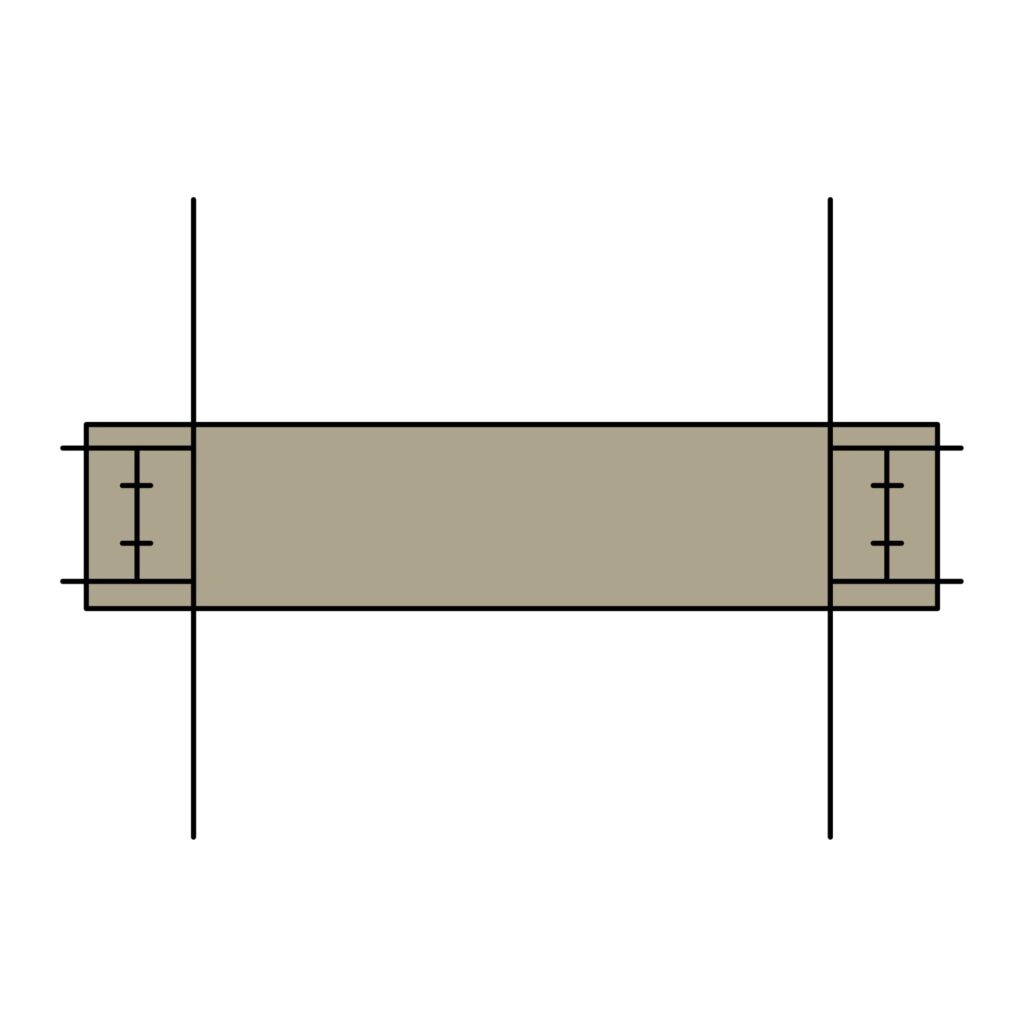
Add a Background
To make your cricket pitch drawing even more vibrant, consider adding a background. You could depict a cricket ground with spectators, or maybe a beautiful landscape surrounding the pitch. This will give your artwork context and depth.
Color Your Drawing
While your cricket pitch looks great in pencil, adding color can make it more visually appealing. Use colored pencils or markers to fill in the pitch, creases, and stumps. Traditionally, the cricket pitch is usually brownish-green in color. This doesn’t mean that you can’t be creative with the colors. You don’t have to use brownish-green for the pitch or white for the creases. You can play around with different colors to create something unique.
You should never be afraid to experiment with the colors and different shading techniques. Using varying shades of green for the pitch and grass will help create a three-dimensional effect. The key, however, is to use different shades for the various parts of the cricket pitch so that the crucial details are not concealed.
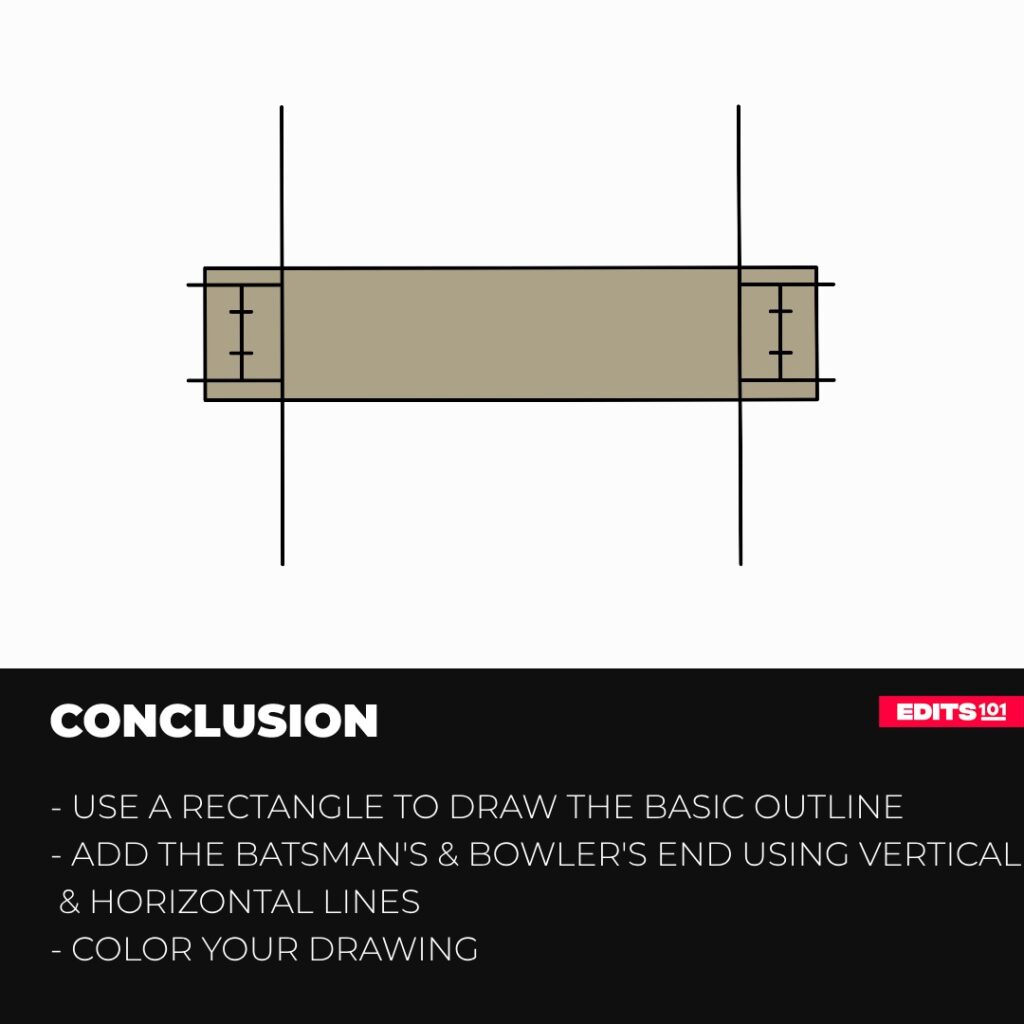
Conclusion
As you can see, drawing a cricket pitch can be a rewarding and enjoyable artistic exercise. By following our easy steps, you will be able to create a visual representation of the heart of the game of cricket. In our tutorial, we started by using a rectangle to draw the basic outline of the pitch. We then used vertical and horizontal lines to add the batsman’s end and the bowler’s end.
You can use these steps to draw a cricket pitch from different angles and even from a real photograph. The key is to always start with the outline and then add the other details. So grab your materials and let your creativity shine as you draw your pitch masterpiece.
Thanks for reading & feel free to check out more of our articles!
Author Rating
Overall Rating
Summary
The tutorial will teach you how to draw a cricket pitch and advance it so that it looks more realistic.