How to Draw a Four-wheel drive | in 7 Steps
Do you love big cars? A Four-wheel drive is a big vehicle with an engine that powers all four wheels equally. This is unlike the rear-wheel drive or the front-wheel drive. The unique thing about 4 x 4 vehicles is that they are built for the off-road. You see these vehicles scaling steep hills or driving in muddy waters.
The best thing about today’s lesson is that we will cover how to draw a 4 x 4 vehicle in very simple steps. All you have to do is follow our instructions carefully.
What You Will Need
- A pencil
- A ruler
- An eraser
- A drawing piece of paper
- Coloring supplies
- 30 minutes
How to Draw a 4 x 4 Vehicle
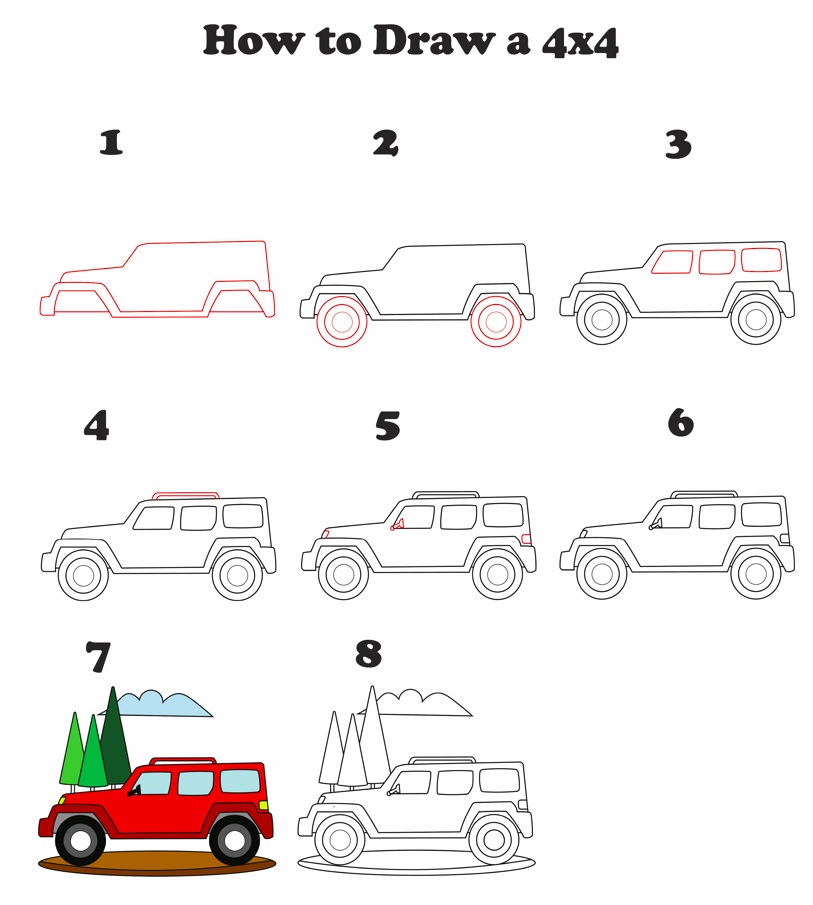
Our goal is to turn you into a great artist. For this to happen, we must start by guiding you through simple lessons and then sharing tips on advancing your skills. In today’s drawing, we will be drawing a very simple four-wheel drive vehicle. Here are the steps we will be following. Review them so that you know what to expect.
Step 1: Draw the Body
The first thing we will be drawing is the body of the vehicle. This is the biggest part of the vehicle and thus needs to come first.
For our guide, we first need to use the ruler to draw a horizontal rectangle. This should start from close to the left margins and stretch to the right margins. The rectangle should, however, not be too tall. The height should be about half the length of the rectangle.
We now need to transform the rectangle into a 4 x 4 vehicle. To start with, we will add a diagonal line that starts from the bottom right corner of the rectangle and slants slightly to connect with the upper part of the rectangle. Erase the sections of the rectangle that sit on the right of the diagonal line.

For the front end, we will add a diagonal line starting from the top line of the rectangle and extend it towards the left to about a quarter of the rectangle’s height. Next, we will add another diagonal line that connects the first line to the left side of the rectangle. Erase the section of the rectangle that sits to the left of the two diagonal lines.
Next, we will make grooves for the wheels. The first groove should start at the bottom left corner of the rectangle, while the second groove should start at the bottom right corner.
To complete the wheel grooves, draw a continuous line that starts on the left side of the groove for the front wheel and then extends to the right of the groove for the rear wheel. Add a small rectangle below the two grooves. The rectangle should sit below the rectangle. Erase the lines that overlap. Your drawing should look like this.
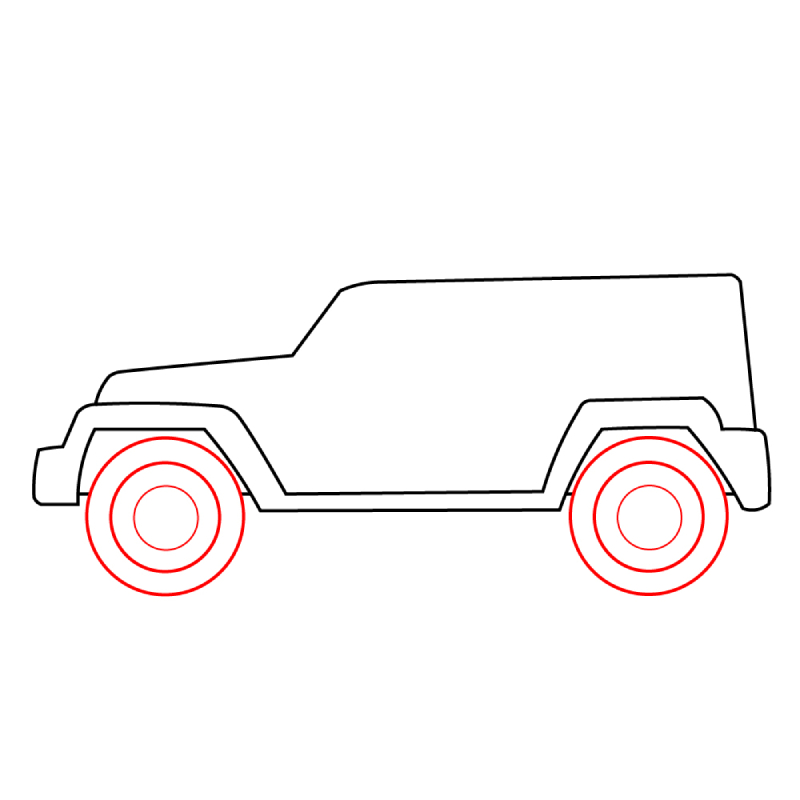
Step 2: Draw the Wheels
Adding the wheels is very easy. For this, we need to start by drawing a small circle at the base of the wheel groove. Next, we need to add another circle over the first and then another. This will form the wheel. Make sure the circles remain under the wheel groove. You should then erase any lines that cut through the wheel. Do the same for the other wheel.
Your 4 x 4 vehicle is taking shape, right?
Step 3: Draw the Windows
The next thing we need to add to our 4 x 4 is the windows. We will be adding three windows. One for the driver’s cabin, another for the backseat, and the third for the cargo area.
We will start by using our ruler to draw guiding lines to achieve proportional windows. For this, start by drawing a faint line slightly below the roof of the 4 x 4 vehicle. You then need to add another parallel one starting from the front of the vehicle to the back.
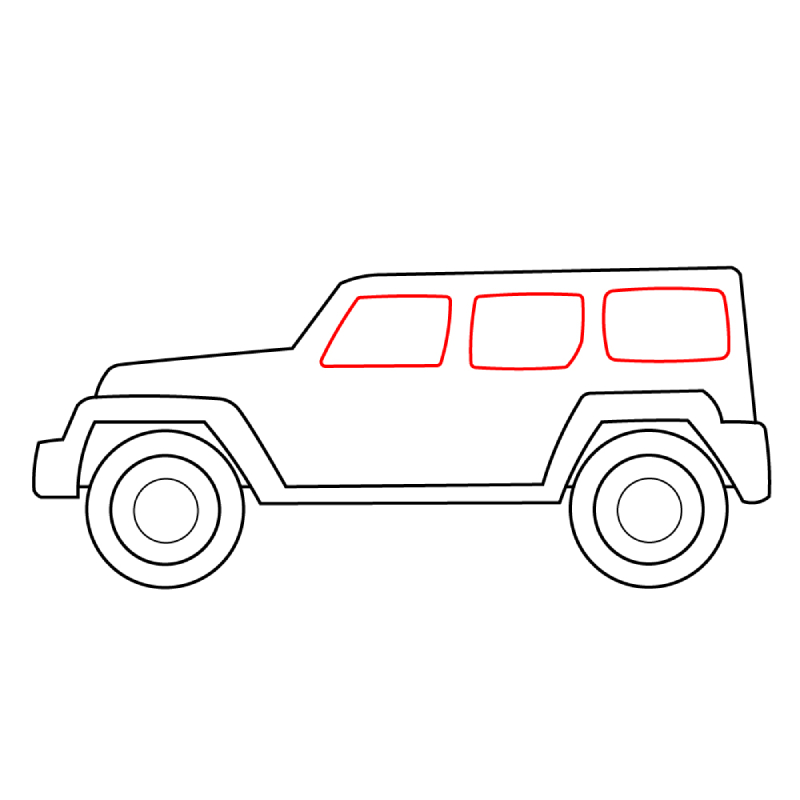
Now, add a diagonal line starting from the top guide line to the bottom. The diagonal line should be parallel to the diagonal line we added for the front of the vehicle. Add a vertical line to form the driver window. Leave a small space and use vertical lines to create the backseat window. The window for the cargo area should cover the remaining space.
Retrace the line on the bottom and top part of the windows to complete them. Use your eraser to remove the unused sections of the faint line we drew for the guide. Our 4 x 4 is now ready. That was pretty easy, right?
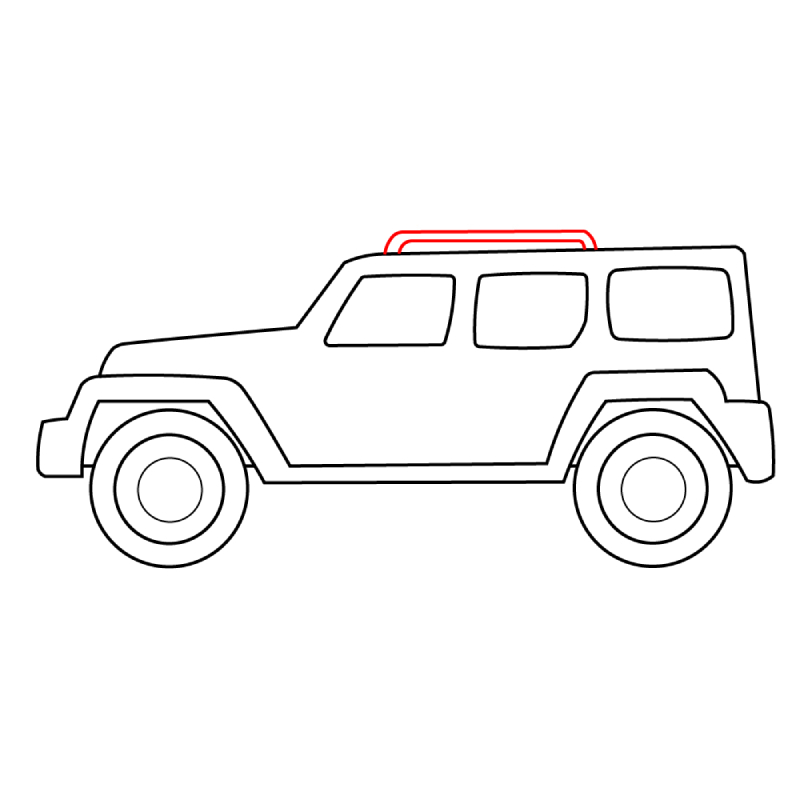
Step 4: Add the Roof Rails
4 x 4 vehicles often carry heavy cargo on the roof. The cargo may be a canoe, camping gear, or anything else needed. To be able to fasten the cargo to the roof, the vehicle has roof rails. These are simple bars on the roof. We will be adding them next.
To draw the roof rails, add a small rectangle on the roof. The rectangle should not be too tall. Next, add another smaller rectangle inside the first one. This will form the roof rails. For more realism, make the corners of the two rectangles a bit rounded.
Taking the Drawing to the Next Level
Our drawing is now ready. You can easily get away with it if you leave the 4 x 4 vehicle as it is. But we will not do that. We are here to turn you into a great artist.
Step 5: Add More Details to the Vehicle
To demonstrate that we pay attention to detail, we will first add the side mirror. This sits outside the driver’s window. Add a small rectangle starting from the base of the driver’s window and then another diagonal rectangle at the end of the rectangle. That will represent the side mirror. Don’t make it too big.
Next, we are going to add the headlights. These will go on the front side of the 4 x 4. Draw a small rectangle that fits in the space between the groove for the front wheel and the diagonal line for the bonnet/ hood. The left side of the rectangle should be touching the outside of the vehicle.
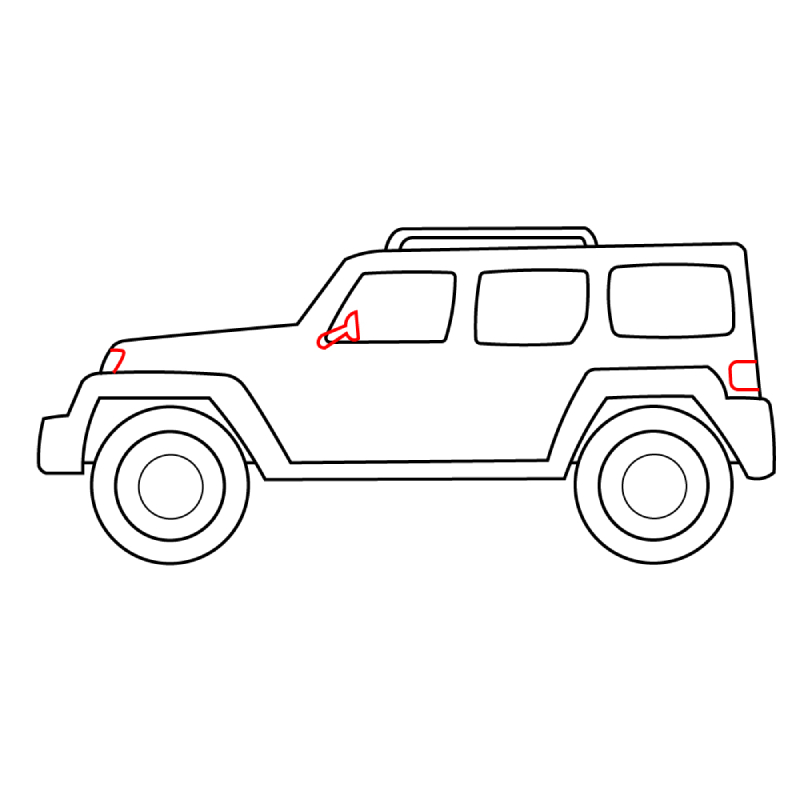
We will now add the rear lights. For this, we will add a small rectangle that sits in the space between the cargo window and the groove for the rear wheel.
Refine Your Drawing
Our 4 x 4 vehicle is now ready. However, before we proceed, we need to fix any mistakes we may have made. Go through your drawing and if something feels off, erase and redo it. You also need to erase any lines that are overlapping.
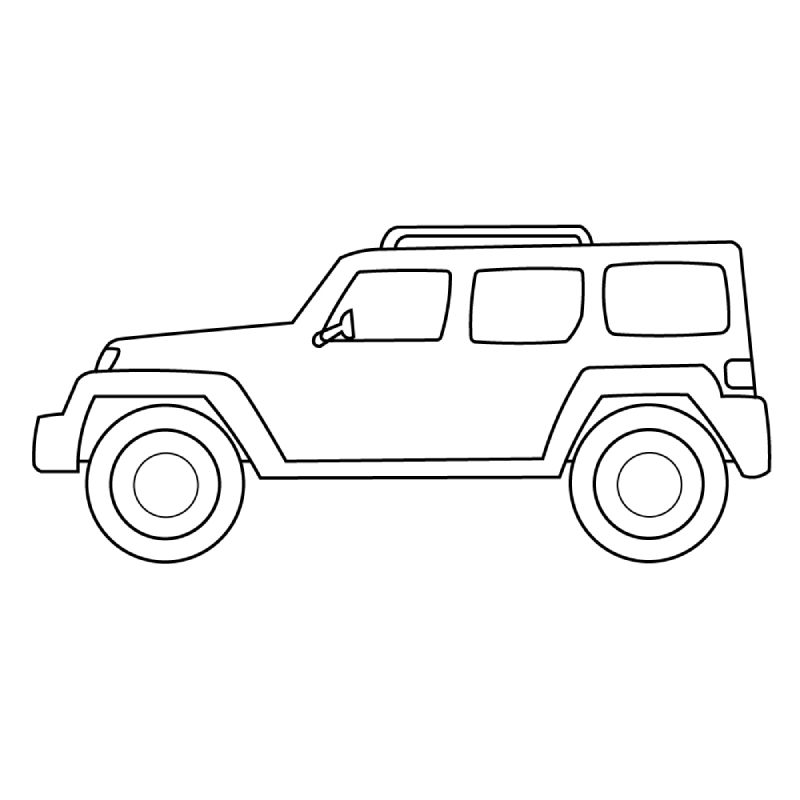
Do not feel bad if your drawing doesn’t look great. It takes practice to become a good artist. Besides, this is your first attempt. Most people don’t get the desired results until the third or fourth attempt. There is still room for improvement. Cheer up!
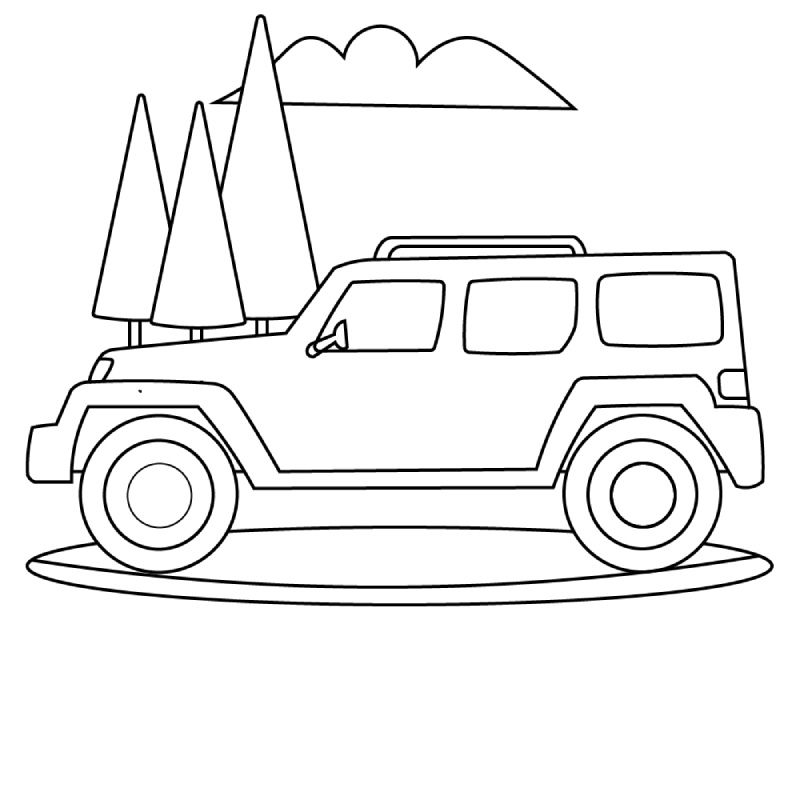
Step 6: Add a Background
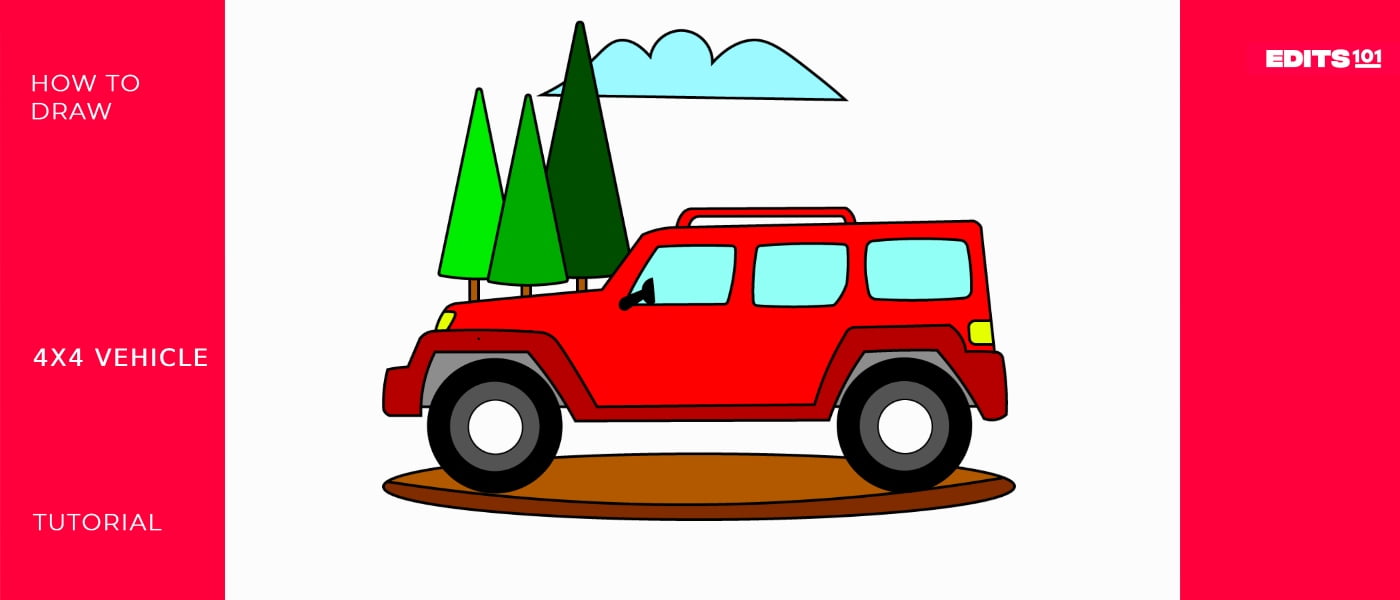
We don’t want to leave our 4 x 4 vehicle floating in the air. This is where the need for a background comes in. For our drawing, we will add a disk beneath the vehicle, a few trees in the background, and a cloud. This is how our drawing looks.
You don’t have to do exactly what we have done. Let your imagination run wild. You can add virtually anything to the background of your drawing. For example, you can add a tarmac or a rough road, the sun in the background, and your name on the side of the vehicle.
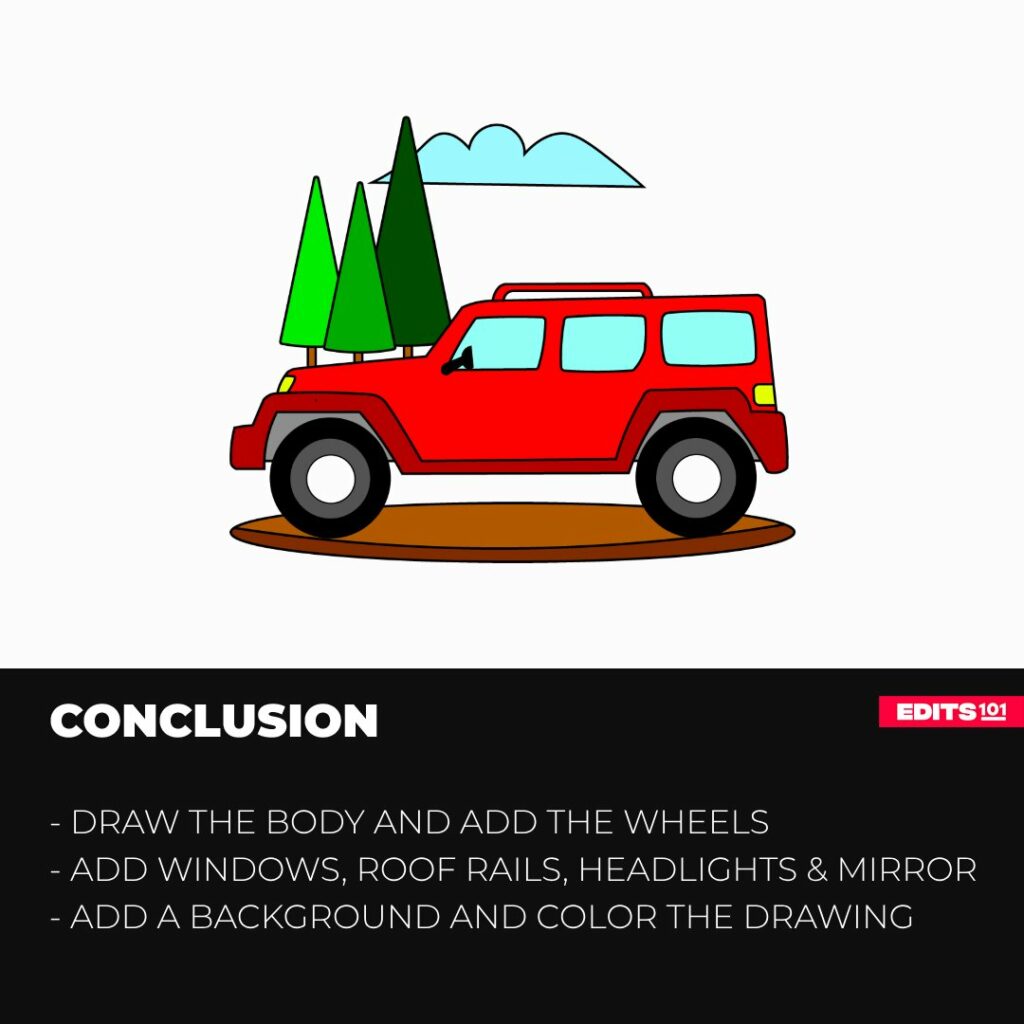
Step 7: Color Your Drawing
The final step is the most fun. It involves adding color to your drawing. Here, you can use any combination of colors that you want. In our drawing, we used red for the body of the vehicle, black for the wheels, brown for the road, green for the trees, and light blue for the windows and the clouds.
Again, you don’t have to use the same colors we have used. If you want your 4 x 4 vehicle to be yellow, go for it. However, you should ensure that the colors you use don’t spill outside the areas you are coloring.

Conclusion
The guide was pretty straightforward, right? We started by drawing a rectangle to guide the body of the 4 x 4. We then added the wheels, windows, roof rails, side mirrors, headlights, and background and then colored our drawing.
You can follow these steps to draw a 4 x 4 from an image you download online. Alternatively, you can use these steps to sketch out a 4 x 4 vehicle using your preferred sketching software. The key, however, is always to be patient and never forget to have fun. You also need to keep in mind that it takes practice to become a great artist.
Thanks for reading & feel free to check out more of our articles!