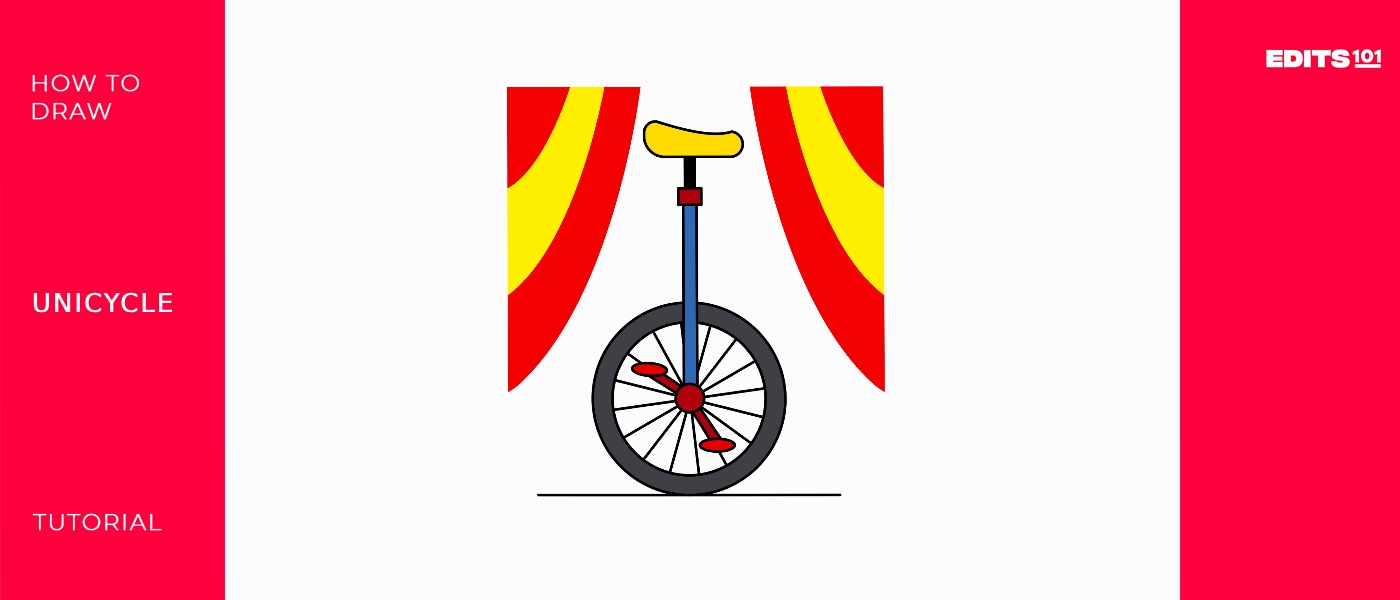
How To Draw A Unicycle | In 7 Steps
Today, we will have a fun and enjoyable session of drawing a unicycle.
It is generally thought that unicycles are more difficult than a bicycle or a tricycle, right? But in some parts of the world it is very common to ride a unicycle, e.g., in the USA about a million people know how to drive it. There is also a sport known as unicycle hockey (invented in California), in which you play hockey while on a unicycle. Interesting right?
What you will need
- A pencil
- An eraser
- A sheet of paper
- Coloring kit
- Ruler
- 30 minutes
How to Draw Draw a Unicycle
This is an easy and step-by-step guide in which we will make a unicycle. It might seem difficult to draw a unicycle at first, but this guide has broken down into very easy steps.
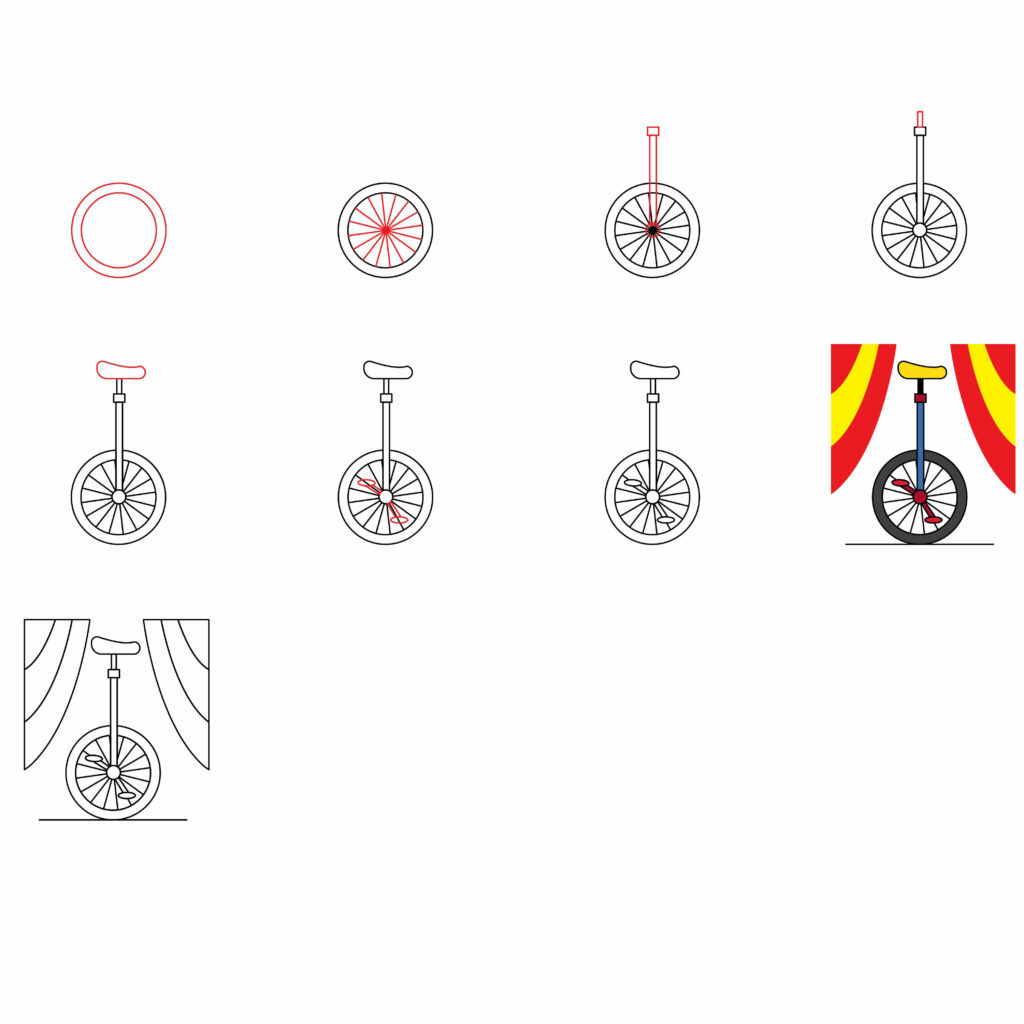
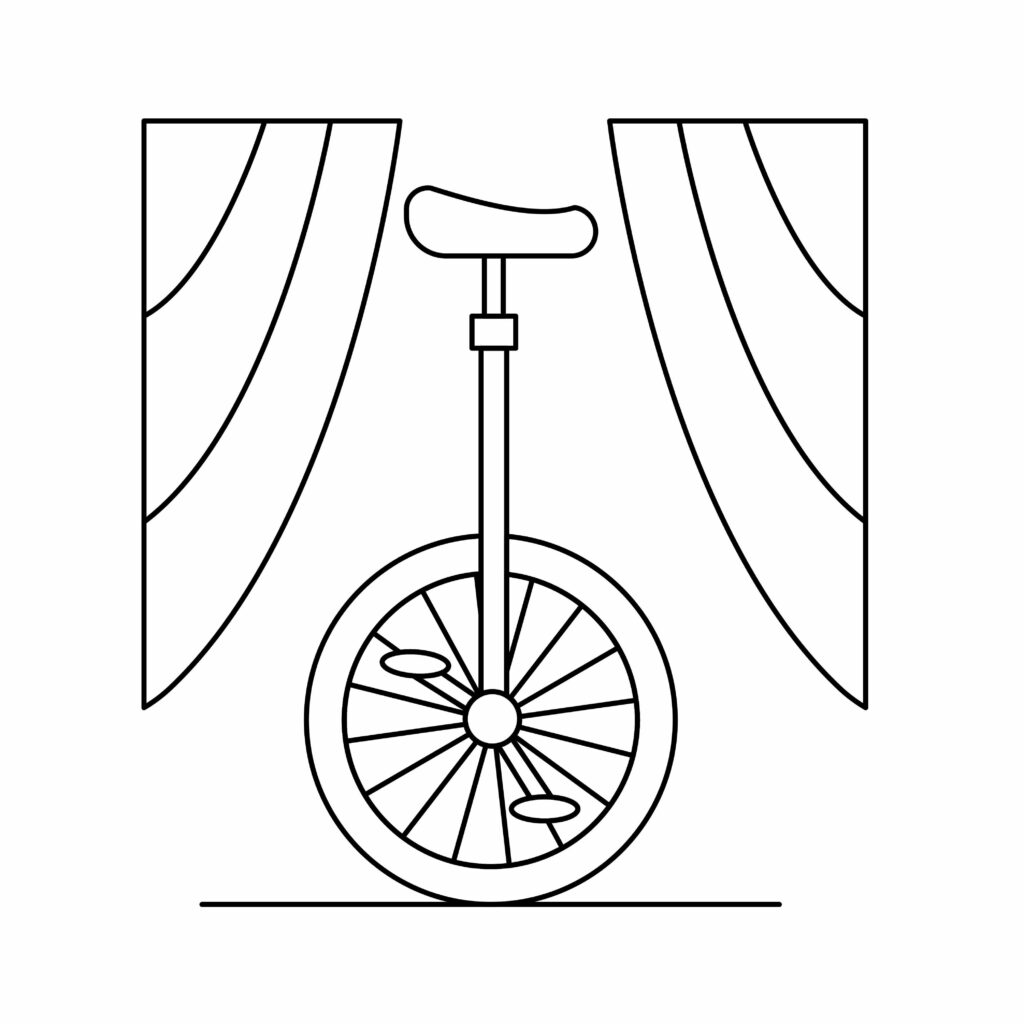
Step 1: Draw the Wheel
We will start our drawing with the wheel, as it is the most important component of a unicycle. As we know, wheels are round structures. So, to draw a wheel, start by drawing a circle. This circle can be drawn either by putting some kind of round lid or object on the paper and drawing around it, or you can take out your compass and draw a circle with a diameter of around 5 cm. After you’re done with the first circle, make another circle slightly bigger than the first circle. These two circles will make a tire. Now you can see a tire on your paper.

Step 2: Draw the wheel Spoke
Now, to complete the wheel, we need to draw a wheel spoke. In order to draw a wheel spock, you need to first draw a very small circle in the middle of the tire. You can do this in two ways;
If you used a compass for the first two circles (tires), just draw a very small circle around the point where you had the fixed arm of the compass, i.e., centre of all three circles is the same (circles are concentric).
If you drew the first two circles with a lid, you need to draw two straight lines antiparallel to each other (at an angle of 90 degrees). These lines can be drawn like a plus sign (like that on an ambulance). The point where these lines meet is the center of your first circles, and you should draw a third very small circle here.
The diameter of the 3rd circle should be around 1 cm.
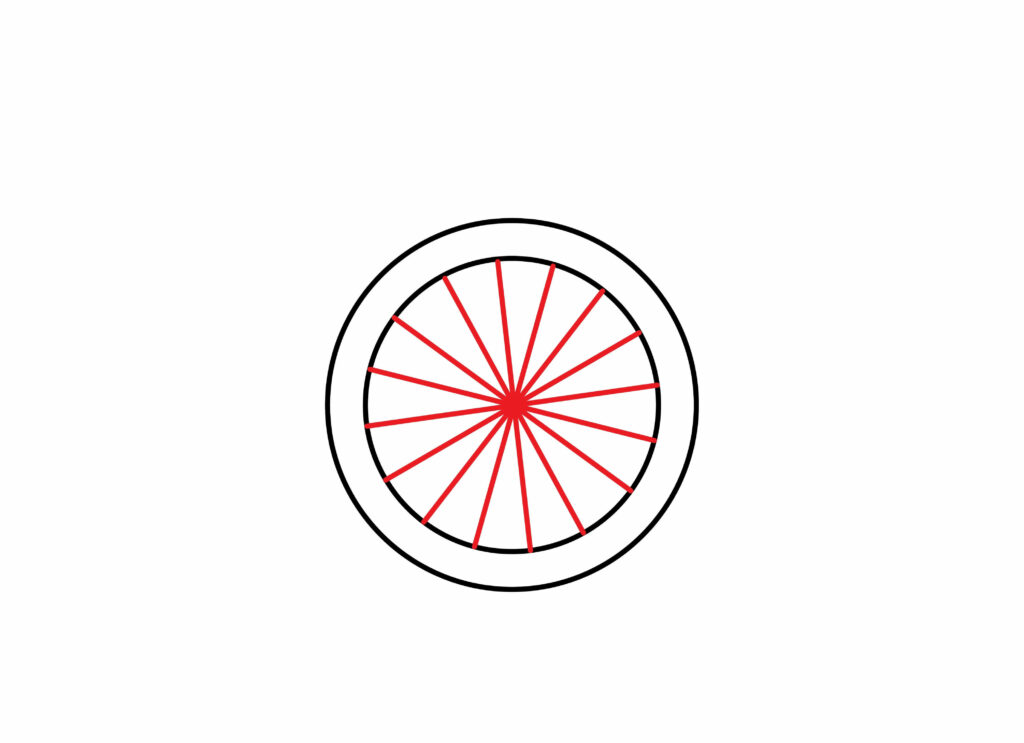
After you have drawn the smaller circle, to complete the circle, we need to draw straight lines around the circle; we need to draw about eight straight lines. These lines represent the rim of the tire. To draw these lines, first draw two lines like a plus (at right angle). Now, draw another pair of lines in a cross. Draw another pair of lines in between the plus and cross (on the upper side). Similarly, draw another pair between plus and cross on the lower side. Ensure these lines are not inside the smaller circle (if they are, erase them).
Your wheel spock is complete, and it looks just perfect.
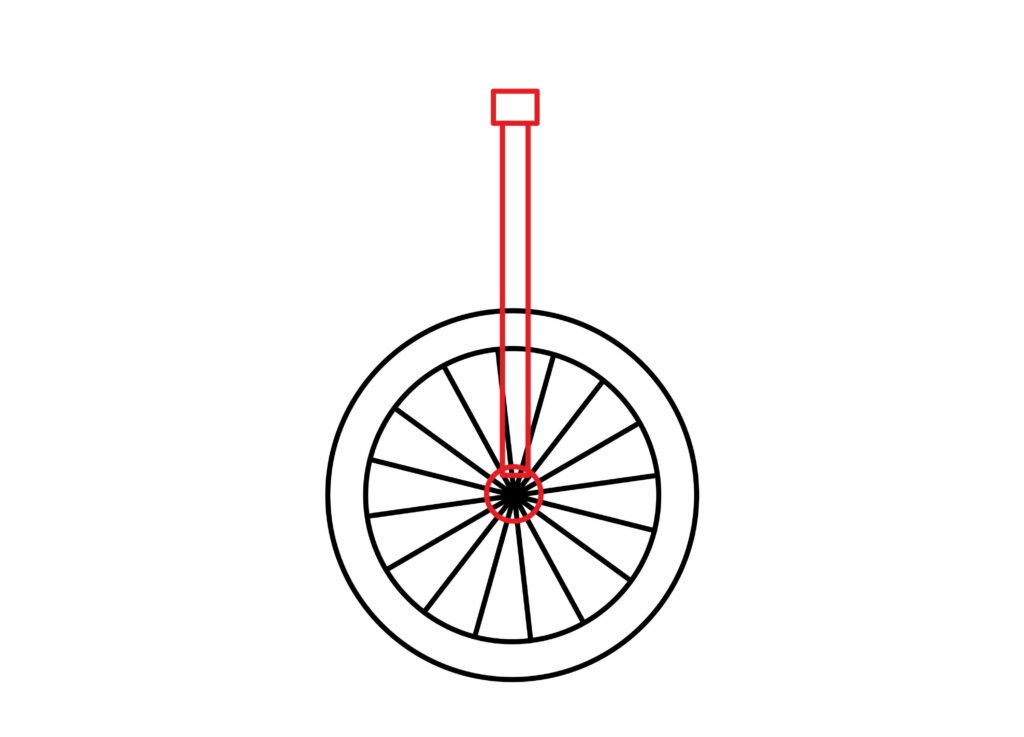
Step 3: draw the sitting handle
We have completed the wheel of our unicycle, and in this step, we will make its sitting handle. To draw a sitting handle, draw another circle around the smaller circle you just made in the previous step. Now, draw vertical lines that go up from the circle that you have just made and extend them above the wheel. Draw a small rectangle on the top of these two lines (the rectangle connects both lines).
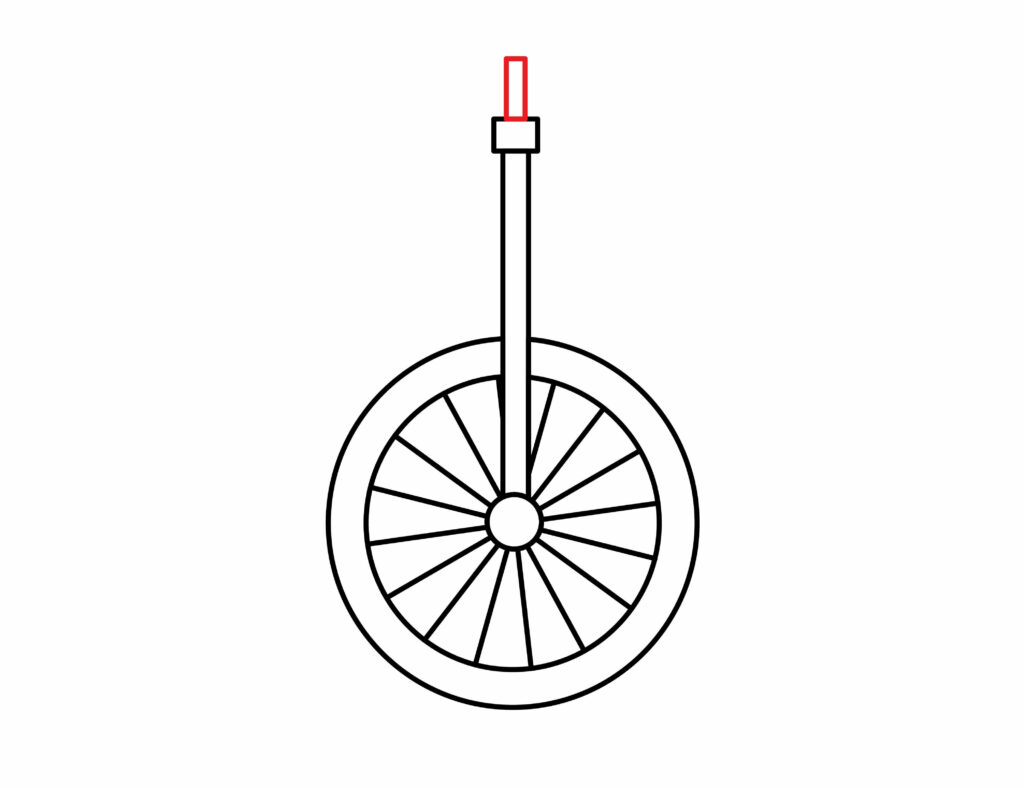
Step 4: Draw the Seat Holder
To draw the seat holder, draw another rectangle (elongated along the vertical axis) on top of the rectangle you just made.
Step 5: Draw the Seat
In this step, we are going to draw the seat. First draw a horizontal straight line on the top of the seat holder and then draw the curved lines on its both sides such that the curved line on the left side is bigger than the curved line on the right side. Now, connect these two lines with the help of another curved line on the top.
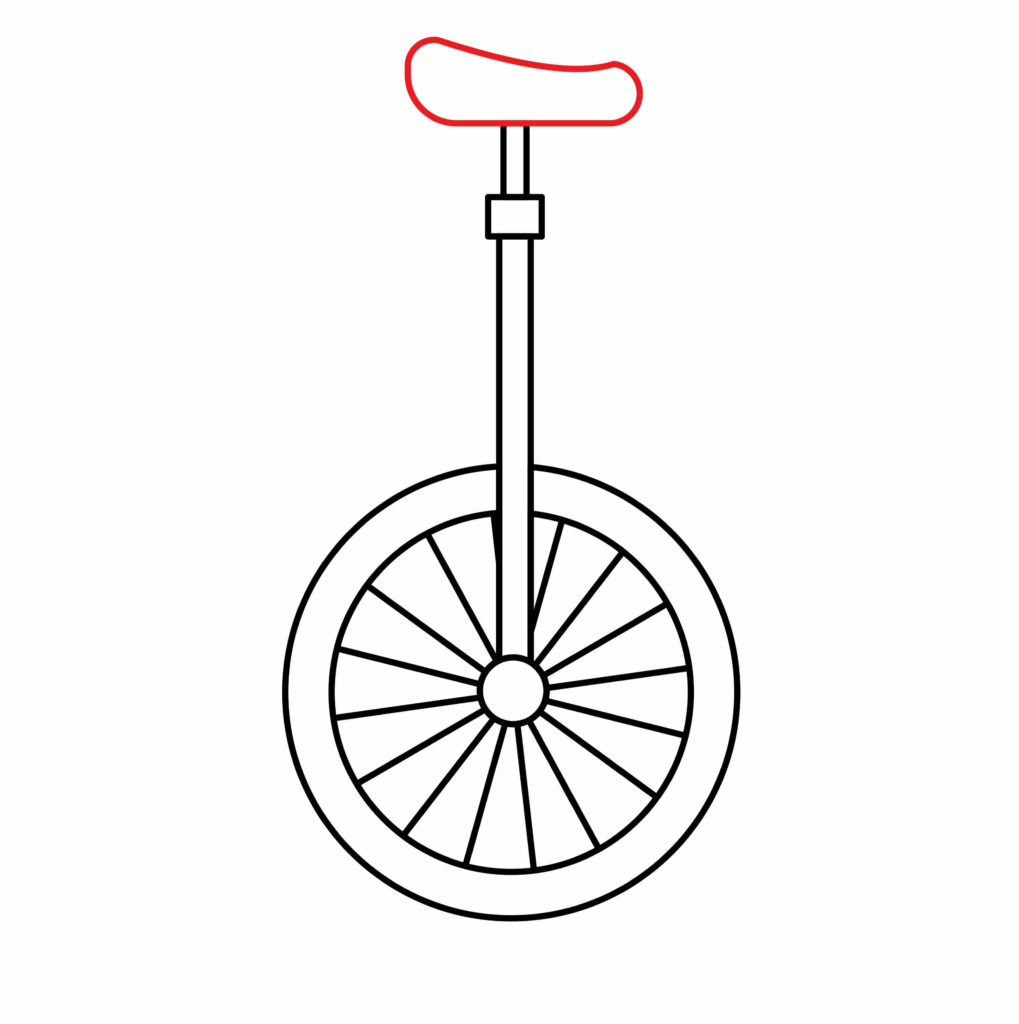
This is the seat of your unicycle.
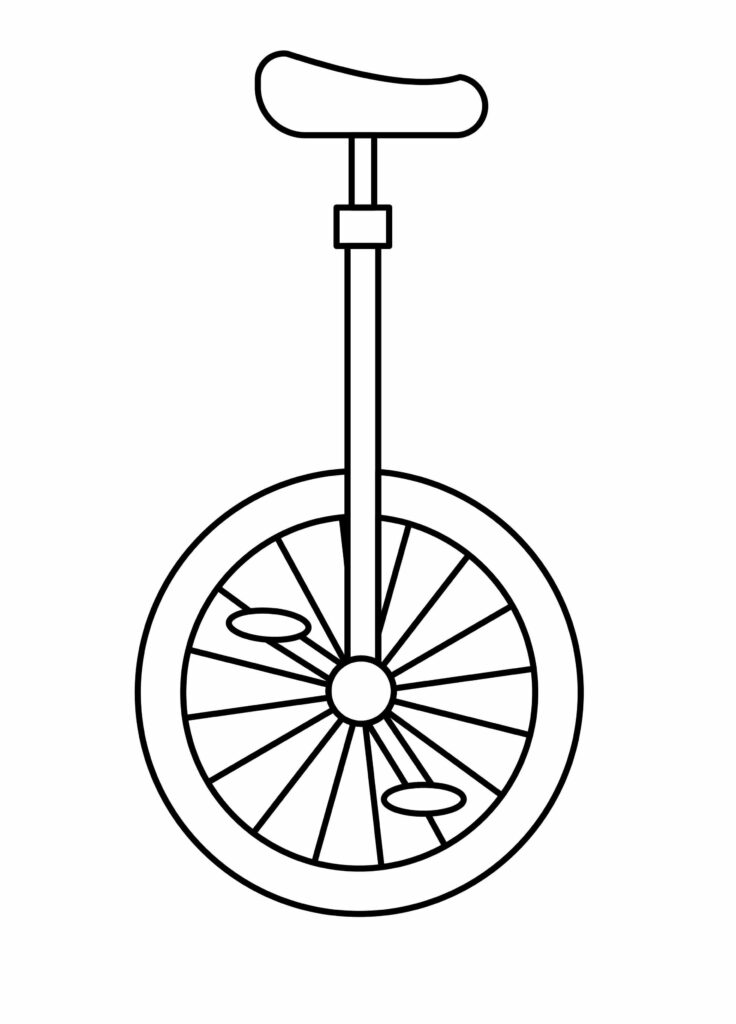
Step 6: Draw the Paddle
After we have completed the seat,now we will move towards the paddles of our unicycle. To draw the paddles, draw two pairs of angled lines (one pair angled to right and upward from the spock while the other pair angles towards left of the spock and downwards. Now connect both these pairs of angled lines with spheres around them. The size of these spheres should be small.

Step 7: Unicycle is Ready
Our unicycle is ready, and you did a great job drawing it. Well, young Picasso, did you enjoy drawing it? Here’s a surprise for you: the fun part is just about to begin. Drawing the basic parts of drawing is not the most fun part. In the next part, you will use your imagination, and by giving some final touches to your drawing, you’ll take this drawing to a whole another level.
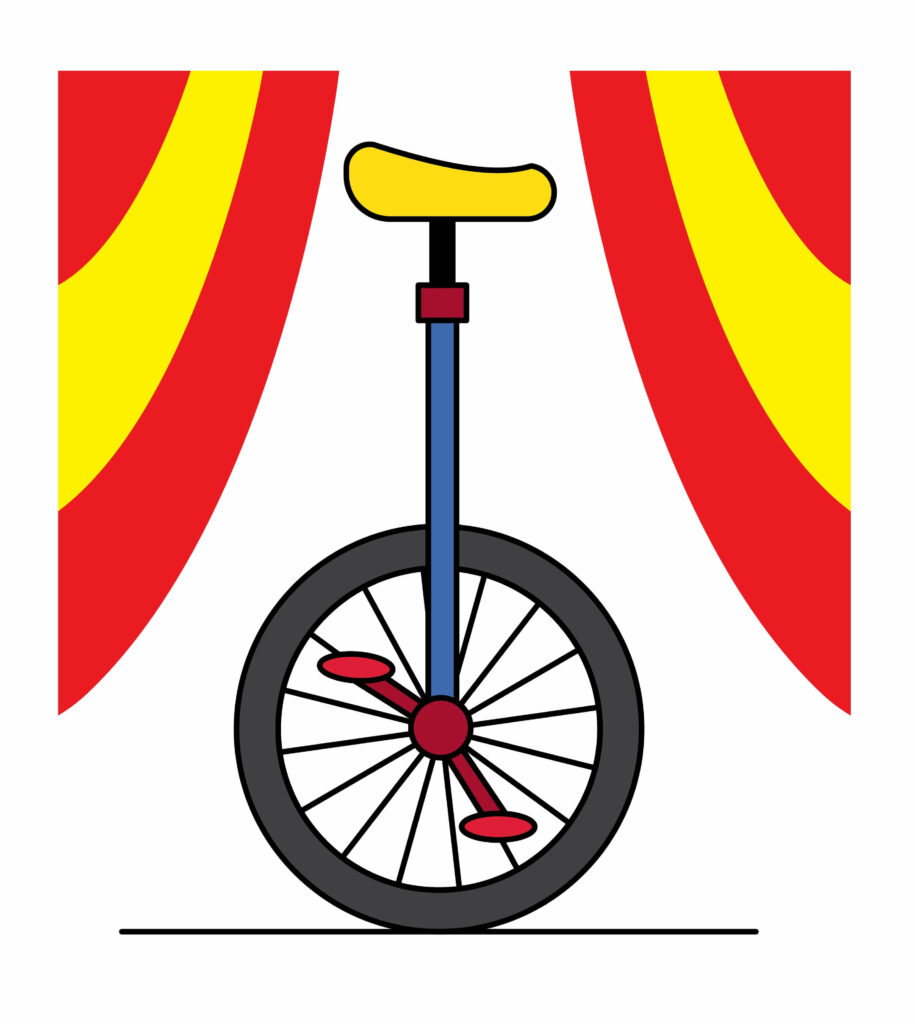
Taking your unicycle drawing to another level
You did a great job drawing this unicycle, and we hope you enjoyed the process. Sometimes, we get stuck at a particular step, and we think we cannot move further, but if we try that particular step two to three more times, we realize we become even better at it as compared to the other steps. So, if you ever get stuck at a point feeling I didn’t do this in a better way, just repeat the process a couple more times, and you will feel the difference yourself.
There is no doubt that drawing is one of the most important parts of art, but at the same time, the importance of finishing touches cannot be denied. Finishing touches are the most enjoyable part because you use your imagination and artistic abilities in these steps. These steps include adding background and color to your picture.
Adding Background to Your Drawing
Adding background to a drawing is a very important step. It makes your drawing look more realistic. Adding background is a step that most people don’t care about, but in fact, it makes a lot of difference. Adding background brings life to a drawing. Attention to this small detail is very important. These small things will make your drawing stand out.
How do we add a background? Well, where is your unicycle standing? Is it in the backyard? In your house? In your room? Or is it actually in a circus?
We think a unicycle belongs to a circus, and that is where it should be. While adding background, remember an important point: it gives life to your picture and makes your picture more realistic. So, for these reasons, we try to pick a background that gives our drawings a more natural look.
Adding Colors to Your Drawing
Now you have a drawing of a unicycle with a background on it. It looks very good. But there is something missing. It does not feel complete. Do you realize what is missing? Yes, colors. Whatever we see in the world around us has colors. So, whenever we draw something, we color it so that it looks real.
Choose the colors you like and use your imaginative powers to see what combination of colors looks good on your drawing. You can try different contrasts to make different parts more prominent. In the end, you’ll be overjoyed to see the masterpiece you’ve made!
P.S Bonus Tips
Art is all about your creativity and your imagination. Whenever you make a drawing, use your creativity to increase its beauty. You can make small little touches to make it look even better. For example, adding designs to your unicycle will make it look better. You can add a fire-like sticker on the sitting handle, etc. These are some small final touches that beautify your drawings. Whenever you make a drawing, do not forget to use your creativity to add something to it that will set apart your drawing as compared to the others.
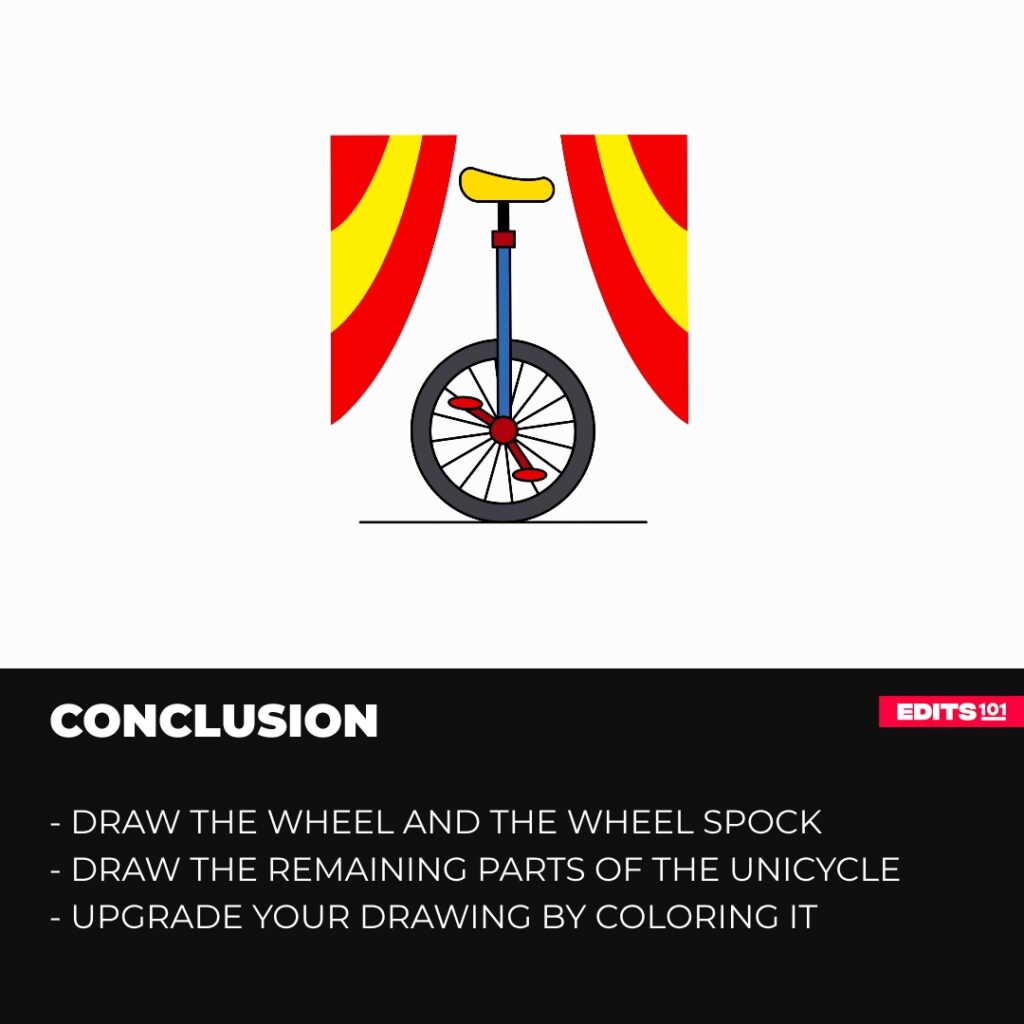
Conclusion
In these notes, we learned step-by-step how to draw a unicycle. Even though it looks very difficult, when we break the whole process down into simple steps, it becomes easy. We also learned the importance of other parameters or finishing touches. We added a background and then filled the drawing with colors.
In the whole process, we realize that what really started as a couple of circles ended as a beautiful drawing of a unicycle standing in a circus with flamboyant colors. You did a great job doing this drawing, and it is no doubt amazing. So remember, whenever something seems difficult, just take your time, break it into small steps, and take baby steps. It will lead you to a result that you would never have expected.
Thanks for reading & feel free to check out more of our articles!
Author Rating
Overall Rating
Summary
This guide explains how to draw a unicycle t in a simple and effective way.