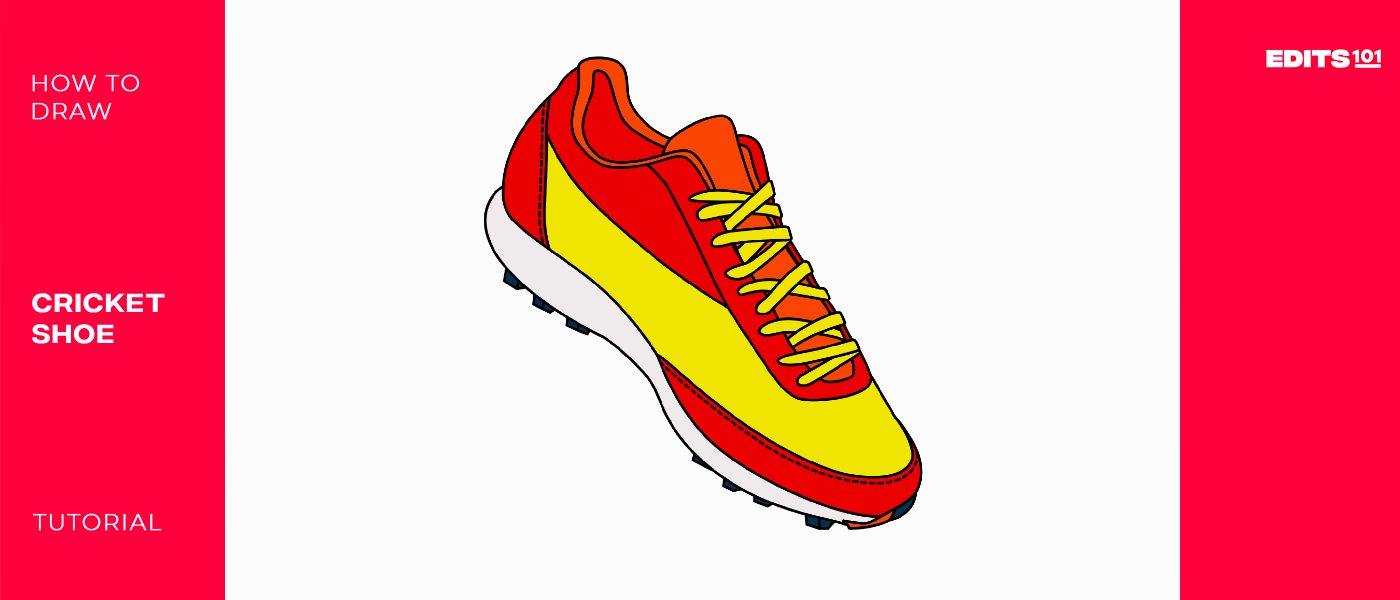
How to Draw a Cricket Shoe | An Easy Step-by-Step Guide
A good pair of cricket shoes is necessary for the fast-paced sport of cricket. Just like football cleats, cricket shoes have spikes to help the player have more traction when running. The shoes are also designed to give the player the necessary support that enables the player to perform better on the cricket pitch.
In our lesson, we will be looking at how you can draw cricket shoes in simple steps. We will also be discussing how you can advance your drawing so that it looks more realistic and interesting. All you need to do is follow our steps and your drawing will take shape.
| Steps | Complexity Level |
| Drawing the Sole and Cleats | 2 |
| Drawing the Upper Outline | 3 |
| Adding Details to the Shoe | 2 |
| Drawing the Collar Padding & Tongue | 3 |
| Drawing the Laces | 2 |
| Coloring | 1 |
What You Will Need
- A drawing piece of paper or a sketchbook
- Pencils
- An eraser
- A ruler
- Color pencils or markers for coloring
- 15 Minutes
How to Draw a Cricket Shoe
If you completed our lesson on how to draw an American football shoe or volleyball shoe, today’s lesson will be bliss. However, if you haven’t gotten to those lessons yet, you don’t need to worry. We will be guiding you step by step so that you don’t feel out of place.
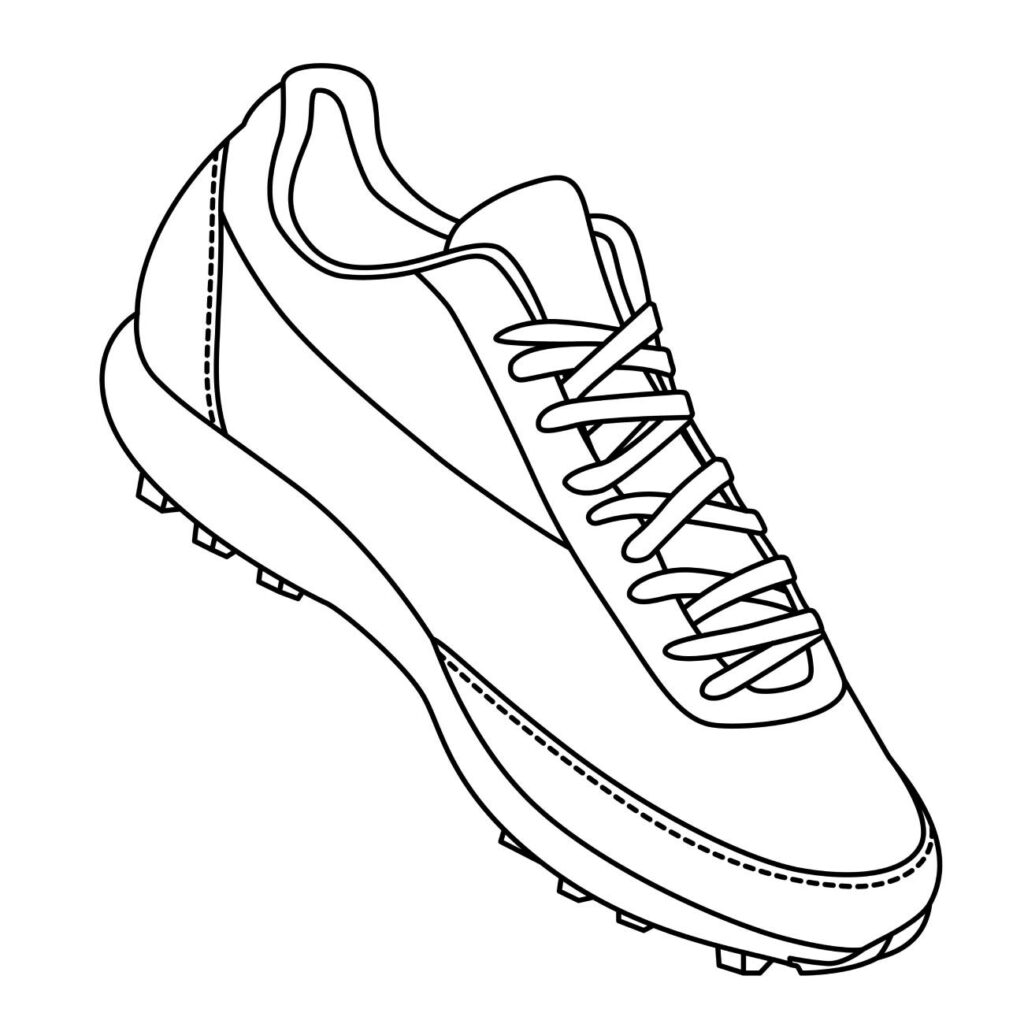
To give you a better understanding of what we will be doing, we have included an image with all the steps we will be taking. Take a moment to study the below image so that you can anticipate each step.
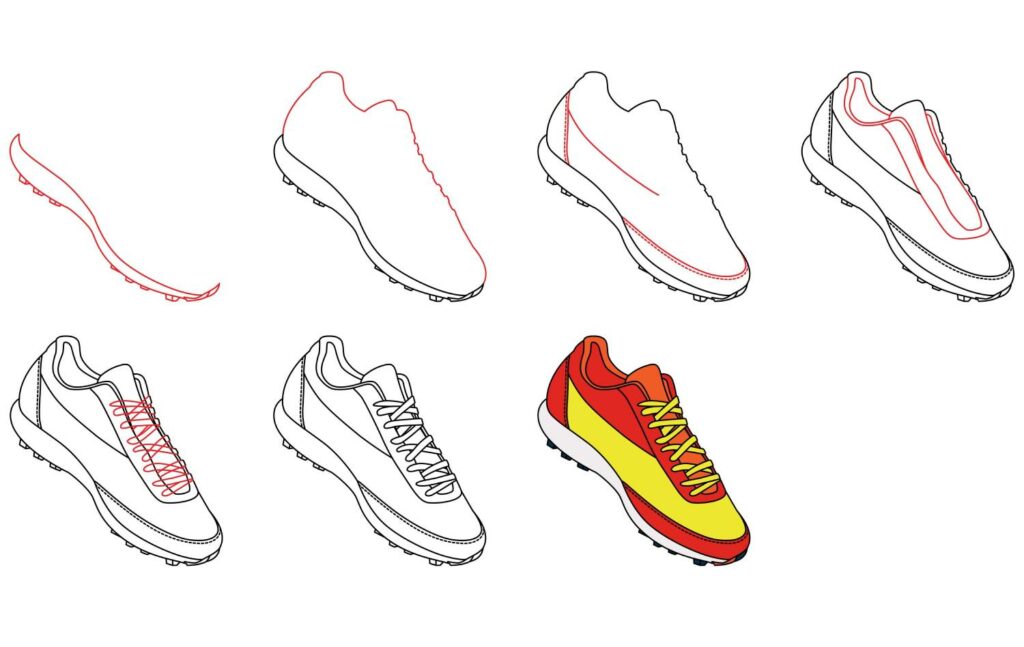
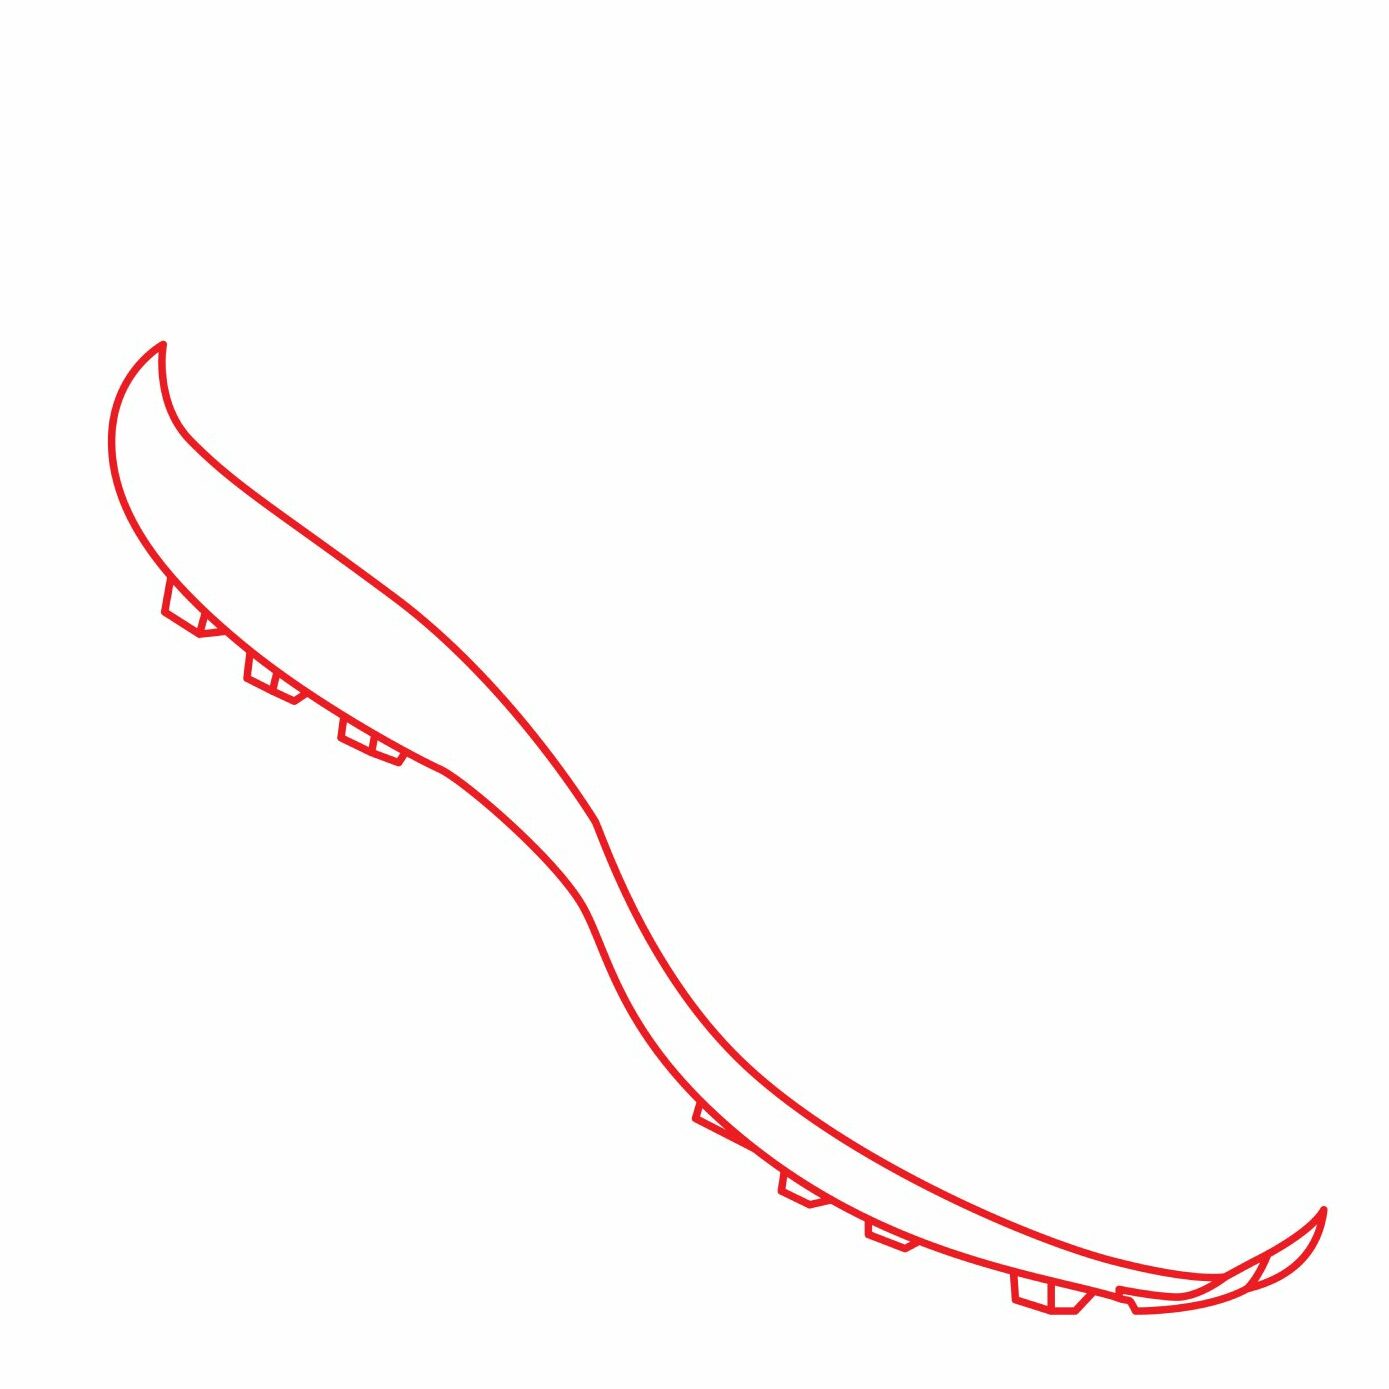
Step 1: Draw the Sole and Cleats
The first thing we are going to do is draw the bottom part of the cricket shoe. With your drawing paper in a portrait orientation, we will be drawing the sole using two diagonal lines. For artistic value, we are going to slant the shoe a bit.
Using your pencil, draw a diagonal curved line starting close to the top left corner of your drawing paper and extend it towards the bottom right corner. Add another diagonal curved line so that you have a shape that looks like what we have below.
To complete the drawing of the sole, we are going to add the cleats. These are protrusions on the bottom of the sole that give the player more traction while on the field. Unlike soccer cleats that are pointy, the cleats on a cricket shoe are a bit flattened.
- Use two curved lines to draw the sole
- Use tiny flattened rectangular shapes to add the cleats to the bottom of the shoe.
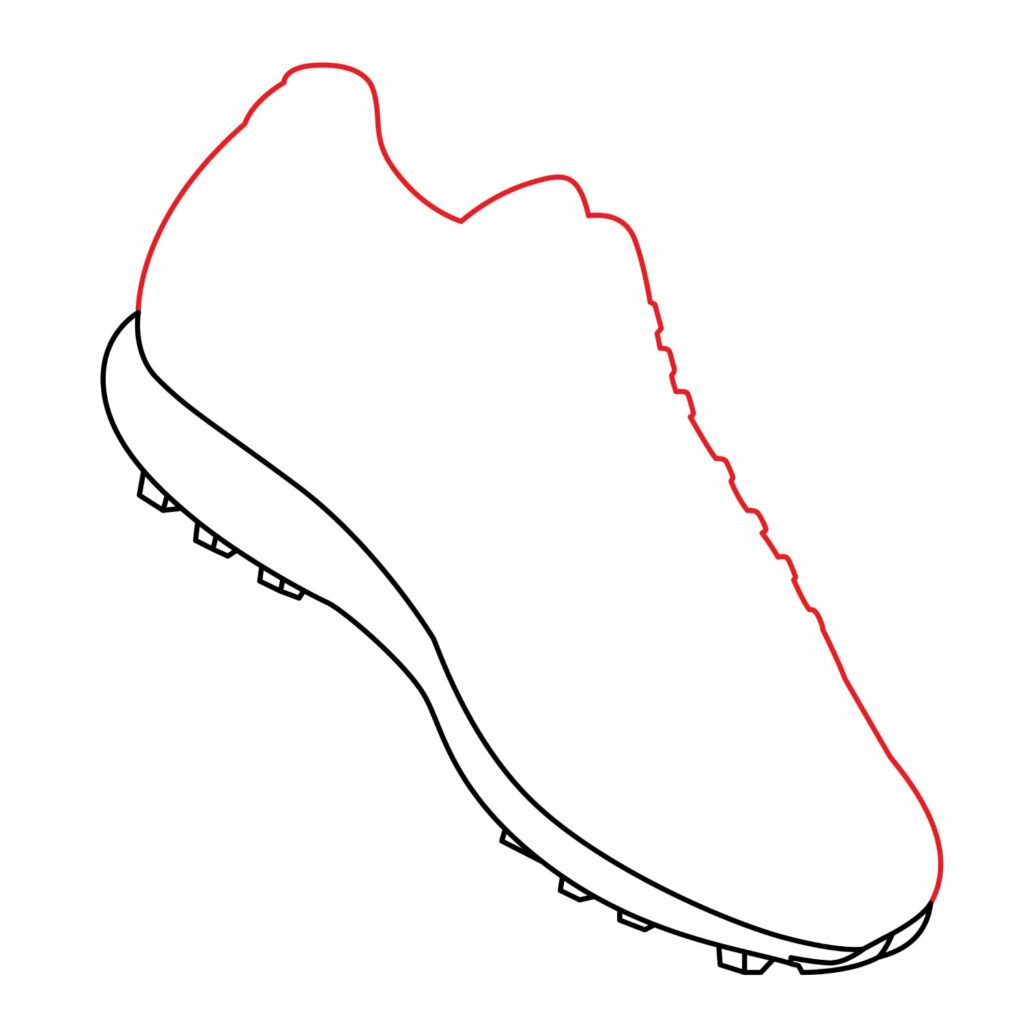
Step 2: Draw the Upper Outline
Now that the sole is ready, we are going to add the upper part of the shoe. This is the part that goes over the player’s feet. The cricket shoes look less like soccer shoes and more like sneakers.
To add the upper outline, use a series of curved lines to draw something that looks like what we have in the below illustration. Don’t forget to add a groove at the top of the shoe to depict the collar of the shoe. You should also make sure that you add some bumps on the front part of the shoe to depict both the tongue and the laces. These details will give your cricket shoe a more three-dimensional look.
- Use curved lines to draw the upper part of the cricket shoe
- Add grooves on top to depict the collar, tongue, and laces
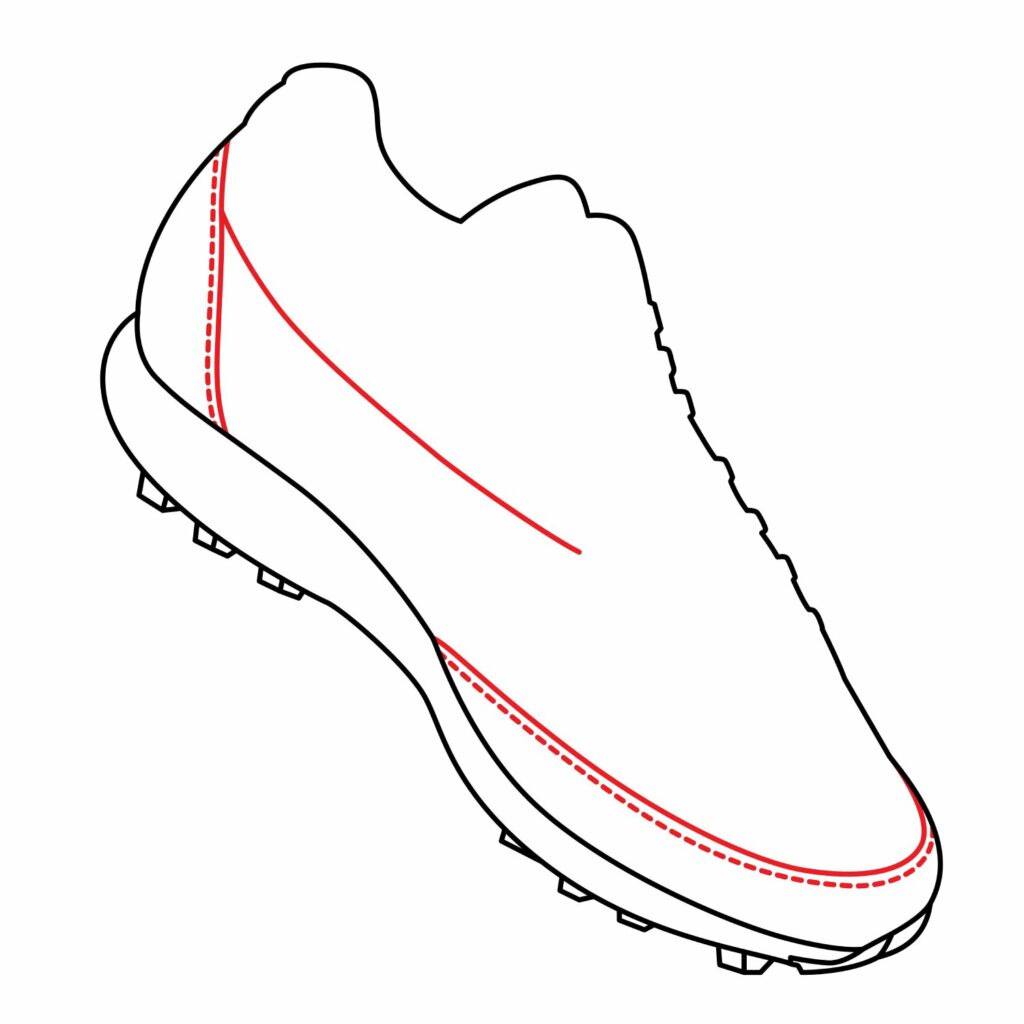
Step 3: Add Details and the Sew Line
With the outline of the cricket shoe ready, we are now going to add the details that will turn the outline into a realistic shoe. The first things we are going to add are the sew lines. We will do this using a combination of continuous and dashed curved lines.
Start by adding a continuous curved line at the back of the shoe. You should also add a dashed curved line below the curved line. That will form the heel of the shoe. Next, add a slightly curved line extending from the heel to the waist of the shoe.
To add details to the toe cap, we are going to add a curved line that starts from the middle of the shoe’s sole, curves, and connects to the top part of the shoe. We will then add a dashed line below this line. Your drawing should look like what we have below.
- Use a combination of curved continuous and dashed lines to add details to the shoe
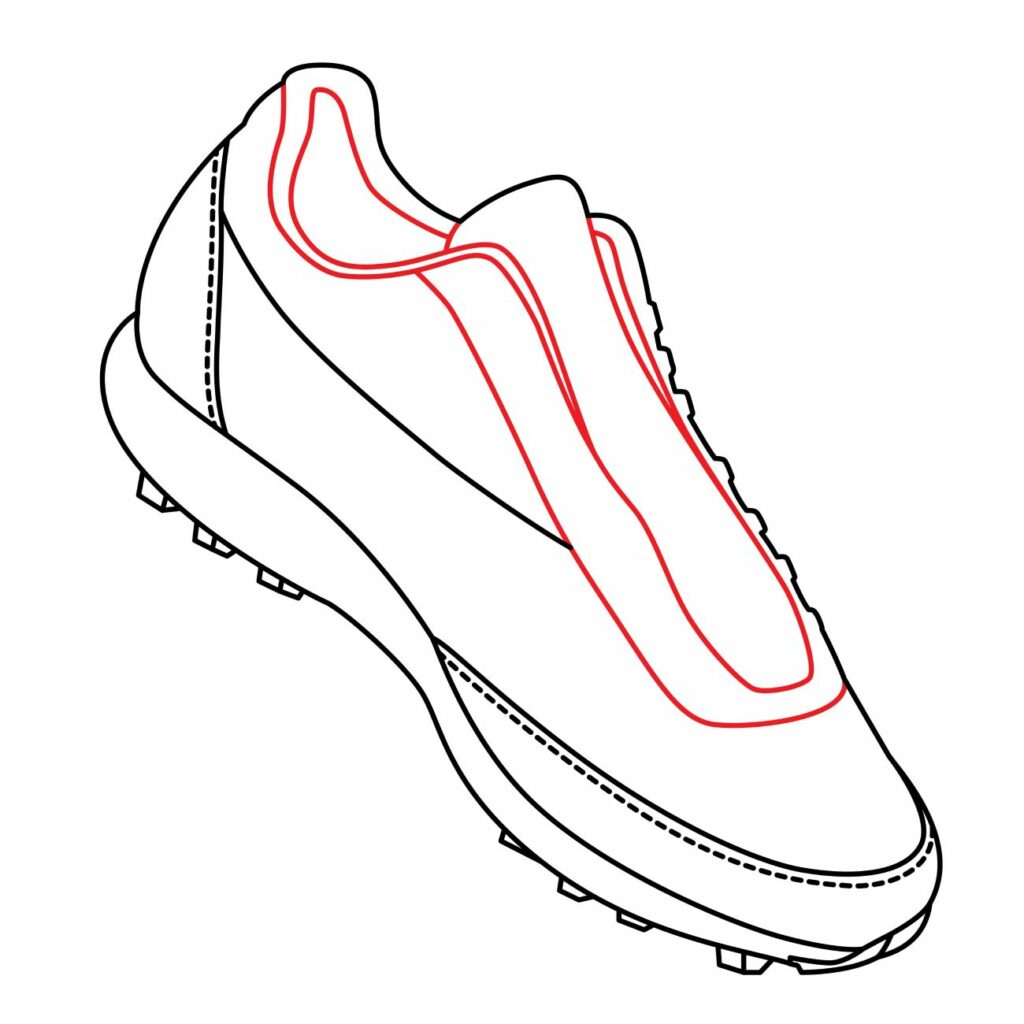
Step 4: Draw Collar Padding and the Tongue
The next thing we are going to add is details to the collar and front part of the cricket shoe. For this, we will be using a series of curved lines to create something that looks like what we have in the below illustration. Adding the collar padding and the tongue will give your shoe a realistic appearance. Try and replicate what we have in our drawing below.
- Use a series of curved lines to draw the collar padding and the tongue
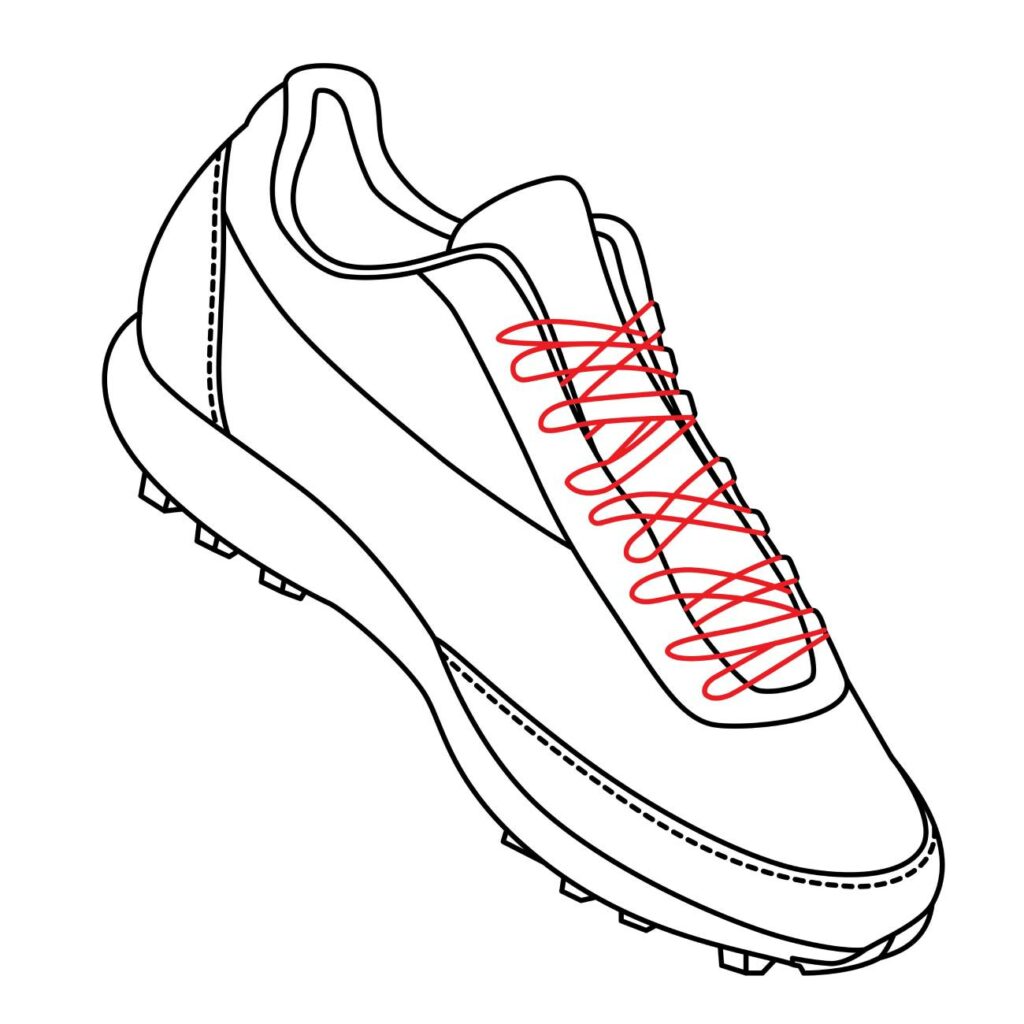
Step 5: Draw the Laces
The cricket shoe is almost ready. The last detail we are going to add is the laces. For this, we will be using a combination of crisscrossing shapes along the length of the tongue. Once you have something that looks like what we have in the below illustration, use your eraser to remove the lines that cut through the laces. The laces will give your shoe an authentic look and feel.
- Use crisscrossing shapes to add the laces
- Remove the lines that cut through the laces
Congratulations! Your Cricket Shoe Is Ready
By following the five steps, your drawing of a cricket shoe should now be ready. Your drawing should look like what we have below or even better. Take a moment to appreciate your work. You have successfully drawn a cricket shoe on a blank drawing paper.
Take the Drawing to the Next Level
It is not advisable to leave your drawing as it appears above. The goal is to draw something interesting. Keep in mind that this is your creation. You can do whatever you want to it. In our case, so as not to distract you, we did not add any background details.
Add a Background
Enhance the cricket shoe by adding a background to create a complete composition. Some of the things you can consider doing include placing your cricket shoe on a cricket field or any setting that suits your imagination. You can also add a cricket bat in the background or a cricket ball below the shoe. It is also perfectly okay to add your name or a logo on the side of the shoe.
Color Your Drawing
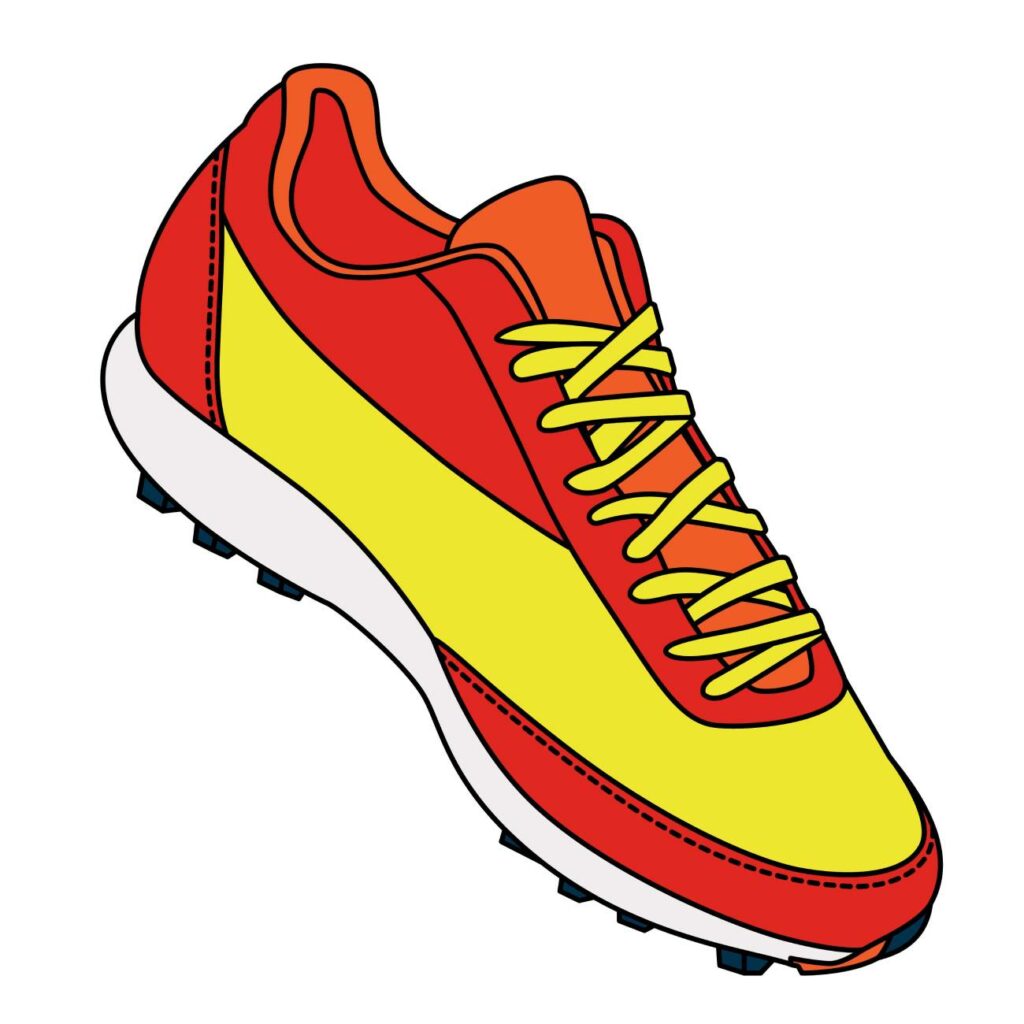
The most important thing to do once you are done with the outline of your cricket shoe is to color it. Using your coloring supplies, add your preferred colors to the cricket shoe. Here are some tips you can use when coloring:
- Decide on the colors you want before you start coloring. That will help avoid mistakes.
- Don’t start coloring until you are done adding background details.
- Keep the colors within the boundaries of the areas you are coloring
- Use different shades for different parts of the drawing to avoid concealing crucial details
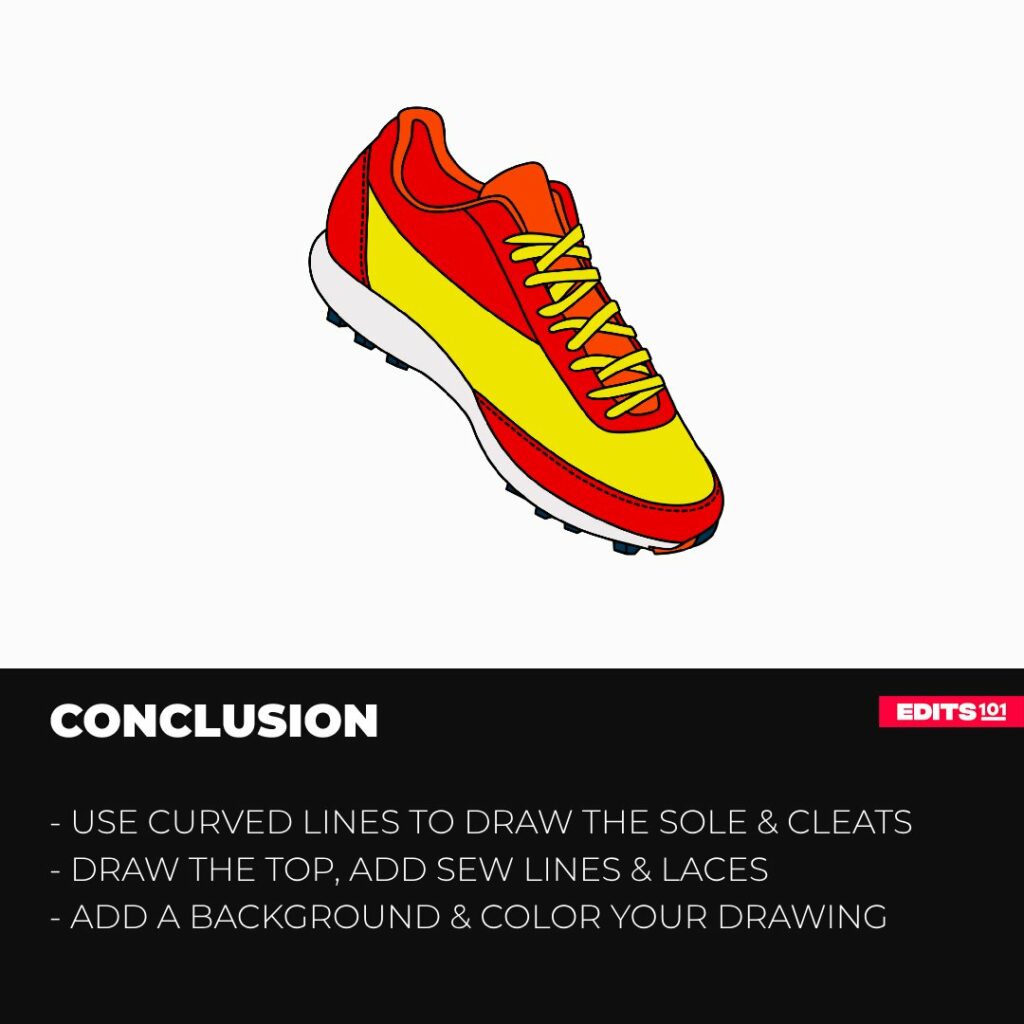
Conclusion
Drawing a cricket shoe can be a lot of fun when you know how to go about it. In our tutorial, we started by using curved lines to draw the sole. We later used curved lines to add the top part of the shoe. To make the shoe more realistic, we added sew lines, the tongue, and padding to the collar. We also added the laces. We brought our drawing to life by coloring it.
You can use these steps to draw a cricket shoe on any sketching app and from different orientations. Needless to say, once you know how to draw a cricket shoe, you will be able to draw any shoe that you want may it be an ice hockey skate or a soccer boot. You must, however, keep practicing to improve your sketching skills.
Thanks for reading & feel free to check out more of our articles!
Author Rating
Overall Rating
Summary
Learn how to draw a realistic cricket shoe in easy steps.