How to Draw Cricket Stumps and Bails | An Easy Guide
In a cricket pitch, the stumps are the three vertical posts that support the bails and form the wicket. The three stumps are the leg stump, the center stump, and the off stump. The stumps have two other smaller sticks that are known as bails. The stumps are used to determine when the wicket is ‘put down’.
In the tutorial for today, we will be learning how to draw the stumps and bails. By the end of the tutorial, you will not only have a realistic drawing but you will also have learned quite a lot about these posts and their significance.
| Steps | Complexity Level |
| Drawing the Stumps | 2 |
| Drawing the Bails | 2 |
| Coloring | 1 |
What You Will Need
- A drawing piece of paper or a sketchbook
- Pencils
- An eraser for correcting mistakes
- Ruler for drawing straight lines
- Color pencils or markers to add that vibrant touch
- 10 Minutes
How to Draw Cricket Stumps and Bails
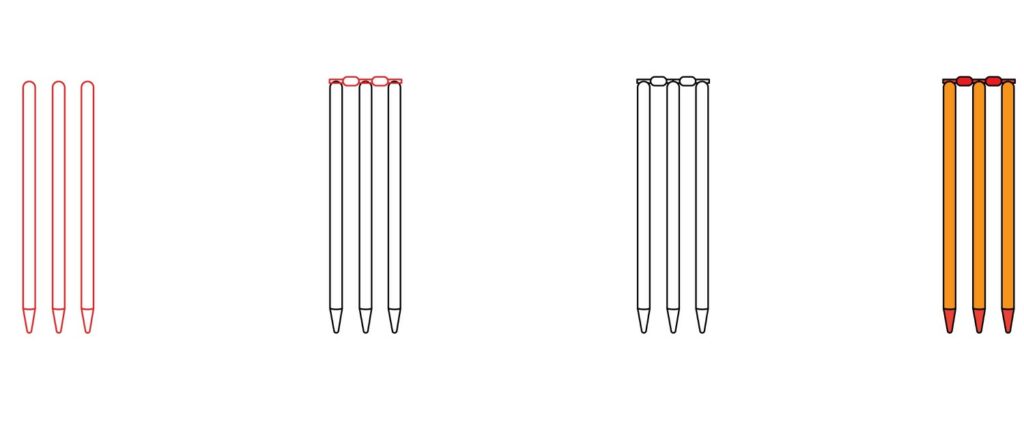
The stumps and bails are an important part of the game of cricket. They are used to determine if the bowler or batsman has earned a point. Our drawing is going to be very simple. However, to help you know what we will be doing, we have included the below image which has the steps we will be taking. Studying the image will help you anticipate each step.
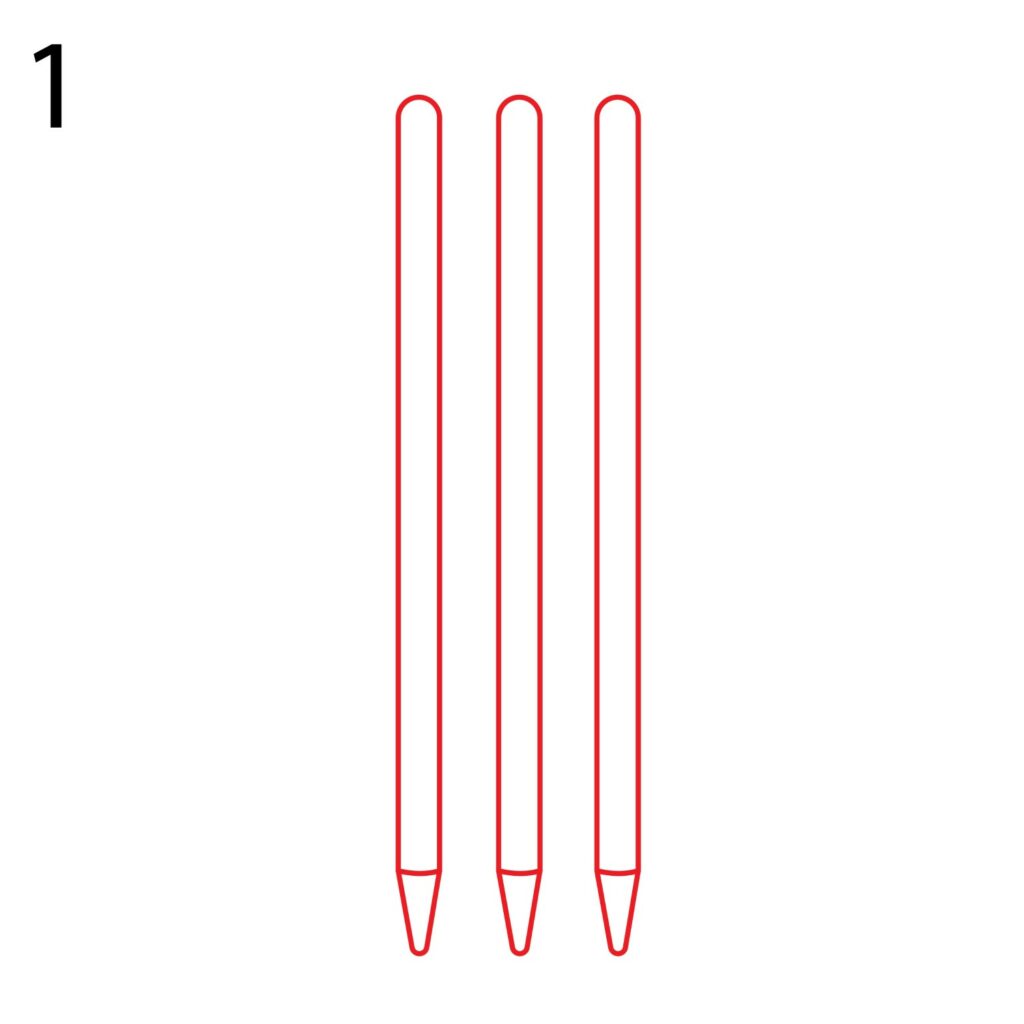
Step 1: Draw the Stumps
As aforementioned, there are three stumps on each side of the cricket field. These are what form the wicket. The stumps are usually made of wood, most commonly ash. It is, however, not uncommon to find stumps that are made of metal or plastic. There is also a newer variation of stumps that is made of LED. These are stumps that light up thus making them ideal when there is low visibility. The overall width of each wicket is 9 inches.
To create the foundation of our cricket scene, we will start by drawing two vertical straight lines on the left side of the drawing paper. These lines will serve as the main stems of the left-most stump.
At the top of the vertical lines, add a curved line that bends upward, and at the bottom, add a curved line that bends downward. You should then add a triangular shape at the bottom to give the stump a solid, grounded look. The triangular shape is what goes into the ground and enables the stumps to stand upright.
Repeat the process to add two more stumps to the right of the first one. Make sure the stumps are of the same width and height. They should also be evenly spaced else the drawing will not look very realistic.
- Draw two vertical lines on the left side of your paper
- Connect the bottom and top parts of the vertical lines using a curved line
- Add a triangular shape at the bottom to complete the drawing of the first stump.
- Repeat the process and add two more stumps to the right of the first stump.
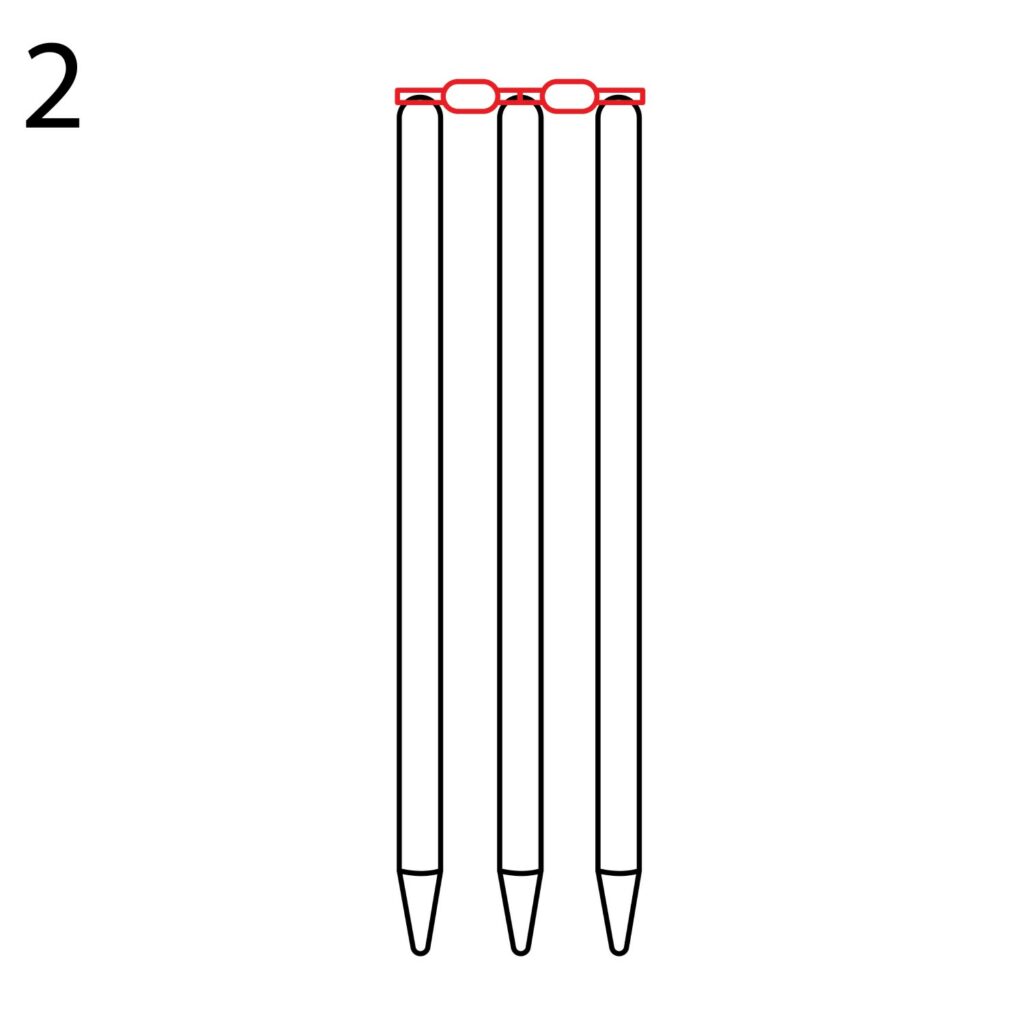
Step 2: Draw the Bails
Now that the stumps are ready, we are going to add the bails. The bails are the two smaller sticks that are placed on top of the three stumps to complete the wicket. The bails are used to determine when the wicket has been broken or put down. They help determine if the batsman is out-bowled, turned out, stumped, or hit a wicket. The wicket is broken when one or both of the bails fall off the stumps or when the stump is struck out of the ground by the ball, batsman’s bat, or fielder.
To draw the bails, we will start by drawing two oval shapes in the space between the stumps, at the top. The oval shapes should be slightly above the stumps because they are usually placed on top.
Next, we will add a horizontal rectangle that cuts through the bails and sits on top of the stumps. Use your eraser to remove the lines that cut through the oval shapes. Your drawing should look like what we have below.
- Draw two oval shapes in the spaces left between the stumps. The oval shapes should be slightly above the stumps.
- Draw a horizontal rectangle that cuts through the oval shapes and sits above the stumps.
- Erase the lines that cut through the oval shapes.
Congratulations! Your Drawing is Complete
In just two steps, the drawing of the cricket stumps and bails is ready. That was quite easy, wasn’t it? If your drawing doesn’t look like ours, you don’t have to be frustrated. You can erase and redo the areas that are way off. Alternatively, you can start over since the drawing doesn’t require a lot of work. You will notice better results on your next attempt because you now understand what the drawing requires.

Take the Drawing to the Next Level
You must always resist the urge to leave your drawing in its basic form. To become a great artist, you must be willing to take extra steps to make your drawing stand out and stop being boring. To make your drawing more captivating, there are two things you should consider doing.
Add a Background
Adding a background will significantly enhance your drawing of cricket stumps and bails. If you have time, you can draw a cricket pitch around the stumps, complete with the creases and the bowler’s mark. You may also consider adding a cricket player in the background or a crowd in the distance. Placing a cricket ball or a bat on the side of the wicket will also elevate your drawing.
Keep in mind that this is your drawing and you can add as many or as few details as you want. In our case, we did not add any background so as not to distract you from the main focus of our lesson.
Color Your Drawing
The one thing you must never skip when drawing anything is color. Coloring your drawing is what brings it to life. Take out your coloring supplies and start coloring. You can use any of the colors that you like. You don’t have to stick with the traditional white color of the stumps and bails. You should also not forget to color your background if you added one.
When coloring, don’t hesitate to experiment. Use different shades to create vivid and engaging scenes that reflect the excitement of a cricket match.

Conclusion
Drawing cricket stumps and bails is very easy. The drawing doesn’t have any complicated aspects. In our drawing, we started by drawing one stump using vertical lines, curved lines, and a triangular shape at the bottom. We then repeated the process to add two more stumps that were evenly spaced. We added the bails using two oval shapes at the top of the stumps and a horizontal rectangle. We completed our drawing by coloring everything.
With a bit of practice and creativity, your cricket-themed artwork can become a source of pride and inspiration. You will also learn a lot about the game of cricket as you draw. Keep practicing and never forget to have fun.

Thanks for reading & feel free to check out more of our articles!
Author Rating
Overall Rating
Summary
Learn what cricket stumps and bails are used for and how to draw them in simple steps.