How to Draw a Bulldozer | Step-by-Step Tutorial
A bulldozer is a tracked, heavy-duty engineering vehicle equipped with a large metal plate, known as a blade, at the front. The primary function of a bulldozer is to push, lift, and move large quantities of earth, rocks, debris, or other materials during construction and demolition projects.
It’s commonly used in tasks such as road building, land clearing, grading terrain surfaces, and leveling ground for various applications like infrastructure development and mining operations.
The powerful engine and sturdy tracks of a bulldozer allow it to operate effectively in rough terrains while exerting significant force to perform its tasks efficiently.
In today’s tutorial, you will learn how to draw your very own bulldozer with 8 easy steps.
What You Will Need
- A pencil
- An eraser
- A sheet of paper or sketchbook
- Ruler
- Drawing compass or coins/spray bottles
- Coloring Materials (Crayons, colored pencils, oil pastel, etc.)
- 25-30 minutes
| Steps | Complexity Level |
|---|---|
| The Engine | 1 |
| The Cab | 2 |
| The Tires and Tracks | 3 |
| The Push Frame and Blade | 3 |
| The Smoke Pumper | 2 |
| The Windows | 3 |
How to draw a bulldozer
This may seem like a challenging task because of all the varying components you need to draw, but in this tutorial we’ll provide you with informative, easy-to-do steps and tips to complete a beautiful depiction of a bulldozer!
Before you begin, make sure you have all of your drawing tools on hand, study the outline provided below for some insight on what you will be doing, and without any further ado, jump right in!
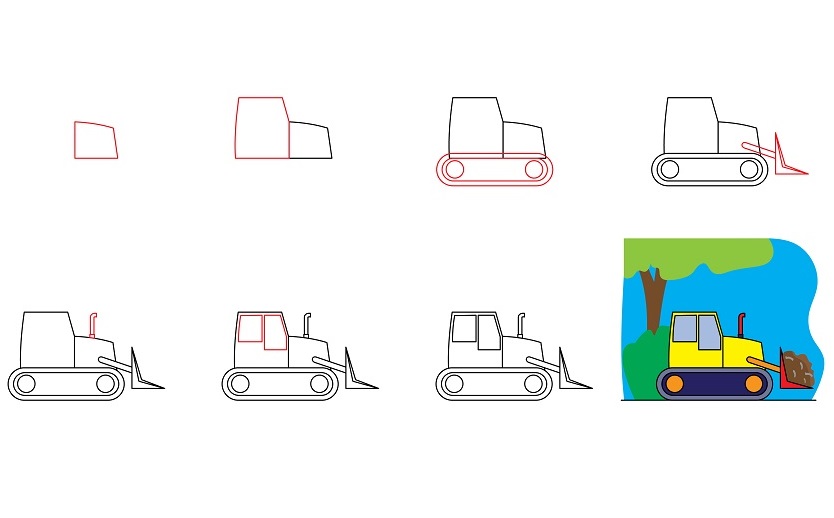
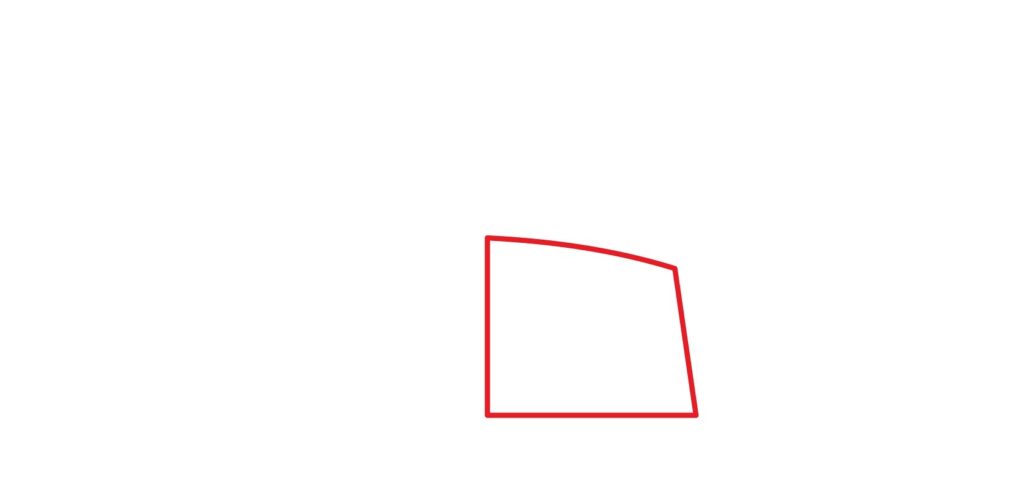
Step 1: Draw the engine
The first thing we will be drawing today is the bulldozer’s engine. Make sure you flip your drawing paper around into a landscape orientation to cover more room and that you draw the engine approximately on the middle of your paper.
Using a ruler, start by drawing a big square. Erase the top line and corners of the square, and also make sure you erase a little bit more of the vertical line on the right.
Next, draw a diagonal line starting from the left side and connect it to the right. The line should move downward when starting from the left angle.
- Flip your paper into a landscape orientation
- Draw a big square in the middle of your paper
- Erase the top line and corners of the square
- Draw a diagonal line from the top left to the top right corner of the square
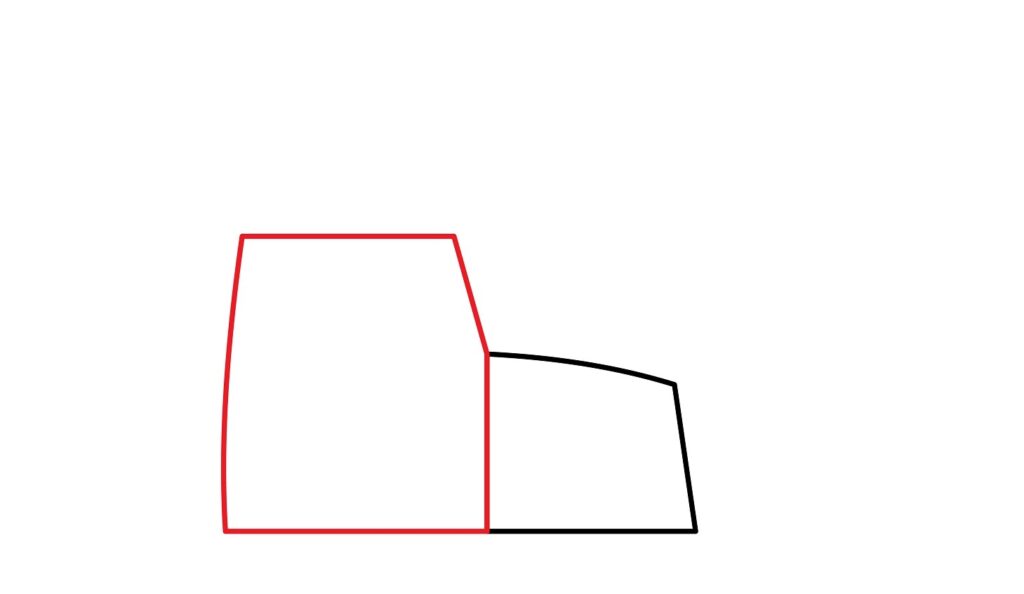
Step 2: Draw the cab
The cab of a bulldozer is the enclosed area where the operator sits to control and operate the heavy machinery. There are many features inside the cab, so it’s quite bigger than the engine.
In order to complete this step, use your ruler and draw a big square on the left side of the engine. Make sure the bottom lines of both the engine and the cab are aligned, while the top of the cab is roughly double the length of the engine.
Erase the top left and right sides of the cab before turning them into curved and diagonal lines. Draw a curved line on the left side of the cab and a diagonal line on the right, as shown in the image below.
- Draw a big square attached to the left side of the engine
- Erase the top left and right sides of the cab
- Draw a curved line on the top left side of the cab
- Draw a diagonal line on the top right side of the cab
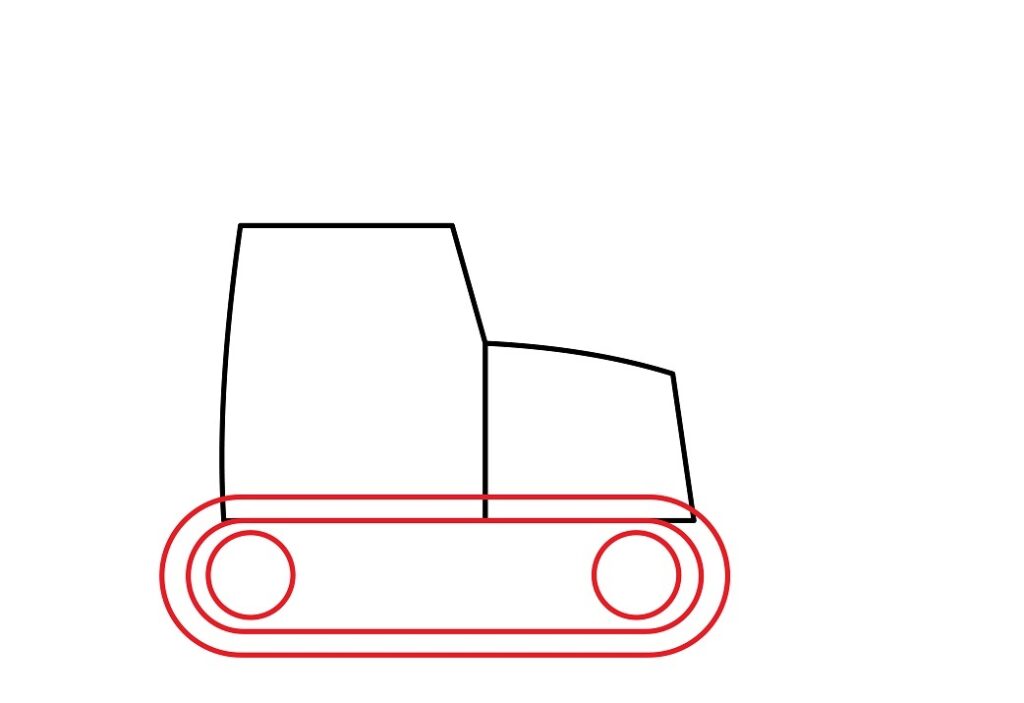
Step 3: Draw the Tires and tracks
The tires and tracks of a bulldozer are rugged, durable and sturdy materials that provide traction and stability.
In order to finish this step, start by drawing a long oval below the dozer’s body (engine and cab). Then, draw a smaller yet equally long oval inside the big one and make sure there’s a small amount of space in between them. Add the tires within the big empty space in the middle of the two oval shapes.
Using a household circular object like a coin or a small spray bottle, draw a smooth circle on the left side and then another smooth circle on the right. Make sure they’re almost identical in size.
- Draw a long oval below the engine and cab
- Add another smaller oval inside the first oval drawn
- Draw a smooth circle on the left and the right within the oval shape
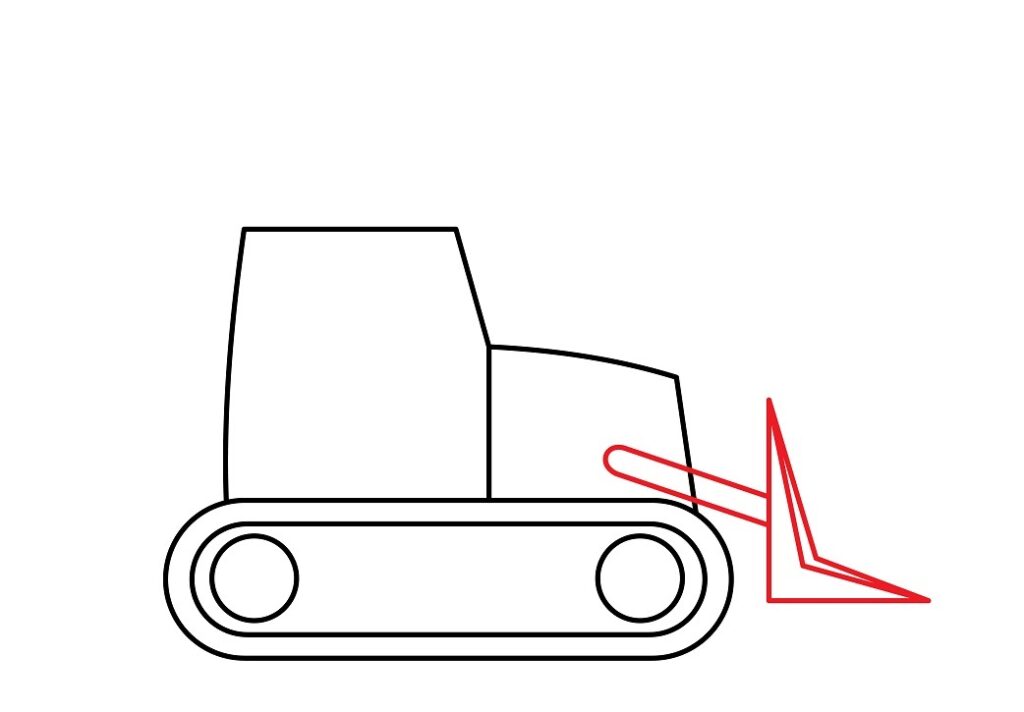
Step 4: Draw the push frame and blade
As aforementioned, the blade is a large metal plate used to lift, carry and deposit heavy materials. The push frame, on the other hand, is the component used to make the blade move in the directions the operator wants it to.
First, start by drawing a long thin oval attached to the center of the engine. This will be the push frame of the dozer. The oval shape should run downward diagonally, and end a short distance away from the edge of the engine.
On the tip of the push frame you drew, draw a big L-shaped line. Next, draw two more L-shaped lines inside the first one. Make sure that their tips are connected to one another. This is the blade of the dozer.
Once finished, erase the line of the engine that overlaps with the push frame and you’re set!
- Draw a long thin oval shape starting from the center of the engine
- Make sure the oval shape runs diagonally and ends a short distance away from the engine
- Draw a big “L” shaped line on the tip of the push frame
- Connect two more “L” shaped lines to the first “L” shape line
- Erase any overlapping lines
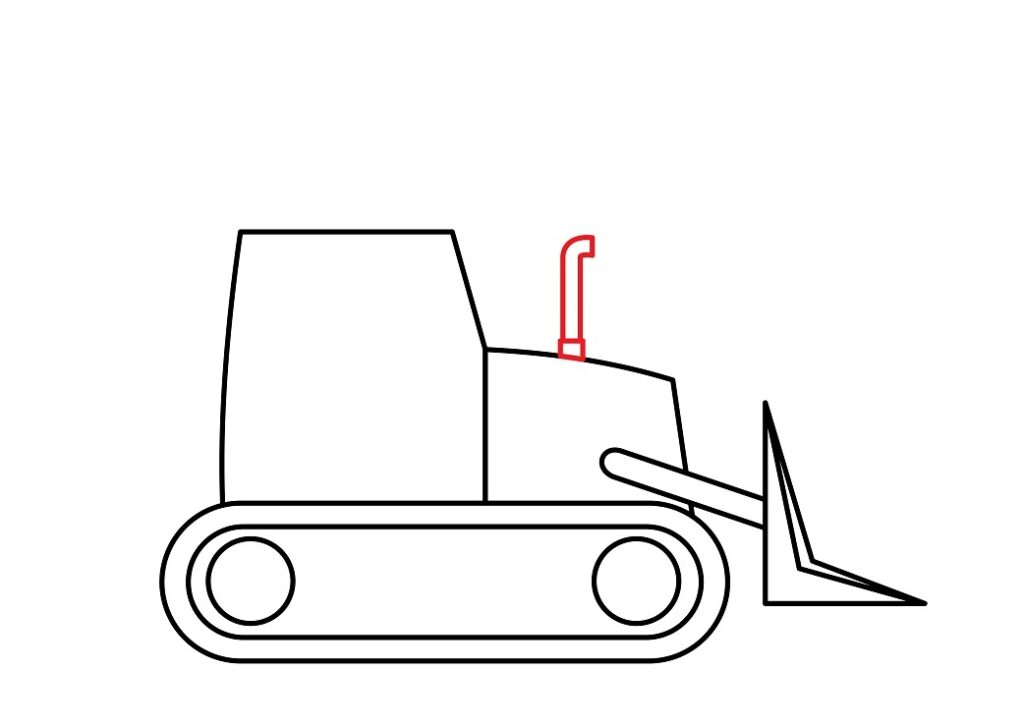
Step 5: Draw the Smoke pumper
The smoke pumper of a bulldozer is the component that helps to expel excess smoke and emissions produced by the engine.
In order to finish this step, start by drawing a small square on top of the engine, roughly around the middle of the top line. Next, draw a long vertical rectangle on top of the square that ends when in alignment with the top of the cab.
Finally, curve the top of the rectangle to the right and then draw a vertical line to cut it off.
- Start by drawing a small square on top of the engine
- Draw a long vertical rectangle on top of the square aligned with the top of the cab
- Curve the top of the rectangle to the right and end it off with a vertical line
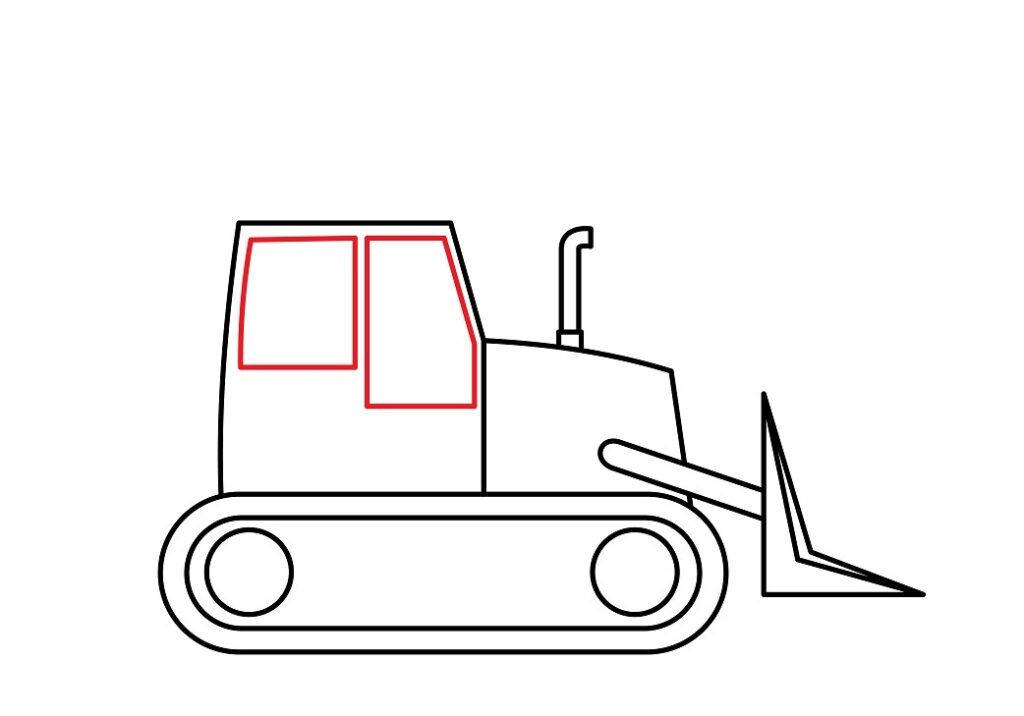
Step 6: Draw the windows
Your bulldozer drawing is now almost finished, though it would be incomplete without some windows for the operators to peer out of!
To start, draw a semi-small square on the left half of your cab. While doing so, bear in mind that the left side of the square needs to be slightly curved.
Next, draw a vertical rectangle on the right half of your cab. Since it’s a rectangle, naturally it will be longer than the square you drew earlier. While drawing the rectangle, bear in mind that the upper right side of the shape should curve in a similar way the cab does.
Once finished, you should have two windows on your bulldozer drawing!
- Start by drawing a square on the left-half side of the cab
- Draw a rectangle on the right half-side of the cab
- Make sure the outer lines of your shapes curve in alignment with the cab
congratulations! your bulldozer drawing is complete
Your bulldozer drawing is now finished! Well…sort of. Before you go any further, take a much needed break and assess the quality of your drawing. Are you pleased with the results?
We’re super stoked that you made it this far into the tutorial and breathed some life onto a blank page. We’d like to commend your hard work by saying job well done! You’ve completed something you set out to do which is an achievement in its own right, however, it’s not over yet. Once you’re ready, consider following the steps below to add some extra quality to your design!

Taking Your Drawing To The Next Level
There are ways to take a black and white sketch and improve the overall condition of it. Adding a background and some color to your bulldozer drawing are merely two of those options.
Remember, art is not linear, nor does it necessarily have to only be black and white. You are always allowed, and even encouraged, to experiment with your drawing abilities and see how far you can go!
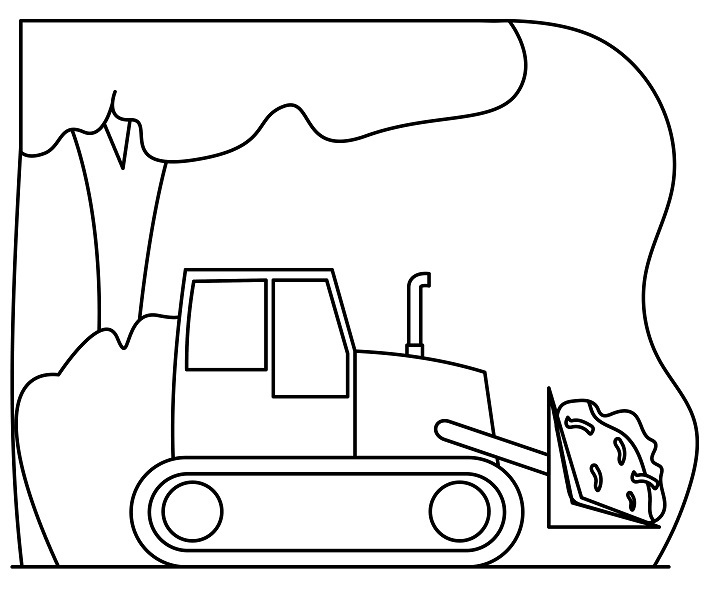
Step 7: Adding a Background
A background helps provide context and depth to artwork. It aids in establishing the setting of the scene, creating atmosphere, and enhancing the overall visual appeal of a drawing. It adds layers of detail that complements or contrasts with the main subject, which in turn may boost interest and balance to the piece. That is the power of a good background!
For your bulldozer drawing, there are quite a few background ideas to play around with, but first, you need to establish the story you’re trying to tell.
Ask yourself a few questions before you begin, like what time of day you’d like to include in your story. Is it dark or sunny outside? Is your bulldozer on a construction site? Is it currently en-route to a construction site, driving through a city center?
Take your time to really sift through all the possibilities. We have a few backgrounds that might inspire you within some of our other tutorials, like how to draw a police car, how to draw a tow-truck or how to draw a monster truck.
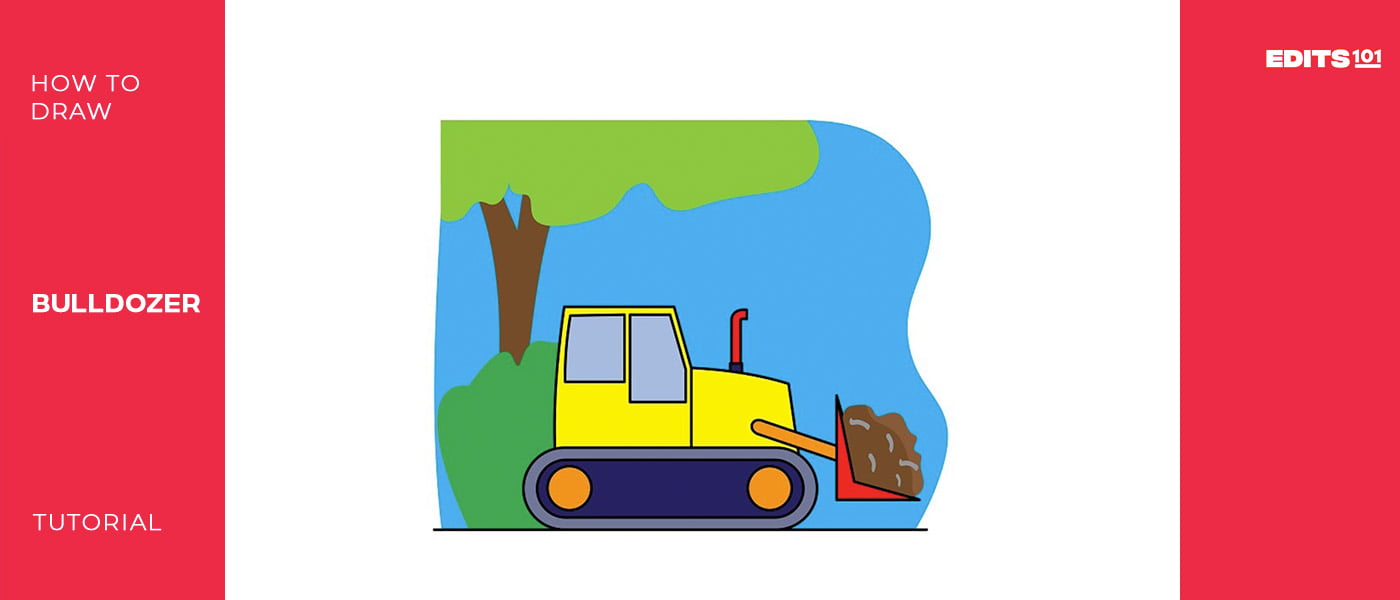
If you like the background we have chosen for our bulldozer drawing – which is mainly comprised of a tree, a shrub and some dirt added to the blade – feel free to copy those details as much as you’re able. Use the image we provide to help guide you through the process.
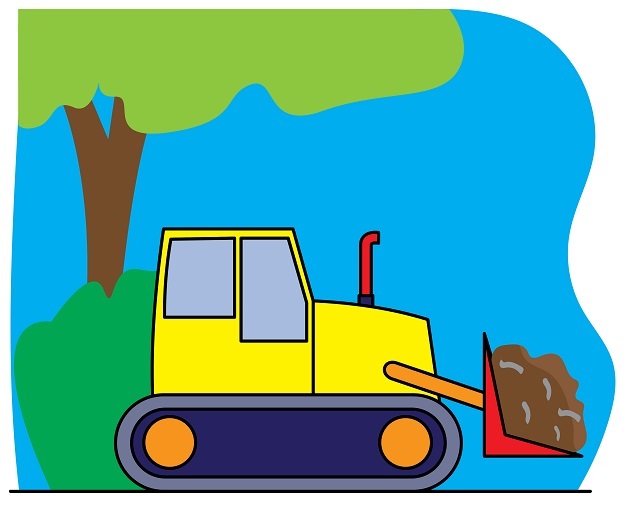
Step 8: adding color
Adding color to a drawing heightens visual appeal and can also help convey emotion, mood, or a specific message more effectively than a monochrome (black and white) image. By adding different colors to different components of a drawing, each part is highlighted and instantly more intriguing.
Make sure the colors you pick for your background relate to the objects therein in order to make it look more realistic.
For the bulldozer, pick different colors for each step you drew. E.g, a bright yellow for the engine and cab, a light gray for the windows, red for both the smoke pumper and blade, varying blues for the tracks, and a nice creamy orange for the push frame and tires. Those are the colors we went with for our bulldozer, and we personally think it compliments the composition quite well.
bonus Tips
Be sure to check out some YouTube videos on vehicle drawing tutorials for some added inspiration and guidance.
Write your name somewhere on the design for a personalized touch.
Experiment with different colors to play around with your creativity.
Add some other distinctive features of a bulldozer, like a operator (driver), group of construction workers around the vehicle, some smoke above the smoke pumper or some rubble and dirt around the bottom.
Check out similar drawing tutorials for inspiration, like how to draw an excavator, tractor, dump truck and crane. There are many to choose from on our site, so be sure to thoroughly browse through the vehicle section for some great inspo!
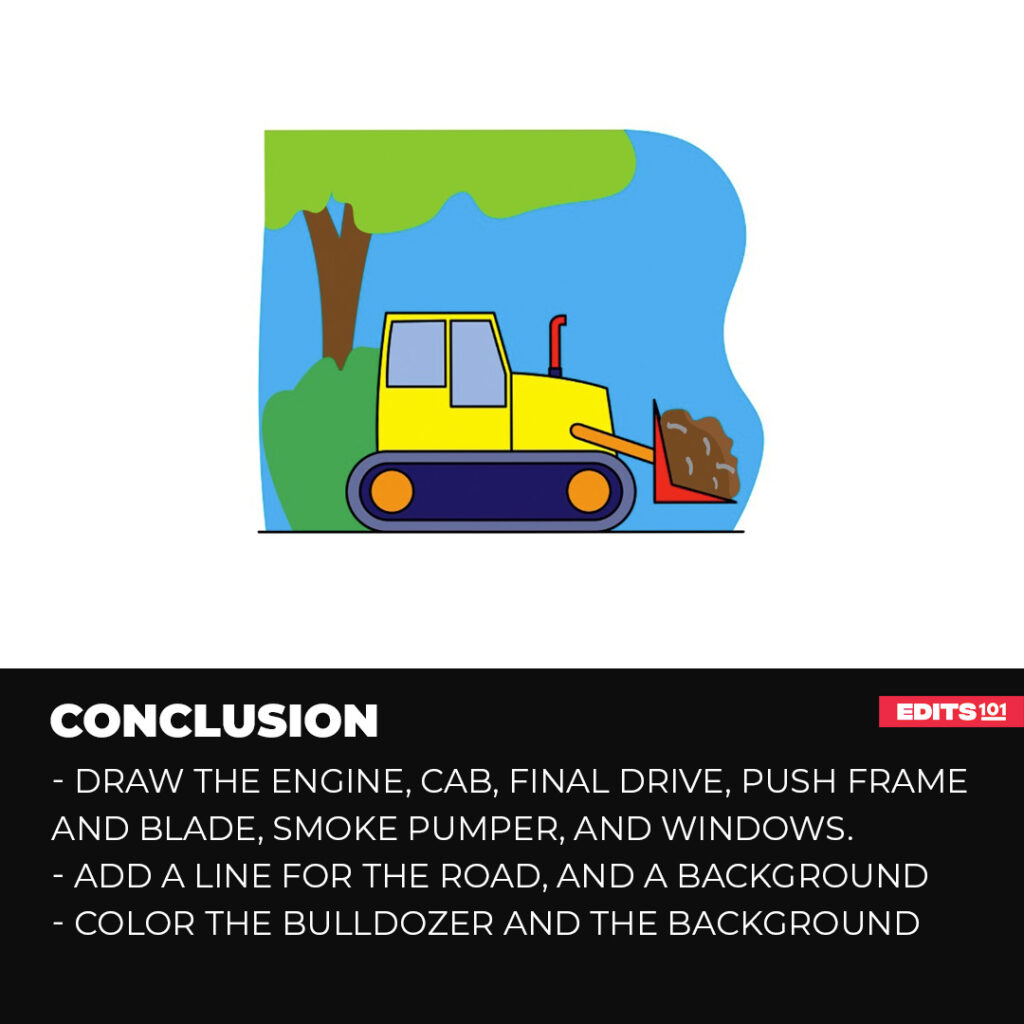
Conclusion
You have learnt quite a lot by completing this tutorial. Not only about drawing and art, but about the functionality of bulldozers as well. For that, you should be proud! Well done!
You now have a cool sketch to add to your collection and also show your friends and family. If you’re new to the journey of artwork and drawing, let this be the first step in an awesome adventure.
There are so many other drawings to get started on that will really challenge you and your creativity, so from Edits101 to you, see you next time in another tutorial.
Thanks for reading & feel free to check out more of our articles!
Author Rating
Overall Rating
Summary
An easy step by step tutorial on how to draw a bulldozer. You will learn how to add a realistic background and add vivid colors.