How To Draw An Arrow | A Step-by-Step Guide
An arrow is a projectile that is shot from a bow in the sport of competitive archery. It usually consists of a long, straight shaft with a pointed tip on one end and feather or plastic vanes on the other to stabilize its flight. The arrow is nocked onto the bowstring and drawn back by the archer before being released towards the target.
In this tutorial, you will learn how to draw your very own arrow from scratch in only 6 easy steps.
| Steps | Complexity Level |
| The Shaft | 1 |
| The Point | 1 |
| The Fletching | 2 |
| The Nock | 2 |
What You Will Need
- Pencils (2b, 3b or 5b)
- Paper or sketchbook
- Eraser
- Ruler
- Color pencils or markers
- 10-15 minutes
How to Draw an Arrow
Drawing an arrow can be an incredibly satisfying experience because it’s not hard to complete at all.
An arrow is basically only comprised of four parts; the shaft, the point, the fletching and the nock.
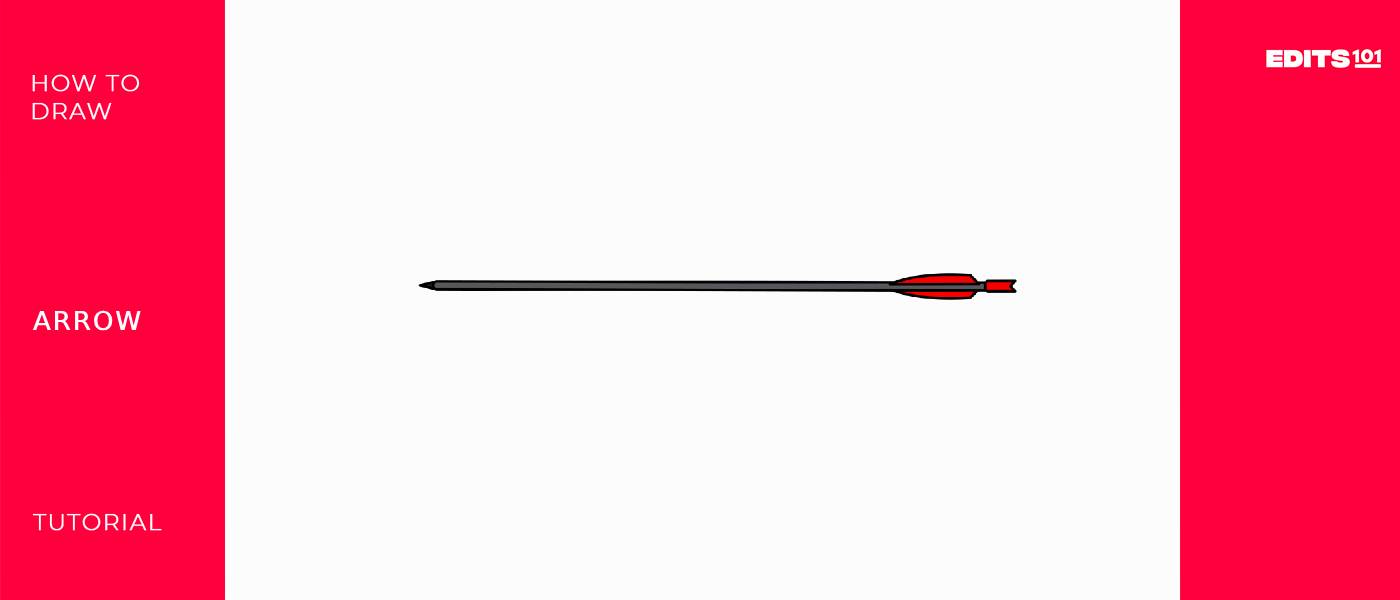
Check out the image below for an outline of all the steps and what the final product will look like. Make sure you have all of your drawing tools handy, plus some time and patience, and without any further delay, get started!
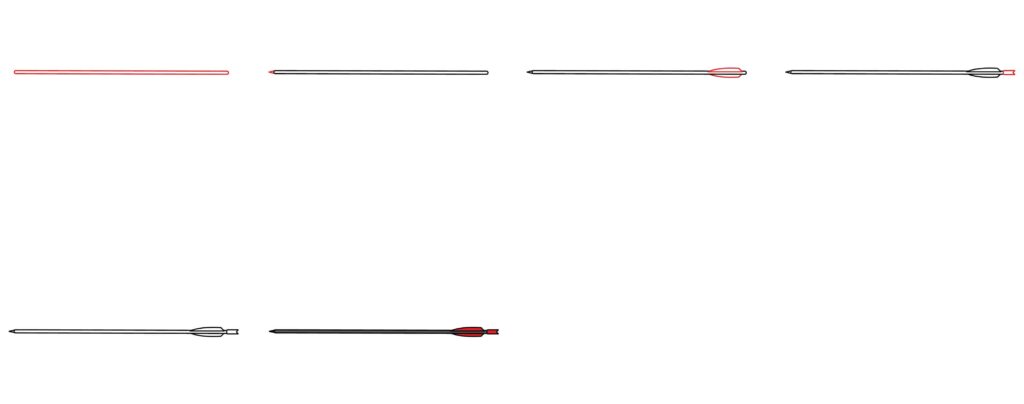
Step 1: Draw the Shaft
The shaft is the long, straight part of an arrow that connects the arrowhead at the front to the fletching at the back. Selecting the right shaft for an arrow is essential for archers to achieve consistent and accurate shots. Factors such as spine stiffness, weight, and length all contribute to how well an arrow flies and penetrates a target.
In order to complete this step, you’re going to need to grab your pencil and ruler. Start by drawing a horizontal line in the middle of your page.
You can decide how long you’d like your line to be, but just remember to not make it too close to the edge of your paper because we’ll need to add more things on the sides later.
Next, draw another horizontal line beneath the first one and make sure it’s identical in terms of your chosen length.
Finally, attach these two lines to each other by drawing rounded edges at the front and back.
- Draw a thin rectangle with curved edges in the center of your page
- The rectangle should be horizontal
- Use a ruler for accuracy

Step 2: Draw the Point
The point of an arrow is the sharp metal tip at the front, designed to penetrate the target. Arrow points come in various shapes and sizes depending on the type of archery being practiced (e.g., target shooting, field archery, etc).
To complete this step, start by drawing a small triangle laying on its side on the left part of your shaft. Think of the nose of a paper plane and try to draw something similar. It needs to be nice and pointy at the tip, like the name “the point” suggests!
- Draw a sideways triangle on the left side of the shaft
- Make sure the tip of the traingle is sharp
- Use a ruler if necessary

Step 3: Draw the Fletching
Your drawing of an arrow is now coming together beautifully. After completing this step, you will be able to visualize your arrow even more! Before we start though, here are some interesting facts about the fletching part of an arrow;
The fletching refers to the feathers or plastic vanes attached to the back part of the arrow shaft. The primary function of fletching is to stabilize the arrow during flight by creating drag and ensuring proper orientation.
An archer can customize their arrows with different sizes, shapes, and materials for fletchings based on their shooting style and preferences.
Properly tuned fletchings are essential for achieving tight grouping and accurate target placement in competitive settings!
To complete this step, start by drawing a wide semi-oval shape on top of the back end of your shaft.
Then, starting from the bottom line of your shaft, draw another wide semi-oval shape against the back end of your shaft. For some guidelines on the dimensions you need to aim for, check out the image below.
- Start at the top of the back end of your shaft
- Draw a wide semi-oval shape on the top and bottom part of the shaft
- Follow the image provided for guidance, if necessary

Step 4: Draw the Nock
The nock of an arrow refers to the notch at the rear end of the arrow shaft where it attaches to the bowstring. The purpose of the nock is to hold the arrow securely in place on the string until it is released by the archer.
To draw this step, start by going to the right end of your shaft. Draw a small rectangular shape against the edge of the shaft.
It should start off as a rectangle, however the right side of your newly added shape should look like an inverted triangle once you’re done.
- Draw a horizontal rectangle shape against the right end of the shaft
- Make sure the side of the rectangle becomes an inverted triangle

Congratulations! Your Arrow Drawing Is Complete
Once you’re ready, inspect your drawing to make sure you’re happy with the final product. If there are any steps you want to correct, take your time and do so now. Use your eraser and perfect the little inconsistencies, if any.

Taking your Drawing to the Next Level
While you’ve accomplished an amazing thing by completing your new drawing, there are still ways to improve and make it even more better.
As Albert Einstein once said, “Creativity is seeing what others see and thinking what no one else ever thought.”
Push yourself even further by taking your drawing to the next level and adding in your own personalized touches. That’s the spirit of true creativity.
step 5: adding a background
Adding little background details instantly transforms an idea because it inspires the viewer to imagine a story, and not just an object!
There are many background ideas to choose from when it comes to an arrow drawing.
First think about what story you’re trying to tell, and then the background pieces will all fall into place.
Check out some of our other archery inspired tutorials for some inspiration, like how to draw a target face, an archery bow, a quiver, or some archery gloves.
Alternatively, we have some great background sketches on our site as well – check out this one for an outside sunny feel.
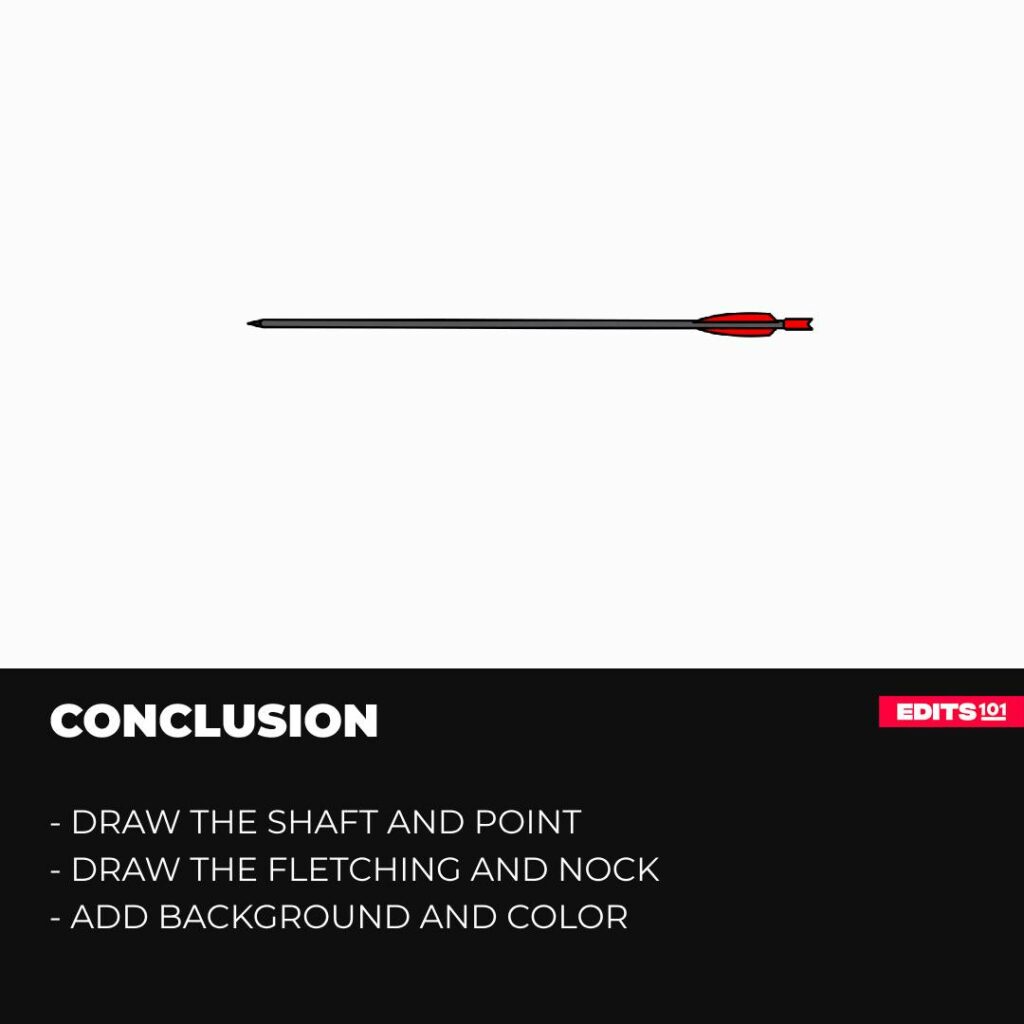
step 6: adding color
Adding color to a drawing is no different than adding a background in terms of its benefits. Right now, you have a black and white sketch on a piece of paper.
While some artists like the aesthetic appeal of black and white drawings, color just gives drawings an extra sparkle! It instantly brightens up the page, and quickly stimulates the viewer’s imagination.
For your arrow drawing, choose your favorite colors and color neatly within your lines. Be sure to pick different colors for the shaft, point, the fletching and the nock.
We’ve opted for a semi-realistic look, and if you perhaps like the way our drawing looks, you can go ahead and use the same colors!
We chose a dark gray for the shaft, a black for the point, a vibrant red for the fletching and the nock.

Bonus Tips
Experiment with different arrowhead shapes, feather styles, and proportions to create unique designs.
Add shadows for a nice 3D effect and use contrasting colors to make your arrow pop.
Don’t forget to sign your artwork to showcase your artistic personality.
Check out our tutorial on how to draw Olympic Rings, seeing as archery is one of the sports included in the famous games coming up in 2024.
Conclusion
Your arrow drawing is now done and “fully” dusted! If you’ve followed all the steps and made it this far, you did some great work. Job well done!
You have read and hopefully learnt so much from today’s tutorial; like how to draw an arrow, some fun facts about archery and different types of arrows used in competitive archery. For that, be proud of yourself, and remember, you can only improve from here!
Thanks for reading & feel free to check out more of our articles!
Author Rating
Overall Rating
Summary
This tutorial will guide you through sketching a fundamental arrow design and then enhancing it to achieve a more authentic and intricate look.