How to Draw an Ice Hockey Player | A Fun and Easy Step-by-Step Guide
Ice hockey is a game played between two teams who wear skates and compete on an ice rink. In our tutorial, we will be learning how to draw an ice hockey player in action. You will also learn how to advance your drawing so that it is more realistic.
At first, drawing an ice hockey player may seem hard. This is because of the many components you have to include starting with the ice hockey helmet and then adding the jersey, skates, and puck. We will do so step by step so that you can follow along without getting confused.
| Steps | Complexity Level |
| Drawing the Head and Helmet | 3 |
| Drawing the Jersey | 2 |
| Drawing the Hands and Gloves | 3 |
| Drawing the Hockey Stick and Puck | 2 |
| Drawing the Pants and Leggings | 2 |
| Drawing the Skates | 2 |
| Coloring | 1 |
What You Will Need
- A drawing piece of paper
- A pencil
- An Eraser
- A ruler
- Some coloring pencils or markers
- 20 Minutes
How to Draw an Ice Hockey Player Step-by-Step
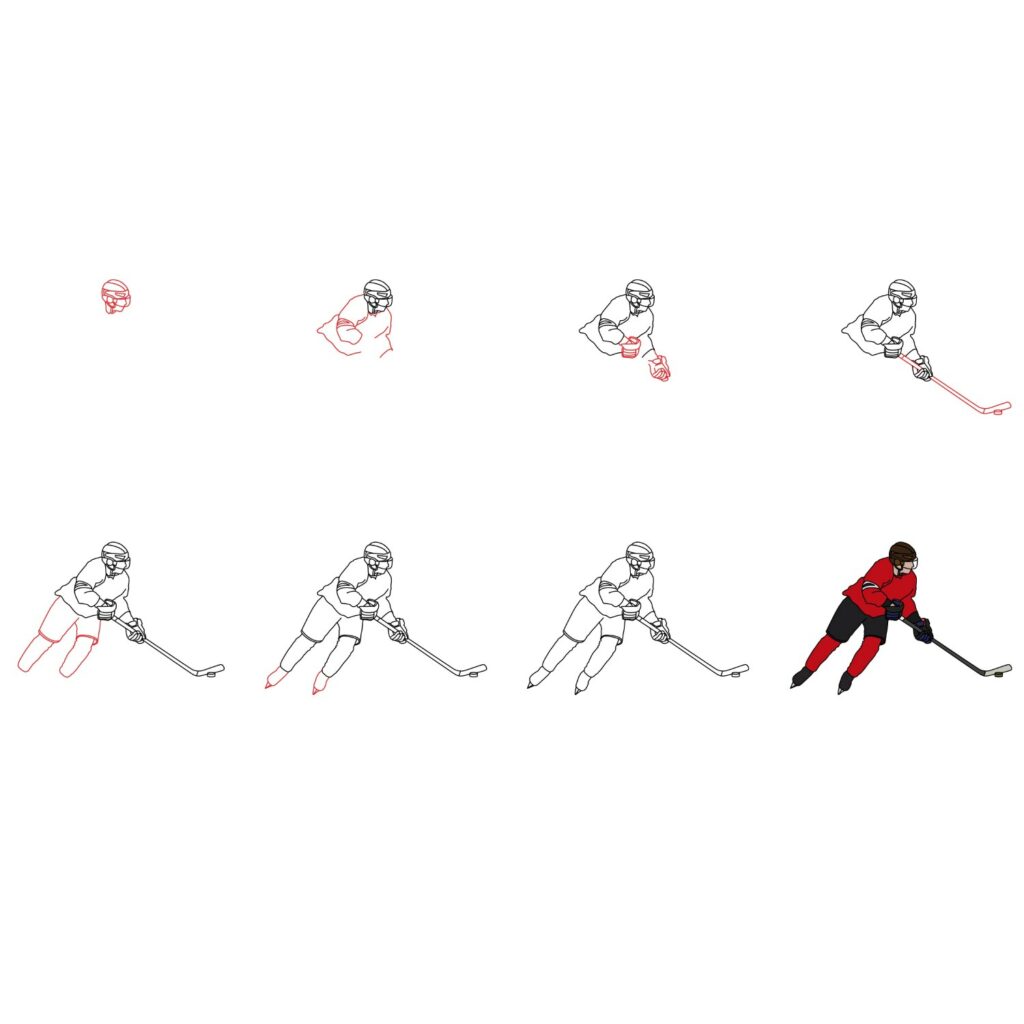
It is always good to start with an overview of what will be involved when drawing an ice hockey player. That is why we have included the below image which has all the steps we will be taking. Studying the image will help you anticipate each step.
Step 1: Draw the Head and Helmet
If you completed our tutorial on how to draw a soccer player or any other lesson involving a player or coach, you know that we always start with the head. This is important because it makes it easy to make use of our drawing space.
Since ice hockey players wear an ice hockey helmet, this is the first thing we are going to draw. Start by drawing an oval shape at the top of your paper. The oval shape needs to be in the middle of the paper so that you have room for other components. Use curved lines to add details that turn your drawing into something that looks like what we have below.
As you can see, we added the top part of the helmet, a visor, an ear guard, and straps and used some lines to draw the face of the player.
- Draw an oval shape at the top of your drawing paper
- Use lines to turn the oval into a helmet and to add a face

Step 2: Draw the Jersey
The next thing we are going to add is the ice hockey jersey. Every ice hockey player is required to wear a jersey while on the rink. The jersey helps identify the players even when they are far away. For this, we will use rough lines to outline the jersey. Keep in mind that we are drawing an ice hockey player in action so the jersey will not have smooth lines.
Using your pencil, try and recreate what we have in our illustration below. Start by using curved lines to add the right sleeve. You should then add the front part of the jersey and then the backside. We did not connect our lines because we will be adding more details in the spaces we left. You can do the same for your drawing or connect the lines and then erase them later.
- Use curved lines to add the sleeve
- Add the back and front parts of the jersey

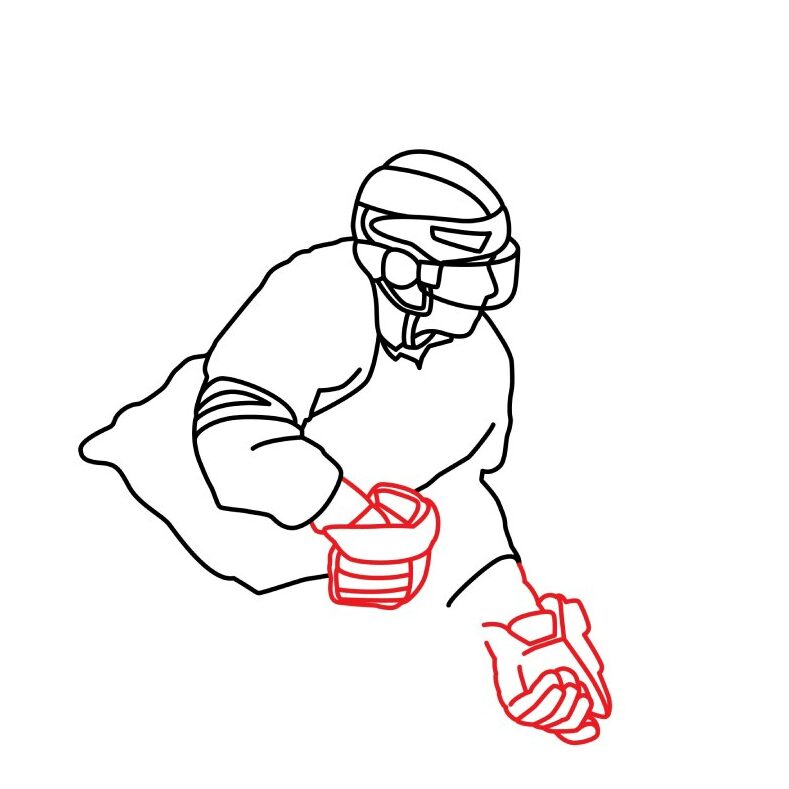
Step 3: Draw the Hand and Gloves
We are now going to add the ice hockey gloves. The players wear gloves not just to protect their hands but also to improve their grip when holding the ice hockey stick.
To add the gloves, use a combination of straight and curved lines to add the left and right gloves. Try and replicate what we have in the below illustration. Keep in mind that the hands are facing different directions because we will be adding the ice hockey stick next.
- Use curved and straight lines to add the left and right gloves
- The glove on the right should be facing up
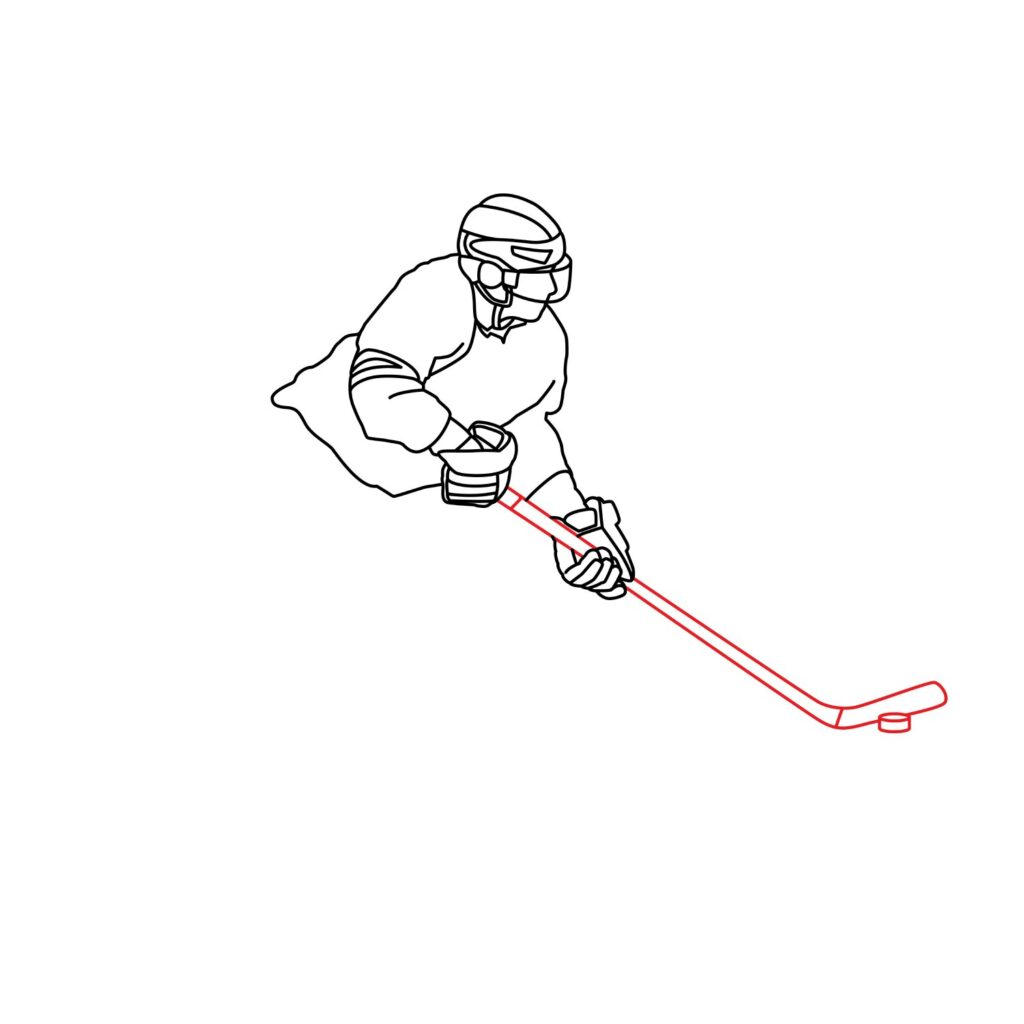
Step 4: Draw the Hockey Stick and Puck
To add the hockey stick, we will need to use a ruler to create straight lines. Draw two diagonal lines that run diagonally starting from the right hand, passing through the left hand, and then extending slightly towards the left margin.
At the end of the diagonal lines, add the blade using a rectangular shape that widens towards the end. For realism, make the corners of the rectangle a bit rounded.
We are then going to add the ice hockey puck below the stick. For this, we are simply going to add a cylindrical shape below the blade of the ice hockey stick. Your drawing should look like what we have below.
- Use two diagonal lines and a rectangle to draw the hockey stick
- Add a cylindrical shape below the blade to represent the puck
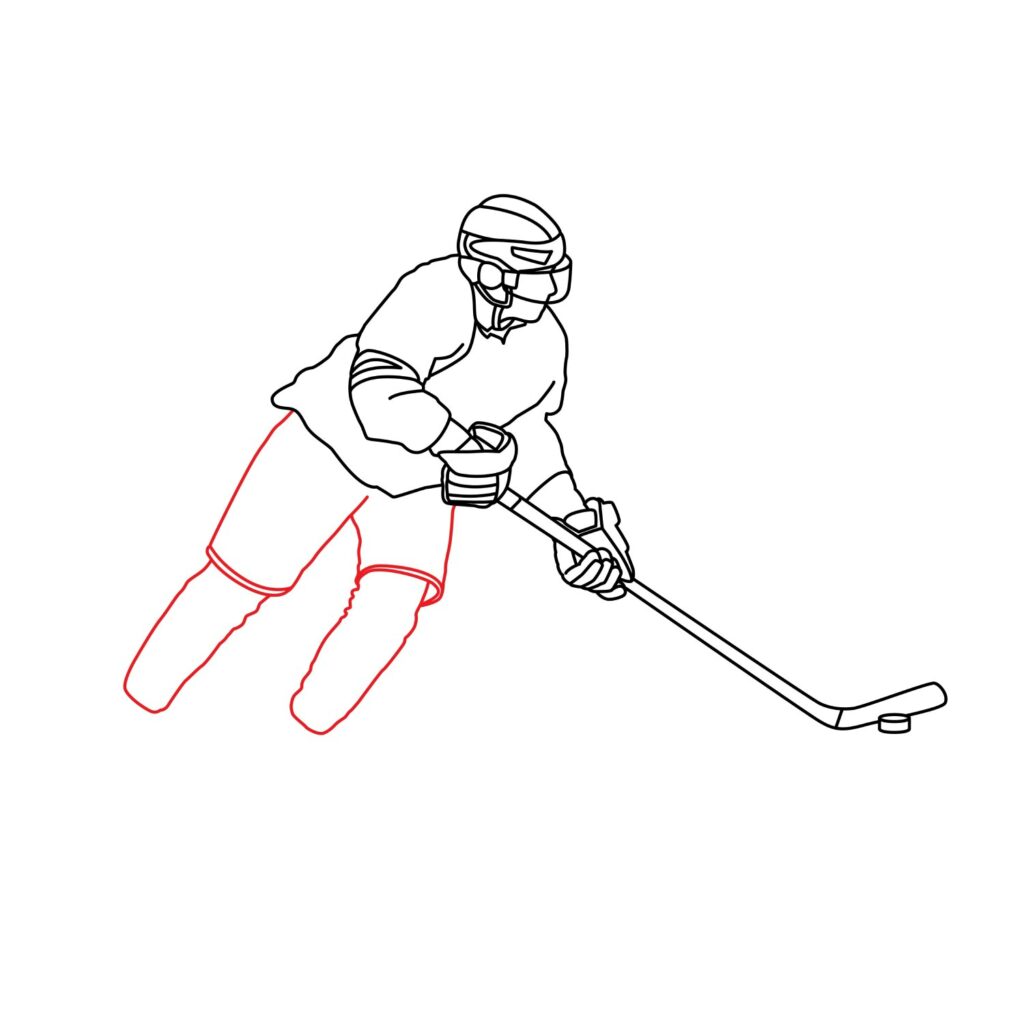
Step 5: Draw the Pants and Leggings
For the pants and leggings, start by drawing a slightly curved line that starts at the bottom left side of the jersey and slants towards the left. Use another shorter line to draw the right side of the pants. Add a V-shape between the two diagonal lines and connect the lines using two curved lines as shown below.
For the leggings, use slanted, slightly curved lines, to add the left and right leg. Make sure you add some crease on the legs to indicate that the player is wearing leggings. The leggings are worn for safety and mobility.
- Use curved lines and a V-shape to add the pants
- Draw the leggings using slightly curved lines
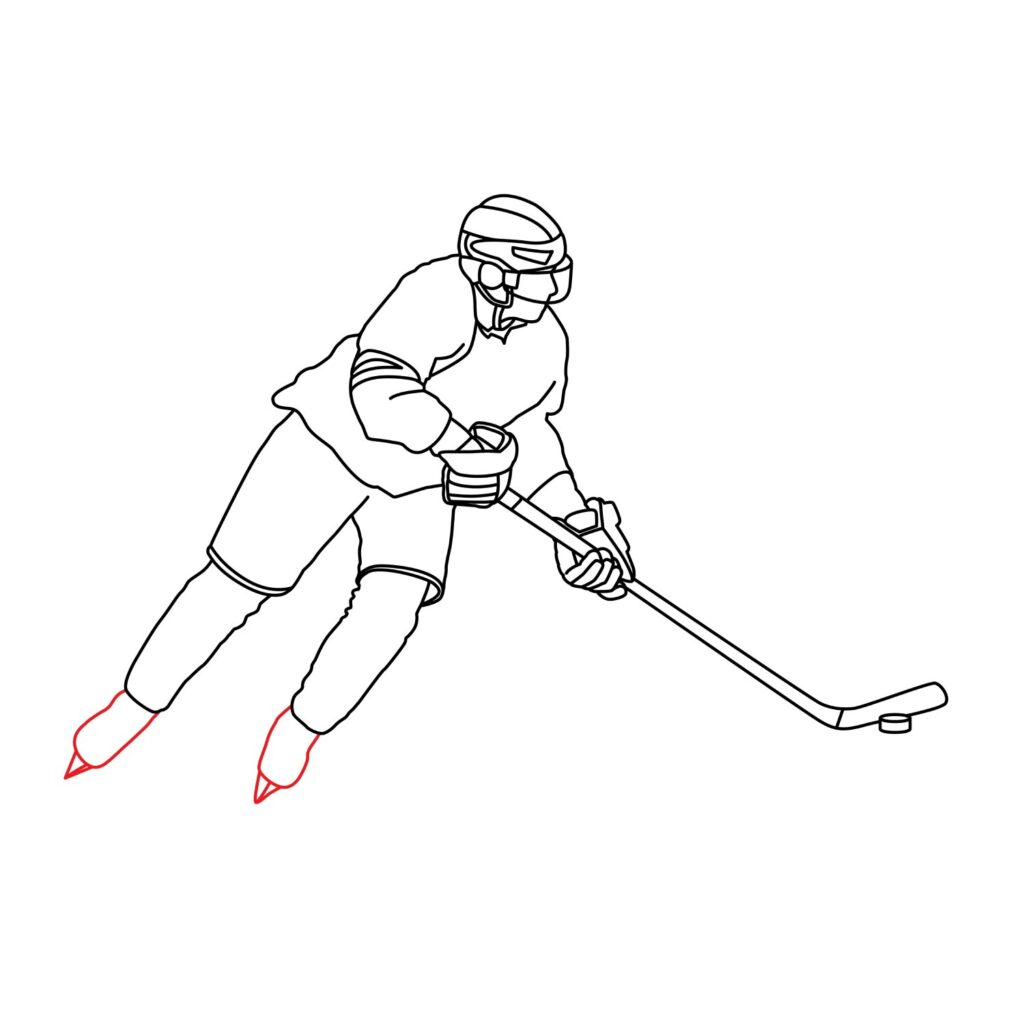
Step 6: Draw the Skates
The final thing we are going to add is the ice hockey skates. Since they play on an ice-covered surface, ice hockey players wear skates to enable them to move smoothly on the rink.
To add the skates, start by drawing diagonal shapes below the legs of the player to represent the boots. Next, add V-shapes beneath the boots to represent the blades of the skates. You can add a straight line in the middle of the V-shape to give the blades a three-dimensional appearance.
- Draw diagonal shapes below the leggings to form the boots
- Add V-shapes below the boots to form the blades
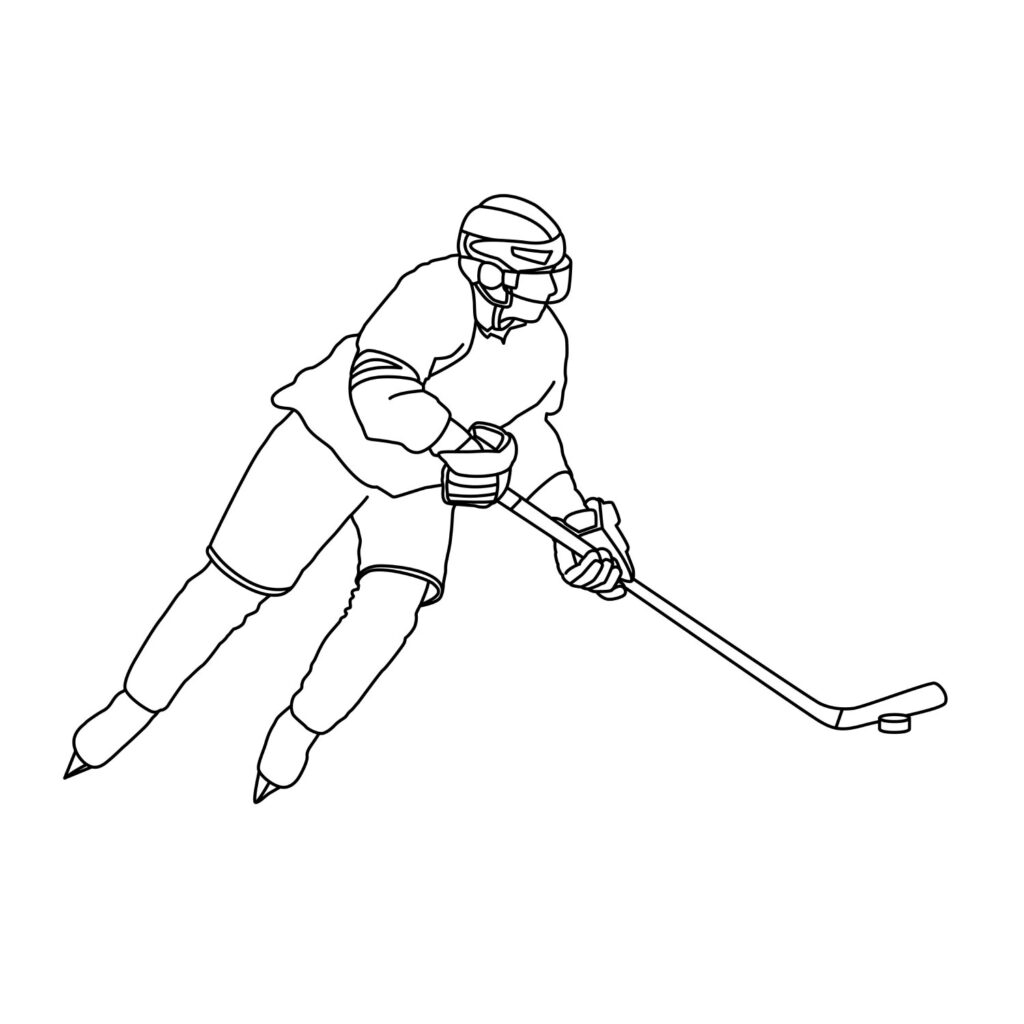
Congratulations! Your Drawing Is Done.
With just six easy steps, the outline of the ice hockey player is ready. That was not as difficult as you thought, was it? Take a few seconds to admire your work.
Taking the Drawing to the Next Level
Although it is okay to leave the drawing as it is, you should add more details to make it more realistic.
There are many things you can do to elevate your drawing. For example, if you have time, you can add silhouettes of one or two other ice hockey players in the background. You may also consider adding a goal cage in the background or some rough shapes to represent a cheering crowd.
The rule is to make sure your background doesn’t conceal the ice hockey player because he is the main focus. In our drawing, we will not add background information. We will, however, do one important thing that will bring our drawing to life: color.
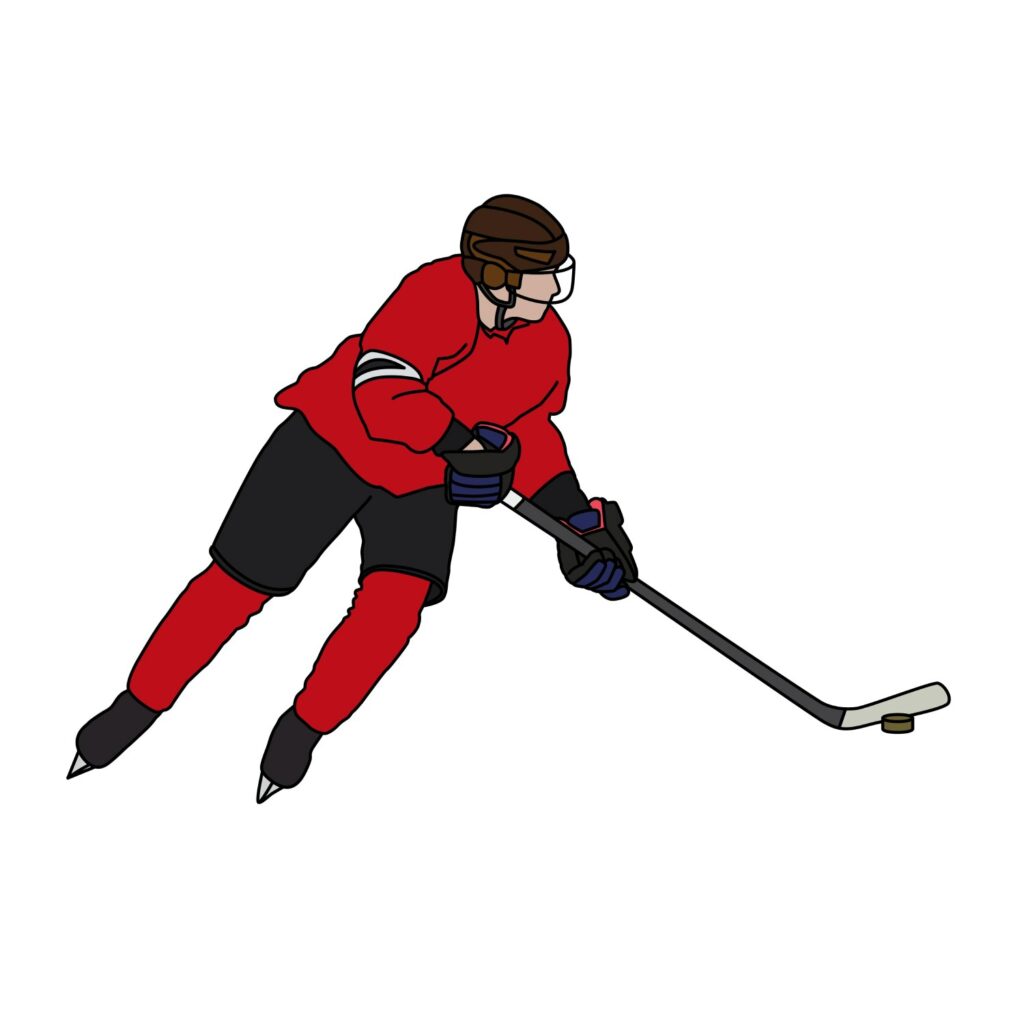
Color Your Drawing
Color is very important when drawing anything. It is what makes everything take shape and pop. Here are some pro tips you should keep in mind.
- Never start coloring until you have added all the details you want in your drawing. This is because you don’t want colors in the wrong areas.
- It is important to decide on the colors you want to use before you get started.
- Make sure the colors don’t spill outside the boundaries of the areas you are coloring.
- Use different colors or shades for different areas so as not to conceal crucial details in your drawing.
The drawing is your creation. You can use any color that you want. Here is how we colored our drawing.
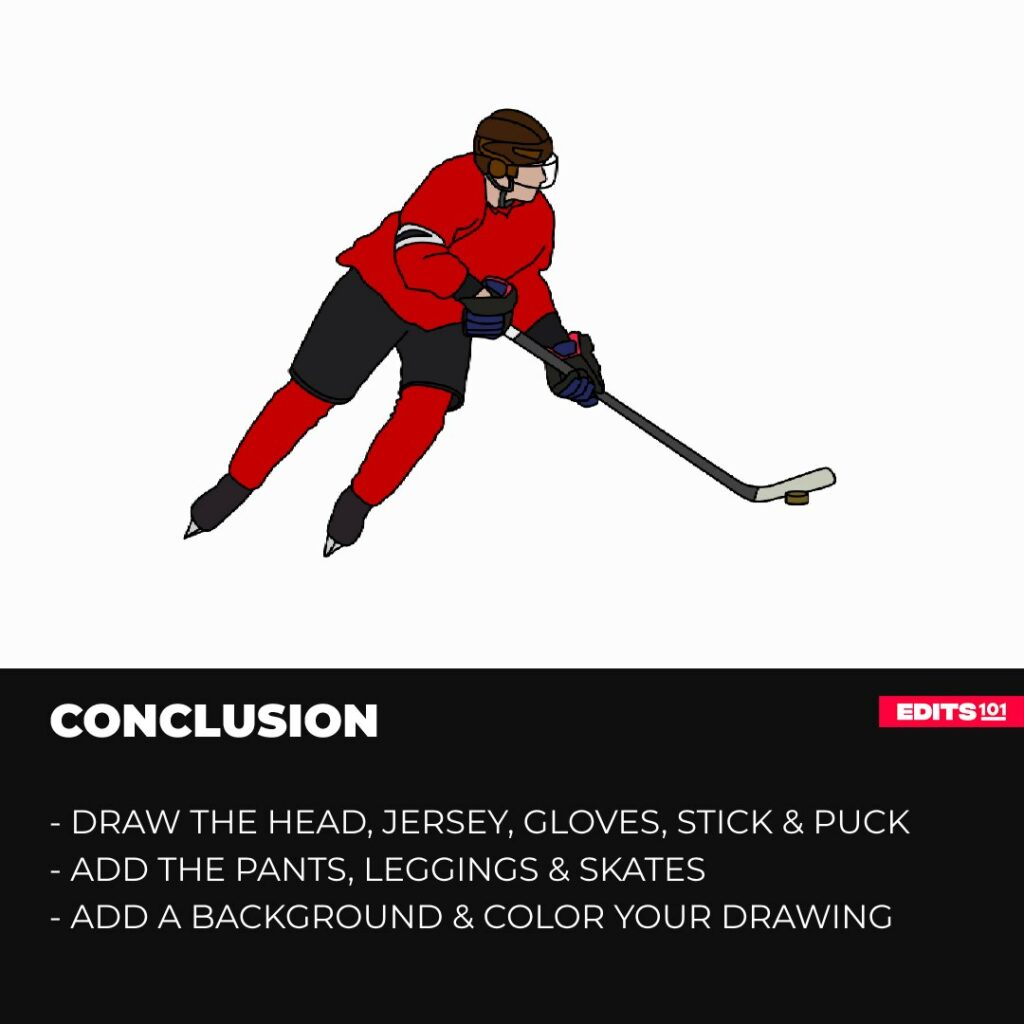
Conclusion
Congratulations on successfully creating an impressive ice hockey player illustration. You can use these steps to draw an ice hockey player from a real image or to draw one on your sketching app.
Drawing an ice hockey player is not difficult. You simply need to know where to start and how to add the various components. In our tutorial, we started by drawing the ice hockey helmet and face. We then drew the jersey, added the gloves, the ice hockey stick, and then the puck. We later gave our player some pants and leggings and then added the skates. To advance our drawing, we colored it.
Always remember that the key to great art is practice and a willingness to explore. Keep drawing because that is the only way you can hone your skills.
Thanks for reading & feel free to check out more of our articles!
Author Rating
Overall Rating
Summary
This easy guide will teach you how to draw an ice hockey player. You will also learn how to elevate your drawing so that it looks realistic.