How To Draw Flippers | A Quick and Simple Drawing Guide
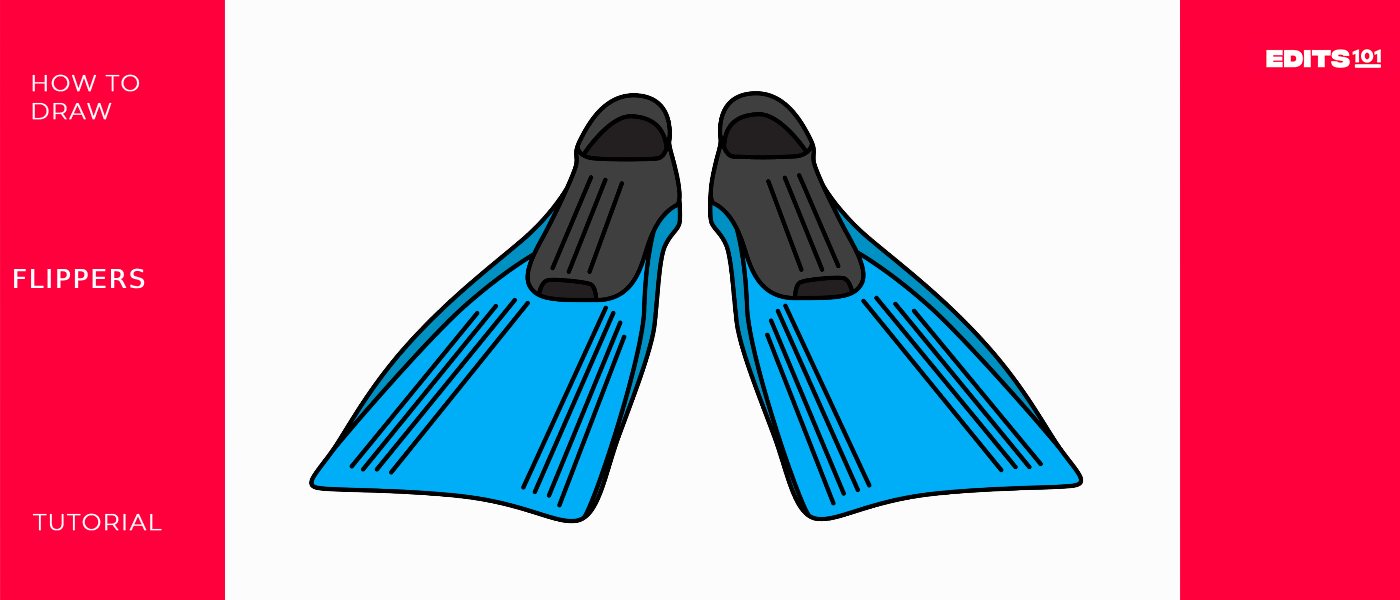
“Flippers” can refer to a type of footwear used in water activities like snorkeling or diving. These are typically rubber or plastic fins worn on the feet to help swimmers move through the water more efficiently. Whether you’re outfitting scuba divers or speedy sea turtles, drawing delightful flippers is a splash. With just a few easy steps, simple shapes transform into flexible foot fins ready to propel all maritime adventures. Our lighthearted flipper tutorial breaks the process into friendly stages accessible for beginners. Before you know it, you’ll have pages fluttering with rocket-fast flippers of all styles. Customize boot shapes, play with patterned texture details, and even invent fantastic sci-fi jet variants!
| Steps | Complexity level |
| Draw the flipper shoe | 3 |
| Draw the wings | 3 |
| Add details | 3 |
| Add background and color | 4 |
What You Will Need
The beauty of drawing flippers is that they need minimal supplies. Our guide only requires:
- Paper – Printer paper or construction paperwork. Dark shades make details pop!
- Drawing tool – Pen, marker, pencil, etc. Start light and darken the final lines.
- Ruler (optional) – Helpful for straight edges but not essential.
- Photo references (optional) – Search online if you need pose inspiration
How to draw flippers
Grab your favorite oceanic pets or divers and prepare to put some powerful propulsion at their feet! Through scale drawings and savvy shaping techniques, lifelike flippers will set your aquatic illustrations into motion. Add water and watch our imaginations swim as we draw marvelous maritime flippers! Then let helpful how-to guide you worry-free into sketching and shading spectacular flippers! Fanciful fish, turtles, and divers await some propulsive new footwear.
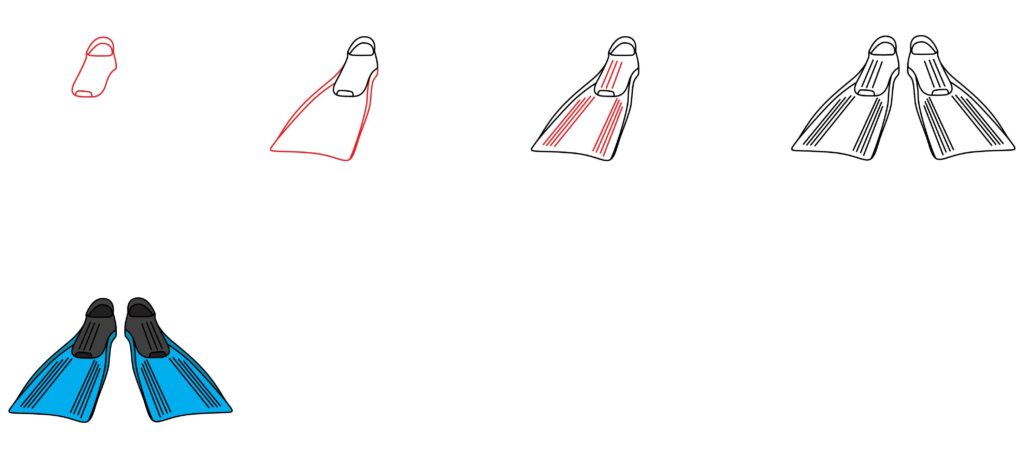
Step 1: Draw the Flipper Shoe
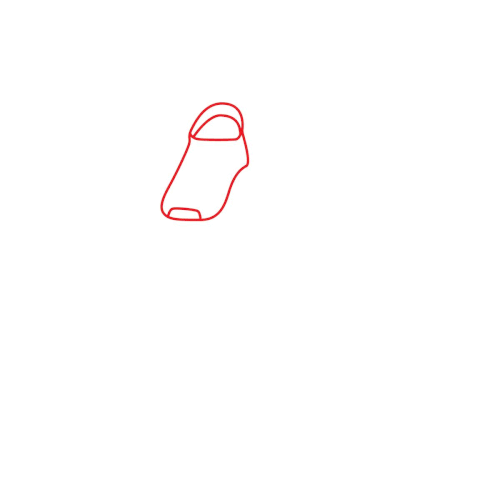
Start by visualizing your flipper at rest, standing upright on dry land with the rounded toe pointing down and the wings angling up behind. Bring this mental image alive by lightly sketching a rounded half-circle shape to form the toe end of the flipper shoe like any other shoe we drew. Use a smoothly curving line that gradually tapers smaller as it reaches the highest point of the arc.
Next, draw slightly inward curving lines descending both sides from the arc to create the edges of the foot opening. Picture how these lines contour at the correct scale to fit snugly around a human foot or animal paw. The inward tapers should visually cradle the heel while providing enough room for comfort and security.
Finally, close off the bottom of the flipper shoe with a straight horizontal line representing the flat sole. Place this line near the bottom of your page, leaving plenty of room to draw later the propulsive wings that give flippers their power. Take a moment to ensure your flipper shoe looks sturdy yet streamlined, ready for rapid movement through water.
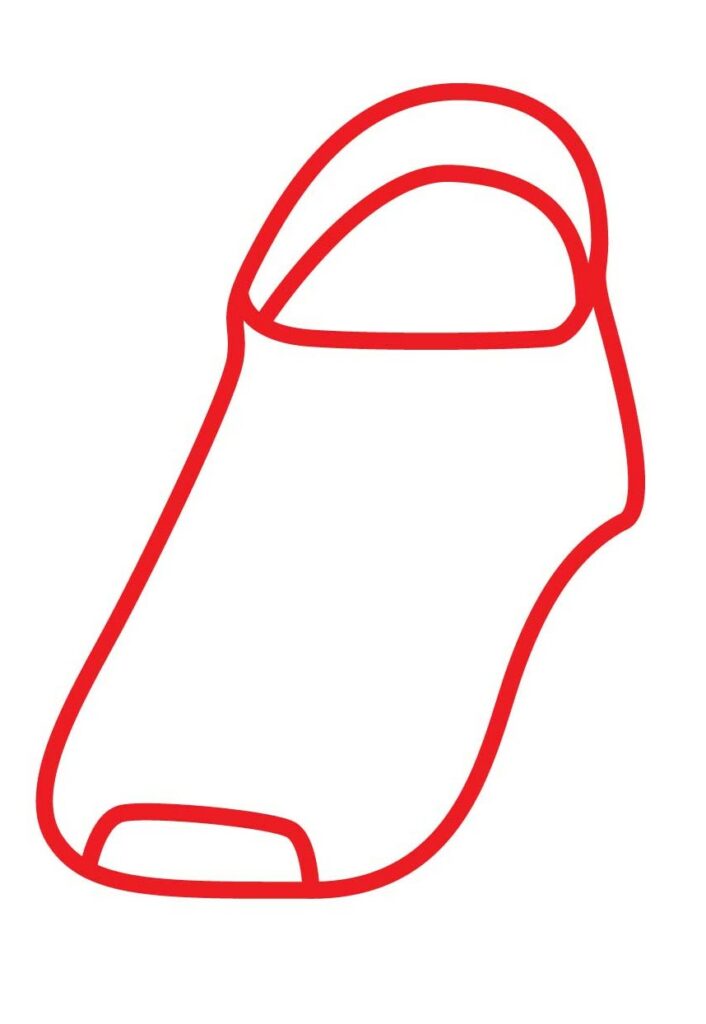
- Start by drawing the flipper shoe at the top of your paper.
- Use curved lines to create the shape.
- The flipper will lay flat as if it is resting on the ground
Step 2: Draw the Wings
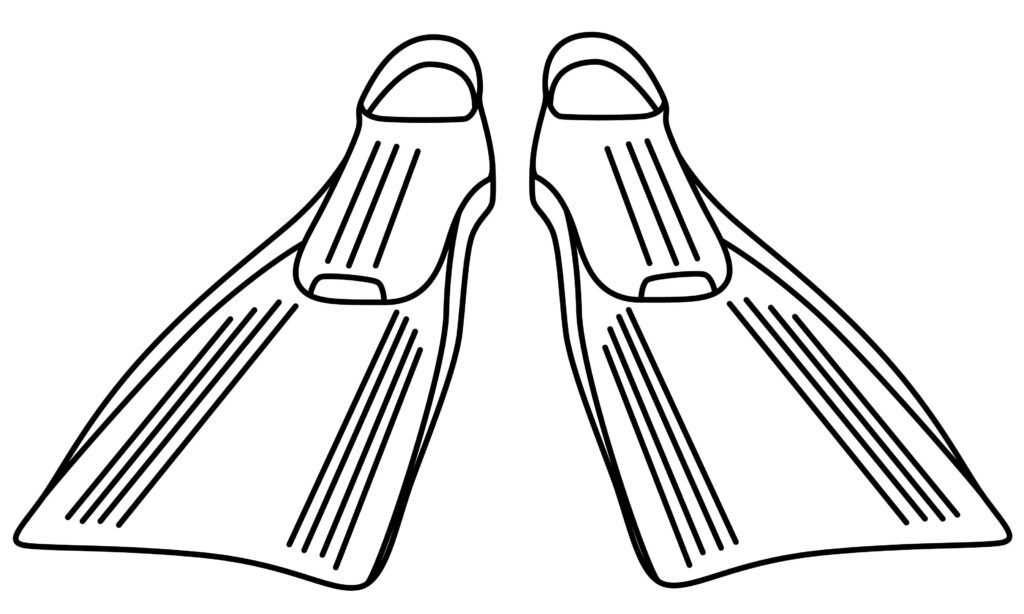
The signature wings give flippers powerful kicking capability, providing the broad surface area needed to propel divers and sea creatures forward as their feet flick back and forth. Begin forming your flipper’s wings by lightly drawing a short, straight line atop the rounded point of the shoe you sketched previously. Center this line horizontally across the curving flipper toe.
Next, sketch longer curved lines on both the right and left sides that angle gently outward from the central axis, then curve back inward to taper to a point. These twin sweeping lines on either side form the iconic flipper wing shape. Make them as broad as your page space allows, keeping the curves smooth and symmetrical on both sides for maximum push. The larger the wings, the more potential thrust your flipper will generate!

Make the wings appear integrated into the top of the shoe in a streamlined, hydrodynamic way. Erase and refine any uneven lines until your flipper looks cohesive yet powerful. The wings should unfurl like sleek aquatic sails ready to propel diving adventures!
- Attached to the shoe, draw the wings of the flipper using horizontal and vertical curved lines.
- These lines will give the flipper its characteristic shape, resembling a “Y.”
Step 3: Add Details
Consider embellishing your flipper with styled texture details to enhance realism and visual flair that we did in roller skates. Flippers come in various materials, from plain neutral rubber to flashy metallics. Use embellishments to capture distinctive looks and decorations.
A classic approach uses short, varied vertical lines scattered across the shoe and wings to mimic the ribbed texture of rubber diving flippers. Make some lines barely visible dashes while others stretch nearly the height of the wings to catch light dramatically. Feel free to incorporate small circles, dots, or abstract wave/scale shapes for extra sparkle!

For a more sleek, high-tech vibe, try coloring larger sections of the wings in glossy metallic hues. Layer on dynamic angled stripes or glowing neon piping that resembles futuristic propulsion jets or reactors. Let embellishments reflect innovative aquatic technology!
However, you choose to detail your fundamental flipper aim for enhancing streamlined cohesion and speedy personality. Let embellishments pay tribute to hydrodynamics to support your creation’s primary purpose – granting effortless yet powerful underwater propulsion!
- To make your flipper drawing more realistic, add some details.
- Draw vertical straight lines on the shoe and wings to give texture and depth to your flipper.
- These lines will mimic the design elements on a real flipper.
Step 4: Congratulations! Your Flipper Drawing Is Complete
You’ve successfully drawn a flipper! Step back and admire your creation. Following the abovementioned steps, you can also draw the other flipper to complete a pair. Feel free to show it off to your friends and family. But if you want to take your drawing to the next level, keep reading.
Taking your flipper drawing to the next level
Like any other skill, sketching requires practice. Set aside time each day to sketch, even if it’s only for a little while. Be mindful of your surroundings. This enhances comprehension of details, dimensions, and forms. You can start with the basics and work up to more complex topics. Experiment with different drawing tools like charcoal, colored pencils, watercolors, markers, and pencils. Every medium has unique characteristics that could help you identify your preferences.
You can also play with basic hatching, blending, shading, and cross-hatching techniques. Understanding these techniques will greatly enhance the complexity and realism of your drawings. When you’re drawing, use your imagination and try out new concepts.
Adding Background to Your Flipper Drawing
Whether depicting flippers on dry land or in aquatic action, creative backgrounds bring settings to life and spark the imagination. Sketch sun-drenched shores with flippers digging into wet sandy ridges left by receding tides. Place divers flippered up to enter gently lapping cobalt lagoons or ominous shipwreck skeletons. Show sea turtles sporting stylish flippers while migrating past intricate reefscapes. Invent something futuristic like extraterrestrial terrains or sleek aquatic architecture backdrops!
Coloring Your Flipper Drawing
Strategic coloring choices enhance mood and realism for your fundamental flipper. For comic vibrancy, paint shoes fire-engine red or neon yellow against jet-black wings traced in bright white outlines for an eye-catching pop. Try glossy silver or flaming holographic on sci-fi variants like we did in volleyball boots. For realism, utilize mottled olive greens, navy blues, and deep grays found on actual diving flippers, taking care to preserve texture details. Age-fade some flippers to suggest weathering and use. However, your color, define dimensions, and make those textured accents shine!

Bonus Tips for Flippers
Take your flipper illustrations further by showing strained flipper straps to convey action mid-kick, incorporating trailing streams of bubbles, accessorizing with equipment like dive knives or cameras, matching flippers to unique aquatic pets like seahorses or sharks for fun friends and story ideas, and even animating sequences of extreme flips, spins, and tricks! The possibilities are endless, so let your imagination dive deeper!
Conclusion
With fundamental techniques now learned through gradual steps – from shoe sketch to wing shaping – you can deck fantastic beasts and explorers with speedy flippers to empower adventures. Soon, friends and family will eagerly follow new currents of creativity as lively aquatic realms flourish through your vision. Believe in imagination’s power to transform simple lines into wondrous new worlds!

Thanks for reading & feel free to check out more of our articles!
Author Rating
Overall Rating
Summary
This guide explains how to draw a flippers that are used by divers in the sea.