How to Draw a Tennis Shoe | A Fun Tutorial
Hey folks! Today, we will draw tennis shoes worn by tennis players during matches.
Tennis shoes, also known as sneakers or athletic shoes, have a rich history and exciting characteristics. One fun fact is that the term “sneakers” originated from the rubber soles of these shoes, which allowed wearers to tiptoe or “sneak” around without making much noise. Another intriguing aspect is the role of tennis shoes in popular culture.
Brands like Nike, Adidas, and Converse have become iconic in fashion, with certain styles achieving cult status. The Chuck Taylor All Stars, introduced by Converse in 1917, have remained a beloved classic for decades. Additionally, tennis shoes have evolved with technology, incorporating features like air cushioning, specialized materials, and ergonomic designs to enhance performance and comfort for athletes.
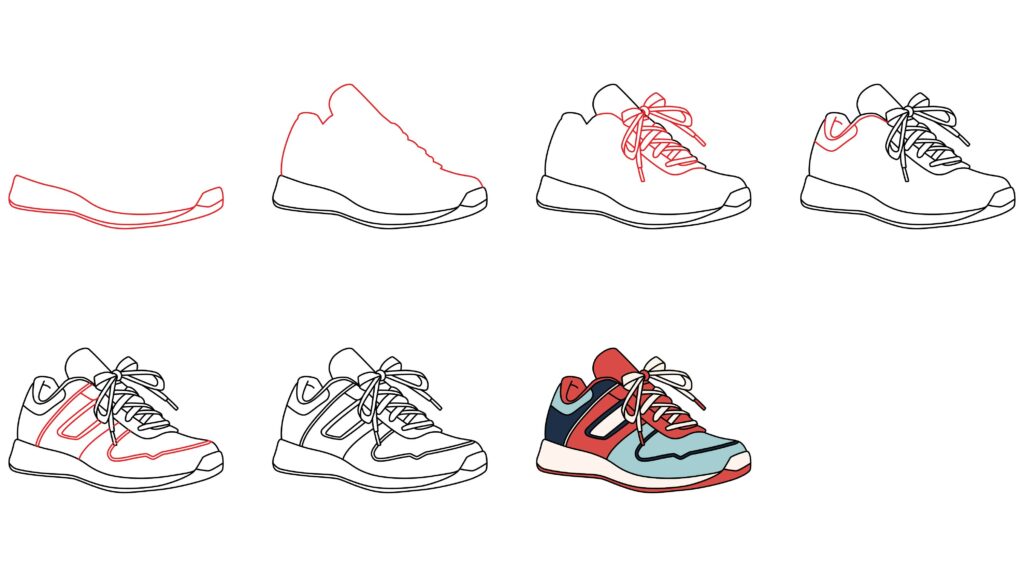
| STEPS | COMPLEXITY LEVEL |
| Draw the sole of the shoe | 3 |
| Draw the upper part outline | 2 |
| Draw the lace | 4 |
| Draw the back part | 2 |
| Add some details | 4 |
What you will need
● A pencil
● An eraser
● A sheet of paper
● Coloring kit
● Ruler
● 40 minutes
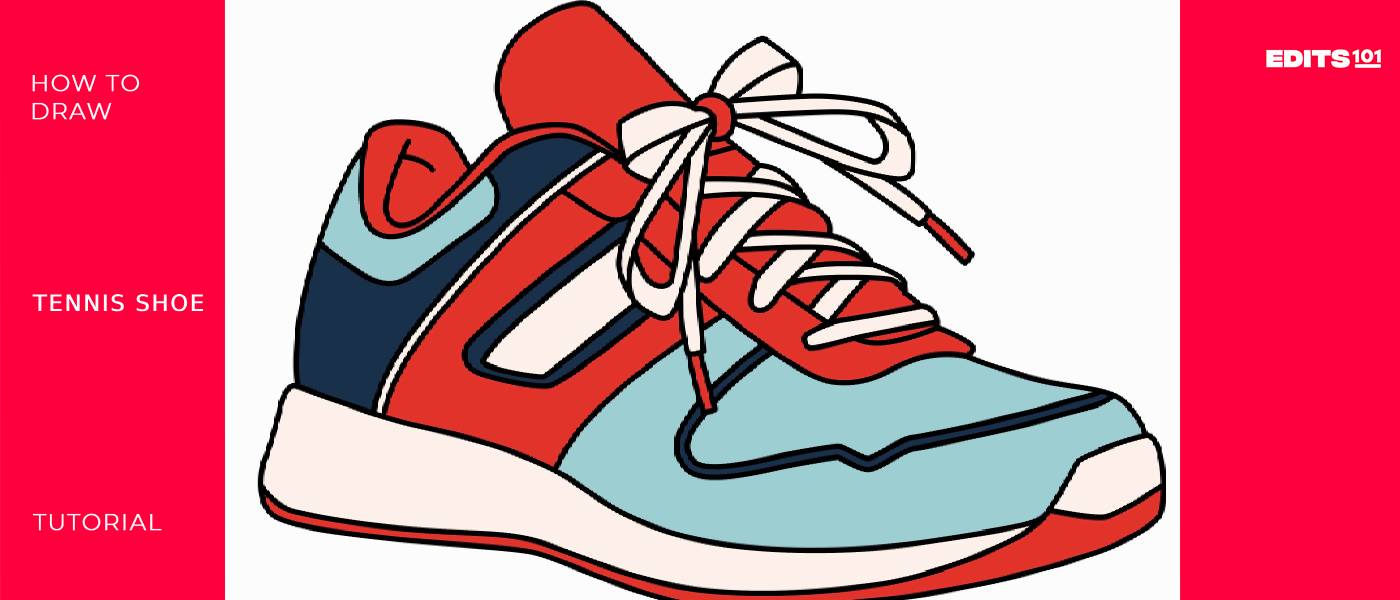
How to draw a tennis shoe
Let’s get ready and dive into the world of drawing. Today, this comprehensive guide will teach you how to draw tennis shoes in almost 40 minutes. To make a perfect drawing, follow each step in this guide carefully. There are 4 to 5 steps, and you can make an excellent piece of art.
Step 1: Draw the sole
Sole is an essential part of the shoe. One important part that gives the wearer traction, stability, and support in tennis shoes is the sole. The portion of the shoe that comes into direct touch with the ground is the bottom. Usually constructed of synthetic or sturdy rubber, tennis shoe bottoms are meant to survive the rigors of the playing surface.
They have unique patterns called outsole treads that are made to stick to different types of court surfaces, including grass, clay, or hard courts. The designs might be hexagonal, circular, or herringbone to increase traction and stop slippage when moving quickly.
To make the sole of the tennis shoes, draw horizontal curved lines on the lower part of the page. This will be the base for further steps of drawing tennis shoes. Two lower curved lines will be adjacent, and the third line will be at a distance. All these lines will merge at the front part of the sole. The front of the sole will be slightly elevated for extra coverage.
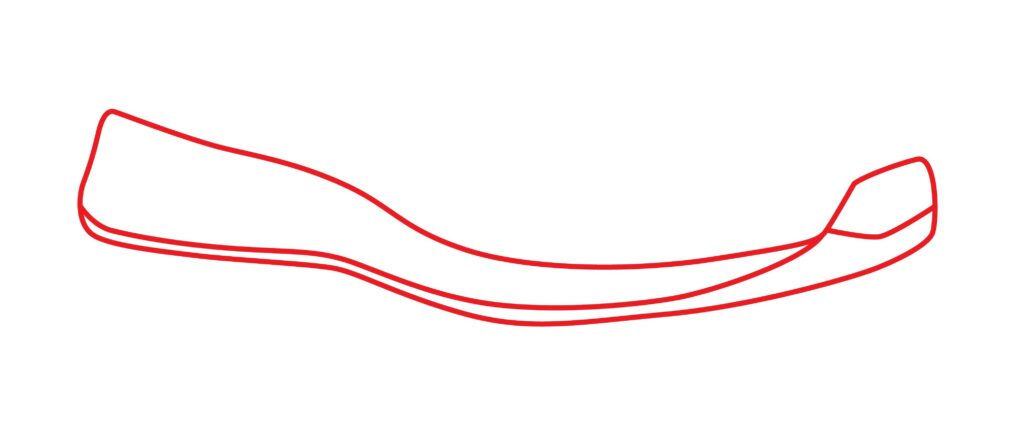
- Draw the sole of the tennis shoe using several lines like the image.
Step 2: Draw the upper part outline
The portion of a tennis shoe that covers the top of the foot and offers comfort, support, and protection to the wearer is called the upper part. Usually, a blend of materials, including leather, mesh, and synthetic fabrics, is used to create it. Because the upper is made to fit snugly, it keeps the foot from sliding around too much inside the shoe during playing.
It frequently has characteristics like padding for support and cushioning around the ankle collar and tongue. Moreover, mesh or ventilation panels may be included in the upper to enhance breathability and keep the foot cool during strenuous games.
To make the upper part outline of the shoe, draw curved lines that are more in an upward direction. The back line for the backside of the shoe will be straight. The front line will follow the slope of a hill, as shown in the picture. Make sure to draw bounce lines for the laces.
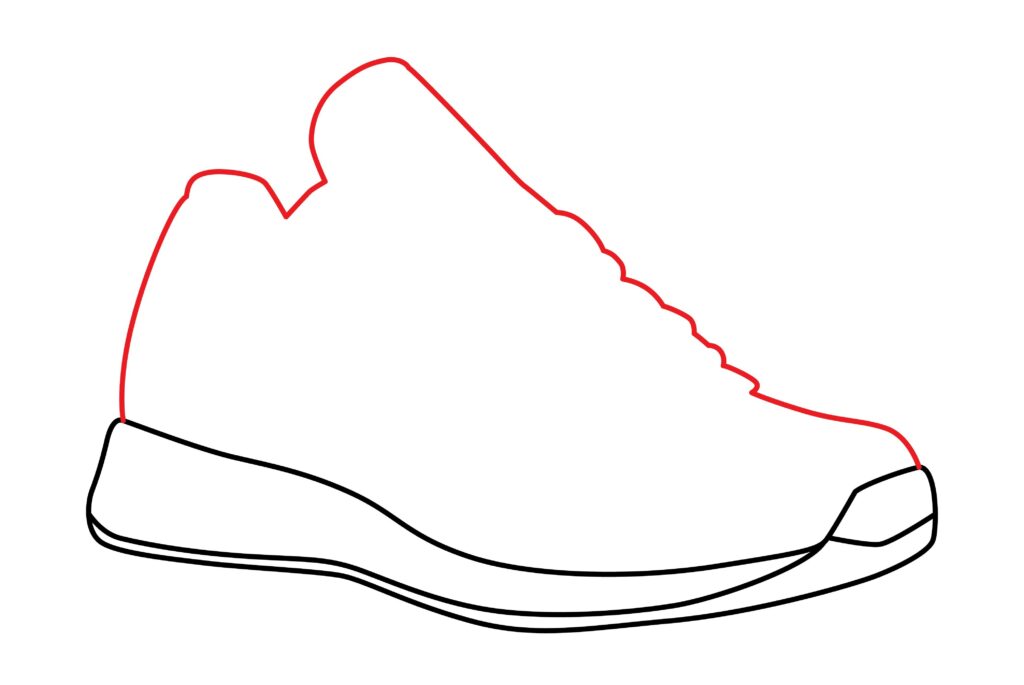
- Draw the upper part of the full outline of the shoe with several curved lines like the image.
Step 3: Draw the lace
Tennis shoe laces are essential for fastening the shoe to the foot and giving the wearer a personalized fit. Usually composed of solid and long-lasting materials like cotton or nylon, braided or weaved. The wearer can adjust the tightness or looseness of the laces by passing them through many eyelets or loops on the shoe’s upper. The ability to modify the shoe guarantees that it fits snugly and comfortably and keeps the foot from moving around too much while playing. Compared to circular laces, flat laces are less likely to come undone during vigorous activity and are used on many tennis shoes.
As we are making a 2D drawing, whether we make flat laces or circular laces, it won’t make a difference. For the laces, draw criss-cross lines on the surface of the upper part of the shoe.
Remember to double-line the laces. Now, draw a curved line around the laces. You can make it a double line for prominence. Now that we have the laces, we will make a knot over the laces with a bow. To make the bow, we will draw loops with curved lines on the laces we drew before.

- Draw the shoe’s lace using some rounded lines.
- Draw loops over the shoe laces to make the bow
Step 4: Draw the back part
Start by drawing two parallel lines curved slightly outwards to form the basic shape of the back of the shoe. Make sure to leave enough space at the bottom for the sole. To finish, go over the main outline lines to darken them. Erase any sketch lines inside the shoe that you don’t need. You can also add stitching, lace loop, and other small details in this step.
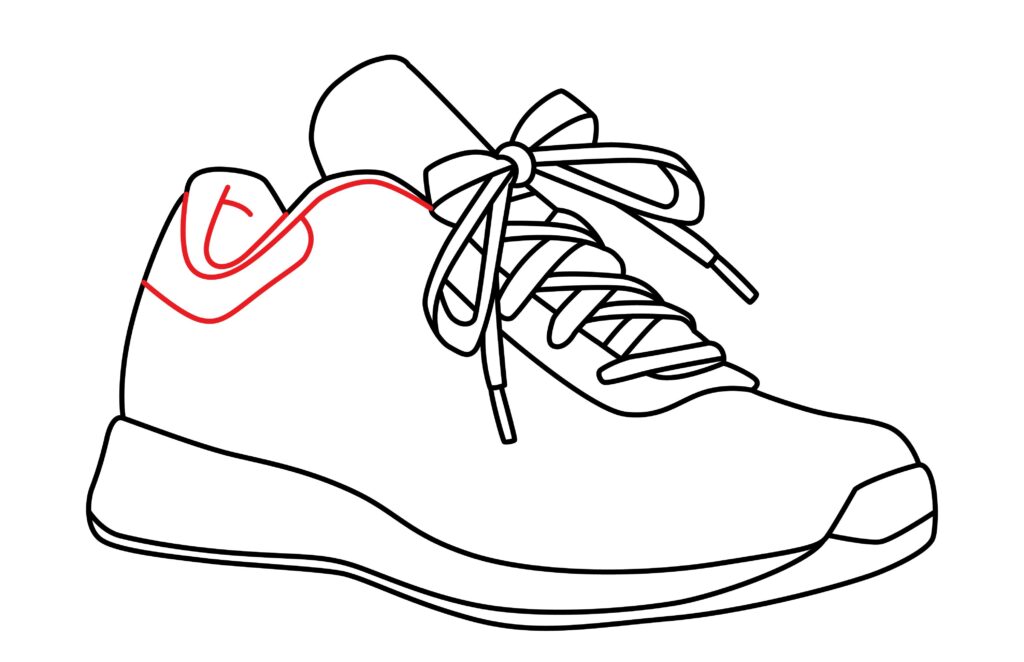
- Draw the back part of the shoe with several lines like the image.
Step 5: Add some details
In this step, we will add the detail on the shoes. Now, you can go creative in this step and draw patterns on the shoes. If you have nothing in mind right now, do not worry; we will guide you with this reference image. You can start by drawing some angular lines on the side of the shoe. You can also draw some wavy lines for more details.
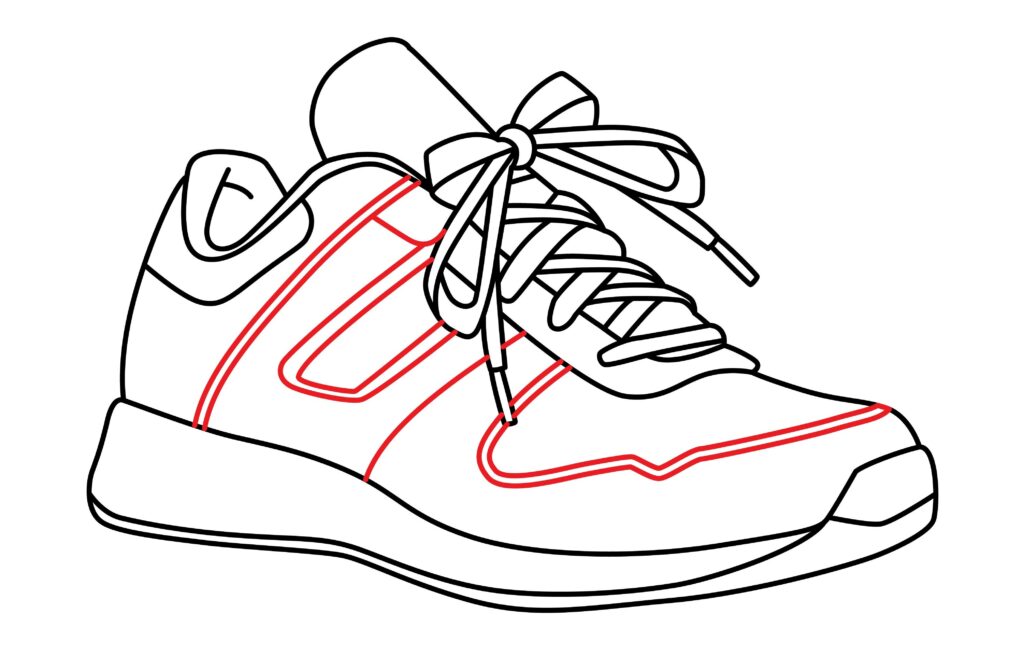
- Draw some details on the shoe body with several lines to add details on the shoe, like the image.
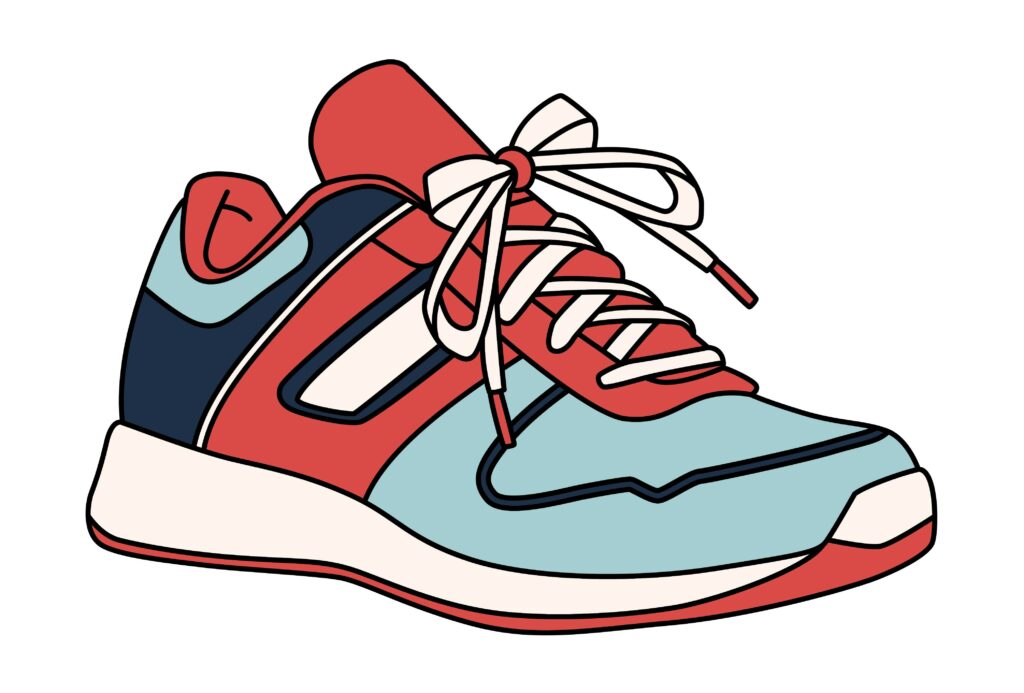
Step 6: Our tennis shoe is ready
Congratulations! Our drawing is ready. We are sure you followed each step elucidated in this guide to complete your drawing. Hold up, something is missing in our picture. You guessed it right. There is no color or background.
In our guide, we will elaborate on how to add life to our drawing and give a context. So grab your stationery and let the real fun begin.

Taking your tennis shoe to the next level
Creation starts with imagination. The capacity to create a mental picture of something that is not observed through the five senses is known as imagination. The mind can create scenes, things, or events that do not exist, are not happening, or have already happened. After picturing what you wish, you will act as you imagine and produce what you envisage. Your creative potential is infinite. Everything is possible as long as you know how to use it properly. You may improve your artwork in a similar way to how creativity works. Give your creativity free rein to produce a beautiful drawing.
You’ll gain more self-assurance and enthusiasm for drawing after doing this. The focal points of this section are experimentation and innovation. We’ll embellish our drawing using a variety of elements.
Take out your stationery, and start working your magic.
Adding background to your drawing
The background establishes the setting, which also lends the elements a sense of atmosphere. The impact depends on minor details, like a wall’s cast shadow or a pattern’s recurrence. A lovely backdrop is an appealing background and a visual link to the foreground subjects.
You can make your tennis shoes on a shoe rack or elevation. You can also put it on the ground. You can make the other shoe of the pair if you like. These are a few ideas for the background. Do not limit your selves to these ideas; create your background with your imagination.
Adding colors to your drawing
Here are some tips for adding color to a drawing of a tennis shoe:
Use white and shades of grey to color the shoe’s rubber sole and toe guard. Go darker at the edges to show dirt and wear. Use muted cool tones like light blues, greens, or purples on the mesh or fabric parts of the shoe. Add some darker accent colors, too. Add pops of brighter colors like orange, yellow, red, or pink on logos, brand names, or design elements. Use varying shades of the primary shoe color to show texture, folds, and dimensionality. Darken creases and lighten protruding areas. Pick complementary colors for the laces, eyelets, and other small details. Contrast with the primary shoe color. Shade the bottom edge of the sole darker to establish a cast shadow grounding the shoe. Color any background elements like a tennis court appropriately – green court, tan clay, gray concrete, etc. Limit your palette for unity. Stick to 2-3 primary shoe colors and 1-2 accent colors.
P.S. Bonus Tips
Here are some bonus tips to upgrade your drawing. Draw patterns, textures, or designs on the shoe for a customized look. Include fun embellishments like sparkles, beads, fabric accents, or spikes. Go wild! Draw the shoelaces untied and dangling for a playful look. Set an imaginative scene like giant tennis shoes on a tennis court or floating in clouds.
Conclusion
First, we started by sketching the basic shape of the shoe’s sole. We used light pencil strokes to create a rough outline, and then we gradually refined the shape until we were happy with it. Once we were satisfied with the sole, we added the upper part outline. We started at the back of the shoe and drew a curved line up to the toe box. Then, we drew a horizontal line across the top of the shoe and connected it to the back line.
Next, we added the details to the shoe. We drew in the laces, tongue, and other features such as eyelets and stitching. We also added some shading to give the shoe a more realistic look. Finally, we erased any stray pencil lines and colored in our drawing. We used a variety of colors to create a bright and eye-catching design.
We are very proud of our finished drawing. It was a lot of fun to create, and we learned a lot about drawing shoes in the process. We hope you like it too!
Author Rating
Overall Rating
Summary
Learn important facts about Tennis Shoe as well as how to draw one step by step.
Useful Links