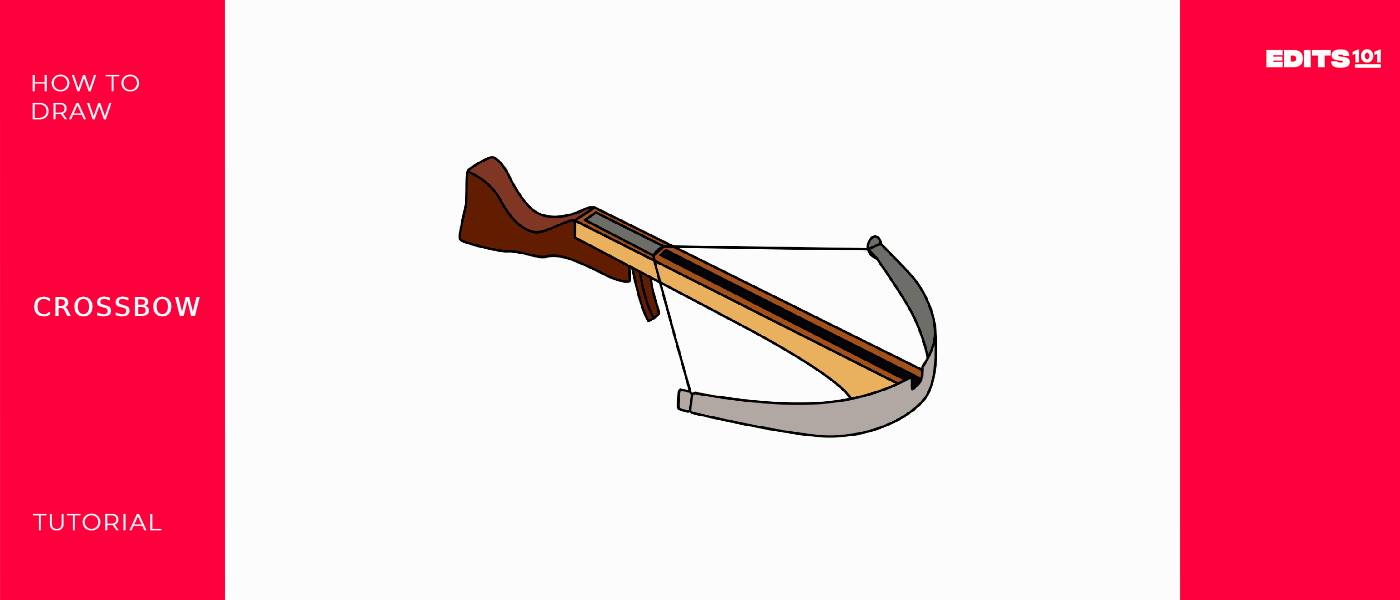
How to Draw a Crossbow | An Easy Guide
A crossbow is a type of instrument that consists of a bow mounted on a stock or frame, which shoots projectiles called bolts. It is used in shooting sports such as match crossbow and field crossbow.
In match crossbow, participants shoot at targets from fixed distances with the goal of achieving precise accuracy.
Field crossbow involves navigating through outdoor courses while accurately shooting at varying distances and angles. Both variations require skill, precision, and concentration to hit targets effectively within specified parameters.
In today’s tutorial, you will learn how to effectively draw a 3D crossbow in 7 steps!
| Steps | Complexity Level |
| The Limb | 2 |
| The Barrel | 3 |
| The String | 2 |
| The Stock | 4 |
| The Trigger | 2 |
What You Will Need
- Sketchpad or drawing paper
- Pencils (2b, 3b or 5b)
- An eraser
- A ruler
- Color pencils or markers
- 30-35 minutes
How to Draw a Crossbow
This may seem like a very challenging task, but with a little practice, patience and dedication, you will definitely be able to complete this tutorial.
This step-by-step guide is constructed in such a way that the instructions are easy to follow, for those attempting their first drawing project and seasoned sketchers alike.
Before you begin, make sure you have all your drawing tools ready and that you thoroughly go through the outline provided to prepare yourself for the steps ahead.
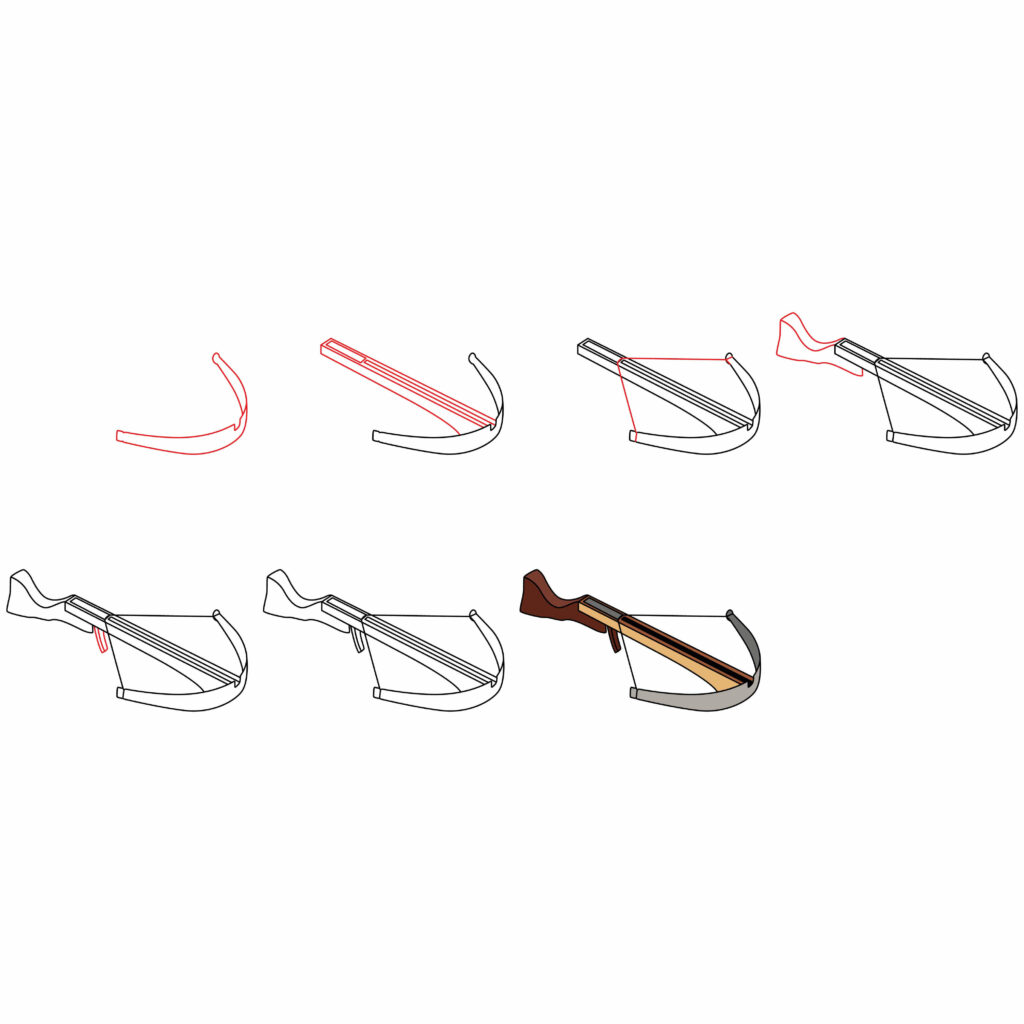
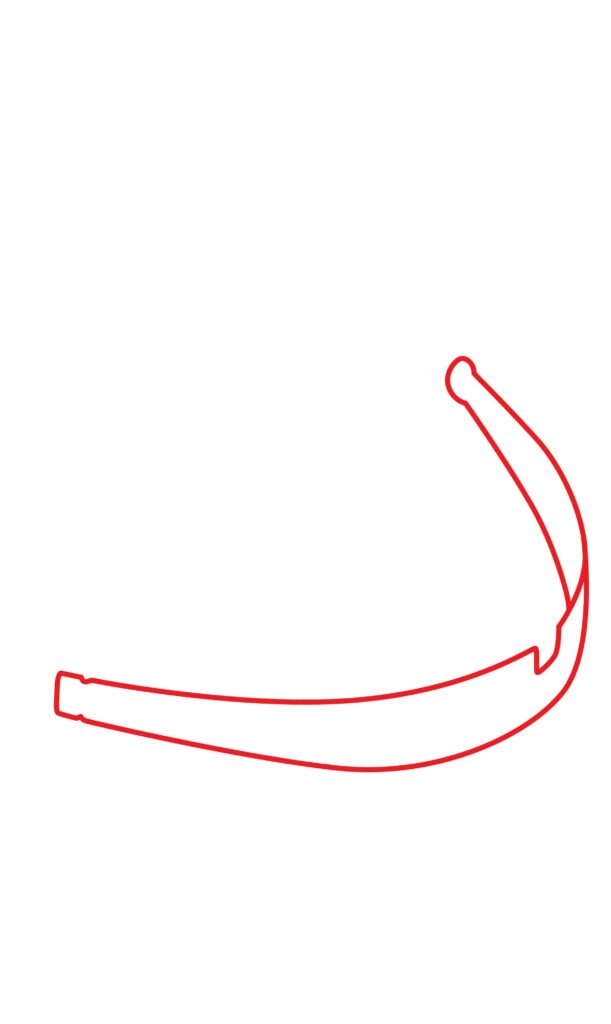
Step 1: Draw the Limb
The limb of a crossbow refers to the flexible arms or limbs that are attached to the main body of the crossbow. These limbs store and release energy when the string is drawn back, propelling the bolt forward with force and accuracy.
Start by drawing an inverted “C” on the middle of your page. Ensure that the shape is not straight, but more so laying on its side; i.e., tilted to the right.
Erase a small portion of the line in the middle, and then add a little groove by leaving the top empty and drawing a square shape beneath.
Once completed, find the outer curve of the “C” shape. Ensure that your pencil connects with the point where the “C” curves, slightly above the groove you just added.
From that point, draw a smaller inverted “C” that has a nice bit of space between the upper shape. End the line once it reaches the end of the first line drawn and connect the two using a small vertical line.
Next, find the inner curve of the first inverted “C” shape drawn. Start drawing a diagonal line that extends upward and to the left from the point just above the groove drawn.
Once the line is in alignment with the upper edge of the “C” shape, connect the two corners together with a rounded curve.
- Draw an inverted “C” laying on its side on the middle of your drawing paper
- Erase the middle of the line and add a groove
- Add a curved line beneath the bottom section of the “C” shape
- Add a curved line next to the upper section of the “C” shape
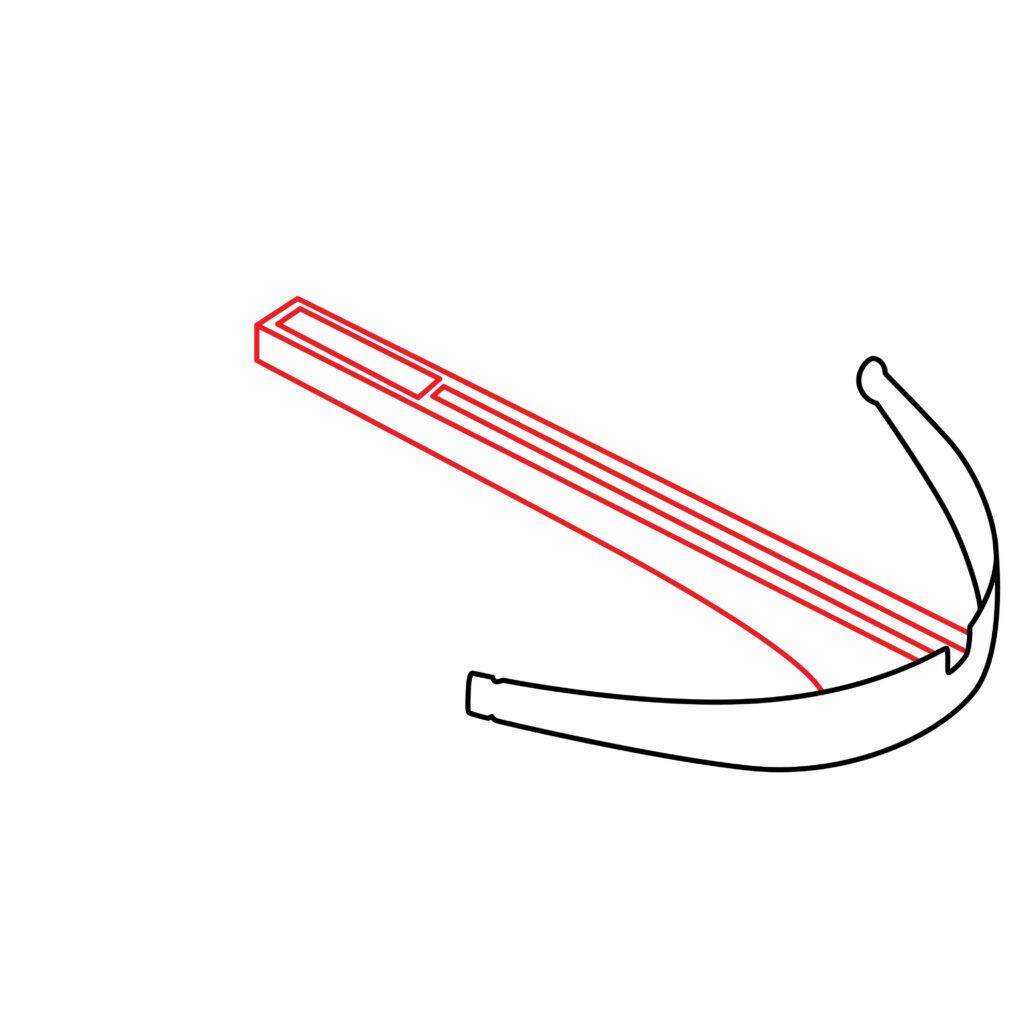
Step 2: Draw the Barrel
The barrel is a long tube through which the bolt or arrow travels when fired. This step involves drawing quite a few lines, so be sure to grab your ruler before you begin.
First, draw a diagonal rectangle that smoothly extends upward and to the left from the tip and bottom of the groove created in step one. Check the image below for a guide on the length you should aim for.
Next, draw a line starting from the lower half of the limb and ensure it starts out wavy then becomes straight once it aligns with the diagonal rectangle.
When the line is next to the end of the rectangle, connect them with the use of a small vertical line. You should now have the outline of the barrel.
To complete it, draw a thin rectangle within the first rectangle drawn (upper barrel) starting from the groove and ending about a quarter inch away from the edge of the rectangle.
Finally, draw a long square within the first rectangle on the edge of the shape.
- Draw a diagonal rectangle that extends to the left of your limb
- Draw a thin rectangle within the upper barrel
- Add a long square towards the end of the upper barrel
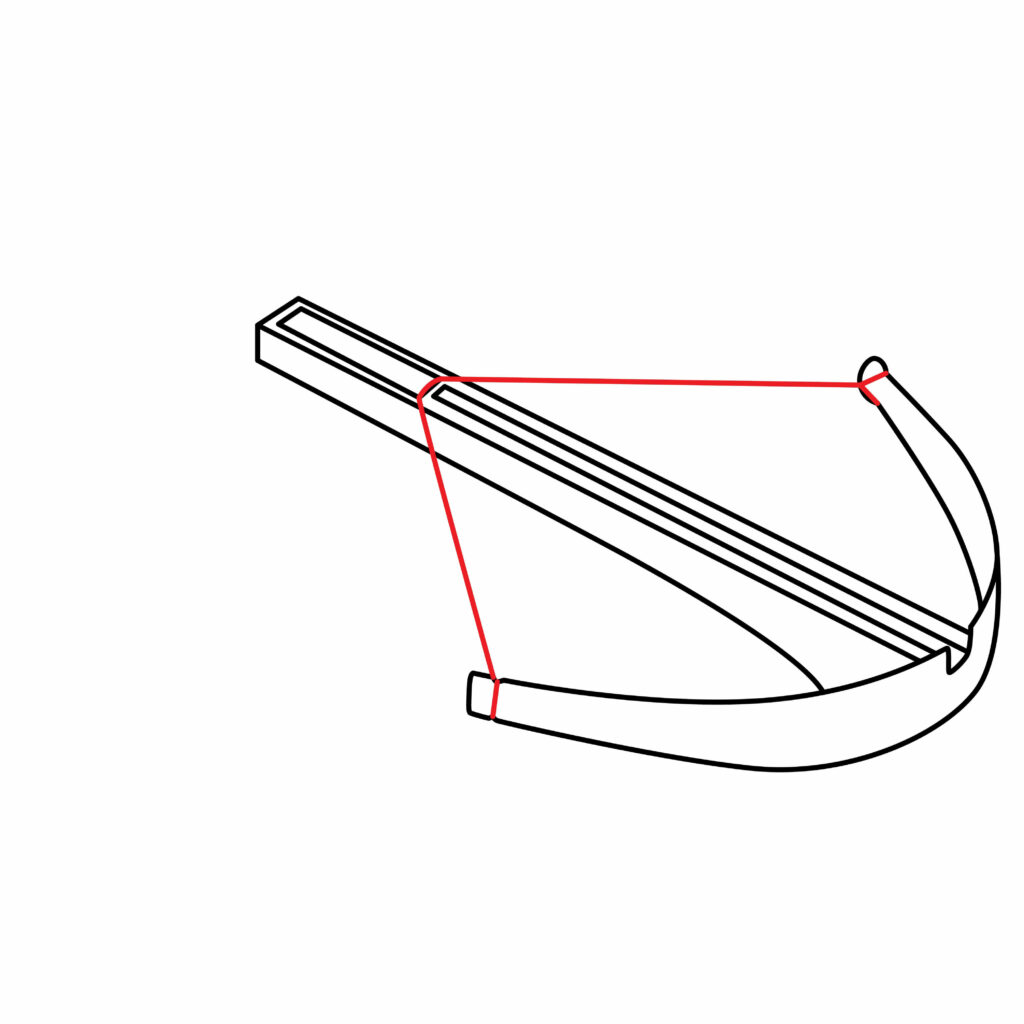
Step 3: Draw the String
The string, used to propel the bolt or arrow forward, is typically made of strong and flexible material, such as synthetic fibers or animal tendon.
Using your ruler, draw a diagonal line from the upper tip of your limb and connect it to the bottom edge of the square shape drawn within the barrel.
Ensure that you add a line running over the barrel, and then draw another diagonal line extending toward the bottom tip of the limb.
- Draw a diagonal line from the upper corner of the limb to the barrel
- Draw a line running over the bottom edge of the square within the barrel
- Draw a diagonal line extending from the barrel towards the lower edge of the limb
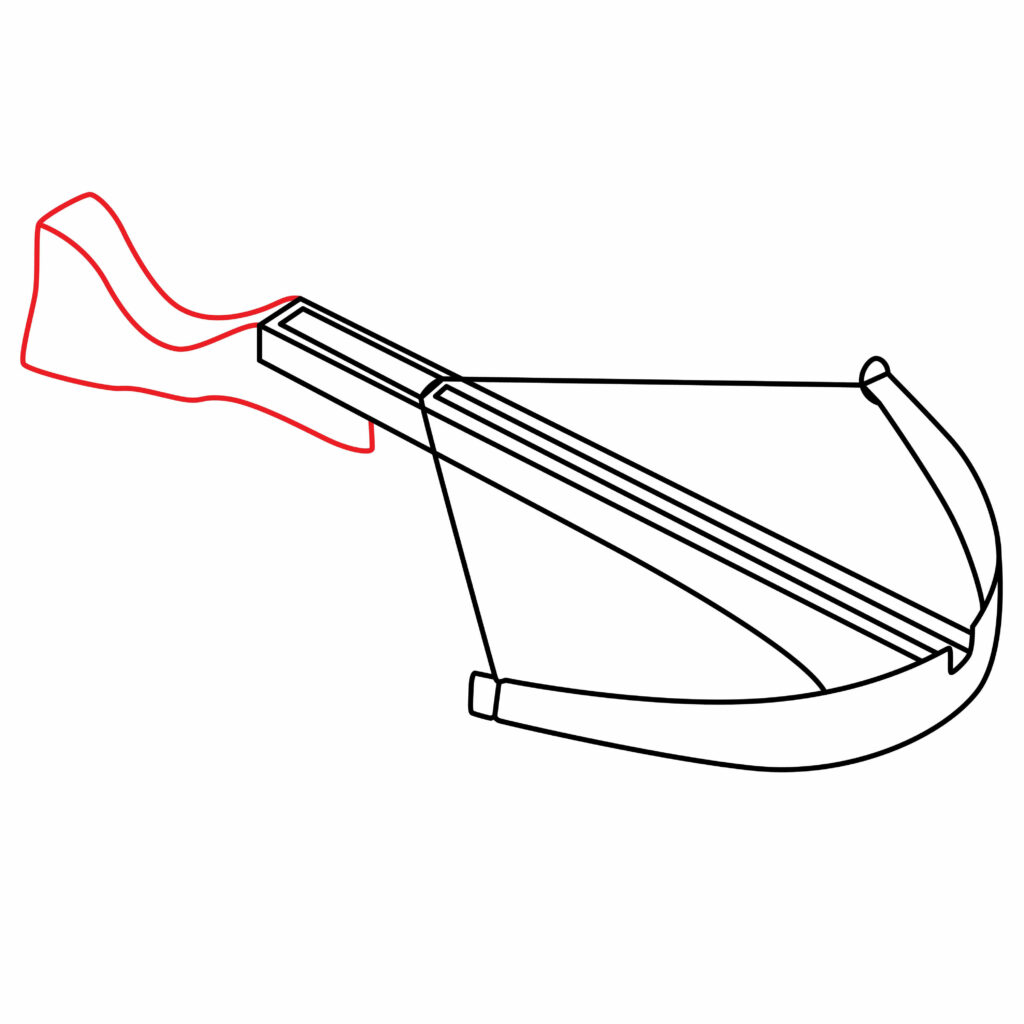
Step 4: Draw the Stock
The stock is the part that is held against the shoulder when firing, and it is used as a stable platform to support and aim the crossbow.
You will need to draw a few wavy lines, so make sure your drawing hand is nice and loose before you start. Do this by shaking your hand for a few seconds, if you please.
First, place the tip of your pencil on the upper edge of the barrel. Draw a line that dips down and then upward until it’s relatively in line with the barrel.
You can make sure it’s in alignment by placing a ruler against the upper line of the barrel and check if the tip of your newly added line peeks out above the ruler.
Then, draw a line starting from the bottom edge of the barrel (not the side) and curve the line in a similar fashion as you did with the first one. Connect the two wavy lines together with a small rounded diagonal line.
Finally, draw a shape resembling a large “L” starting from the tip of the bottom line and connecting it to the underside of the barrel. If necessary, check out the image below as you complete this step to make sure you’re on the right track.
- Use smooth, wavy lines to draw the stock.
- Ensure the upper part of the stock dips down in the middle
- Connect the stock to the barrel along the underside of the barrel
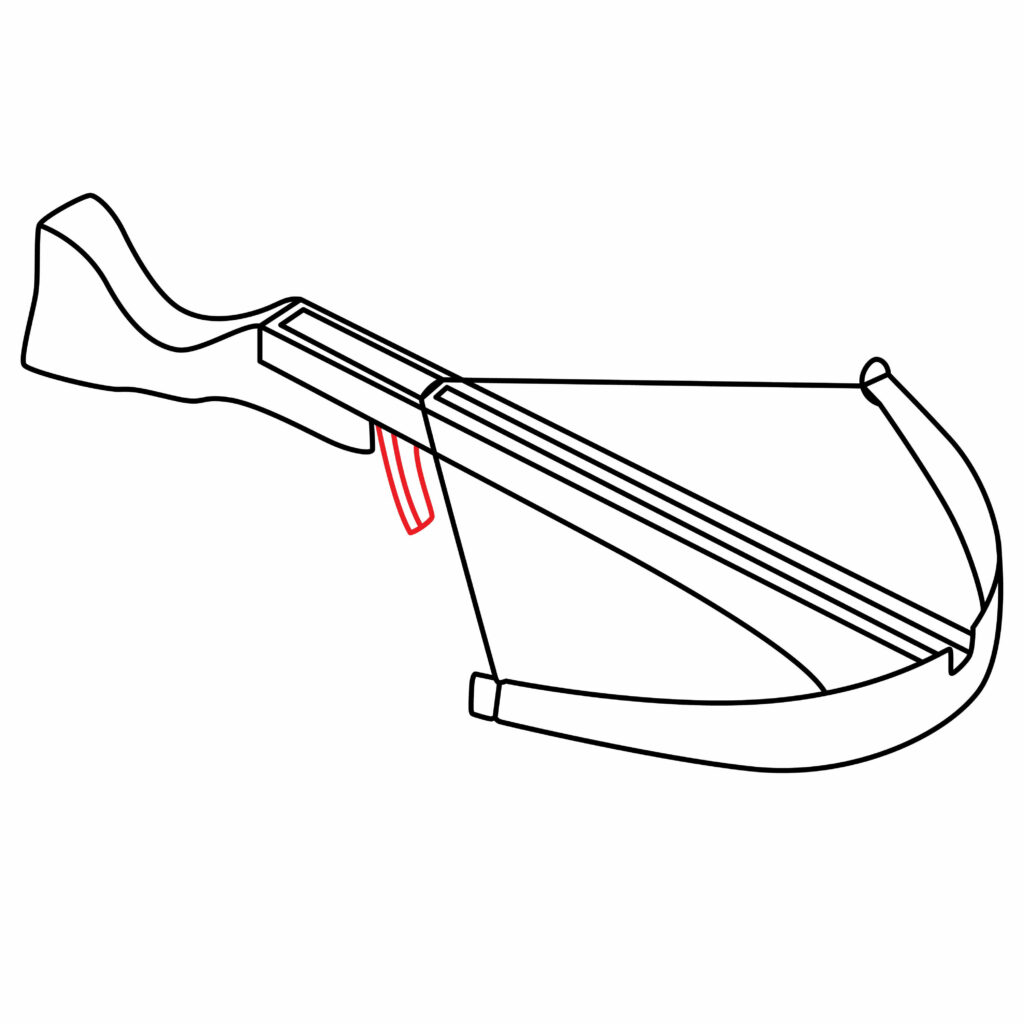
Step 5: Draw the Trigger
The trigger is a mechanism that activates the release of the string, which in turn propels the bolt through the barrel and towards a target. Therefore, the trigger is usually found somewhere close to where the string is attached to the barrel.
To complete this step, draw a small diagonal rectangle beneath the barrel, right next to the stock. Add a line within the rectangle, and once you’re finished, you should have a shape that accurately represents the trigger!
- Draw a diagonal rectangle beneath the barrel
- Add a diagonal line within the rectangle
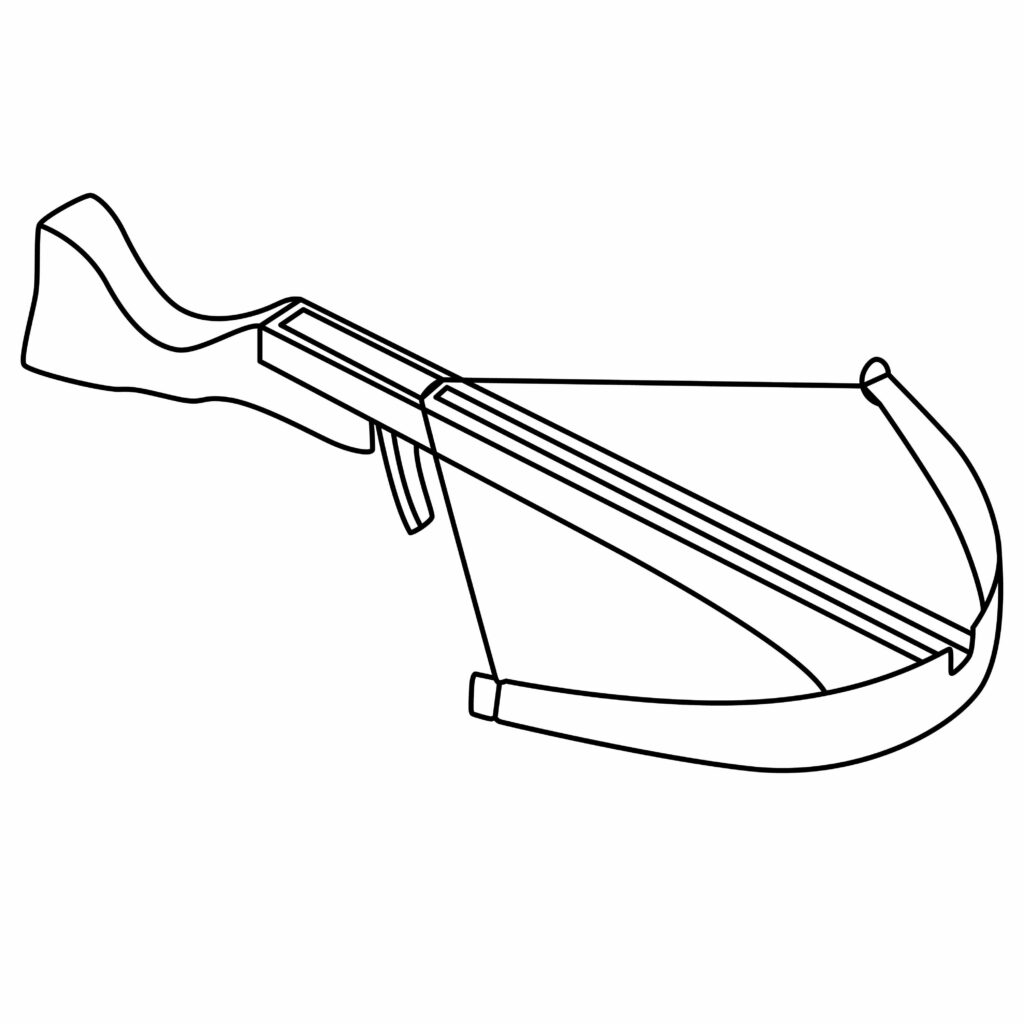
Congratulations! Your Crossbow Drawing is Complete
Job well done for completing your drawing of a crossbow! That’s a great accomplishment. To ensure that your drawing matches the tutorial accurately, we recommend comparing your work closely to the reference image provided below.
Pay attention to details such as proportions, angles, and line accuracy. If you feel the need to make any adjustments, feel free to do so now. Once you’re ready, follow the rest of the tutorial to elevate your sketch!
Taking Your Drawing to the Next Level
It’s important to not leave a black and white sketch of a crossbow as it is because adding color and background objects can bring the image to life, making it more visually appealing and engaging.
Step 6: adding a Background
To make your crossbow even more interesting, think about what objects you would like to have surrounding it. You can ultimately decide on whatever imagery you prefer. This is a prime opportunity to allow your imagination to roam free.
For a realistic theme, consider adding a forestry theme as a background to represent field crossbow. Add some trees and grass surrounding your crossbow.
Alternatively, you could incorporate a few other crossbow related objects, like some archery equipment.
We have a few tutorials of such equipment on our site, like how to draw an archery bow, an arrow, and a target face.
These added items could possibly improve the well-roundedness of your drawing.
Additionally, scan through a few YouTube videos to draw some inspiration on a possible background.
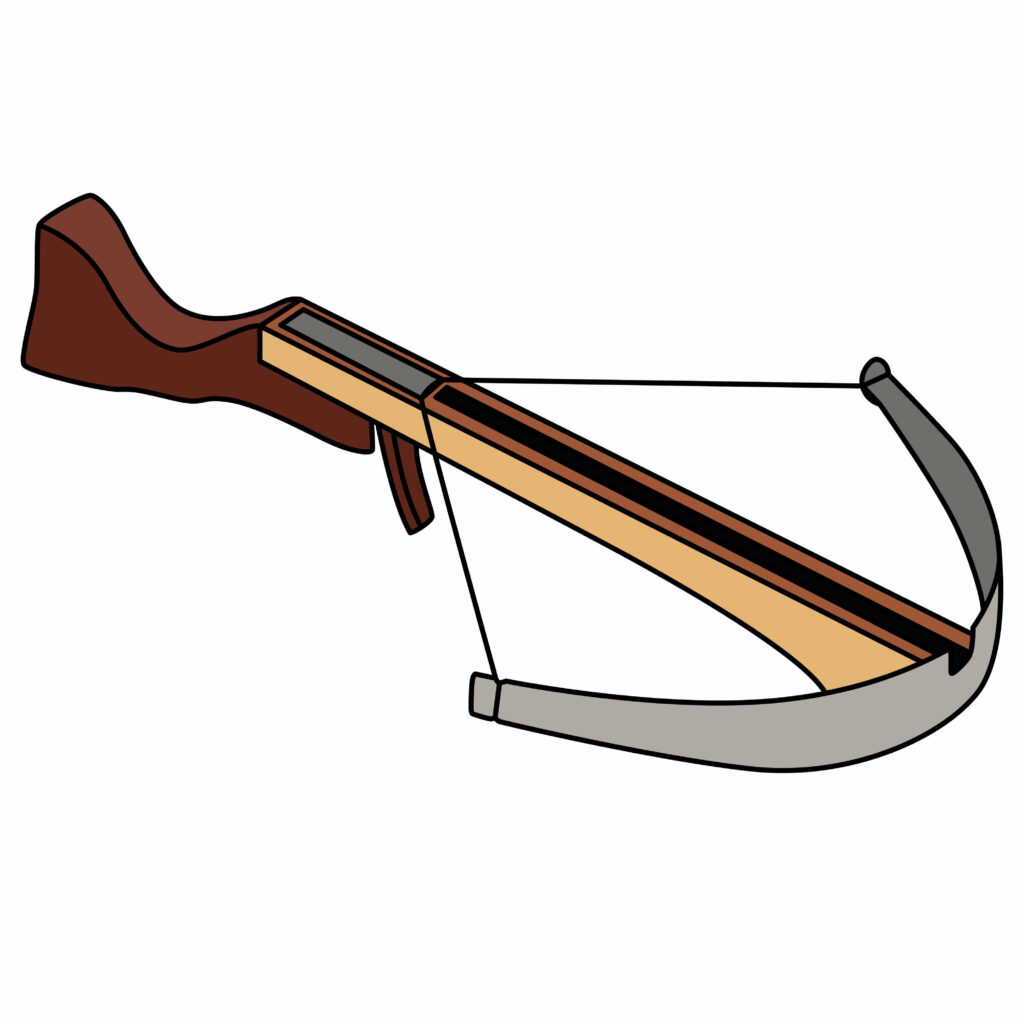
Step 7: adding color
Add some color to a crossbow sketch to instantly make it more visually appealing. Great colors to use for coloring in a crossbow drawing can include shades of brown, black, silver, and gold to give the crossbow a realistic and polished appearance.
If you like the way we have colored in our drawing, feel free to use similar colors on your design. Just remember, using different colors on different parts is ultimately what’s going to give your drawing a three-dimensional look.
The use of contrasting colors can also help highlight different parts of the crossbow and make it more eye-catching.
Bonus Tips
Practice regularly to improve your drawing skills and familiarity with the crossbow’s structure.
Study reference images of crossbows to understand their details and proportions accurately.
Use a variety of drawing materials such as pencils, pens, markers, or digital tools for different effects.
Add your name to your drawing for a nice personalized touch.
Focus on shading and highlighting to add depth and realism to your crossbow illustration.
Take breaks during long drawing sessions to rest your eyes and maintain focus on details.
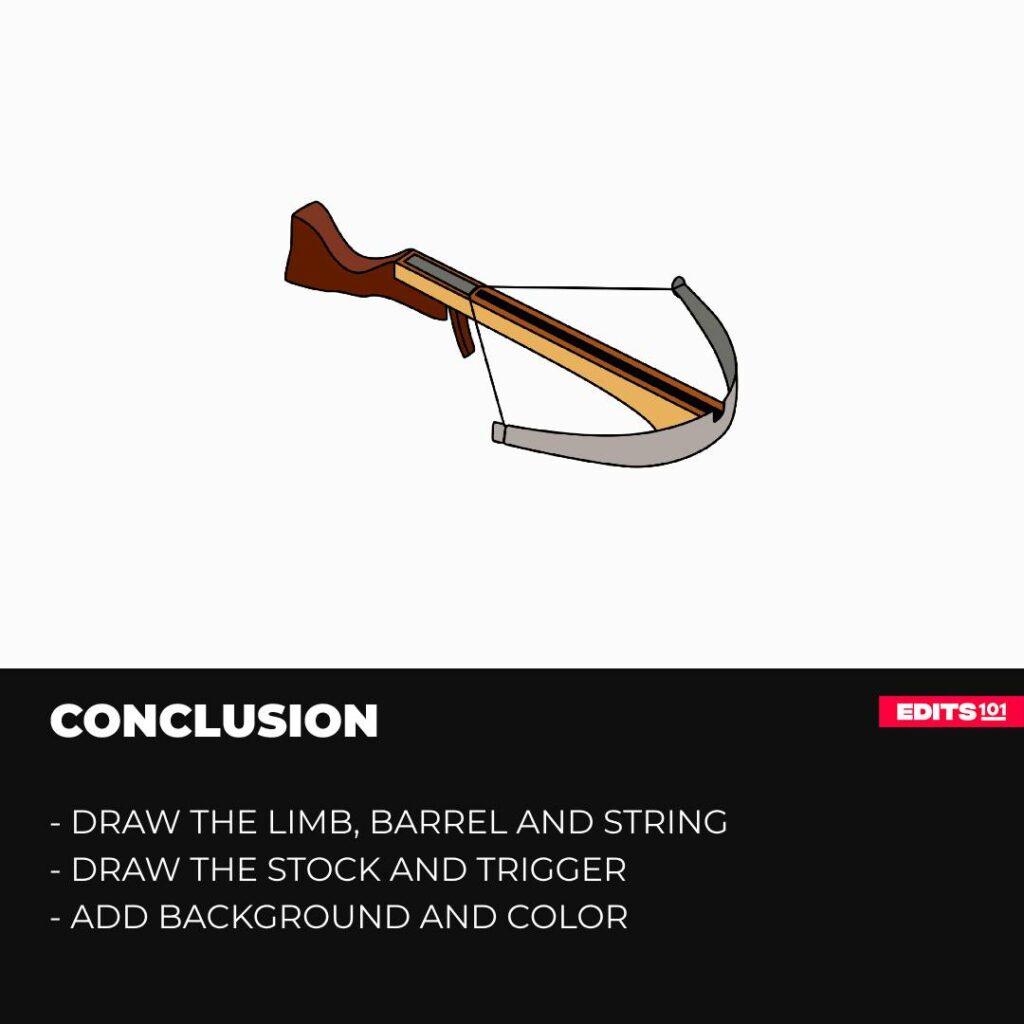
Conclusion
If you’ve followed all the steps and made it this far, you did some great work. We’d like to applaud your dedication and commitment to the craft of drawing.
You have read and hopefully learnt so much from this tutorial; like how to draw a limb, barrel, string, stock and trigger.
All of this was done from an angle that’s not easy to complete at all, so give yourself a pat on the back for putting in the time and effort to create a cool three-dimentional crossbow sketch.
Always remember, you can only improve once you’ve started something, so keep on going and try out some other fun tutorials!
Thanks for reading & feel free to check out more of our articles!
Author Rating
Overall Rating
Summary
This tutorial will walk you through sketching a basic crossbow design and then refining it to achieve a more realistic and detailed appearance.