How to Draw 3D Cycling Sunglasses | In 6 Easy Steps
Today, we’re going to dive into the sport of cycling with an informative tutorial on how to draw a cool pair of 3D cycling sunglasses. Are you ready to get started?
Cycling sunglasses are specialized eyewear designed to provide protection from sun glare, wind, debris, and enhance vision while riding. They often feature wraparound frames that hug the face, ensuring a secure fit and increased peripheral vision for cyclists.
Many cycling sunglasses also offer interchangeable lens options for different lighting conditions, as well as anti-fog coatings to maintain clear vision during intense rides.
By utilizing this tutorial, you will learn how to draw a pair of dazzling 3D cycling sunglasses with only 6 easy steps!
| Steps | Complexity Level |
| The Frame | 3 |
| The Glass Holder | 2 |
| The Lens | 2 |
| The Bud Lines | 1 |
What You Will Need
- Drawing paper or sketchbook
- Pencils (2b, 3b or 5b)
- An eraser
- A coloring kit
- 15-20 minutes

How to Draw 3D Cycling Sunglasses
This may seem like a challenging process, but if you follow this comprehensive guide that breaks down each step in a simplified manner, you’ll find that you’re completing this tutorial with ease.
You’ll ultimately only need to sketch four components; the frame, the glass holder, the lens and the bud lines. Adding color is primarily the key to enhancing your sketch into a 3D design, but we’ll cover that in more detail later on.
For now, scan the outline provided below to familiarize yourself with each step, grab all of the necessary tools and make sure you have enough time available to sketch undisturbed.
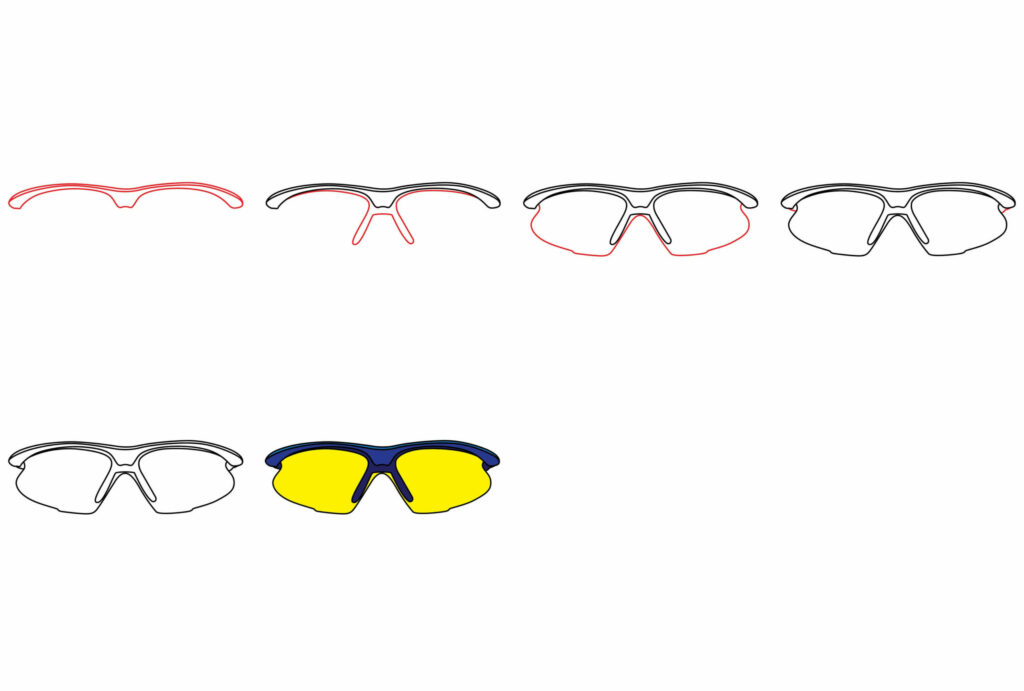
Step 1: Draw the Frame
The frame of a pair of cycling sunglasses is typically lightweight and aerodynamic to provide comfort and stability on the face during rides.
To complete this step, start by drawing a wavy line on the center of your page. Ensure that the line slightly curves upward on the left, then dips in the middle, and once again curves upward on the right.
Directly beneath that line, draw another line that follows the same pattern, maintaining a very small space in between.
Finally, draw a line that starts from the edge of the first line drawn which follows a similar curve pattern. However, this line needs to curve more roundly on the left and right side, and dip a bit lower and wider in the middle.
- Start by drawing a wavy horizontal line on the center of your page
- Draw another line directly beneath the first one following the same pattern
- Add a more wide and rounded line connected to the top frame

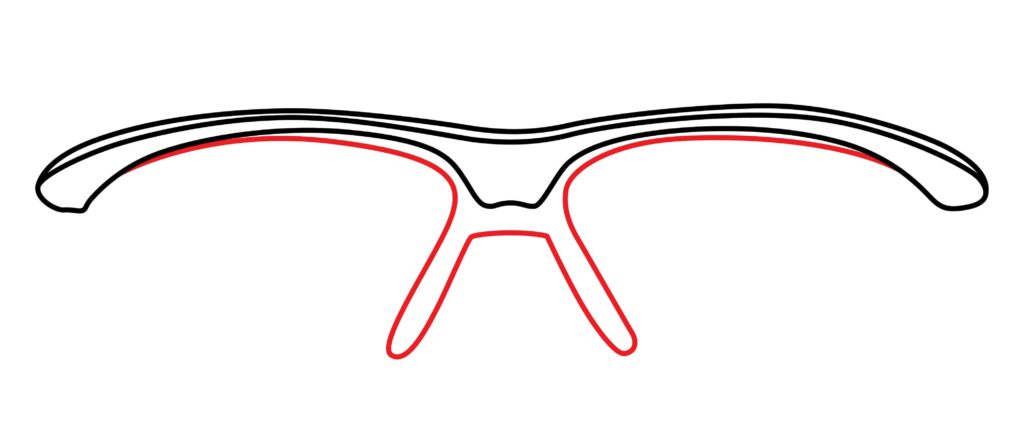
Step 2: Draw the Glass Holder
The glass holder is designed to connect the lens to the frame through a combination of adhesive and mechanical fastening elements.
Starting from one side of your frame, draw a curved line attached to the bottom of the glass frame and make sure the line curves into a diagonal line once it reaches the mid-point of the frame.
Add a small horizontal line across the space beneath the mid-point of the frame, and then follow the same process done on the remaining side.
I.e., draw a diagonal line downward and curve it upward until it becomes a wavy horizontal line attached to the bottom of the glass frame.
- Start by drawing a curved horizontal line directly beneath the frame
- Curve the line into a diagonal line once it reaches the mid-point
- Add a small horizontal line directly beneath the center of the frame
- Repeat the process on the opposite side
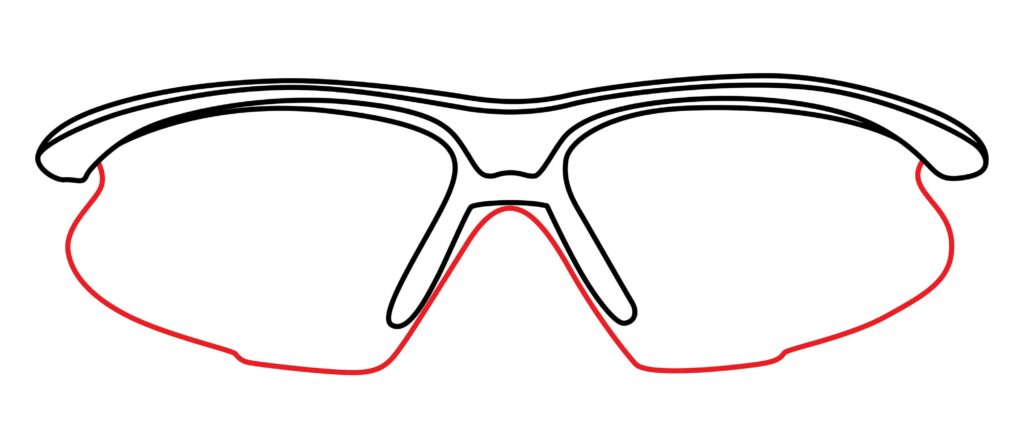
Step 3: Draw the Lens
Now it’s time to draw the lens. This is quite possibly the most interesting feature found on a pair of cycling glasses. They possess a variety of functions – from UV protection, glare reduction to contrast enhancement – that ease the task of cycling.
To complete this step, you will need to draw a long line that curves in multiple ways, so make your sure your drawing hand is nice and loose for some seamless curves before you begin.
First, start by drawing a wavy diagonal line from the bottom side (left or right) of the frame and allow the line to smoothly curve into a bumpy horizontal, somewhat diagonal, line as it spans the width of the frame’s side.
Once it reaches the inner side of the frame holder, curve the line upwards into a sharp diagonal line. Create a vertical wave in the center, and then follow the same process on the remaining side.
- Draw a wavy circular shape within each frame
- Create a vertical wave below the mid-point of the glass holder
- Ensure that both lens are symmetrical
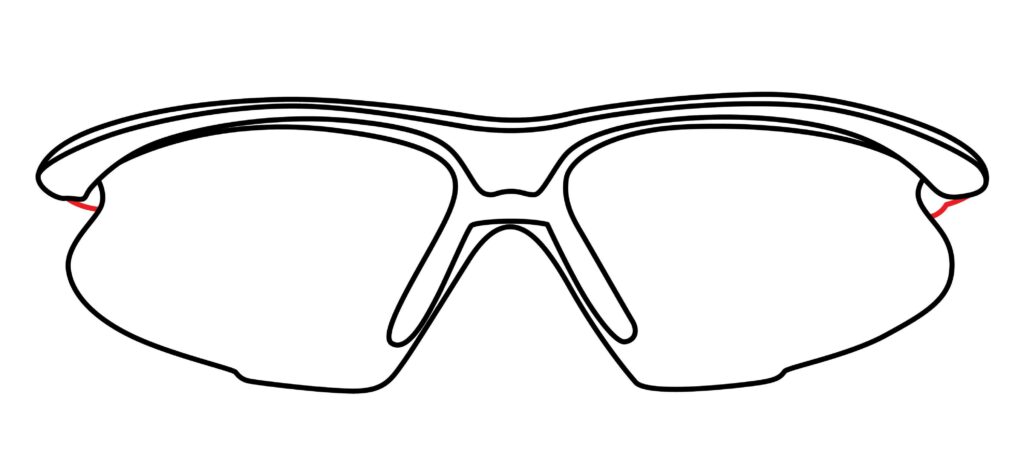
Step 4: Draw Bud Lines
The bud lines represent the side frames that hold the glasses in place while they are on the cyclist’s face. Since our sketch is angled from the front, we won’t need to add much details to resemble the side frames.
Simply draw a small diagonal line starting from the bottom side of the frame and connect it to the upper side of the lens. Repeat the process on the remaining side, ensuring that both sides are symmetrical.
- Connect the side of the frame with the side of the lens using a diagonal line
- Repeat the process on the remaining side
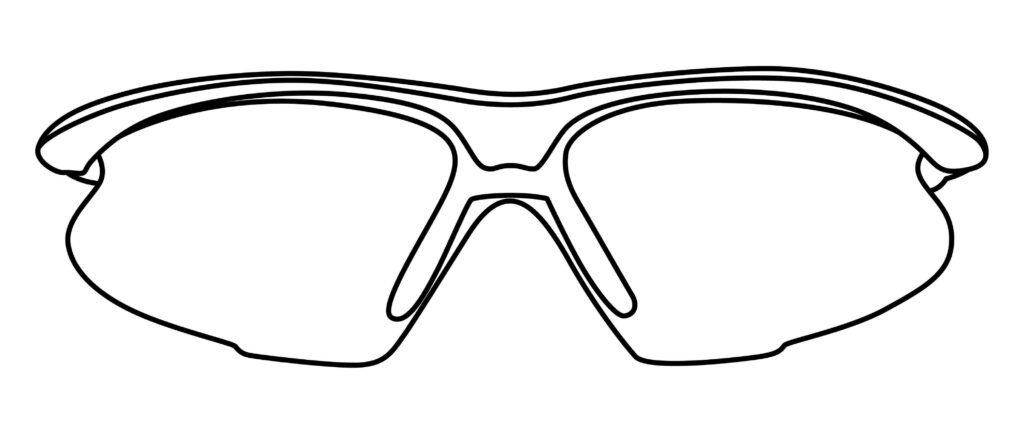
Congratulations! Your 3D Cycling Sunglasses Drawing is Complete
While the sketching process consisted of only four steps, some aspects were more complex than others and required a great deal of dedication.
So, congratulations on completing a solid black-and-white sketch of a pair of cycling sunglasses.
The process is still ongoing, though. Two more steps await you that will ultimately transform your drawing into a multifaceted work of art.
Taking Your Drawing to the Next Level
Adding color and background to sketches transforms them from dull to inspiring art. Color brings sketches to life, and backgrounds add depth and context.
Help inspire yourself and others to imagine stories based on your drawings by following these steps.
Step 5: adding a Background
When it comes to creating a sketch of cycling glasses, you have various background ideas to choose from.
First, you need to determine the story that you want to convey through your sketch.
For instance, you can depict your newly designed glasses lying amidst other cycling gear such as jerseys, gloves, or shoes that are waiting to be washed after a rigorous cycling tournament.
Alternatively, you can portray your cycling glasses being worn by an Olympic-winning cyclist.
The possibilities are endless, and the background you choose is entirely up to you. So, feel free to explore different environments that best suit your sunglasses sketch.
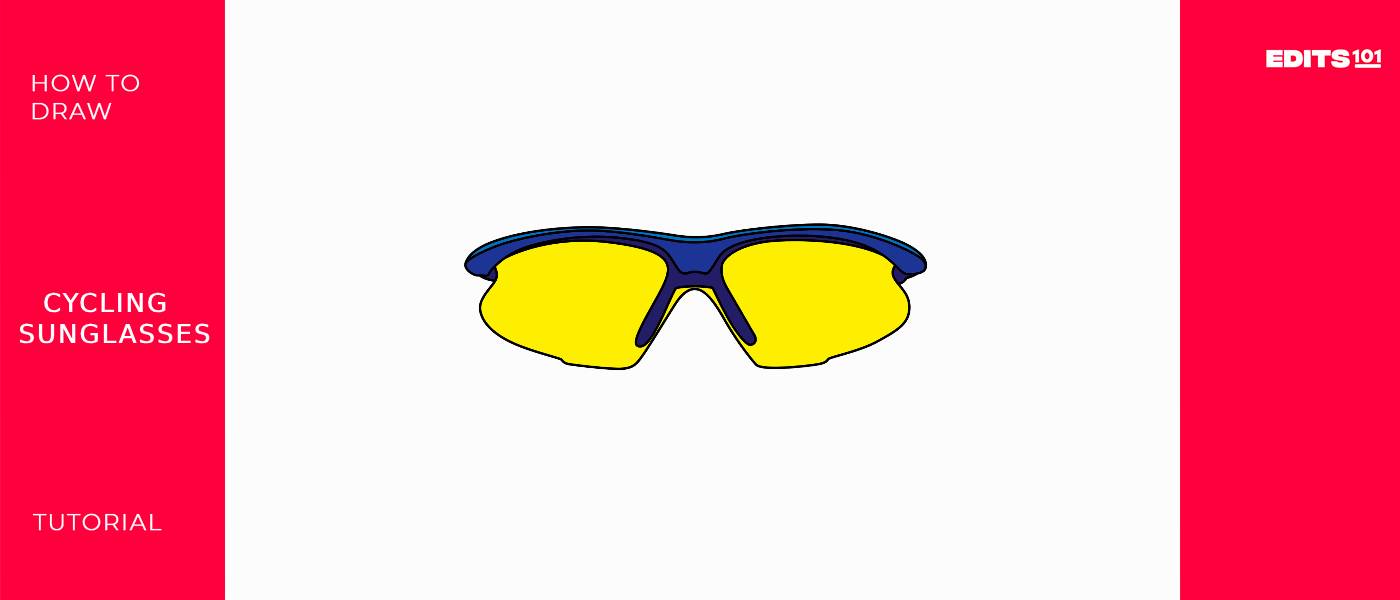
step 6: adding Color
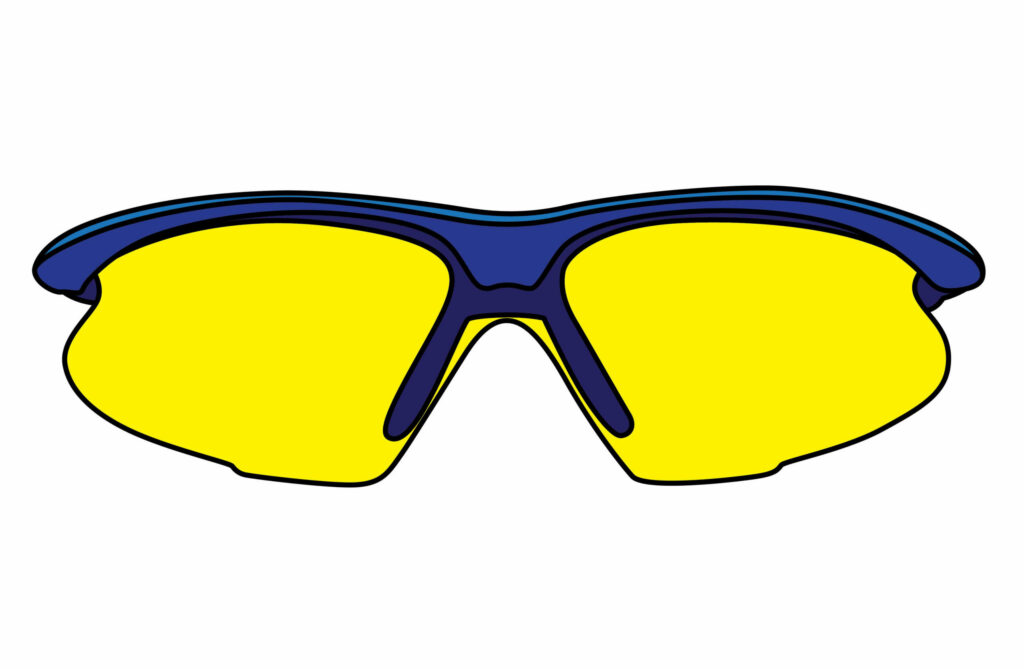
As mentioned earlier, adding color is what will give your sketch the appearance of being three-dimensional. By carefully selecting color combinations, you can highlight each element you have drawn.
For example, you can add a light blue to the top curve of the frame, and then add a slightly darker blue to the bottom curve of the frame. This will accentuate both curves and highlight their width.
Moreover, you can add a navy blue shade to the glass holder and a vibrant yellow to the lens. This will help improve the contrast quality and make the sketch look more realistic.
Bonus Tips
Add shading on the lens using white or silver colors to make the sunglasses look as though they’re gleaming and reflective.
Experiment with different colors and textures to create a unique design for your sunglasses.
Study real-life cycling sunglasses for inspiration and accuracy.
Consider incorporating elements like cyclists or bike accessories in the background for context.
Practice drawing various angles of the sunglasses to develop your skills further.
Check out some YouTube videos of other drawing tutorials for added inspiration on background designs.
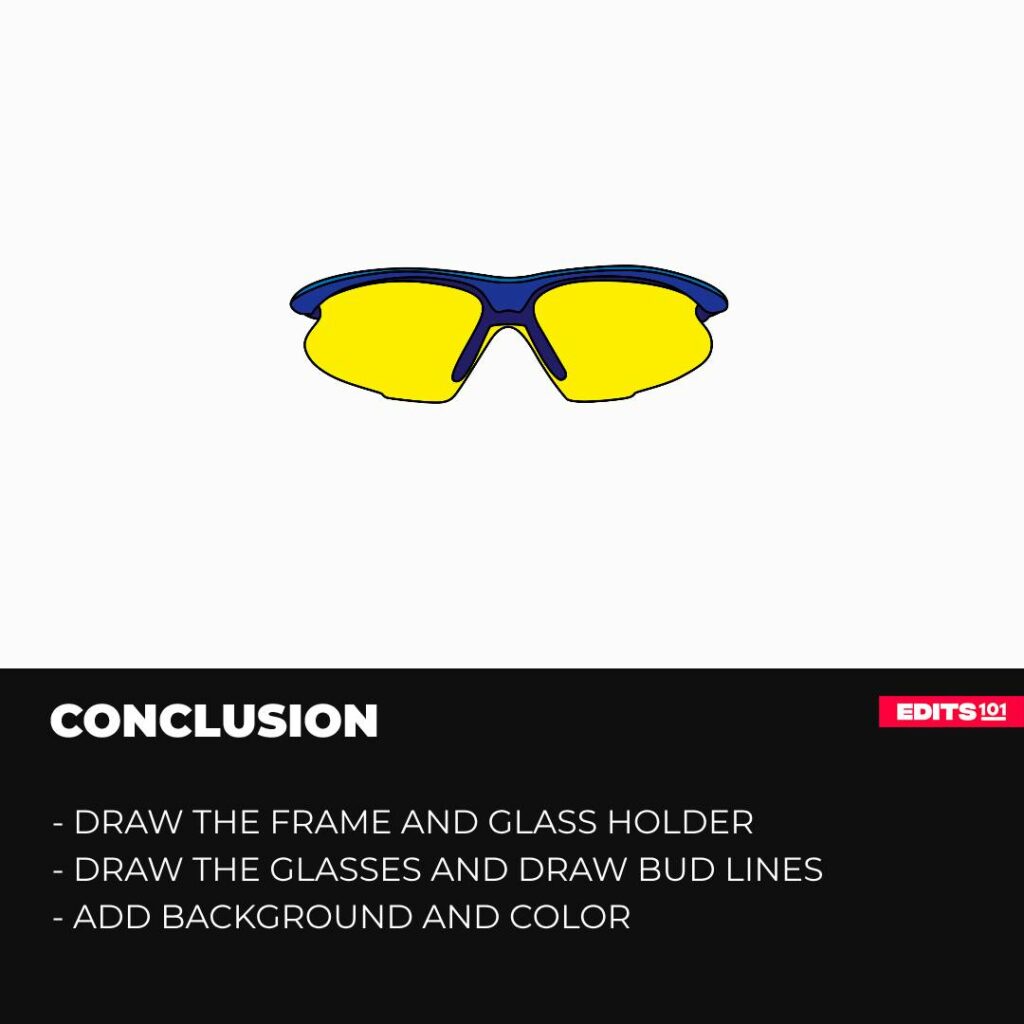
Conclusion
Completing today’s drawing tutorial has resulted in a detailed and realistic depiction of cycling sunglasses.
By carefully completing each stage, from sketching out the frame to refining details like the glass holder, lens and bud lines, you have successfully enhanced your drawing skills.
Remember that practice makes perfect, so keep experimenting with different styles and techniques to improve your drawing abilities further. Enjoy the process!
Thanks for reading & feel free to check out more of our articles!
Author Rating
Overall Rating
Summary
This tutorial will walk you through sketching a basic design for cycling sunglasses and then elevating it to achieve a more realistic and detailed appearance.