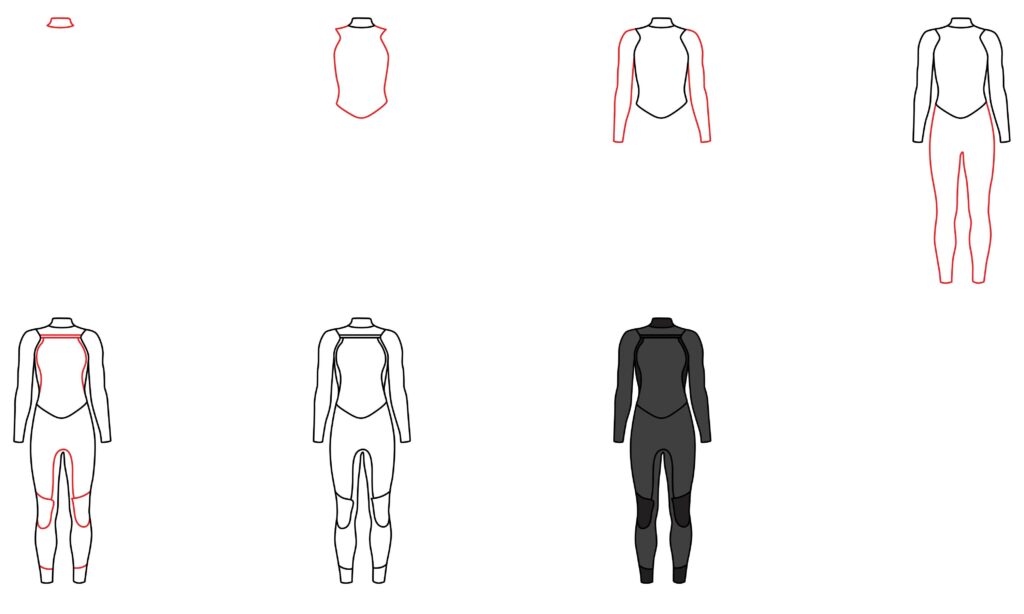
How To Draw A Wetsuit | A Quick and Simple Drawing Guide
A wetsuit is a specialized garment worn by divers, surfers, and water sports enthusiasts to provide thermal insulation in cold water. Typically constructed from neoprene, a synthetic rubber foam, wetsuits have closed cells that trap a thin layer of water between the suit and the wearer’s body.
The body then warms this water, creating a protective thermal barrier. Wetsuits come in various thicknesses, with thicker suits offering more insulation, and they may feature zippers and different seam constructions to minimize water entry. Whether in full suits, shorties, or spring suits, wetsuits are crucial for maintaining warmth and extending the duration of comfortable water activities such as scuba diving, surfing, and snorkeling in colder environments.
| Steps | Complexity level |
| Draw the collar | 2 |
| Draw the upper body part | 3 |
| Draw the sleeves | 2 |
| Draw the lower body part | 3 |
| Add the details | 2 |
What You Will Need
- Paper
- Pen
- Eraser
- Colored pencils or markers (optional)

How to Draw a Wetsuit
In this step-by-step guide, we’ll walk you through drawing a wetsuit that is perfect for your next ocean-themed masterpiece.
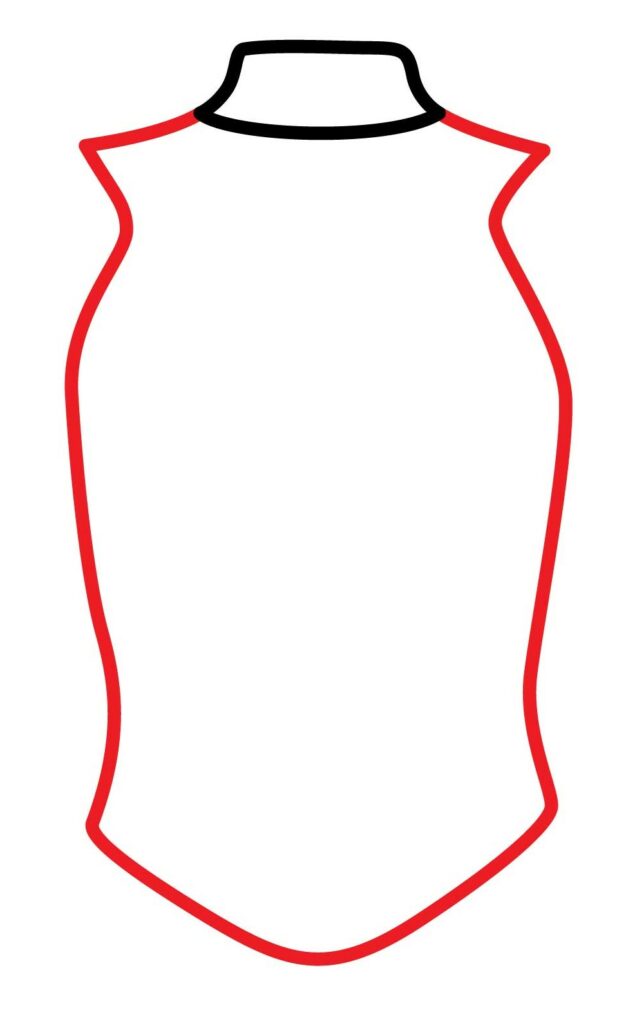
Step 1: Draw the Collar
The wetsuit, introduced in 1952 by physicist Hugh Bradner, has become a staple in water sports and diving. Crafted from neoprene, a material developed in the 1930s, wetsuits offer a combination of insulation and flexibility. Not only do they keep wearers warm in cold water, but the trapped layer of water within the neoprene also provides buoyancy. Wetsuits come in various styles catering to different water temperatures and activities, from full suits for comprehensive coverage to shorties and spring suits for more moderate conditions.
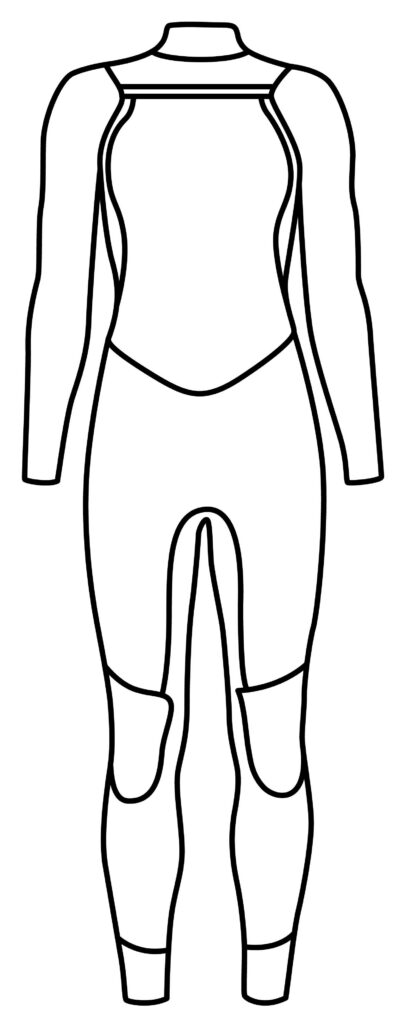
Begin your wetsuit drawing by sketching the collar shape at the top of your page using curved lines like we drew a collar is a softball jersey. Create an oval-like form with an opening in the front for the head to go through. Angle the lines to depict the collar lying gently on the shoulders rather than standing straight up. Draw a curved line across the bottom of the collar, readying a foundation for the chest and back to be built upon.

- Sketch oval collar with curved lines, leaving a head opening
- Collar shape angles across shoulders
- The curved line along the bottom preps for the chest/back
Step 2: Draw the Upper Body Part
Connected to your collar’s bottom line, form the wetsuit’s upper body using vertically and horizontally curved lines. Sketch the general rounded shirt-like shape, minding angles, and proportions as they wrap around the chest/waist. Lightly mark sections for the arms to attach later. Remember to keep curves smooth and even.
- Connect upper body lines to the bottom of the collar
- Mind proportions and angles of chest/waist curves
- Mark out lighter arm line sections to attach later
Step 3: Draw the Sleeves
The sleeves form next, attached to the shoulders of the upper body using curved vertical lines. Draw one sleeve slightly bent as though an arm is raised while the other hangs straight down. Add curved lines and angles within each sleeve to show wrinkles in the fabric, giving a realistic appearance of arms filling out the suit.
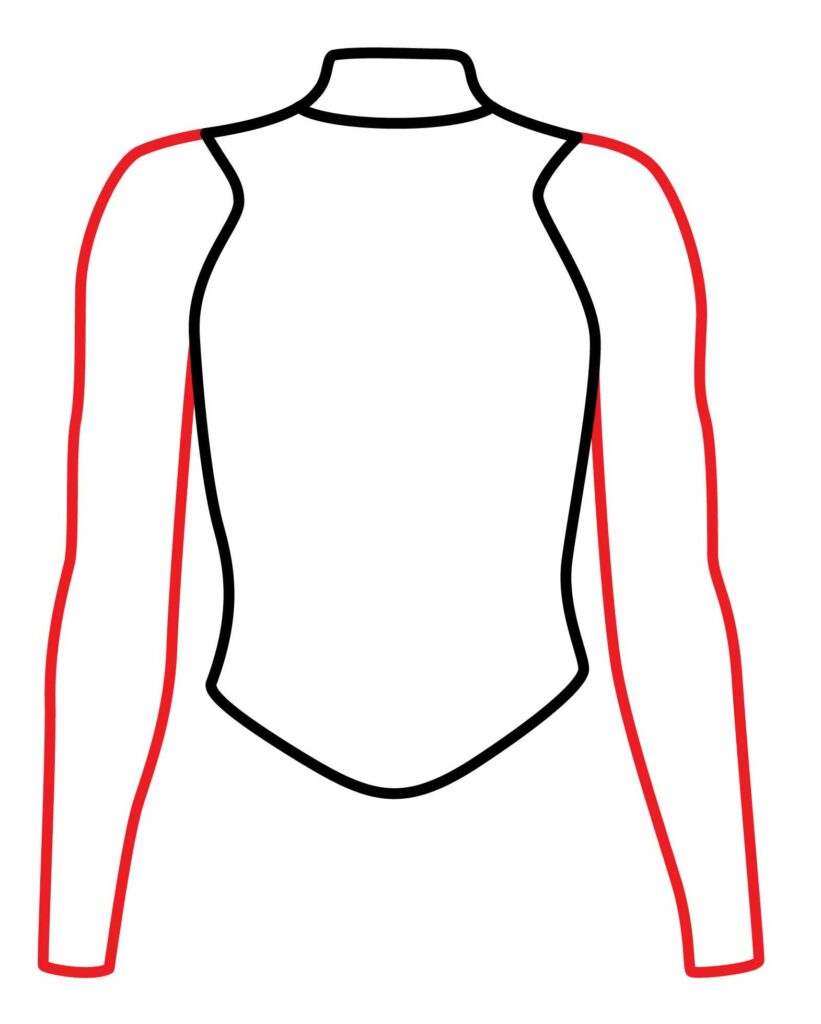
- Attach sleeves with curved vertical lines at the shoulders
- Make one sleeve bent, the other straight
- Add interior curved lines showing fabric wrinkles
Step 4: Draw the Lower Body Part
Finally, sketch the wetsuit’s lower body portion using longer, gently curving vertical lines that connect down from the upper body’s waistline. Create a general leg shape that tapers in at the ankle areas like we drew the legs of a coach. Leaving the legs mostly as smooth single lines keeps focus on the upper body and sleeves as the main subjects.
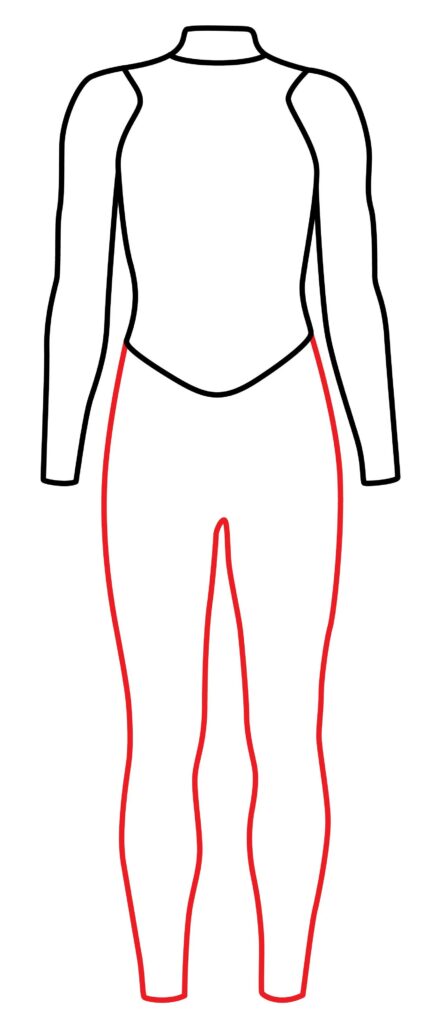
- Connect lower legs with long, gently curving lines
- Taper legs inward at ankle areas
- Smooth leg lines let the upper body remain center focus
Step 5: Add Some Details
Beyond sports, wetsuits have found applications in marine research and photography. Innovations include ongoing efforts to create eco-friendly alternatives, reflecting a broader awareness of environmental concerns. Using wetsuits in events like polar bear plunges and triathlons highlights their versatility, making them indispensable in diverse aquatic pursuits.
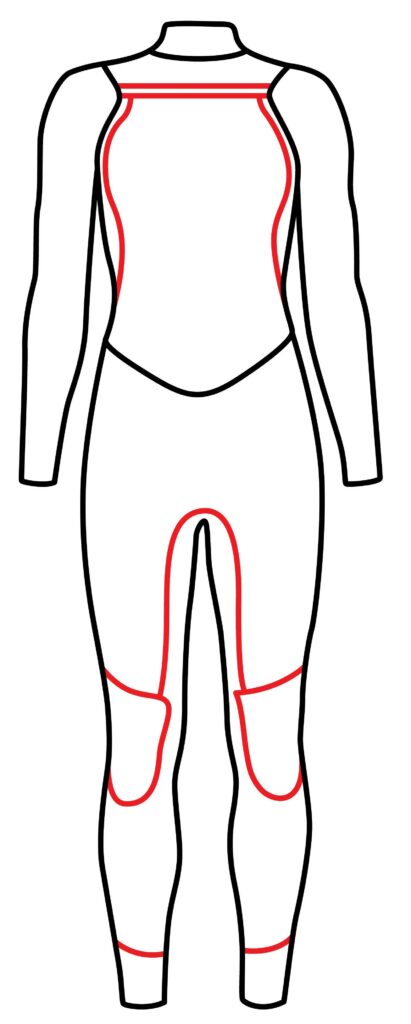
Take your wetsuit illustration further by adding small yet meaningful details like we added details on jerseys. Sketch curved and straight lines on the thighs resembling seams and panels that enhance dimension. Add a visible zipper to line up the chest with neatly parallel segments. Define the sleeve wrinkles more for realism. Finally, consider non-fabric texture elements like decorative stripes or prints!
- Enhance dimension with thigh seam and panel lines
- Add a central zipper with neat parallel segments
- Refine realistic sleeve wrinkle details more
- Consider decorative stripes or prints for extra flair.
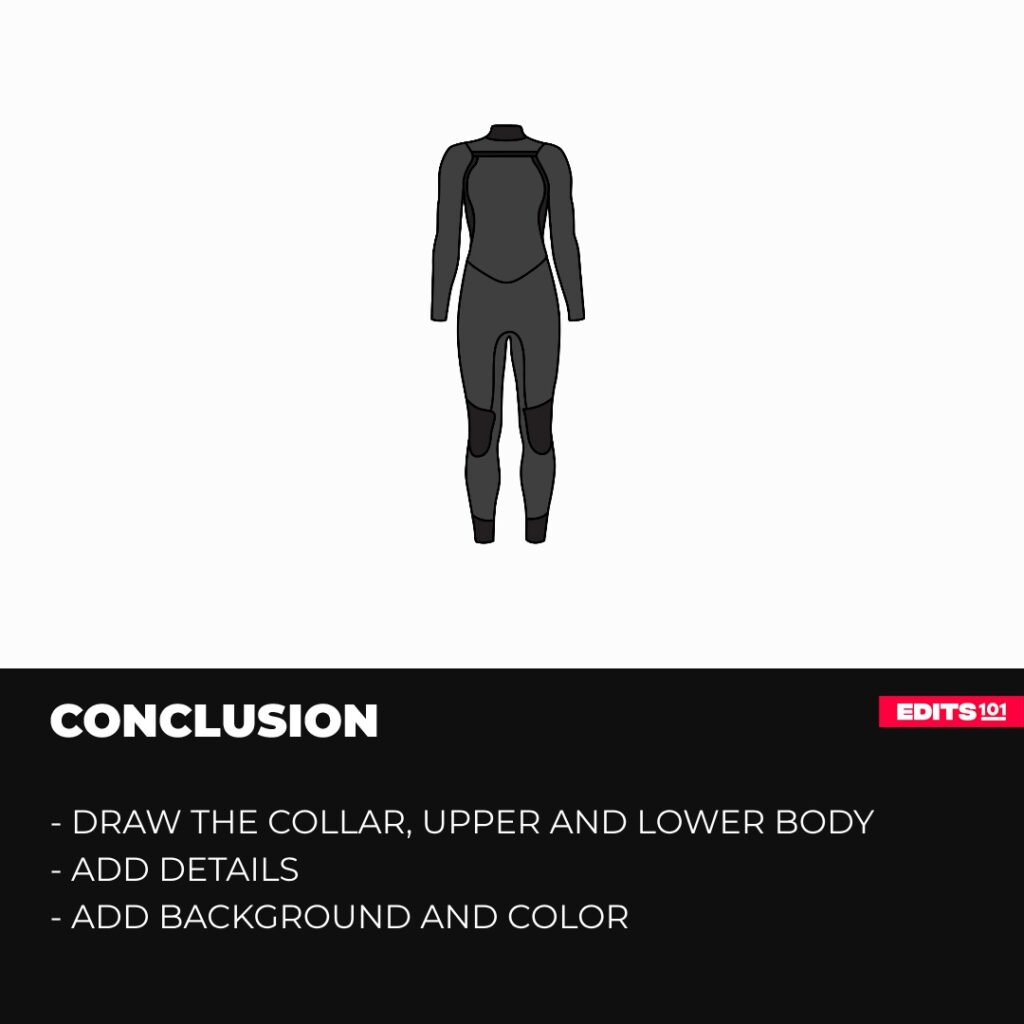
Step 6: Congratulations! Your Wetsuit Drawing Is Complete
With all the essential elements in place, step back and admire your wetsuit drawing. You’ve completed the main structure.
Taking your wetsuit drawing to the next level
Like any other skill, sketching requires practice. Set aside time each day to sketch, even if it’s only for a little while. Be mindful of your surroundings. This enhances comprehension of details, dimensions, and forms. You can start with the basics and work up to more complex topics. Experiment with different drawing tools like charcoal, colored pencils, watercolors, markers, and pencils. Every medium has unique characteristics that could help you identify your preferences.
You can also play with basic hatching, blending, shading, and cross-hatching techniques. Understanding these techniques will greatly enhance the complexity and realism of your drawings. When you’re drawing, use your imagination and try out new concepts.
Adding Background to Your Wetsuit Drawing
Now, let’s make your wetsuit drawing even cooler by putting it in a special background. Imagine your wetsuit in places like a beach with awesome waves or a tropical lagoon with palm trees swaying. You can even think about the deep sea with mysterious shipwrecks.
For the beach scene, draw foamy waves coming up on the sandy shores behind your wetsuit. Make the waves lead the eye to the distant rolling ocean on the horizon. Add seashells, starfish, and tangled kelp and seagrass on the golden sands. Picture seagulls flying overhead, and maybe there’s a sunbather with a colorful towel and a beach umbrella on the side. This will make your wetsuit drawing tell a really cool story.
Imagine your wetsuit in a tropical lagoon with calm, turquoise waters. Picture manta rays gracefully breaking the surface, surrounded by volcanic rocks and beautiful coral gardens. At the top of the scene, draw coconuts hanging from palm trees swaying in the warm breeze.
For a more dramatic setting, think about a shipwreck background. Draw old ship hulls rising above the water, covered in floating debris. Show schools of shiny fish swimming around, and let sunlight spill down to reveal ancient cannons and gold doubloons. Your wetsuit diver can explore these mysteries along with the underwater wonders.
Coloring Your Wetsuit Drawing
Strategic splashes of color help a thoughtfully shaded wetsuit drawing leap off the page. Consider bright primaries for a retro comic book look or deeper oceanic tones for realistic effects. For a vibrant retro palette, color your wetsuit crimson red or royal blue with crisp white accents to make details like zippers pop. Paint matching gloves and flippers in alternating tones. Use beach backdrops of golden yellow sands against teal waters and periwinkle blue skies—pepper with rainbow umbrella towels.

For realistic hues, utilize shades of black and gray to capture true neoprene textures. Reserve black for depth shadows while leaving raised surfaces battleship gray. Blue grays add sheen along rounded edges. Soak side lighting into one side of your subject to showcase dimension. Meanwhile, splash seafoam green and aqua blue into serene waters behind your splendidly shaded creation. Whether favoring eye-catching primaries or authentic aquatic shades, subtle blending and controlled brush strokes heighten the drama. So grab a palette fitting imagined depths and start coloring shadowy mysteries or sun-drenched shores!
Bonus Tips for Customizing Your Wetsuit Drawings
You can accessorize your wetsuit – Deck out your wetsuit diver with stylish gear like sleek dive knives, wrist-mounted dive computers, and GoPro cameras on artfully angled helmet mounts. High-tech equipment opens story ideas. Get creative with textures. Move beyond classic neoprene looks by designing unique bio-patterned wetsuits that mimic aquatic life. Sketch colorful manta ray shapes into suit panels or glowing neon jellyfish tentacles trailing the arms for a dazzling effect.
Convey dramatic action. Capture wetsuit divers mid-scene by including dynamic elements like air bubbles trailing movements, spearguns firing at darting prey, and grasping hands reaching to steady rising treasures from ancient wrecks. Show some action! You can also invent a fascinating scene – Place your finished wetsuit illustration against an intricately detailed background rich with coral reefs or mysterious shipwrecks. Populate with schools of exotic fish, friendly dolphins, or lurking sharks to add environmental storytelling. Let decorative embellishing take your fundamental wetsuit drawing in unlimited, fun directions!
Conclusion
Through gradually acquired techniques, you have artistic skills to depict wetsuit divers ready to plunge into imaginative undersea exploits! Whether left minimalist or customized with elaborate textures and accessories, bring colorful new realms alive by continuing to harness vision. Soon, friends will eagerly soak in the vibrant aquatic stories told through your grinning drawings. So believe in your creative currents and go with the flow!
Thanks for reading & feel free to check out more of our articles!
Author Rating
Overall Rating
Summary
This guide explains how to draw a wetsuit that are used by diving in the sea.