How To Draw A Target Face | A Step-by-Step Guide
The 2024 Summer Olympics are around the corner, and it’s been announced that the sport of archery will be included in the games! In archery, one of the most crucial objects of the sport is the target face.
A target face is a big colorful circle with different sections on it used for measuring an archer’s skill and accuracy. They do this by aiming and shooting at different score values on the target face, and in order for archers to get the highest points, they have to hit the center value, commonly known as the “10-point value”.
| Steps | Complexity Level |
| 5-Point Circle | 2 |
| 6-Point Circle | 3 |
| 7-Point Circle | 3 |
| 8-Point Circle | 3 |
| 9 & 10-Point Circle | 4 |
What you will need
- Paper
- Pencil
- Eraser
- Colored pencils or markers
- Drawing compass
- Circular objects, like round perfume or spray bottles (optional)
- 15-20 minutes
How to Draw A Target Face
Drawing a target face is a great way to express yourself through art while also learning about the sport of archery.
In this tutorial, you will learn how to draw your very own target face in only 7 easy steps.
Before you begin though, be sure to check out the outline of each drawing step below to familiarize yourself with the process. While you’re at it, check out how awesome the last one looks! Ready to get started?
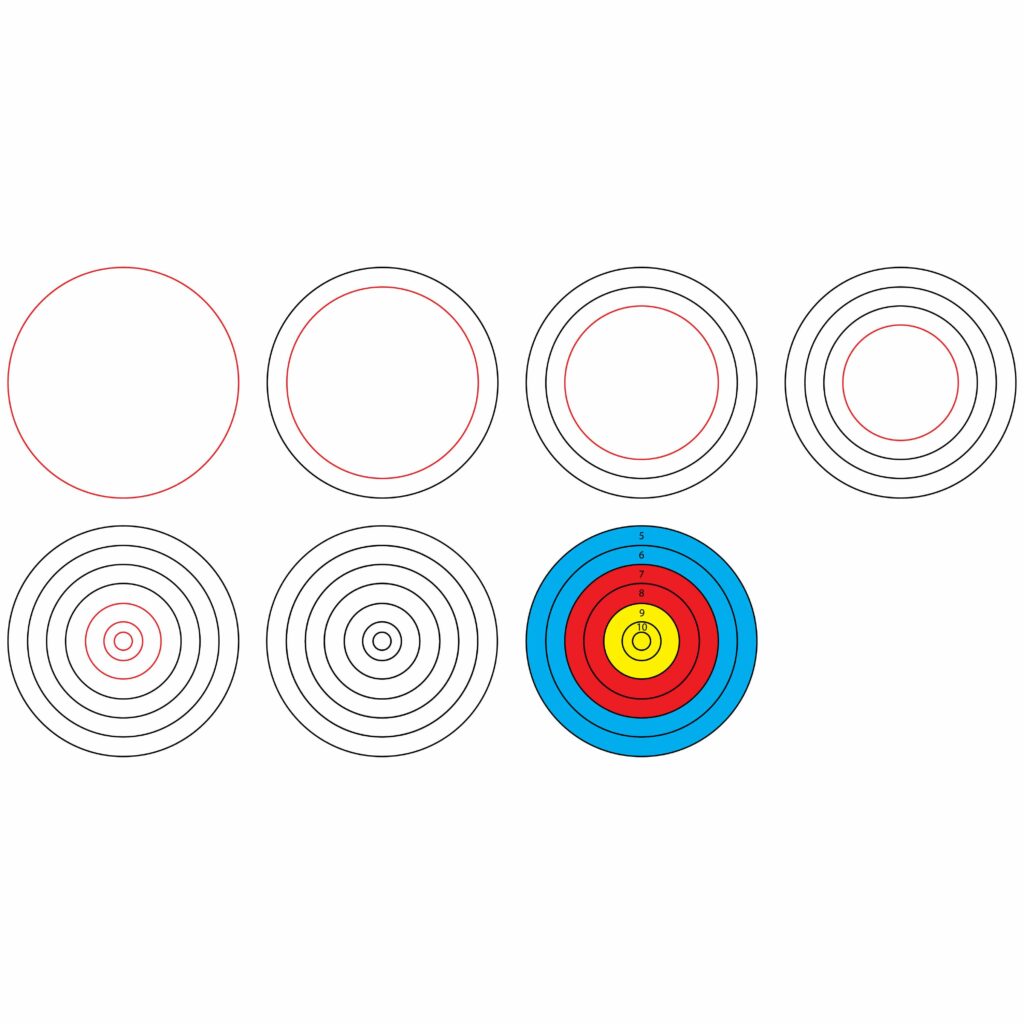
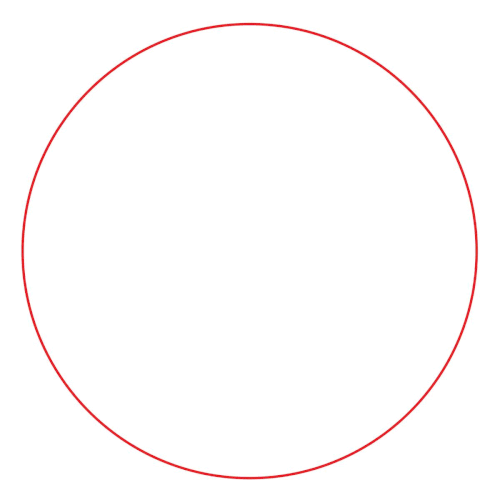
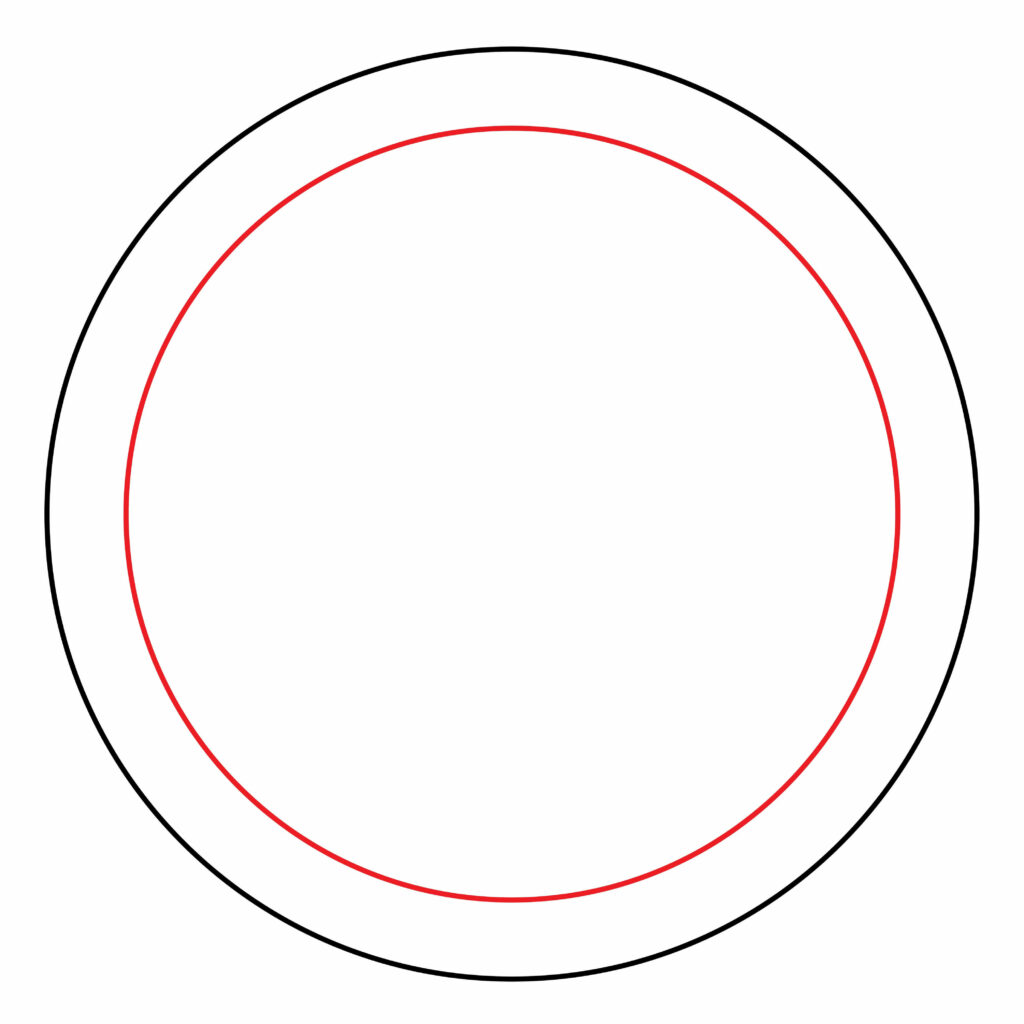
Step 1: Draw the 5-point circle
Each circle within a target face represents a specific point value. The furthest circle from the middle of a target has the least point value, and the circle closest to the middle of the target face has the highest point value. So in archery, the goal is to be accurate and aim for the middle!
The 5-point circle is the point value that’s furthest away from the middle, and has the lowest value.
In this step, you will need to draw a relatively big circle in the middle of your page. To make your lines nice and straight, use a mathematical drawing compass.
If you don’t have one of those handy though, don’t worry! Look for other things in your environment that might help you draw a perfect circle, like a perfume bottle, a spray bottle, or you can even use a nice big plastic cup!
While you’re grabbing those, get a bunch of different sizes as well! You’ll need smaller ones for smaller circles later on.
- Start by drawing a big circle in the center of your drawing paper
- Use a mathematical drawing compass for smooth lines
- Alternatively, use circular household items if necessary

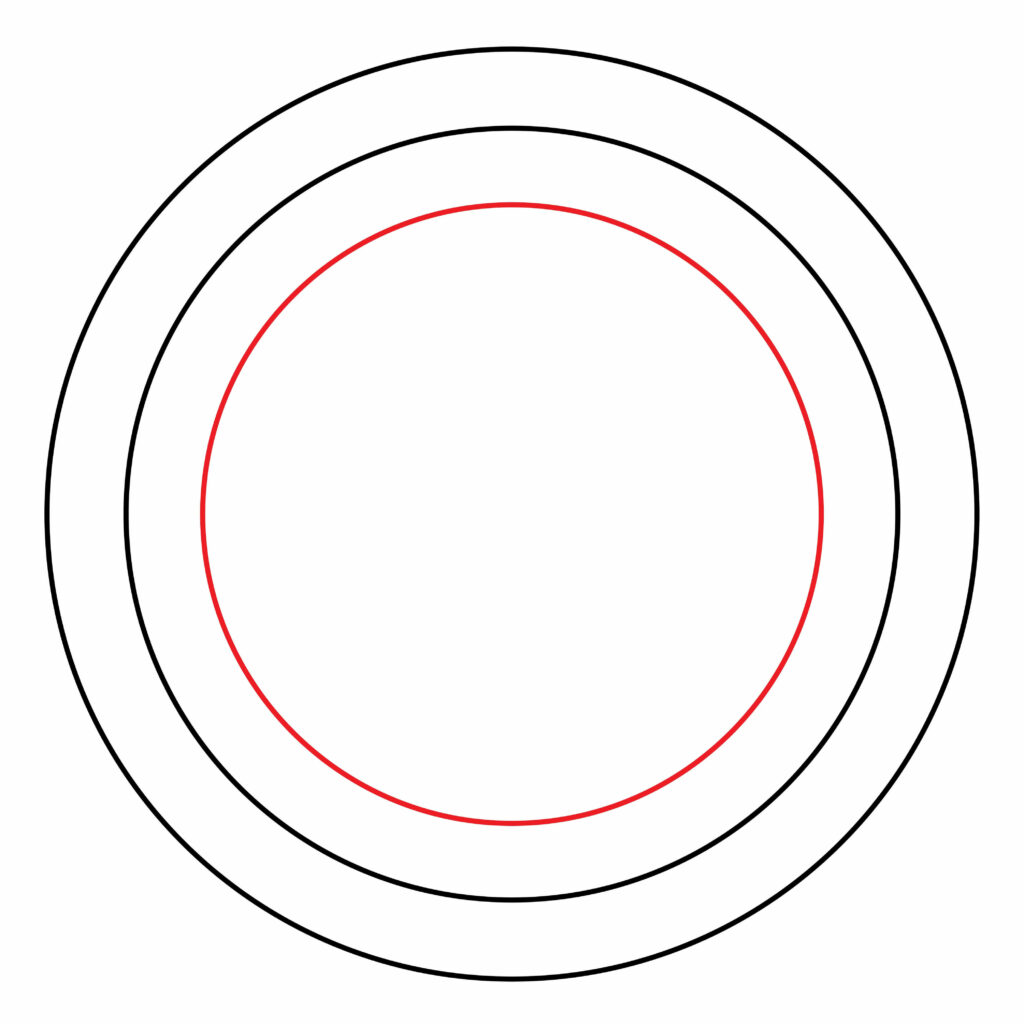
Step 2: Draw the 6-point circle
As mentioned before, the closer the circles get to the middle of the target face, the higher the point value will be. So the next circle you’ll need to draw is called a “6-point circle”. Archers score 6 points if they manage to hit this target!
In order to complete this step, you need to draw a circle within the 5-point circle. This circle should be smaller, with about half an inch of space in between it and the 5-point circle.
Remember to make your lines as smooth as possible, similar to how the drawing in the image below looks!
- Draw a smaller circle within the 5-point circle
- Add a nice amount of space between your two circles
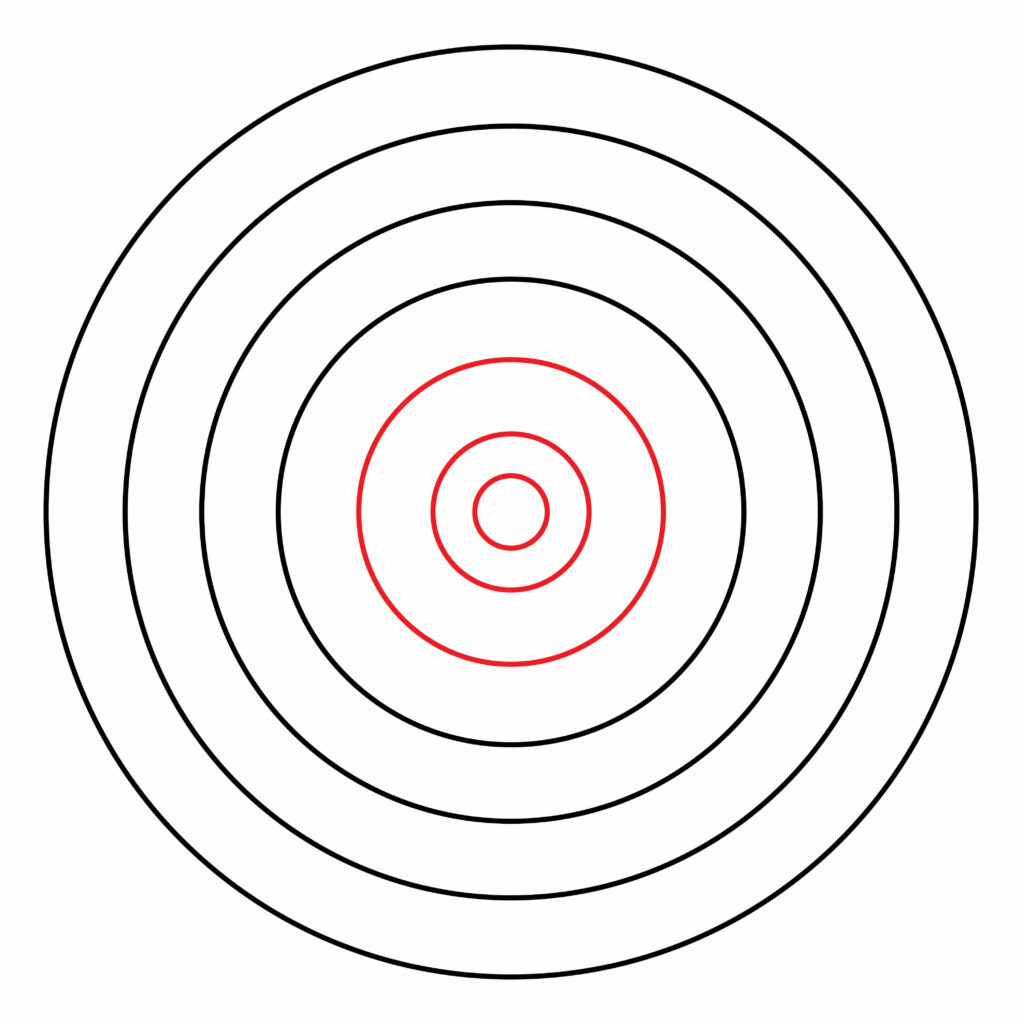
Step 3: Draw the 7-point circle
The highest point value on a target face is 10.
The 7-point circle represents 7 points, so we’re slowly getting closer to the middle of the target face now!
Fun fact: in individual Olympic archery tournaments, archers get to aim and shoot 3 arrows in 1 set. The archer with the highest score after shooting 3 arrows, gets 2 points added to their set total. The winner will be the one with the best score out of 5 sets, so it’s 15 arrows shot in total.
If an archer hits the 7 point circle thrice during a set, they’ll have 21 points. That’s not a bad score at all considering how difficult it must be to hit any circle on the target face from far away, wouldn’t you say?
For this step, like you did in the previous ones, draw another circle within your 5-point circle. This one being closer to the center, so there will be about half an inch of space between it and your 6-point circle.
Take a look at your drawing and notice how it’s slowly transforming into a target face. Soon, your drawing will be complete and you’ll have a beautiful piece of artwork to add to your – hopefully growing – collection.
Additionally, check out the image we provide below to make sure your drawing is on the right track!
- Draw a circle inching closer to the center of your target face
- Remain mindful of the space between your circles
- Make sure your circle line is smooth and even
Step 4: Draw the 8-point circle
Hitting the 8-point circle during a target match means archers score eight points!
Because the 8-point circle is pretty close to the center of the target face, this is a difficult feat for archers to achieve in the beginning. Like any skill, it takes time and practice to perfect. Similar to your journey with art!
In order to complete this step, draw a circle closer to the middle of your target face. Remember to keep the space between your circles the same.
If you’ve got a mathematical drawing compass, setting the inches on it will help you get better dimensions.
If you’re using DIY (Do It Yourself) materials, find an object that will help you draw a smaller circle. Instead of a cup, use a spray or perfume bottle for this step.
Remember, you can always use of your eraser wherever you please to help you make the drawing as best as it can be!
- Draw a smaller circle within your target face drawing
- Keep the space in between circles the same as previous ones
- If necessary, use your eraser to correct any mistakes

Step 5: Draw the 9 and 10-point circle
The 9-point and 10-point circles are the ones in the center of a target face. Hitting these circles with arrows award archers with the highest points!
In order to complete this step, draw three circles, each one closer to the middle of your target face.
Like you did in the previous steps, keep the space between your 8 and 9-point circle the same as the outer circles.
However, for the 10-point circle, make the space slightly smaller. This is needed because it makes your drawing more realistic.
In archery, the most difficult target to hit is the 10-point circle, also known as “bullseye”. Therefore, the space is a little smaller between the 9-point circle and the 10-point circle.
After all, archers need to show off all the hard work and practice they put in. It makes sense for this part to be difficult.
- Draw three circles that inch toward the center of the target face
- Keep the space between the 8 and 9-point circle the same as previous ones
- The space between the 9 and 10-point circle should be slightly narrower
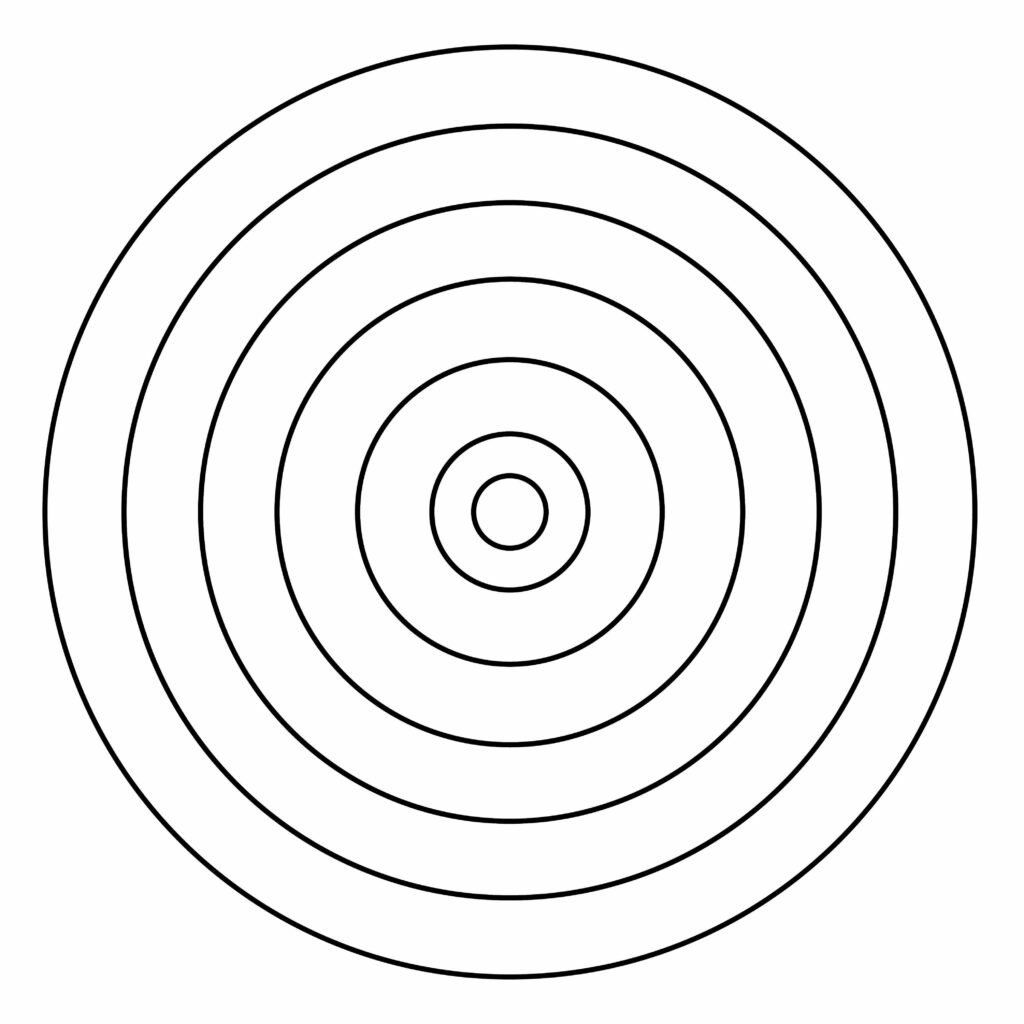
Congratulations! Your target face drawing is complete.
If you’ve managed to complete all of these steps, take a moment to applaud yourself for putting in the time and effort to finish something. We want to let you know that we’re proud of your dedication, so job well done!
Take a step back and check out your drawing. If there’s anything you’d like to fix about it, now would be the time to do so.
Use your eraser to improve any squiggly lines you might have.
Your drawing should look something like the one below. If it doesn’t, take your time and do your best to make it better. It doesn’t necessarily have to be perfect, though “better” is always good.
Do this now, because soon comes the fun bit; taking your drawing to the next level!
Taking your Drawing to the Next Level
There are many ways to improve a drawing and give it an extra spark.
Adding color takes a black and white sketch and almost immediately transforms it into something eye-catching and realistic-looking.
Adding a background enhances a drawing by broadening the scope of your artwork. Not only does it inspire you, but it will inspire those who look at your drawings to imagine different things and attach storylines to the objects you draw.
Step 6: Adding a background
There are lots of different background ideas to play around with for a target face!
Archery is both an indoor and outdoor sport, so consider adding a background with some trees and grass for an outside feel, or a brick wall placed behind your target face – which will entice the imagination to think that it is inside a building.
Additionally, you could add some other archery items in your background as well. This might give your drawing a more subject-oriented feel. Consider adding an arrow, archery bow, or some archery gloves in your background.
step 7: adding color
For some artists, this is the most fun part of creating art.
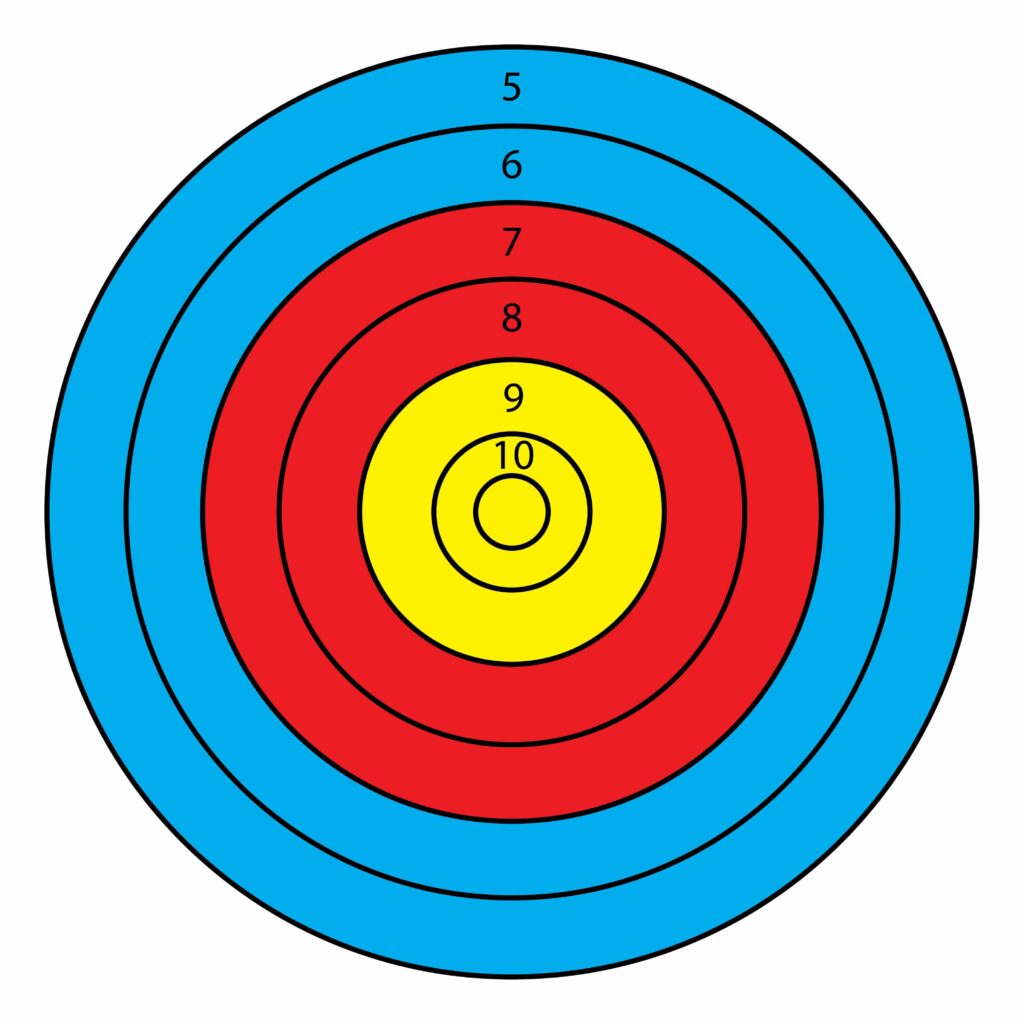
On your target face drawing, to make it look realistic, add a light blue color to the 5 and 6-point circle. Then color your 7 and 8-point circles with a nice red tone.
For the last section, the 9 and 10-point circles, color them in with a vibrant yellow. This is almost an exact depiction of a real-life target face.
Check out the drawing below for guidelines, and if you’re going for a realistic feel, then be sure to add the numbers as we have done in our drawing of a target face, as well.
Draw them as neat and clear as you can!
Check out the image of a real-life target face for some more inspiration on this site!
Bonus Tips
Take a step back and examine your final drawing from a distance to get a better perspective on the overall composition.
To make your drawing even more authentic, add some shading techniques to the target face. This will add depth to your drawing, and also boost originality plus stimulate the imagination of those lucky enough to view your drawing!
Be sure to include some distinctive features of a target face, like some markings on the circles to indicate where arrows just hit, or an X in the middle, to indicate a “bullseye”.
Alternatively, because art is not linear, you can make your drawing your own. Don’t be afraid to add some personal touches to your new drawing!
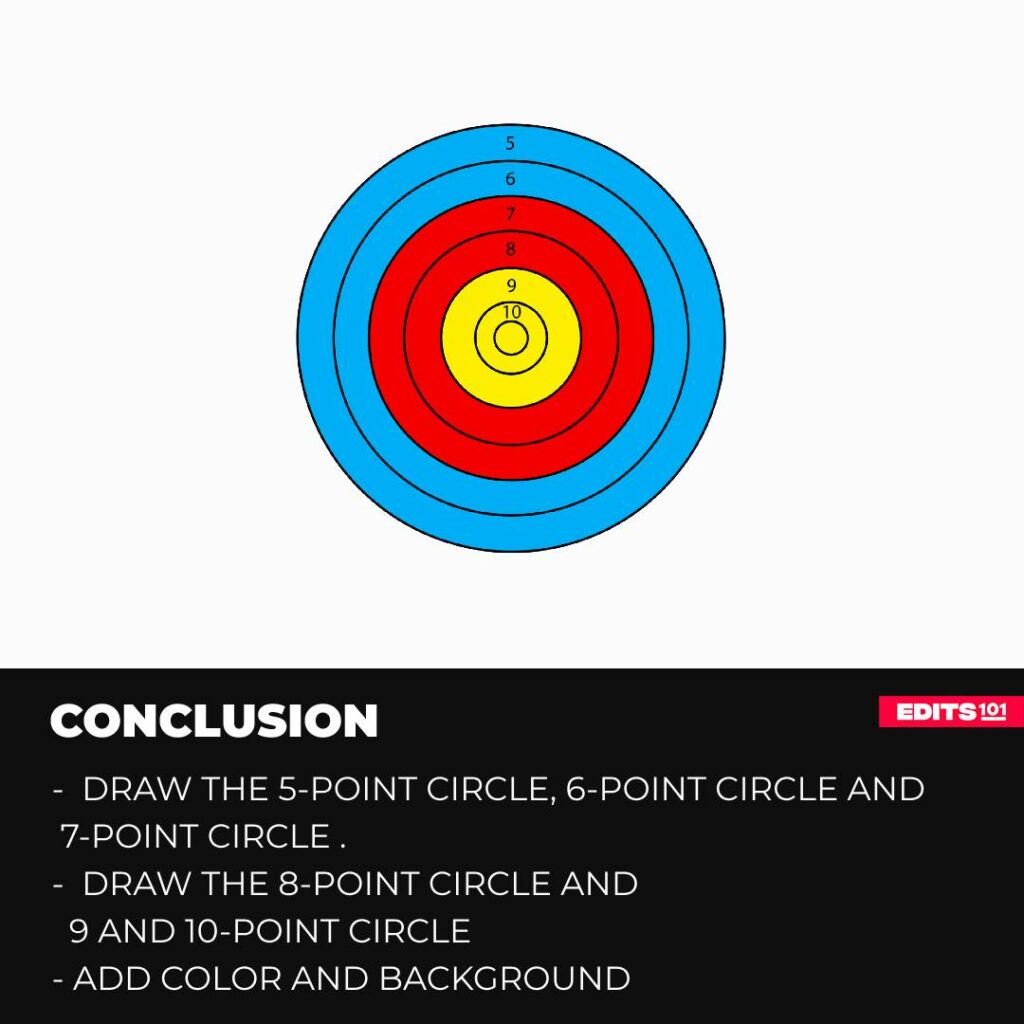
Conclusion
You have learnt a few things by completing this tutorial, like how to draw smooth circles and make use of household items to help you do so. If perhaps you were not priorly exposed to the sport of archery, you’ve hopefully also learnt some of the rules of the game.
With the Olympics around the corner, you now have a cool sketch to add to your collection, and also show to your friends and family.
If you’re new to the journey of artwork and drawing, let this be the first step in an awesome challenge. There are so many other drawings to get started on that will really challenge you and your creativity!
If you’ve already drawn a few things and have just added this drawing to your body of work, well done! Continue to challenge yourself and do more. See you next time in another tutorial!
Thanks for reading & feel free to check out more of our articles!
Author Rating
Overall Rating
Summary
This tutorial will guide you through sketching a basic target face design and then enhancing the overall look to achieve a more authentic and intricate appearance.