How to Draw a Taxi | Step-by-Step Tutorial
A car used for public transportation is known as a taxi or cab in various places around the world. They’re often used by people because of their convenience and affordability – and because they provide a quick and easy way to travel from one point to another without the need for parking or navigating public transportation schedules!
In today’s tutorial, you will learn how to draw your very own taxi cab in only 10 easy-to-do steps!
| Steps | Complexity Level |
|---|---|
| The Taxi Body | 1 |
| The Roof | 1 |
| The Windows | 2 |
| The Signboard | 2 |
| The Doors | 3 |
| The Wheels | 2 |
| The Bumpers | 2 |
| The Lights & Locks | 1 |
What You Will Need
- A Pencil
- An Eraser
- A sheet of paper or sketchbook
- Ruler
- Coloring Materials (Crayons, colored pencils, oil pastel, etc)
- Household circular objects (e.g, coin, small spray bottles, etc)
- 15-20 minutes
How to Draw a Taxi
Drawing a taxi cab might be an exciting and gratifying activity to do mainly because it’s not very difficult to complete at all.
Though it may seem a little bit daunting at first, if you follow the steps we provide and utilize a bit of patience you’ll find that you’re gliding through the process with ease!
Before you begin, make sure you steal a peek at the outline we provide to get you up to speed on all you be doing, grab all of your drawing utensils, and without any further ado, get ready to start sketching!
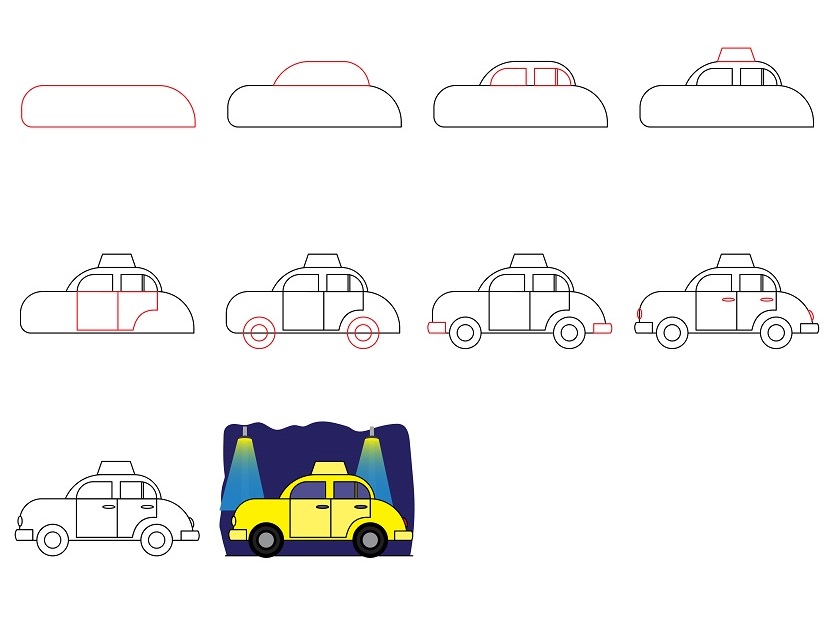
Step 1: Draw the Taxi Body
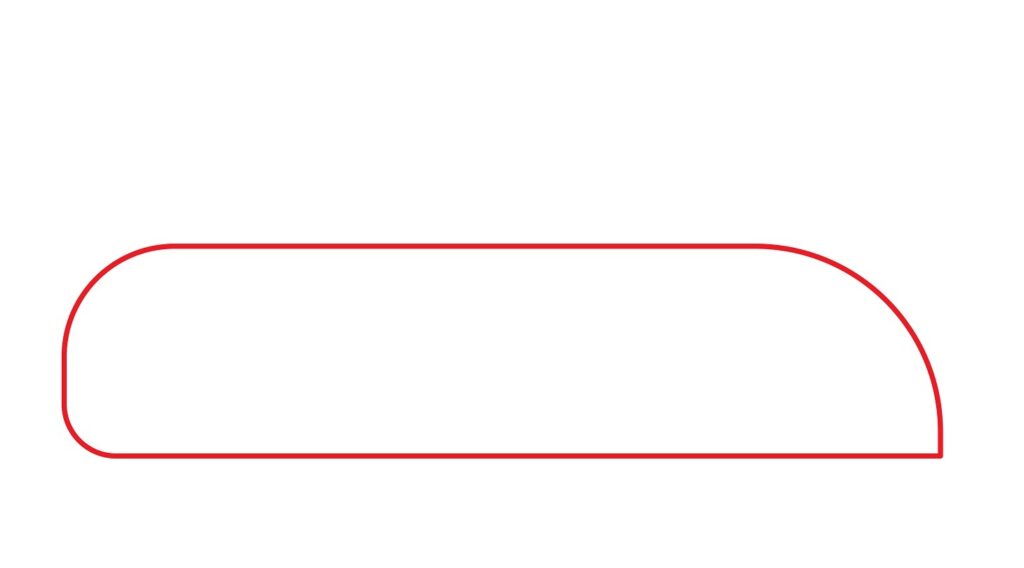
The first thing you will need to do is draw the taxi’s body. This is the central component of your drawing as you will be adding in other parts around the body later on.
Using a ruler, start by drawing a long rectangle in the middle of your paper. Then, erase the two short vertical lines on both sides of your rectangle.
Make sure there are no remnants/traces of those lines left behind, because you will need to draw some curved corners in those two spots next.
For the left side of the taxi’s body, draw smoothly rounded corners, and for the right side of the taxi’s body, draw a smooth curve on top that turns into a sharp corner on the bottom edge.
- Draw a long rectangle in the middle of your drawing paper
- Erase and curve the corners
- Make the bottom right corner sharp
Step 2: Add the Roof
A taxi would be incomplete without a roof to protect its passengers, wouldn’t you agree?
In order to complete this step, you need to draw another rectangle above the taxi’s body, however this one should be noticably smaller in size, and should also be placed slightly to the right of the mid-section.
Again, the corners of the smaller rectangle should be removed just like you did in the first step in order to add curved corners to the front and back. Remember to curve the front corner a little sharper than the back corner.
- Draw a smaller rectangle above the taxi’s body
- Place the smaller rectangle slightly to the right of the mid-section
- Erase the corners of the rectangle
- Draw curved corners instead – a sharp curve on the left and a smooth curve on the right

Step 3: Draw the Windows
Now let’s draw some windows so that drivers and passengers can see where they are going.
Begin by drawing two small rectangles inside the taxi roof. The two rectangles must have the same size and should be placed next to one another, with a nice bit of space in between them.
Erase the left side of the first rectangle and add a smooth curve to the corner. Then, erase the right side of the second rectangle and make it curved as well.
Now, divide the back window by drawing two straight lines slightly towards the right end.
- Start by drawing two small rectangles within the taxi’s roof
- Erase the outer corners of each rectangle
- Add curved corners to the left of the first rectangle and the right of the second one
- Divide the back window by drawing two vertical lines within the shape

Step 4: Draw the taxi signboard
Taxi cabs are commonly recognized by their signboards which distinguishes them from other cars on the road.
For this step, you have to place the signboard at the top of the taxi’s roof. To do so, draw a small rectangle on the middle part of the roof.
Now, erase the sides of this rectangle and change them to diagonal lines. The sides must be drawn in opposing directions, and they will look like a small flat head of a lampshade as shown in the image.
- Draw the signboard on top of the taxi’s roof
- Draw a small rectangle in the middle of the taxi’s roof
- Erase the corners of the rectangle and add diagonal lines

Step 5: Draw doors
By now you should be able to visualize your taxi. We’re halfway through the drawing process so keep on going!
A crucial component of any car or vehicle are doors because they enable passengers to enter and exit the vehicles. For our drawing today, you must draw the doors inside the taxi’s body. It should also be aligned with the windows of the taxi.
Start by drawing a big rectangle under the taxi’s windows. The bottom corner of the windows and the upper edge of the rectangle must be aligned and connected to one another.
Next, divide the rectangle into two squares by drawing a straight line in the middle of it. You will now see two connected squares.
Remove the lower right-side corner from the second square. Then, draw a half circle facing outside of the said square.
- Draw a big rectangle within the taxi’s body that aligns with the windows
- Divide the rectangle into squares with a vertical line down the middle
- Erase the bottom right corner of the second square
- Draw a semi-circle facing away from the square

Step 6: Draw the Wheels
Your taxi cab drawing now needs a set of wheels to indicate that they’re roadworthy and in good condition!
Before you begin this step, make sure you have a coin, compass, or any small circular object available that you can use as a guide for the wheels.
Start by drawing a circle on the left side of the taxi’s body, and another circle at the right side, with a nice bit of space between them and the taxi doors. The two circles must be the same size and parallel to one another!
Next, draw two smaller circles inside the two big circles to represent the tire shape. Erase the bottom of the taxi’s body lines that overlap and run through the wheels.
- Grab a circular object to help you draw the shape of the wheels
- Draw the first circle on the left side of the body and second one on the right
- Add a smaller circle within both big circles to represent the tires
- Erase any lines that run through the wheels

Step 7: Draw the bumpers
Bumpers on a car serve several functions, including absorbing and redistributing impact energy in the event of a collision to minimize damage to the vehicle and protect passengers! So for a touch of realism, we need to add some bumpers to our taxi cab drawing.
The rectangular bumpers must be drawn at the bottom edge of the body. One at the left corner and the other at the right corner.
After drawing the rectangles, erase the front side of the front bumper and make it curved. Then, erase the back side of the back bumper and make it curved as well.
- Draw the first bumper against the left corner and the second one against the right corner of the taxi’s body
- Erase the left side of the front bumper and make it curved
- Erase the right side of the back bumper and add a smooth curve

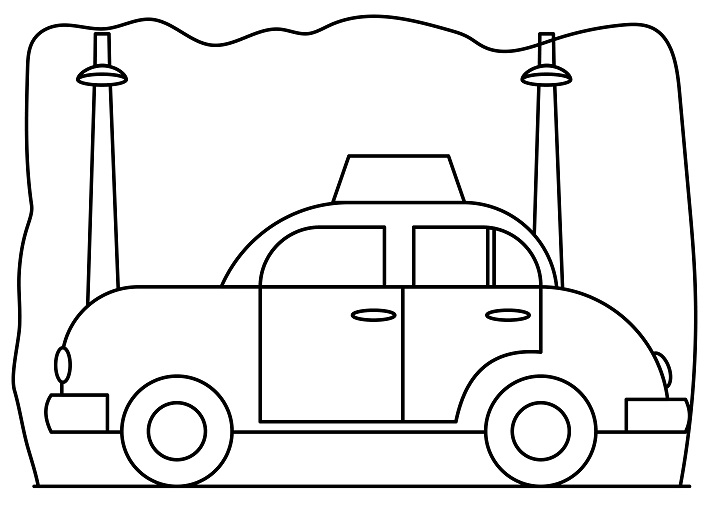
Step 8: Draw lights and locks
A taxi drawing – or any vehicle drawing really – would be incomplete without some lights and door handles (a.k.a, locks).
Begin drawing the lights by adding a small vertical oval above the front side bumper. Then, erase the overlapping line inside the oval shape. For the light at the back, draw a half circle above the back side bumper.
The locks must be placed at the upper right corner of each square door.
To draw the door locks, draw a small flat circle inside the front door, and another small flat circle inside the back door.
- Draw a small vertical oval above the front/left bumper and erase overlapping lines for the headlights
- Draw a half circle above the back/right bumper to indicate the rear lights
- Draw two small flat circles within each square door on the upper right corner

Congratulations! Your taxi drawing is complete
And that’s it! Well…sort of. Before we go any further, take a little break to relax and give your drawing hand a much needed rest. While you’re at it, don’t forget to acknowledge the fact that you just took a blank page and created an awesome new drawing on it. We’re super proud of your hard work. But it’s not exactly over yet! When you’re ready, follow the steps below to really enhance the quality of your drawing.
Taking your Drawing to the Next Level
Some artists like the aesthetic appeal of minimalistic art, so we understand if perhaps you would like to leave your drawing as it is at the moment. However, there are many ways to explore your creativity and boost the overall appeal of your drawing as well, and we would be amiss if we didn’t make you aware of them.
Think the way Vincent Van Gogh did when he said, “I want to touch people with my art. I want them to say, ‘he feels deeply, he feels tenderly.”
Push yourself to go even further so that those lucky enough to view your drawings are touched and transformed by them!
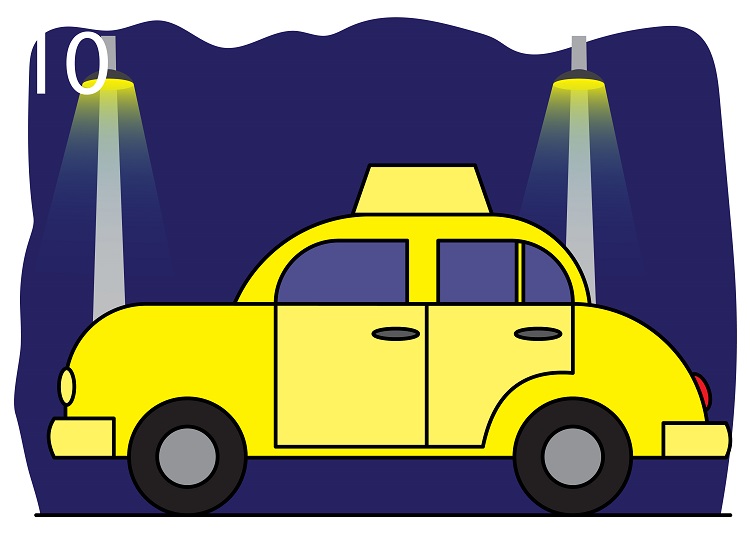
Step 9: Adding a background
Adding a background to a drawing is like adding a set to a movie or play. It’s almost fundamental! It instantly expands the scope of your artwork and allows the viewer to explore their own imagination by attaching a storyline to your drawing.
For your taxi cab drawing, there are plenty of ideas to play around with for a scenic background. Taxis are commonly found in city centers, so you may be enticed to draw a some buildings in the background.
Though not as common, they’re also found in rural settings in some parts of the world. You can draw a field in the background, or a dirt road underneath your taxi cab, as well. Additionally, think of the time of day when you’re sketching your background.
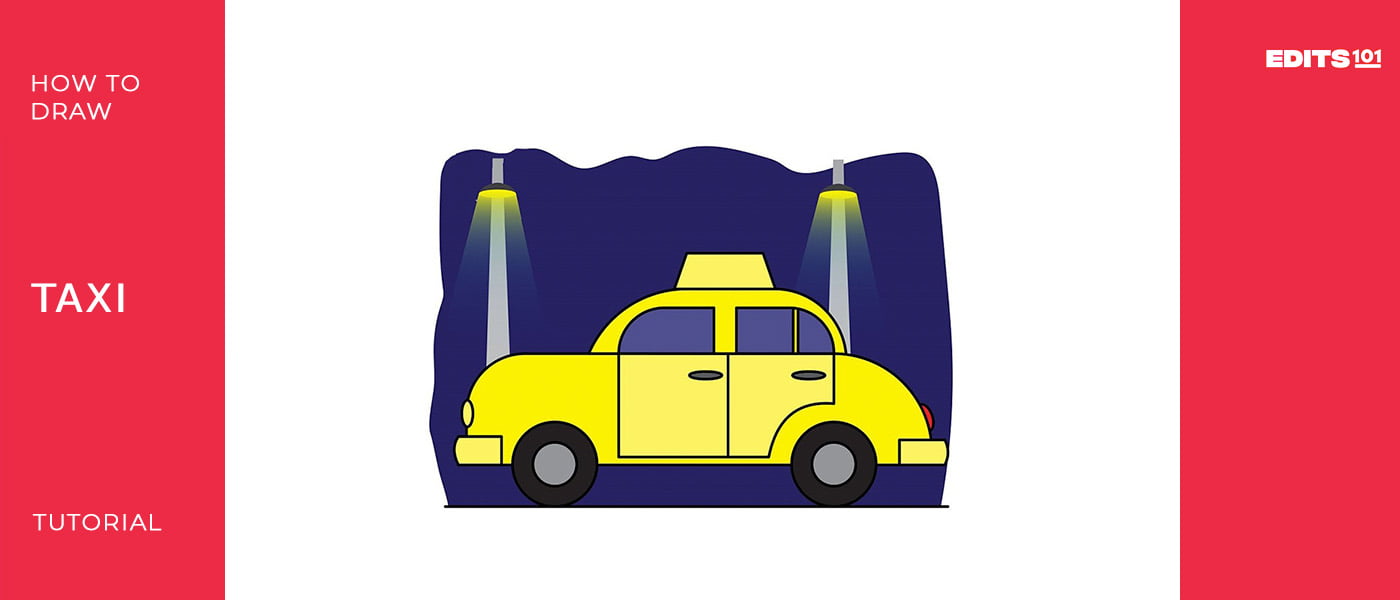
We’ve chosen a night time scene for our background by adding in two street light posts and light bulbs. If you like the idea of this background, feel free to use it for yours!
Step 10: adding color
For some artists, this step is considered to be the most fun part of the entire drawing process. Adding some color brightens up the page and makes art all the more eye-catching and attractive.
Here you can really allow your imagination and creativity to roam free! Think outside of the box and use colors you prefer.
We opted for a realistic depiction of a taxi cab which is why we’ve colored in the main body of the taxi yellow. Because our background depicts a night time scene, we went ahead and colored in the general background area with a nice dark blue.
When adding color to your drawing, remember to use different colors for different parts of the taxi.
E.g, yellow for the body, beige for the doors and bumpers, black and gray for the tires and center disk, beige for the front light and red for the back light, light blue for the windows and finally, a dark gray for the handles (locks). This highlights the different parts quite beautifully and adds a sprinkle of realism.
Bonus Tips
Check out other public transportation drawings to inspire your imagination or give you a jump start on an idea of your next drawing adventure.
We have some cool ones on our site, like a double-decker bus tutorial, a school bus, a train, airplane and even a cable car tutorial.
Add some personalized touches to your drawing, by either adding your name in the corner of your page or adding a brand logo/company name to your taxi’s signboard.
Feel free to leave a comment on our YouTube video and let us know what your experience was like drawing a taxi cab. We’d love to hear from you!
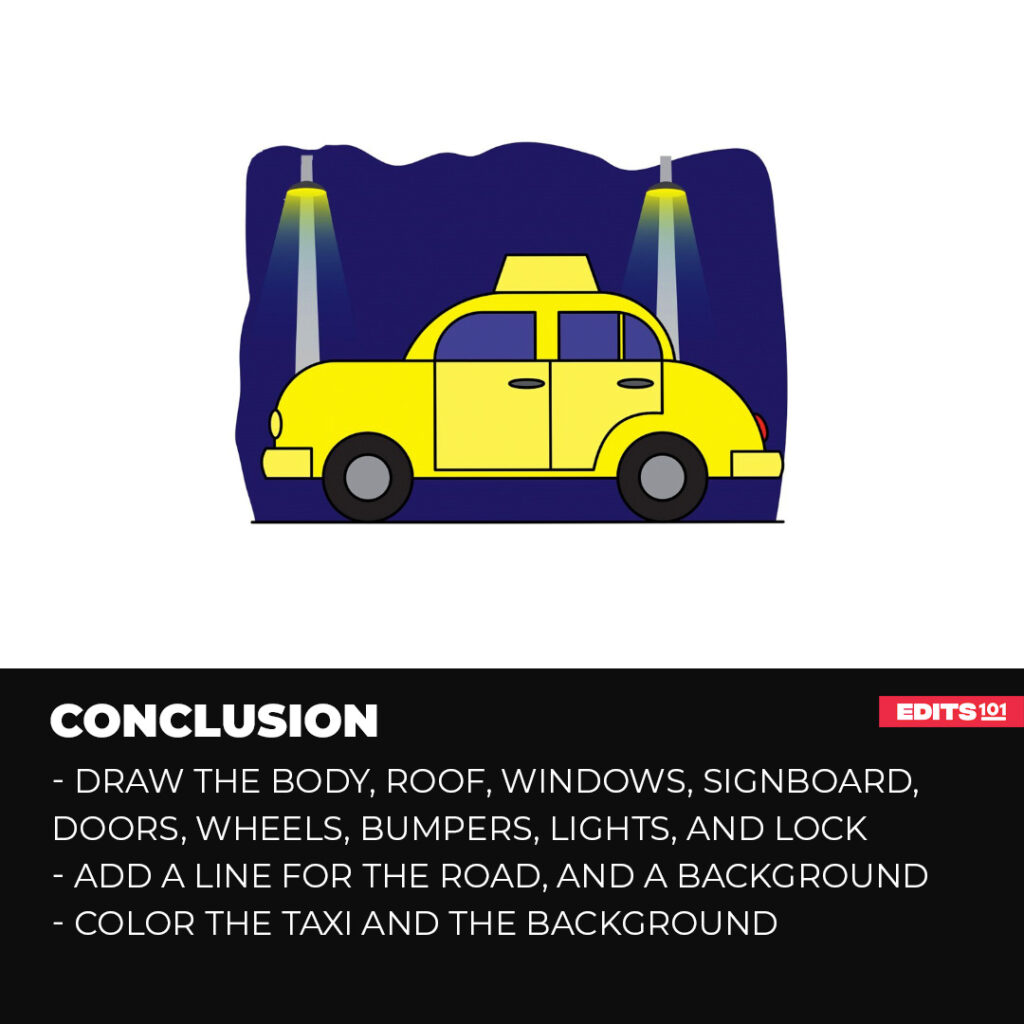
Conclusion
If you’ve followed all the steps and made it this far, we’d like to commend and applaud your work. If your drawing doesn’t look exactly the same as ours, remember that it doesn’t neccessarily need to.
Art is individualism in its purest form, so be proud of the drawing you’ve created just as we are proud that you’ve managed to complete this tutorial. There are so many more drawing tutorials that can improve your artistic abilities – so from Edits101 to you, see you next time!
Thanks for reading & feel free to check out more of our articles!
Author Rating
Overall Rating
Summary
An easy step by step tutorial on how to draw a Taxi. You will learn how to add a realistic background and add vivid colors.