How to Draw a Scooter | Step-by-Step Guide
Back when I was a kid, scooters were like the pinnacle of the playground. Suddenly swings and parks and slides were set aside, and scooting around the neighborhood in a flock was the new ‘in-thing’.
Imagine my surprise seeing the influx of scooters making its way back into trend. These days, scooters are not only for kids but for teens and the working class alike. They’re not only being used as means of “play” anymore but a viable means of transportation.
This is one of my favorite drawings because not only is it nostalgic, it’s simple, straight to the point, and doesn’t require a lot of fine-tuning. If you’re looking to explore your skills in art and design, this is definitely a great place to start.
What You Will Need
- A4 sheet of paper
- Pencils
- Eraser
- Ruler (optional)
- Mathematical drawing compass (optional)
- Colored Pencils
- 30 minutes
How to Draw a Scooter in 9 Steps
I like to use a combination of heavy and soft lead pencils while drawing vehicles. A soft lead comes in handy when outlining the main components of the drawing. It allows room for error with soft strokes that can easily be erased. Then, once I’m confident the sketch will come out okay, I go in with the heavy lead.
These are differentiated by the terms H (hard leads) and B (soft leads). HB is the common ground, great for soft strokes and lines, and possibly this scooter drawing, as well. If, however, you’re going for a more dramatic and detailed drawing, be sure to grab a selection of grades. HB, 2h, and 3b should do perfectly!
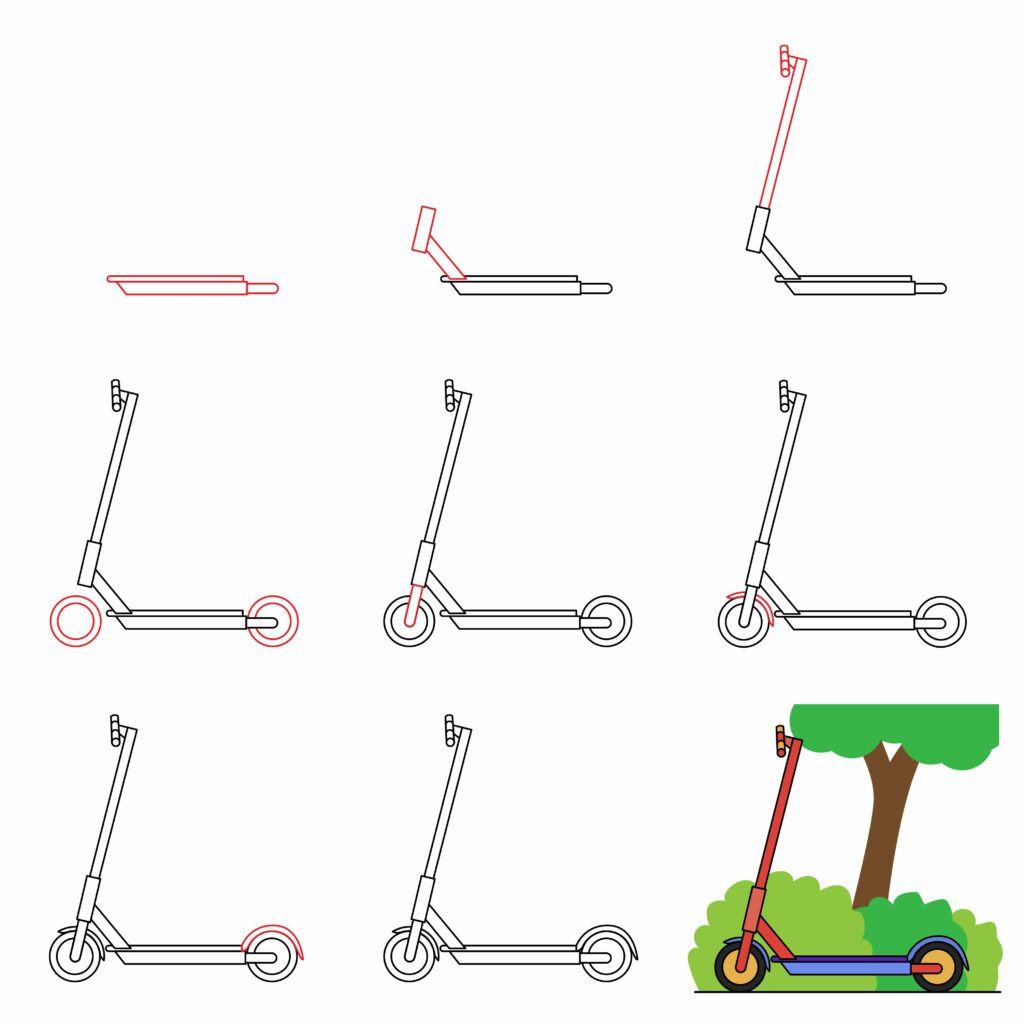
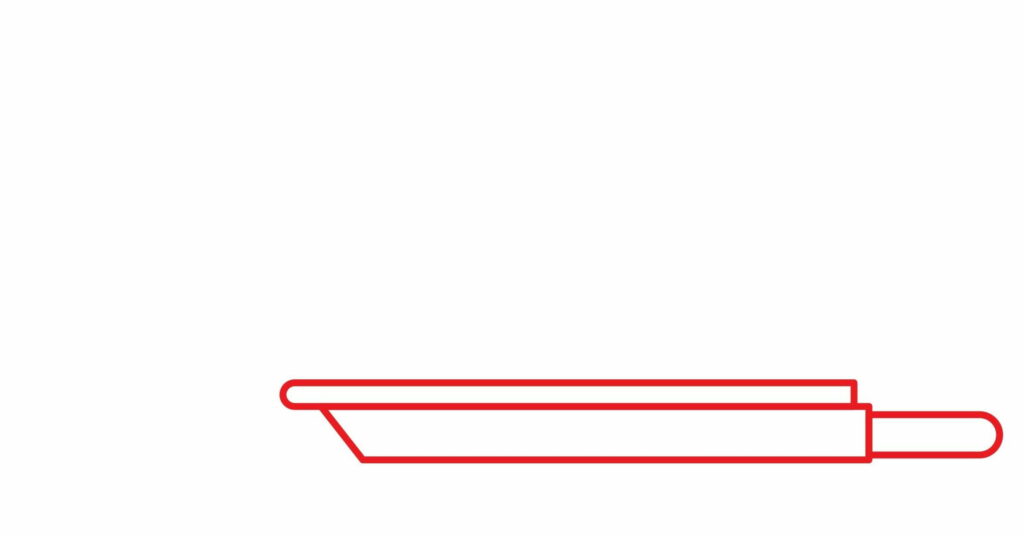
Step 1: Draw the Scooter Base
To draw the base of the scooter, start by drawing a horizontal rectangle along the bottom part of your page. Make sure it’s as thin as the one in the illustration and that it also bears a similar round corner on the left side.
Then, draw another rectangle right below the first one and ensure the angle from the left side is indented to depict the front end of the scooter. Attach a small rectangle on the right of the bottom rectangle, and you’re good to go.
- Draw a horizontal rectangle on the bottom part of your page
- Draw another rectangle, this one wider, below the first rectangle
- Add a small rectangle with round corners on the right of the bottom rectangle
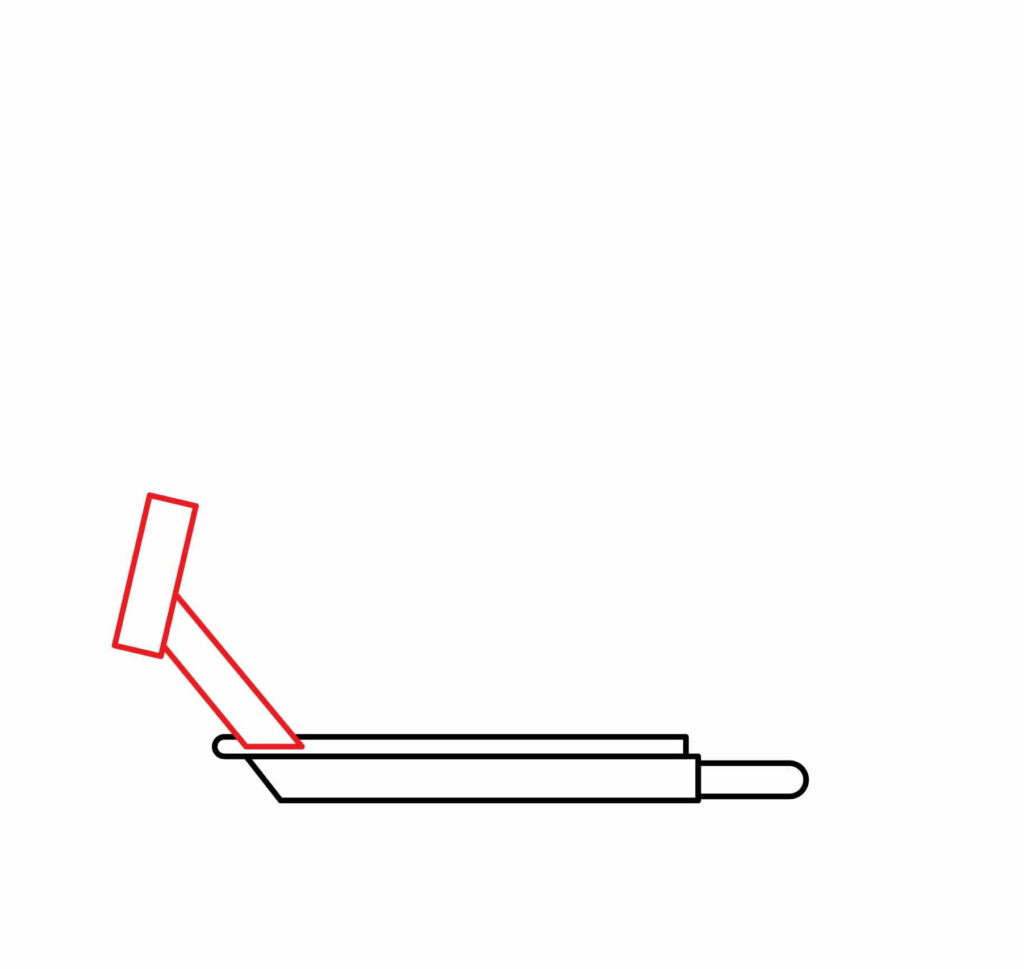
Step 2: Draw the Base for the Handlebar
Draw a small diagonal rectangle from the upper left side of the scooter’s base. You then need to add another rectangle at the top of the diagonal rectangle, as shown in the image below. This will serve as the base or the lower part of the steering wheel, which you will add next.
- Draw a small diagonal rectangle from the upper left side of the base
- Add another rectangle at the top of the diagonal one
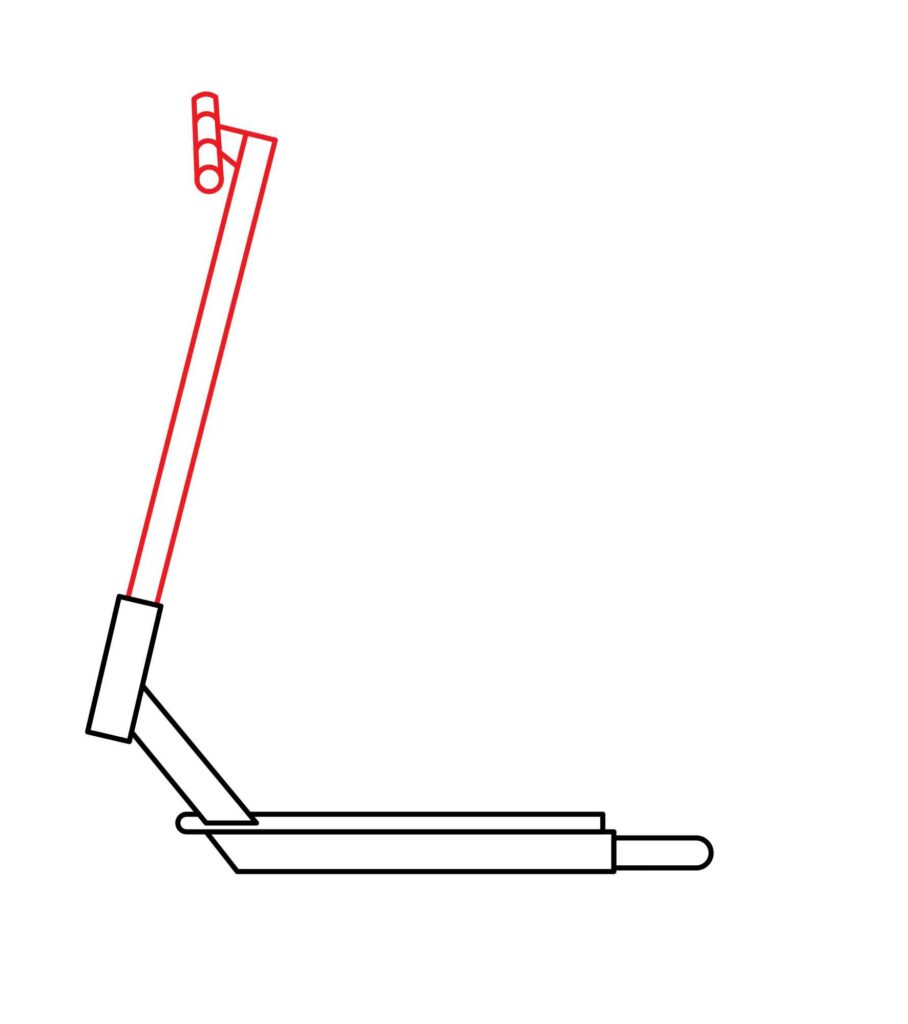
Step 3: Draw the Handlebar and Handles
To add the handlebar, draw a long rectangle rising from the final rectangle you completed in step two. For the handles, draw a short tube at the top of the new rectangle, as shown in the below image.
Draw two lines to connect the handle to the steering rack, and add a circle at the end of the handlebar plus three semi-circles along the tube to depict the handles.
- Draw a long rectangle rising from the last rectangle completed in step two
- Draw a short tube at the top of the new rectangle to resemble the handles
- Draw two lines to connect the handle to the steering rack
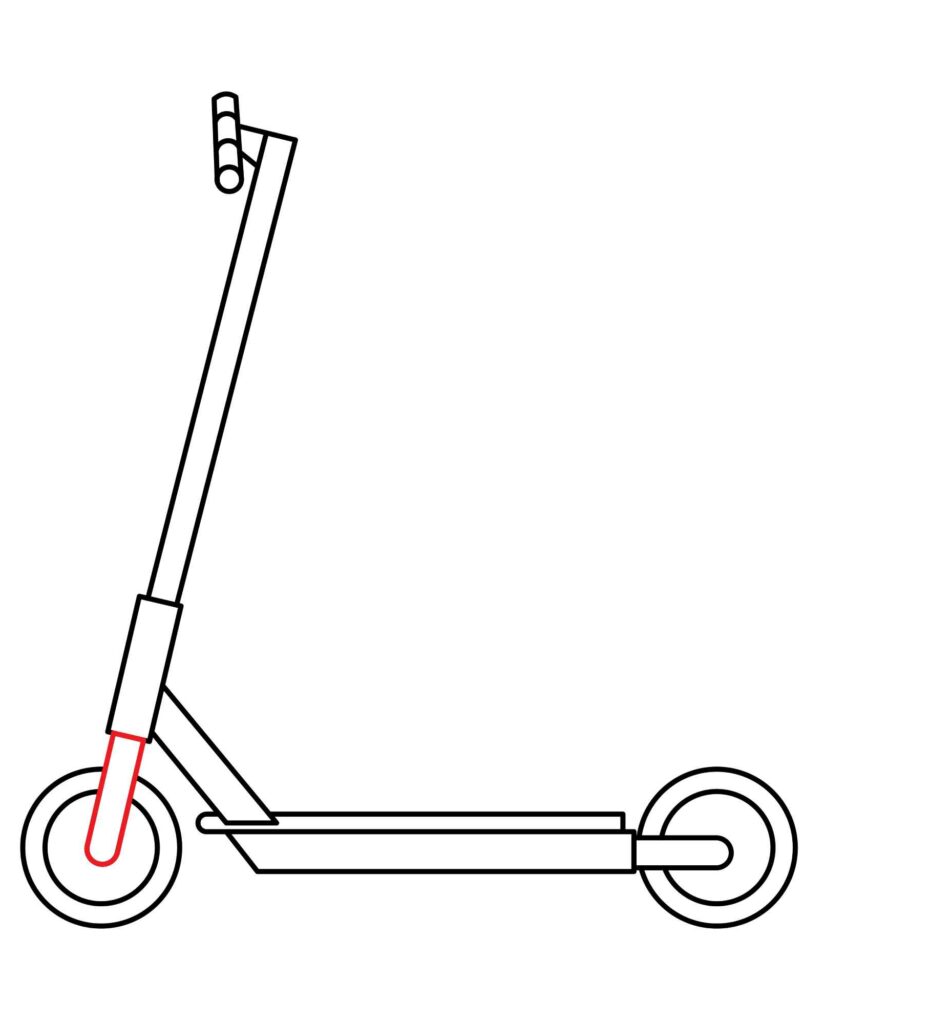
Step 4: Draw the Wheels
Start by drawing two circles below the steering rack for the first wheel. Use a mathematical drawing compass or a household circular object like a bottle cap or coin for smooth circles.
For the rear wheel, use the end of the small rectangle you added to the far right of the base as the center. Draw two more circles, again one inside the other, as shown in the below image.
- Draw two circles below the steering rack for the front wheel
- Draw two circles on the right side of the scooter for the back wheel
- Use a drawing compass or a household circular object for smooth circles

Step 5: Connect the Front Wheel
Draw two parallel lines that are slanted diagonally and at the same angle as the long rectangle of the handlebar drawn in step three.
The lines should start from the base of the handlebar base and end at the center of the front wheel. Connect the bottom part of the lines with a semi-circle to form a rounded head, as shown below.
- Draw a small diagonal rectangle from the center of the first wheel
- Pay close attention to the proportion and angle while drawing
- Erase the lines of the wheel that are visible inside the connector
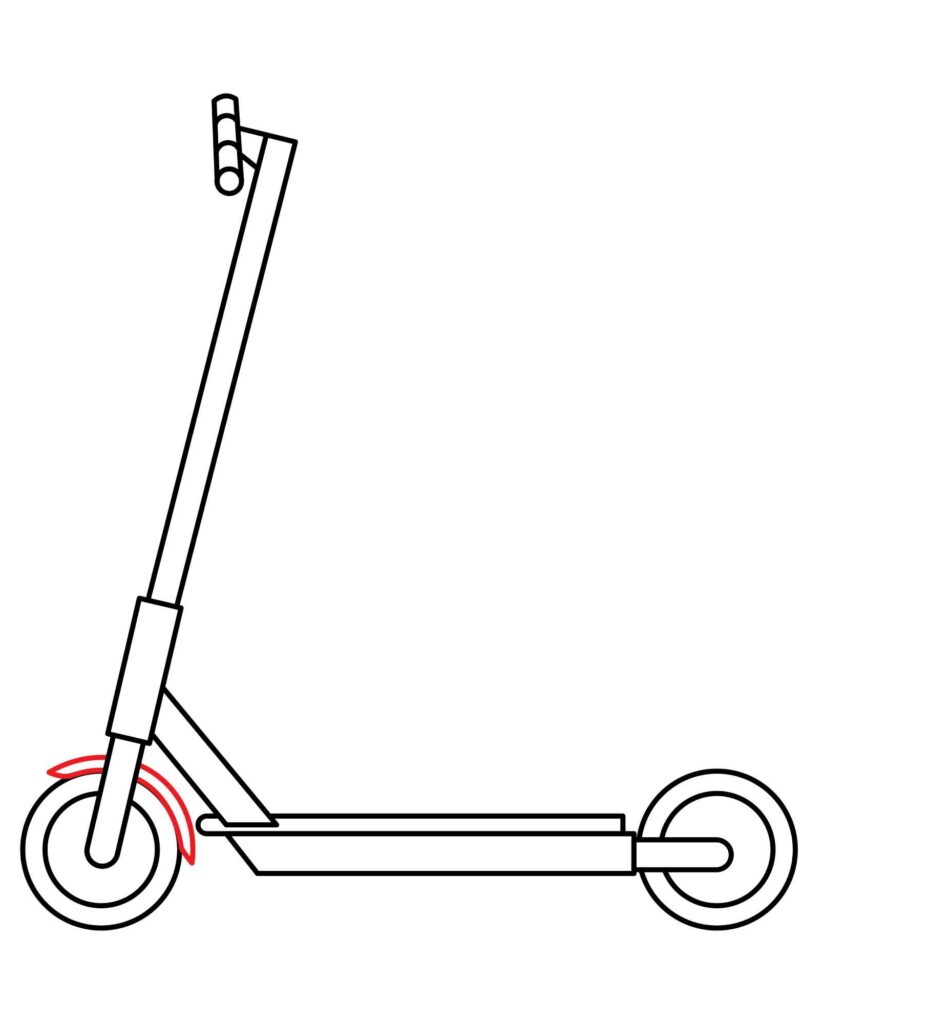
Step 6: Draw the Front Fender
Draw a curved line over the front wheel to add the front fender. The lines should extend slightly over the wheel but not too long. Draw another curved line parallel to the first one and connect the two at the end with a line to create a fender.
- Draw a curved line over the top part of the front wheel to resemble a fender
- Once again, pay attention to proportion and angle of the line as you draw
- Draw another curved line parallel to the first one and connect them together
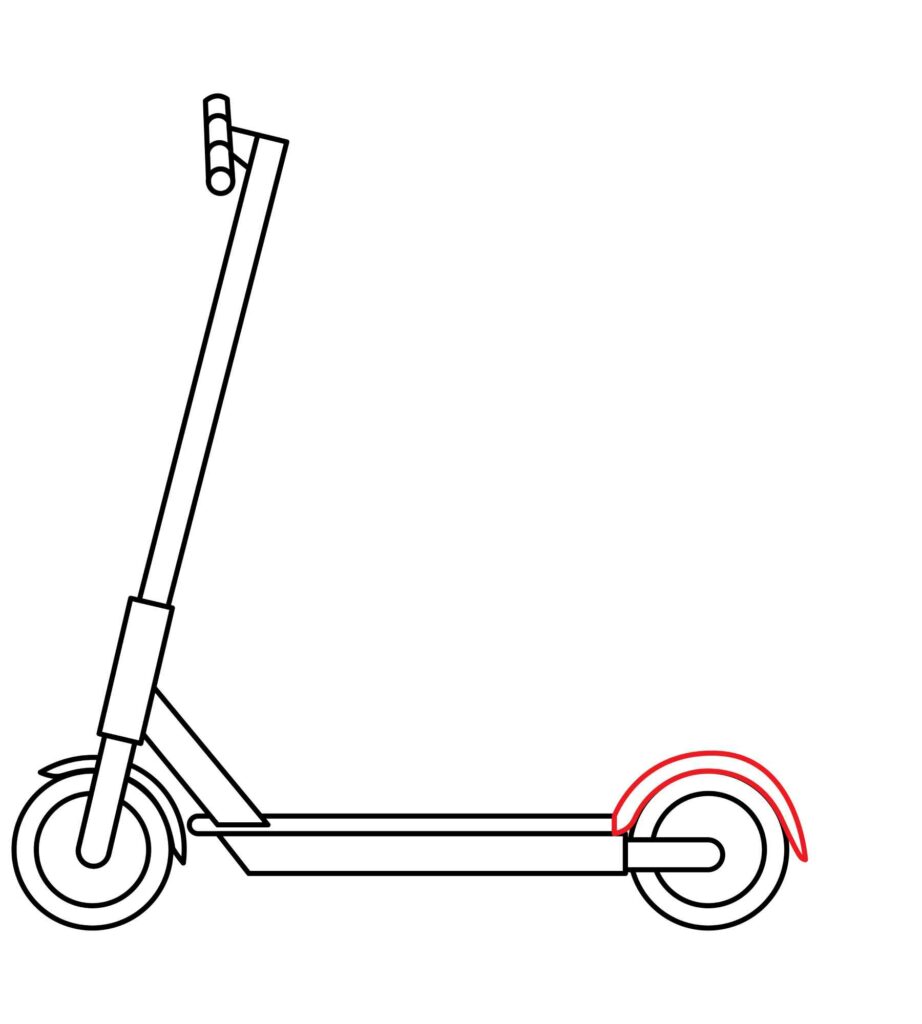
Step 7: Draw the Rear Fender
As you did with the front fender, draw a curved line above the rear wheel and then add another parallel curved line above it. Connect the two curved lines to create the rear fender.
While the rear fender can be bigger than the front fender, it should not be too big, as that will make it unrealistic. It goes without saying that the rear fender should not be extended too far to the ground.
- Draw a curved line above the back wheel as you did for the front fender
- Add another curved line above the first and connect them together
- Ensure the rear fender covers more of the wheel than the front one does
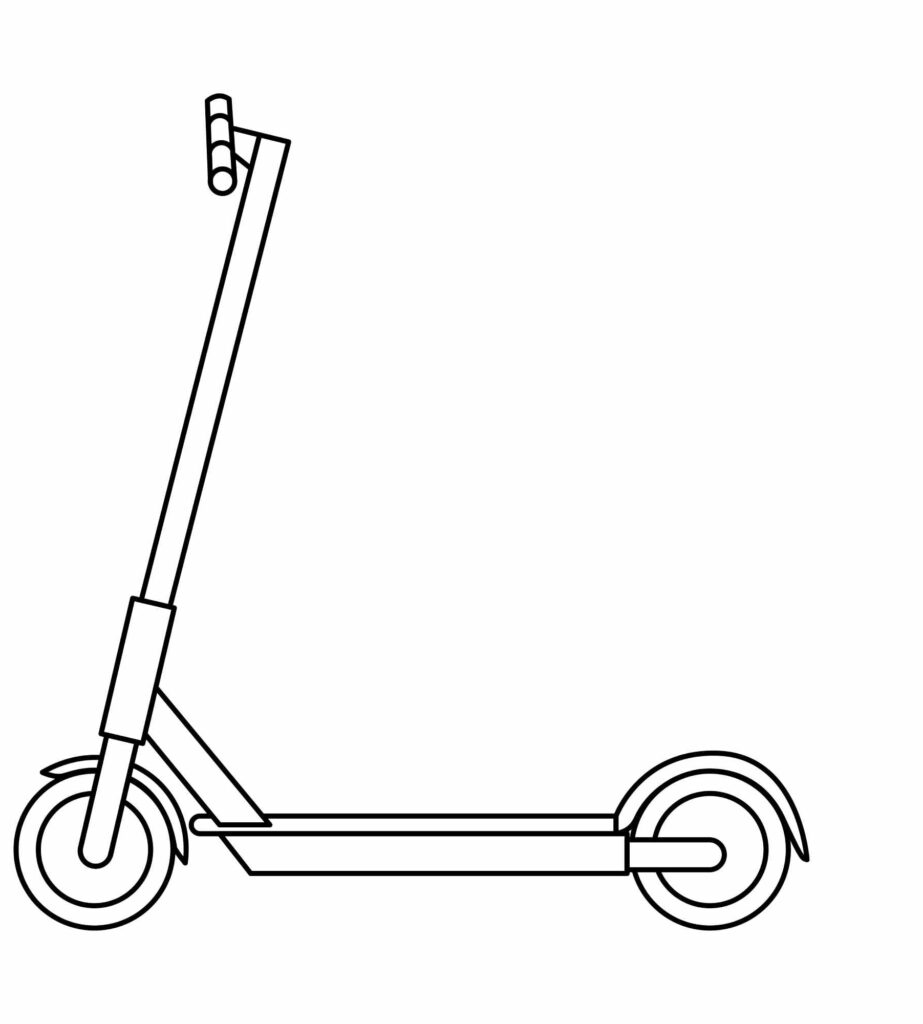
Congratulations! Your Scooter Drawing is Complete
If you’ve followed along and completed all of the steps in one go, great job! Before you set your drawing aside though, take a little moment to analyze the outcome of your scooter sketch.
Use the image we provide below to assess whether or not your drawing looks the way you want it to. Then, once you’re ready, check out the rest of the steps. You surely don’t wanna miss out on those.
Taking Your Drawing to the Next Level
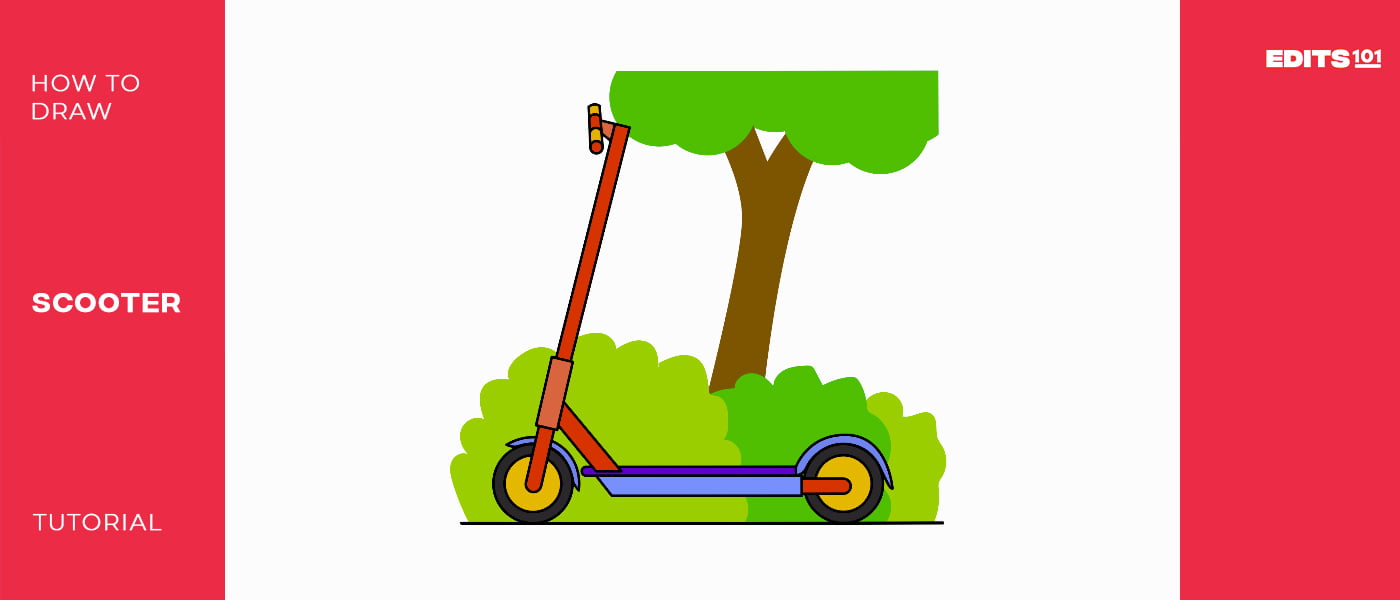
Right now, you’ve got a great black-and-white scooter drawing. While that’s okay, we should always strive for a little bit more, wouldn’t you agree? Let’s kick things up a notch by incorporating a background and adding some color.
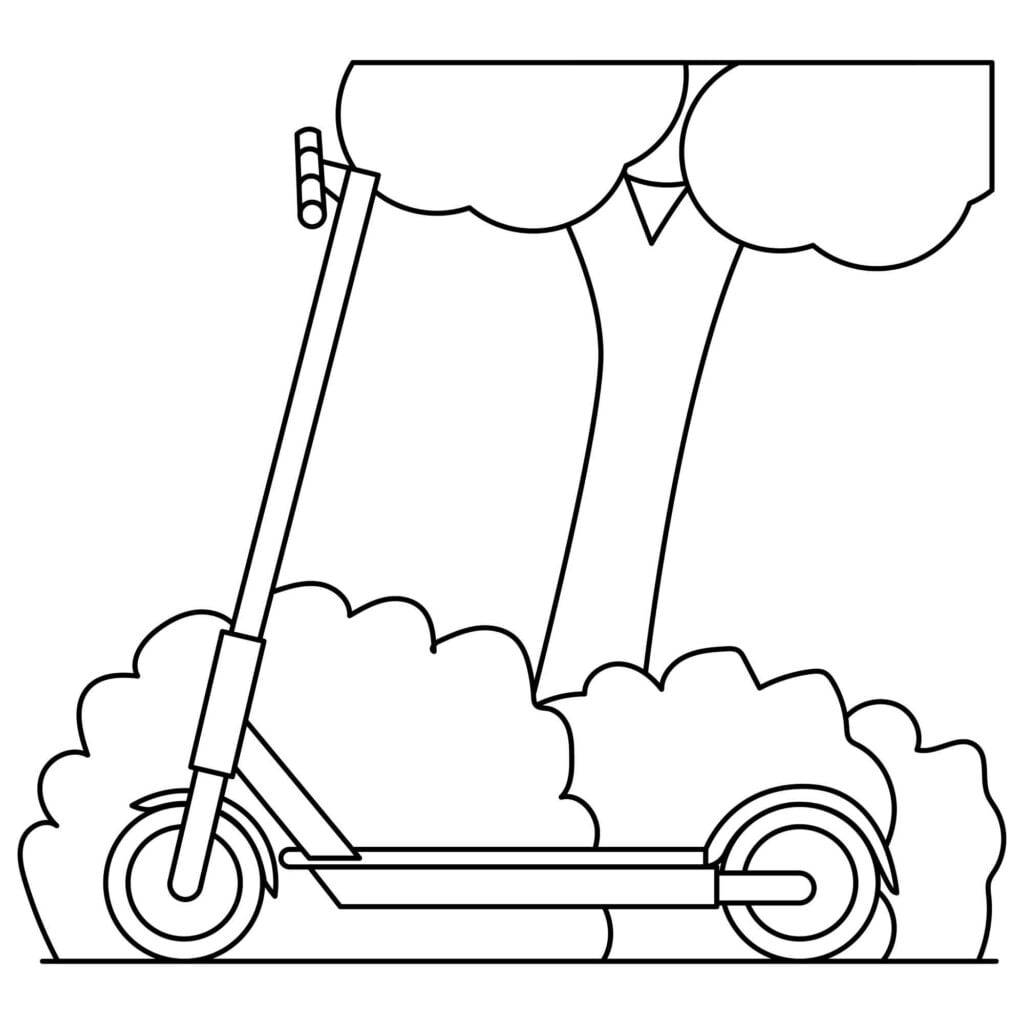
Step 8: Adding a Background
The first thing you should probably consider is adding a road. I’m willing to bet it will make your drawing ten times more realistic, because let’s face it, while we may wish it were possible, scooters can’t float in air (yet).
Draw a straight line directly beneath your scooter using a ruler for the road. The line should touch the base of the wheels and extend further.
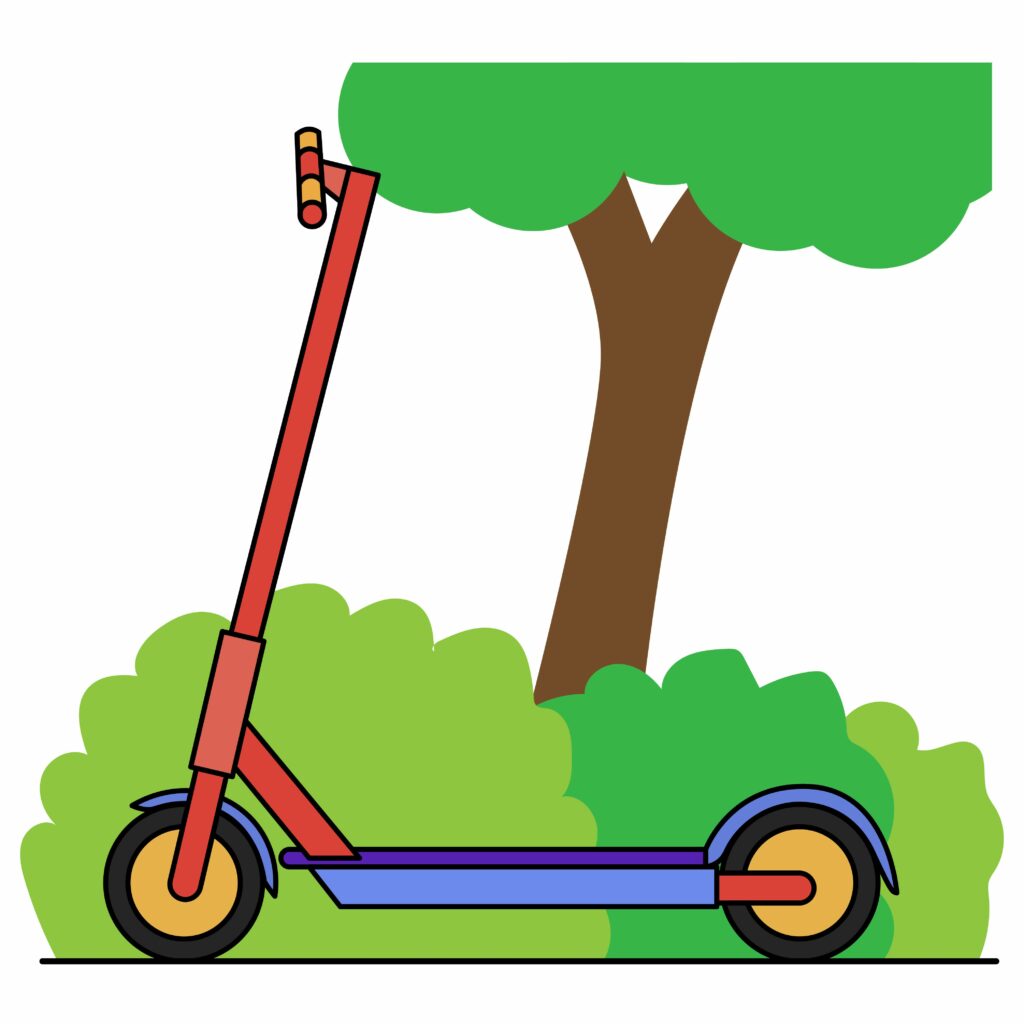
Next, add a background of your choosing. You can add a building, items from a playground, a bush, or anything else. In our case, we added a tree and a few shrubs as our background.
Be careful not to draw the background over your scooter and use your eraser to remove any lines that may overlap.
Step 9: adding color
This is often considered the easiest part of the drawing process, because it allows for a break from the ‘rules’ of art and following a specific structure. The motto here is to just let go and have fun with it!
Use a combination of your favorite colors for the scooter, making sure each part has a different color to highlight and compliment it all.
For the background, be a little bit more assertive and use realistic colors. For example, we all know that tree trunks are mostly brown, and shrubs are green. Follow this pattern of thought as you select colors for your background.
Other than that, you are free to let loose and explore.
Bonus Tips
Apply some shading techniques to the sketch. Your drawing might benefit from some cross-hatching on the tree trunks, and the favored scribbling technique for the shrubs and leaves. Same goes for the wheels and handles of your scooter.
Watch YouTube videos explaining the perspectives used when drawing scooters to help you better understand the process. It’s also a great tool to connect and interact with other budding artists.
To keep your drawing neat, place a piece of scrap paper below your hand to prevent smearing the colors while you work.
Share your drawing with others on visual learning platforms or your favorite social media app.
I like adding my name and the date to my drawings because I feel like it personalizes the work and creates a timestamp that documents my progress. This is a fantastic tool for you to use as well, so be sure to consider it!
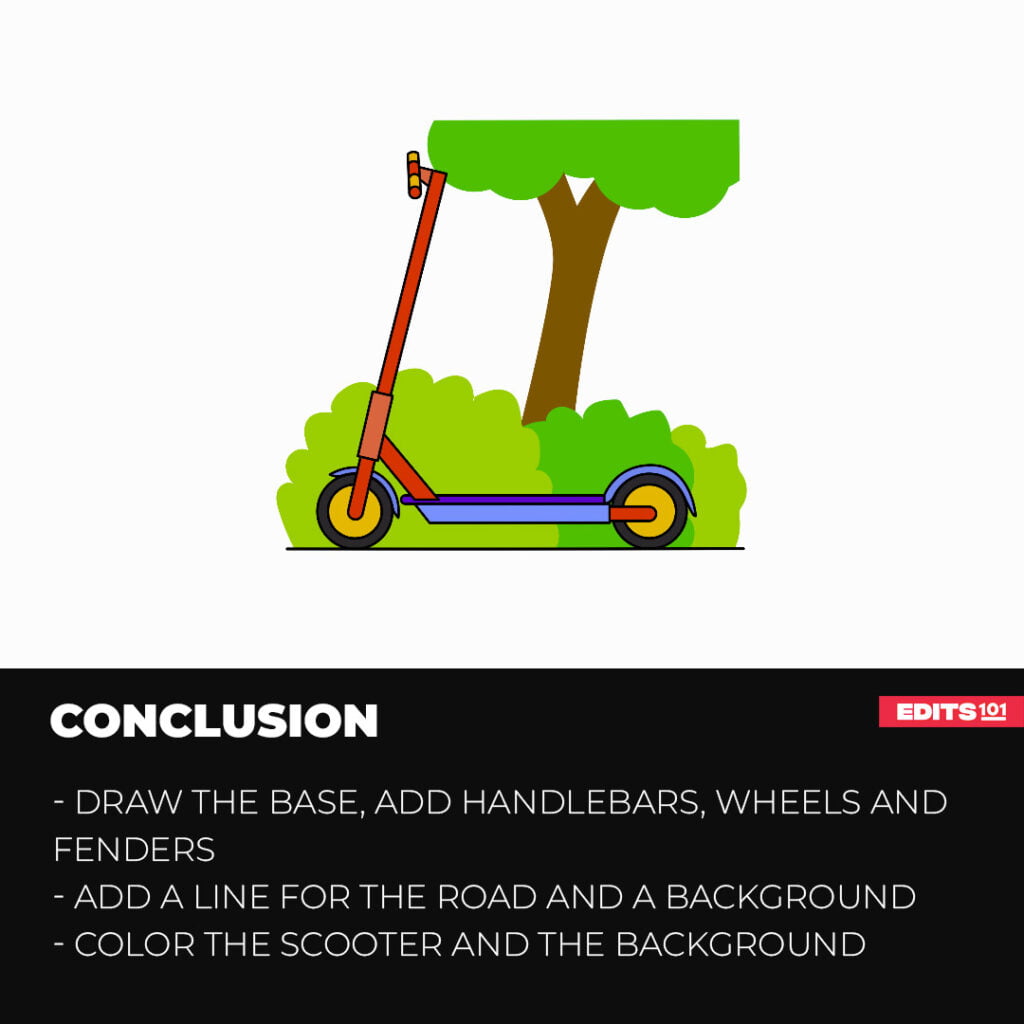
Conclusion
Learning how to draw a scooter is relatively easy. You started by drawing the scooter base using rectangles, adding the handlebar and handles, then adding the wheels and fenders.
To take your scooter drawing to the next level, you added a road, a background and then colored everything.
Transforming a blank page into something new is a commendable feat, so job well done! The team here at Edits101 hope to facilitate your progress as you explore other drawing tutorials, so instead of a goodbye, let’s make it a see you soon!
Thanks for reading & feel free to check out more of our articles!
Author Rating
Overall Rating
Summary
This tutorial is for kids, teens and young adults interested in learning how to draw a standard scooter.