
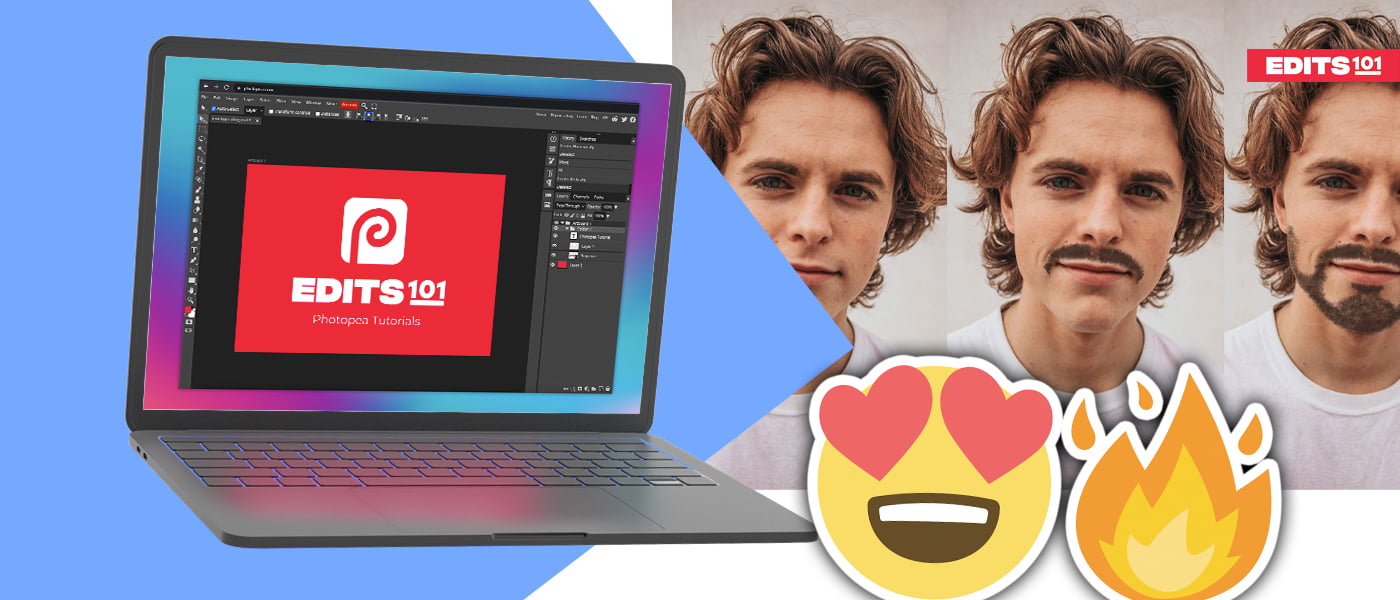
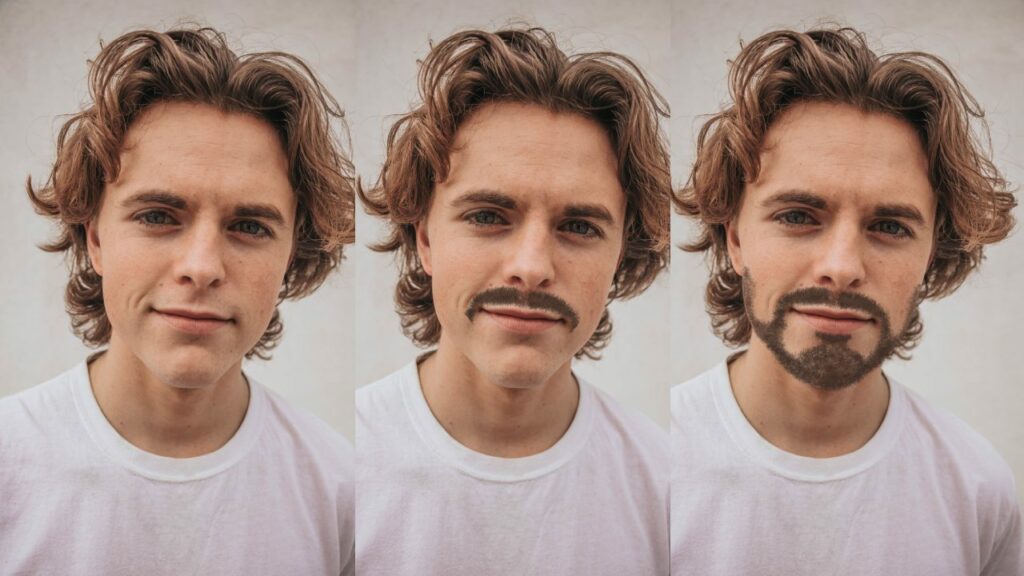
Sometimes you may want to add facial hair to a photo to enhance it or just for fun.
The good thing is there is a way of doing so in Photopea. In this article, we will be showing you how to add facial hair in Photopea.
Load Up Your Photo
The first step is obviously to load up the photo you want to edit.
- Go to Photopea.com
- Click File from the Menu Bar and select Open
- Select your photo from your computer and click Open
Create a Custom Brush
We need to start by creating a custom brush. We will use the custom brush to paint in the facial hair.
Step 1: Create a Transparent Layer
We don’t want to make permanent changes to the original image when editing. For that, we need to create a new transparent layer.
Go to the bottom of the Layers Panel and select New Layer.
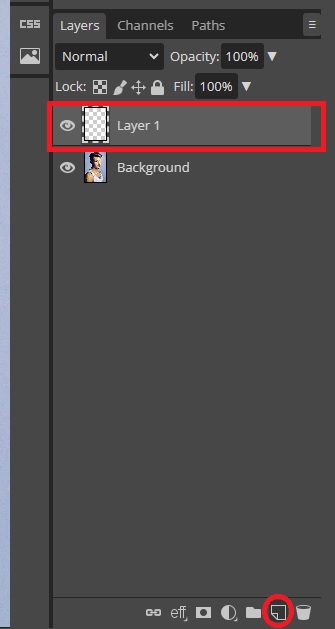
This will add a transparent layer over the image. We will now be making changes to the transparent layer.
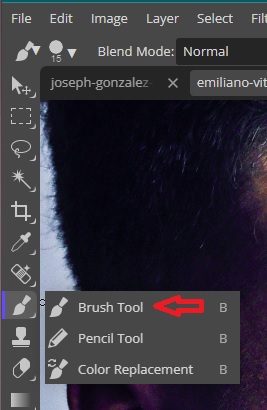
Step 2: Create a Strand of Hair
Next, we need to create a single hair on the face. To do so, we will need the brush tool.
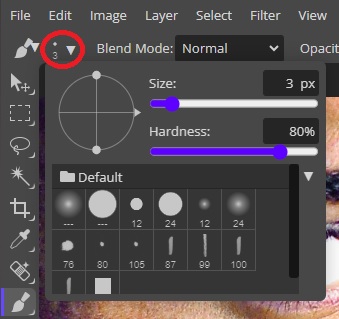
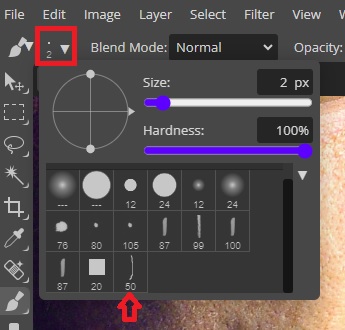
Once the tool is selected, use the Brush tool settings to adjust the size and hardness (make the brush size really small according to the size of the hair). The size should be the same as the hairs already on the photo you are editing, while the hardness can be about 80%.
With the transparent layer selected, draw a hair on the face until you get a size that is realistic. Undo the changes if the brush size is not okay.
Pressing Ctrl + Z on the keyboard is the shortcut for undo. The [ (Open) and ] (Close) brackets are keyboard shortcuts for adjusting the brush size.
The secret to getting the best results is to zoom the image in so that you are able to match the paintbrush size with the facial hair accurately.
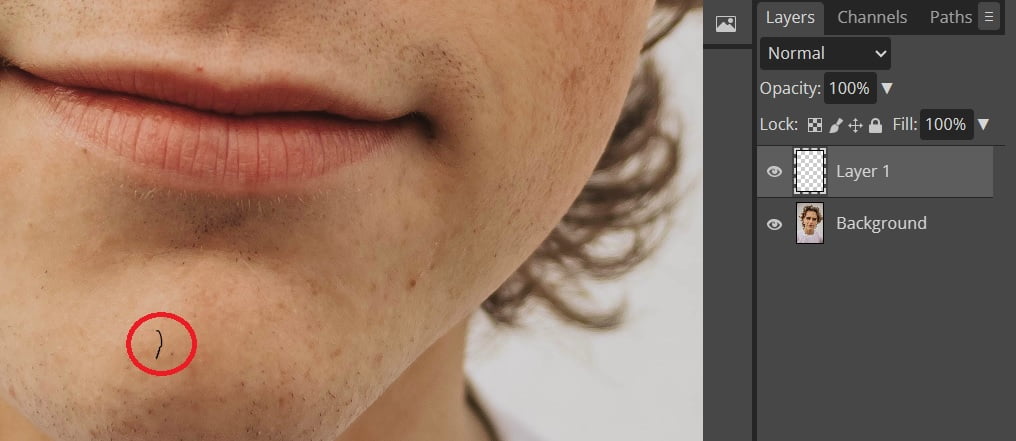
The highlighted strand in the image is the hair we drew.
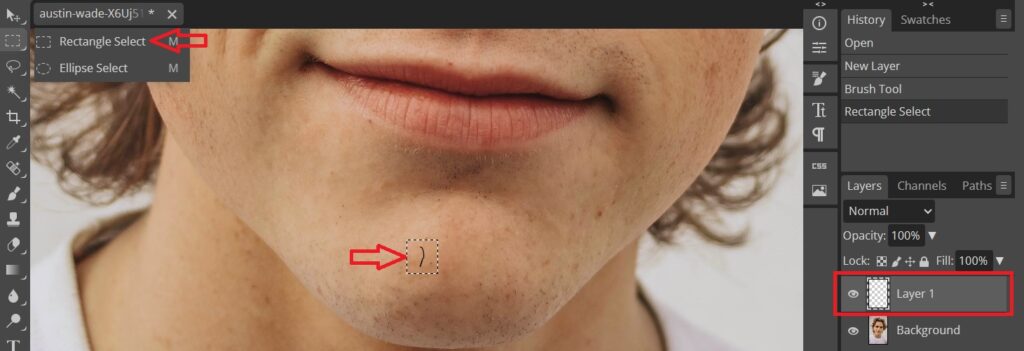
Step 3. Turn drawing into a Brush in Photopea
Once you are satisfied with the hair you created, you need to turn it into a brush. To do so, you will need to select the hair you drew. With the layer selected, use the rectangular select tool to select the hair.
Now go to Edit in the Menu Bar and click Copy.
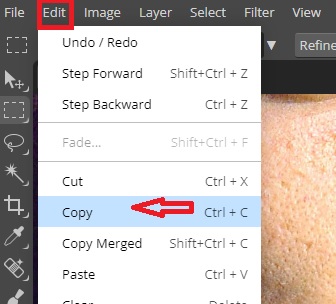
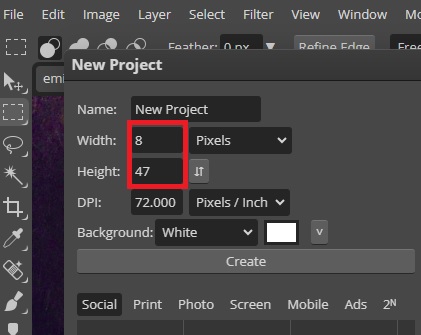
Next, go back to the Menu Bar, click on File, and then New to create a new document.
Do not change the settings, as the dimensions of the new page will be adjusted to the selection you copied. Only make sure the background is set to White, then click Create.
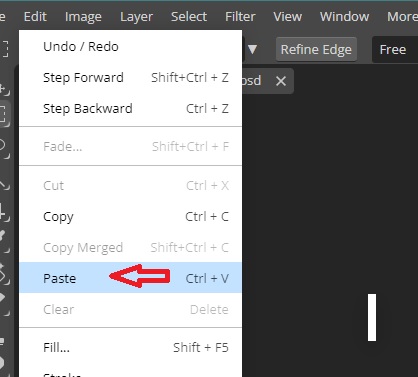
You don’t necessarily have to zoom in on the new project to get a better view of the page. Simply go to Edit and click Paste. That will paste the layer we copied from the first project.
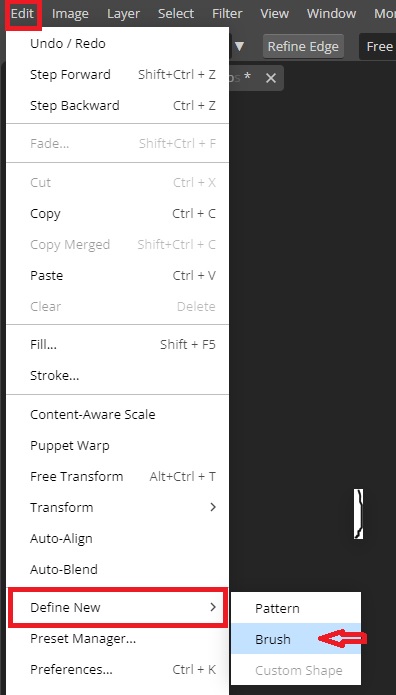
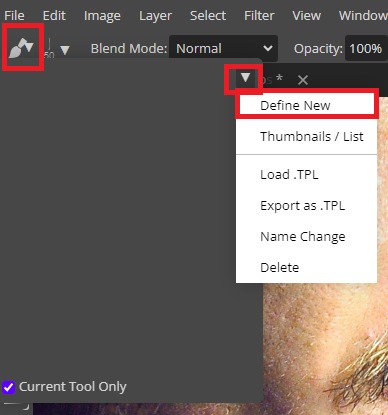
With the new layer selected, go to Edit then select Define New, and then select Brush.
With that, you will have created a custom brush. Go ahead and close the current tab and go back to the image. Delete Layer 1 from the image tab and clear the selection by holding down Ctrl + D.
Step 4: Rename and Activate the New Brush
To select the new brush, select the brush tool, then from the Options Bar, click the dropdown menu. From the list of default brushes, your new brush will not be at the very end of the list.
You can select the new brush, right-click on it, then click the Name Change and rename it to your preferred name. We renamed ours to Facial Hair.
Now when you hover over the image, you will notice the new brush is active. You can click anywhere to add facial hair. The results will be quite static, so we need to make more changes to the brush.
Step 5: Transforming a Brush into Something More Dynamic in Photopea
The first thing you need to do is access the brush settings. With the custom brush active, click on the icon on the Character Palette.
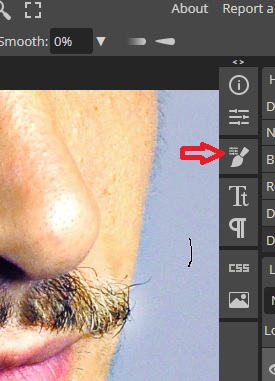
If the icon is not visible, go to the Window in the Menu Bar and select Brush.
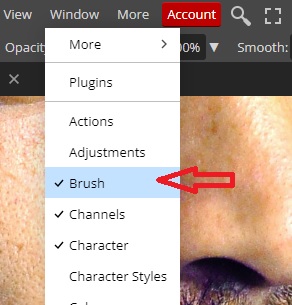
You will have numerous options from the brush settings.

Tips for a Dynamic Brush
Use the below settings.
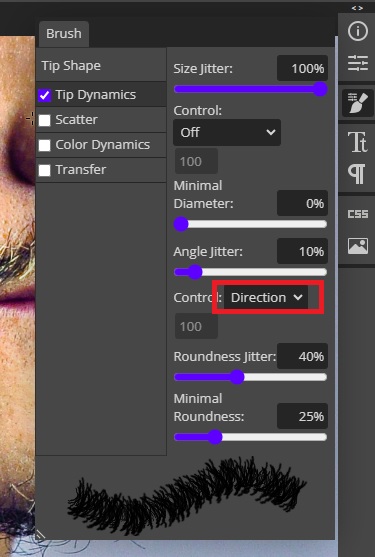
Tip Dynamics
- The size jitter value will randomize the size of the brush up to the set maximum percentage. The higher the percentage, the bigger the variance. For our beard, we will have it at 100%
- The angle jitter alters the rotational angle of the brush. 100% is equal to 360 degrees of rotation. For our case will turn it up to 10%. From the drop-down, we set the control at Direction so that the hair follows the direction of the mouse movement.
- The Roundness Jitter adds flattened elements to the brush. It makes things look less perfect and thus more natural. We will set ours to 40% for more variations.
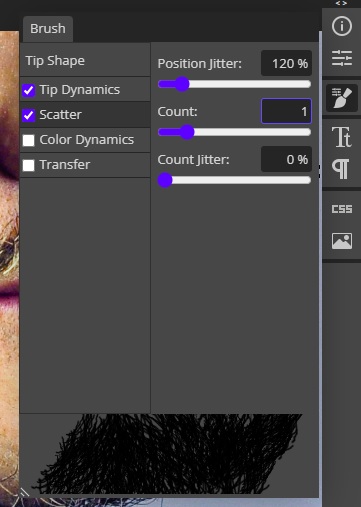
Scatter
- Position jitter will scatter and spread out the brush. The higher the value, the more the scatter. We will leave ours at 120%.
- The count represents the density of the effect. Keep in mind that high values here can slow down the effects of Photopea. Leave it at 1.
- We will leave the count jitter at 0%
Color Dynamics
- Foreground/background jitter mixes up the foreground and background colors. A higher value makes the mix more extreme.
- The Hue, saturation, and brightness jitter adjust the foreground/background jitter mix.
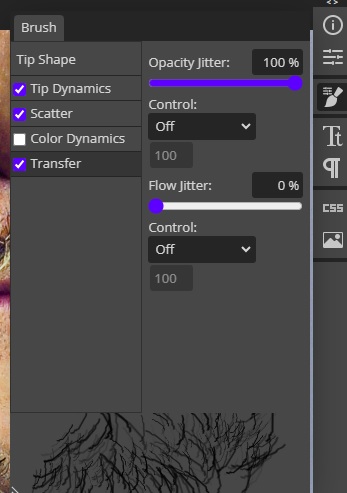
Transfer
- Opacity jitter blends transparency based on the entered value. We will set the opacity at 100% to make some hairs more visible.
- Flow jitter helps darken an area without releasing the mouse. The more times you pass over an area, the more it darkens. It helps build up things over time. Keep it at a low percentage.
Save Your Custom Brush
Even with a perfect brush created, Photopea will most likely not retain the custom brush once you close and reopen it. You need to export it onto your computer to ensure it never disappears.
Step 6: Save the Custom Brush in Photopea
To save a brush, go to the brush icon at the top of the Tool Bar, click the drop-down menu, and select Define New.
Once that is done, return to the brush icon; you will see your new brush. Select it, and from the dropdown arrow on the right, click Export as .TPL. The file will be saved in downloads.
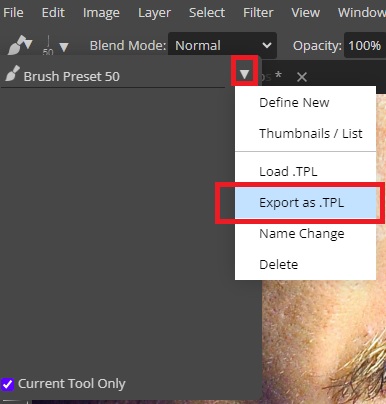
If your preset brush is missing next time, simply go to the brush icon, select the drop-down arrow, and click Load .TPL and select where you saved it.
Add Facial Hair
Now that the brush is ready, you can start painting the facial hair.
Step 7: Paint Hair in Photopea
Simply brush through the areas you want to add more hairs. The more times you pass by an area, the denser the hair becomes.
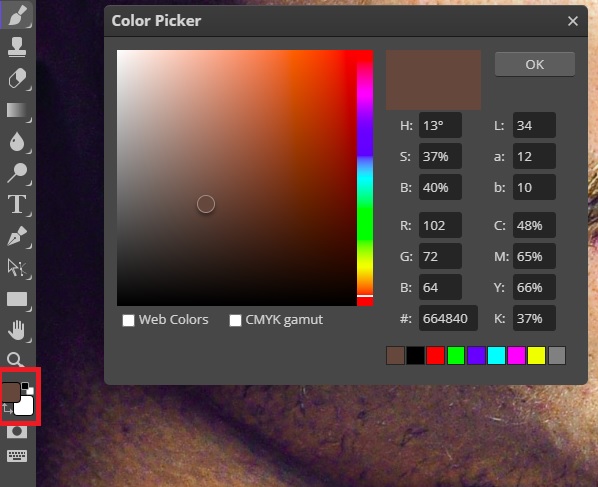
Since this is still a brush tool, you can paint in any color that you want. The best way to add realistic hair is by sampling colors from the existing hair. Click on the color picker from the Toolbar and select the color you want.
Step 8: Save Your Work
Once you are satisfied with the results, go to File, Export As, and select your desired format.
Important Points to Remember
- You can adjust the brush size to get longer or shorter hairs in certain areas.
- For more control, create new layers so that you can activate or deactivate them accordingly. For example, you can create a new layer and add white hairs over the layer with black or brown hairs.
- For dark areas of the face, go to the Brush settings and reduce the opacity so that the hairs blend perfectly.
- Considering the hair will follow the direction of the mouse, make sure you paint in the direction that the hair should go.
- If you wish to work on the photo later on, go to File and select Save As PSD. That way, you can open the PSD file later and continue where you left.
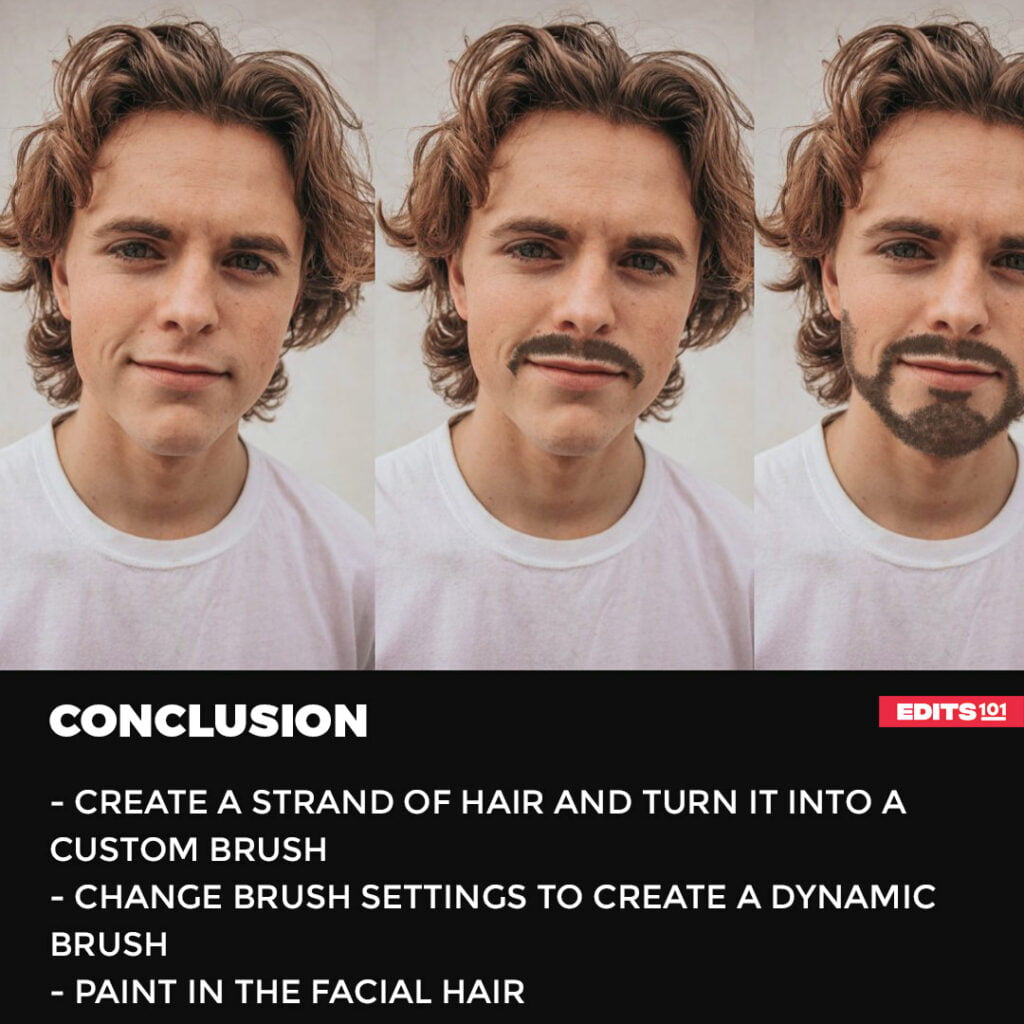
Conclusion
As you may have noticed, creating the custom brush takes the most time, but the work pays off. Always play around with different colors and hair sizes to achieve natural results. With practice, you will be able to create just any type of facial hair that you want.
Thanks for reading & feel free to check out more of our articles!
Summary
Adding facial hair in Photopea involves using tools like brushes, layers, and adjustments to create realistic effects. It may take some practice to achieve a convincing result, but with experimentation and learning, you can effectively enhance portraits by adding facial hair elements.


