How To Draw A Softball Jersey | A Simple Guide
A softball jersey is a specialized piece of athletic apparel designed for players participating in the sport of softball. These jerseys are tailored to provide comfort, flexibility, and durability, catering to the specific demands of the game. Typically made from breathable, moisture-wicking materials, they help players stay cool and dry even in the heat of a match. Softball jerseys often feature short sleeves and a V-neck or round neckline, allowing for ease of movement and ventilation.
They are designed to be loose-fitting to accommodate a range of body motions required in softball, including pitching, throwing, and running. The front and back of the jersey usually provide ample space for team logos, player numbers, and other customizations, allowing teams to display their unique identity. Additionally, some jerseys may incorporate additional padding or reinforced areas in strategic places, such as the shoulders or elbows, to offer extra protection during play.
| Step | Complexity (1-5) |
| Draw a Basic Shirt Outline | 1 |
| Add Collar, Buttons, Placket | 2 |
| Add Custom Designs | 3 |
| Add Authentic Stripes | 3 |
| Add Logo and Number | 2 |
| Finish and Color Jersey | 4 |
What You Will Need
- Paper
- Pencil
- Eraser
- Colored pencils or markers (optional)
How to Draw a Softball Jersey
Softball is a fun sport for kids and adults alike. Drawing a softball jersey can be a great way to show your team spirit or make your original design. In this tutorial, I’ll walk you through the steps to draw your softball jersey. With just a pencil, paper, and a few colored pencils or markers, you can create your unique jersey artwork.
Step 1: Draw The Outline
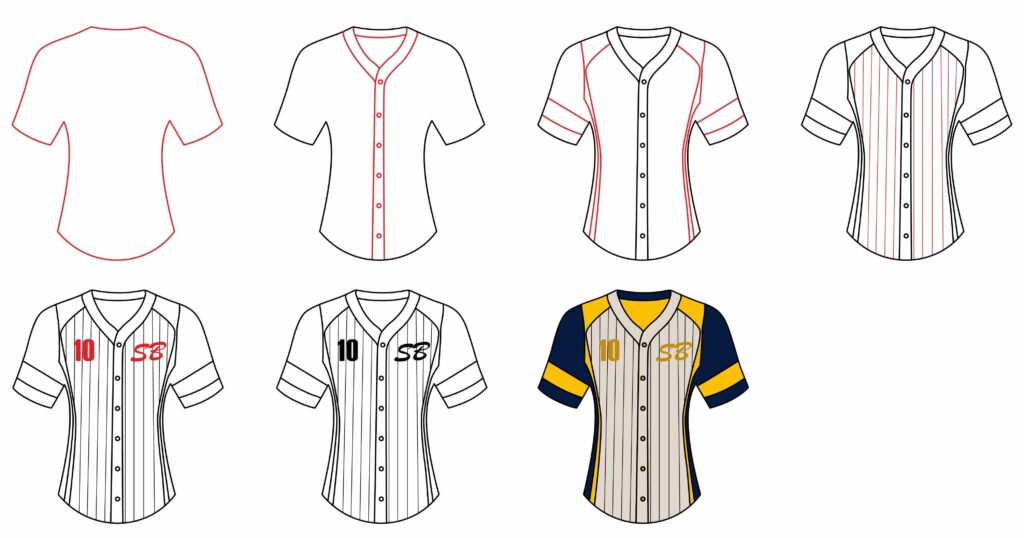
To start, draw the basic outline of the softball jersey in the middle of the page. Begin with a vertical line down the center to represent the front of the shirt. At the top, draw a short horizontal line to mark the neck opening. Below the neckline, sketch two curved lines that slope down and out to form the arm openings. Then, add two vertical lines on either side for the sides of the shirt. The bottom of the shirt can angle down slightly.
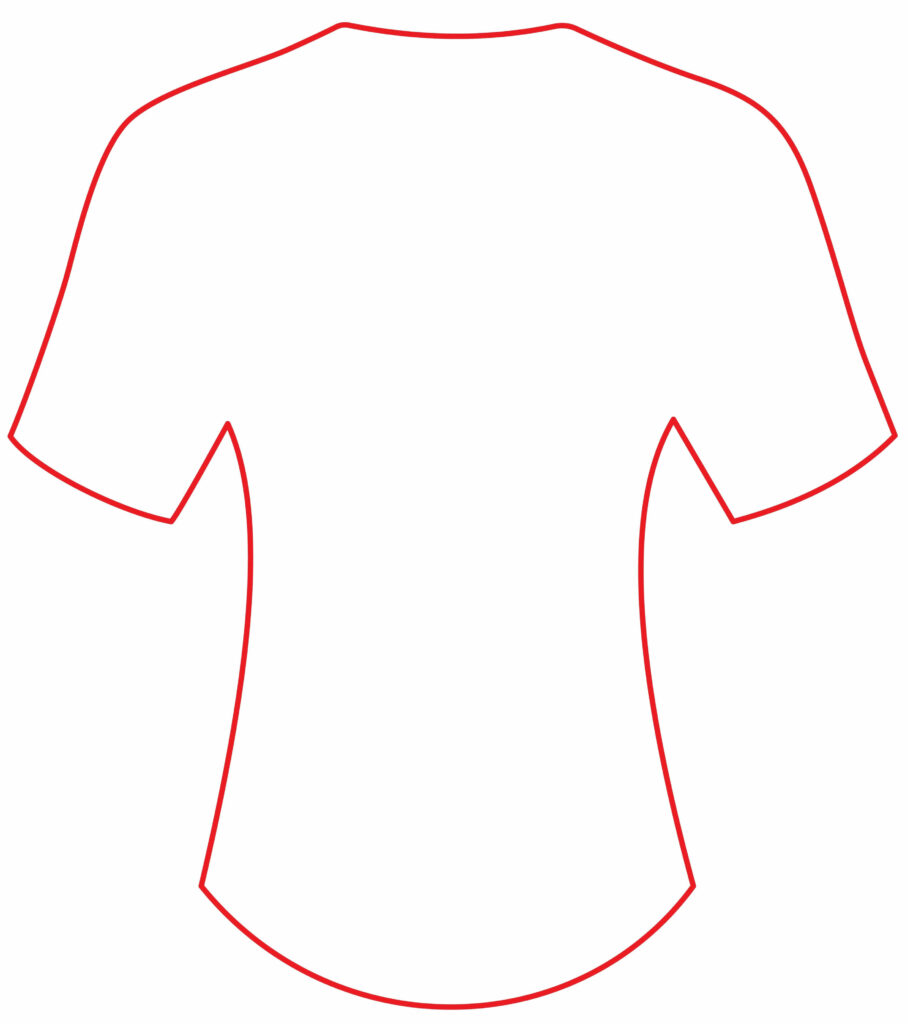
Finish the outline by drawing a line across the bottom and one more vertical line up the center for the back of the shirt. Your outline should look like the basic shape of a softball jersey.
- Start with a vertical line for the front of the shirt
- Add neck opening, armholes, sides, bottom, and back
- The outline looks like a basic softball jersey shape
Step 2: Draw The Collar, Button Line, And Buttons
Now, we can add some critical details to the jersey outline. Start by drawing the collar. On the front vertical line below the neck, sketch two short diagonal lines that slope slightly to form the collar. Next, draw a vertical line down the middle of the front of the shirt to represent the button placket. Add several small circles evenly spaced down this line for the buttons. To finish this area, draw a V-shape at the bottom of the button placket to indicate the point of the shirt tail.
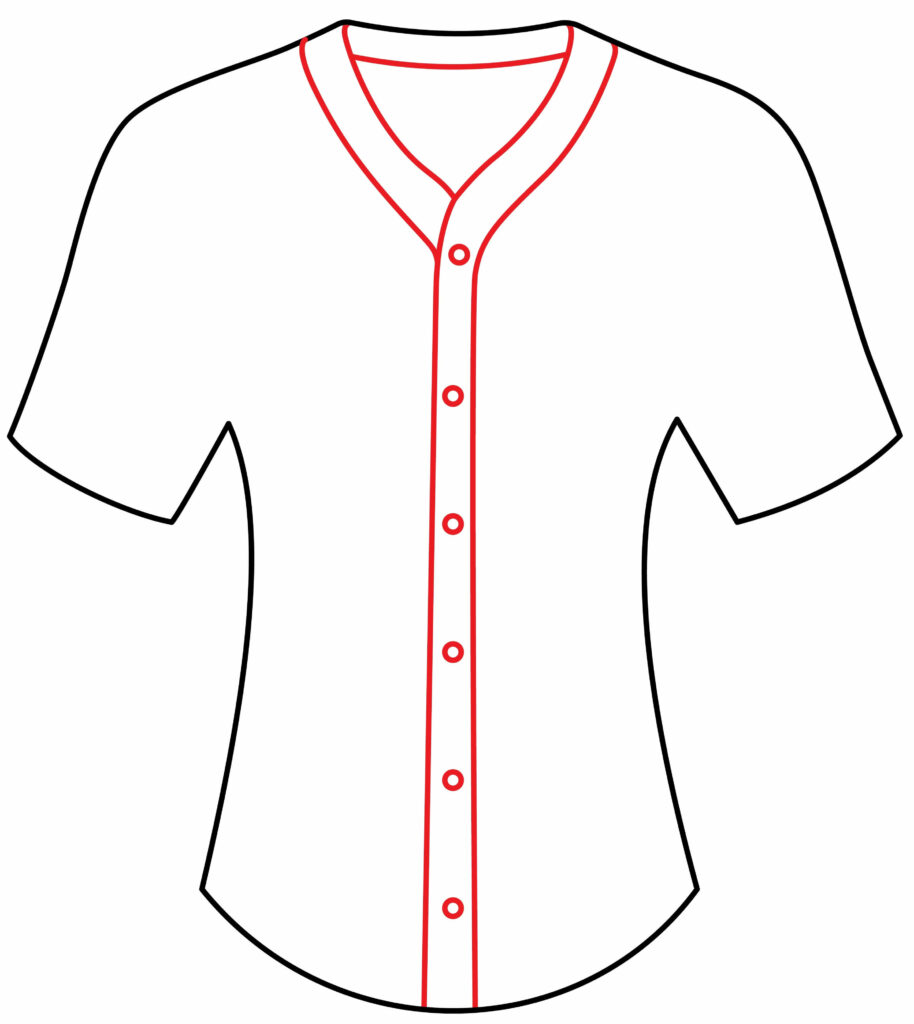
- Sketch angled lines for the collar below the neck opening
- Add a button placket line down the middle of the front
- Draw small circles for buttons along the placket
- Include a V-shape at the bottom for the point of the shirt tail
Step 3: Add Design
Now it’s time to make your softball jersey unique by adding your custom design. You can add shapes, patterns, numbers, or words to make your jersey special.
Divide the shirt into sections using straight lines across the front and back for a simple design. Then, add additional shapes, symbols, or patterns in each area. For example, add some wavy lines, stars, hearts, circles, triangles, etc.
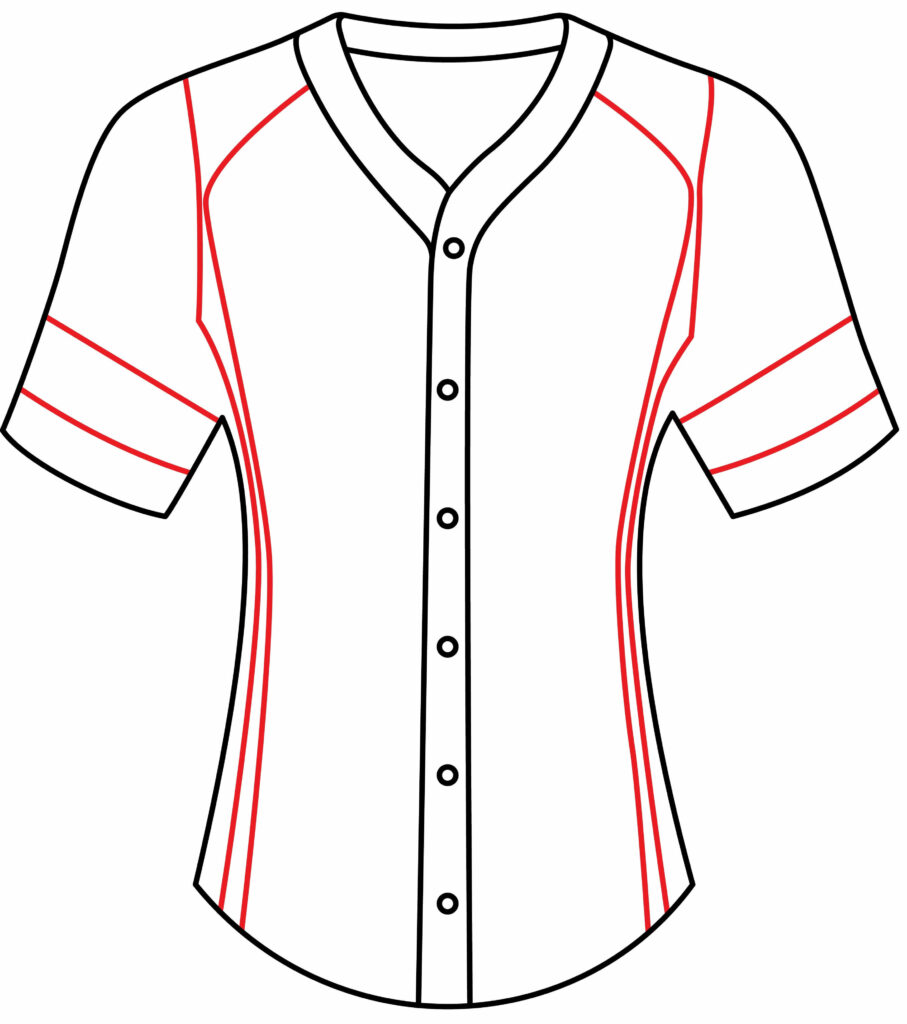
If you want to make a team jersey, add a large number in the center front and back. Include stripes on the sleeves or around the bottom. The possibilities are endless for creating your original softball jersey artwork!
- Divide the shirt into sections with straight lines
- Add shapes, symbols, numbers, and patterns in each section
- A large number for a team jersey, stripes on sleeves
- Get creative with your custom designs
Step 4: Add Some Stripes On The Jersey
Stripes are a classic design element seen on many sports jerseys. Let’s add some stripes to your softball jersey drawing to give it that authentic look. Use a ruler if needed to draw thin, straight lines for stripes. Add stripes along the sleeves, around the collar, down the sides, or circling the bottom hem. Try using stripes in the primary color of your jersey design. For example, if your jersey is purple, use purple stripes. Or use contrasting colors like black stripes on a white jersey.
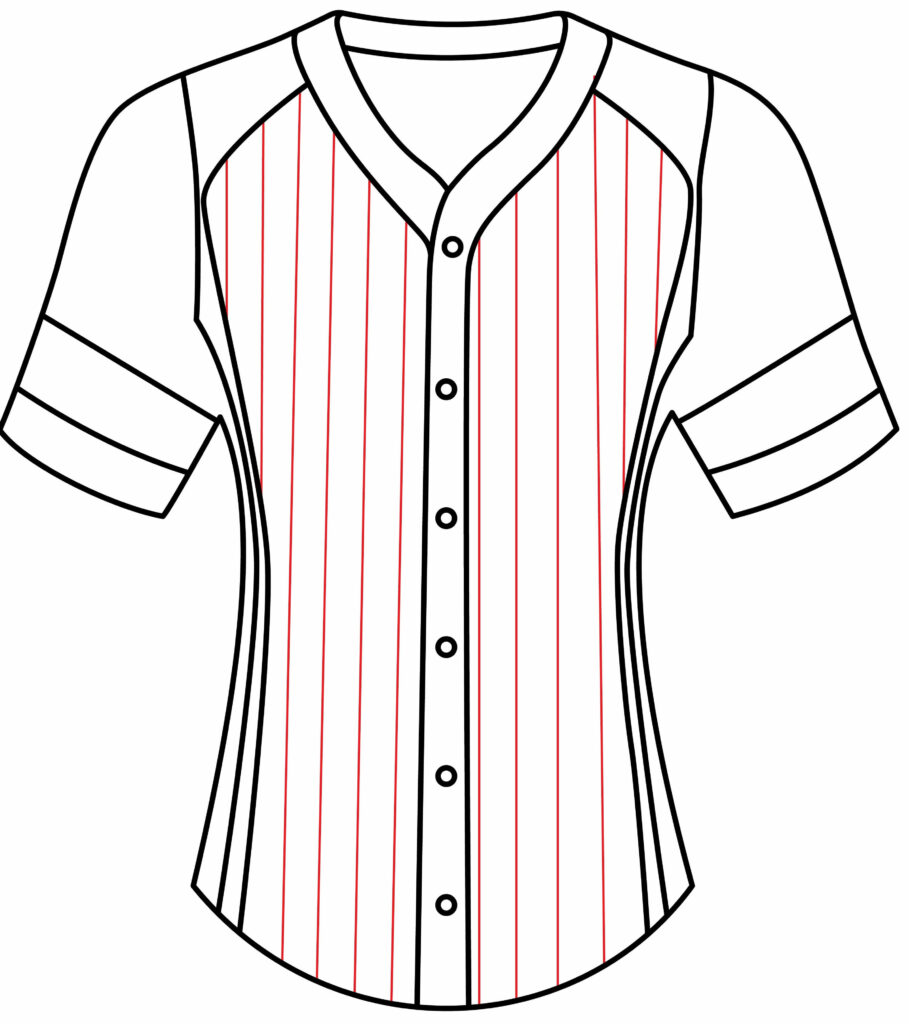
Vary the thickness of the stripes by drawing some thin and some thicker. Space the stripes evenly for a clean look. Keep the stripes straight and evenly spaced. Adding well-drawn uniform stripes brings your jersey drawing to life with polished sports design elements. Have fun getting creative with different stripe patterns!
- Use a ruler to draw straight, thin stripes
- Add stripes on sleeves, collar, sides, hem
- Make stripes in the main jersey color or contrasting shade
- Vary thickness and spacing of stripes
Step 5: Add Logo And Number
Add a team logo and player number to make your softball jersey look like the real deal. You can get creative and draw your own logo and number designs. Or simplify it by using basic shapes. For a logo, you can draw something like a star, circle, diamond, or triangle shape. Place it prominently on the front of the jersey. Use a larger font size for and draw the number clearly on both the front and back. Center it for impact. Choose any number you like, or use the number for your favorite player. If doing a uniform for an entire team, do several jerseys with different numbers. The logo and number are vital identifiers for any sports jersey. Take your time drawing them neatly and prominently on your jersey design. They’ll make your artwork look complete.
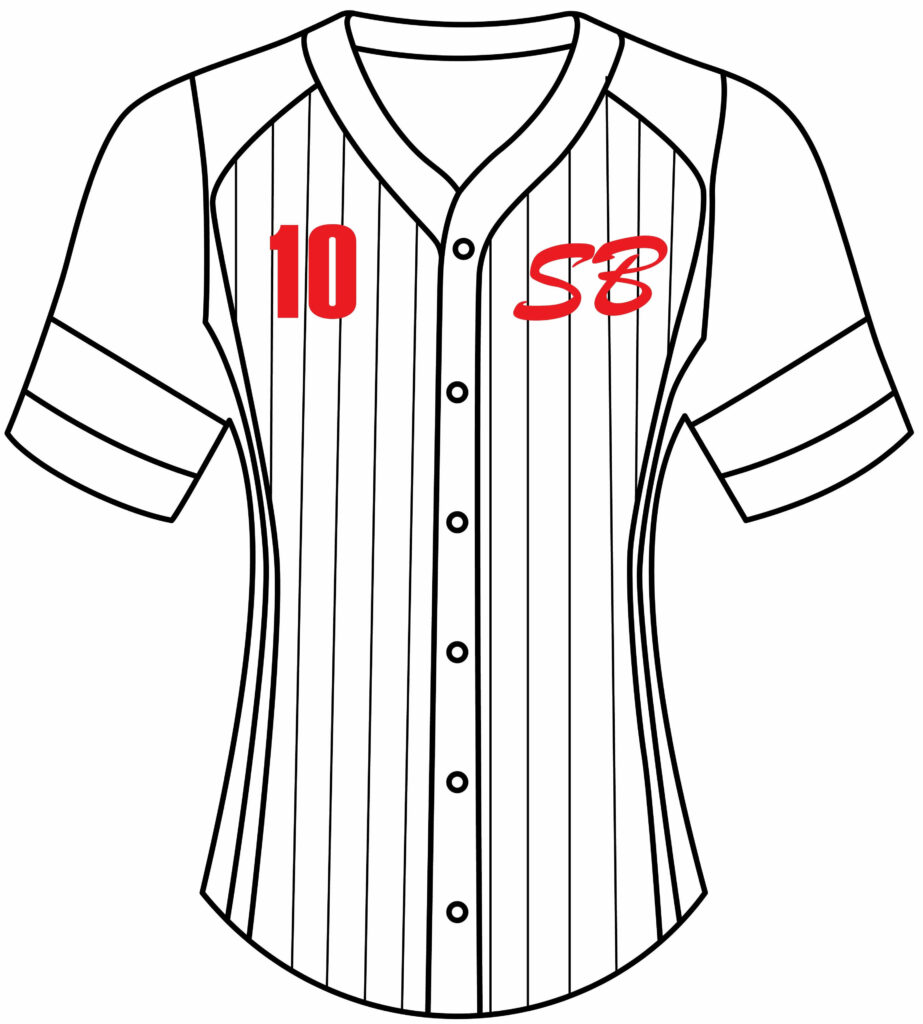
- Draw a simple shape or custom logo on the jersey front
- Use large numbers on both the front and back
- The center logo and number prominently
- Vary numbers if doing team uniforms
Step 6: Your softball jersey Is Ready
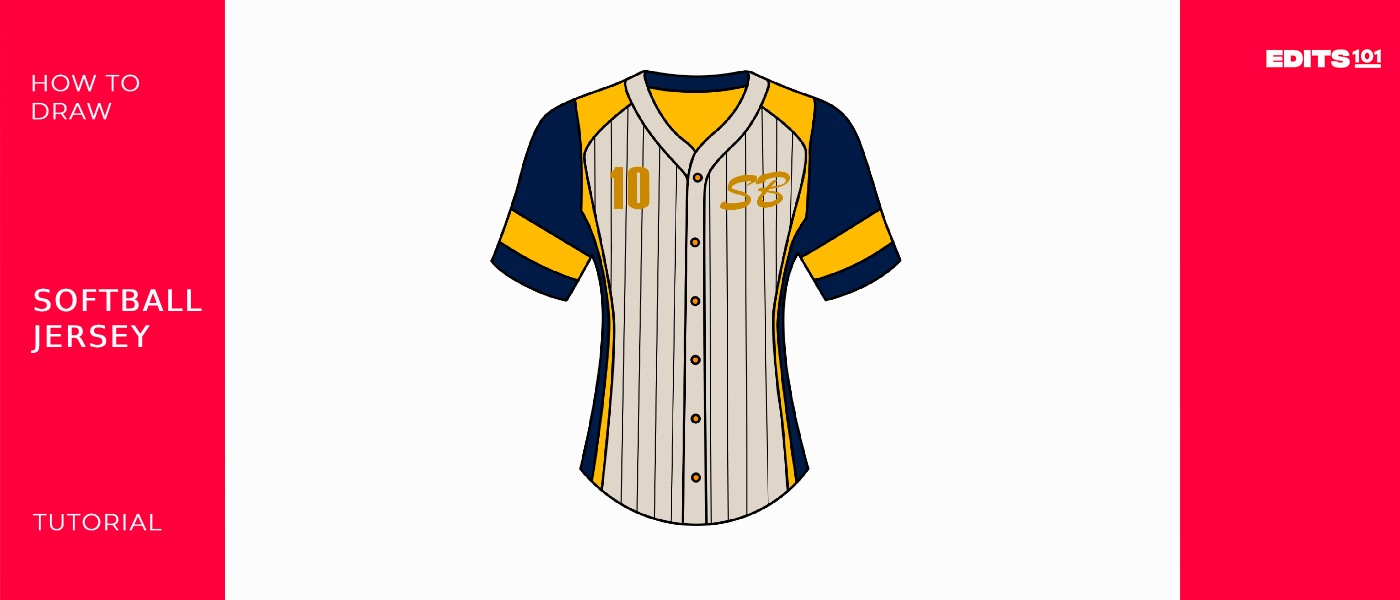
Congratulations, you did it! Following these drawing steps, you now have a complete softball jersey artwork. You started with the basic jersey outline and added critical features like the collar, buttons, and design elements. Then you decked it out with authentic stripes, logo, and number. Now, you have your very own softball jersey drawing you can take pride in creating yourself.
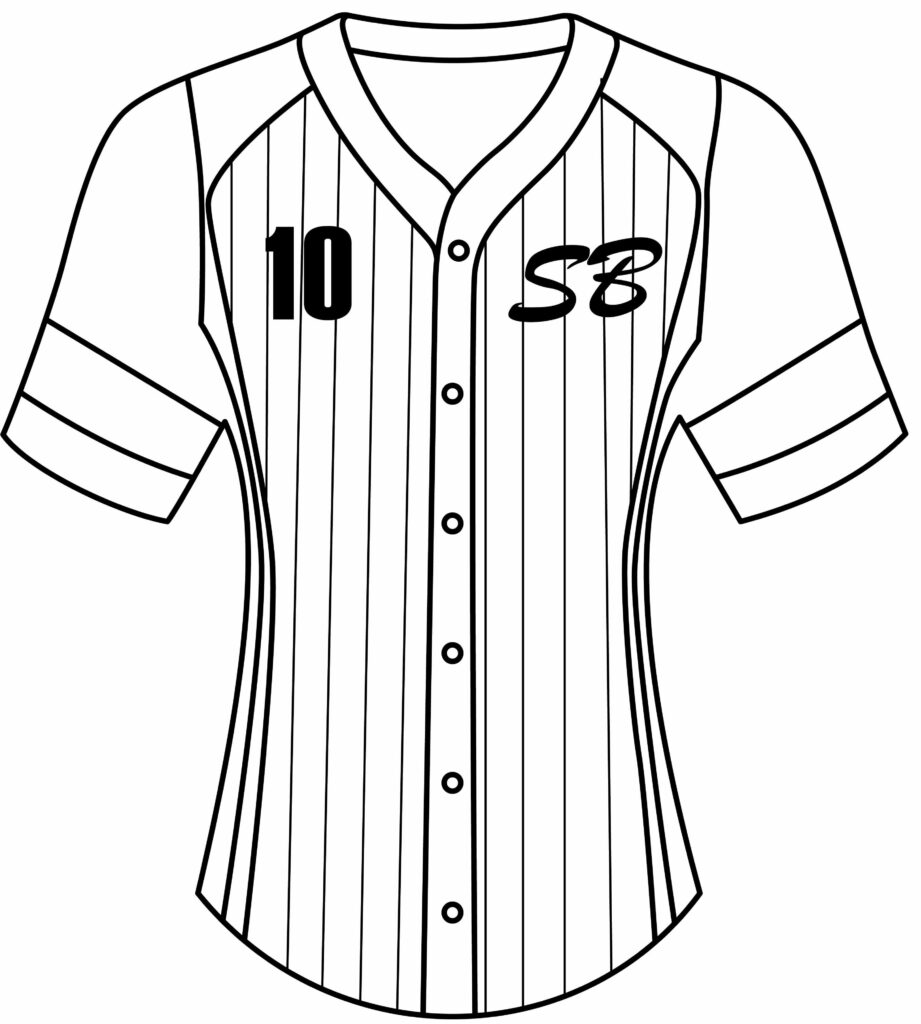
Taking your drawing to the next level
Now that the sketching is done, we will upgrade our softball jersey with a background and color.
Adding a background to your softball jersey drawing
Draw some simple lines or shapes at the bottom to represent the ground or playing field. Some ideas: green grass, brown dirt infield, asphalt or concrete.
Draw a bat, ball, glove, or helmet to set the softball scene. Place them around the jersey. Insert text boxes with words like “Softball,” “Team,” “Champs,” etc. Rotate or curve text for interest. Draw simple clouds, birds, and the sun. For the night game, add stars or the moon. To frame it, draw a simple rectangle, circle, diamond, or other shape around the jersey. The jersey should stand out as the main element, so the background should only compete a little.
Coloring your softball jersey drawing
Determine what team the jersey represents and use their color scheme. Use the primary colors’ shades, tints, and tones for visual interest. Darker for shadows, lighter for highlights. Make the stripes a coordinating or contrasting color from the primary jersey color. Use bold, contrasting colors so they stand out. Black or white works well. Complementary colors (opposites on the color wheel) contrast boldly. Analogous colors (next to each other on the wheel) are harmonious.
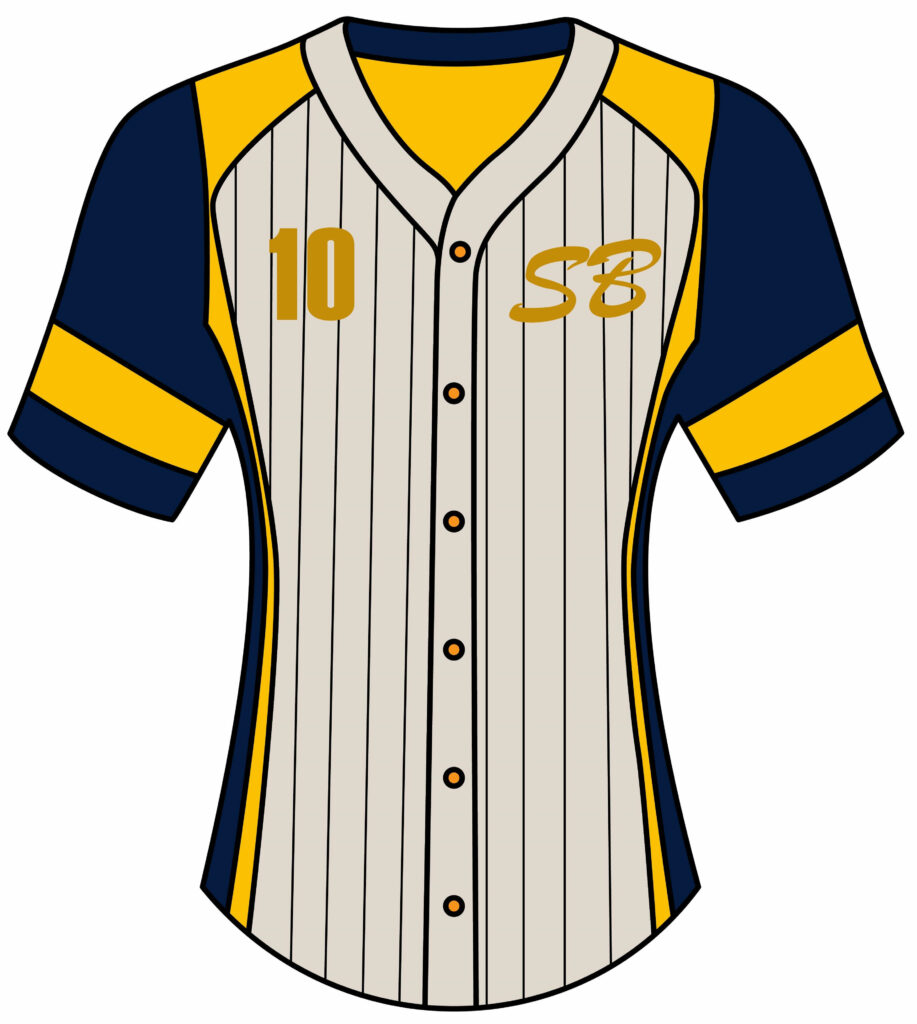
Bonus tips
Use different shading techniques to show smooth, shiny jersey fabric vs. rough, bumpy surfaces like dirt or grass. Look at photo references of actual jerseys and pay attention to details like creases, folds, and seams. Rather than a flat jersey, show it on a figure in an active batting, throwing, or catching pose. Place the jersey in a scene, like on a field, at bat, catching a ball. Add more context. Combine your drawing with a painting or collage for more unique effects. Try making part of the jersey seem three-dimensional, popping off the page. Shadows behind or underneath the jersey can enhance dimension. Mount, mat, and frame your finished jersey drawing to make it look like art. Add your artist’s signature, date, and title somewhere on the jersey drawing. Continue developing your drawing skills.
Conclusion
In this step-by-step tutorial, we started with the basic jersey outline and built the drawing by adding details like the collar, buttons, stripes, and team logo. You can now draw your unique softball jersey design using the techniques covered in these steps. The options are endless for creating custom colors, numbers, patterns, and other creative touches to make your jersey stand out.
Thanks for reading & feel free to check out more of our articles!
Author Rating
Overall Rating
Summary
Learn how to draw a beautiful softball jersey in easy to follow steps. You will also learn interesting facts about jerseys.

