How To Draw A Volleyball Net | 4 Simple Steps Guide
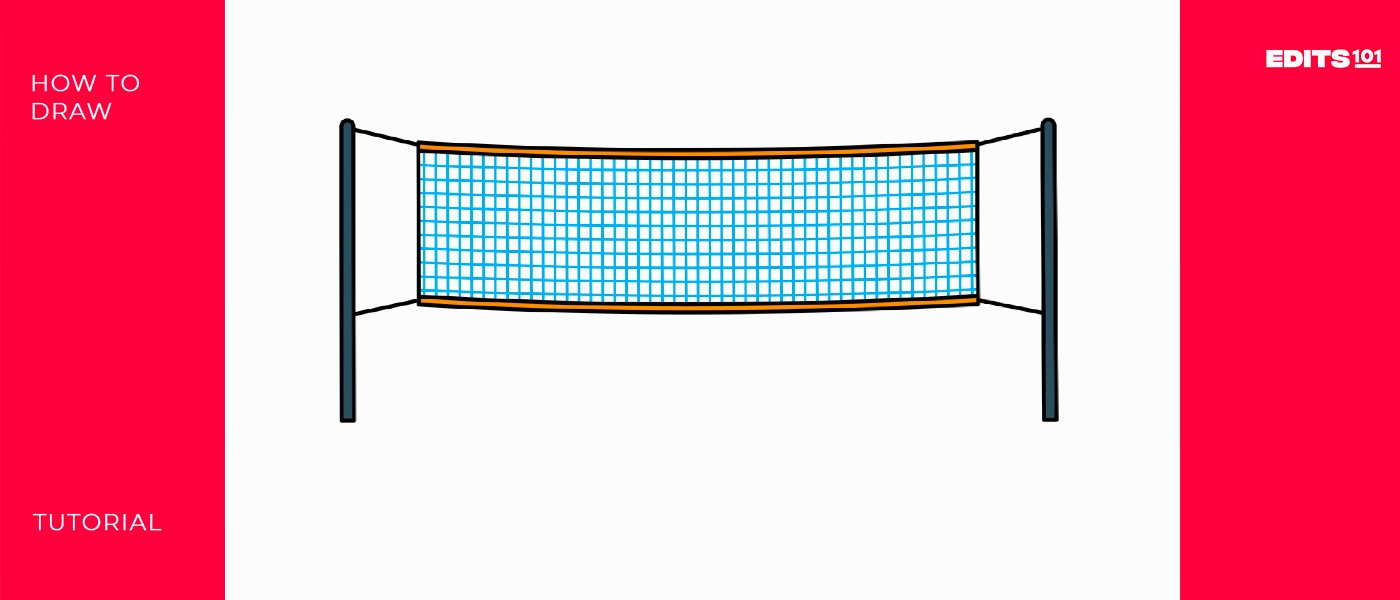
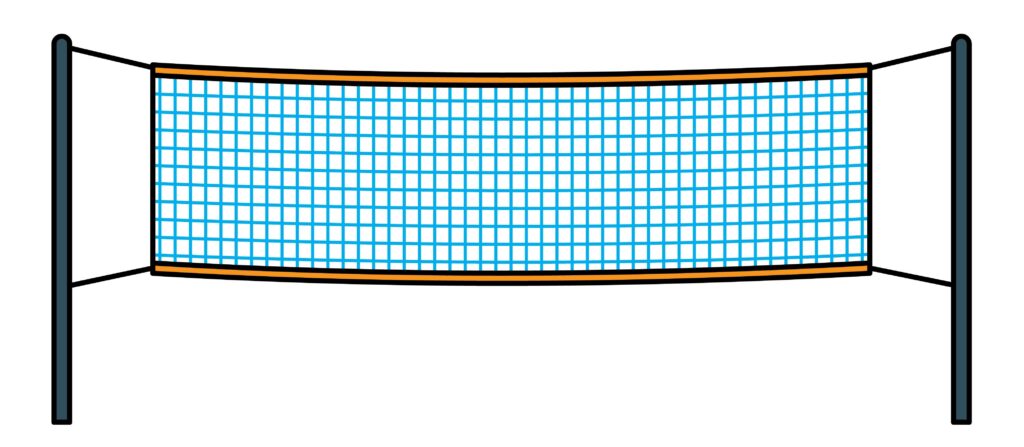
Hey there, budding artists and volleyball enthusiasts! We will draw a volleyball net today. A volleyball net is a pivotal element, a physical barrier that divides the playing area into two halves. It is suspended horizontally over the center of the court, supported by vertical poles or posts on either side. The net’s dimensions conform to official regulations, with a specified height for men’s and women’s play. Typically made of durable materials like nylon, the net features top and bottom bands that reinforce and stabilize it. It also incorporates visible markings to facilitate proper positioning during setup. The net is crucial in defining the game’s boundaries and is a focal point for serves, spikes, and blocks.
| Steps | Complexity level |
| Draw The Bars | 2 |
| Draw The Nets’ Baseline | 2 |
| Draw the ropes | 3 |
| Add details on the net. | 3 |
| Coloring and background | 4 |
What You Will Need
- Drawing Paper
- Pencils
- Eraser
- Ruler
- Colors
How to Draw a Volleyball Net
Today, we’re embarking on an exciting artistic journey as we learn how to illustrate a dynamic volleyball net. Whether you’re looking to capture the essence of the game or add a sporty touch to your sketchbook, this step-by-step guide is here to make the process enjoyable and educational. So, grab your pencils, gather your supplies, and let’s dive into this creative adventure!
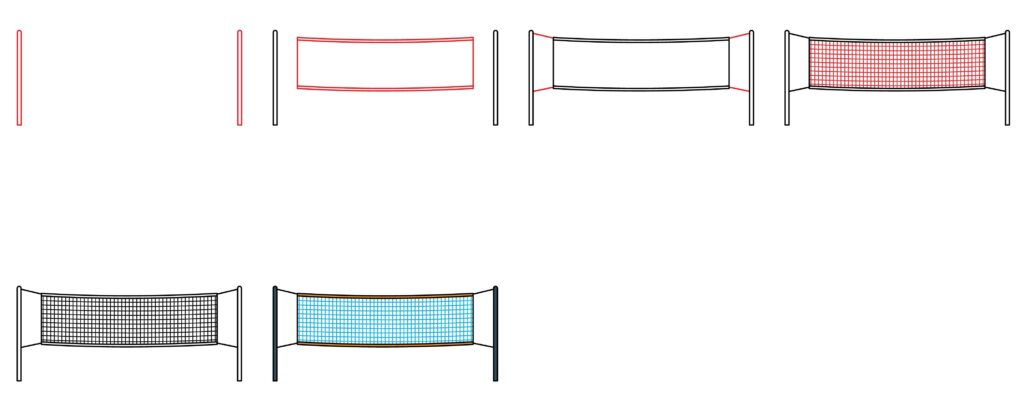
Step 1: Draw The Bars
Excellent start! Let’s dive into step one by drawing the bars of the volleyball net. Begin by drawing two vertical lines on both sides of the page. These lines will serve as the borders of the net. Next, make the upper side of each line slightly rounded. This curvature will give the bars a realistic appearance, mimicking the shape of an actual volleyball net.
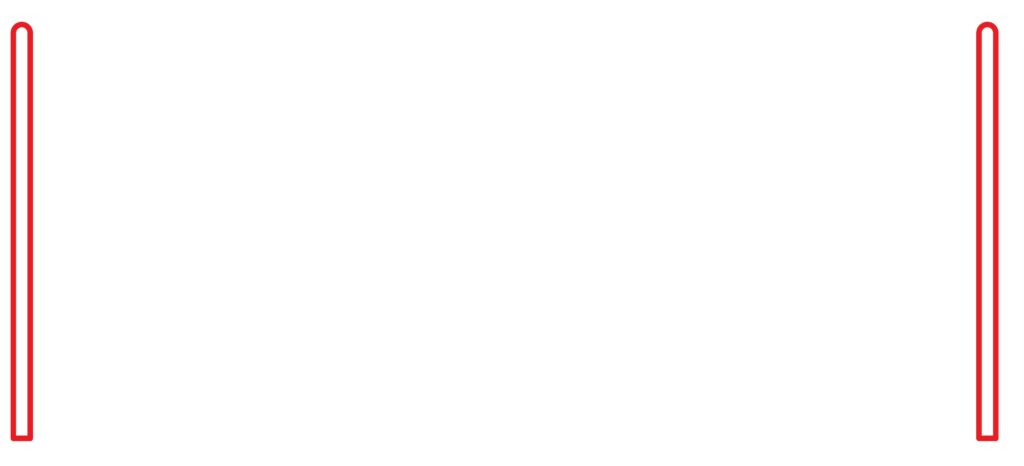
Ensure that the bars are evenly spaced and that the curvature is consistent on both sides. This step sets the foundation for your volleyball net illustration.
- Draw two vertical lines on both sides of the page.
- Curve the upper side of each line to create the appearance of a rounded bar.
- Ensure even spacing and consistent curvature for a realistic look.
Step 2: Draw The Nets Baseline
Start by drawing two horizontal lines, one on the upper and one on the lower sides. These lines will define the top and bottom edges of the net. Make sure to add a slight curvature to them, mimicking the natural shape of a tensioned net.
Next, draw two vertical lines on both sides of the horizontal lines. These lines connect the bars to the baseline, completing the net structure. Ensure that the lines are proportionate and well-balanced. This step defines the baseline, giving your volleyball net a realistic appearance.
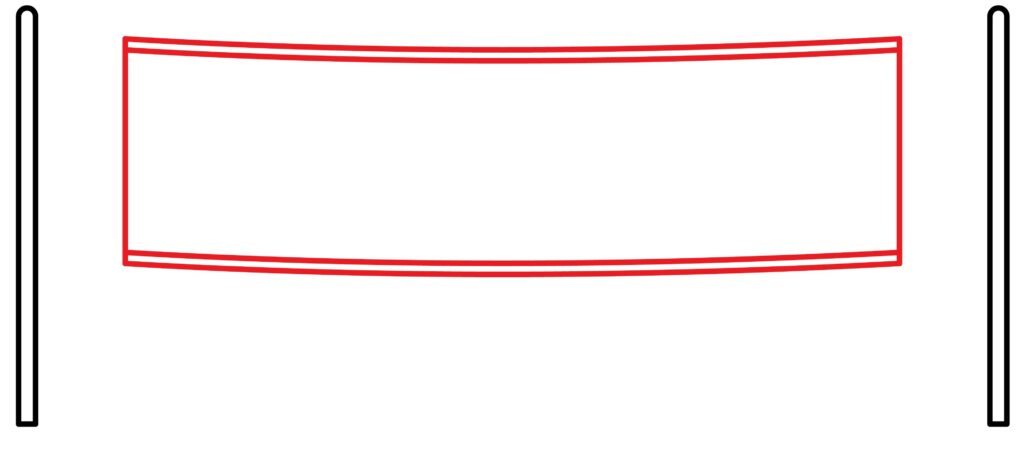
- To define the top and bottom edges of the net, draw two slightly curved horizontal lines on both the upper and lower sides.
- Add two vertical lines on both sides of the horizontal lines to connect the bars to the baseline.
- Ensure proportionate and well-balanced lines for a realistic baseline.
Step 3: Draw The Ropes
The ropes of a volleyball net serve as vital structural elements, defining its dimensions and stability. Constructed from durable materials like polyester or nylon, they run horizontally along the net’s length, encompassing top and bottom sections. These ropes are meticulously tensioned to maintain the net’s required height, which is crucial for official gameplay. In addition to vertical side ropes, they contribute to the net’s stability and shape. Adjustable for precise regulation, the ropes also feature visibility-enhancing stripes, especially valuable in outdoor settings.
Designed for weather resistance, regular maintenance ensures continued performance and safety. Overall, these ropes are essential components, ensuring the integrity and playability of the net. Start by drawing two ropes with multiple angled horizontal lines on both sides of the net’s baseline. These lines represent the tensioned ropes that hold the net in place. Make sure to vary the angles to create a realistic appearance.
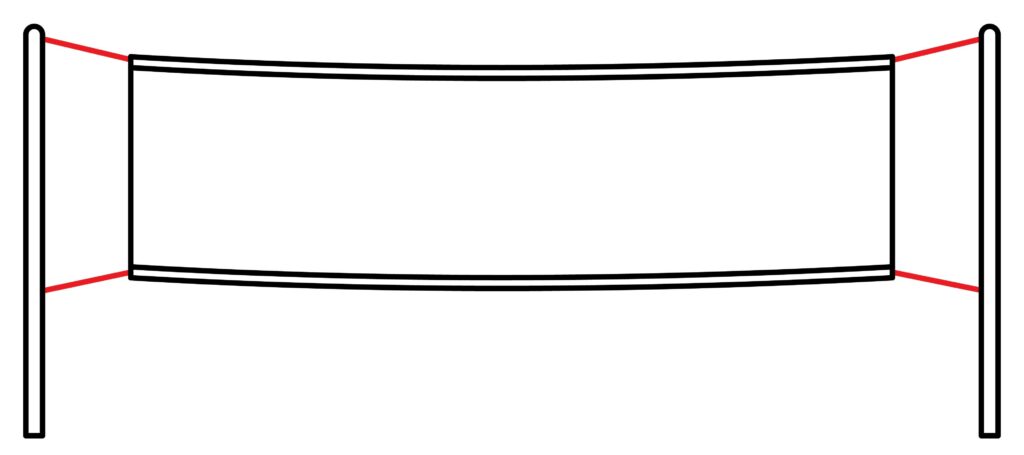
Next, connect the ropes to the bars by drawing lines that intersect with the bars. This step will give the impression that the ropes are securely fastened to the bars. Please pay attention to the placement and angles of the ropes to ensure they look taut and well-positioned.
- Draw two ropes with angled horizontal lines on both sides of the net’s baseline to represent the tensioned ropes.
- Vary the angles for a realistic appearance.
- Connect the ropes to the bars by drawing lines that intersect with the bars for a secure look.
Step 4: Add Details In The Net
Start by adding multiple vertical and horizontal lines within the net. These lines should be straight and curved to create the appearance of a woven texture. The combination of straight and curved lines will mimic the intricate pattern of an actual volleyball net.
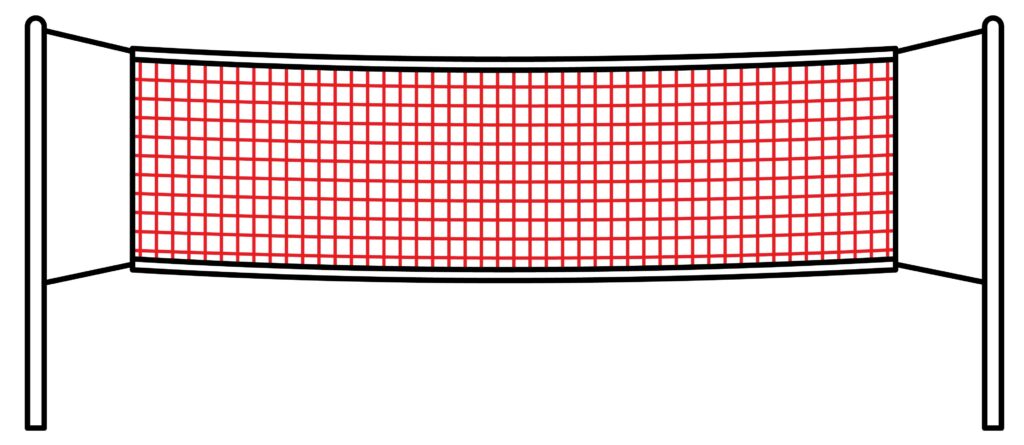
Please pay attention to the spacing and angles of the lines to ensure they look natural and realistic. This step adds depth and dimension to your volleyball net illustration.
- Add multiple vertical and horizontal lines within the net.
- Use both straight and curved lines to create a woven texture.
- Pay attention to spacing and angles for a natural and realistic look.
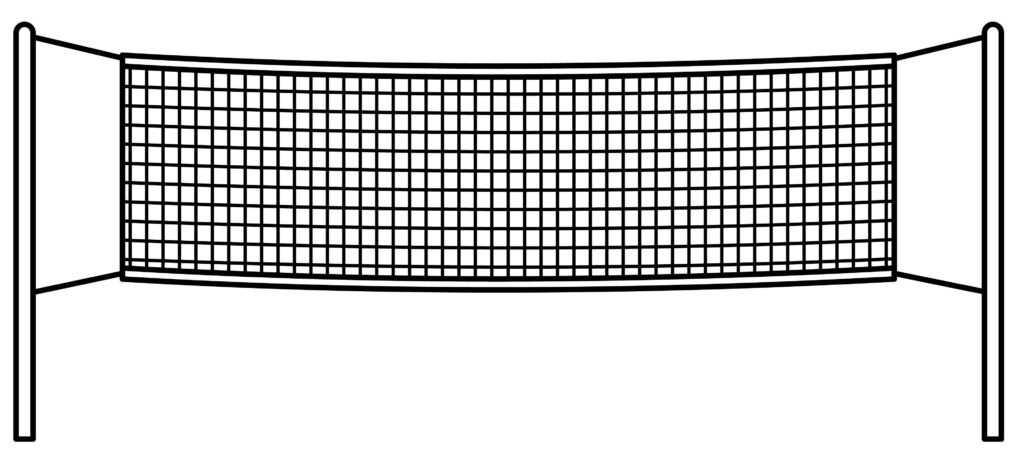
Step 5: Your volleyball net Is Ready
Congratulations, talented artist! You’ve completed your illustration of a dynamic volleyball net. Take a moment to admire your creation—it’s a testament to your creativity and dedication.
Now, if you’d like, you can take your drawing to the next level with some additional steps.
Taking the volleyball net to the Next Level
Like any other skill, sketching requires practice. Set aside time each day to sketch, even if it’s only for a little while. Be mindful of your surroundings. This enhances comprehension of details, dimensions, and forms. You can start with the basics and work up to more complex topics. Experiment with different drawing tools like charcoal, colored pencils, watercolors, markers, and pencils. Every medium has unique characteristics that could help you identify your preferences.
You can also play with basic hatching, blending, shading, and cross-hatching techniques. Understanding these techniques will greatly enhance the complexity and realism of your drawings. When you’re drawing, use your imagination and try out new concepts.
Adding a background
To elevate your volleyball net illustration, consider adding a fitting background. Imagine placing the net in the heart of a sun-drenched beach, with the turquoise waves gently lapping at the shore. The golden sand stretches beyond, with beachgoers enjoying a game or lounging under colorful umbrellas. Alternatively, choose the vibrant atmosphere of an indoor volleyball court, complete with cheering spectators and sleek, polished floors. This setting amplifies the game’s intensity, with players diving and spiking in the heat of competition. Whatever backdrop you envision adds depth and context to your illustration, immersing the viewer in the dynamic world of volleyball. Feel free to experiment with different scenes, as each brings unique energy to your artwork.
Adding color
Infusing your volleyball net illustration with color is the final touch that brings it to life. Begin by selecting a soft, sandy beige for the net, capturing the natural hue of volleyball nets. Then, consider a gentle azure for the sky, evoking the sunny outdoor ambiance of a beach volleyball match. For the ropes, a subtle gray or light brown shade adds authenticity. Remember to add a splash of verdant green for surrounding foliage, hinting at the lush environment of a beachside court. To complete the scene, use warm earth tones for the sand and cooler blues for the water, creating a harmonious color palette that captures the essence of a coastal volleyball setting. Remember, blending and shading techniques can add depth and realism, so feel free to experiment. With each stroke of color, you’re transforming your illustration into a vibrant, dynamic representation of a volleyball match in full swing.
Bonus tips
Here are some bonus tips to take your volleyball net illustration to the next level. Firstly, consider experimenting with different textures to add depth and realism. Techniques like cross-hatching or stippling can create a tactile feel for your drawing. Also, incorporate shadows and highlights to enhance the three-dimensional effect. This can make your illustration pop off the page. Secondly, try varying your line thickness to add emphasis and create focal points within your artwork. Thicker lines can draw attention to essential elements, while thinner lines add delicate details. Lastly, consider adding a touch of motion to your illustration. This could be achieved by slightly blurring the lines of the players in action, giving the impression of movement. Remember, art is all about experimentation and finding your unique style, so have fun exploring these techniques!
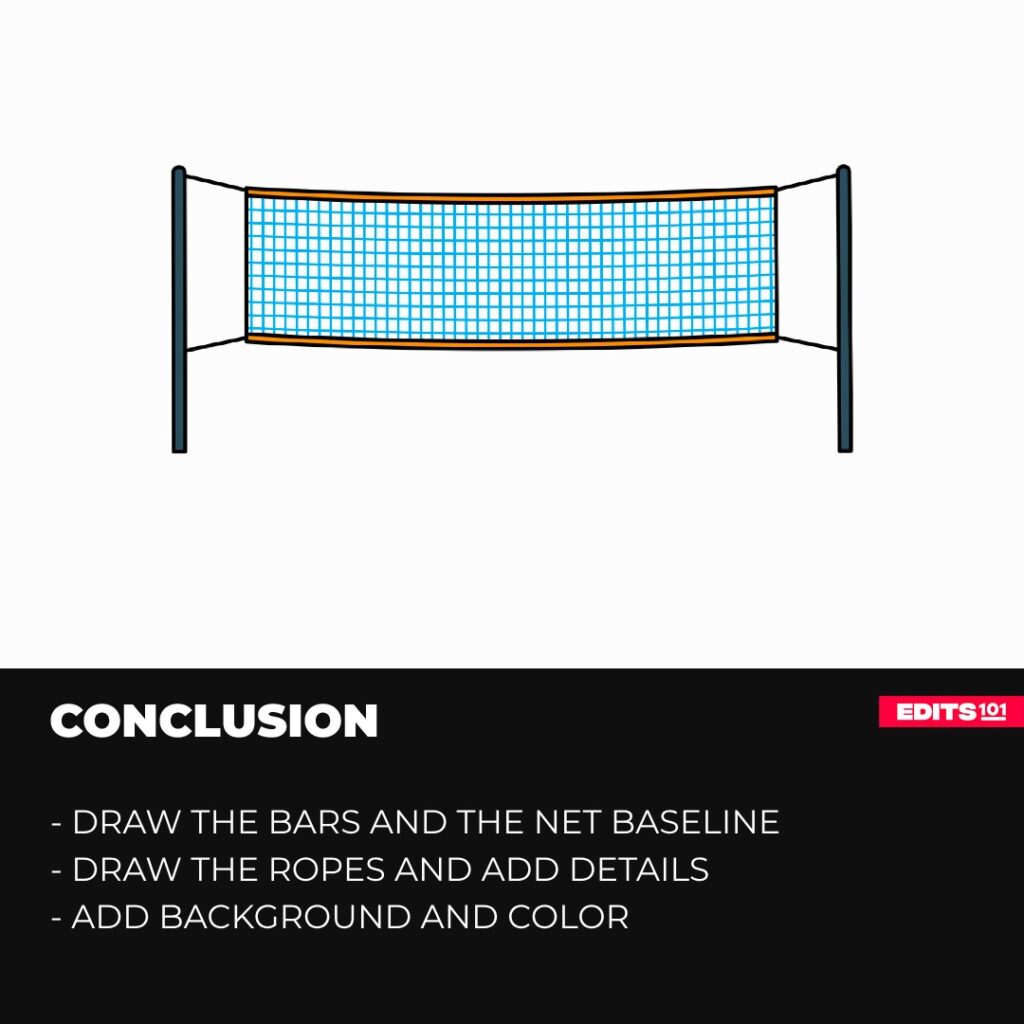
Conclusion
In conclusion, creating a vibrant and dynamic illustration of a volleyball net is an enjoyable artistic endeavor and a testament to your creativity and dedication. Through each carefully drawn line, added detail, and thoughtful use of color, you’ve brought to life a scene that captures the essence of the sport. First, we drew the bars, and then we drew net baseline, net ropes and added the details.
Remember, your techniques in this process serve as a foundation for your future artistic endeavors. Whether you continue to explore the world of sports illustrations or venture into entirely new subjects, the skills you’ve honed here will undoubtedly contribute to your growth as an artist.
Thanks for reading & feel free to check out more of our articles!
Author Rating
Overall Rating
Summary
this guide explains how to draw a volleyball net. It also explains some interesting facts about the volleyball net and ways to upgrade your drawing.