How to Draw a Hoverboard | Step By Step
Hello everyone. Thank you for taking an interest in our lesson. Today, we will look at how to draw a hoverboard in simple steps. But first, we need to understand what is a hoverboard.
Also spelled as a hoverboard, a hoverboard is one of the newest inventions in the realm of transportation. They are an upgrade to the skateboard. Hoverboards are levitating boards that are used for personal transportation. They were first described in science-fiction and were made popular by their appearance in the 1989 movie title Back to The Future II.
What You Will Need
- A pencil
- An eraser
- A marker
- Drawing sheet of paper
- Ruler
- Coloring kit
- 30 minutes
How to Draw a Hoverboard
You have probably seen someone riding a hoverboard or maybe that person was you. But do you know how to draw one? If not, today is your lucky day.
In this article, we will be drawing a basic hoverboard to help you grasp the concept. You can add details to your hoverboard later on once you get the gist of things. We will be following these steps.
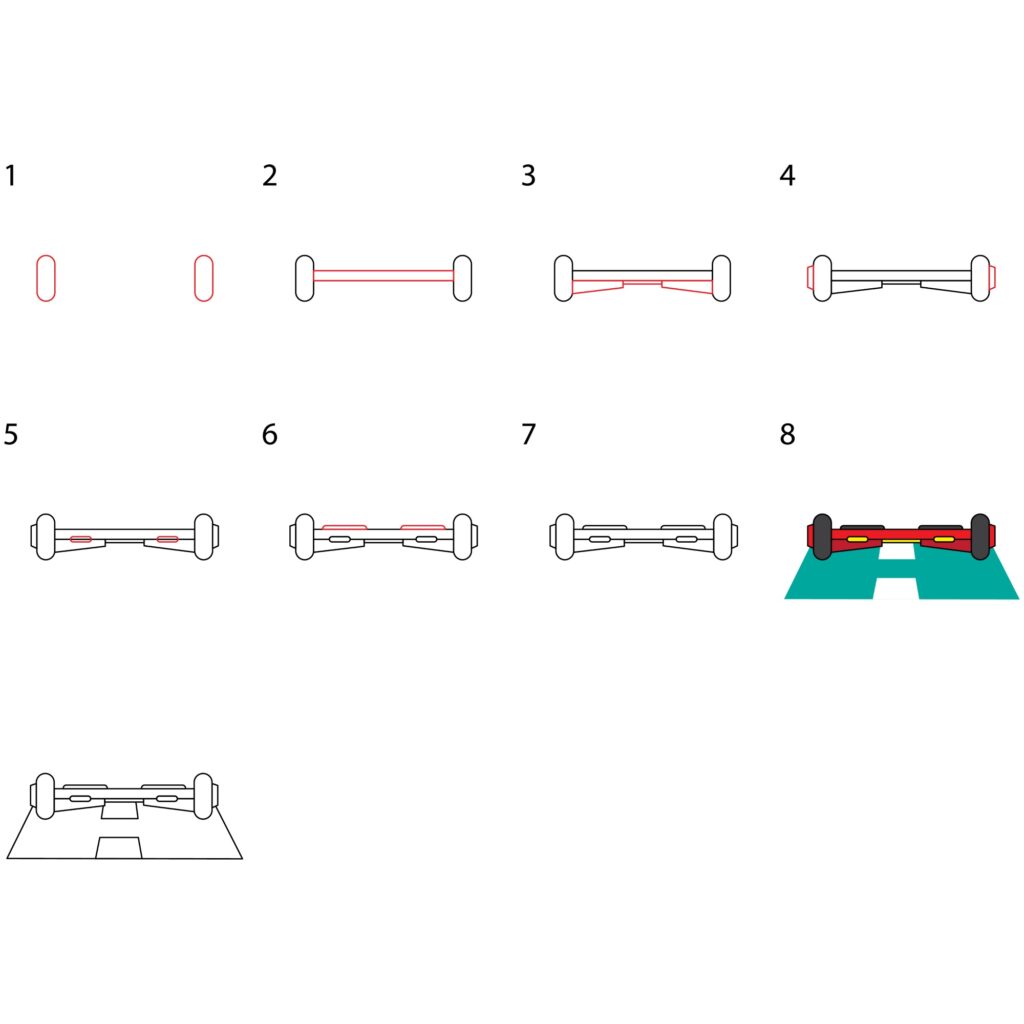
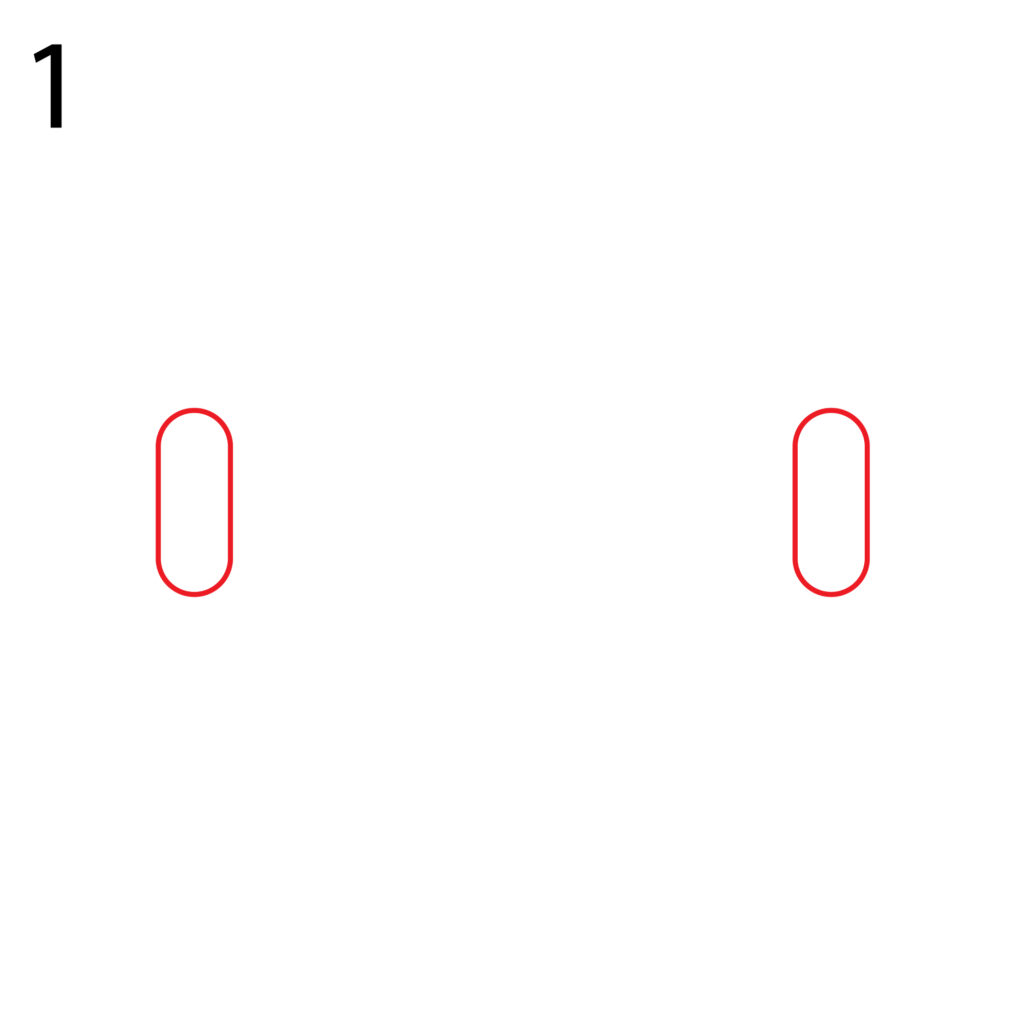
Step 1: Draw the Wheels
The reason hoverboards are considered to be levitating boards is because they only have two wheels positioned parallel to each other. If you haven’t ridden this amazing device, you might be wondering how a person gets to balance on it.
Well, balancing is all made possible by a gyroscope. This is the technology that adjusts the tilt of the platform to keep the rider balanced. If you have seen people fall off hoverboards on YouTube, something that is very funny is because they forgot to charge their devices.
To draw the wheels, we need to draw two rectangular shapes of the same size. You can use your ruler for this. Draw the first rectangle on the left side of your drawing paper. Make the rectangle big because this will be the tallest part of the hoverboard. Make sure you leave a short distance between the rectangle and the left margin of your paper. Draw another rectangle on the right and make sure it is the same level and height as the first one.
Next, you need to make the edges rounded so that the rectangles look like wheels. Erase the sharp corners and add rounded ones as shown in our illustration below.
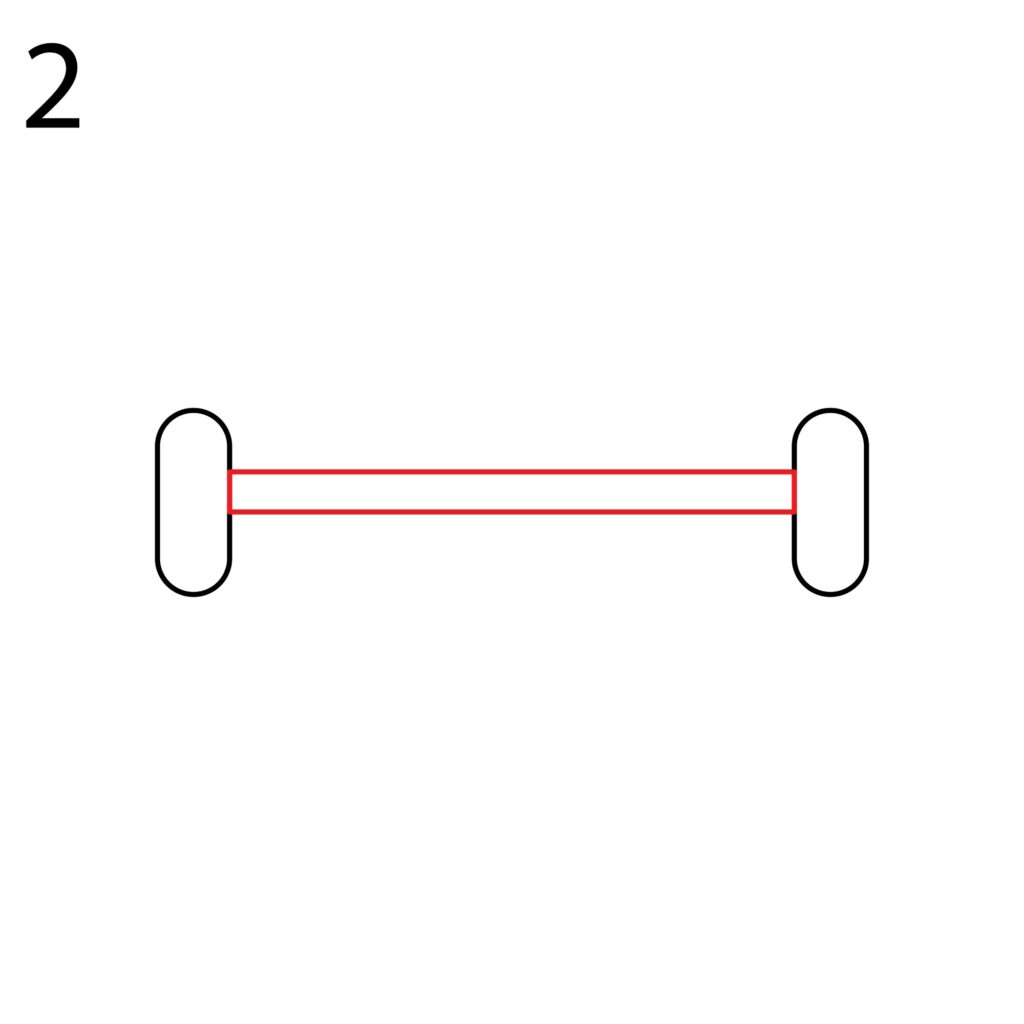
Step 2: Draw the Main Body
The rider stands between the wheels of a hoverboard on a platform. This is the part we will be drawing next.
Use your ruler to draw an elongated, horizontal rectangle that connects the two wheels. The rectangle should not start at the center of the wheels. It should be in a higher position as shown in our illustration below. Make sure the lines of the rectangle don’t overlap with the wheels. If they do, use your eraser to remove the overlapping sections.
Step 3: Draw the Bottom Part
To be able to steer the hoverboard and increase speed, the wheels operate independently. They are each on a separate platform which makes it possible to adjust the amount of power that goes to each wheel. The rider adjusts the speed with their feet by tilting forward or backward.
Now we will add the motors for each wheel. To do so, draw a line starting close to the bottom of the left wheel and raise it diagonally towards the center of the main body. Connect the diagonal line to the body using a vertical line. Do the same for the right wheel and make sure you leave some space between the two motors. We will then add a small rectangle between the two motors we just added. You should now have a drawing that looks like this.
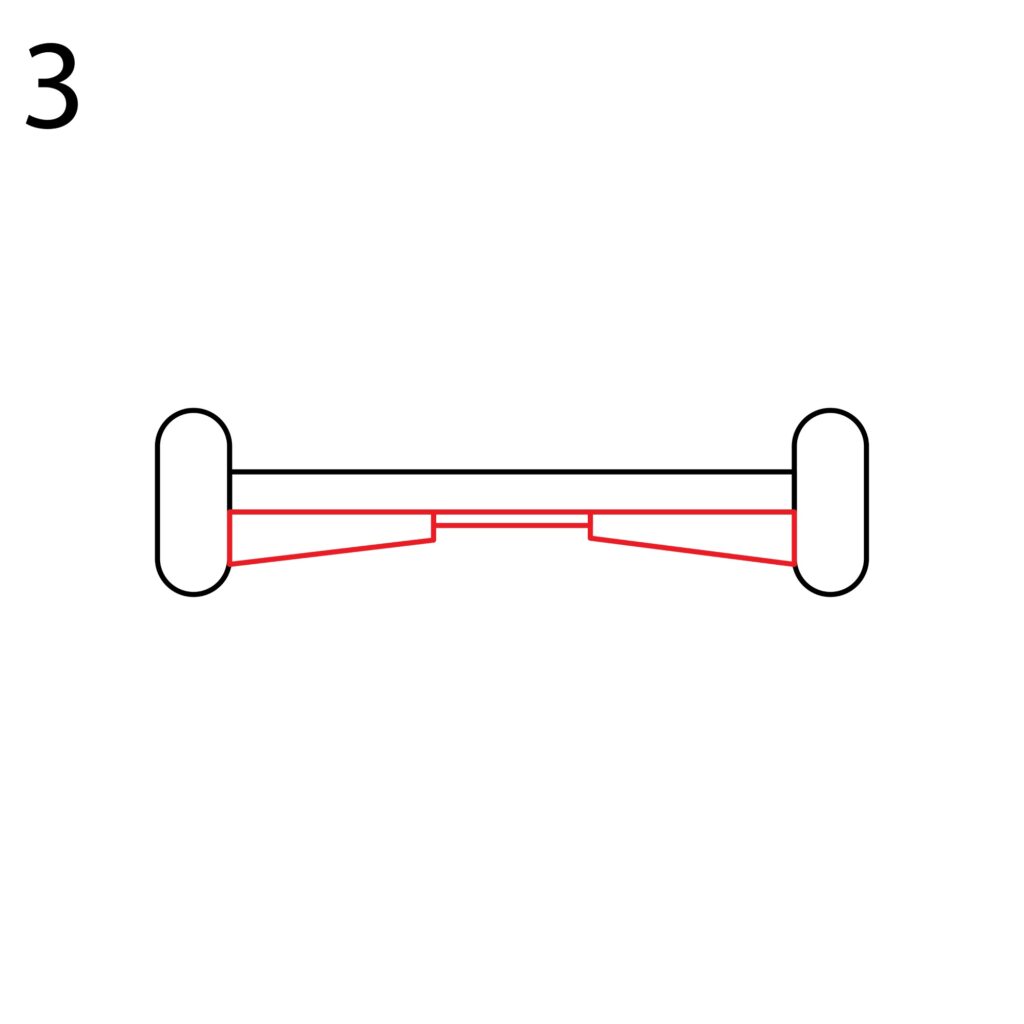
Make sure the lines do not overlap. For great results, avoid drawing the lines freehand. Use a ruler so that you get proportional shapes.
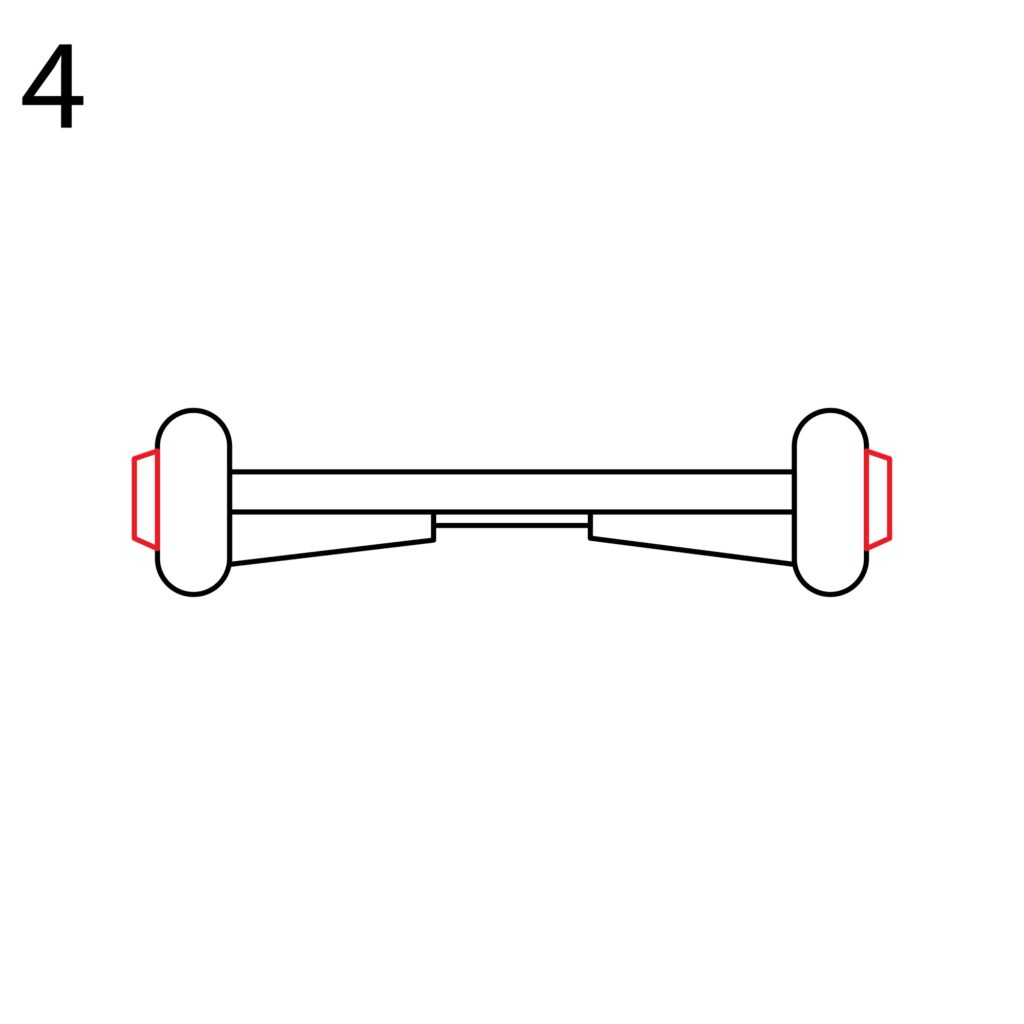
Step 4: Draw the Wheel Caps
We don’t want our wheels to come off, do we? That is why we need the wheel caps/holders. The wheel holders are not just meant to keep the wheels in place but also to add an attractive feel to the hoverboard.
The wheel caps go outside each of the wheels. We will start by adding a vertical rectangular shape to the left wheel. The shape should be positioned at the center of the wheel. Next, bend the outer part of the rectangle so that it is a bit pointed as seen in our illustration. You should then do the same to the right wheel.
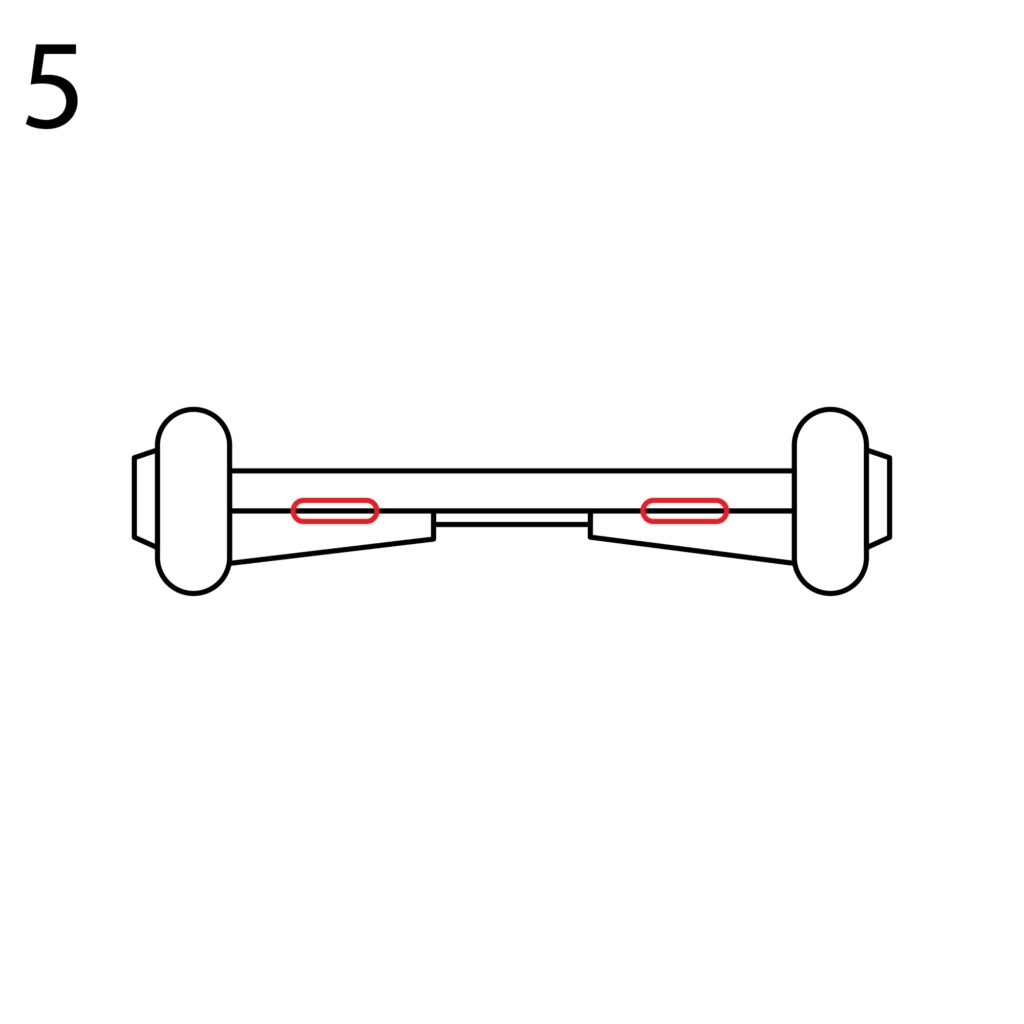
Step 5: Draw the Lights
Unlike traditional skateboards that don’t have a battery pack, hoverboards have a battery. This makes it possible to add some headlights to the device so that it can illuminate your path when riding in poorly lit areas. The lights also work as indicators. When there is an issue with the device, the light just blinks. You can then refer to the user manual to know what the error is.
To add the lights, draw a small horizontal rectangle at the bottom of the hoverboard’s body. The rectangle should not be too big and should sit above the left motor we added earlier for the left wheel. You should then add a similar shape to the right side of the device, above the right motor.
Use your eraser to make the corners of the rectangles rounded. You should also erase the lines that pass through the rectangle for the lights.
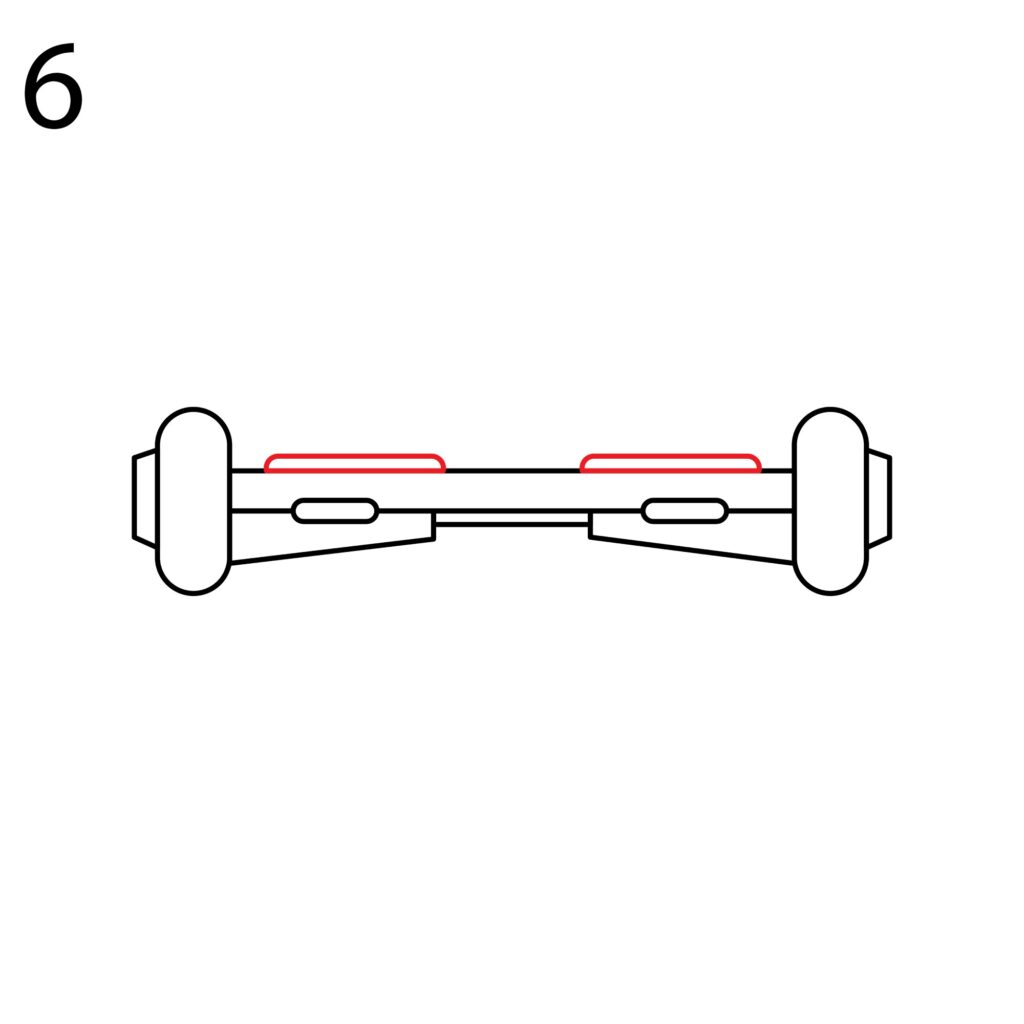
Step 6: Draw the Pressure Pads
The pressure pads are where the rider stands. They are designed to offer a good grip so that the rider doesn’t slip off while riding. They also fit the feet perfectly so that the rider can steer the device with ease.
Let’s talk a bit about how the hoverboard is controlled. When the rider climbs on the hoverboard and tilts their feet slightly forward, the speed sensor tells the hoverboard to move forward. When the feet are tilted backward, the hoverboard moves backward. To turn, the rider tilts one foot. If only the right foot is tilted forward, only the right wheel will turn thus causing the hoverboard to turn left and vice versa when the left foot is tilted.
To add the sensor pads, we need to draw two rectangles on top of the hoverboard’s body. The rectangles should not be too close to each other neither should they be too narrow or too close to the wheels. They should be located above the lights.
Once the rectangles are in place, make the top part of the rectangles rounded. You should have something that looks like this.
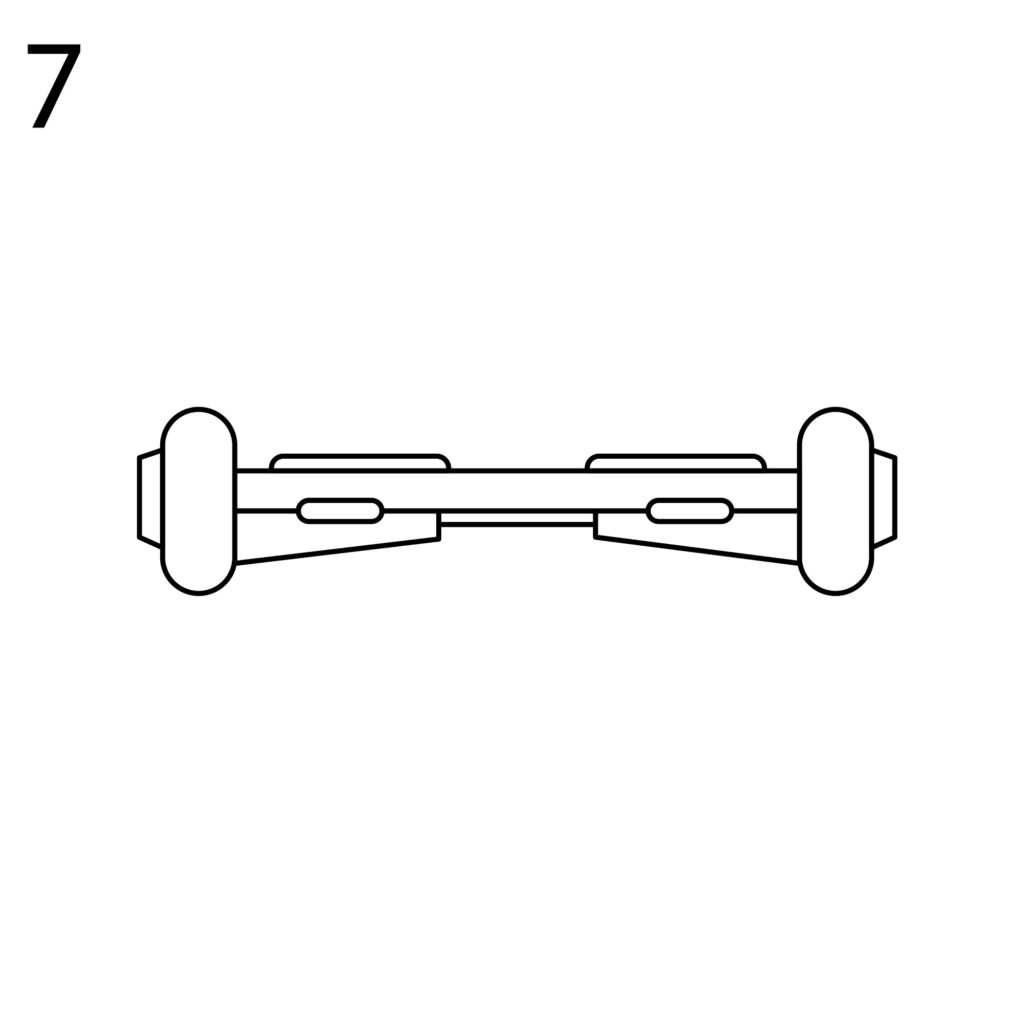
Step 7: Refine Your Drawing
If you followed all the steps, your hoverboard should be ready. Congratulations! If some things are a bit off, use your eraser to remove them and refine them. Keep in mind that your drawing doesn’t have to be as perfect as ours. Most people don’t get the perfect drawing the first time. The good thing is the second time is the charm.
If everything looks good, use your marker to draw over the drawing so that it is more prominent. It is, however, okay to leave your drawing as it is if you don’t wish to use a marker.
Take the Drawing to the Next Level
There is no harm in leaving your drawing as it is. However, if you wish to become a great artist, you have to be willing to take your drawing further by adding more details to it. This section is all about letting your imagination run wild. You can add as many details as you want provided you don’t go overboard.
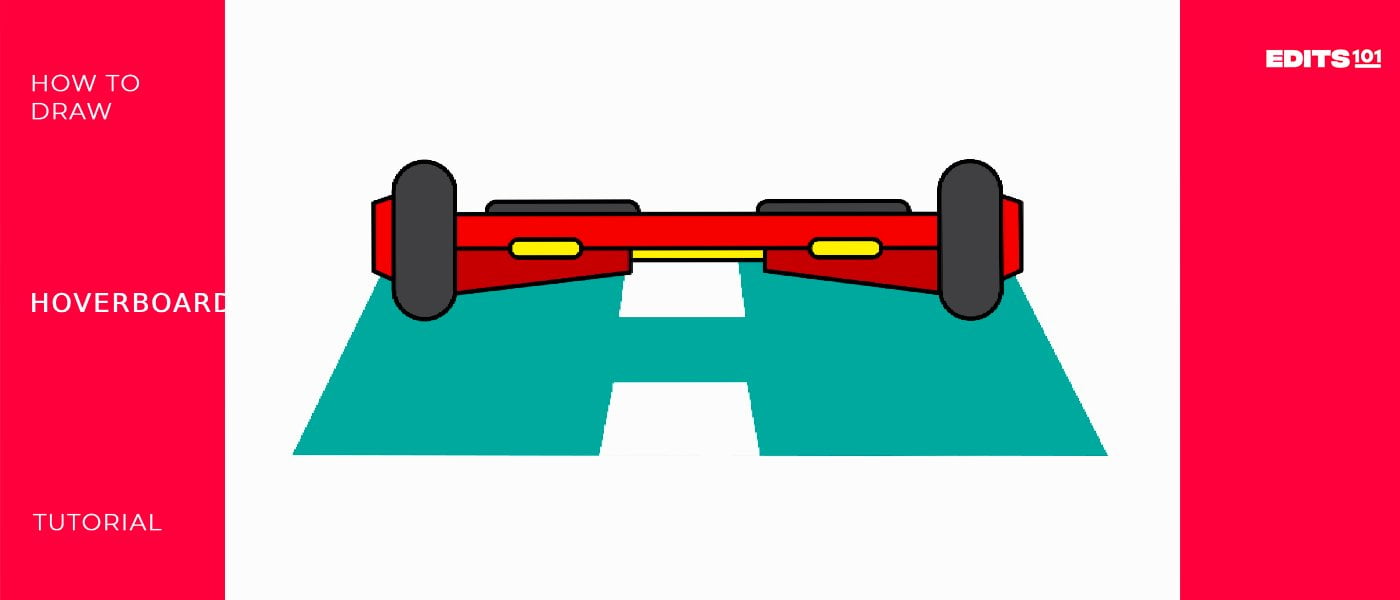
Add a Background
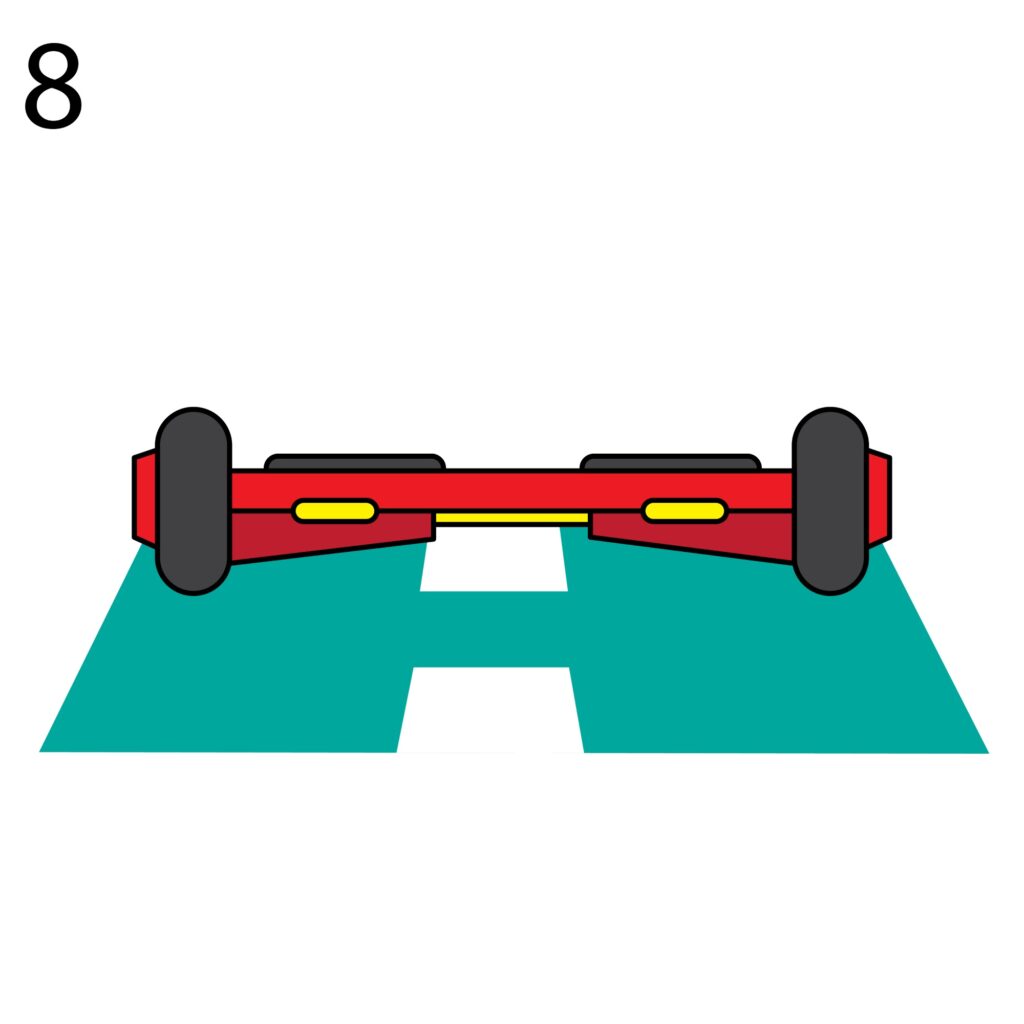
For our drawing, we are going to add a road beneath the hoverboard. You can do so using lines and shapes as we did in our drawing.
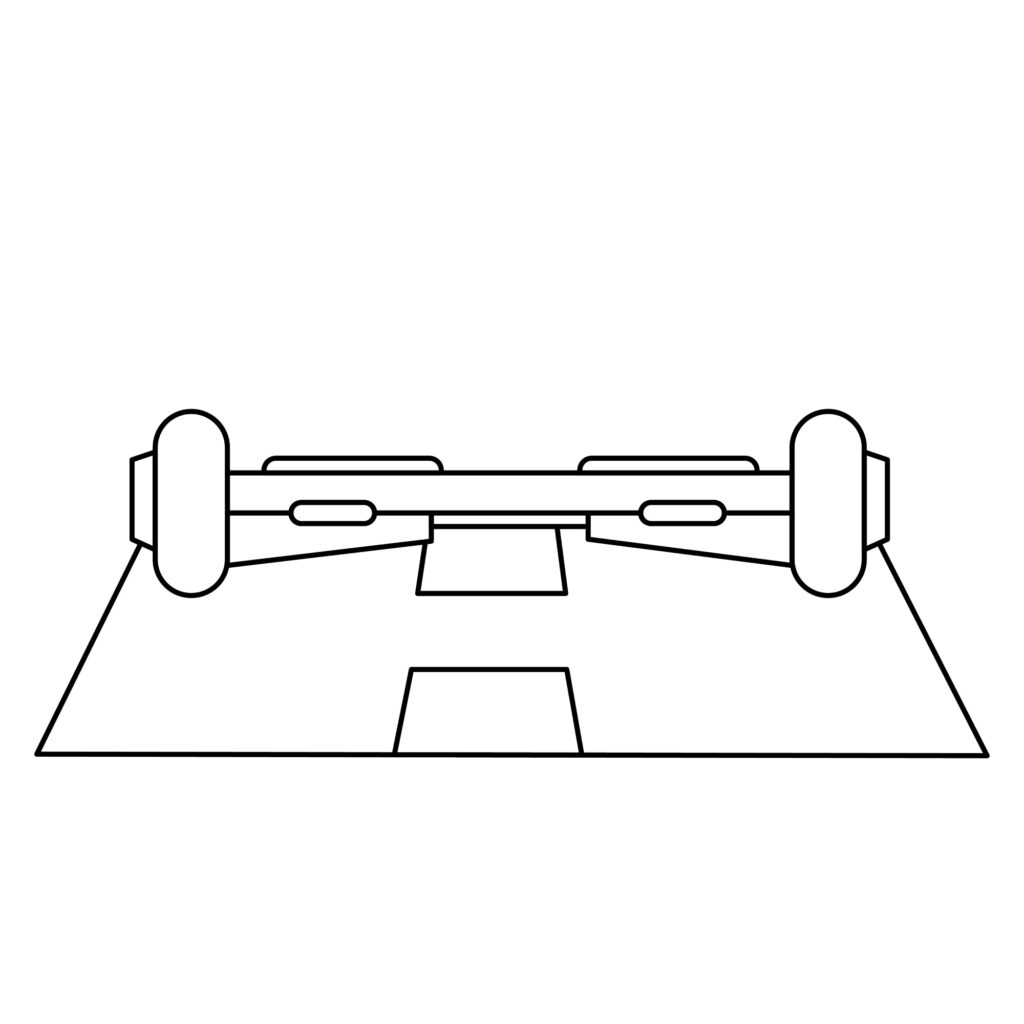
You don’t have to stop where we did. If you are confident, you can add a background filled with anything you want including a bush, trees, electric poles, or rocks. The key is to make sure the background doesn’t overlap with our hoverboard. The hoverboard is the star of our lesson, remember?
Color Your Drawing
The final step is the most fun. You need to add color to your drawing. Color is what adds life to your drawing. Take out your coloring supply and go as wild as you want. Here is what we did to our drawing.
Bonus Tips
In our lesson, we covered the basic layout of a hoverboard so that it is easier to draw. You can redo the drawing again and this time add more details. You can upgrade your drawing by writing your name on it or adding stripes to the wheels so that they look more impressive.
You can also look up the image of a real hoverboard online and try drawing it from a different perspective. It is only with practice that you will become a great artist. Don’t forget to have fun.
Conclusion
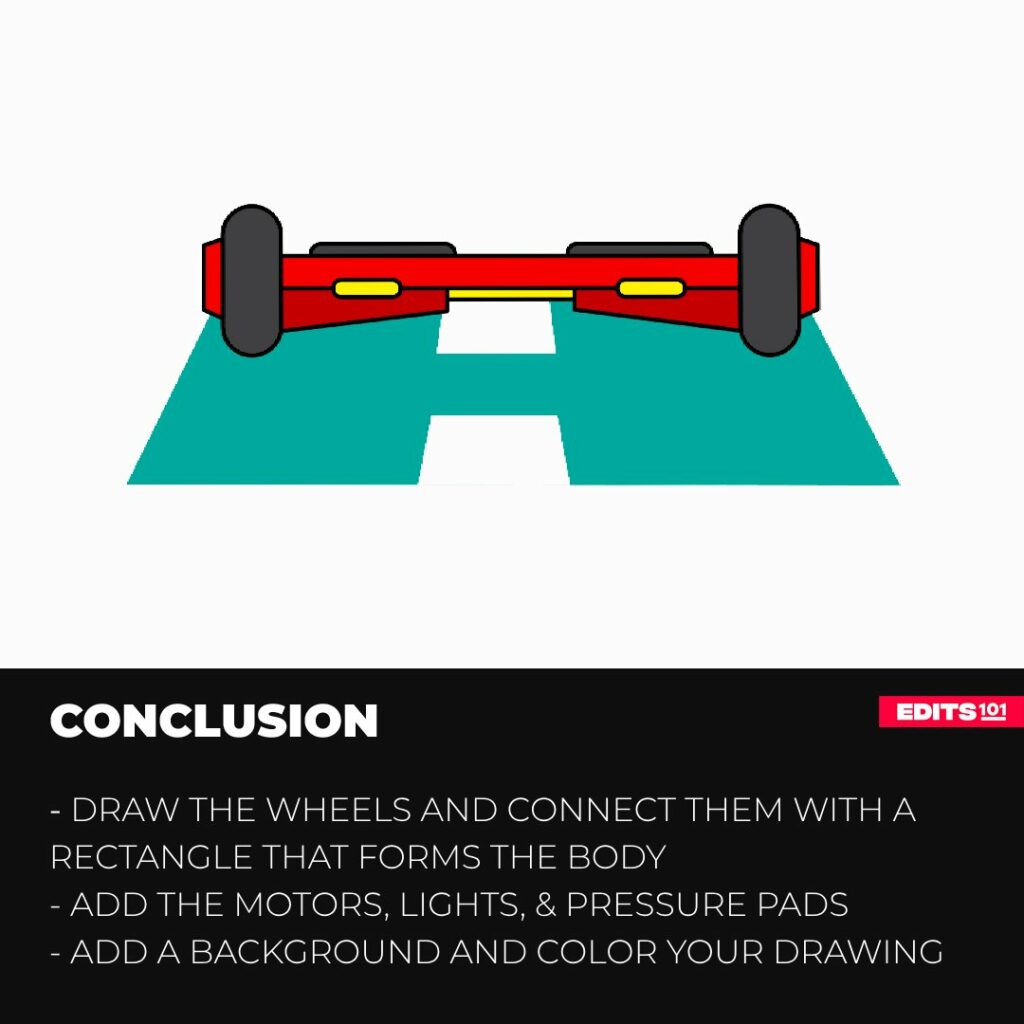
I hope you had as much fun as I had drawing my hoverboard. Our guide explained each step starting from drawing the wheels and then adding the body and other components of the hoverboard. We also took our hoverboard further by adding a background. After that, we brought our drawing to life by adding vibrant colors.
Remember that it takes practice to become a great artist. Never give up when things don’t shape up as you would want. Keep practicing and most of all have fun.
Thanks for reading & feel free to check out more of our articles!