How to Draw a Snowplow | Simple Step-By-Step Tutorial
The fact that you opened this post means you want to learn how to draw a snowplow. You have probably seen one clearing your street during winter or seen one on TV. The best thing is that drawing a snowplow doesn’t require much steps as you will see by the end of this lesson.
A snowplow is a piece of equipment used to remove ice and snow from outdoor surfaces such as driveways, sidewalks, roads, and so on. A fun fact is the snowplow is the device mounted on a vehicle. It is, however, not uncommon to find people refer to the device and the vehicle as a snowplow. That is what we will be doing in this guide. Wink! Wink!
What You Will Need
- A pencil
- An eraser
- A ruler
- A piece of drawing paper
- Coloring supplies
- At least 30 minutes
How to Draw a Snowplow
In this guide, you will not only be learning how to draw a snowplow but also getting familiar with the components that make up a snowplow. While it may seem difficult at first, following our steps carefully will help you draw an amazing snowplow. Here are the steps we will be following.
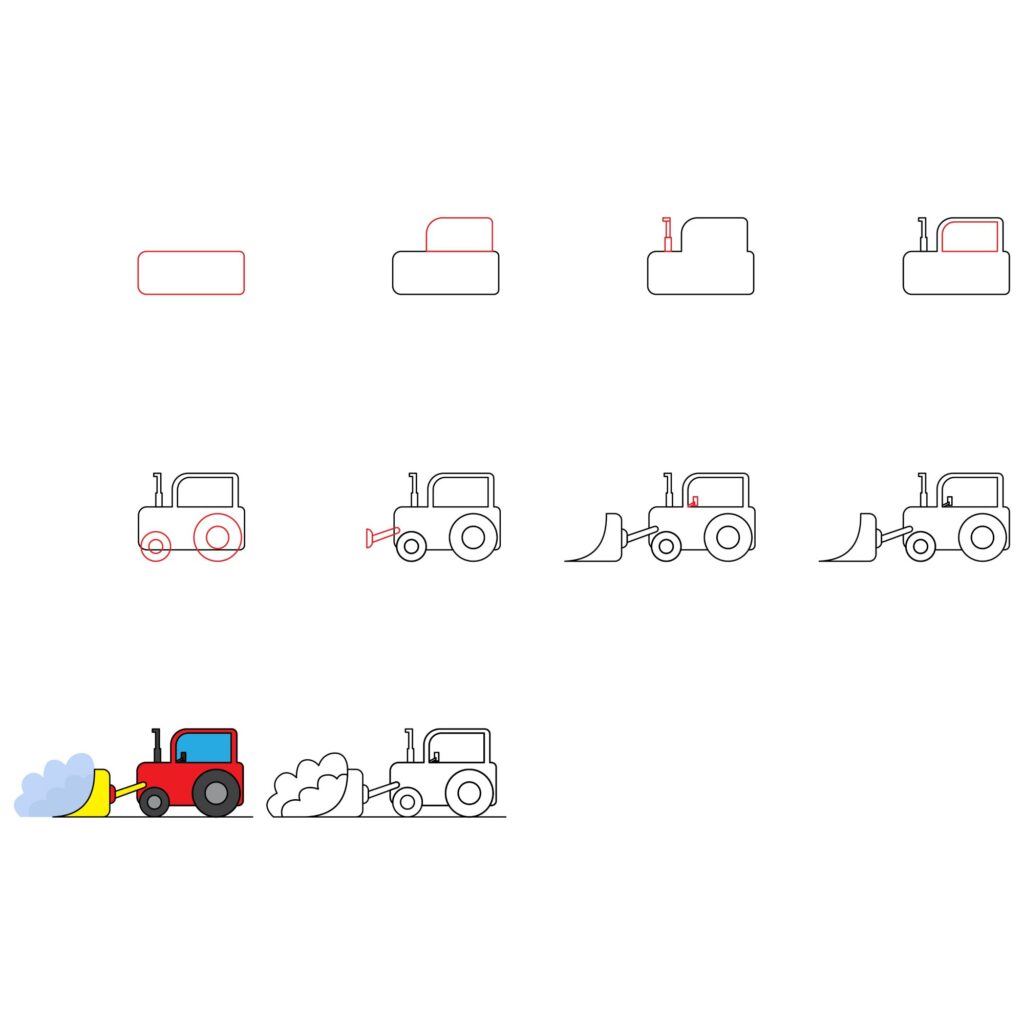
Step 1: Draw the Body of the Vehicle
A snowplow can be attached to any type of vehicle provided it is powerful enough to support the plow. In our drawing, our snowplow will be attached to a tractor.
The first thing we will be drawing is the body of the tractor. This is quite easy. Simply take your ruler and use it to draw a rectangle close to the right margins of your drawing paper. You should then erase the sharp corners of the rectangle and make them rounded. You should have something that looks like this.

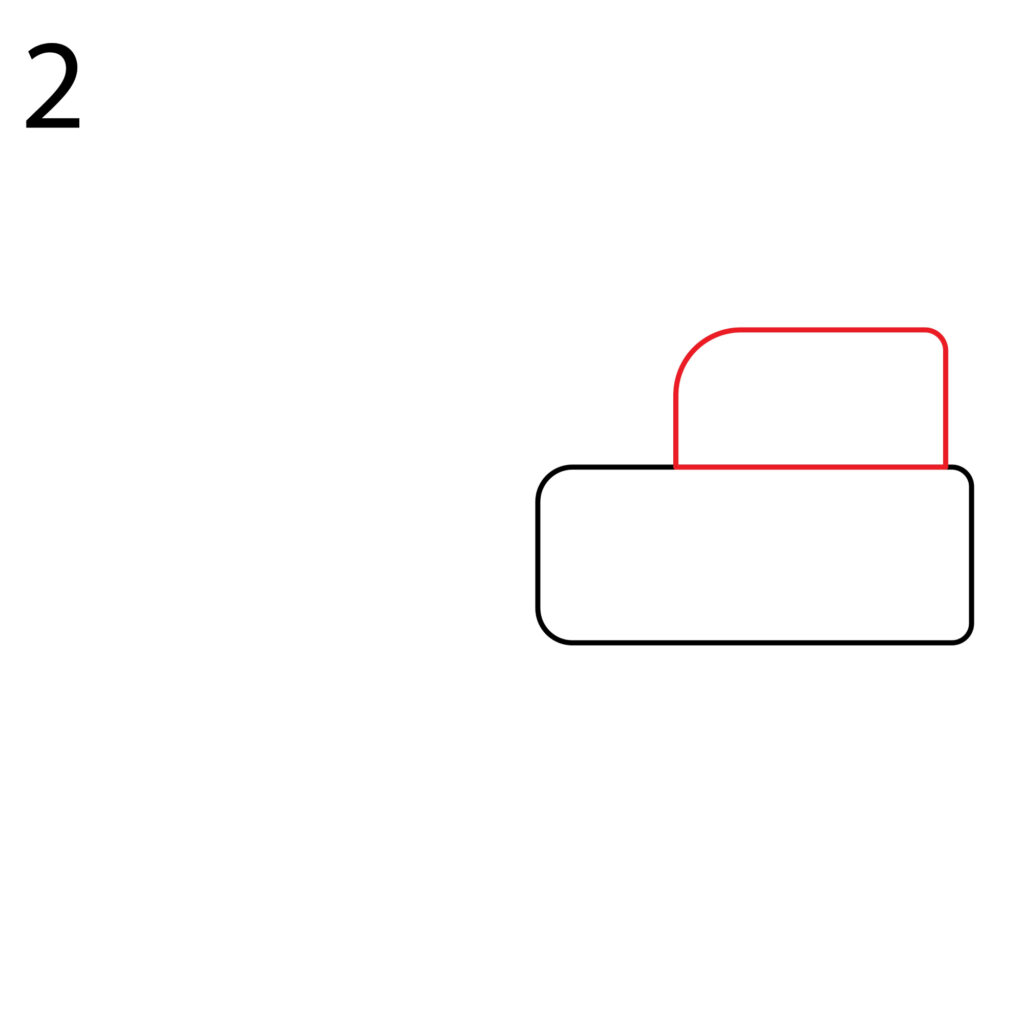
Step 2: Draw the Cabin
Now that the body of the tractor is ready, we need to add a cabin. The cabin is where the driver will sit when driving the tractor to plow the snow/ice.
To add a cabin, simply draw a smaller rectangle on top of the rectangle we drew for the body. The new rectangle should be at least half the length of the first rectangle. Once you are done, use your eraser to remove the top left corner of the rectangle. We need to make that corner rounded so use your pencil to add a curved corner as shown below.
The top right corner should also be rounded but the roundness should not be too much. You also need to make sure that the lines of the two rectangles do not overlap. You then need to erase the line that separates the two rectangles so that we have a single shape.
Step 3: Draw the Exhaust Pipe
If you have seen a tractor, you know that it emits a lot of smoke. This is because of its powerful diesel engine which is located in the front. For that reason, we are going to add a sizeable exhaust pipe to our tractor.
Using your ruler to create straight lines, draw a small vertical rectangle on the front part of the tractor. The rectangle should not be too tall because we will be adding another component on top of it. The rectangle can be half the height of the cabin.
Next, we need to add another smaller vertical rectangle on top of the first one. The new rectangle needs to be thinner so that it appears to go inside the first one. Next, add a small horizontal rectangle on top to serve as the spout of the exhaust pipe. You should have something that resembles what we have in our illustration below.
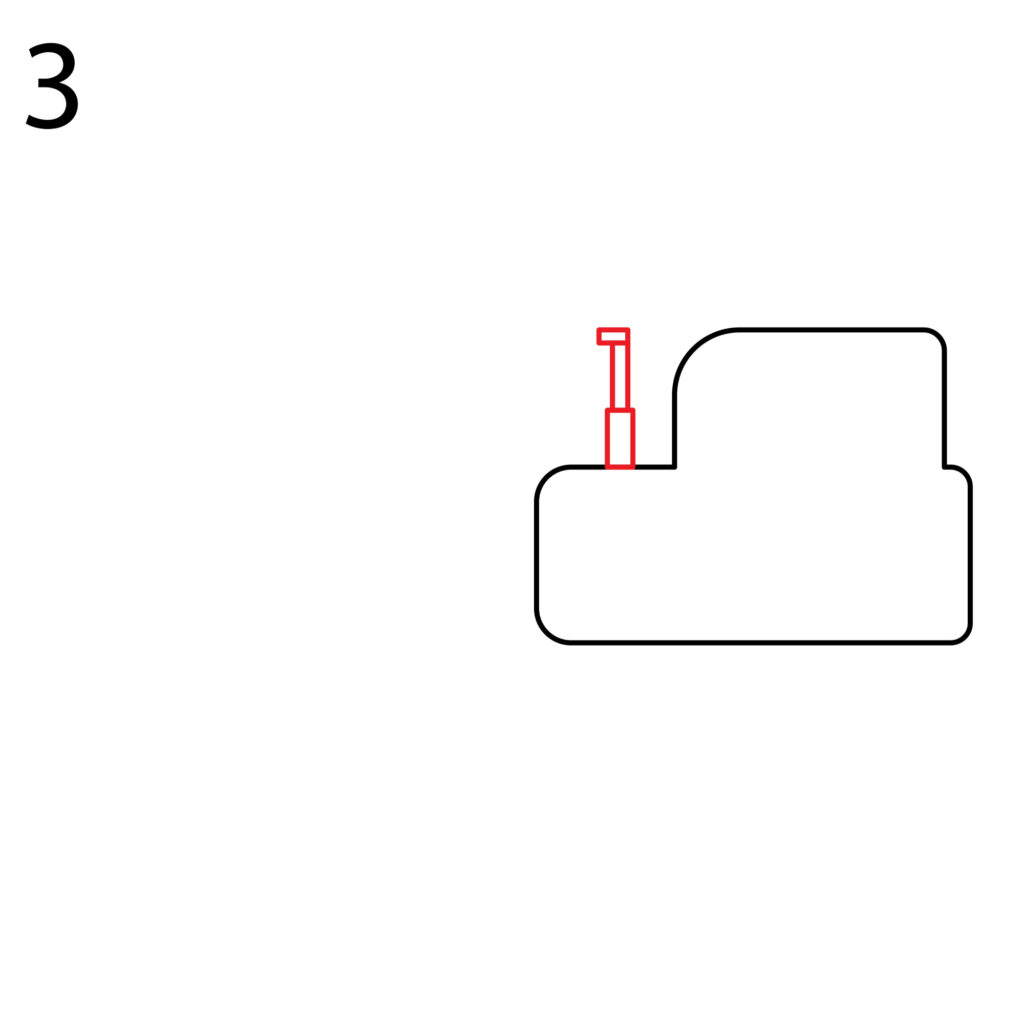
The rule of thumb is always to make sure the lines never overlap. Use your eraser to remove any line that goes outside the intended area. You should then erase all the lines of the rectangles that cut through the structure so that we just left with one continuous shape for the exhaust pipe.
So far so good, right? We are almost done with the body of the tractor.
Step 4: Draw the Window for the Cabin
Since we are drawing a two-dimensional snowplow, we will not be able to add the windshield because we can’t see it from the perspective of our tractor. But we sure can see the window of the cabin. That is what we are going to add next.
To add the window, draw a rectangle that fits inside the height of the cabin as shown below. You then need to remove the top left corner and make it as rounded as the front part of the cabin. Take care so that the lines of the window are at equal distances around the cabin.

Step 5: Draw the Wheels
Now to the final component of our tractor, the wheels. The wheels of a tractor are not proportional. The front wheels are usually smaller than the rear wheels. This is done intentionally so that the tractor has more traction even when moving on slippery terrain such as an ice-covered road.
We will start by adding the front wheel. Start by drawing a small circle close to the bottom left corner of the tractor’s body. We will then add a larger circle over the small circle to form the front wheel.
For the rear wheel, we will draw a larger circle close to the bottom right corner of the tractor’s body. We will then add another circle over the first circle to form the rear wheel.
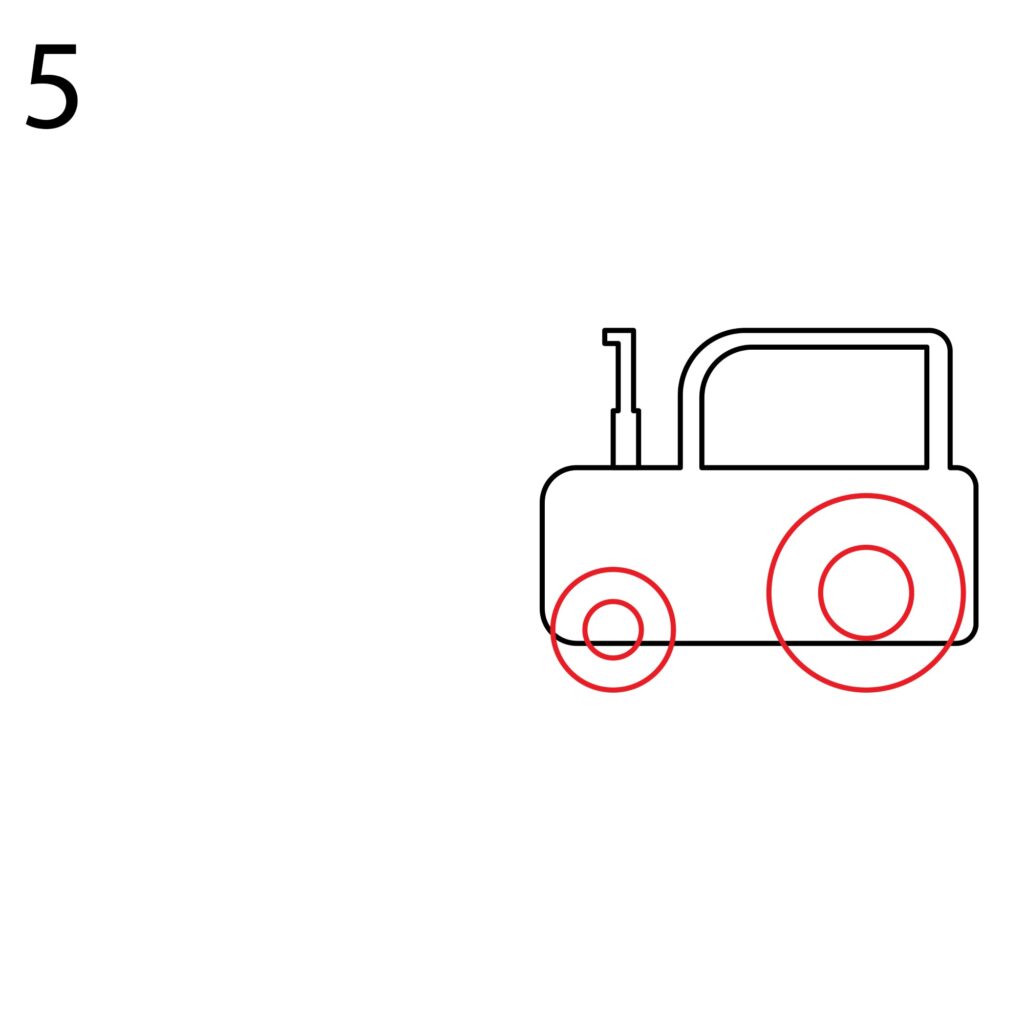
While the two wheels are of different heights, it is important that they extend to the same height downwards. This is because they should touch the ground without causing the tractor to lean backward or forward.
You should then use your eraser to remove the parts of the tractor that cut through the wheels.
Our tractor is ready! We are now left with adding the snowplow in the front end.
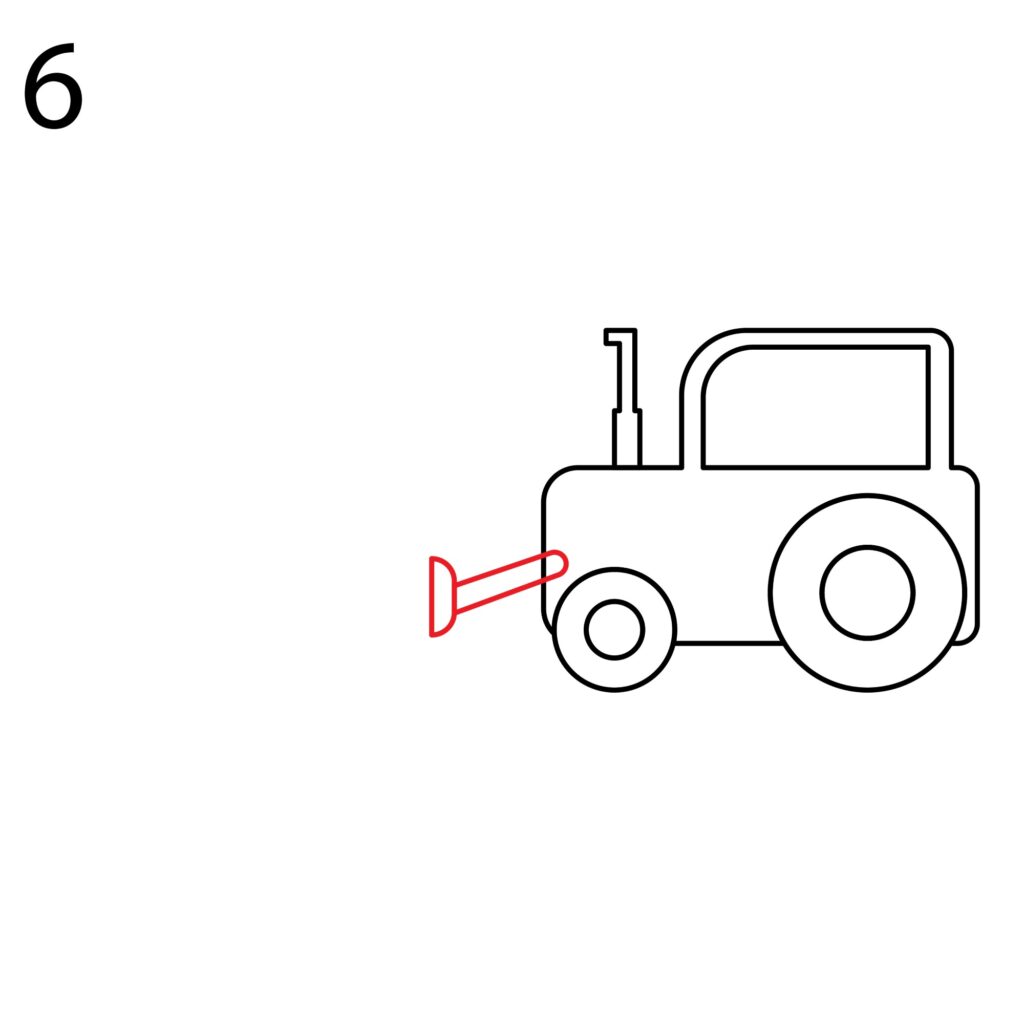
Step 6: Draw the Snowplow Holder
The snowplow is usually an extension from the vehicle pushing it. As a result, when drawing our snowplow, we first need to add the snow tray holder. This is located in the front part of the vehicle’s body.
To add the holder, draw two diagonal lines starting from the area right above the front wheel and extending diagonally, downwards, towards the front. The lines should not extend too much to the point of touching the ground.
Next, we need to add a rectangular shape to the front of the parallel lines. Make the right side of the vertical rectangle a bit curved to indicate that the structure is the mount for the snow tray. You should have something that looks like this.
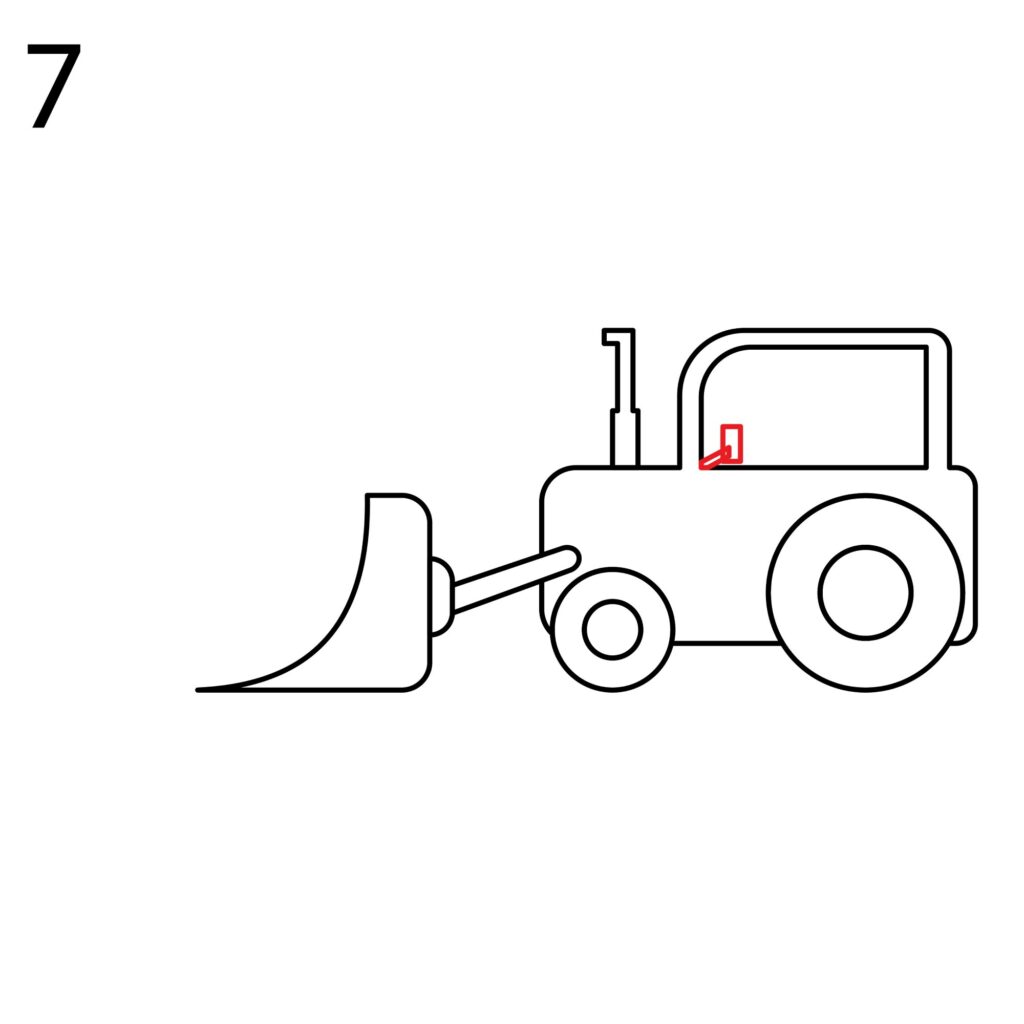
Step 7: Draw the Snow Tray
The snowplow structure is known as the moldboard. It is made of a polyethylene or steel sheet that is molded into a curved tray. The structure is engineered to be both corrosion and impact-resistant. This means it is quite strong and heavy.
To add the snow tray, we will first draw a square in front of the tractor. The right part of the square should touch the small rectangle we added for the mount. Next, you need to make the corners of the square shape rounded.
To turn the square into a snow tray, draw a curved line that starts a short distance from the top right corner and ends at the bottom left corner of the square. Use your eraser to remove the left part of the square that is outside the curved line. You should have something that looks like this.
To refine our image, we added a side mirror to help the driver see what is behind him. We added it within the window for the cabin.
Step 8: Refine Your Snowplow
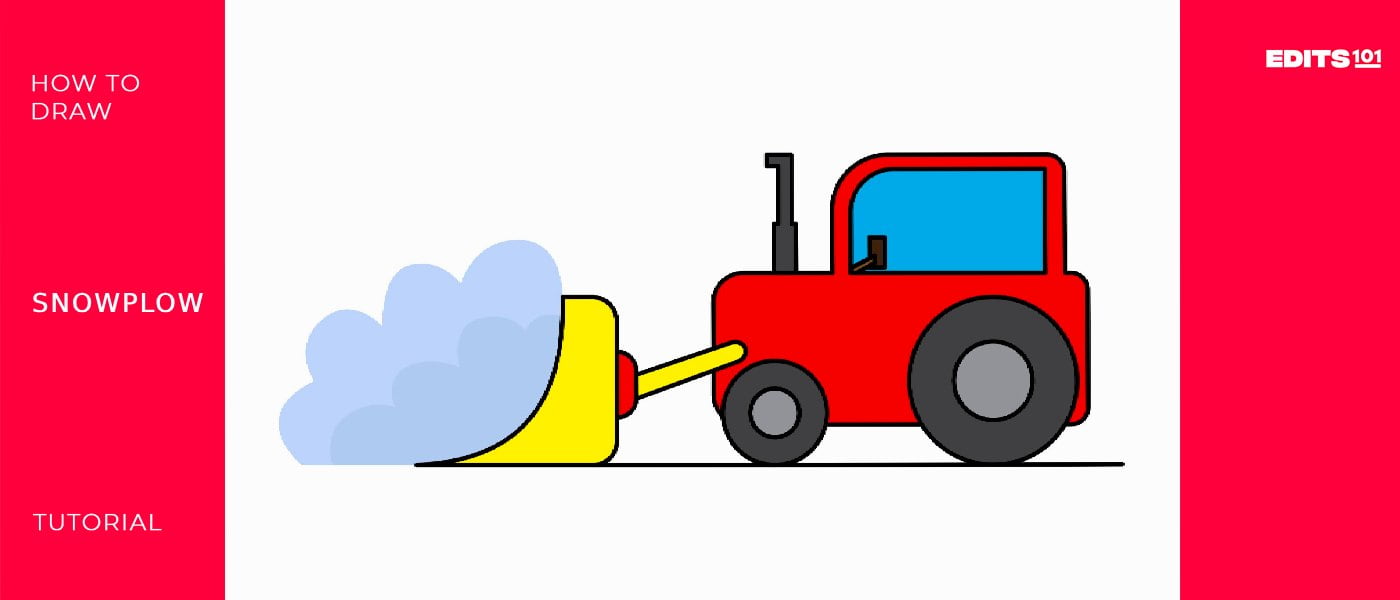
I bet you followed all the steps. If you did, your snowplow should be complete. It should look something like what we have below.
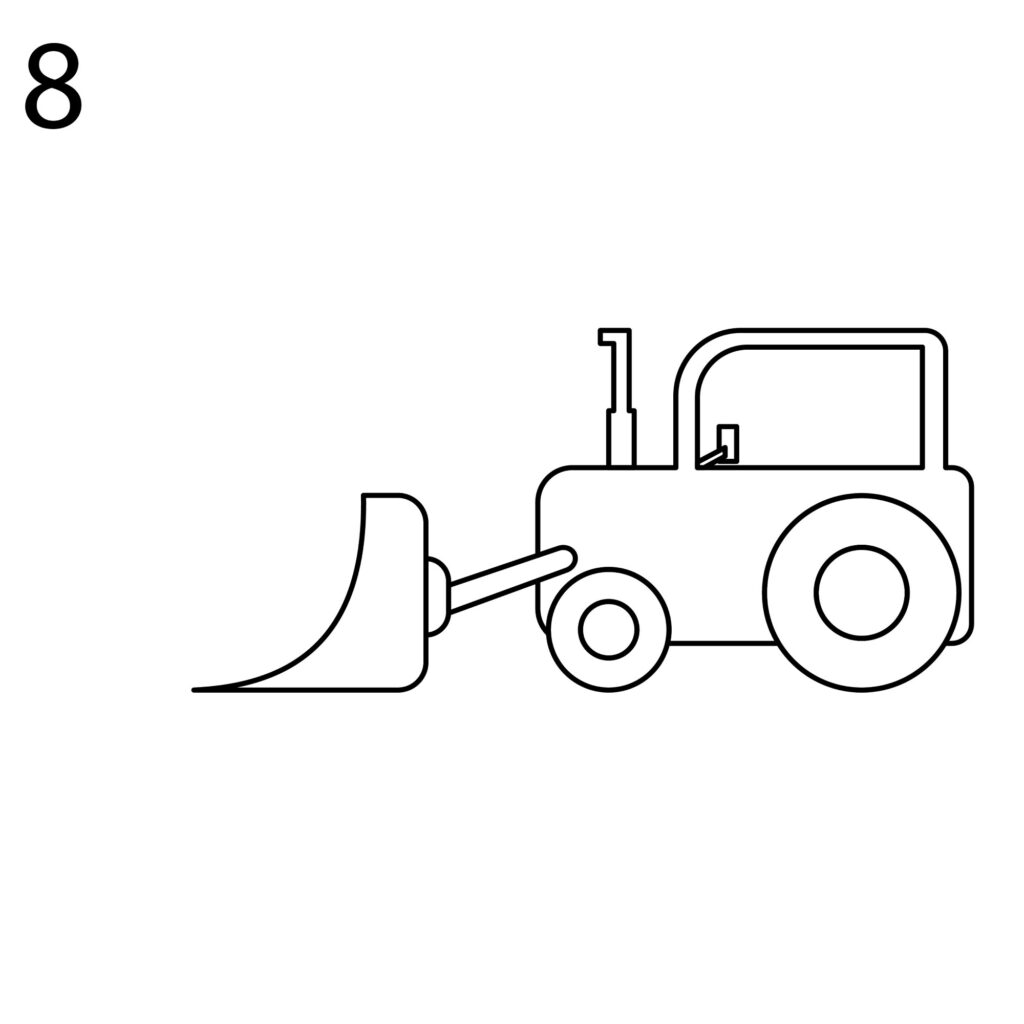
If your snowplow did not shape up exactly like ours, don’t be frustrated. There is room for improvement. Use your eraser and pencil to redo the areas that don’t look great. Keep in mind that this is the trial run. You will get things right on your next try. The key is to keep trying and never forget to have fun.
Take the Drawing to the Next Level
Adding more details to your drawing will make it more impressive. You should add the details you want before you start coloring.
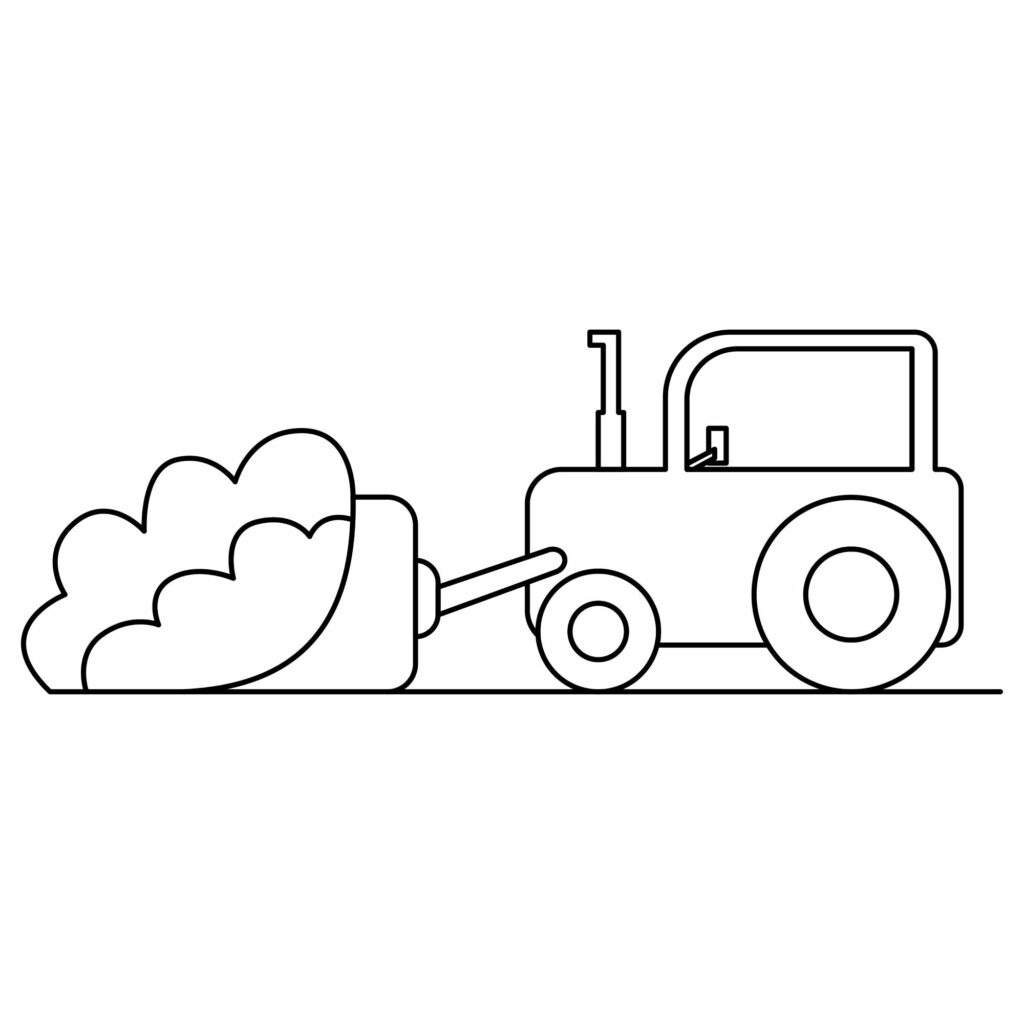
Add More Details
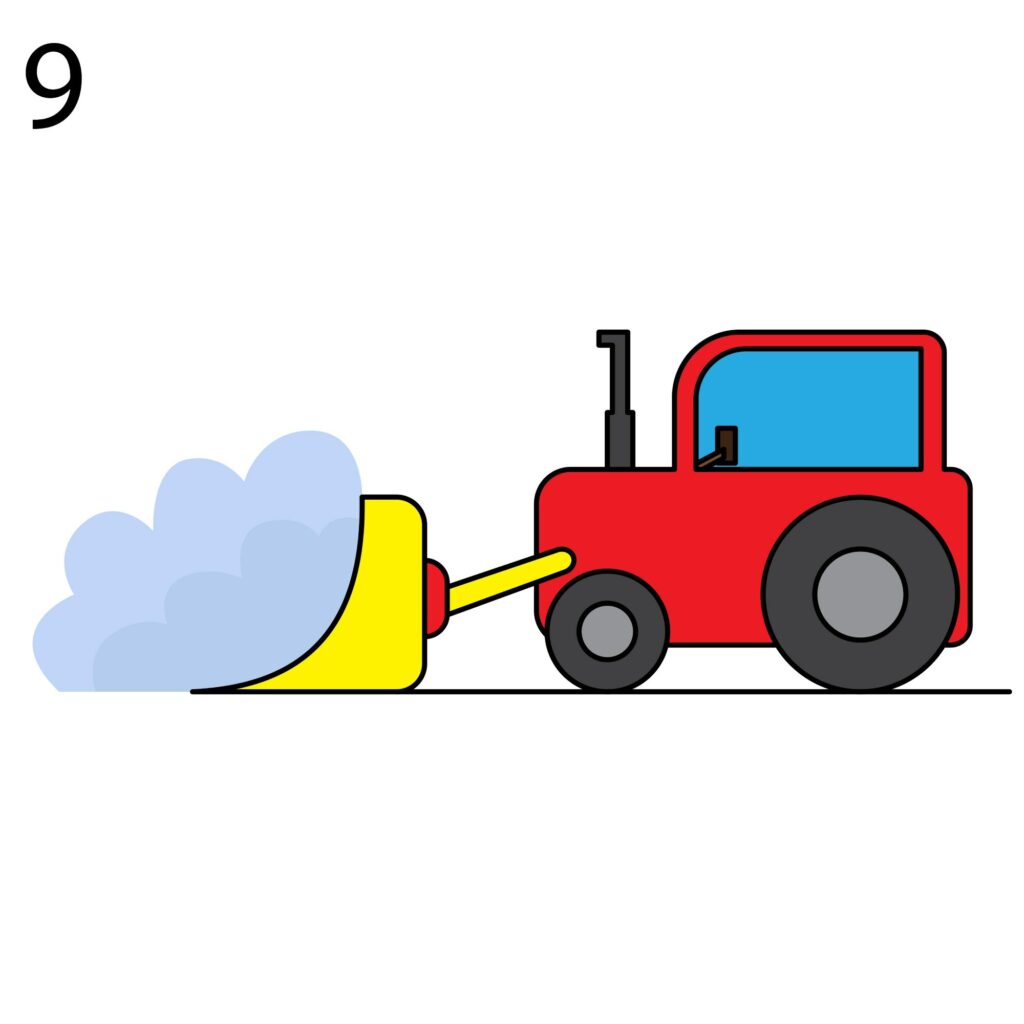
To make our snowplow stand out, we add a pile of snow on the snow tray. This was easy. We simply drew wavy lines on the tray to show that it was loaded. We then drew a straight line below the snowplow to represent the ground. You can add more details. Let your imagination run wild.
Color Your Drawing
Now is the time for the fun part. Use your coloring supplies to add color to your drawing. Make sure the colors don’t spill outside the shapes you are coloring. You can use just any combination of colors that you want.
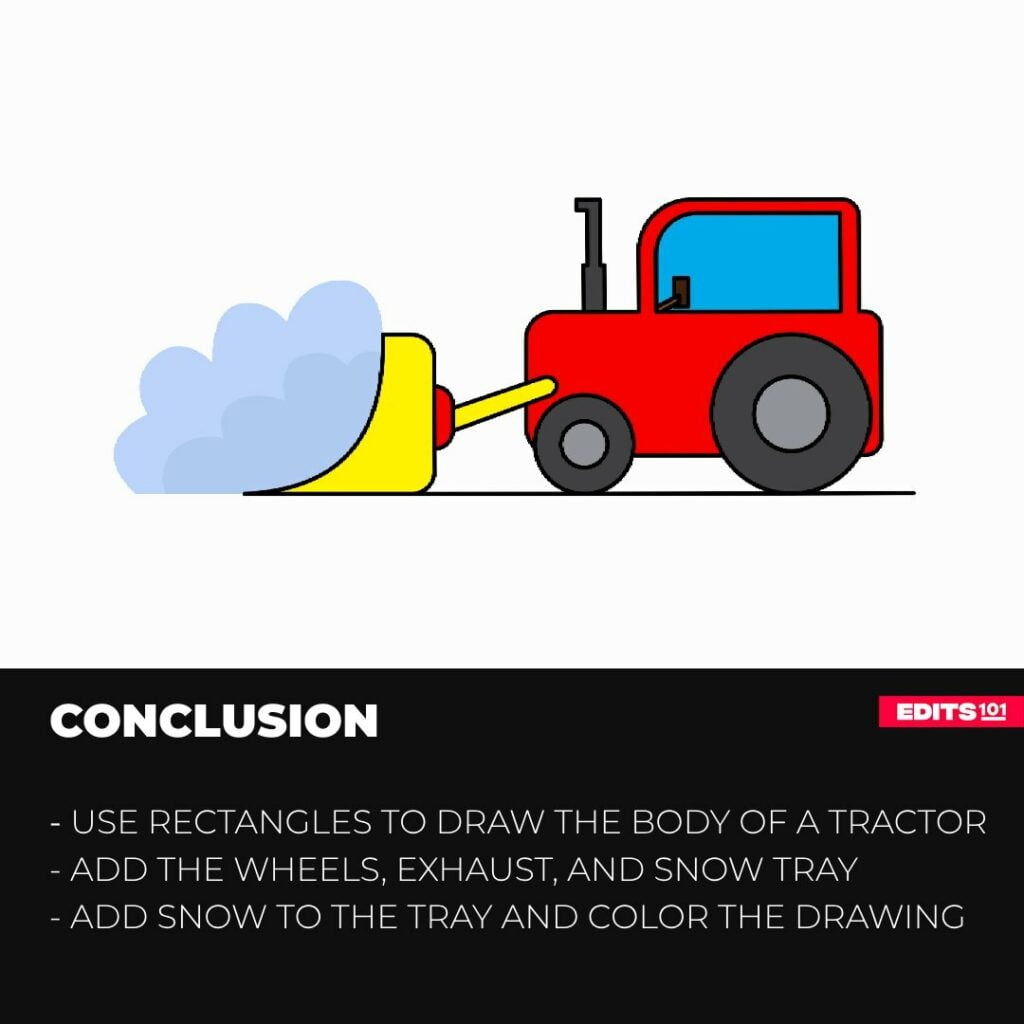
Conclusion
That was fun, wasn’t it? The best thing is that you can start over and draw an even better snowplow. The steps will remain the same if you plan on drawing a snowplow using your favorite app. Start by drawing the tractor then add the snow tray. Don’t forget to add more details to your snowplow before coloring it.
Practice makes perfect. Never allow frustrations to get to you if your drawing doesn’t shape up properly the first, second, or third time. Provided you follow our steps, you will be able to create a good snowplow drawing and even create one that is much better than ours.
Thanks for reading & feel free to check out more of our articles!