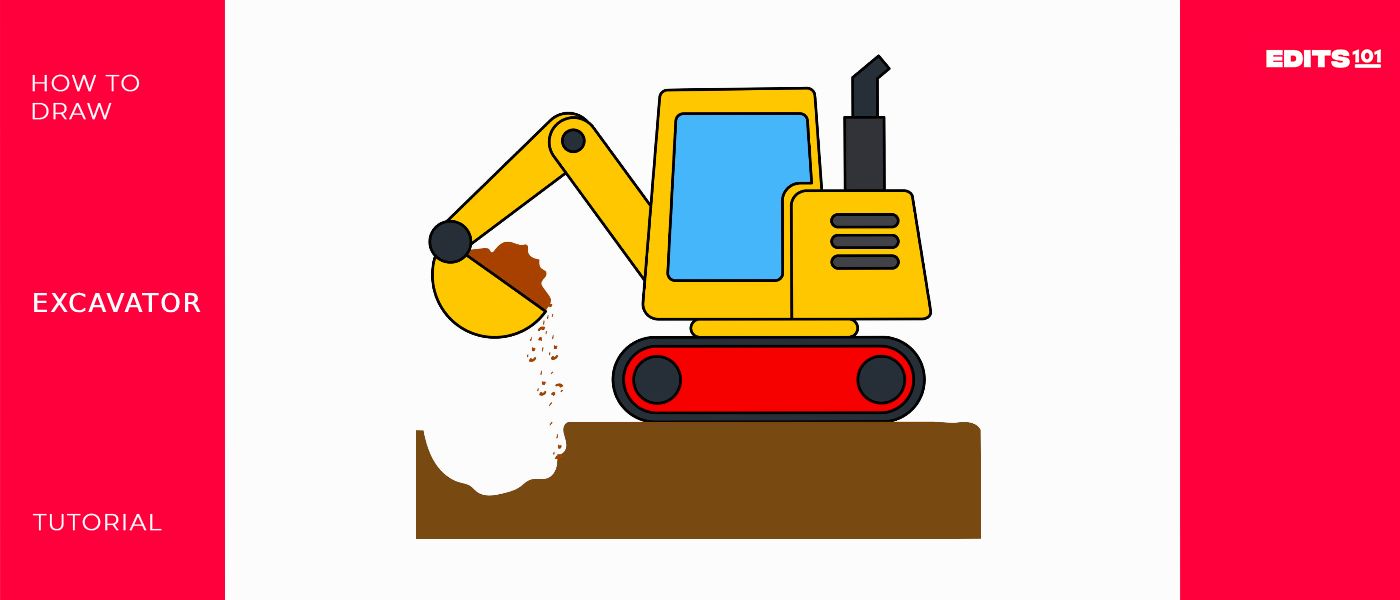
How to Draw an Excavator | for Kids in Simple Steps
An excavator is an earthmoving vehicle used for lifting large amounts of soil. It is distinguished by a large bucket, rotating cab, arm, and movable tracks.
In the lesson for today, you will learn how to draw a beautiful excavator in very simple steps. The best thing is that all you need is to follow the steps we have described below.
| Step | Complexity Level |
| Drawing the Cab | 1 |
| Drawing the Engine Box | 1 |
| Drawing the Swivel and Tracks | 3 |
| Drawing the Boom and Arm | 2 |
| Drawing the Bucket | 1 |
| Drawing the Exhaust and Ventilations | 2 |
| Drawing the Cab Door | 1 |
| Adding Some Load to the Bucket | 1 |
| Coloring | 1 |
What You Will Need
- Pencil
- Paper
- Eraser
- Coloring supplies
- 15 minutes
Draw the Excavator
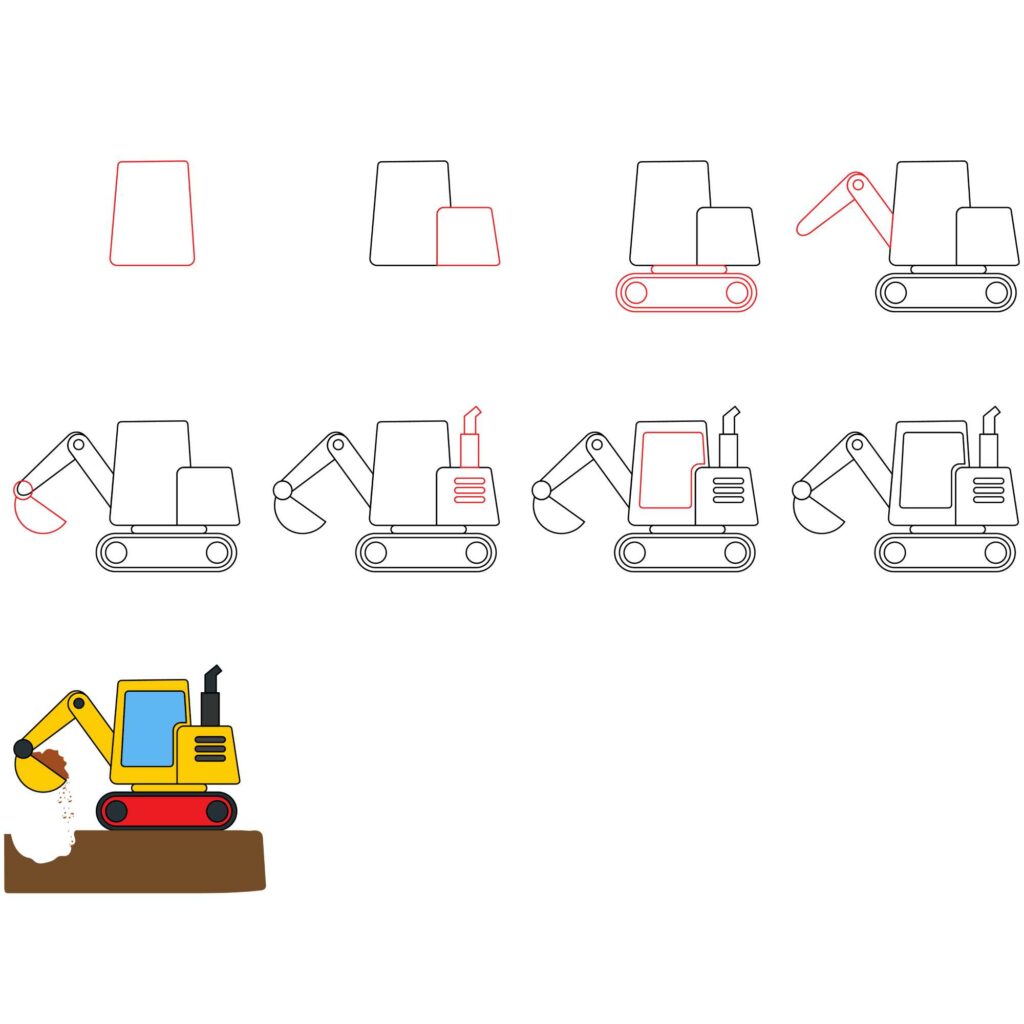
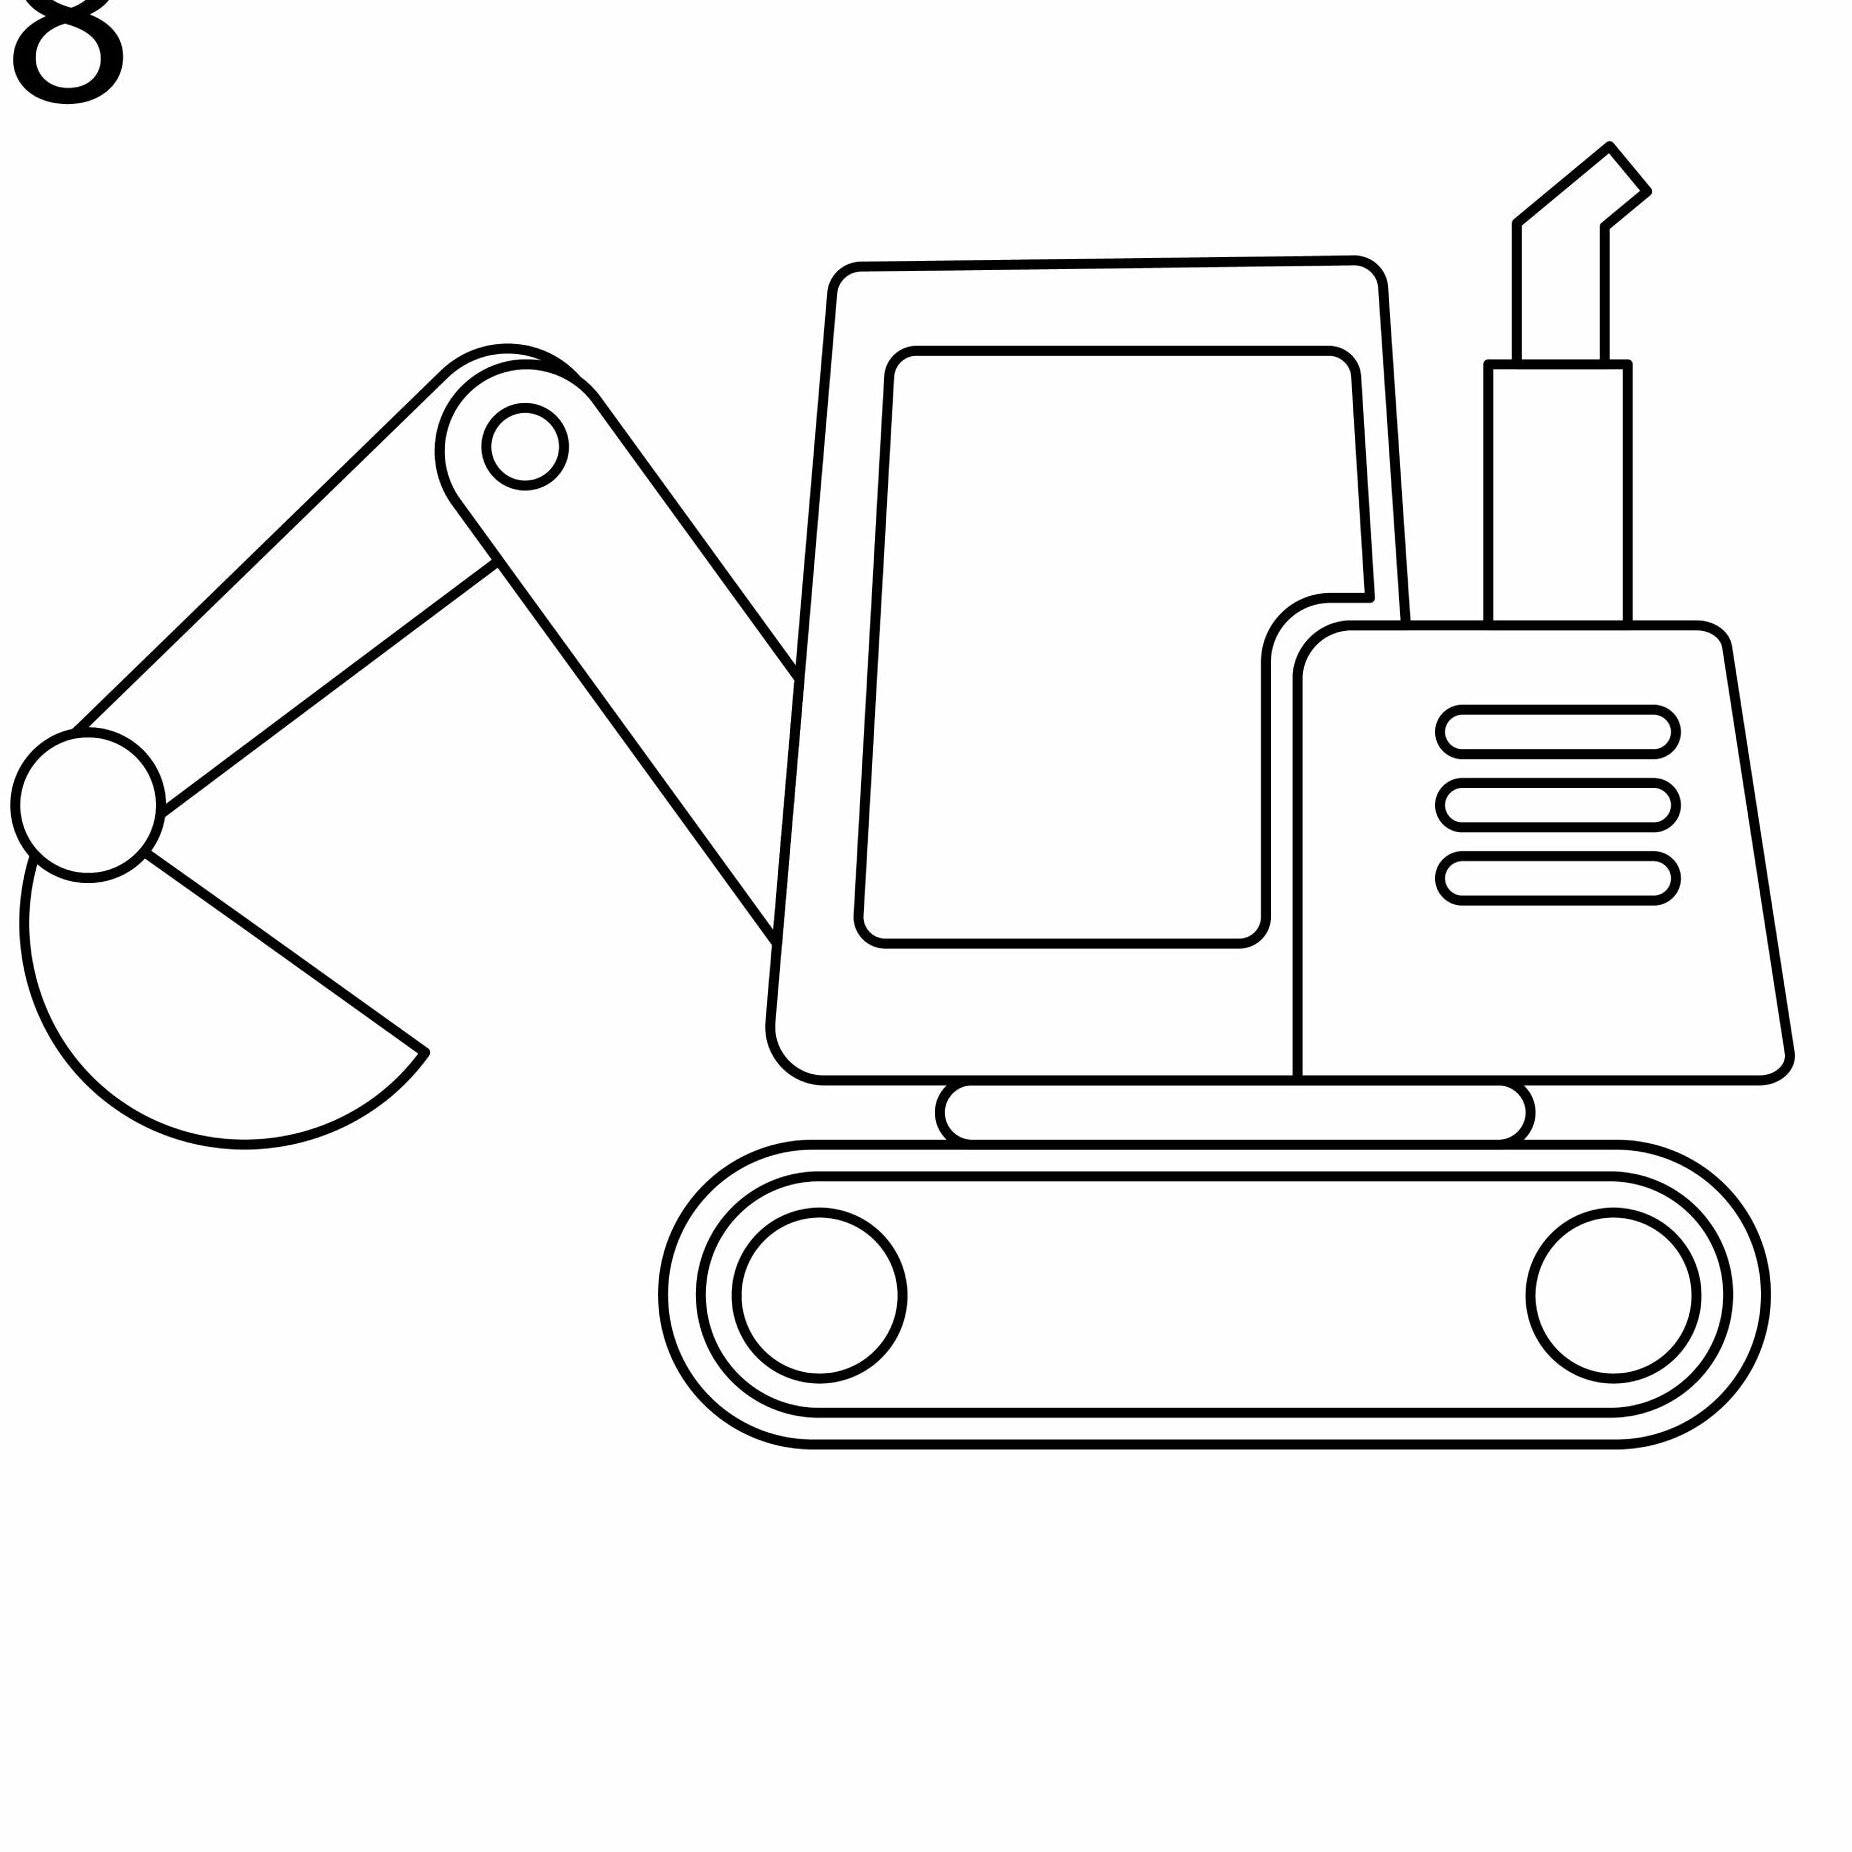
By following our described steps carefully and accurately, you will be able to end up with an excellent drawing of an excavator. Take a moment to study the below image. It has the steps we will be taking to complete the drawing. Studying the image will help you anticipate each step.
Step 1: Draw the Driver’s Cab
The driver of an excavator sits in a cabin. The cabin, also known as the cab, is the biggest part of an excavator. As a result, we will be drawing it first. You must also not draw a rectangle that is too small.
Use your ruler to draw a vertical rectangle. You should then make it narrower on the upper side. You also need to make the edges of the rectangle a bit rounded as shown in the image below.
- Draw a vertical rectangle
- Make the top part of the rectangle narrower
- Make the corners rounded

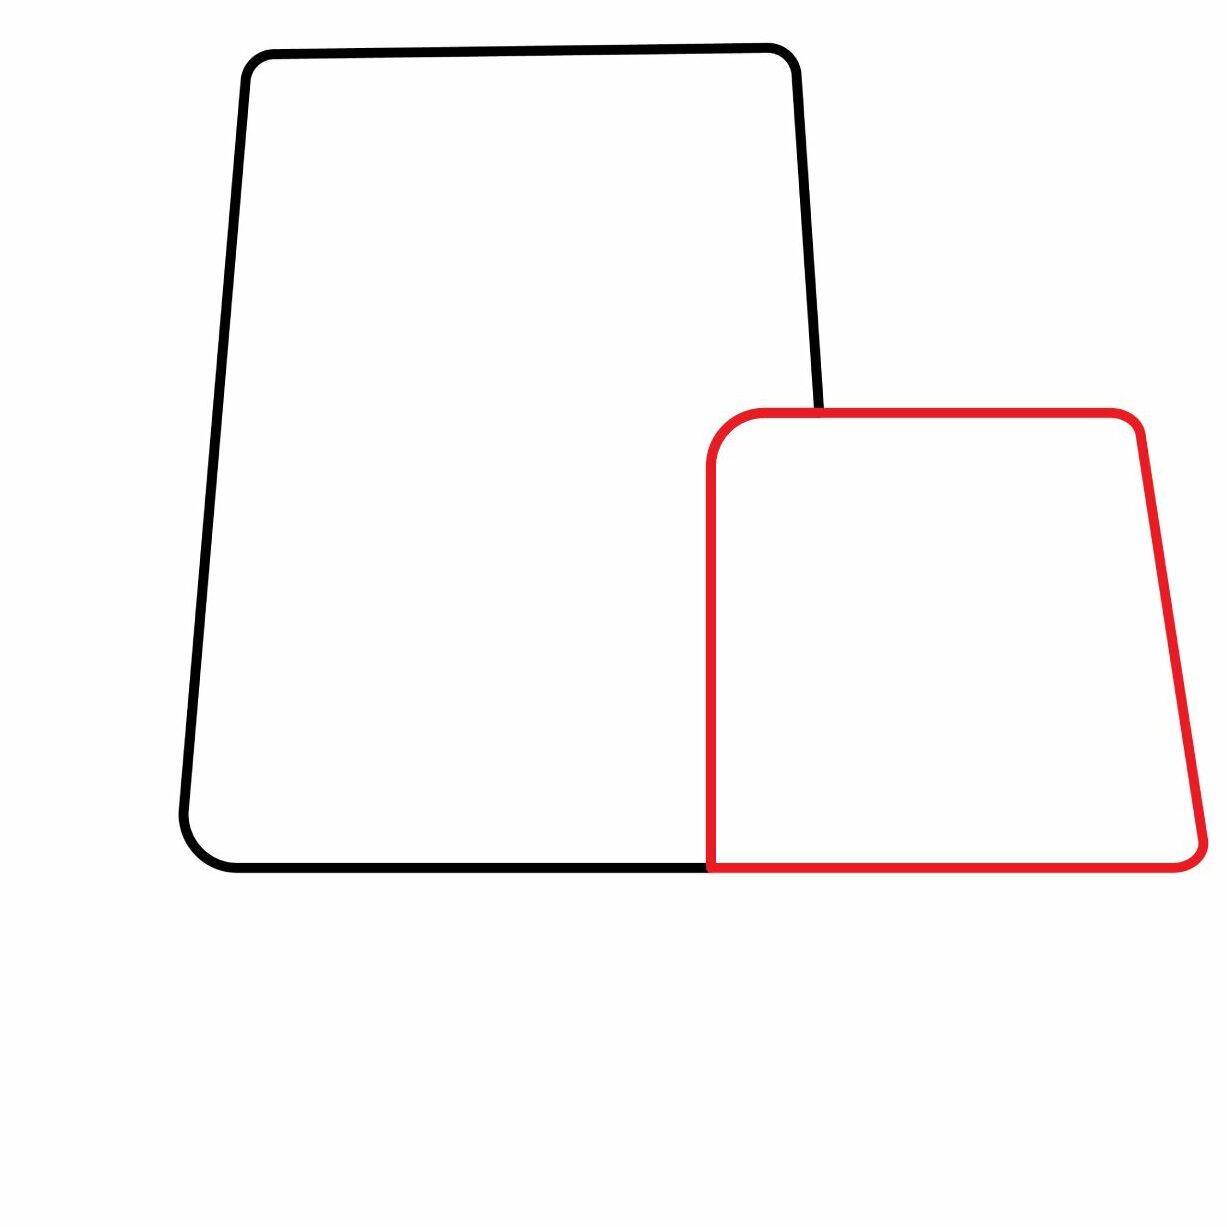
Step 2: Draw the Engine Box
To be able to lift heavy loads of soil and move around, the excavator needs a powerful engine. The engine box sits behind the driver’s cab.
For the engine box, draw a smaller vertical rectangle that is similar to the rectangle we drew for the driver’s cab. The smaller rectangle should be to the right of the first rectangle. It should also cut slightly into the bottom part of the first rectangle as shown below.
Just like with the rectangle we drew for the driver’s cab, keep the edges a bit rounded. You should then use your eraser to remove the part of the driver’s cab rectangle that passes through the engine box.
- Draw a smaller vertical rectangle that is similar to the first one
- The second rectangle should cut slightly into the bottom right part of the first rectangle
- Erase the lines of the first rectangle that cuts through the second rectangle
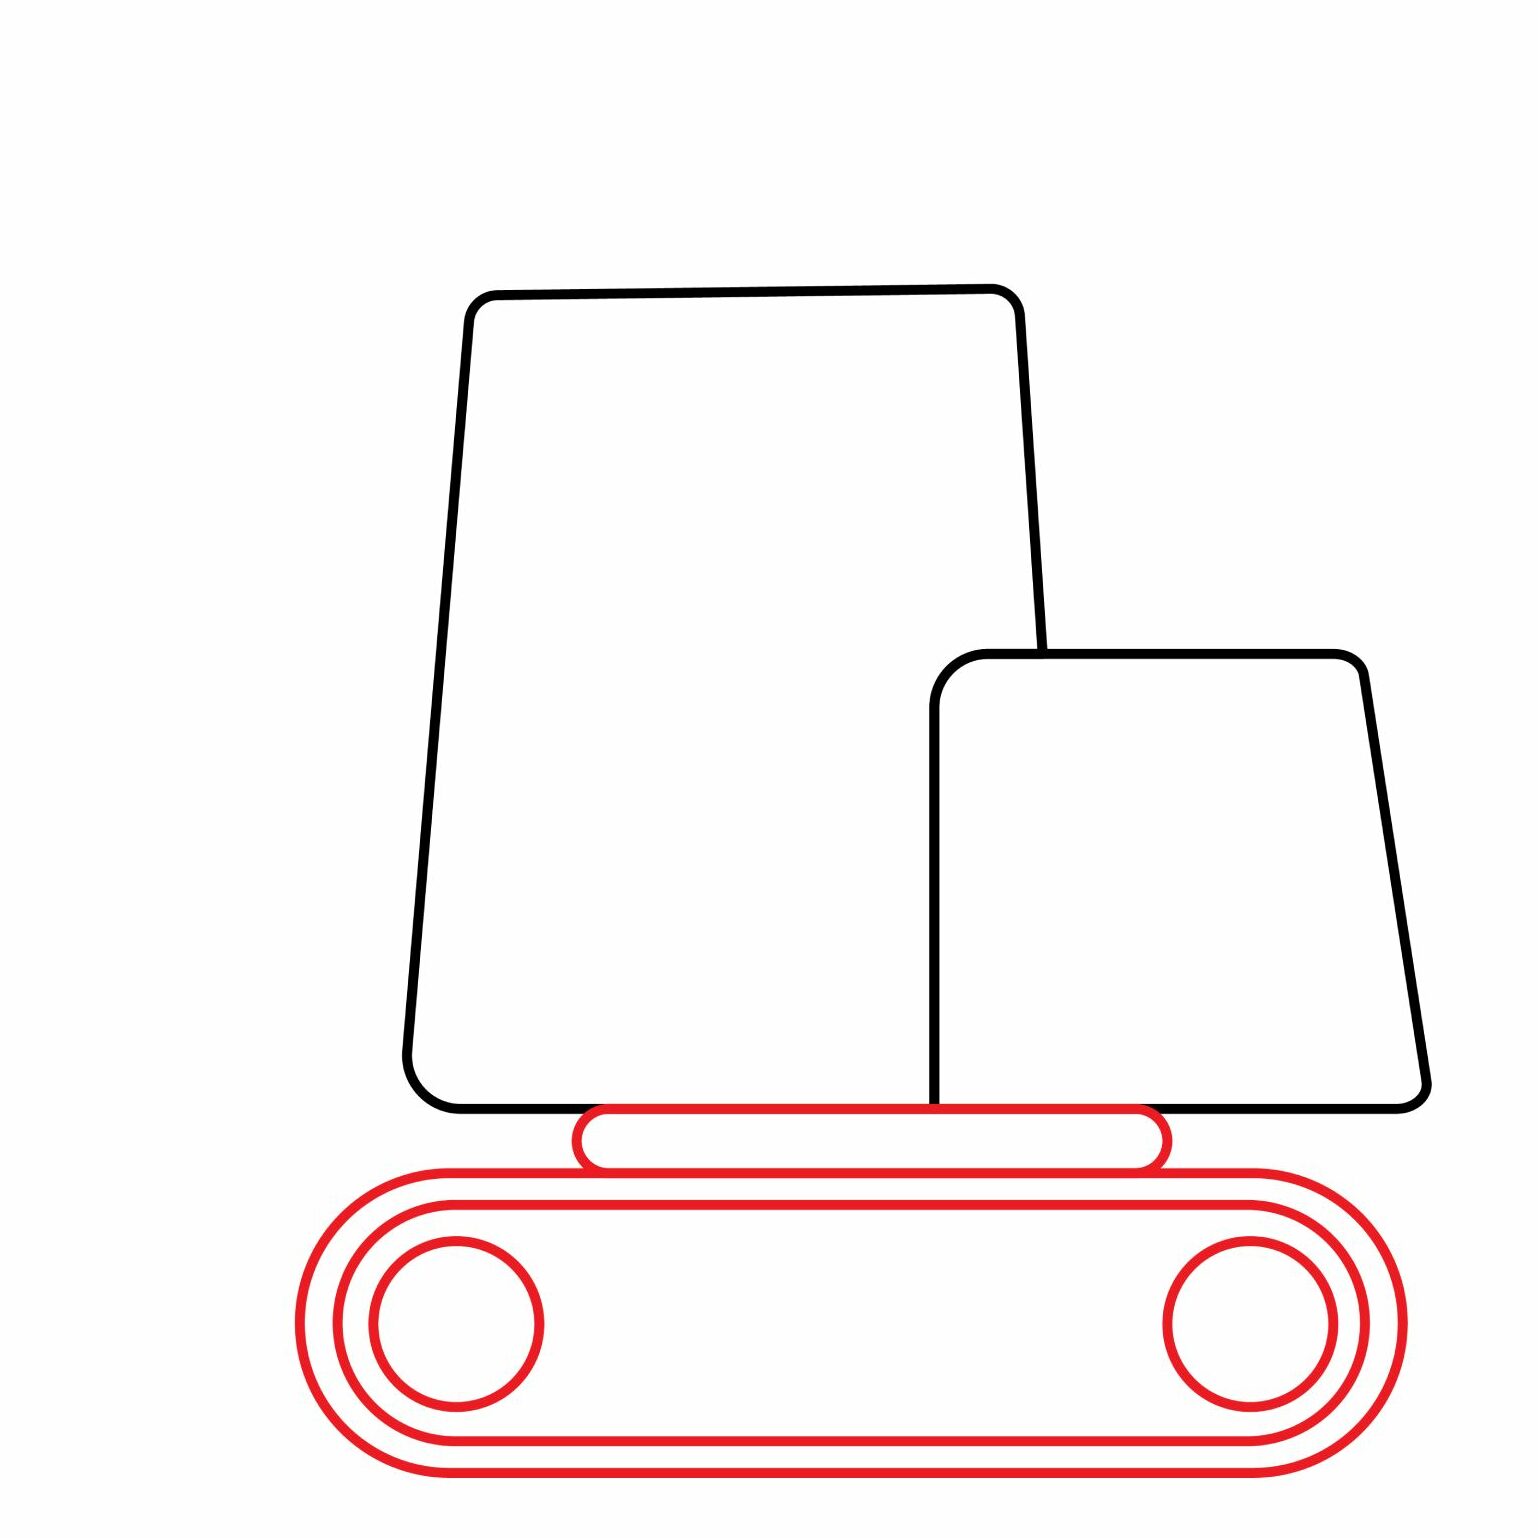
Step 3: Draw the Swivel and Tracks
An excavator has the ability to rotate the driver’s cab so that the driver can face any direction they want. For that to be possible, there has to be a turntable. The turntable is the component that makes it possible for the driver’s cab to rotate. This component is also known as the swing system or the swivel.
To add a turntable, draw an elongated oval shape that sits below the driver’s cab and the engine box.
Next, we need to add tracks to the excavator. The tracks are the part that makes it possible for the excavator to move on any terrain. For the tracks, you need to draw an elongated horizontal rectangle with rounded corners below the turntable. The rectangle should be slightly longer than the length of the cab and engine box.
Draw another rectangle inside the first one. You should then add two circles, one on either side of the track.
- Draw a horizontal rectangle with rounded corners below the cab to form the turntable
- Draw another horizontal rectangle with rounded corners below the turntable. This should be longer than the length of the excavator. It will form the track.
- Add another similar rectangle inside the first one to complete the track.
- Draw two circles inside the two rectangles, one on each end
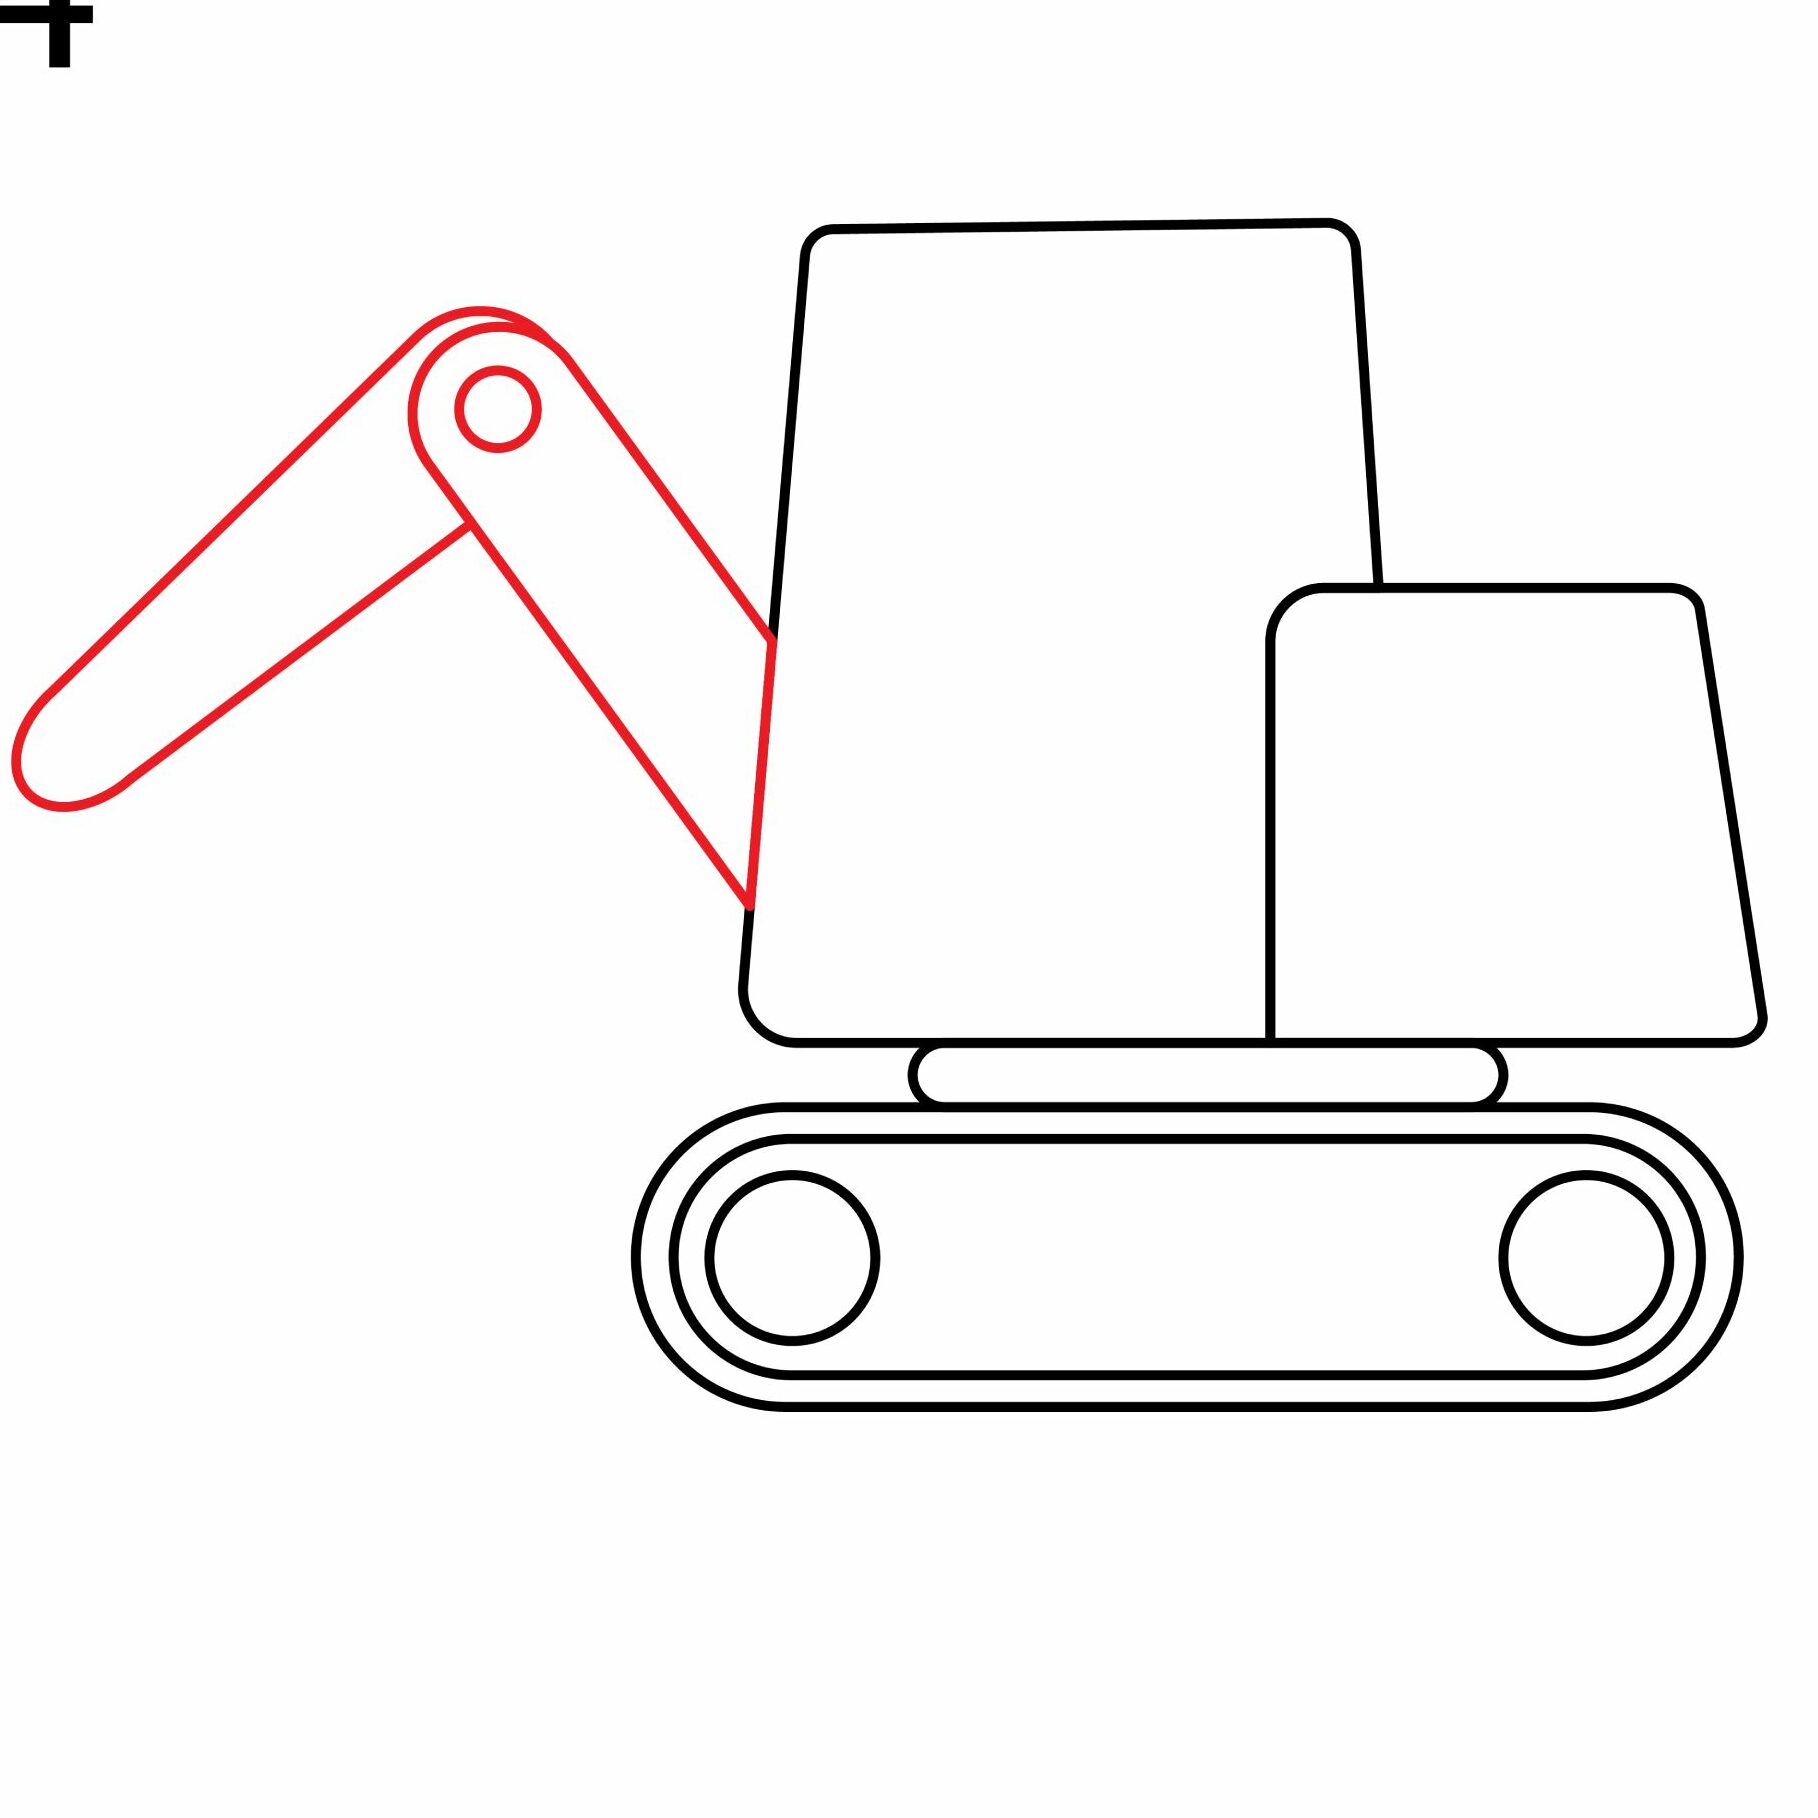
Step 4: Draw the Boom and Arm
To be able to lift soil and load it into a dump truck, the excavator needs a boom and an arm. The boom is the largest part of the arm. It is pinned to the driver’s cab and is pivoted to allow it to rise and lower.
To add the boom, draw two parallel lines from the driver’s cab. These lines should be diagonal and connected with a semi-circle to give a rounded end as shown in the below image.
The arm is attached to the boom. Draw two lines that extend diagonally from the boom. Connect the lines with a rounded end. Draw a small circle at the upper end of the boom to show that the arm is pivoted to it.
If you want, you can make the boom and arm longer. However, it is good to keep things small for now. You can draw a longer boom and arm in your next drawing.
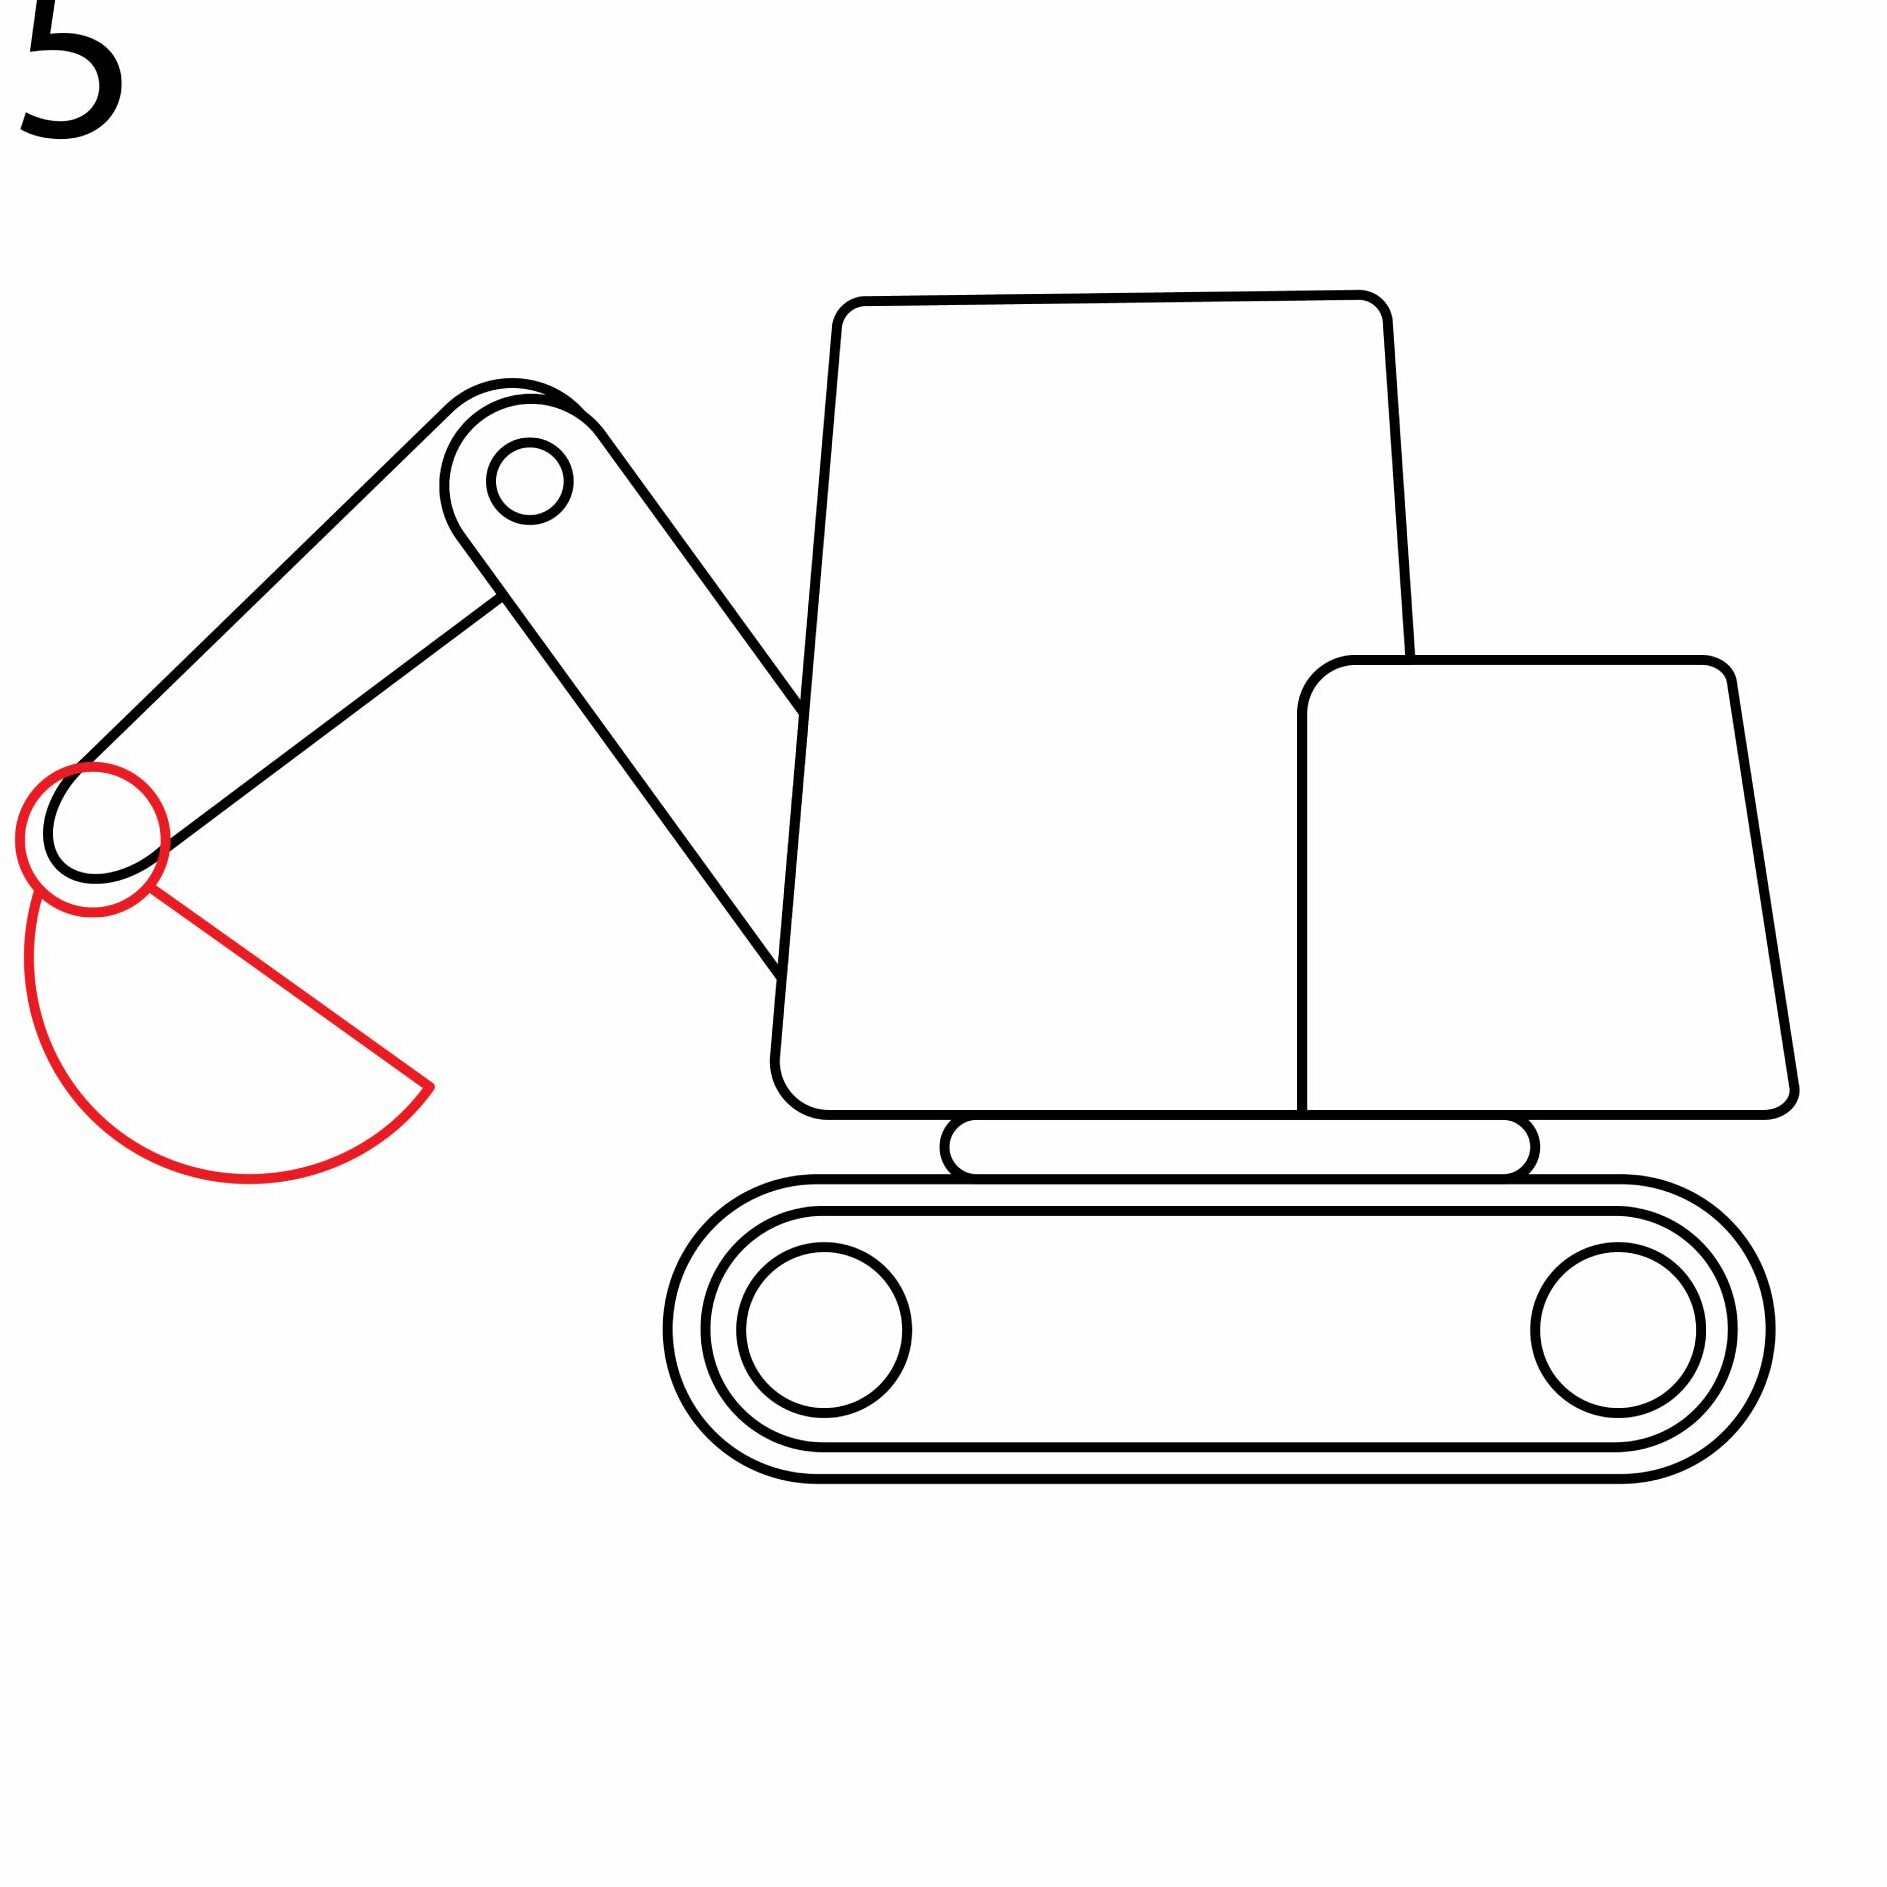
Step 5: Draw the Bucket
The bucket is the attachment that enables an excavator to scoop sand and debris. There are many types of excavator buckets with varying uses. Buckets that can be used for digging have some teeth on the bottom part. In this tutorial, we want to keep things simple so we will be drawing a basic bucket.
Start by drawing a small circle on the end of the arm. This will serve as the attachment for the bucket. Next, draw a semi-circle that is tilted towards the driver’s cab at an angle as shown below.
Keep in mind that the bucket doesn’t have to be a semi-circle. It can be a rectangle or any shape you want. For this example, let’s stick with the semi-circle.
- Draw a small circle on the end of the arm to serve as the attachment for the bucket.
- Draw a tilted semi-circle that attaches to the attachment to form the bucket
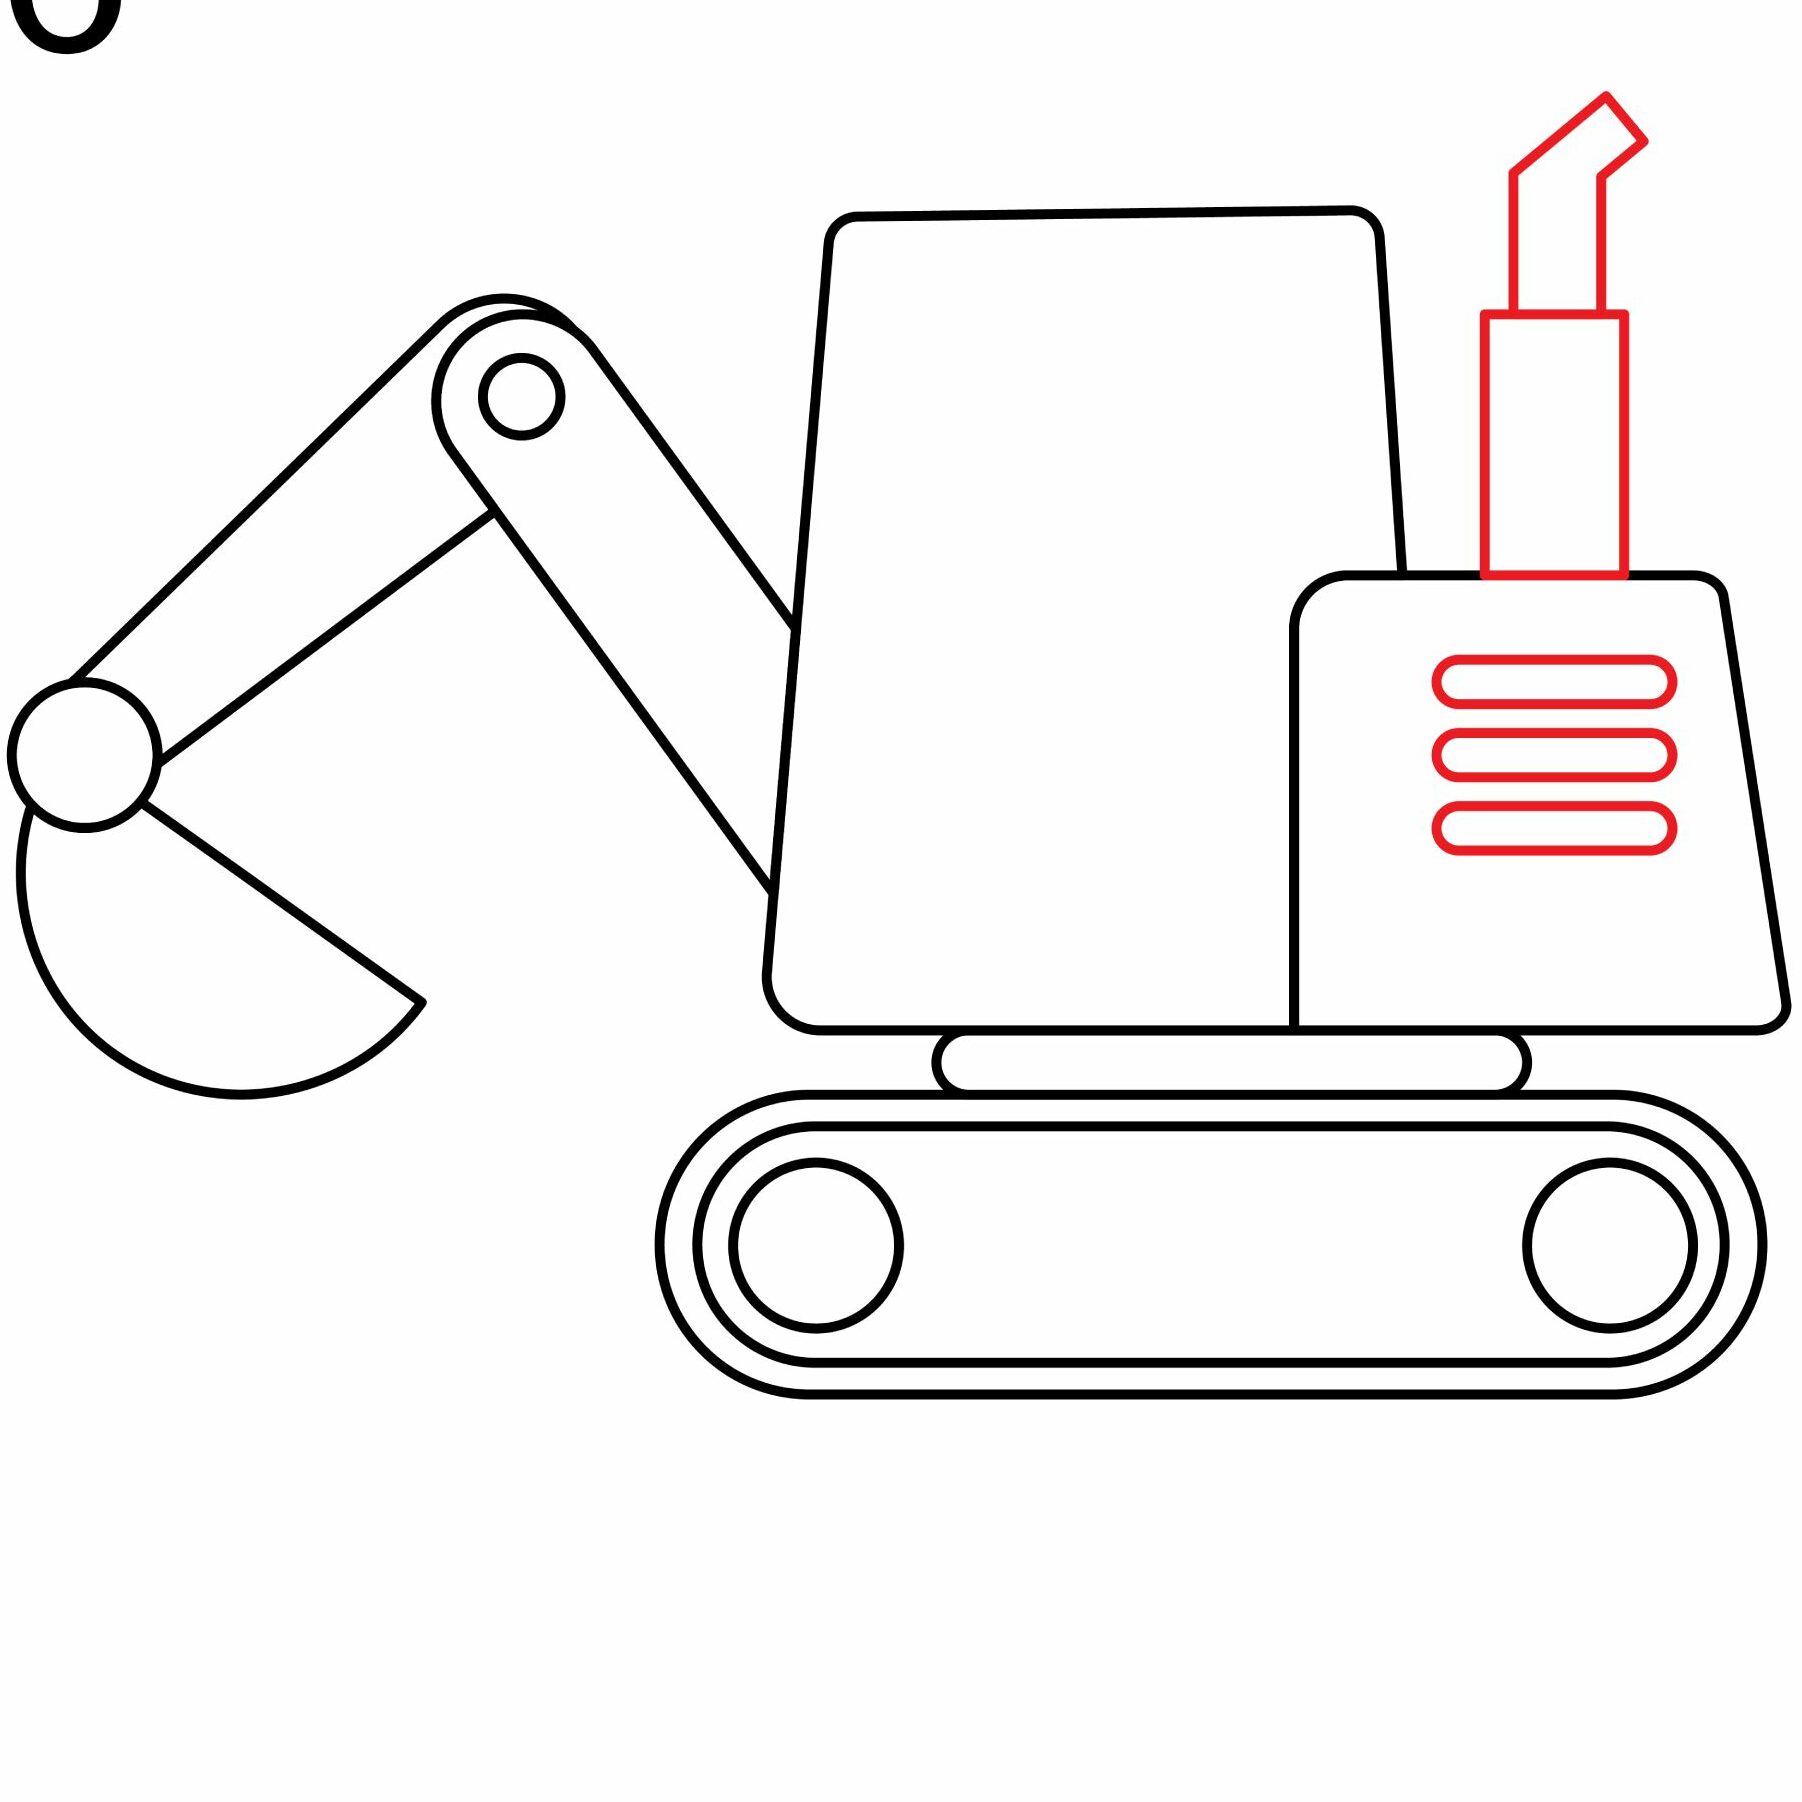
Step 6: Draw the Exhaust and Engine Ventilations
To add the exhaust pipe for the engine, draw a vertical rectangle above the engine box. This should not be too long. Add another thinner rectangle on top of it and curve the top part slightly so that it bends away from the driver’s cab.
For the ventilation, draw three rectangles with rounded ends as shown in the below image. These will depict the ventilation slits for the engine.
- Draw two vertical rectangles on the engine to form the exhaust pipe
- Draw three small rectangles on the side of the engine to depict ventilation
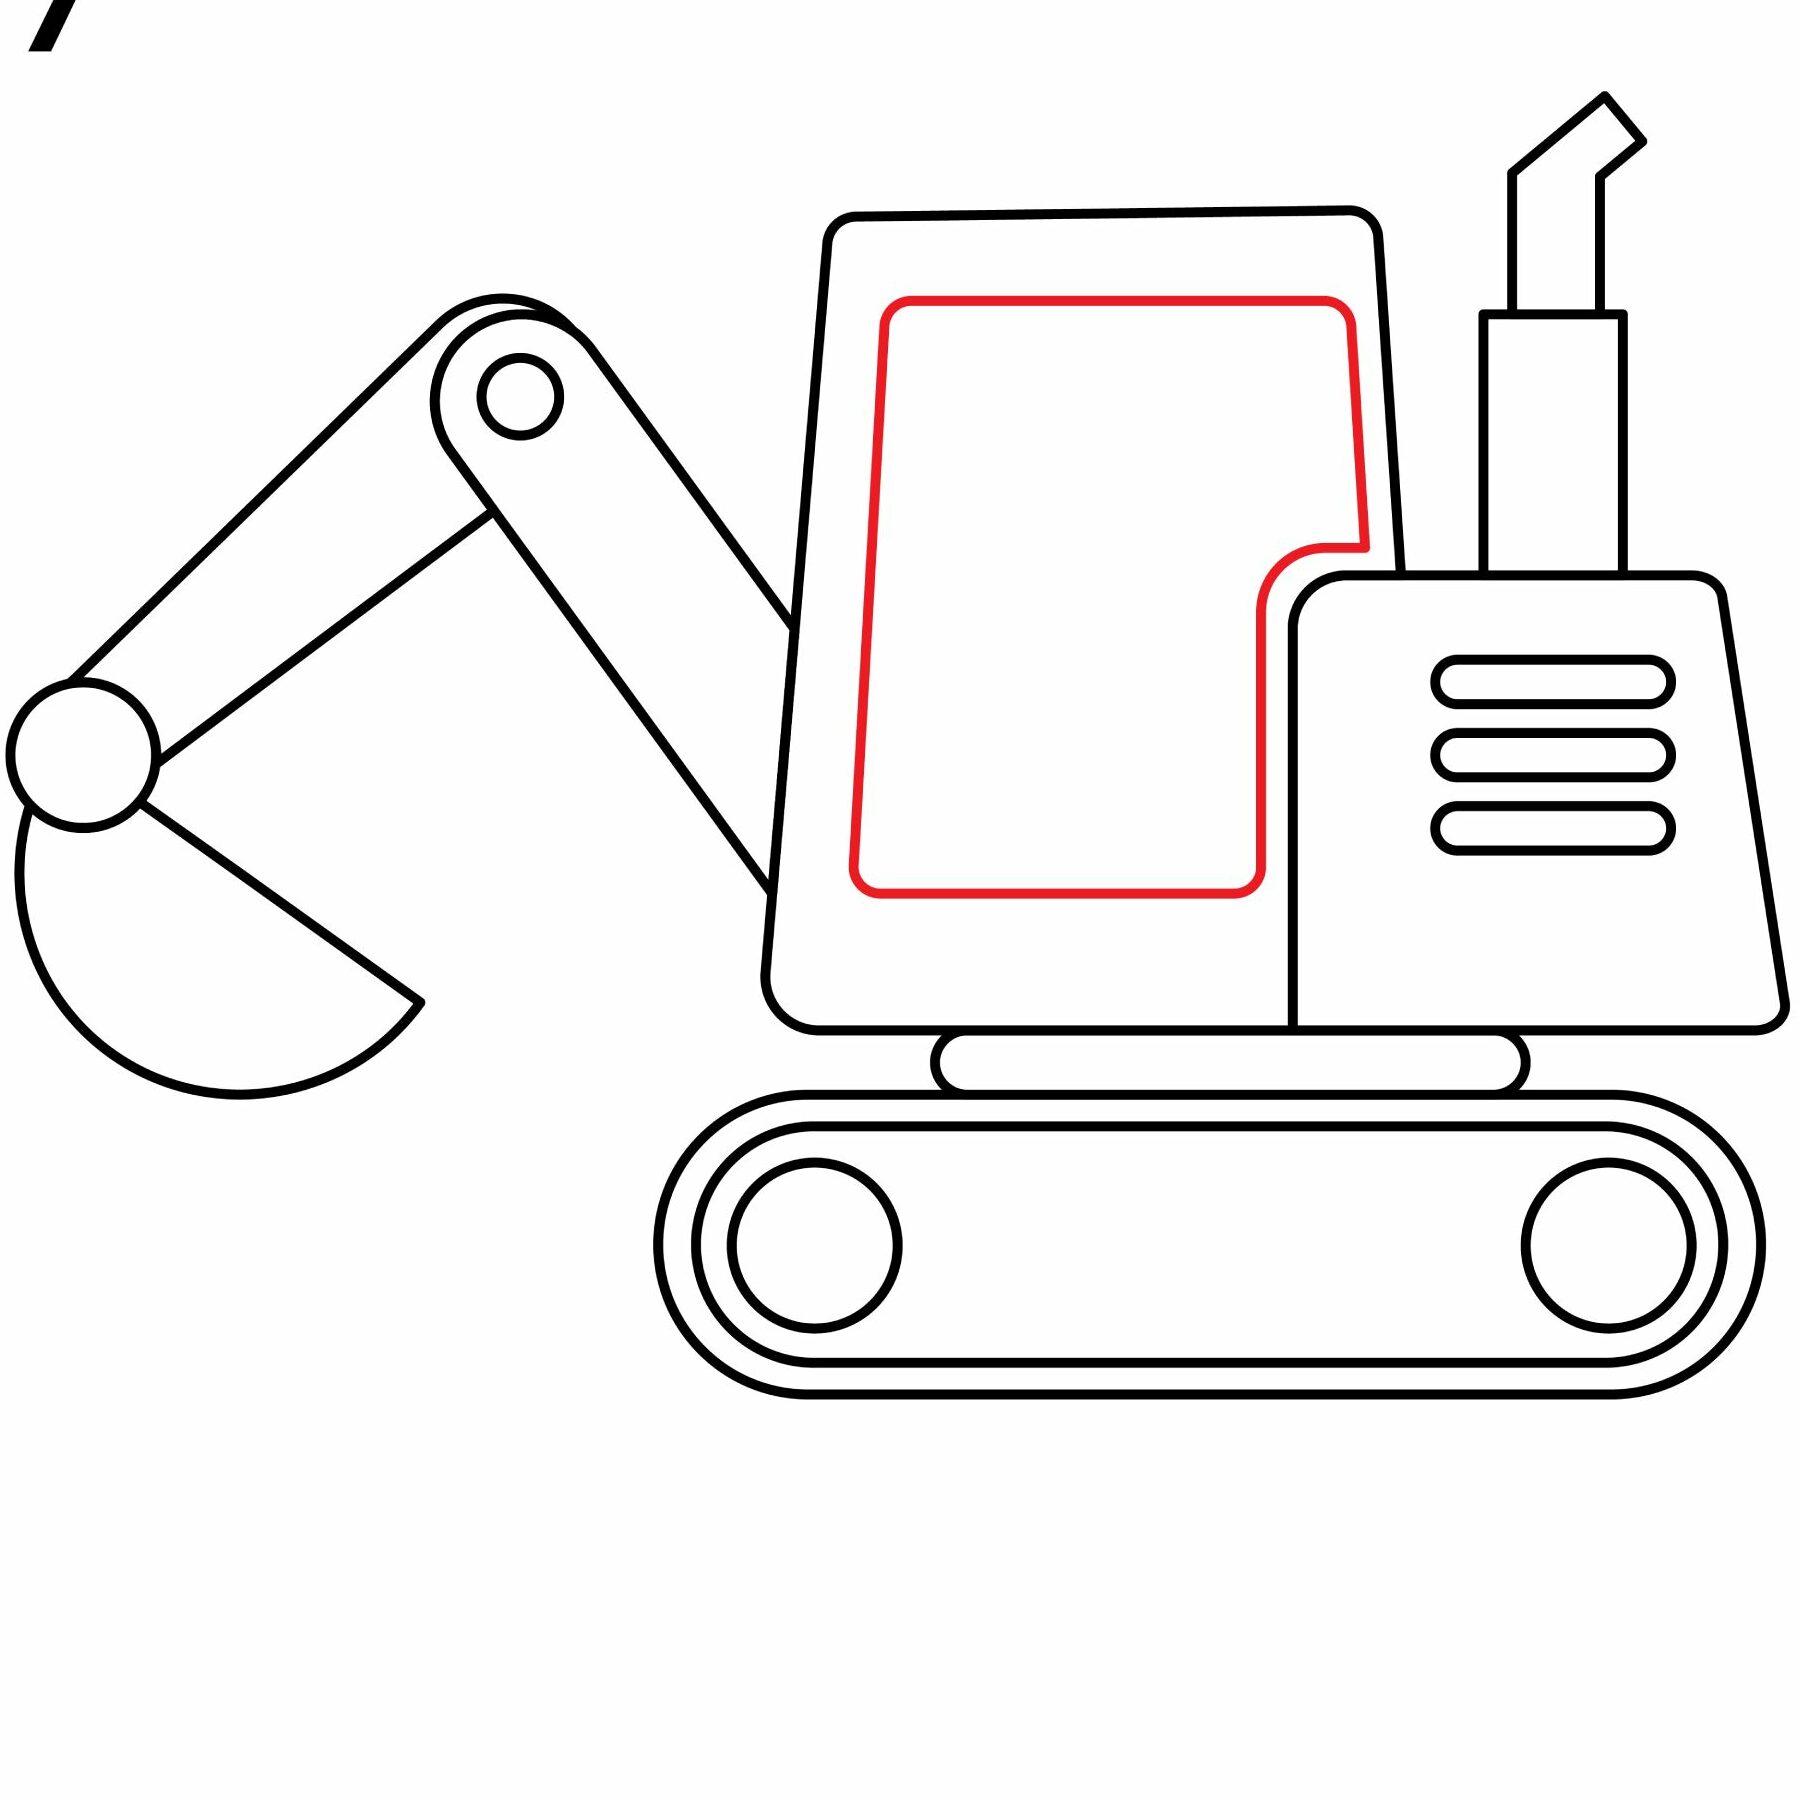
Step 7: Draw the Cab Door
Now we need to add a door to the excavator. For this, you need to draw a rectangle that fits inside the driver’s cab. Don’t forget to curve the lines so that they don’t go into the engine box.
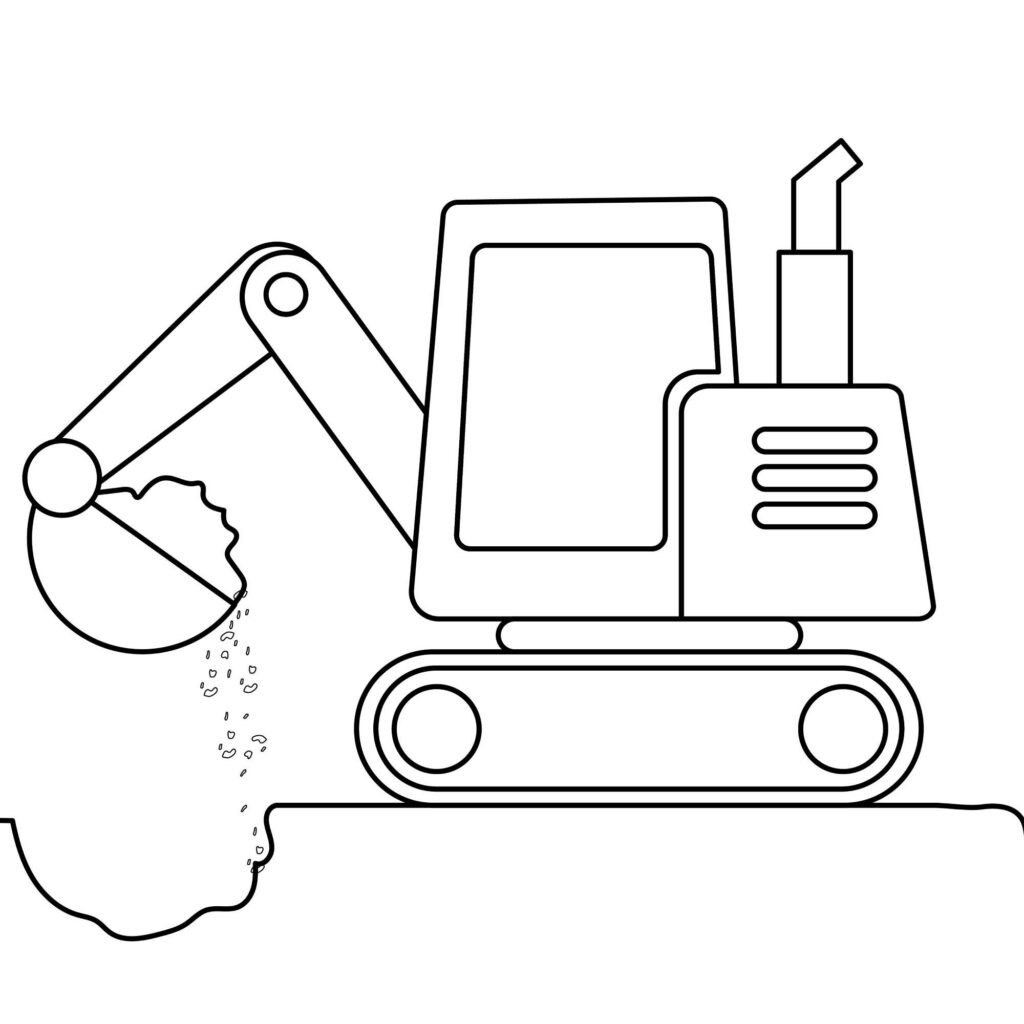
Step 8: The Excavator is Ready
If you followed the steps carefully, you should have an excavator drawing similar to ours. If your image is not the same as ours, there is still room for improvement. Use the eraser, remove the sections that look bad, and redo them. Keep in mind that drawing a good excavator takes practice.
Take the Drawing to the Next Level
You might be tempted to take out your coloring supplies and start coloring, but we need to add a few more details first. More details will make our drawing stand out.
Step 9: Add More Details
We need to add some soil to the bucket. For this, simply draw a wavy line on the bucket to indicate that it has scooped something. Add a few falling particles so that the excavator appears to be in action.
Next, we need to draw a line under the track of the excavator to serve as the ground it is standing on. Make sure you indent the area below the bucket to depict the area where the bucket scooped soil from.
- Use wavy lines to add some load in the bucket
- Add a ground with an indented area to show where the soil was scooped from
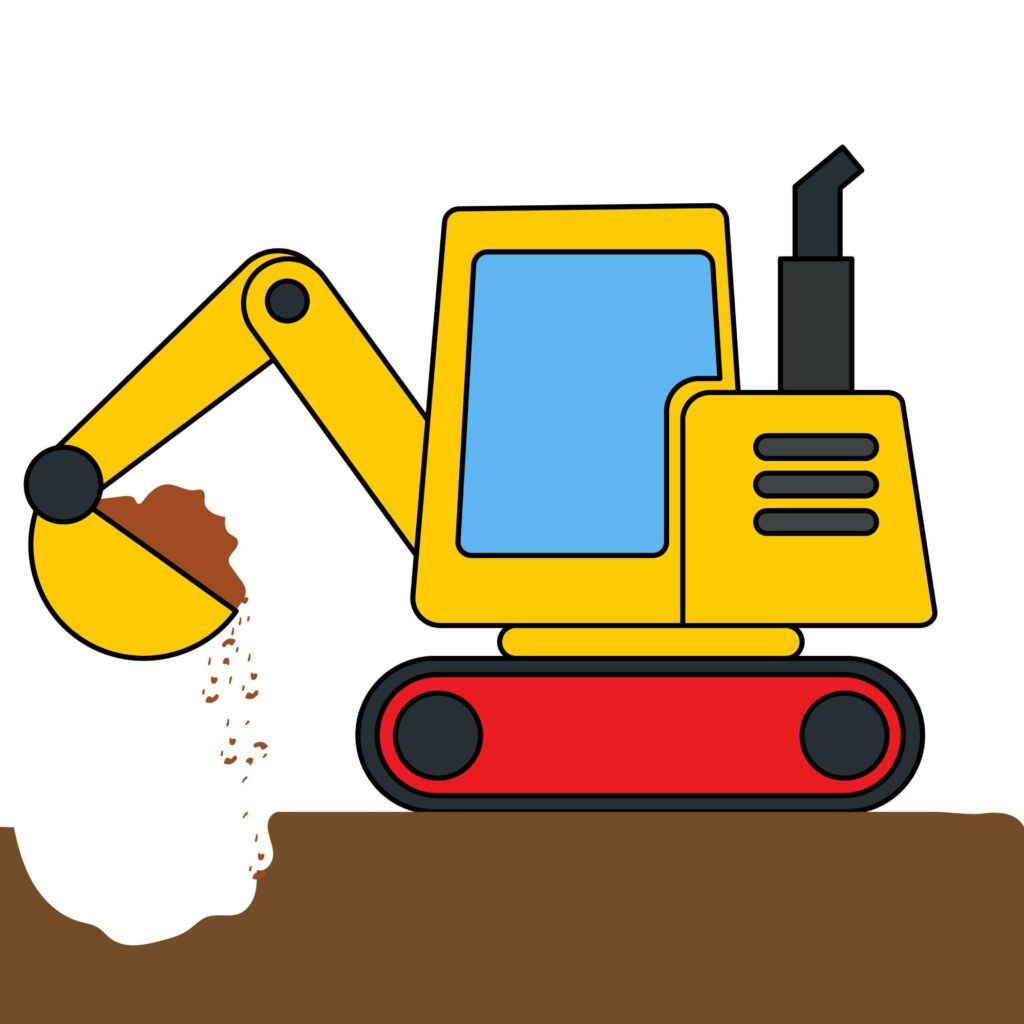
Step 10: Color Your Drawing
Now to the fun part, take out your coloring supplies and start coloring your excavator. Traditionally, excavators are yellow in color. You can use yellow on the cab, engine box, boom, arm, and bucket.
The ground should be dark brown and the exhaust black because it emits dark smoke from the engine. All in all, you don’t have to follow the norms. You can go as wild as you want with the colors.
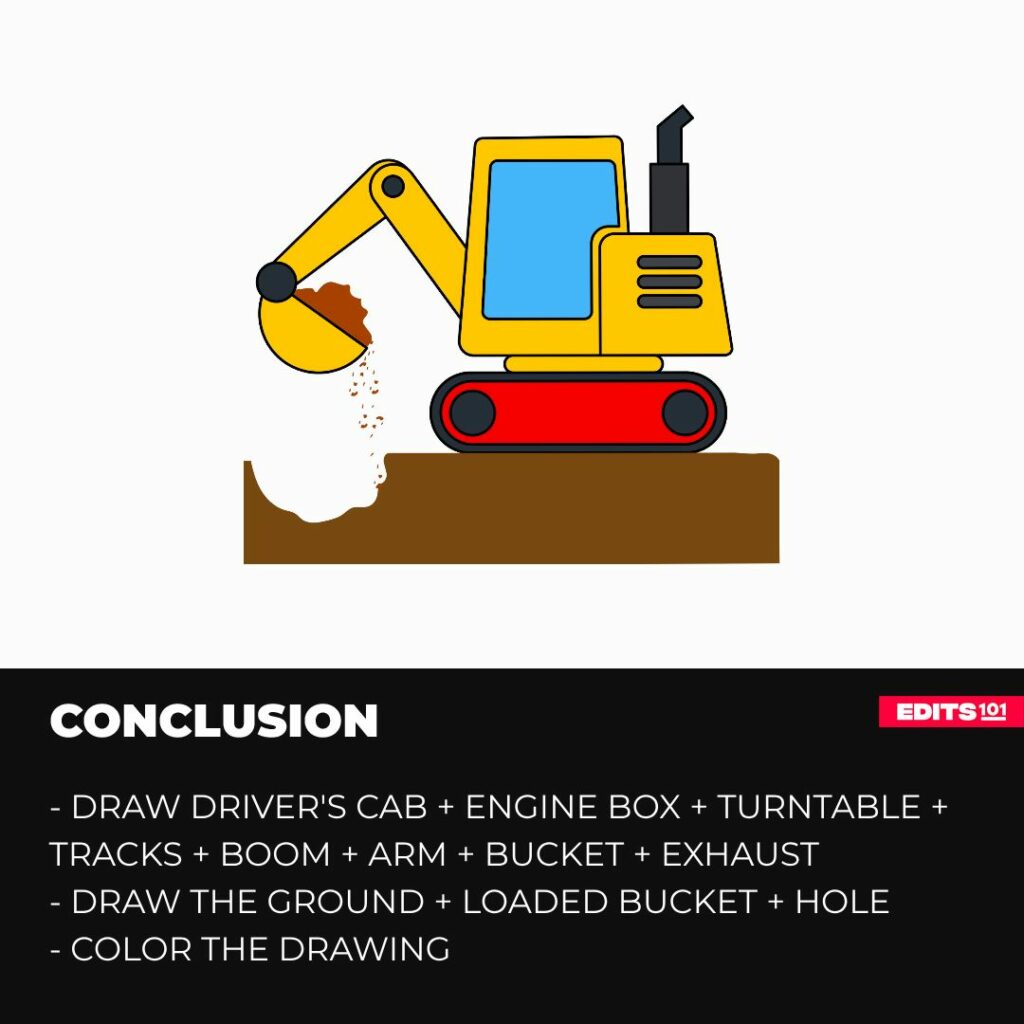
Conclusion
In this tutorial, we looked at the steps you should take to draw an excellent excavator. We started by drawing the driver’s cab and the engine box then added the turntable, the tracks, the boom, the arm, the bucket, and the exhaust pipe. We later added the ground and some soil to the bucket and then colored our drawing.
You can also use these simple steps when drawing an excavator on software like Adobe Illustrator or Paint.
The secret to a beautiful drawing is patience and practice. You may not get everything right the first time and that is okay. Keep practicing and add more details to your excavator as you get better.
Thanks for reading & feel free to check out more of our articles!
Author Rating
Overall Rating
Summary
Learn how to draw an excavator step by step. You will also learn about the names of the different parts of this incredible machine.