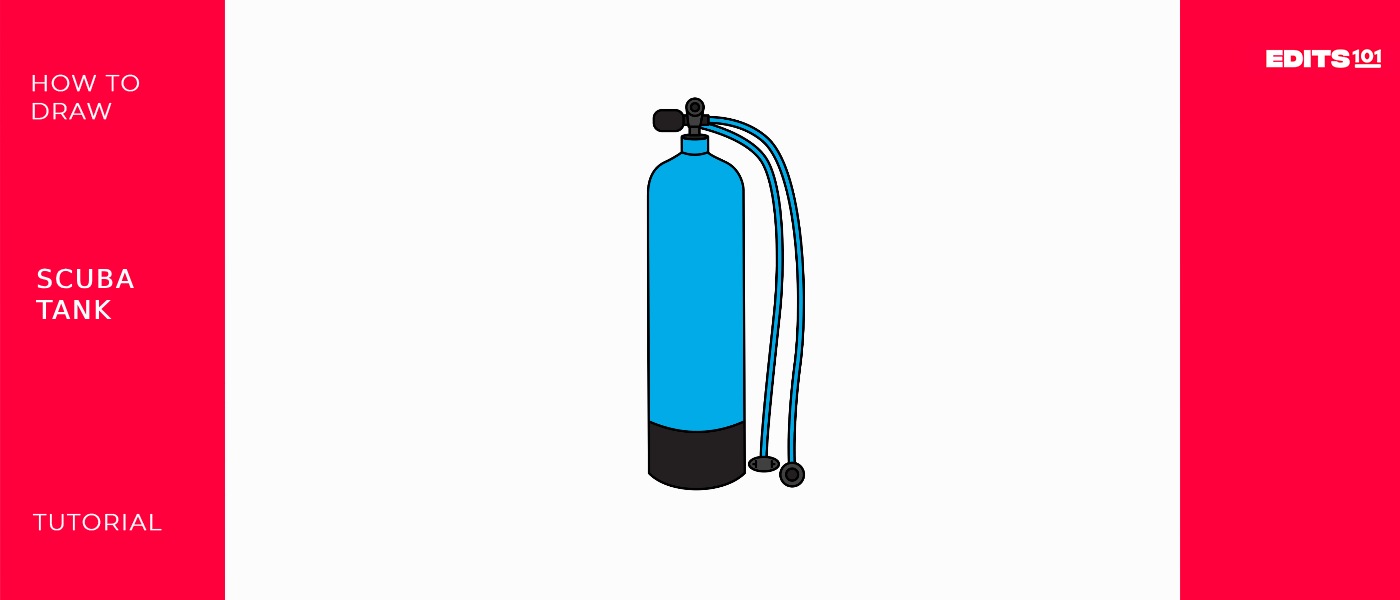
How To Draw A Scuba Tank | A Guide To Draw Like A Pro
A scuba diver tank, also known as a scuba tank or cylinder, is a crucial piece of equipment used in scuba diving to store and carry compressed air or other breathing gases. These tanks allow divers to explore underwater environments by providing a portable and self-contained source of breathing gas.
Prepping for undersea quests or inventing steampunk deep sea divers, drawing a scuba tank brings oxygenated life to all manners of aquatic adventures! With simple shaped and strategic techy embellishments, muted metallic cylinders soon power fantastical excursions through sketchbook coral reefs, pirate shipwrecks, and even to the stygian depths of alien oceans on far-flung worlds.
| Steps | Complexity level |
| Draw the pillar valve and pillar valve knob | 2 |
| Draw the A-camp | 3 |
| Draw the cylinder | 2 |
| Draw the tube and mouthpiece | 3 |
What You Will Need
Our scuba tank drawing tutorial only calls for
- Paper – Printer paper and construction paper both work well. Darker shades make lighter tank details pop!
- Drawing tool – Any pen, marker, or pencil you feel comfortable with. You’ll start light and refine lines towards the end.
- Eraser (optional) – For reworking initial tank line sketches before committing final inking
- Colors

How to draw a scuba tank
Follow along on a pressure-free journey perfect for first-time oceanic illustrators. Our encouraging guide breaks intimidating scuba components into friendly stages accessible to all ages. Learn specialized techniques for harness straps, valves, and gauges as we create tanks ready to empower vivid underwater escapades. Soon, vibrant swims await as imagination dives into effortlessly drawing scuba tanks! Then, whether you are a student, hobbyist, or aspiring deep-sea daredevil, this helpful instruction will guide you into sketching sensational scuba tanks! All ages are welcome.
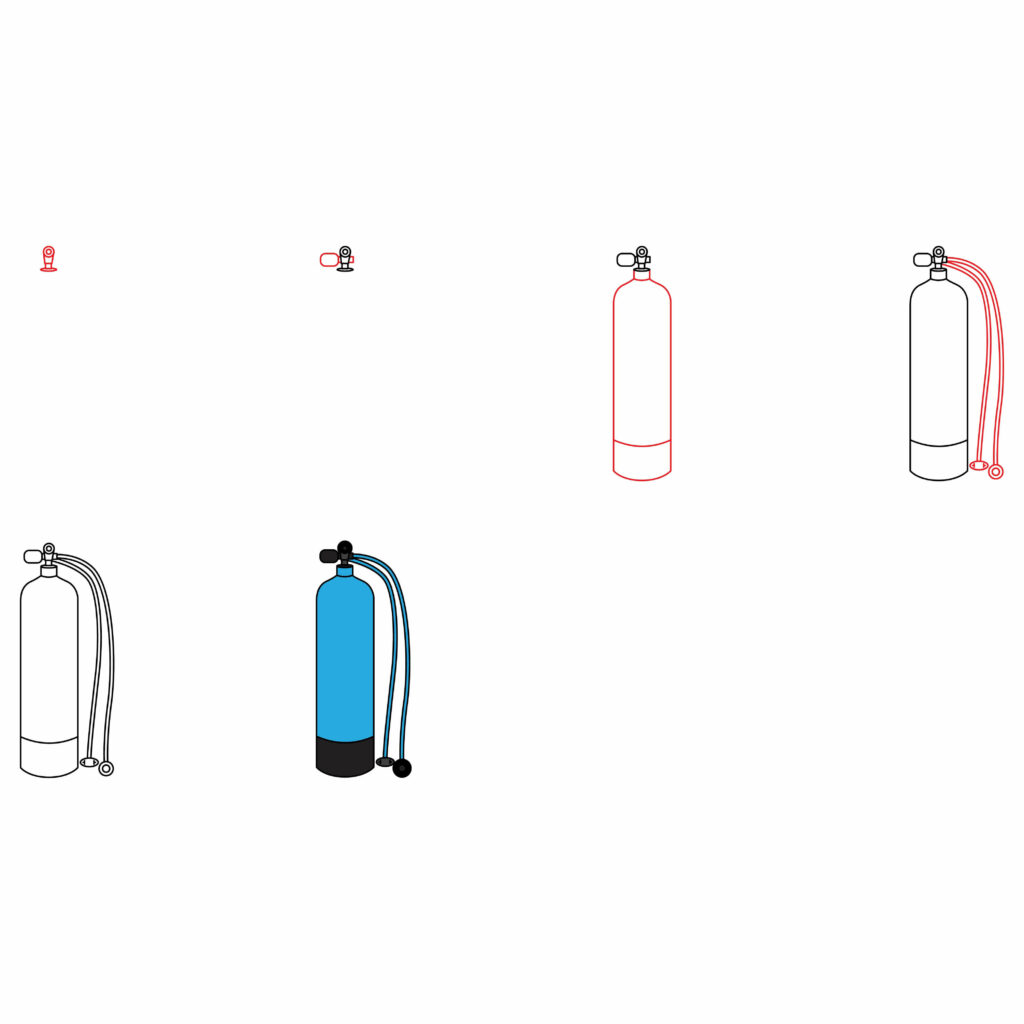
Step 1: Draw the Pillar Valve and Pillar Valve Knob
The tank has a valve that allows the diver to control the airflow. The most common type is the K-valve, which is manually operated, but there are also DIN valves that screw into the regulator. Start your scuba tank by lightly sketching two small circles near the top of your page, one inside the other. These represent the pillar valve, a vital component controlling compressed air flow from the tank. Attaching to the valve circles, draw a short line down, then outwards into a curved shape before looping back vertically to meet the first small circle again. This extended S-shape represents the valve control knob for quickly adjusting volume output while diving.

Finish by adding a few straight lines detailing the valve sides and underlying apparatus. Refine until the essential pillar valve piece feels solidly constructed and integrated with your overall tank drawing.
- Small intersecting circles represent the pillar valve base
- An S-shaped line reaching down and back up forms the control knob
- Straight lines detailing sides integrate valve with tank
Step 2: Draw the A-Clamp
Beneath the valve, draw a small horizontal rectangle near the tank edge to represent an A-clamp anchor point for fastening your scuba cylinder firmly to buoyancy harness straps. Add a few evenly spaced straight lines within the rectangle to detail the tensioning screw found on real A-clamp buckles. This tension and release mechanism ensures adjustable stability while letting divers quickly secure and detach tanks for transport.

Take care to portray the A-clamp scale and tank positioning accurately. They’ll link equipment functionally to divers later on.
- The rectangle shape at the top edge stands for an A-clamp buckle
- Straight lines within show adjustable tensioning screw
- Mind scale and position for linking equipment to divers
Step 3: Draw the Cylinder
Scuba tanks are commonly made of high-strength aluminum or steel. Each material has advantages and is chosen based on weight, buoyancy characteristics, and durability. The capacity of a scuba tank is measured in terms of its gas volume, typically expressed in cubic feet or liters. Standard tank sizes range from smaller capacities for recreational diving to larger degrees for technical or deep diving.
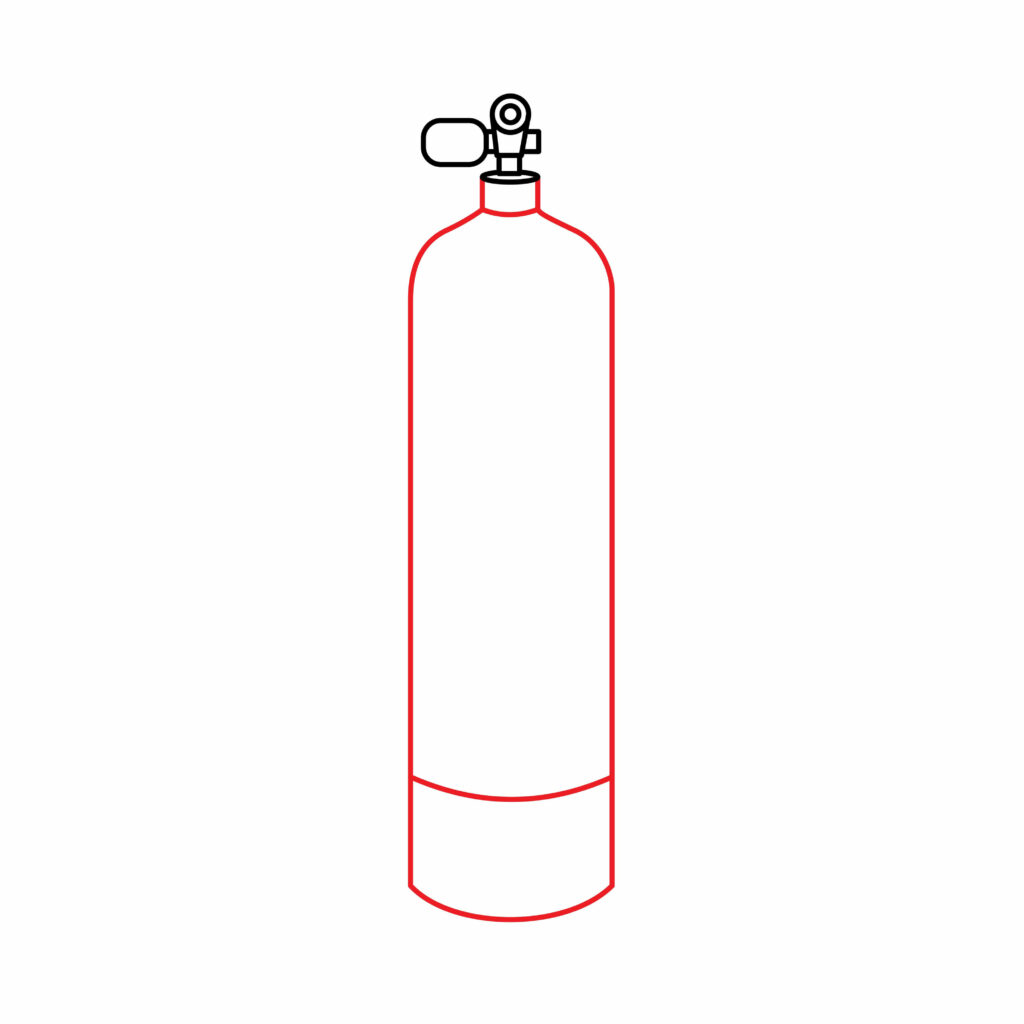
Anchored by valve and A-clamp fixtures, begin visually defining the scuba tank using predominantly straight and gently curving vertical lines like a cylindrical shape. Sketch an elongated rounded-edge rectangle to form the main storage cylinder that holds air pressurized for underwater breathing. Draw cylindrical lines slightly tapered at the base for added dimension. Add small circles and angled rectangles representing openings and reinforced solder points that strengthen real-world tank construction to contain high-pressure gases safely.
- The main cylindrical body stores pressurized air
- The tapered base and small structural details enhance the realism
- The rounded rectangle evolves into the defined storage tank
Step 4: Draw the Tube and Mouthpiece
Moving beyond the core tank, sketch a long curving line from low on the cylinder up past the pillar valve to represent the breathing hose and regulator. This transports released air on demand. Draw a short horizontal straight line near the top to form the mouthpiece gripped between the teeth to receive flowing oxygen that we also drew for the scuba diver. Add an oval and circle combination to detail the front of this vital piece of underwater breathing gear.
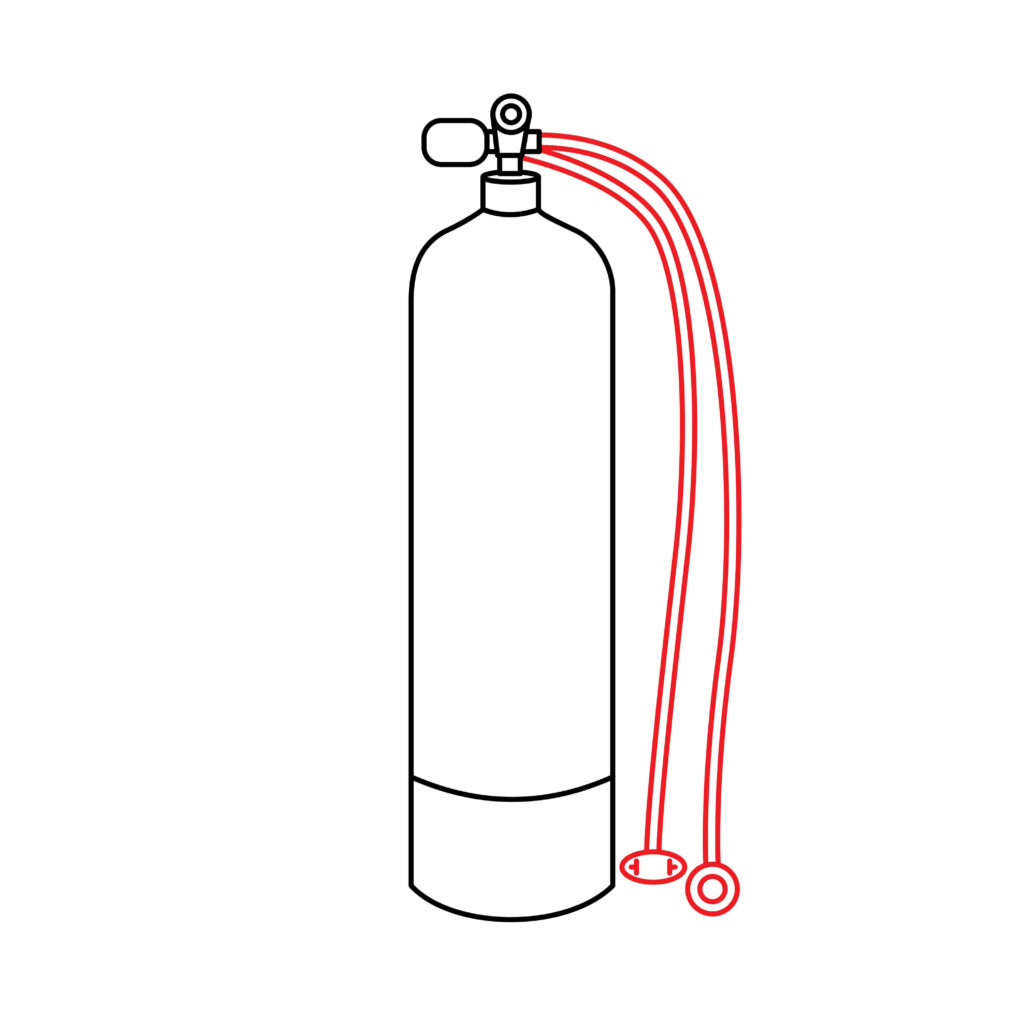
Finish by erasing guidelines until major components feel solidly connected. Pay mind to proportions – the tank will be the anchor point equipment attaches to for diving purposes later on!
- The long curved line traces the breathing hose and regulator system
- The straight line at the top becomes the mouthpiece section
- Mind proportions as core equipment anchor point
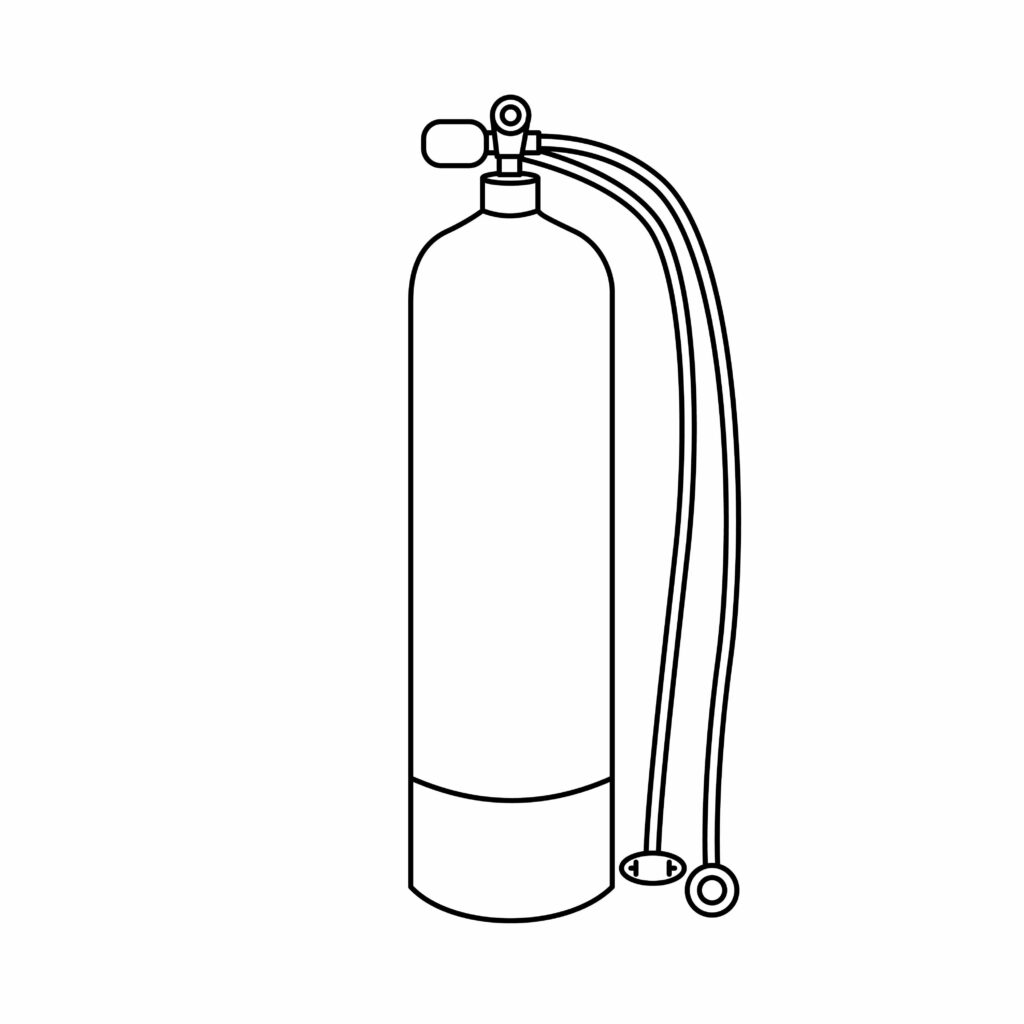
Step 5: Congratulations! Your Scuba Tank Drawing is Complete
You’ve done it! Your scuba tank drawing is complete, and you’ve captured all the essential components of this essential piece of scuba equipment. Take a moment to admire your work.
Taking your scuba tank to the next level
Like any other skill, sketching requires practice. Set aside time each day to sketch, even if it’s only for a little while. Be mindful of your surroundings. This enhances comprehension of details, dimensions, and forms. You can start with the basics and work up to more complex topics. Experiment with different drawing tools like charcoal, colored pencils, watercolors, markers, and pencils. Every medium has unique characteristics that could help you identify your preferences.
You can also play with basic hatching, blending, shading, and cross-hatching techniques. Understanding these techniques will greatly enhance the complexity and realism of your drawings. When you’re drawing, use your imagination and try out new concepts.
Adding Background to Your Scuba Tank Drawing
Whether set on sunny shores, suspended in serene lagoons, or onboard boats bound for an aquatic adventure, thoughtfully composed backgrounds fully immerse scuba tank drawings in rich environments. Sketch trash-strewn beaches populated by curious crabs and seagulls eyeing equipment pre-descent. Frame tanks hover weightlessly over vibrant coral gardens, mysterious shipwrecks, lost cities, and underwater alien craft if imagination dares!
When depicting shore launch points, utilize reference photos to recreate derelict piers, rolling frothy surf, craggy volcanic rock contours, and glittering azure expanses promising wonders. Populate coastlines with swaying palms, opportunistic hermit crabs, or camera-ready groups of student divers for added narrative context. For underwater scenes, consider kelp forests ripe to harvest oxygen supplements, glittering schools of angelfish dodging bubbles, ominous shadows of passing hammerheads adding suspense, and even friendly dolphins offering tows towards legendary sites! Framing fundamentals against artfully embellished backdrops makes drawings dive deeper.
Coloring Your Scuba Tank Drawing
Strategic color choices allow scuba tank drawings to exhibit stylish practicality on land then assume epic mystique below the surface. For realism, utilize oceanic shades of muted grays, navy blues and seafoam greens in careful shading suited to weathered aluminum gear. Try chipped paint reveals, rust wear and faded warning stickers aged by the elements. Use deep shadows and selective silver metallic highlights on rounded edges to define convincing dimensions.
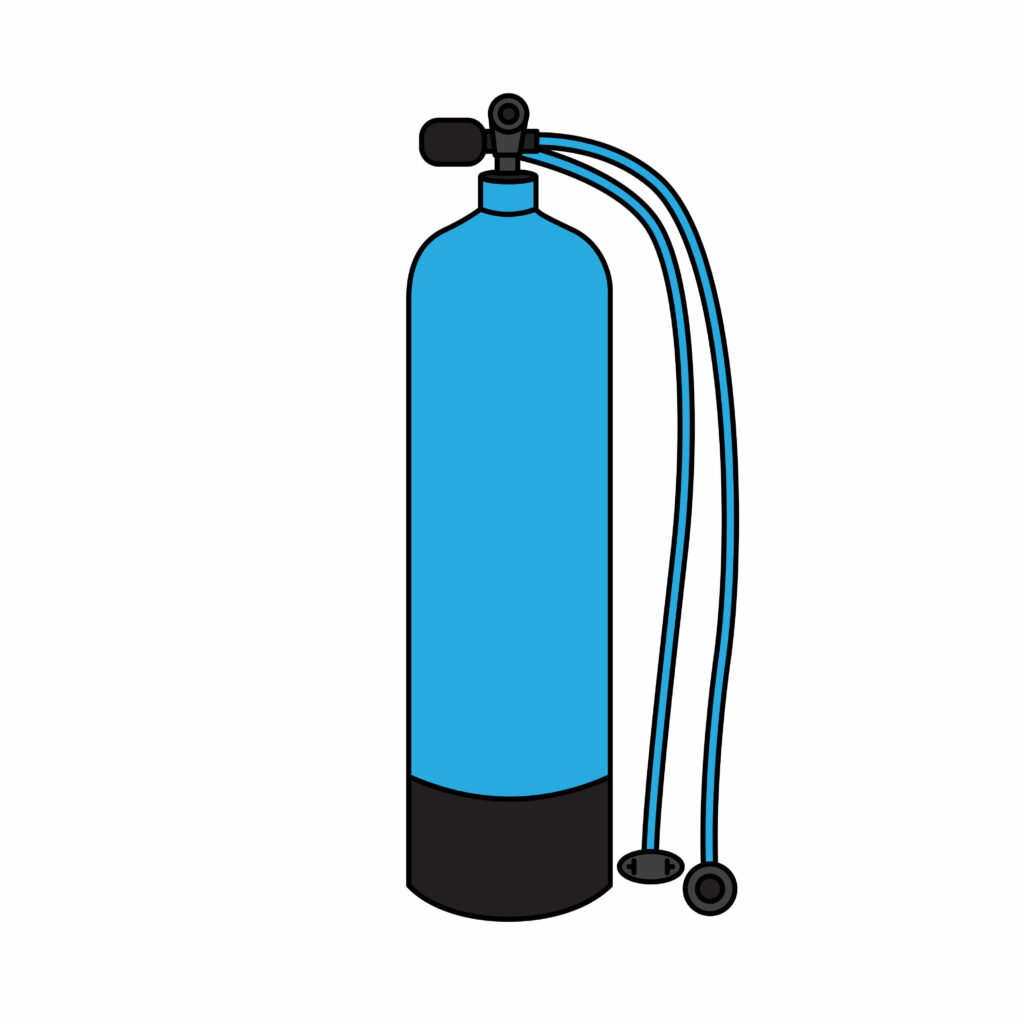
Beneath the waves, shift to bright primaries for emboldened comic vibrancy. Trace valves and handles in fiery reds warning of danger and importance. Make tanks glow ultraviolet among lush purple corals and deep blue benthic mystery. Outline breathing hoses in neon yellow banded by bio-luminescent marine life. However depicted, let color clarify and amplify essential equipment keeping divers alive!
Bonus Tips
Take scuba drawings further by Engineering steampunk retrofit modifications like gauge-covered copper helmets with swirling tentacle air hoses. Depicting background sea life camouflaging against tanks to express environmental connections. Including elbow joint hoses, implying circular movement freedom. Illustrating panels missing to reveal fantastical inner machinery. Pairing with characters like deep sea monster researchers or sunken city archeologists for added storytelling! The creative possibilities beneath the waves stretch vast as the sea itself. Continue building on fundamentals with imagination’s spark!
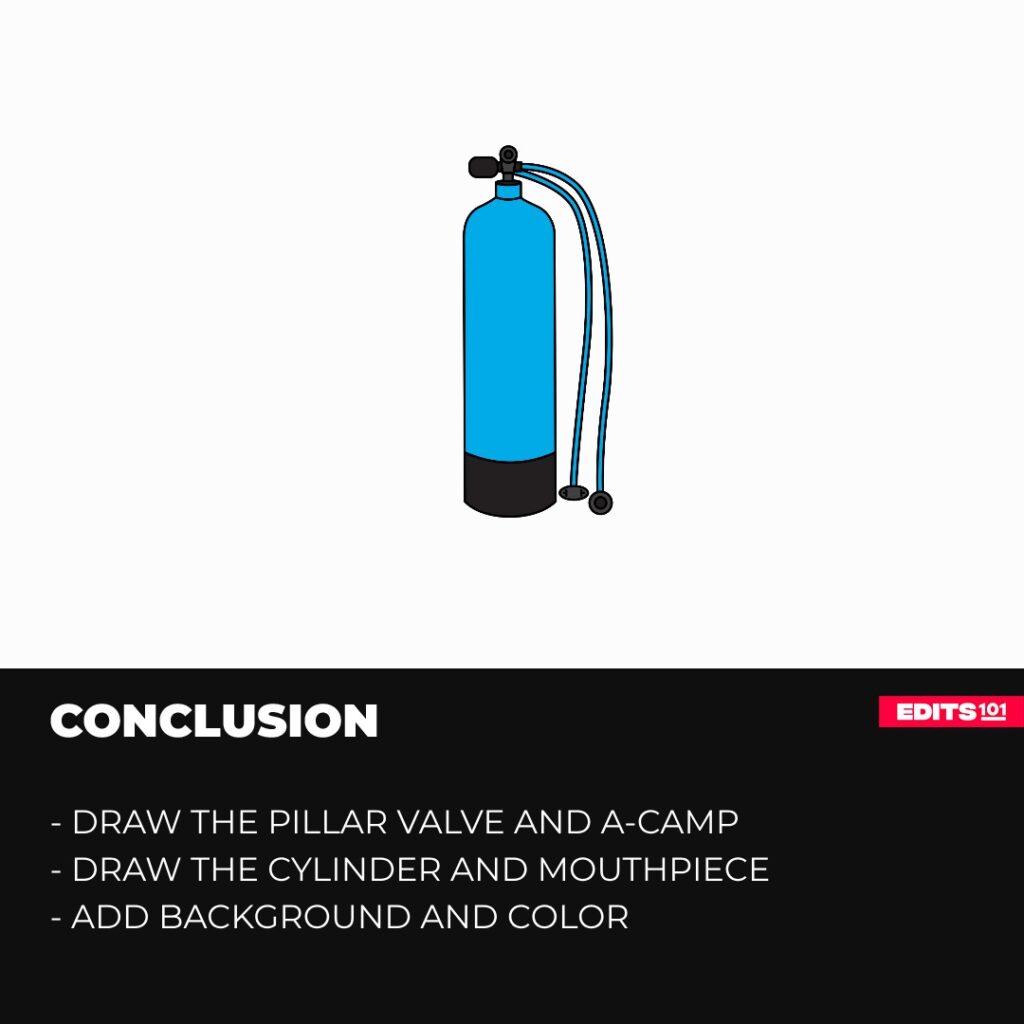
Conclusion
Through gradual revelation and connecting anchor point steps, we now understand tanks as more than metal constructs but symbols of access granting breath and movement in wondrous new frontiers hidden from land-bound eyes. Revisit practices until visions spill effortlessly from the mind through willing hands to the page portal. In time, tanks depicted will power reality-transcending adventures carrying elevated spirits far into fathomless realms built stroke by stroke!
Thanks for reading & feel free to check out more of our articles!
Author Rating
Overall Rating
Summary
This guide explains how to draw a scuba tank that are used by diving in the sea.