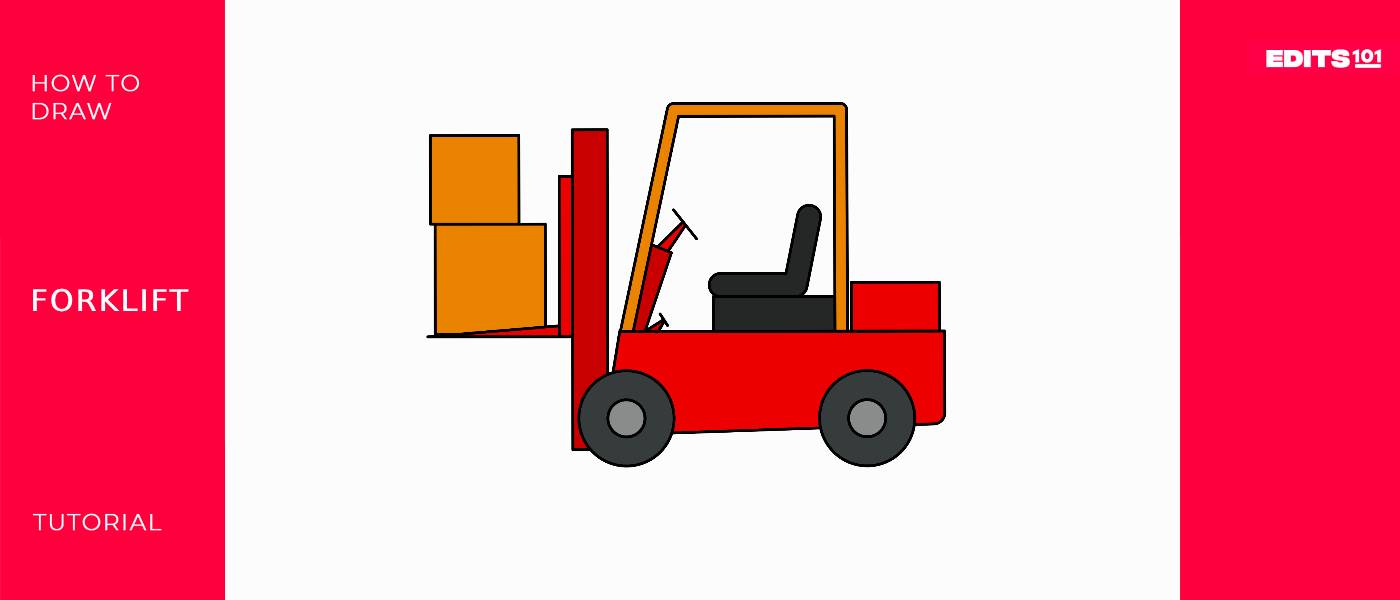
How To Draw A Forklift | In 11 Easy Steps
Today, we’re diving into the world of heavy-duty vehicles with an informative tutorial on drawing a forklift. Ready to get started?
Forklifts were first introduced in the 20th century. The invention is often attributed to an engineer named Eugene Bradley Clark, who designed the first hydraulic lift truck in 1917.
Since then, forklifts have become an essential tool in firms like manufacturing, logistics, or construction, as they make jobs feasible by lifting heavy materials used in various industries.
In this comprehensive guide, we will teach you how to draw a forklift in 11 easy steps!
| Steps | Complexity level |
| The Frame | 1 |
| The Counterweight | 1 |
| The Wheels | 2 |
| The Cabin | 2 |
| The Mast | 3 |
| The Fork | 3 |
| The Operator’s Seat | 2 |
| The Steering Wheel | 1 |
| The Gas Pedal | 2 |
What You Will Need
- Sketchbook or drawing paper
- Pencils (2b, 3b or 5b)
- An eraser
- A ruler
- A mathematical drawing compass
- Small household circular objects (optional)
- Coloring supplies
- 35-45 minutes
How to Draw a Forklift
Drawing a forklift may seem challenging because of all the various shapes you’ll need to draw, but don’t hesitate to start.
By following our step-by-step tutorial and pictorial references, you can create a forklift drawing with confidence and ease!
Ensure you have all the required drawing tools handy and check out the outline provided for an overview of all the steps before you begin sketching.
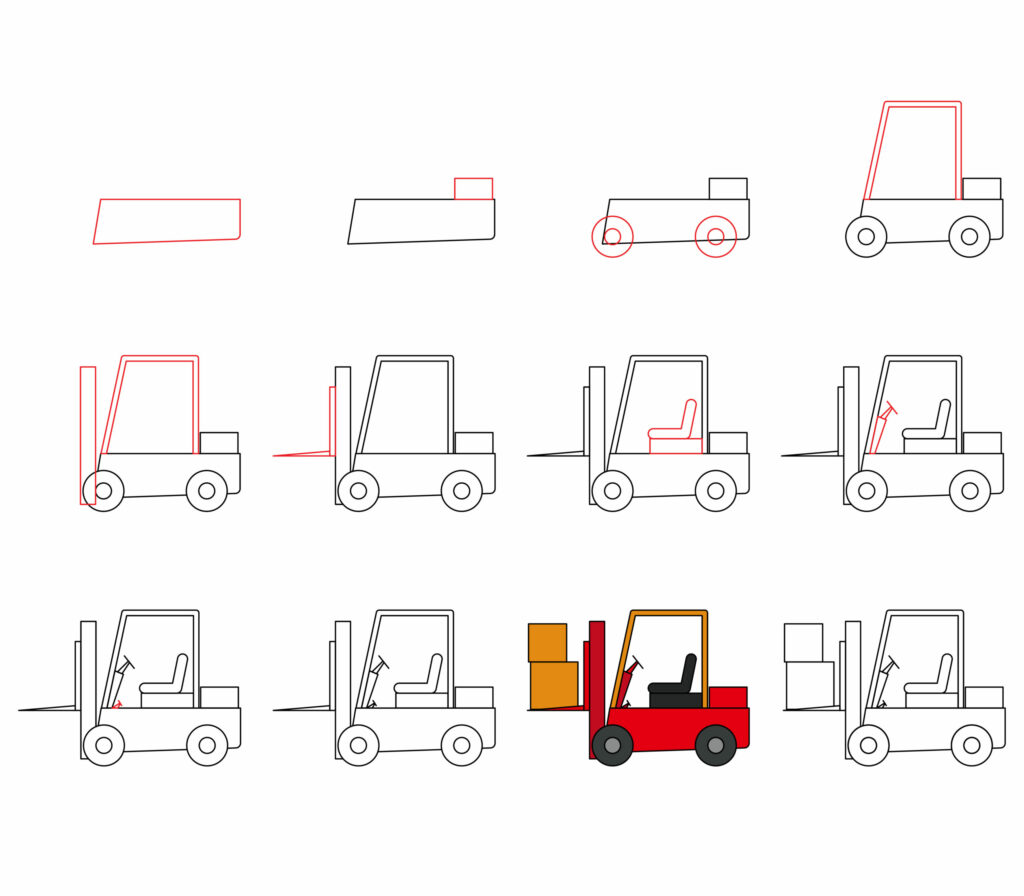
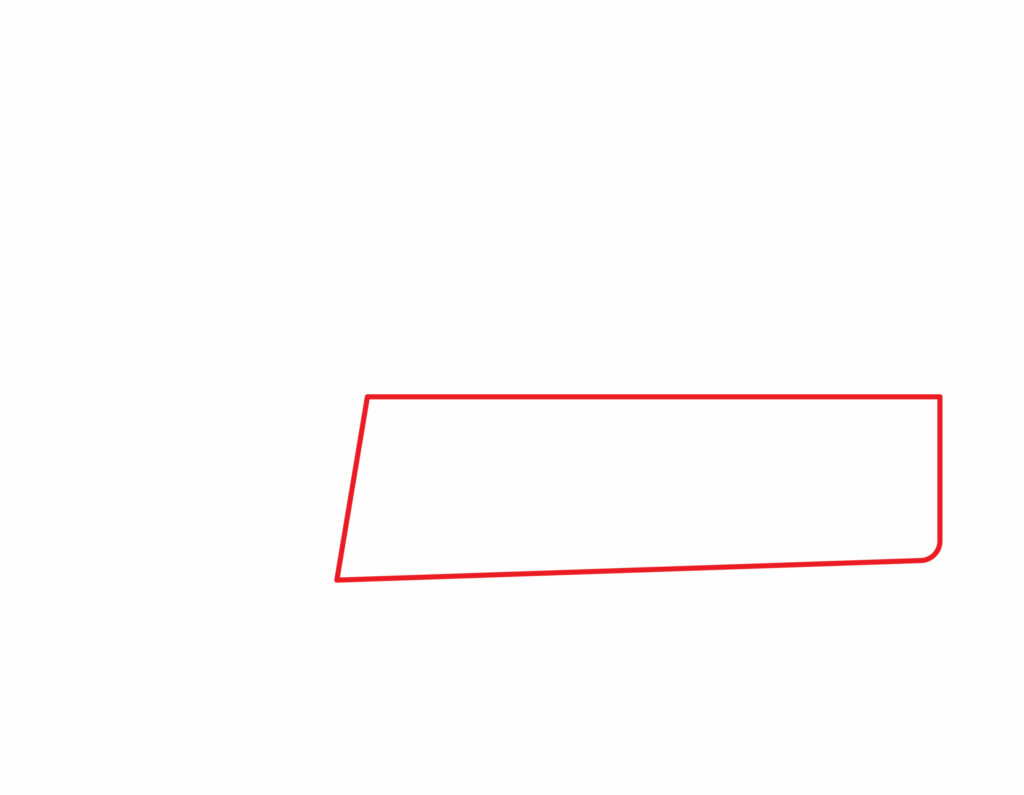
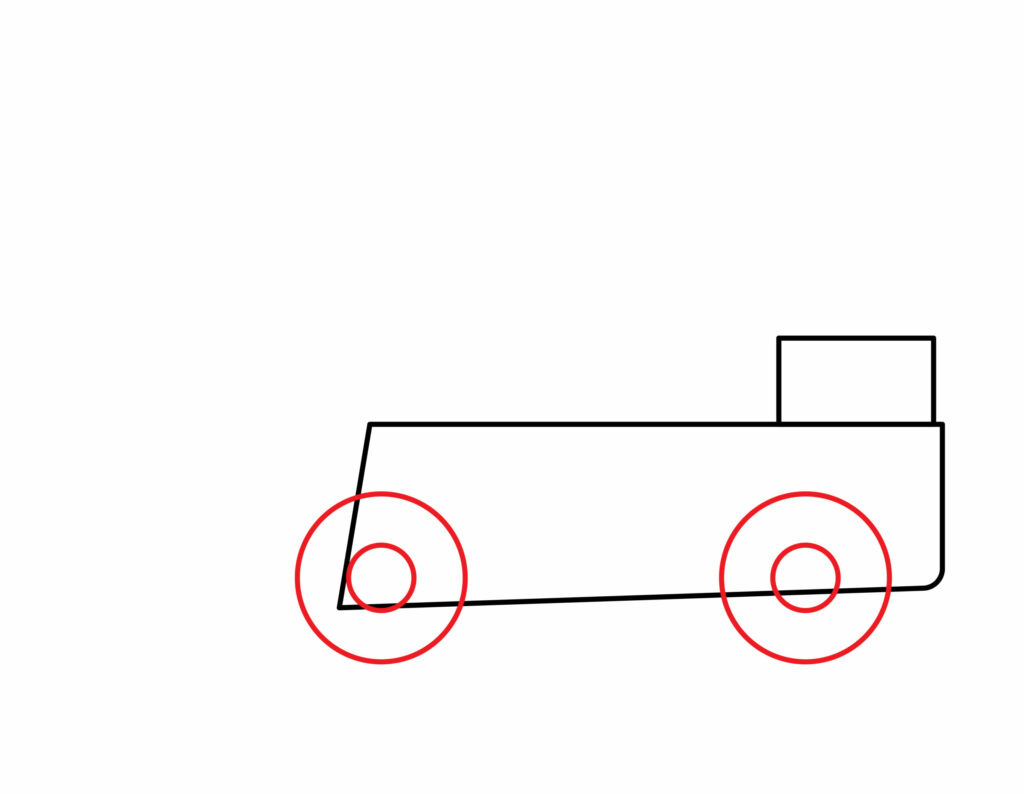
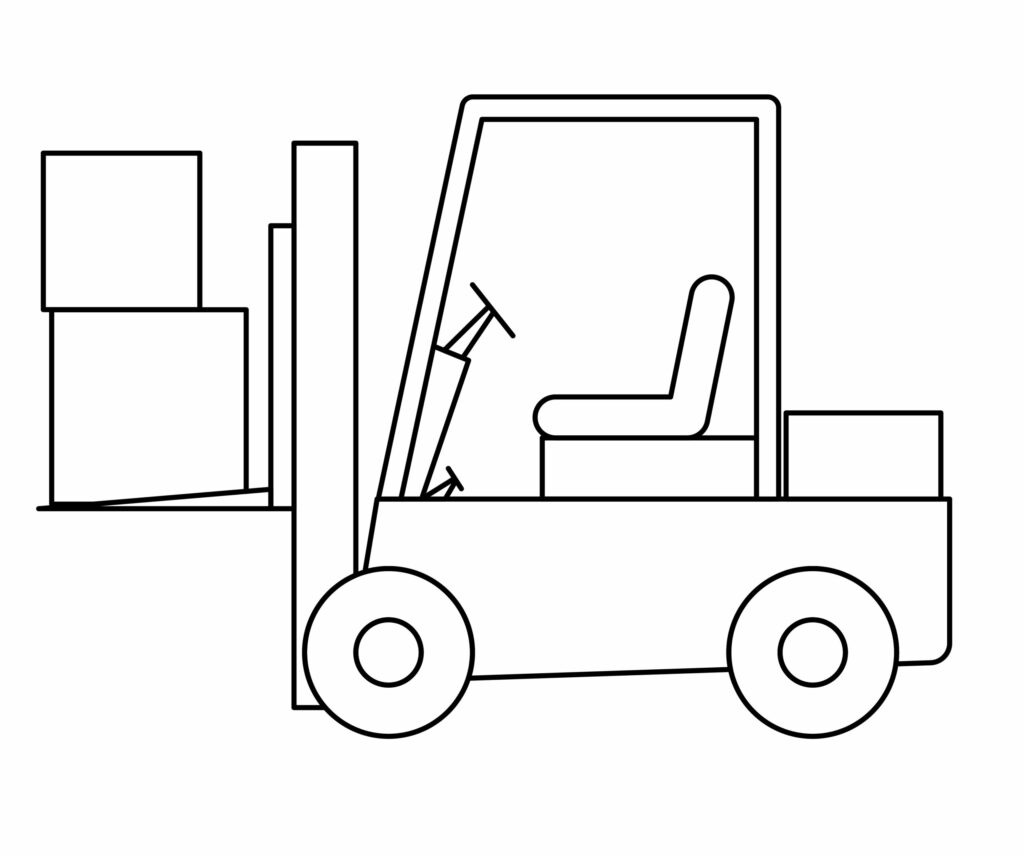
Step 1: Draw the Frame
The frame is the main structural component that holds all other parts together, and is used to support and lift heavy loads, thus it’s best to start off your drawing with this step.
Draw a rectangle on the surface of your paper. Angle the shape towards the right side of your page to ensure enough room for adding other components later on.
Erase the left side of the rectangle, and draw a slight diagonal line instead to create a sharp front curve.
- Draw a rectangle on the paper’s surface – as a base
- Make sure to leave space for the rest of your drawing
- Erase the left side of the rectangle and add a diagonal line
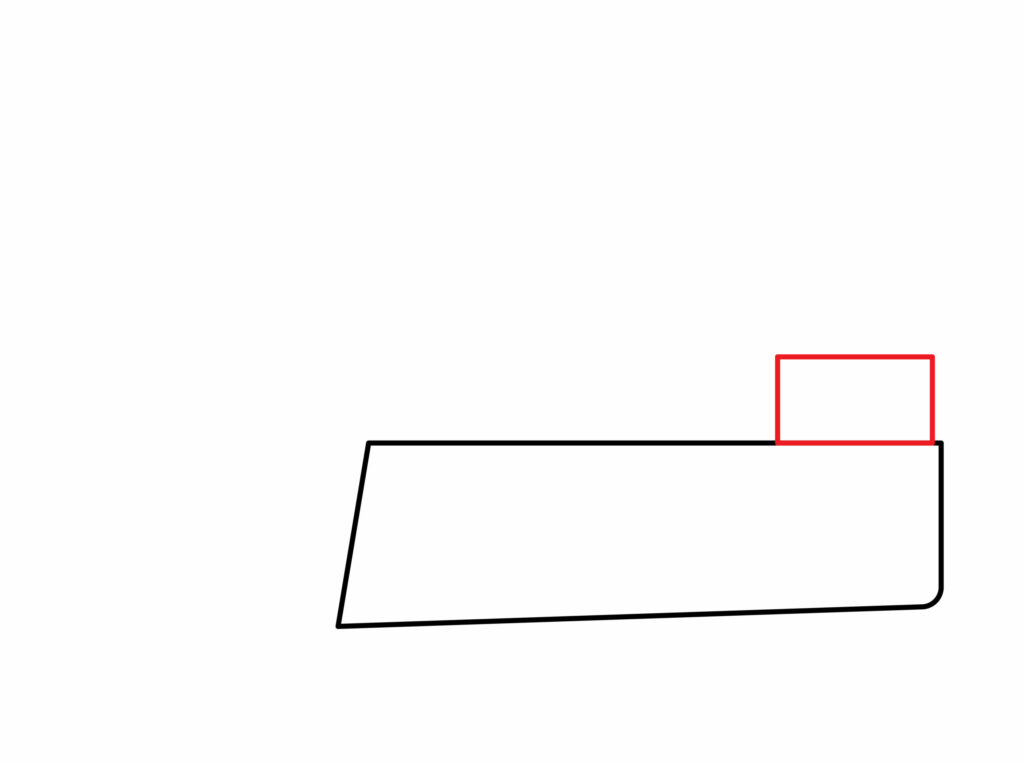
Step 2: Draw the Counterweight
The counterweight is usually located at the rear of the forklift and helps to balance the weight of the load being carried.
Complete this step by drawing a small rectangle directly above the frame, on the right side.
Ensure the shape is smaller than the frame, and make use of a ruler for straight lines, if necessary.
- Draw a small rectangle above the frame of the forklift
- Make sure the rectangle is smaller than the frame
- Use a ruler to ensure straight lines
Step 3: Draw the Wheels
Forklift wheels are multi-functional as they provide traction, support the weight of the forklift and its load, facilitate steering, and absorb shock from uneven surfaces.
To complete this step, start by drawing two small circles along the bottom of the frame, one on the left corner and one on the right side.
Ensure that the lines are not squiggly by making use of a mathematical drawing compass, or a circular household object such as a coin or a bottle cap.
Once finished, add a smaller circle within each previously drawn circle.
- Draw two small circles along the right and left-bottom of the frame
- Add a smaller circle within each circle drawn
- Make use of a mathematical drawing compass for a clear circular shape
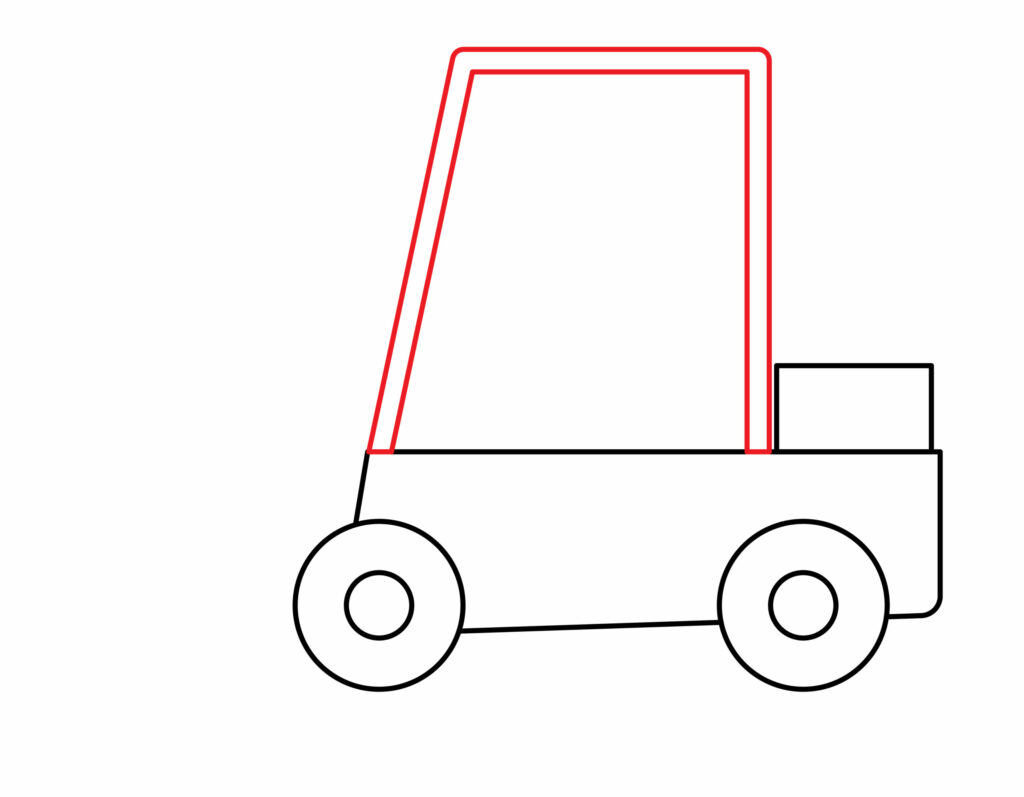
Step 4: Draw the Cabin
A forklift cabin is an enclosed space on a forklift truck that provides the operator with protection from the elements and allows them to operate the vehicle safely.
To add the cabin, start by drawing a long vertical line from the left side of the counterweight.
Once the line reaches double the height of the counterweight, frame and wheels combined, sharply curve it to the left until it forms a horizontal line.
When the line is parallel to the inner curve of the front wheel, curve it into a diagonal line until it connects to the upper-left corner of the frame.
Finally, add the same series of lines inside the shape you just created, following the similar curves to resemble the forklift’s cabin.
- Draw a rectangle on the base (car) of the forklift.
- Draw a larger rectangle this time.
- This will be the cabin of our forklift
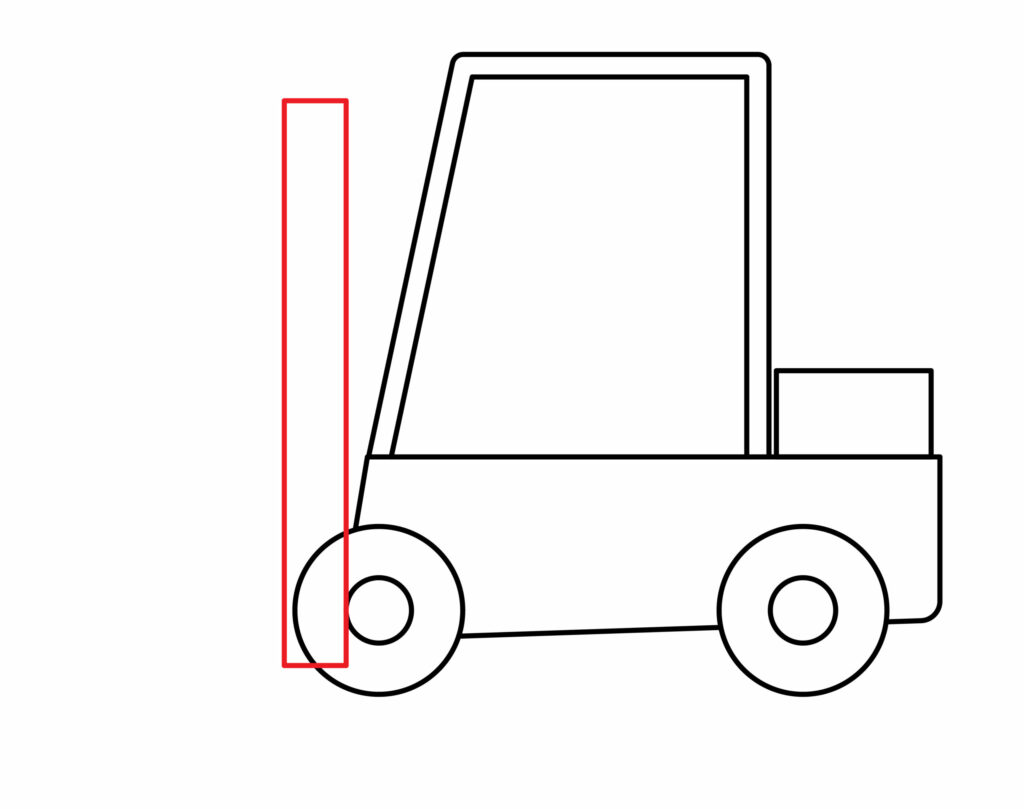
Step 5: Draw the mast
A forklift mast is the vertical assembly on the front of the forklift that enables lifting and lowering of loads.
Draw a thick vertical rectangle attached to the left side of your drawing, over the side of the front wheel and ending slightly below the roof of the cabin.
Once complete, erase the lines of the rectangle that overlap with the front wheel, and redefine the wheel’s shape by redrawing the erased circles.
- Draw a vertical rectangle at the front of the frame
- Ensure the rectangle is nice and thick
- Erase any lines that overlap with the front wheel and redraw the circles
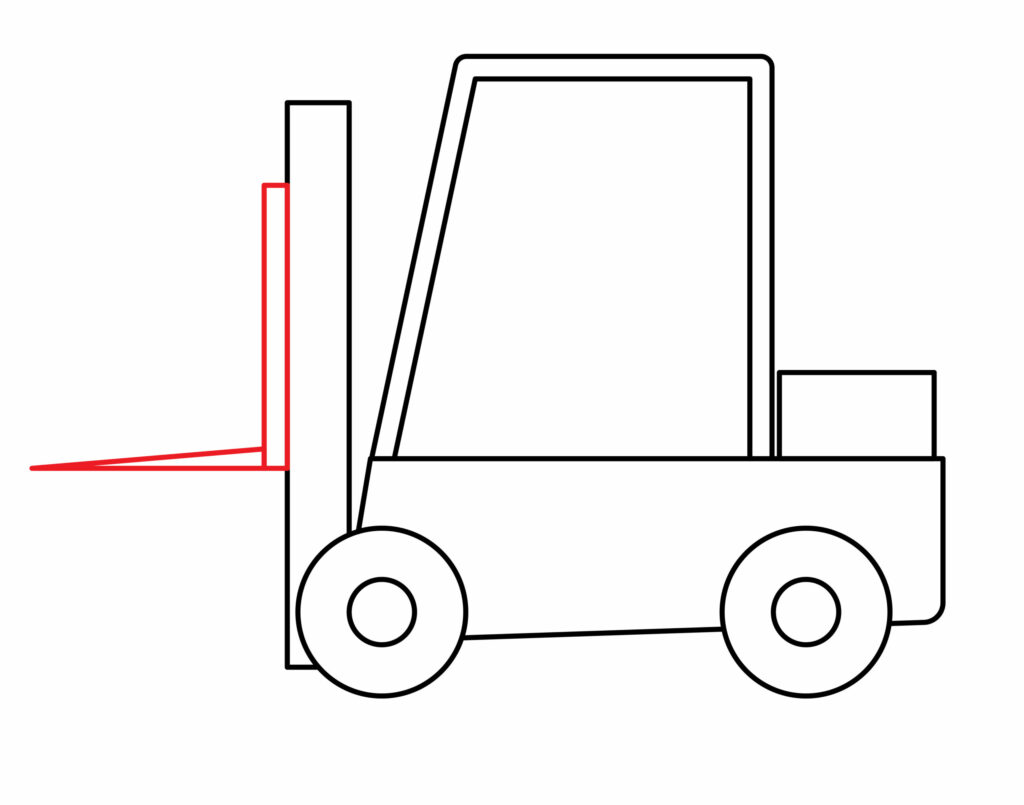
Step 6: Add the Fork
The fork is a pair of metal prongs attached to the mast used to lift and carry loads.
First, draw a small vertical rectangle attached to the center-side of the mast.
To finish off the fork, draw a thin acute triangle starting from the bottom-side of the mast and extending to the left in a sharp point.
- Draw a small vertical rectangle attached to the left side of the mast
- Add a thin acute triangle starting from the mast and extending to the left
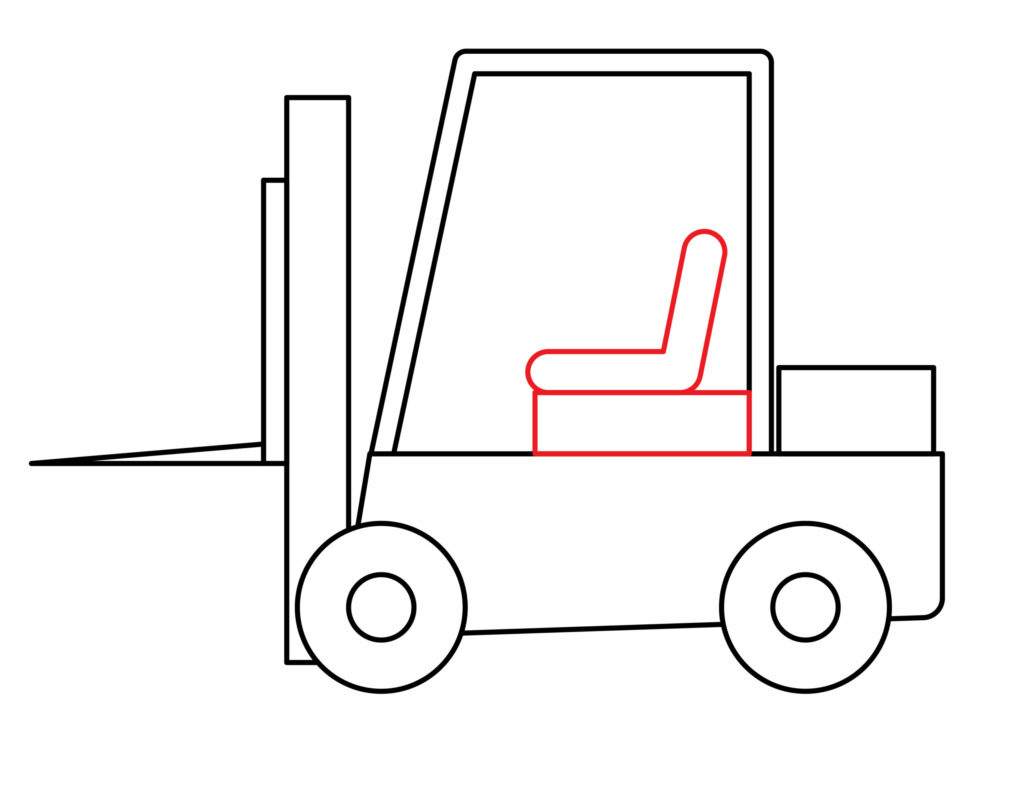
Step 7: Add the Operator’s Seat
It’s time to shift our focus to the operator’s seat, which is usually found within the cabin.
Start by drawing a little rectangle in the bottom-right corner of the cabin to represent the seat foundation.
Then, draw an inverted “L” above the foundation to resemble the seat cushions, and your operator’s seat is good to go!
- Start by drawing a small rectangle in the bottom-right corner of the cabin
- Draw an inverted “L” above the seat foundation to resemble the cushions
- These two shapes together represent the operator’s seat
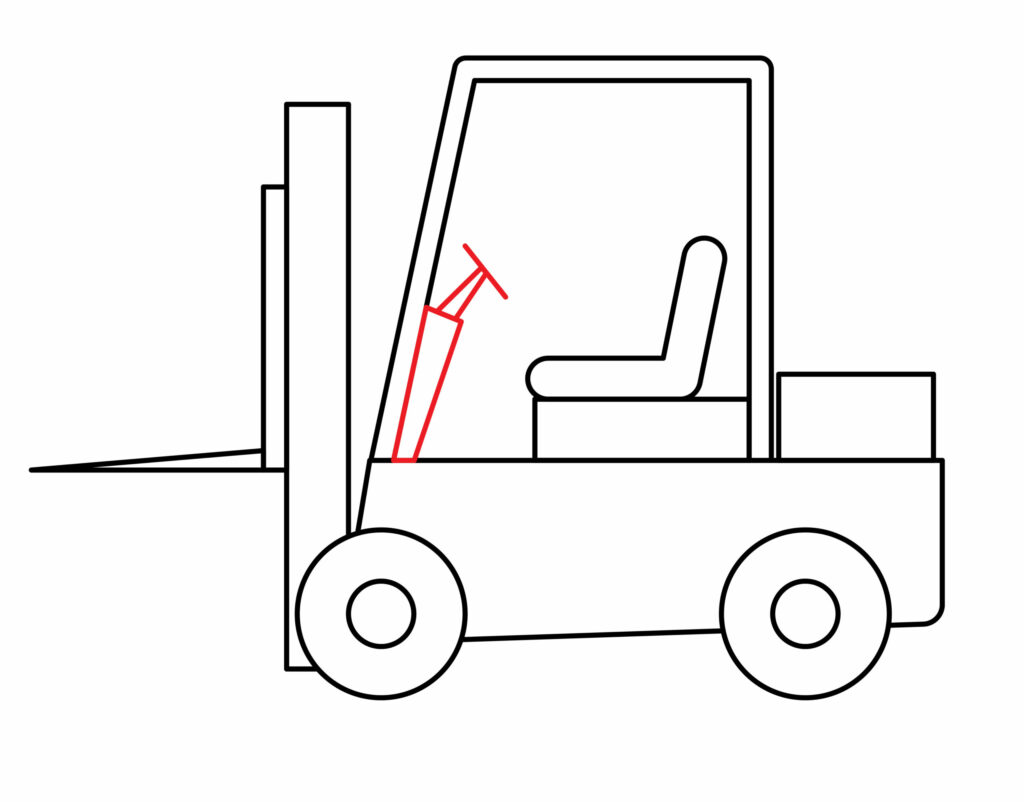
Step 8: Add the steering Wheel
A forklift’s steering wheel allows the operator to turn the vehicle, maneuver into tight spaces, and navigate around obstacles in a warehouse or industrial setting efficiently.
Start by drawing a small cone attached to the bottom-left corner of the cabin. Next, draw a smaller cone above the first one and ensure it’s pointed to the right: i.e., diagonal.
Lastly, draw a small diagonal line against the second cone you added, and you should have a series of shapes that resemble a steering wheel.
Check out the image below to make sure the height of your steering wheel aligns with the dimensions of your seat. This will boost the drawing’s realism!
- Draw a small triangle for the steering.
- Draw an angular line to represent the steering holder.
- Draw angular lines connecting back to the triangle.
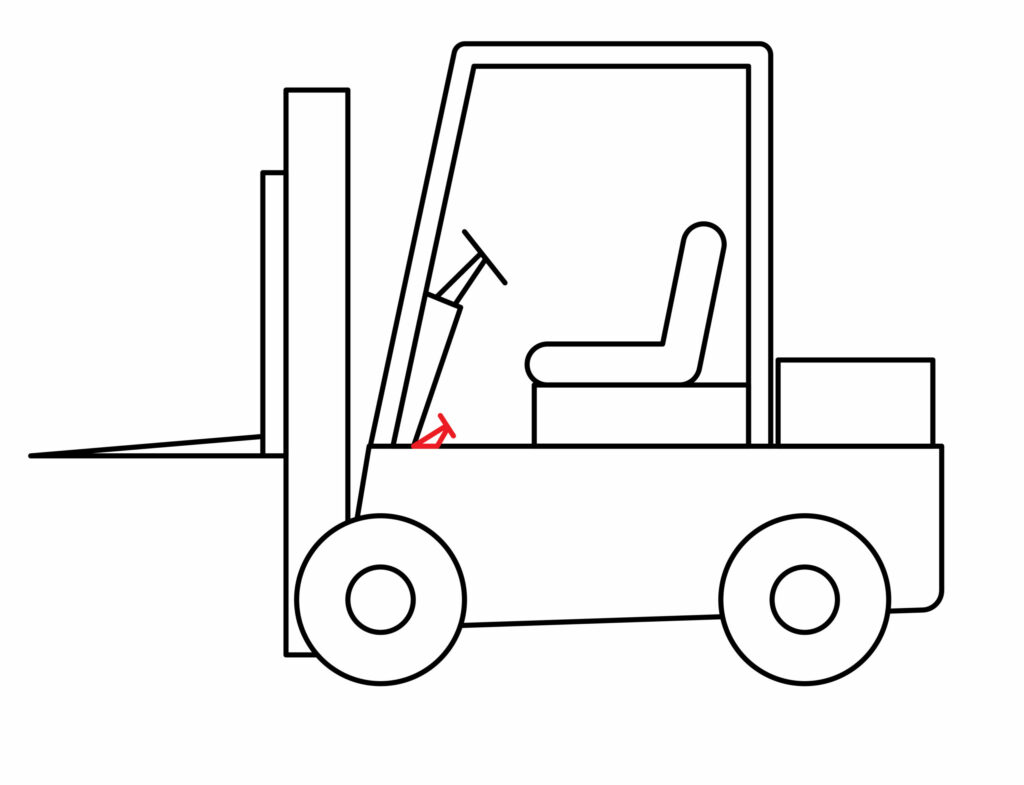
Step 9: Draw the Gas Pedal
The gas pedal of a forklift allows the operator to control the speed, acceleration, and movement direction of the vehicle, thus it’s essential you add this element to your sketch.
Draw a small diagonal cone next to the bottom part of the steering wheel, and top it off by drawing a diagonal line above the cone.
When you’re finished, you might find that it looks quite similar to the upper part of the steering wheel, only much smaller. These shapes represent the gas pedal!
- Draw a small diagonal cone next to the bottom part of the steering wheel
- Add a small diagonal line above the cone
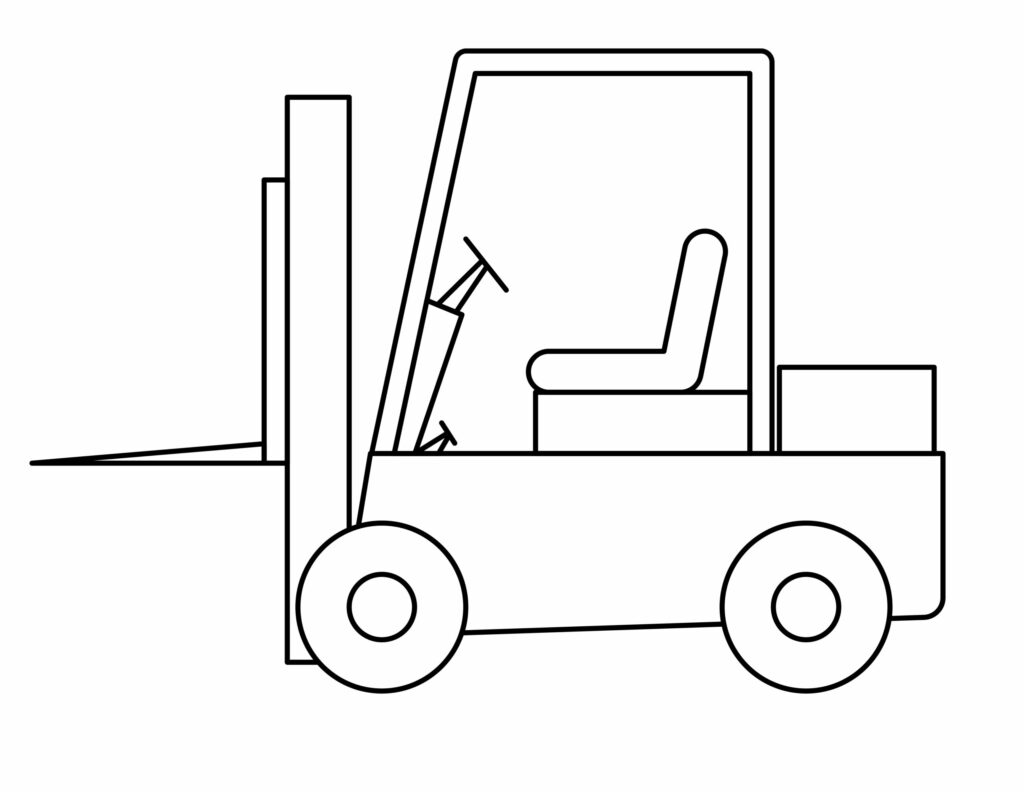
Congratulations! Your Forklift Drawing is Complete
You have invested your time and patience into creating this cool heavy-duty vehicle. Take a well-deserved break and assess the outcome of your drawing.
If you want to leave your forklift sketch as it is, you’re welcome to do so, however, we have some amazing recommendations to transform your black-and-white drawing into a captivating composition coming up!
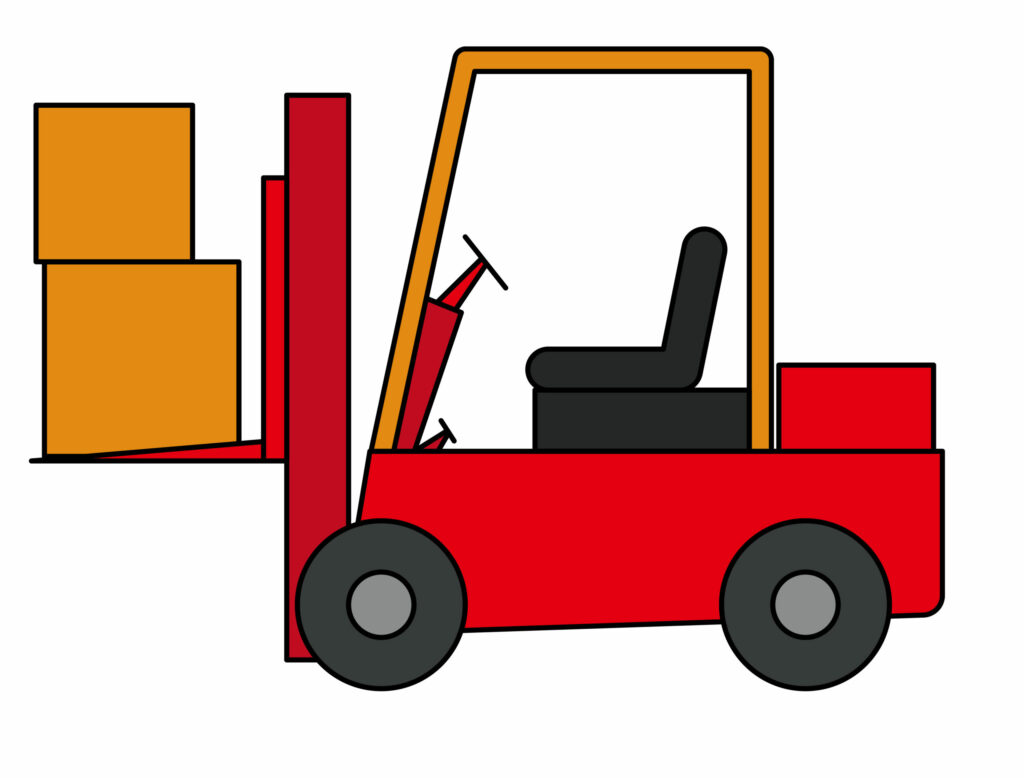
Taking your drawing to the next level
Incorporate backgrounds and colors to enhance the overall visual impact when taking your drawing to the next level. Backgrounds can provide context and depth to your artwork, setting the scene or creating a mood – and color almost instantaneously makes a sketch more eye-catching!
Step 10: Adding a Background
A background is like the supporting actor in a movie: it may not be the show’s star, but it sure does make the movie more interesting.
Remember, a background shouldn’t steal the spotlight from your primary focus. So, take some time to experiment with different options and see what works best for your piece.
We’ve gone for a realistic approach with our forklift sketch, therefore we have decided to draw two boxes on top of our fork to help resemble an industrious setting. If you like the way it looks, you’re welcome to incorporate boxes in your drawing, as well!
Alternatively, you could add a number of other elements in your background, such as a city center landscape, some light posts, or an outdoorsy landscape instead.
Step 11: Adding Colors
You have the freedom to select any combination of colors that comes to your mind. Go beyond your ideas and imagine a forklift painted in deep navy blue or a sleek black model that stands out for its elegance and power.
Additionally, consider pastel shades or vibrant patterns. A pink forklift with floral decals? The possibilities are endless!
Bonus Tips
Visit our YouTube page for background inspiration and as means to receive some feedback from other budding artists.
Add details such as headlights, mirrors, and warning signs.
Practice drawing different types of forklifts.
Use shading techniques to create highlights and shadows
Research reference images of forklifts to better understand their details.
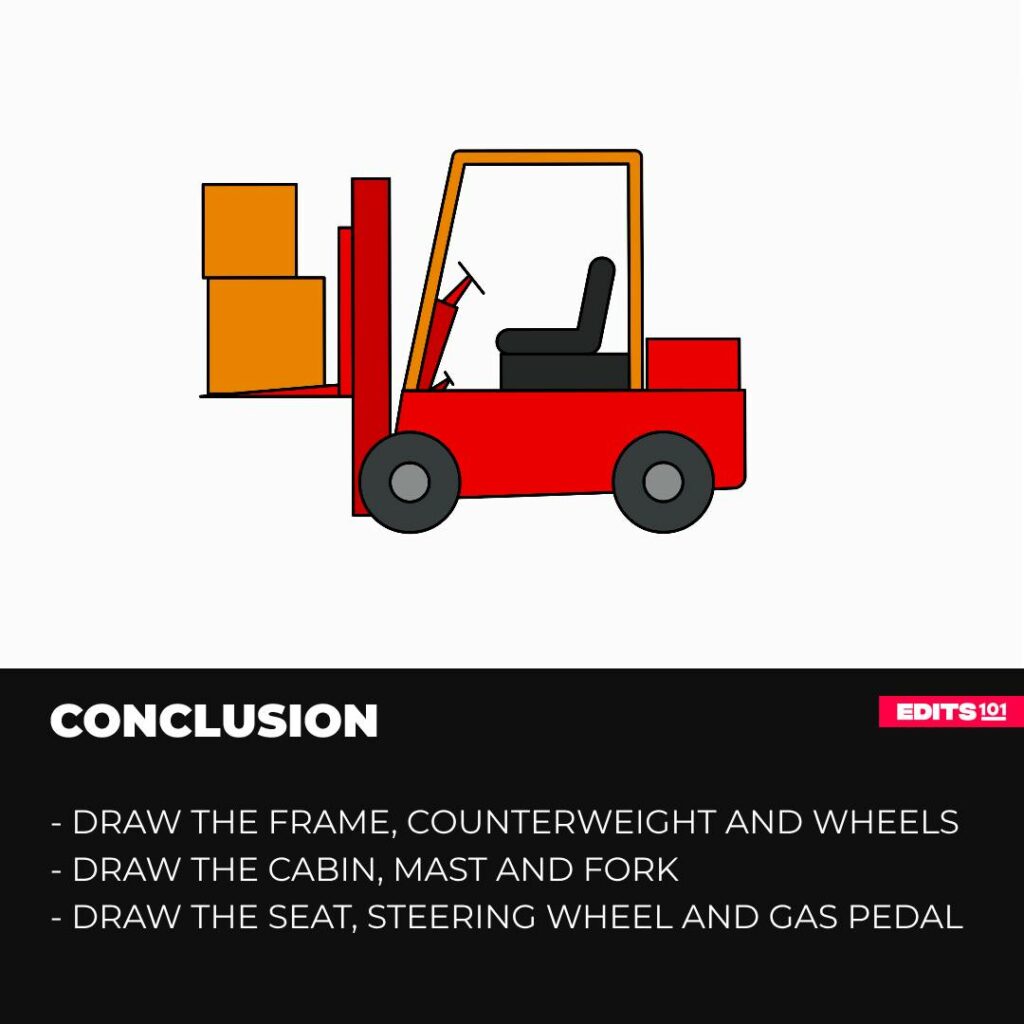
Conclusion
You have completed quite a lot throughout this tutorial, beginning with drawing a forklift’s frame and ending it off by drawing its gas pedal. You have patiently followed each step and displayed your creativity. Well done!
Drawing is a skill that can be enhanced and improved with practice and practice, so don’t think twice when experimenting with different details and color techniques. We hope you continue to create unique drawings in the future. Keep up the great work!
Thanks for reading & feel free to check out more of our articles!
Author Rating
Overall Rating
Summary
This tutorial will guide you on how to draw a realistic depiction of a forklift in 11 steps, including how to enhance your drawing with a background and color.